|
|
|

|
|
| Search | Car Forums | Gallery | Articles | Helper | AF 350Z | IgorSushko.com | Corporate |
|
| Latest | 0 Rplys |
|
|||||||
| WIP - Street Post topics for any "Works In Progress" street vehicles projects in this sub-forum. |
 |
 Show Printable Version | Show Printable Version |  Email this Page | Email this Page |  Subscribe to this Thread
|
|
|
Thread Tools |
 11-07-2006, 07:21 PM
|
#16 | |
|
AF Enthusiast
Thread starter

Join Date: Aug 2006
Location: Portland, Oregon
Posts: 633
Thanks: 2
Thanked 7 Times in 1 Post
|
Re: Corvette Z06 gift project
A little progress--
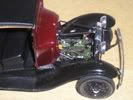
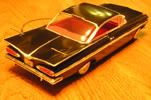
I got my suspension woes all worked out  and now the wheels are nicely balanced. Here is a shot of one of the rear brakes, in which you can see both the vents that I spent all that time making and the pin I had to install to mount the crustified wheels from the original build. and now the wheels are nicely balanced. Here is a shot of one of the rear brakes, in which you can see both the vents that I spent all that time making and the pin I had to install to mount the crustified wheels from the original build. And, a little "teaser" mockup to show how this car will sit when it's done: 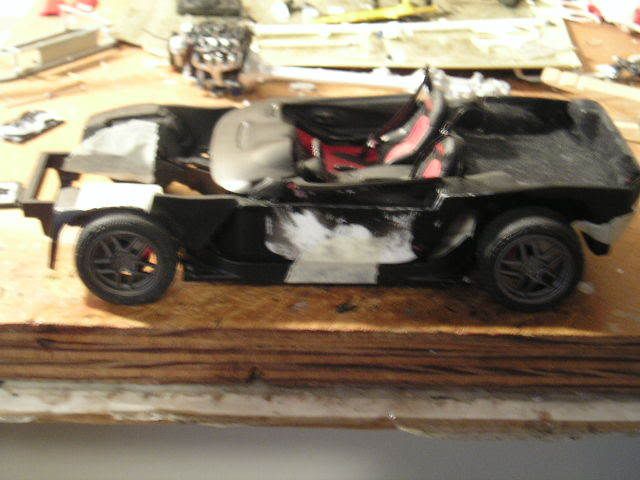 I also finally figured out what to do with those pesky fuel rail covers. I tried black Bare-Metal foil with isopropyl alcohol--that resulted in chrome "Corvette" lettering because the black came right off. Now, I've stripped the paint for the last time (in this picture you can see that I need to add another of those metal wires to the lower part of the driver's side cover, because the one that was there fell off). 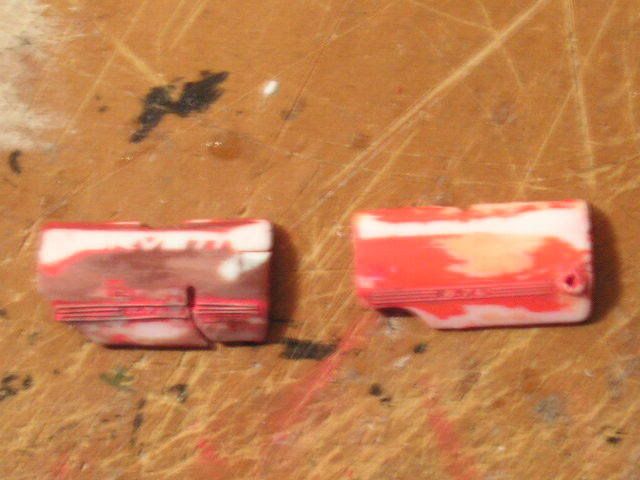 A good coat of red paint will be applied--for the last time (finally  ), and then the lettering will be applied. My solution? Home-made decals. ), and then the lettering will be applied. My solution? Home-made decals.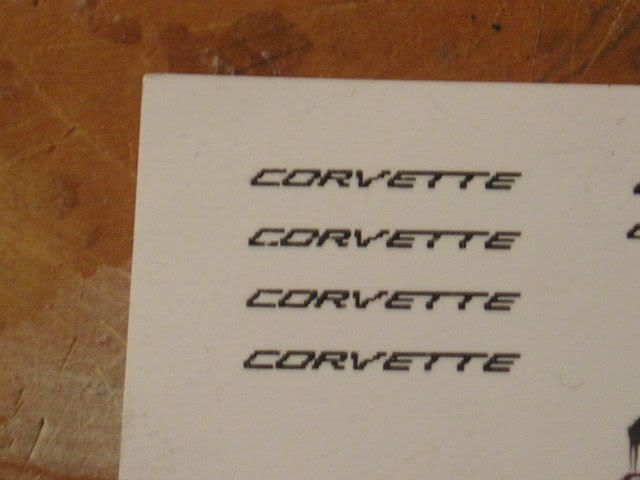 Yes, they're a little pixelated, and I know that others have achieved much more detailed work. But I used Microsoft Paint to make these, as I don't have a copy of Photoshop or any other good programs. These were done using special Testors decal paper for inkjet printers (I also don't have a special printer), and sealed with the Testors Decal Bonder. They might not be perfect, but they're a WHOLE heck of a lot better than my painting attempts. I just couldn't get it right before. I also did a little work in the rear. According to Revell's directions, you are to install the engine/transaxle assembly, then the rear suspension. However, the ABS brake unit is mounted to the suspension, and the brake lines are attached to the torque tube with clips. So it's kind of necessary to assemble the engine and rear suspension before-hand. I mocked it up on the chassis, then glued it and let it dry overnight. Voila!...  And, I finished painting the ABS unit. Now, I can install it, plumb the brake and fuel lines, and (once my FRC's are completed), drop this motor in! At last I am getting somewhere!  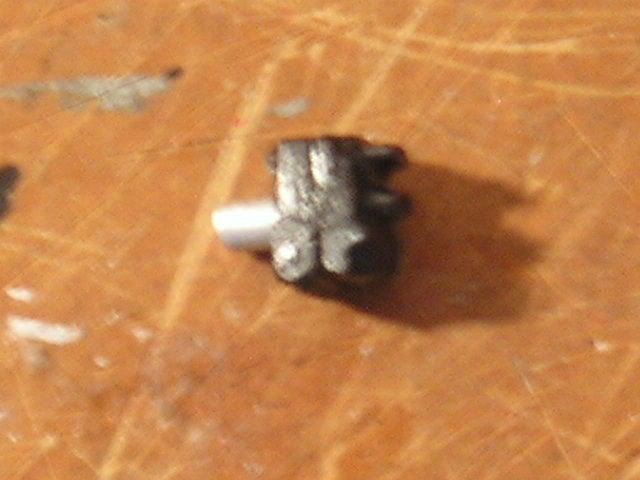 That's all for now, but hopefully I will make some progress soon. Thanks for looking! Alex
__________________
|
|

|

|
|
12-04-2006, 03:42 PM
|
#17 | |
|
AF Enthusiast
Thread starter
Join Date: Aug 2006
Location: Portland, Oregon
Posts: 633
Thanks: 2
Thanked 7 Times in 1 Post
|
Re: Corvette Z06 gift project
Well, I've been computer-less for the last month or so, but in light of the impending date of delivery for this kit, I've been working quite diligently. In fact, I only have about 2 days of work left--and tons of pictures to show. I will start posting those ASAP, but in small installments so as not to overwhelm. Almost there...
__________________
|
|
|
|
|
|
12-04-2006, 07:28 PM
|
#18 | |
|
AF Regular
Join Date: Oct 2006
Location: Metuchen, New Jersey
Posts: 128
Thanks: 0
Thanked 0 Times in 0 Posts
|
Re: Corvette Z06 gift project
please do post some pictures of the finished project, dude. I really wanna see the end.
|
|
|
|
|
|
12-06-2006, 09:22 PM
|
#19 | |
|
AF Enthusiast
Thread starter
Join Date: Aug 2006
Location: Portland, Oregon
Posts: 633
Thanks: 2
Thanked 7 Times in 1 Post
|
Re: Corvette Z06 gift project
Well, here goes. I'm not really going to make small installments--just 2 (I think), because there really are a lot of pictures. Oh, and for those of you complaining about my fuzzy pics--I've finally figured out this camera, so you should notice a significant improvement--at least in some of the pictures. First off, I decided to get my rear in gear and finish the engine. To that end, I built up some air conditioning hoses. Like the tranny cooler lines I mentioned earlier, these were done using two different sizes of copper wire, joined by sheet plastic ground into a hex shape afterwards.
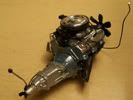
 (This is not a super-great picture). Although the pipes are aluminum, I didn't want to bother with that paint, so I just used silver. It gives them more definition anyway--and it's really easy to apply (Testors enamel, Silver Chrome). The bottom right line is the one from the evaporator (in the dashboard) to the compressor (driven off the engine). Normally, this line has the can-like accumulator (to collect moisture) mounted on it. According to my reference photographs, however, the accumulator is actually mounted behind the firewall. Since that's obviously not going to get seen, I decided to skip the accumulator, and divided the pipe into two sections. I mounted one to the firewall, going into it (to the accumulator, which is really not there) and this one will come out of the firewall and attach to the compressor. Next was the tie rod. The front suspension is attached to the engine before installation (because the engine mounts to it), so the tie rod had to go on too. I added the steering shaft and the hard lines from the gearbox to the rack. 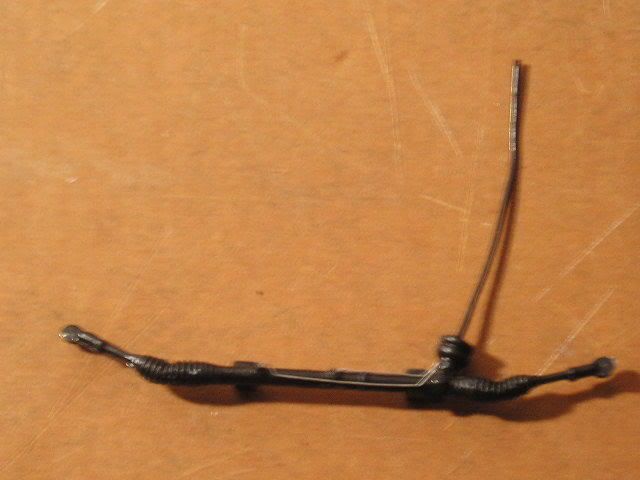 (Another not-so-good picture. Don't worry--better ones are on the way). With these parts installed, I did some more work--actually a lot more work, and finished the engine/transmission/suspension assembly!!  Here are the illustrious pictures--my clearest-ever photo is in this bunch. Here are the illustrious pictures--my clearest-ever photo is in this bunch. The front: 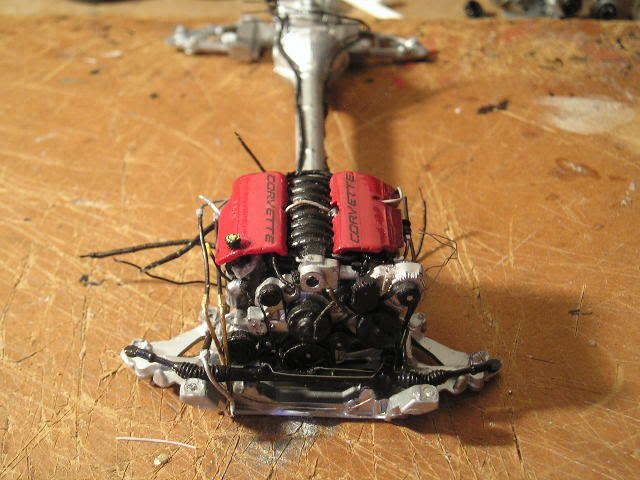 The back (tranny): 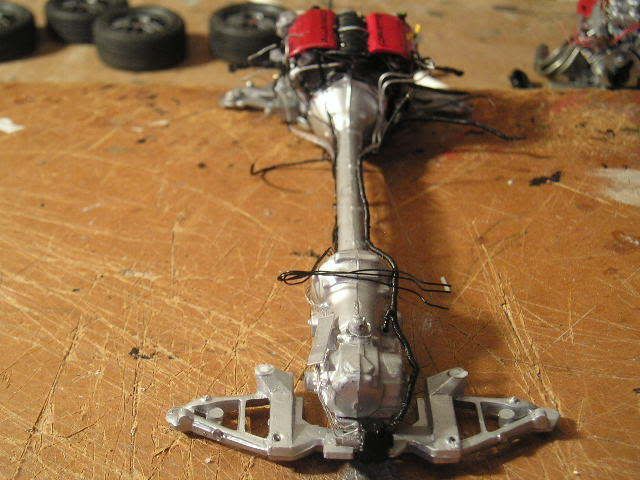 The left side (showing power steering hoses and also the very warped-looking front cover  )--brake lines will be straightened--: )--brake lines will be straightened--: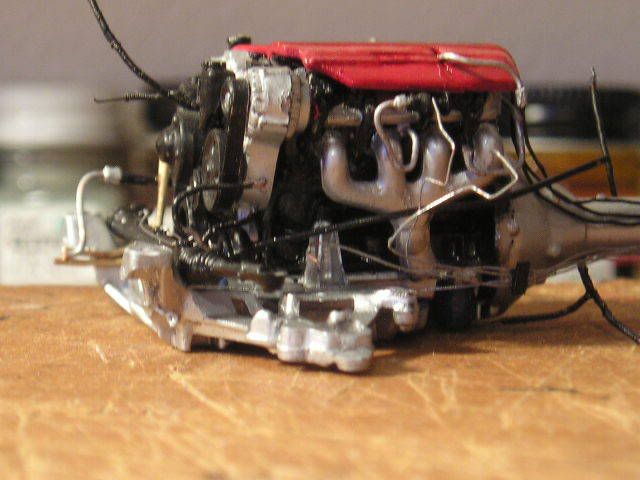 The right side (best pic): 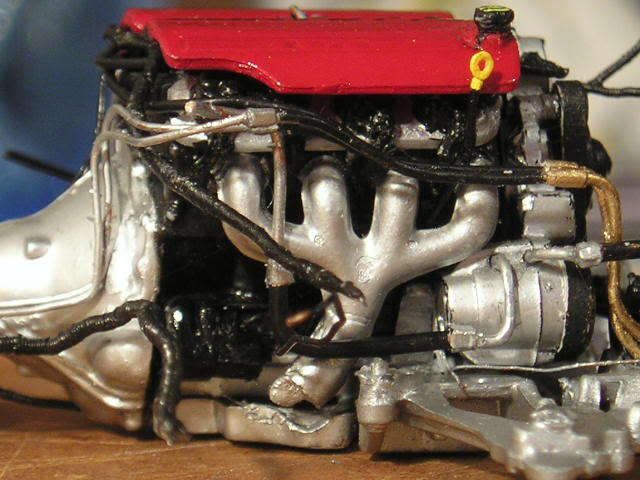 Overall (a fuzzy picture just to show the general proportions of the drivetrain, and that chassis wiring harness I made): 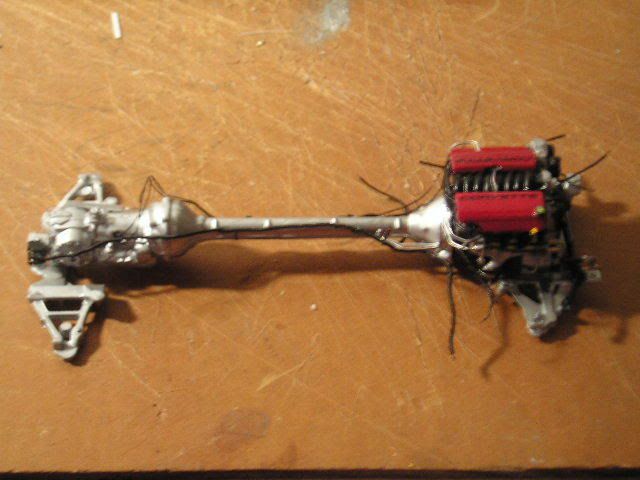 Most of my time was spent on this nightmare. Chevy thought it was a good idea to plumb the brake and fuel lines in a very complex way--leaving me to recreate them. The irritating thing is, you can't even see these lines when the car is done, but my modeler's conscience would never let me get away with not plumbing these suckers--mostly because this car is probably the only one in which I know the exact routing of the brake and fuel lines (even if it is super-complex). So I spent somewhere around four hours patiently pulling copper wire around with tweezers. But it was worth it (though this picture is the only proof of my work now that the lines are hidden): 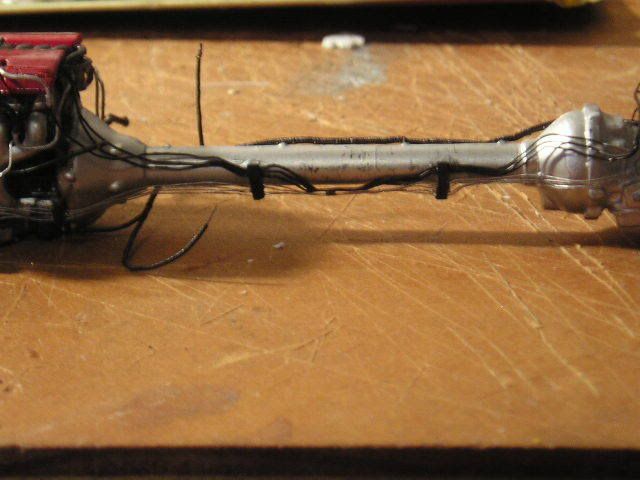 In the meantime-- Remember the radiator fan shroud I was messing with? It had a molded-on wiring harness across it, which I removed; this resulted in plugged-up fan shroud holes, so I cut out those sections and was in the process of replacing the shroud parts with sheet plastic in the last update. Well, with more plastic and some paint: 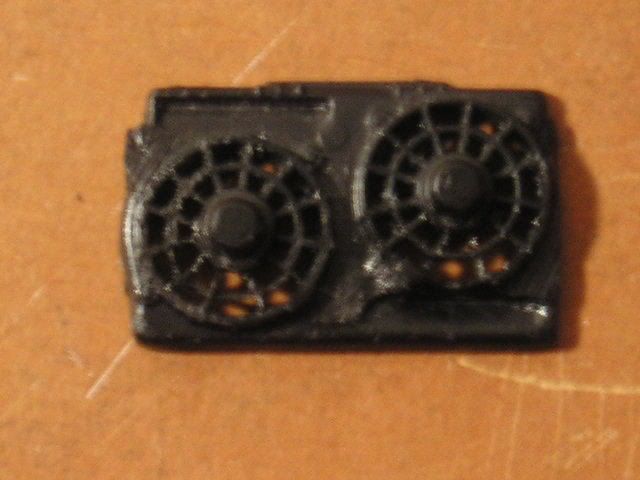 Looked good to me, so I assembled the whole radiator. 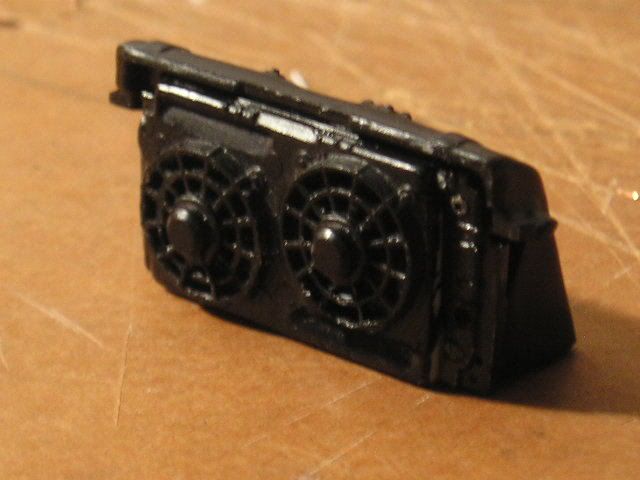 In the meantime (again), I got myself some awesome Tamiya polishing compound. I had already been concerned about this car's paint--I had cloth-polished it (using MicroMesh by Detail Master), but it was still hazy and dull in the light. This same effect had not been cured by wax on a different model, so I didn't want to use wax here. But with Tamiya Finish compound--  I LOVE THIS PRODUCT!!! 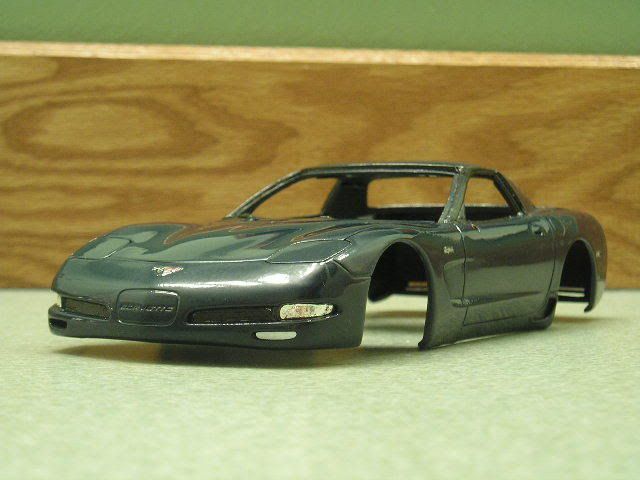 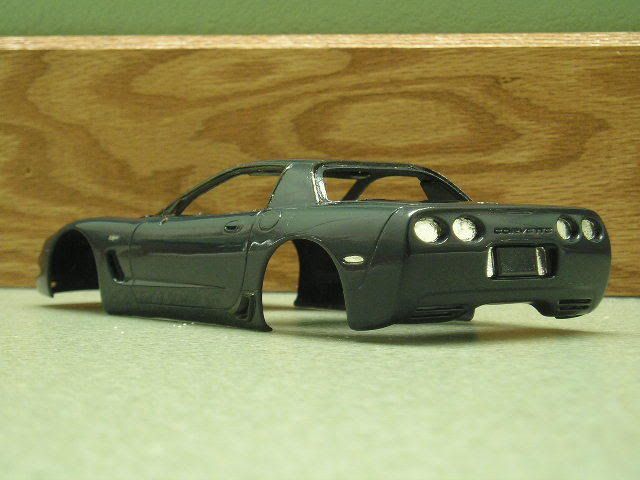 And, letting in a little air: 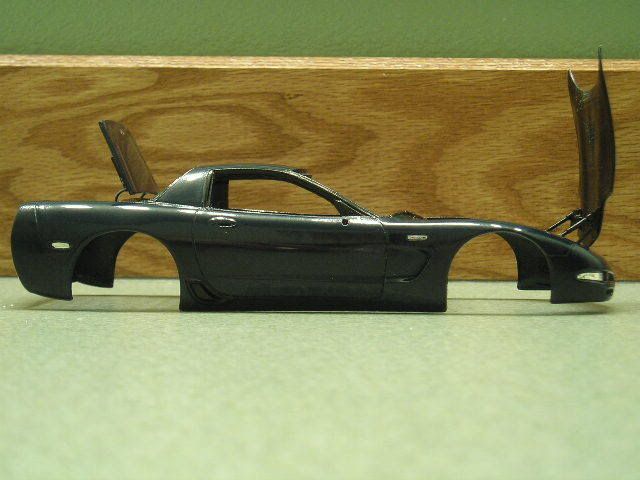 I cannot say enough about Tamiya polish. My advice is: Paint, clear coat heavily, polish with Micro-Mesh to 4000 grit, then use Tamiya Fine and Finish compound! (This had already been polished to 12000 grit, so I just used Finish). And don't bother waxing--looks good as is, and don't want to ruin it! BTW--the color is not as bland and dull as it looks here--this green countertop, though a nice place to photograph, wreaks havoc on my lustrous blue paint. You'll see the true color in my next big update, in a picture taken at my workbench...  But before that-- I worked on the chassis, and built some emergency brake cables. It's hard to see in this mediocre photo, but there is a little hollow square made of .01" styrene that connects the single cable with the duals. (it's just behind that mounting hole for the transmission) 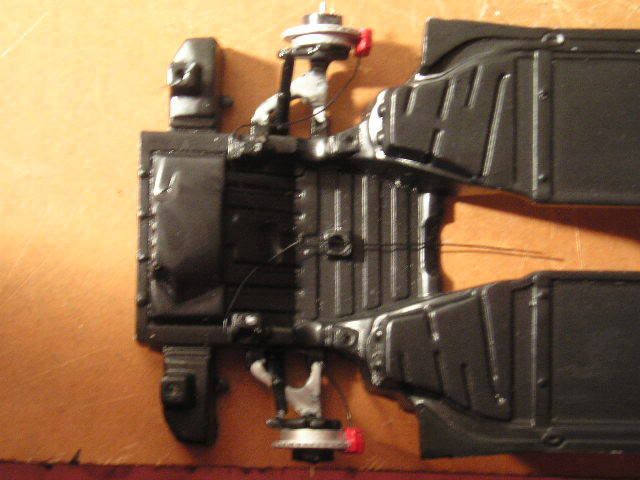 Then, for hydraulic brakes (the hard lines are already strung all over the engine), these hoses and valves: 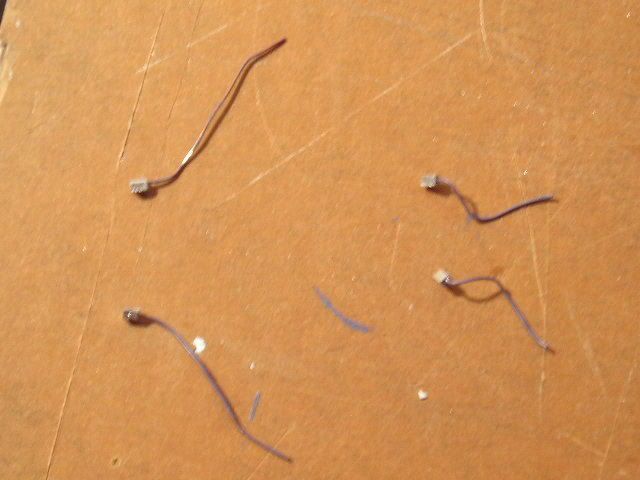 I painted the hoses dark gray because black seems too clean. Rubber hoses are never jet black. Installed (front view only):  This looks pretty good; unfortunately, once the engine was assembled, the hard lines simply could not be attached to those valves, because the suspension was in the way (and also, in the rear, I miscalculated and made the hard lines too short). Fortunately, the only person regretting this is me (just because of the principle of the thing), because you can't see that the lines aren't attached. It's a pretty compact, compressed car, so there isn't much room for observation. The lines are hidden--but the hoses can be seen and appreciated. Oh, I want to show all the rest--but to avoid boring viewers, I'll have to stop here! Another 15 or so pictures all ready to show, plus more on the way as I chug steadily to completion--I know my sister will like this Christmas gift. Thanks all for looking! My first WIP thread--I want to get my work out there and shown, and I really appreciate all your views and comments. Comments welcome!! Criticism just as welcome!! Truly, I'm not going to change much on this car, because of how soon it needs to be done, but any tips to improve my next model are more than helpful--so feel free to "drag me over the coals," if I can learn something from it. Or, you can just compliment!  Get ready for the next update--complete chassis/interior assembly, true body color, and more little details Alex
__________________
|
|
|
|
|
|
12-07-2006, 06:02 AM
|
#20 | |
|
AF Enthusiast

Join Date: Nov 2005
Location: Gunma-ken
Posts: 560
Thanks: 0
Thanked 1 Time in 1 Post

|
Re: Corvette Z06 gift project
 Man,you nuts. Really. Whata detail!! Awesome man! Superb!! Man,you nuts. Really. Whata detail!! Awesome man! Superb!!
__________________
 "Oh noez,it has more stickers than me! And a wing too!  
|
|
|
|
|
|
12-07-2006, 11:19 AM
|
#21 | |
|
AF Enthusiast

Join Date: Sep 2004
Location: Colorado Springs, Colorado
Posts: 1,220
Thanks: 0
Thanked 1 Time in 1 Post
|
Re: Corvette Z06 gift project
I thought I was anal about detail, but this is extreme!!!
Excellent work on the wiring, and your self made decals for the engine. They really look great in my opinion. |
|
|
|
|
|
12-07-2006, 03:16 PM
|
#22 | |
|
AF Enthusiast
Thread starter
Join Date: Aug 2006
Location: Portland, Oregon
Posts: 633
Thanks: 2
Thanked 7 Times in 1 Post
|
Re: Corvette Z06 gift project
Thanks for the comments guys. This model should be all done by the end of the week. I will finish it in this thread! (unlike some people whose models just disappear forever from this forum) Then, I will put more "special photo shoot" pictures in the completed projects gallery. Almost there!
__________________
|
|
|
|
|
|
12-07-2006, 06:48 PM
|
#23 | |
|
AF Enthusiast
Thread starter
Join Date: Aug 2006
Location: Portland, Oregon
Posts: 633
Thanks: 2
Thanked 7 Times in 1 Post
|
Re: Corvette Z06 gift project
A quick update: (I have much more to come)
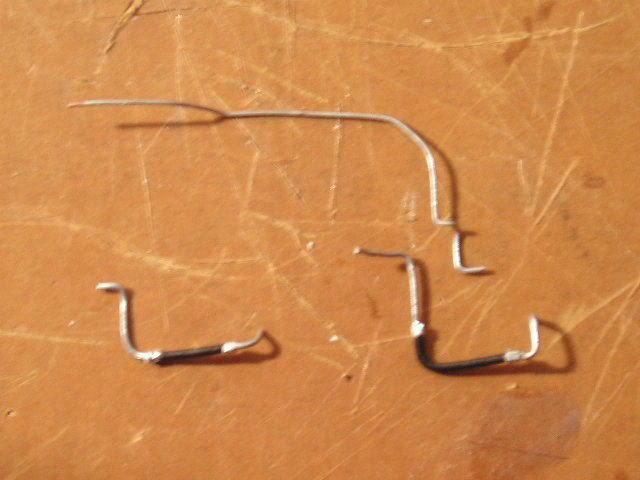
The firewall, with the A/C line on it (battery clamps have been painted since then) 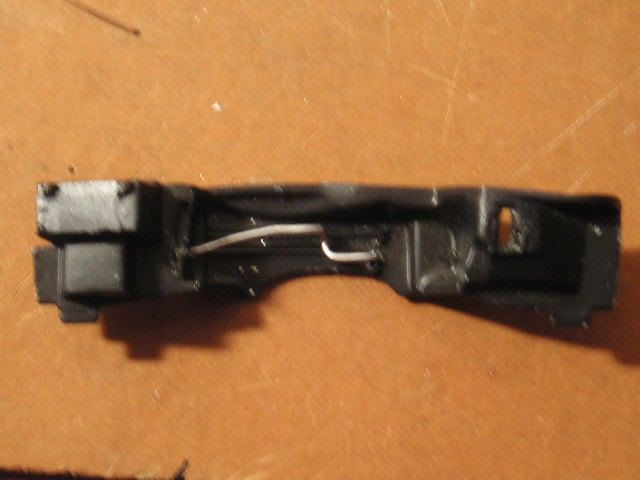 My forward lighting harness. This is another all-wire harness--I'm really starting to like these. Despite being the most realistic harnesses I have ever made, they are also the easiest to build! I will have to make a How-To out of these--any model can benefit from them, and all you need is wire (no shrink-tubing or special expensive materials). This took me about 20 minutes to build. 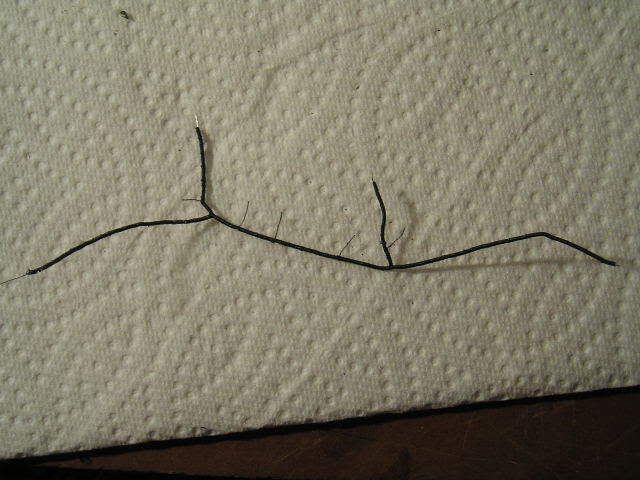 With that stuff done, it was time to assemble the chassis and interior tub/wheel wells. You can see the rubber band holding that feisty warped chassis to the tub while the glue dries. Also, you sometimes have to take a step backward to take two forward--I had to take the dash top off to permit installation of the firewall! 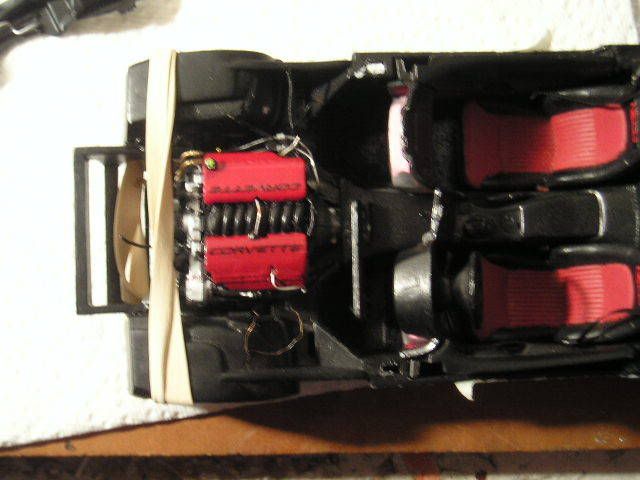 I'll try to make a bigger post next time, to show the true color of the body! (And more, of course). Thanks for all your comments. Alex
__________________
|
|
|
|
|
|
12-08-2006, 03:38 AM
|
#24 | |
|
AF Enthusiast
Join Date: Nov 2005
Location: Gunma-ken
Posts: 560
Thanks: 0
Thanked 1 Time in 1 Post
|
Re: Corvette Z06 gift project
Ahhhh!! Man,one day i'll wire like that. (if I had patience...)
Stunning! I'll be watching close to the next updates! Just awesome!
__________________
"Oh noez,it has more stickers than me! And a wing too!
|
|
|
|
|
|
12-08-2006, 07:06 PM
|
#25 | |
|
AF Enthusiast
Thread starter
Join Date: Aug 2006
Location: Portland, Oregon
Posts: 633
Thanks: 2
Thanked 7 Times in 1 Post
|
Re: Corvette Z06 gift project
OK, looks like I'll be making small posts after all!
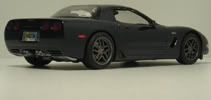
 Here is the underside of the chassis/interior tub, with the "tie plate" (as the directions call it) covering the torque tube of the engine. 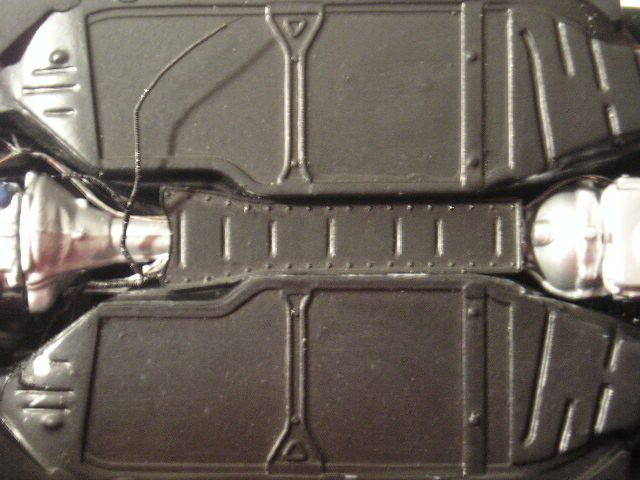 You can see my chassis wiring sticking out for the O2 sensors. Next, with the exhaust system in place and the rear suspension "bolted" down: 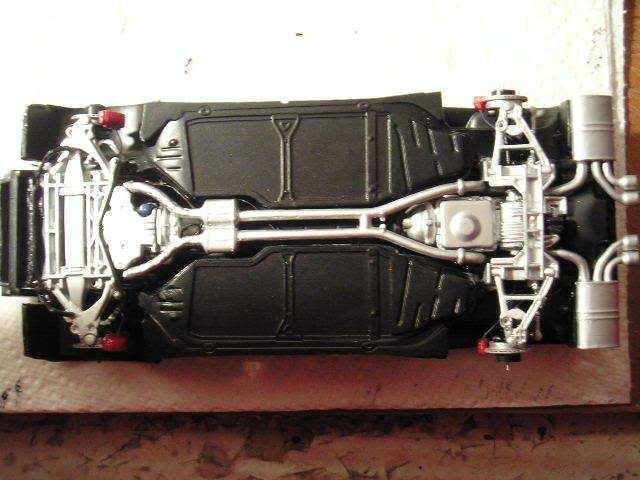 Here's the completed rear suspension. I later did a wash on this part, but rather than define detail, it made the part look dirty  (the wash was much too thin.) But that's realistic anyway--never seen clean suspension on a licensed car! (the wash was much too thin.) But that's realistic anyway--never seen clean suspension on a licensed car! 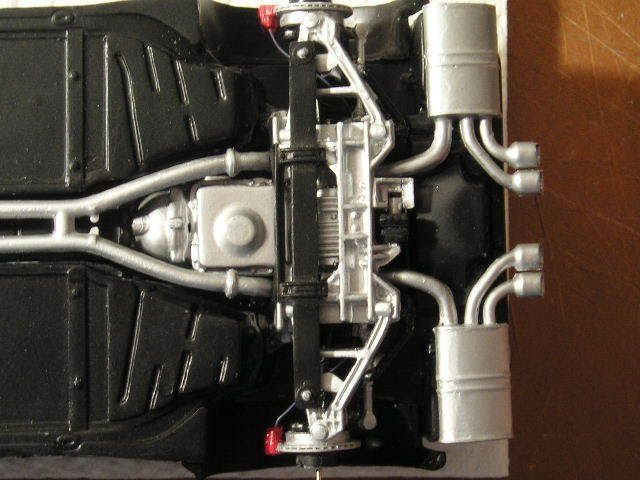 Here is one of the rear wheel well cowls installed. They are separate for easier painting and assembly. (I guess). 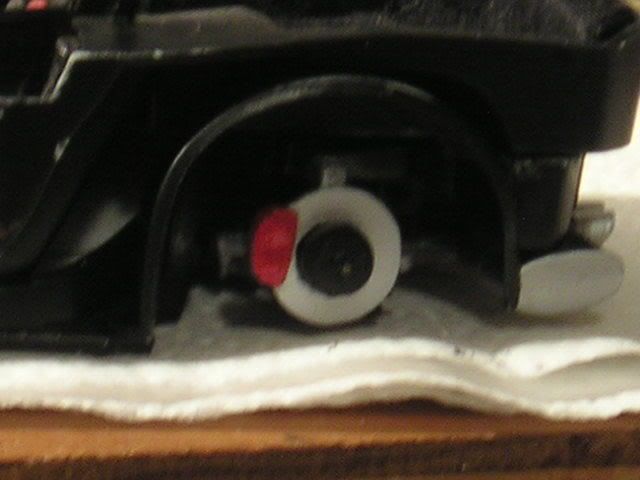 At last--I installed the body, and you can see the true, rich blue color!  I think it looks very nice. (The windshield is also installed). After this picture was taken, I had to peel the body back off and fix the seatbelts, as I discovered they were inaccurate. They're fine now. More updates next time! Thanks for looking and for your kind comments! Alex
__________________
|
|
|
|
|
|
12-08-2006, 08:03 PM
|
#26 | |
|
AF Enthusiast

Join Date: Jun 2005
Location: Red Lake, Ontario
Posts: 2,519
Thanks: 3
Thanked 28 Times in 28 Posts

|
Re: Corvette Z06 gift project
"The irritating thing is, you can't even see these lines when the car is done, but my modeler's conscience would never let me get away with not plumbing these suckers"
I like that train of thought.  I'm amazed by the level of detailing you are putting into this. I think a tuturial on the wire harnesses is a great idea. Nice shine on the body too. You must have great references to do all of this work. Keep up the good work. I'm amazed by the level of detailing you are putting into this. I think a tuturial on the wire harnesses is a great idea. Nice shine on the body too. You must have great references to do all of this work. Keep up the good work.
__________________
  
|
|
|
|
|
|
12-09-2006, 01:52 PM
|
#27 | |
|
AF Regular
 
Join Date: Nov 2005
Location: Moses Lake, Washington
Posts: 310
Thanks: 0
Thanked 0 Times in 0 Posts
|
Re: Corvette Z06 gift project
You're doing really well on this build, your sister will definately like it. It seems you have the same obsessive detailing disease as me, except your sysmptoms include completely things in a rapid manner opposed to my dragging the build out for a couple years... You really should do a write up on the wiring harness, it's just what I've been looking for. I had been peicing together wire insulation, but it just didn't have the accuracy of these, it really looks like convoluted tubing. My problem is getting branches to stay fixed in position and I didn't quite catch the tape part... I'll keep an eye out for a rediculously in depth tutorial
 You were asking to be raked over the coals, I hardly think that's possible with a build of this caliber, but one thing I do see is a few mold lines and some marks from where the part is attatched to the sprue. That's the only thing I could see, and it's a pretty minor deal. I'll keep an eye on this thread... Nice job!
__________________
 Slow down, dear, you're scaring the dog... 1:1 ride: '84 BMW 318i, needs attention. Stickin' with it 1:25 450+ hp DSM build, Click here for thread
|
|
|
|
|
|
12-09-2006, 02:38 PM
|
#28 | |
|
AF Regular
 Join Date: Feb 2002
Posts: 162
Thanks: 0
Thanked 0 Times in 0 Posts
|
Re: Corvette Z06 gift project
All I can say is WOW man! Awesome build so far! Just reading this thread is gonna make my next model better
__________________
 |
|
|
|
|
|
12-11-2006, 09:50 AM
|
#29 | |
|
AF Enthusiast
Thread starter
Join Date: Aug 2006
Location: Portland, Oregon
Posts: 633
Thanks: 2
Thanked 7 Times in 1 Post
|
Re: Corvette Z06 gift project
Thank you once again for all your kind and uplifting comments. I have actually completed the Corvette now
 , so just a couple more posts of my progress pics and then a link to the gallery! And yes, I will try to get a How-To going on that wiring. I'm planning to start the forward lighting harness for my Mustang Cobra pretty soon, but that, I think, is just a little too complicated for the How-To (it has something like 30 wire ends), so I might just make a generic thing to show my method. I'm happy to share it, though--I love it! Yes, mold lines have always been a problem with me. I saw the two on the front bumper after the model was all painted, so it was a little too late. I'll try harder next time, for sure. Keep an eye on this thread--it'll be wrapped up within days. , so just a couple more posts of my progress pics and then a link to the gallery! And yes, I will try to get a How-To going on that wiring. I'm planning to start the forward lighting harness for my Mustang Cobra pretty soon, but that, I think, is just a little too complicated for the How-To (it has something like 30 wire ends), so I might just make a generic thing to show my method. I'm happy to share it, though--I love it! Yes, mold lines have always been a problem with me. I saw the two on the front bumper after the model was all painted, so it was a little too late. I'll try harder next time, for sure. Keep an eye on this thread--it'll be wrapped up within days. Alex
__________________
|
|
|
|
|
|
12-11-2006, 07:53 PM
|
#30 | |
|
AF Regular
Join Date: Oct 2006
Location: Metuchen, New Jersey
Posts: 128
Thanks: 0
Thanked 0 Times in 0 Posts
|
Re: Corvette Z06 gift project
Vettes look steaming hot in black.
I don't know if that is the picture or the paint, but did you paint your vette a dark blue color? |
|
|
|
|
|
|
POST REPLY TO THIS THREAD |
 |
|
|

