|
|
| Search | Car Forums | Gallery | Articles | Helper | Air Dried Fresh Beef Dog Food | IgorSushko.com | Corporate |
|
|||||||
| WIP - Street Post topics for any "Works In Progress" street vehicles projects in this sub-forum. |
 |
 Show Printable Version | Show Printable Version |  Subscribe to this Thread
|
|
|
Thread Tools |
|
#17
 07-14-2012, 08:49 PM
|
||||
|
||||
|
Re: Ferrari 288GTO Revell + Fujimi 2 in one 1/24
Quote:
 I can't wait to see your 935 turbo, too. And I found any other jobs of you are beyond my word. I have ITALERI 250 GT California spider, seeing yours now I'm in a mood making it (but I am planning to replace its engine to GUNZE 250SWB... I have to think about it for a while). I hope someday to look at your outstanding jobs with my eyes. I'll keep updates and working on my 288GTO. I hope you're having nice, sunny Sunday
__________________
Umihito We can learn from mistakes. 

|
|
#18
07-15-2012, 09:21 AM
|
||||
|
||||
|
Re: Ferrari 288GTO Revell + Fujimi 2 in one 1/24
Just a quick and short post today... sorry I had a lot of things to do today and Monday is coming closer...
Inside the bonnet. 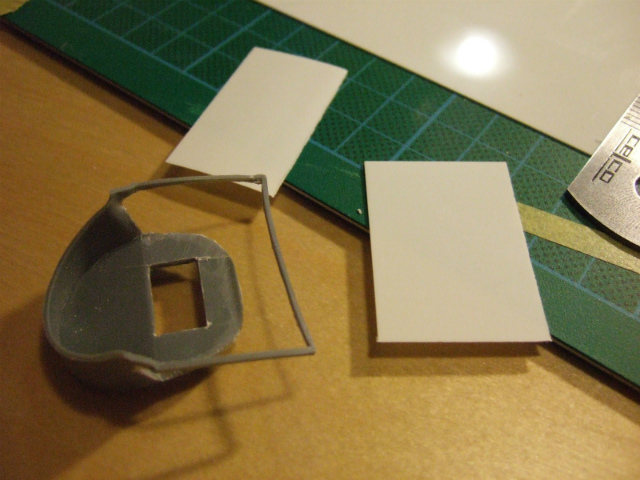 I cut Fujimi's part... 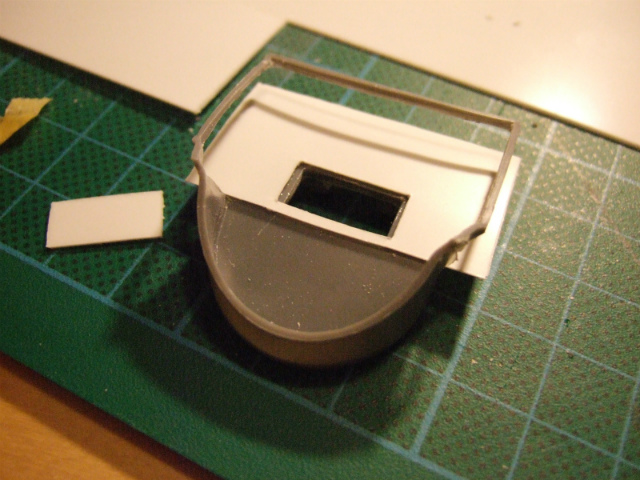 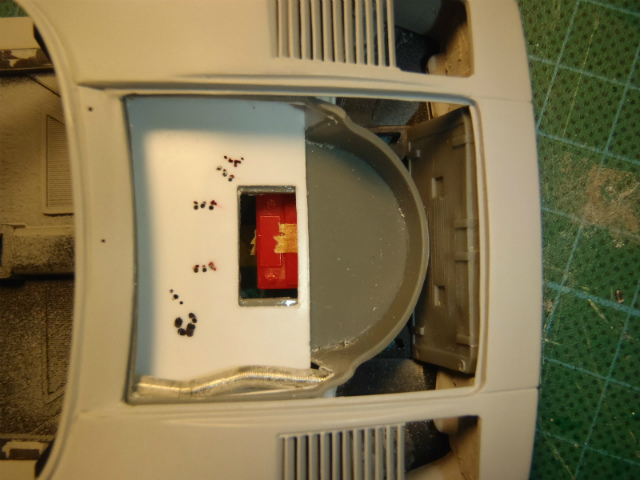 Ok, I can see the battery.  The ducts are made from springs (they have wires in them), and equipments are made from plastic boards and rods. Later on this picture, I replaced the radiator coolant tank to a bigger one. 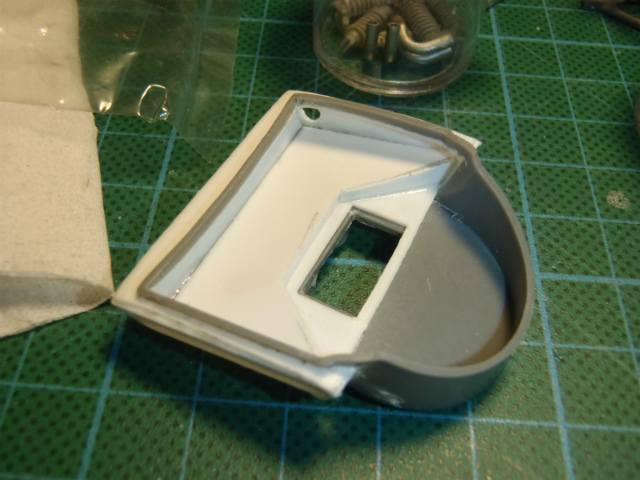 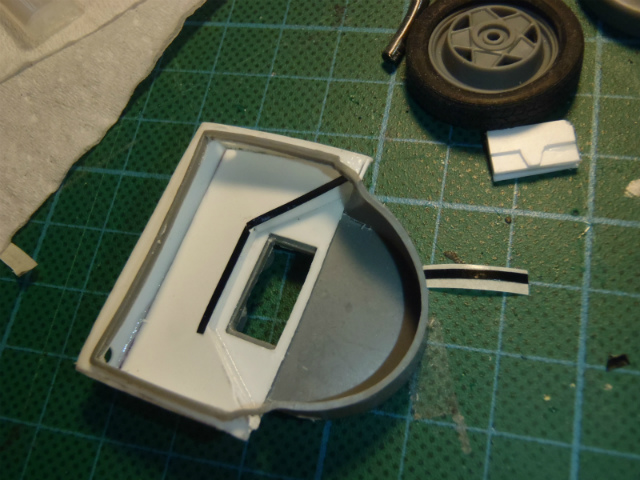  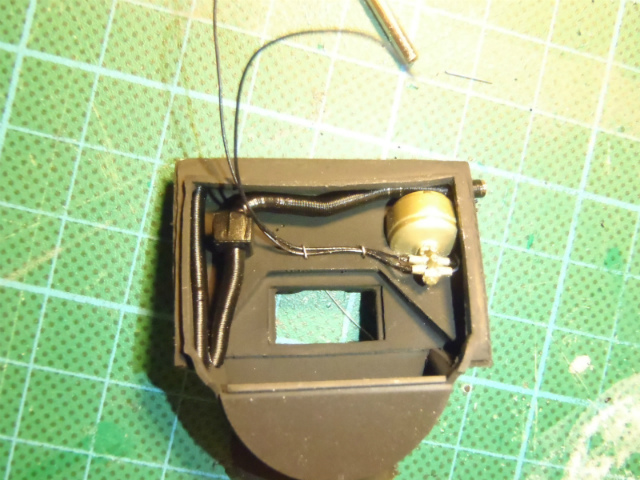 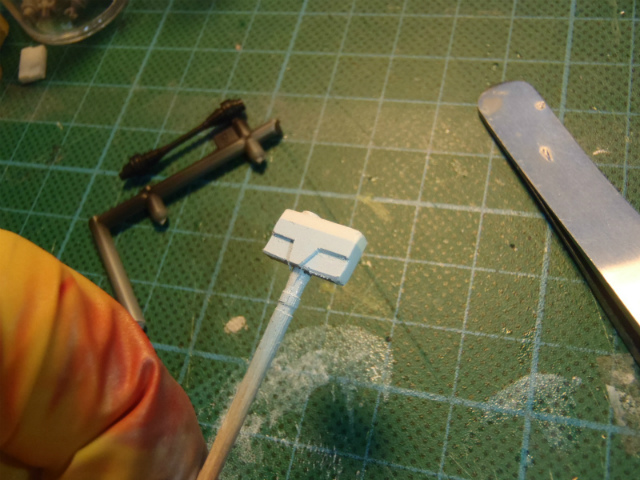 To replicate the radiator coolant inside the tank, I splayed light blue + white, then white + beige + thinner. 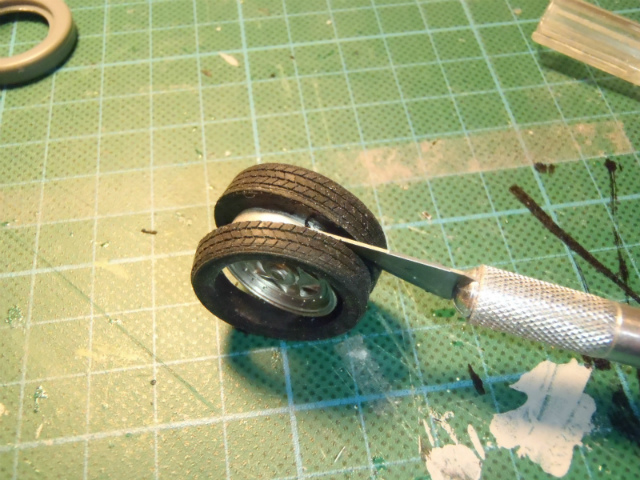 As the spare tire part is too dull (you can see it left-up side in this picture), I cut the tire itself (from spare box of Fujimi GTO). 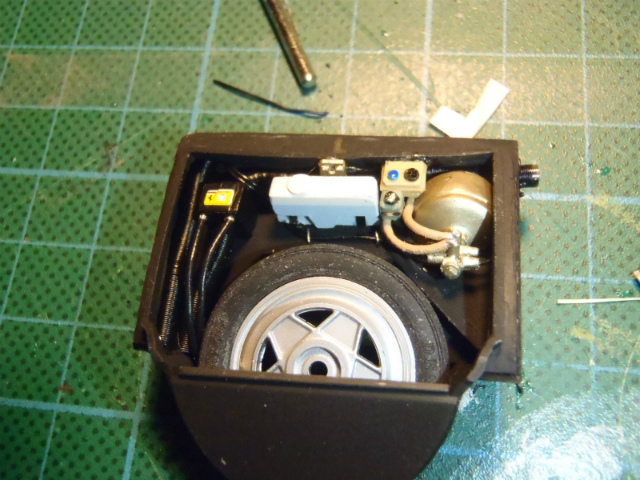 ... On these parts, I reckon I could do a bit better and made some mistakes, but I couldn't wait to proceed to engine section... (The belt for the spare tire will be fitted later once I found a good material.) Sorry today's post is too rough, I know..... but please think it is better than nothing.  Have a good night... zzzzz......
__________________
Umihito We can learn from mistakes.
Last edited by Umihito; 07-15-2012 at 10:33 AM.
|
|
#19
07-15-2012, 02:56 PM
|
|||
|
|||
|
Re: Ferrari 288GTO Revell + Fujimi 2 in one 1/24
wow. you're the first person i've seen to simulate the coolant in its reservoir. very good attention to detail
__________________
olly olly oxen free
|
|
#21
07-16-2012, 06:56 AM
|
||||
|
||||
|
Re: Ferrari 288GTO Revell + Fujimi 2 in one 1/24
Quote:
 I think it could be better to make the reservoir with clear plastic boards painted inside in light blue and white from outside  . . And, here we can find astonishing job on reservoir: not only the reservoir  ! !Anyway, I'm really enjoying making my GTO Please look forward to my next post.Quote:
 ) )Oops, I've got to tell the progress on spare tire... 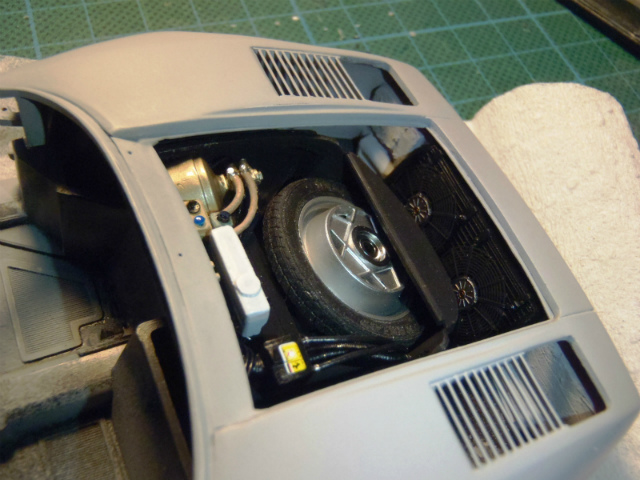 I painted the center of the spare tire wheel with MR. HOBBY's SM08 (PLATE SILVER NEXT). This is the first time to use it, I am so happy with the result! See you next time
__________________
Umihito We can learn from mistakes.
|
|
#22
07-16-2012, 07:45 AM
|
||||
|
||||
|
Re: Ferrari 288GTO Revell + Fujimi 2 in one 1/24
Radiator assemble....
 Of course I used Fujimi's PE. I thought twists were needed on the fins.  Because of the twists, bases were made and glued.  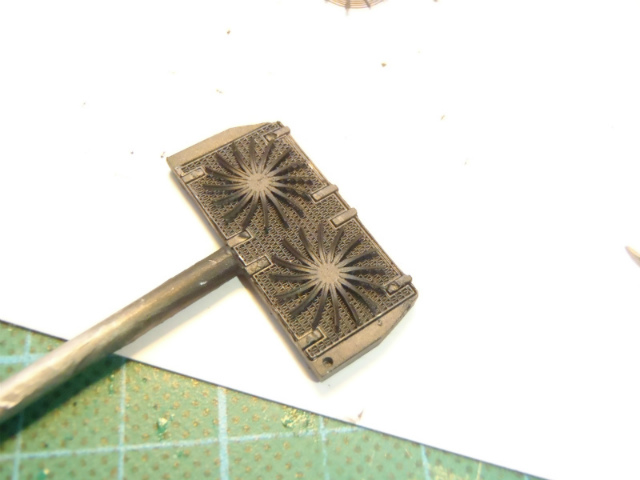 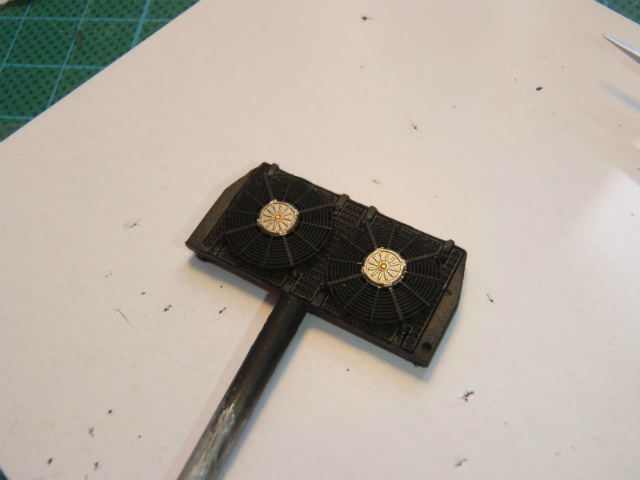 Regardless of my hard work, without any exact reasons but it seems like... not real. Even I can see it Katy Perry's bikini. Maybe I'll spray thinned flat black over these parts.  But the other side looks cool. I glued nickel silver rods (CA glue), after metal primer and semi-gross black applied.  Yes, it comes to the right position! I'll sort out the bad shape of front intake, though. 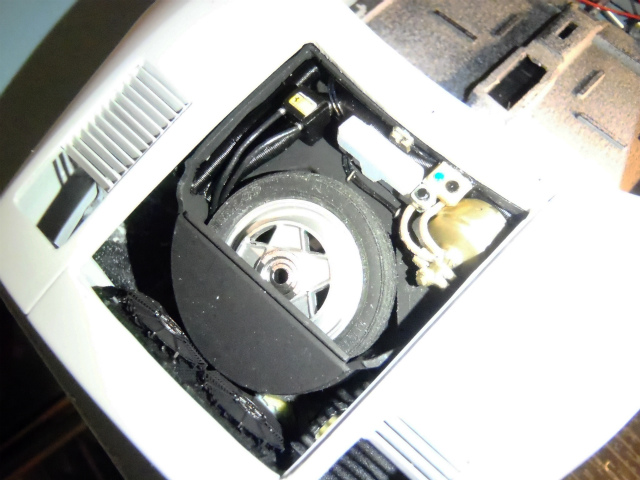 It's a bit short today, but I'll go to bed... Have a good night....
__________________
Umihito We can learn from mistakes.
|
|
#23
07-16-2012, 05:53 PM
|
||||
|
||||
|
Re: Ferrari 288GTO Revell + Fujimi 2 in one 1/24
Fantasic Work
|
|
#24
07-17-2012, 02:46 AM
|
||||
|
||||
|
Re: Ferrari 288GTO Revell + Fujimi 2 in one 1/24
Quote:
 I am looking forward to seeing your Land Rovers to be completed!!
__________________
Umihito We can learn from mistakes.
|
|
#25
07-17-2012, 06:16 AM
|
||||
|
||||
|
Re: Ferrari 288GTO Revell + Fujimi 2 in one 1/24
Body work continues...
 A bit of works on doors. (0.5mm plastic board) 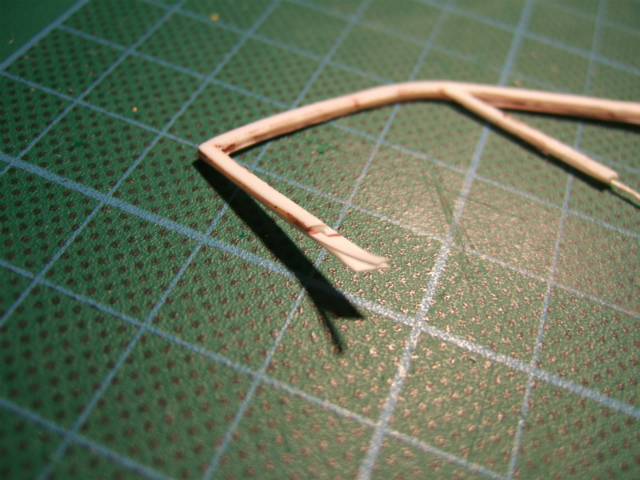 Rims on windows are made from 0.3mm plastic papers x 3 plies. I'll try to sand 0.2mm clear plastic board as windows after a while. 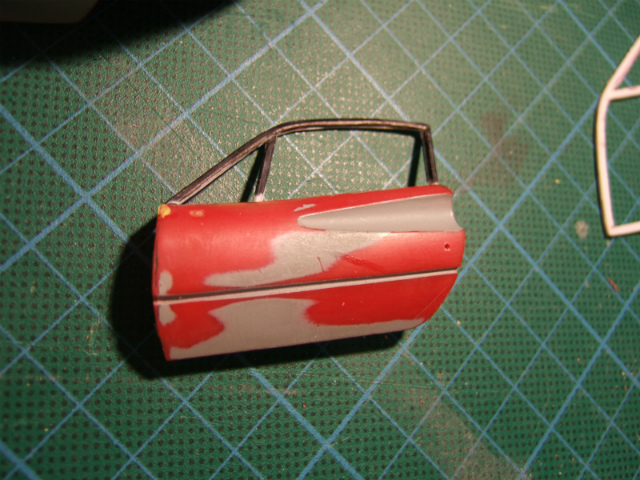 I just temporary painted black on the rims to see the atmosphere. I reckon I should sand more to make them thinner. 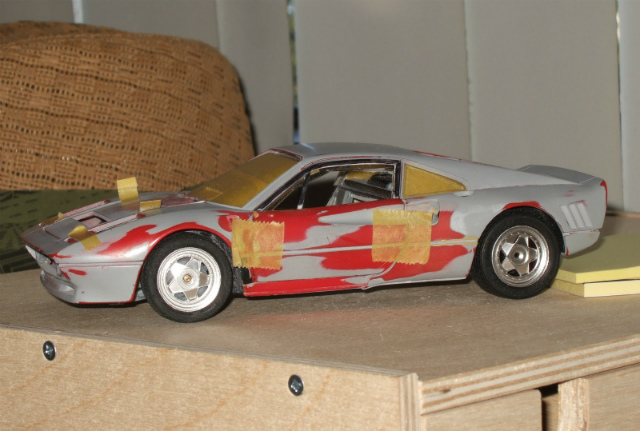 I checked the balance overall. It is going good, I reckon. 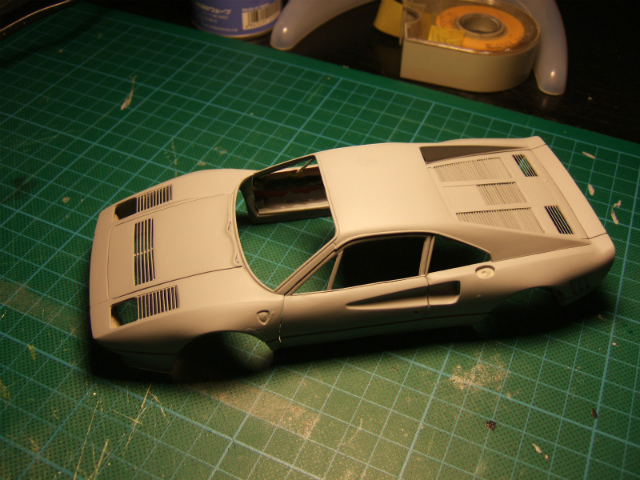 Still a few works needed, but I feel fine with this body. 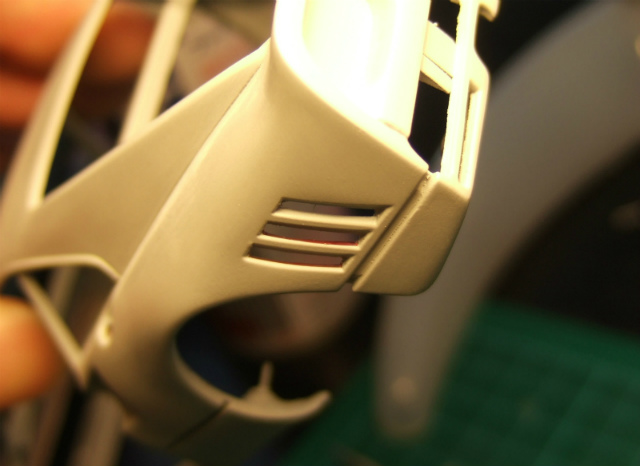 Once again, these slits are edged up. After I got a good hexagonal mesh, I'll apply them. 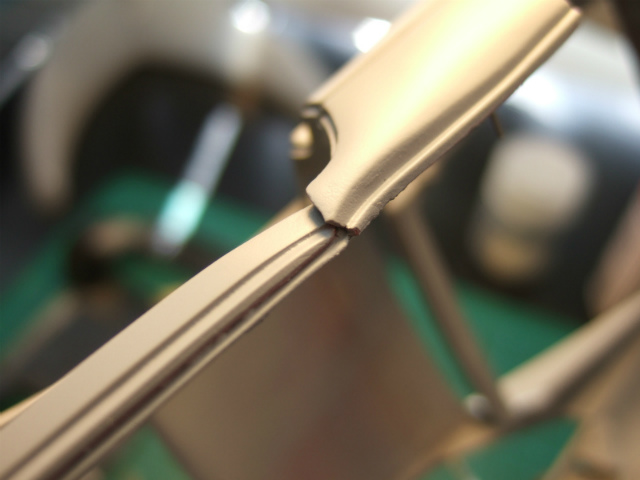 Oooops....!!! The bottom of air intake under door chipped out.... I was nearly crying for 5 minutes  . . 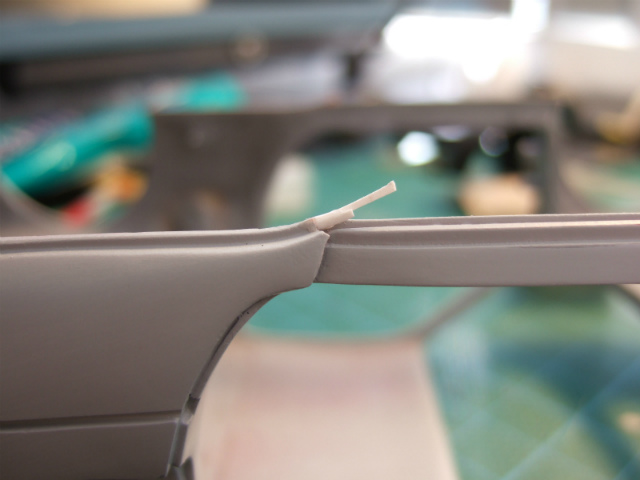 But I am too old to cry... I glued plastic papers on bottom. 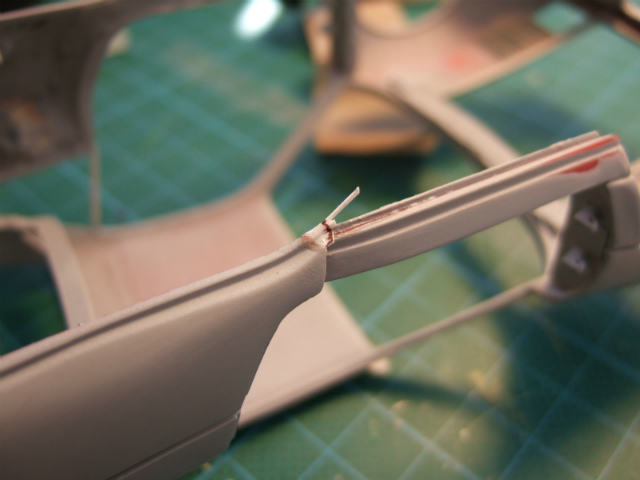 Then another paper on body and cut on the brown line shown on this picture. 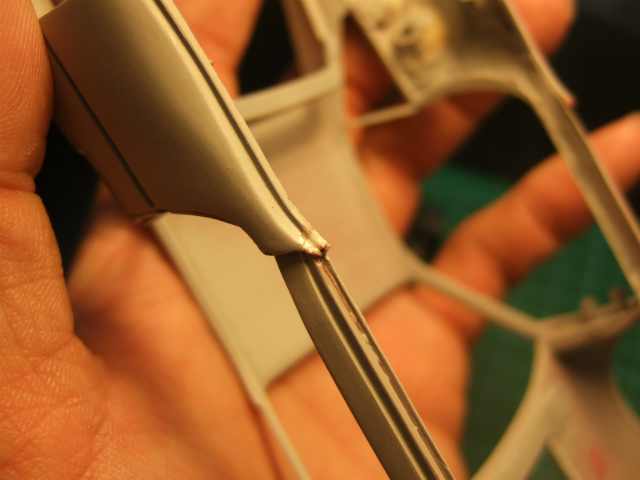 I feel fine now, though a bot of sanding needed. Now head to engine bay!! I'll use Fujimi's engine parts. 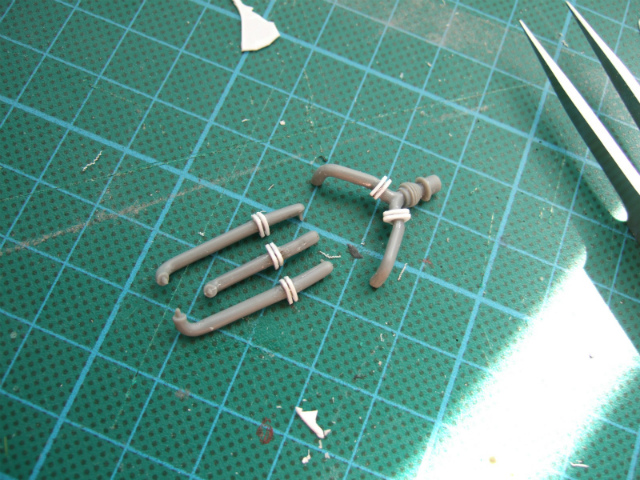 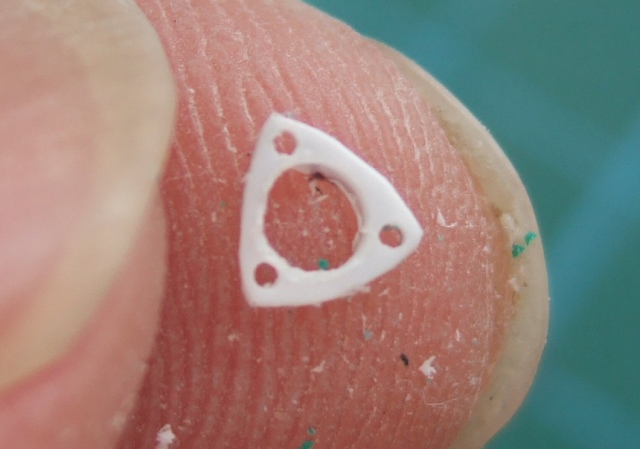 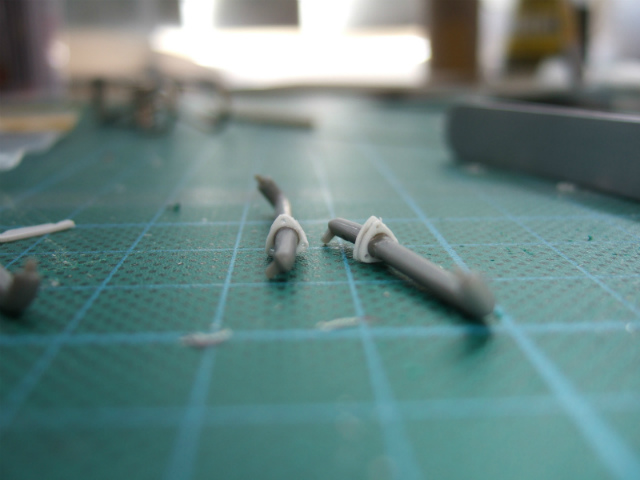 These white parts are from 0.3mm plastic boards. These works are the matter of patience. I've got lots of tries and errors. 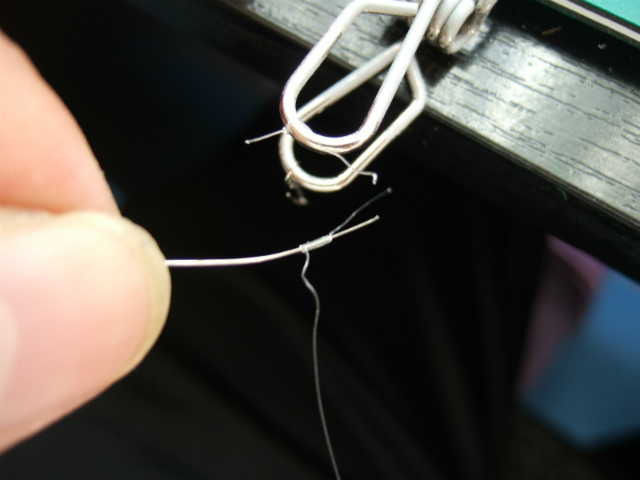 This is the nut part on the white parts above. 4lbs fishing line are coiled and glued with CA glue on 0.5mm nickel silver rod. Good fusion of my hobbies...!!!  Still lots of tries and errors. 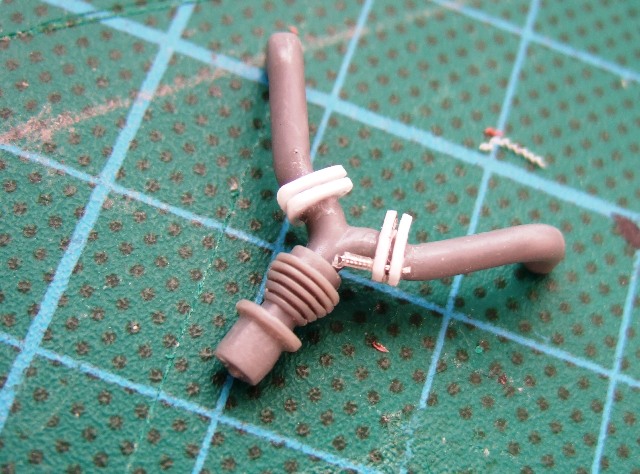 OK, I feel good. 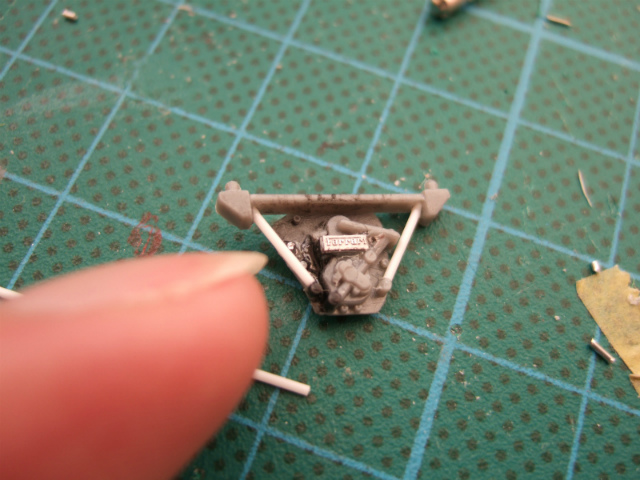 White ones are 0.5mm plastic rods. And the small Ferrari logo was cut from MUSEUM COLLECTION PE. This is one of the most important symbols of 288GTO, but this Fujimi's part doesn't have it (EDITED: Fujimi's box had inlet mark for it, I found the very tiny Ferrari logo much later). That's all for today, thanks for looking!!
__________________
Umihito We can learn from mistakes.
Last edited by Umihito; 12-07-2013 at 05:12 AM. Reason: Wrong information about Ferarri logo on gear box
|
|
#26
07-17-2012, 08:19 AM
|
||||
|
||||
|
Re: Ferrari 288GTO Revell + Fujimi 2 in one 1/24
WIP threads that can be used as reference are the best thing about AF.
Keep it coming!
__________________
AF's Guidelines Read them. __________________  Currently in the process of re-hosting my photos. If any go missing, drop me a PM.
|
|
#27
07-18-2012, 09:03 AM
|
||||
|
||||
|
Re: Ferrari 288GTO Revell + Fujimi 2 in one 1/24
Quote:
I mean, your works are just, just splendid!!! Your 288GTO really moved me, I like your paint work and detailed engine, and... everything! I can learn so much from your works.
__________________
Umihito We can learn from mistakes.
|
|
#28
07-18-2012, 09:13 AM
|
||||
|
||||
|
Re: Ferrari 288GTO Revell + Fujimi 2 in one 1/24
OK, let's start posting for today now.
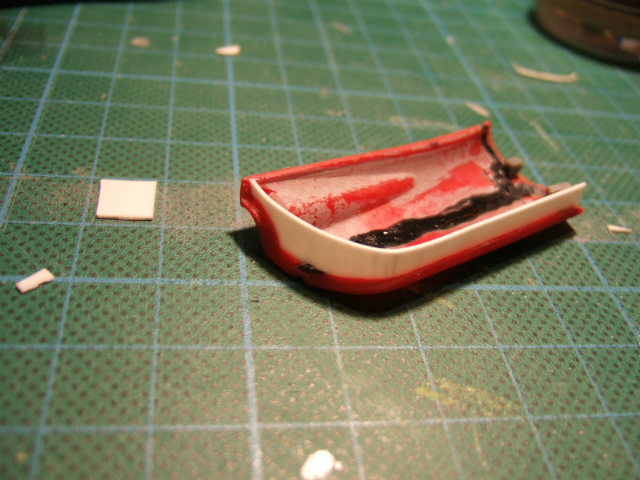
  I chose and pealed the smallest cavallinos from HOBBY DESIGN 1/24 Ferrari Metal Logo (B) for 512BB & 288GTO & 250GTO (HD01-0023); The third photo in this post. 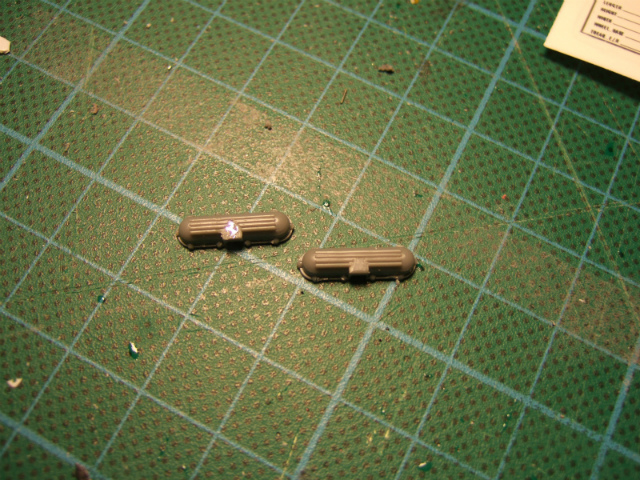 3 ribs were pealed from this injection head parts (don't say the real one has 2 ribs left, mate!) because of the size of the cavallinos. Then the prancing horses are glued with clear bond. This glue can be replaced to woodwork bond, I reckon...? 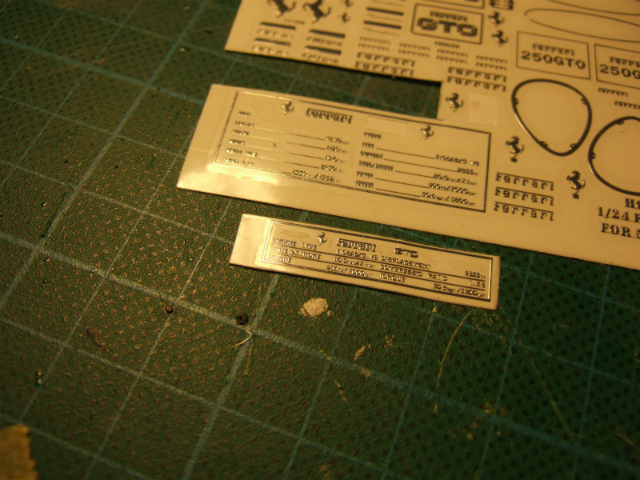 This is the one, the HOBBY DESIGN's logo set. 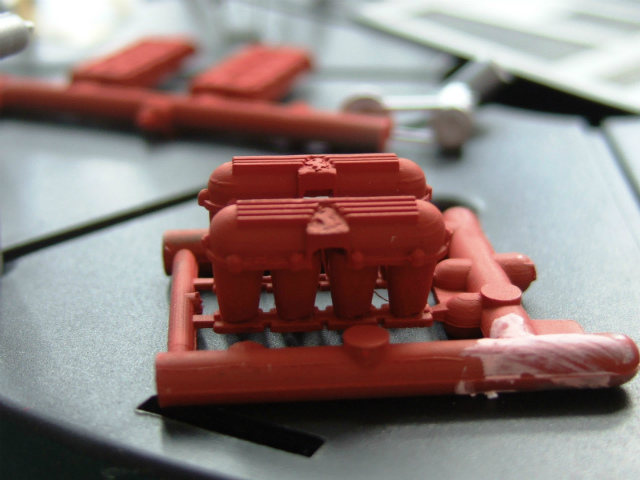 Flat red was applied. I use the old brush to paint these part to replicate rough surface. After this photo, once again I tapped with semi-dried semi-gross red (complicated expression?).  I felt this oil filter was a bit too small. 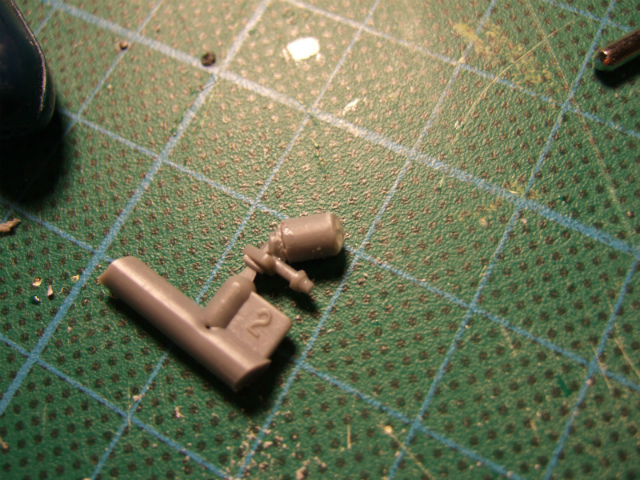 So I replaced to a runner to make it thicker. I used CA glue to make rounded head. 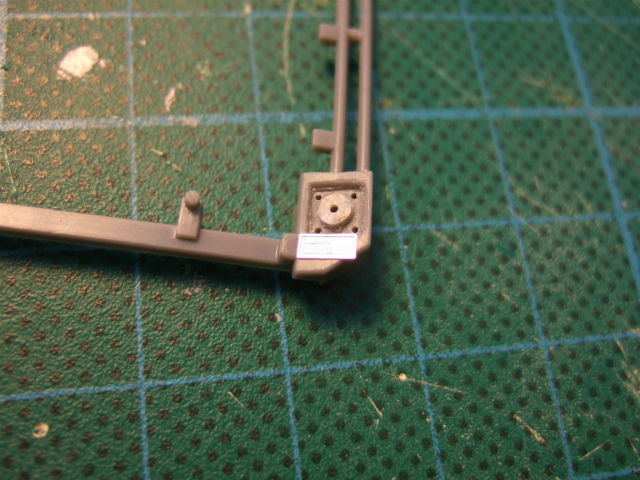 The chassis number plate was applied. This is from Fujimi's box and it was not the chassis number plate actually, but there was no choice because I didn't have it. If it gives atmosphere, I feel fine here. It is just a tiny part and I can hardly read it..!! The flames of PE plate were cut after this photo. 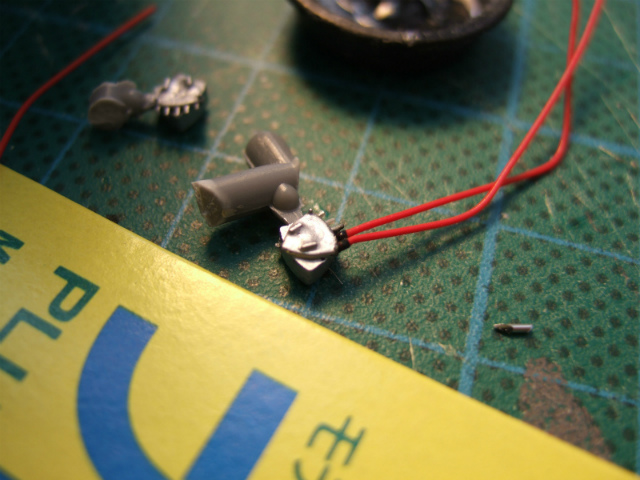 Red plug cords were applied with black CA glue. I used ancient MODELER's 0.45mm plug cords, but I bet you can find several types of cords. This was a really troublesome, frustrating tiny work... Of course lots of tries and errors were there. 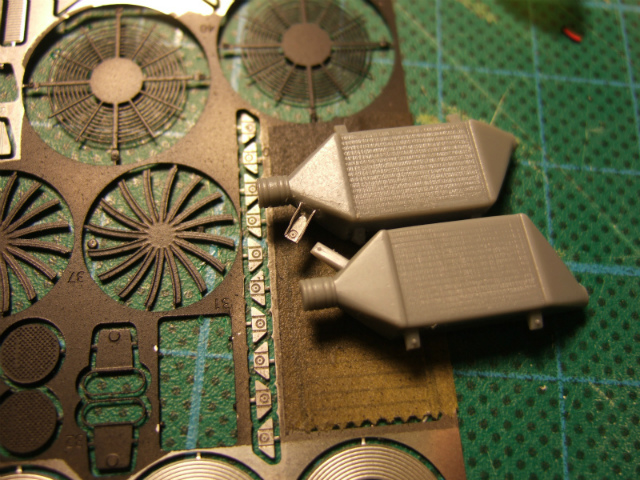 I was wondering if I would use these tiny, small stays of inter coolers, but seeing the trial on above, there was no choice but used them. 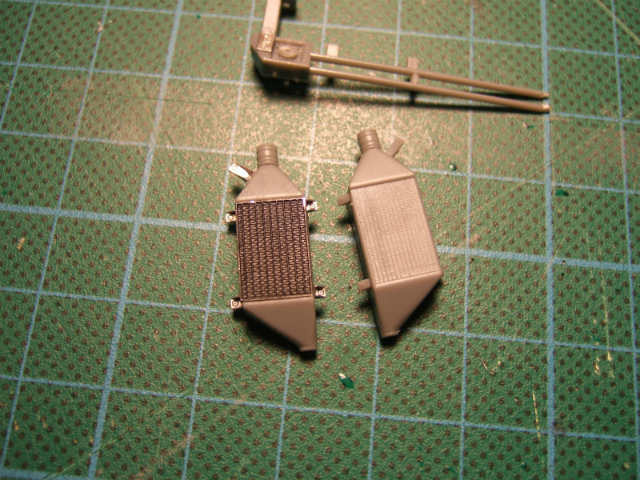 I applied all the PE parts on left. The difference was really big. The PE parts were painted in flat silver after this photo. 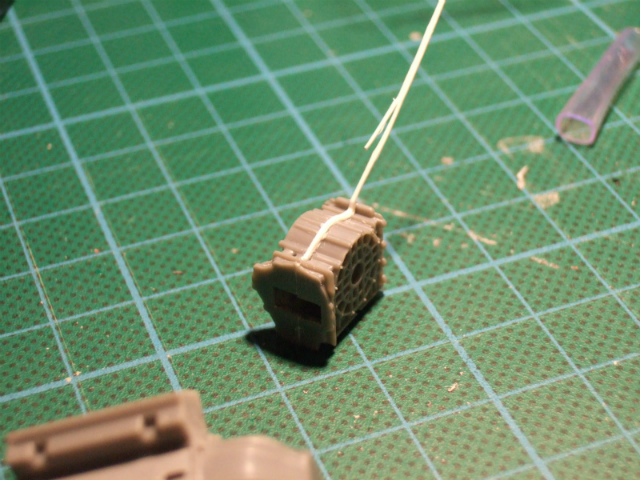 2 pries of 0.3mm plastic paper was applied on differential box, because I felt discomfort to the original parts. 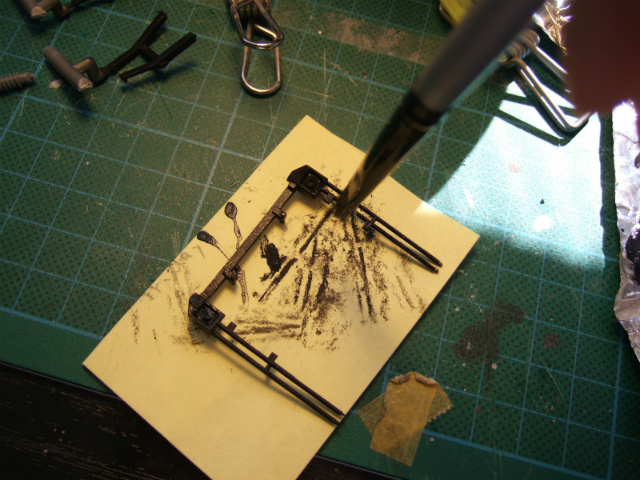 This is how I paint the rough surface. Semi-dried paint was applied on brush and I tapped on the parts. 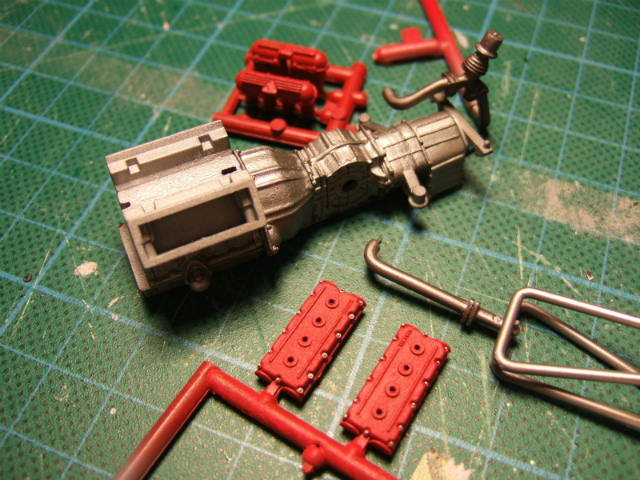 I used the same method on these parts. Now I've got to go to bed.... Thanks for looking always and see you tomorrow, guys!!!
__________________
Umihito We can learn from mistakes.
|
|
#29
07-18-2012, 12:42 PM
|
|||
|
|||
|
Re: Ferrari 288GTO Revell + Fujimi 2 in one 1/24
always a pleasure to see your work here, umihito. not only do we see what you did, but a good explanation on how you did it (even though i can only dream of having the same skill set to do the same thing, LOL). looking forward to more updates from you
__________________
olly olly oxen free
|
|
#30
07-19-2012, 03:20 AM
|
||||
|
||||
|
Re: Ferrari 288GTO Revell + Fujimi 2 in one 1/24
Quote:
I didn't do the same thing to other cars but to this 288GTO, and I have never thought I would do these kind of detailed works before I started this project. I am the one who is surprised that I am doing these kind of detailed works...!!
__________________
Umihito We can learn from mistakes.
|
| ||||||||||||||||||||||||||||||||||||||
|
POST REPLY TO THIS THREAD |
 |
|
|


