|
|
| Search | Car Forums | Gallery | Articles | Helper | Air Dried Beef Dog Food | IgorSushko.com | Corporate |
|
|||||||
| WIP - Motorsports Post topics for any "Work In Process" motorsports vehicles in this sub-forum. |
 |
 Show Printable Version | Show Printable Version |  Subscribe to this Thread
|
|
|
Thread Tools |
|
#47
 02-21-2012, 02:38 AM
|
||||
|
||||
|
Re: Leyton House CG901B
As usual fantastic attention to the details - lovely build. It got me thinking about starting F1 project...

|
|
#48
07-04-2012, 06:56 PM
|
|||
|
|||
|
Re: Leyton House CG901B
So, at long last heres a new update!
During the little time i had since my last post ( work...real life...) i have been working on more data to get additional parts printed. There were some pretty complicated parts to do like the rear uprights, brakeducts and the exhaust pipes. I finally got another run printed and here are some pictures of them as they arrived: The exhaust pipes ( 5 pieces each ) 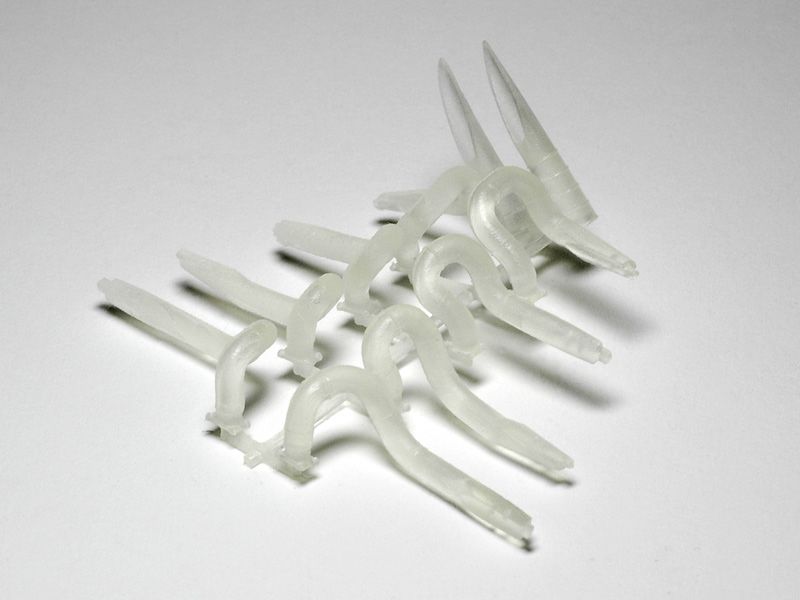 The sidepods 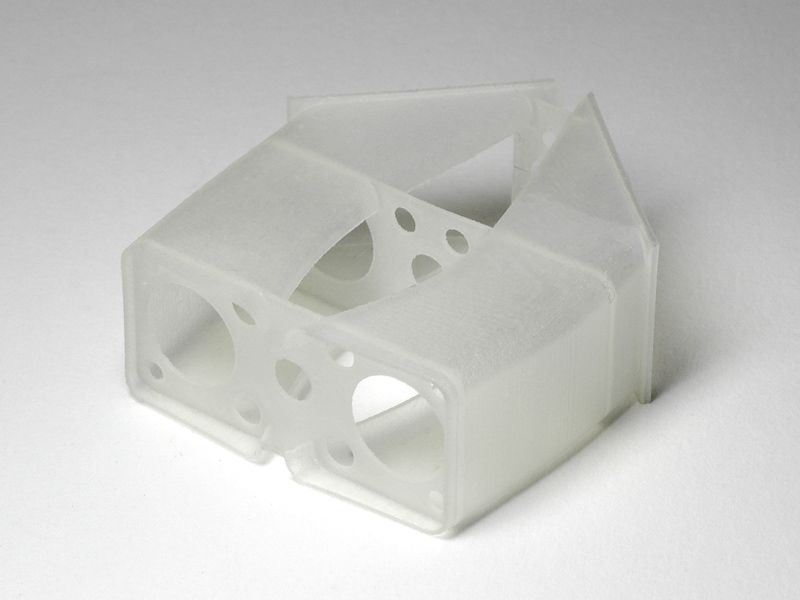 They are 0,4mm thick and you still see the support structure i built into them. At first i had them done 0.2mm thick with less support. They got printed o.k.ish but subsequently warped and were just too thin to do further work on them. Uprights, brakeducts and throttle slides 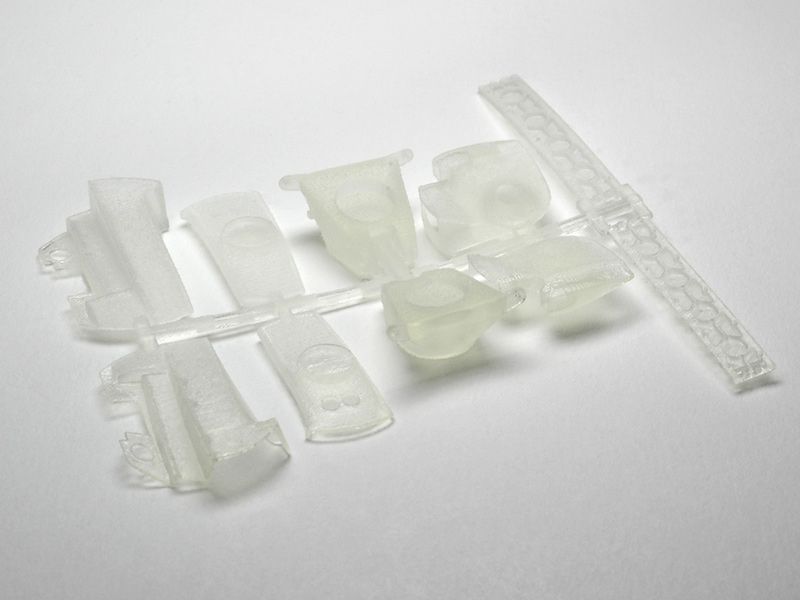 I then started working with the throttle slides. In the kit they are one part with a rudimentary fuel rail attached ( forgot to take a picture of the original part...sorry ). Thats o.k. if you glue the tray with the velocity stacks on top of them but i want that removable and hence more detail below. First i wanted to improve the Tamiya part but that was too simplified, so, using Patrick Morgans engine pictures i built the data for the visible upper sides of the throttle slides and after separating and thinning the kit parts glued them on top of those. Like this i will have a precise base to position the individual velocity stacks i had made before. 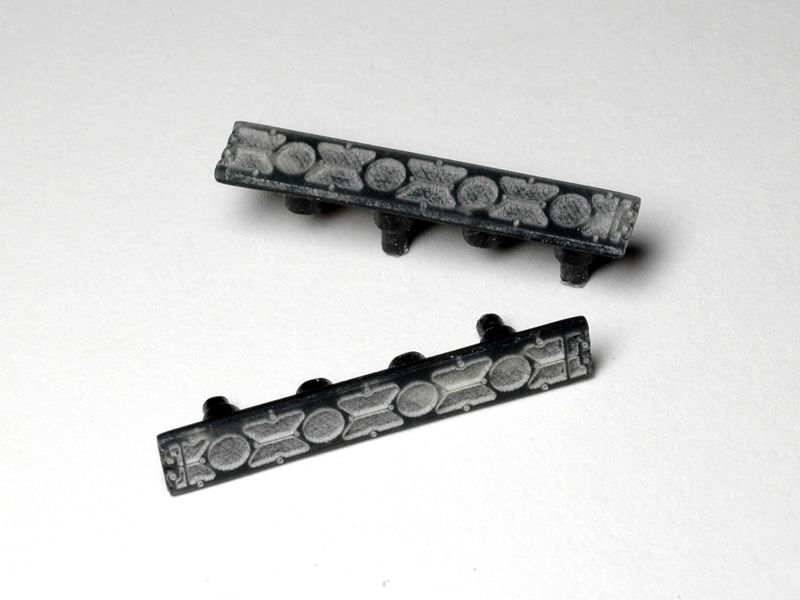 The exhaust pipes in the next picture are just dry fitted. That works very well but the surfaces need a good deal of sanding before i can glue them together and paint. Since the surface of the translucent printed material is quite difficult to judge when sanding i will probably cast them in resin first and then sand. 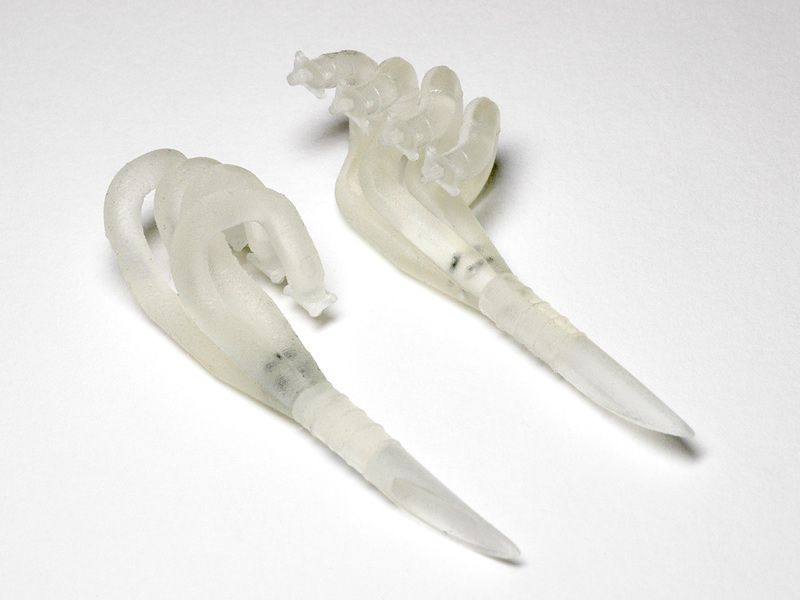 I then dry fitted the parts on the engine 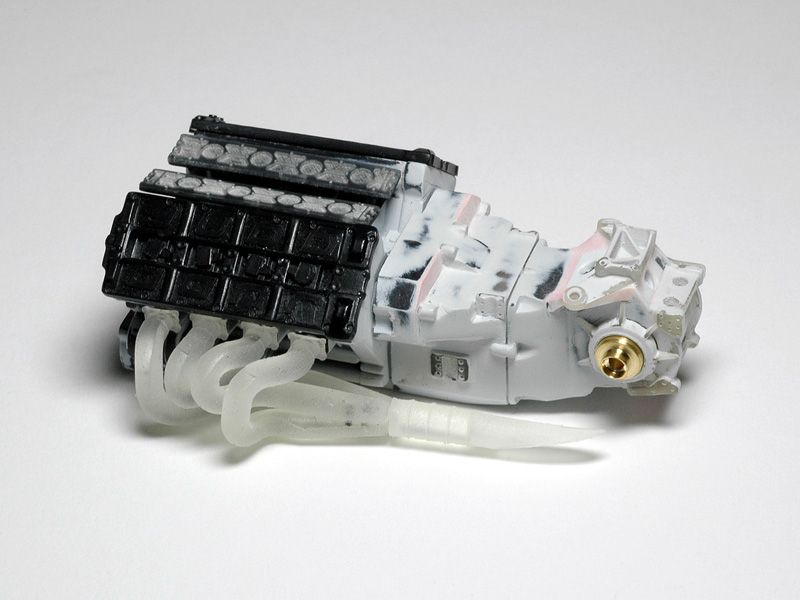 As you can see i also continued adding previous printed parts to the gearbox and blended them in with styrene bits and filler. A first layer of primer showed surface issues and there are more details to attach. 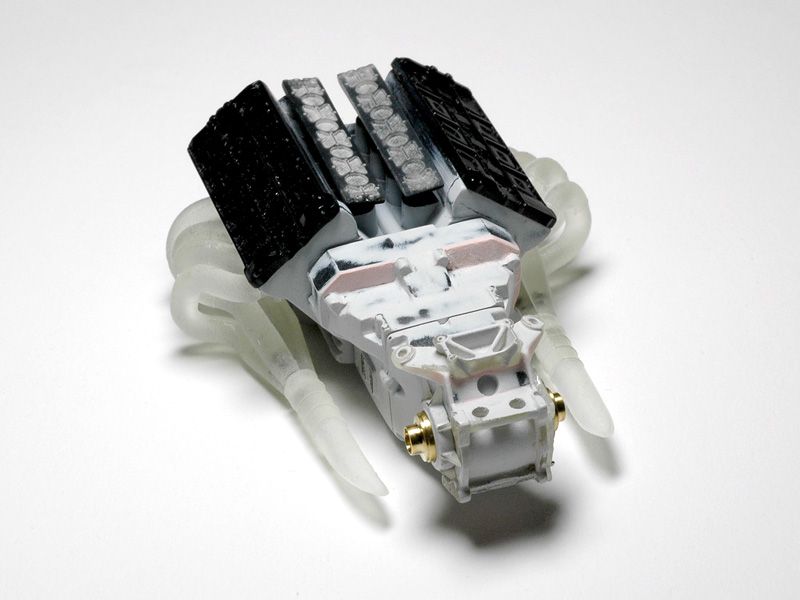 I also started making metal bits in the meantime. The brass drive shaft parts here are the first ones to show. 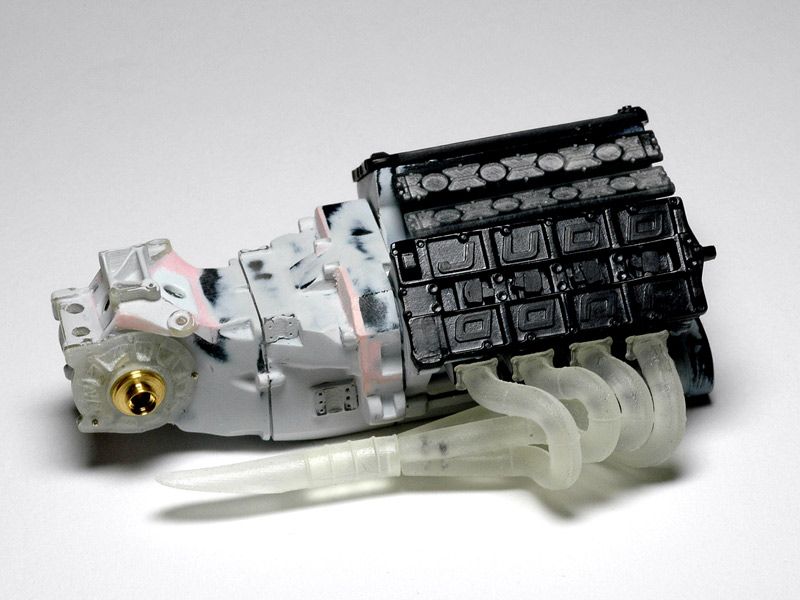 Last weekend i took the engine and a few other parts too Goodwood FOS and had a date with the real car. I got to take more detail pictures and also a bunch of measurements, so now ( time permitting :-) i have great material for more progress. In the end the Leyton House, driven by Gary Ward, took fastest time of the weekend! Congratulations to the team of Dawn Treader Performance and thanks for the invaluable help!
|
|
#49
07-04-2012, 11:22 PM
|
|||
|
|||
|
Re: Leyton House CG901B
Jaykay - saw your Jordan in the 200th issue of the Tamiya magazine - what a tribute - you must be proud - a perfect selection of a model for the 200th edition. It was great to read the article after following your build on this forum. Thank you for sharing your 1/20 scale masterpieces. These parts you are making are amazing - can't wait for Mac to get a 3D printer?? - John
|
|
#50
07-05-2012, 06:26 AM
|
||||
|
||||
|
Re: Leyton House CG901B
Hi,
great stuff, this model will look great close to the Jordan
__________________
Micha       
|
|
#53
07-08-2012, 07:20 AM
|
|||
|
|||
|
Re: Leyton House CG901B
I love your work Joachim. I love the technical precision, attention to detail and insight you provide into your builds. Some of the best modelling I have ever seen. This is very inspiring to do my best, otherwise it would be very depressing.....
  ..lol! ..lol!
__________________

|
|
#55
07-09-2012, 08:26 PM
|
||||
|
||||
|
Re: Leyton House CG901B
This really is Modeling of the Future!
Perhaps for your next build you should consider an engine on a stand with it half open... imagine the detail you could put into that!
__________________
 It's Not wheather you Win or Lose, its how you look while you play the Game
|
|
#56
07-10-2012, 10:50 AM
|
||||
|
||||
|
Re: Leyton House CG901B
Quote:
__________________
Superdetailling is not a crime!
|
|
#58
07-16-2012, 06:47 PM
|
|||
|
|||
|
Re: Leyton House CG901B
Heres a little more progress.
I started casting some of the printed parts in resin and prepared them for primer. The first ones were the velocity stacks. I had only one left and one right, so i needed duplicates. On top of that the resin is nicer to sand than the printed material. Heres a picture of the real ones. 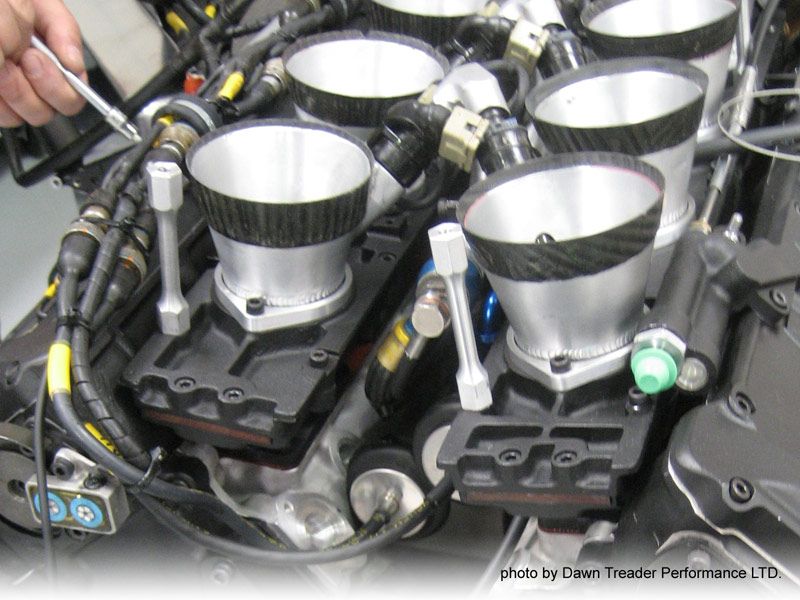 In typical Tamiya fashion they are one part with the tray on top in the kit. Room for improvement... Heres a picture of the parts afetr casting, sanding and a first layer of primer. The fuel rail is the untouched but primed rapid prototype part. I cant get to finishing and properly fitting it, before the other parts are in place. The round discs to the right are turned from aluminium. Theyll represent the throttle sliders. 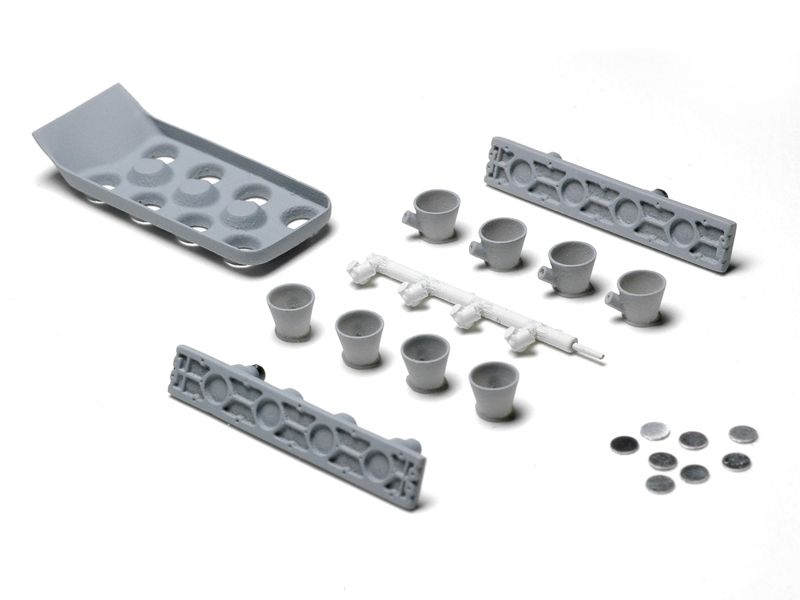 In the next picture the parts are dry mounted on top of the engine. 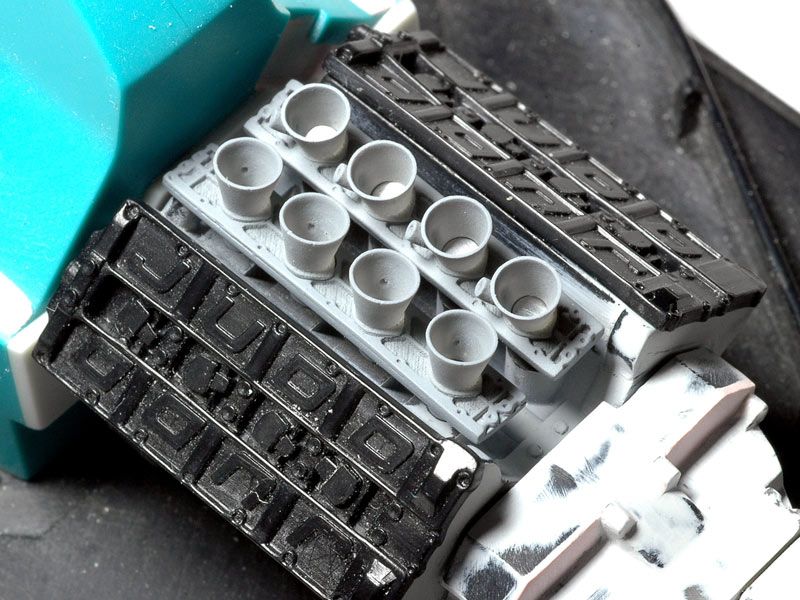 This was necessary to test if i got the try that sits on top of them as a base for the air horn right when i built the data for all these parts. First, theres a shot of the real one again: 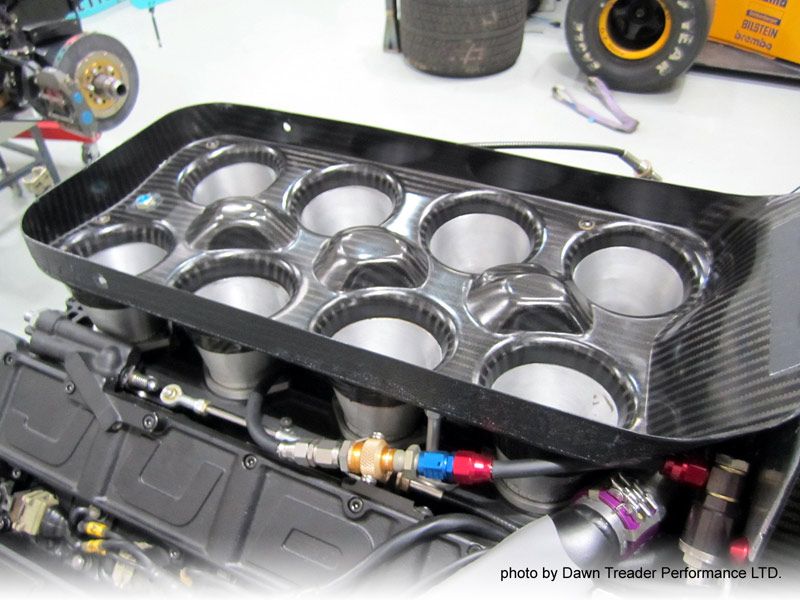 ...and one of the model part. Looks all right. 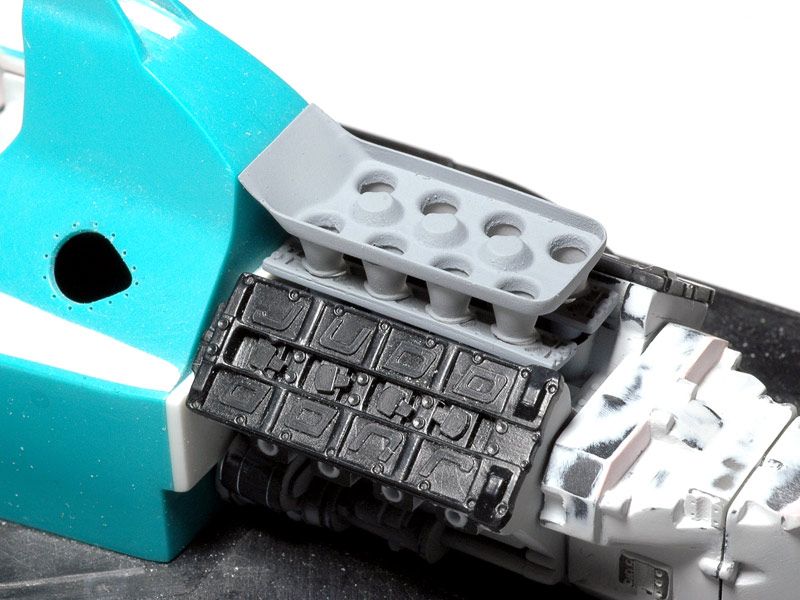 I was pretty happy that worked out because building data for parts, that have to fit an environment without proper reference like a 3D-scan is quite tricky. As you can also see the tray and the other parts are not 100% true to the original but still a big improvement over the kit parts. The task now is, to make sure the wall thicknesses dont get too big during paint and CF-decals and they still fit in the end...:-)
|
|
#59
07-16-2012, 07:40 PM
|
|||
|
|||
|
Re: Leyton House CG901B
jaykay - it is amazing what you can do with a 3D printer and some resin - I am completely in awe at what you can do in 1/20 scale - I am truly stunned - John
|
| ||||||||||||||||||||||||||||||||||||||
|
POST REPLY TO THIS THREAD |
 |
|
|


