|
|
| Search | Car Forums | Gallery | Articles | Helper | Air Dried Fresh Beef Dog Food | IgorSushko.com | Corporate |
|
|||||||
| WIP - Street Post topics for any "Works In Progress" street vehicles projects in this sub-forum. |
 |
 Show Printable Version | Show Printable Version |  Subscribe to this Thread
|
|
|
Thread Tools |
|
#1
 01-03-2006, 12:40 AM
|
|||
|
|||
|
W.I.P Veilside R33 (first model, 56k uhoh)
well i've been a bit bored chillin at home, though i've got some anime i could watch.
i got this for my brother as a gift a while back and its been sittin here collecting dust. I hit up google and searched for a forum of model builders, to get some help. This place is great, after starting this project and reading numerous How-To's, FAQS, other WIP's, finished products, i'm seriously interested in persuing more builds. This again is my first build and i'm learning alot while i go. The FAQS have been a huge help and i wanna say thanks to all those who've contributed. 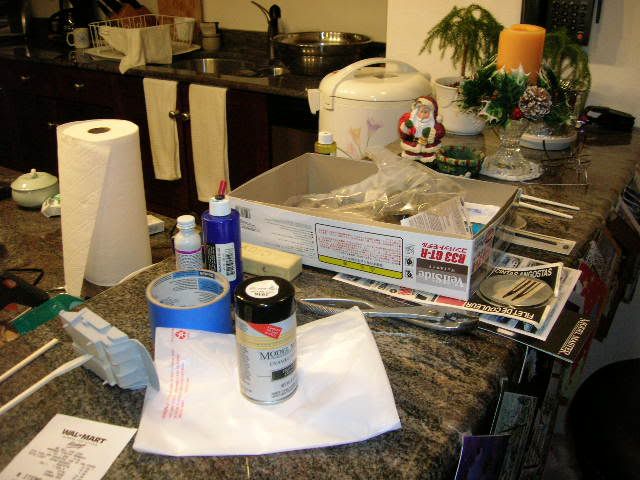 Its a FUJIMI model, and the body kit is made of aluminum/body is plastic. I had to remove the side skirts and rear bumper if i wanted to use the veilside kit. Fitment wasn't too big of an issue, i was careful removing the plastic parts. I masked the area just in case the dremmel slipped a tad, and hacked off the bits. I then used a finger nail file to sand down for an exact fit. Took it out to the garage and got a few coats of primer on it. When that was done, i used modeling spot filler to clean up the itty bitty spaces. Had to wait for it to dry before sanding and a getting another coat of primer. 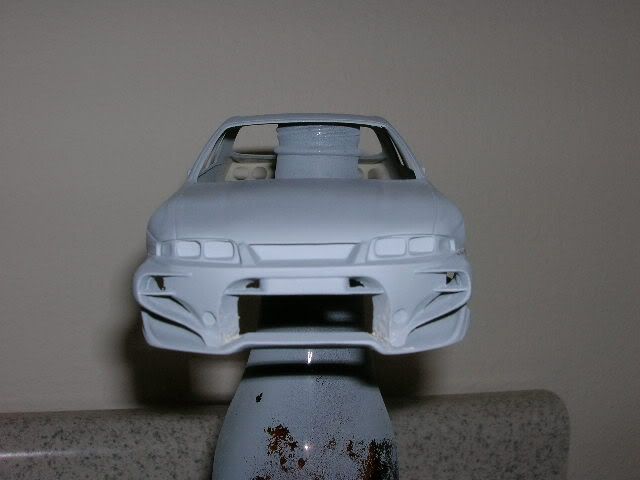 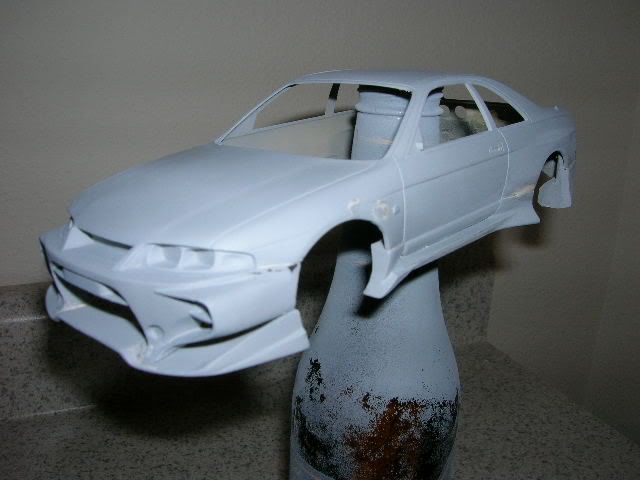 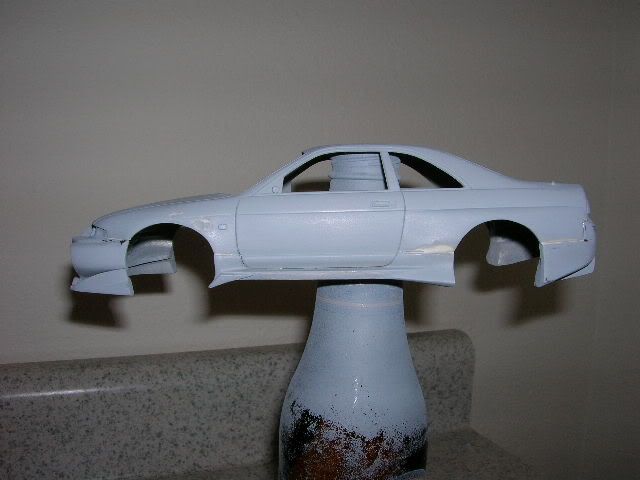 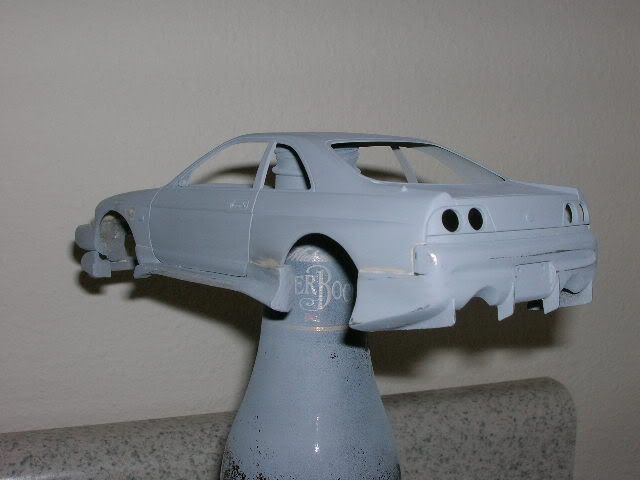  I wet sanded it going from course to fine, getting the imperfections out, along with smoothing out the body filler. Then applied a bit more spot filler for final touch ups. I put this away to dry and attacked the underbody and interior pieces. I cut out every last piece and hot glued them to wooden chopsticks so i could spray them down with primer. 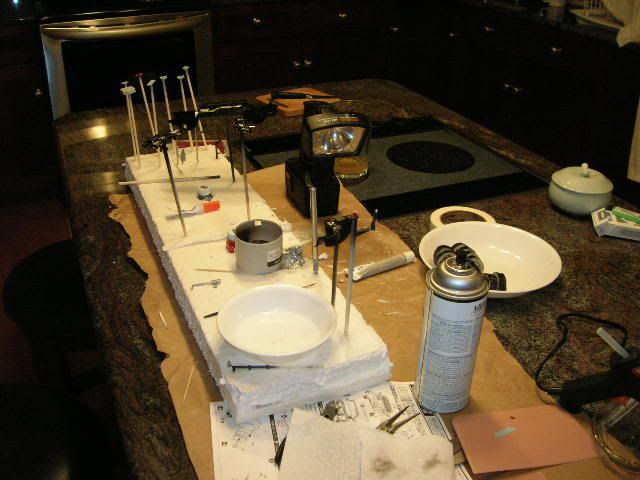 decided to go with a satin black for the interior and some red for accent bits. The undercarrage, dash, center console were finished first 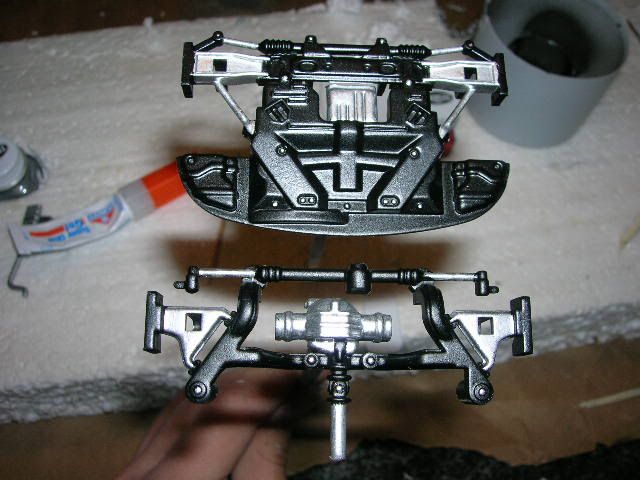 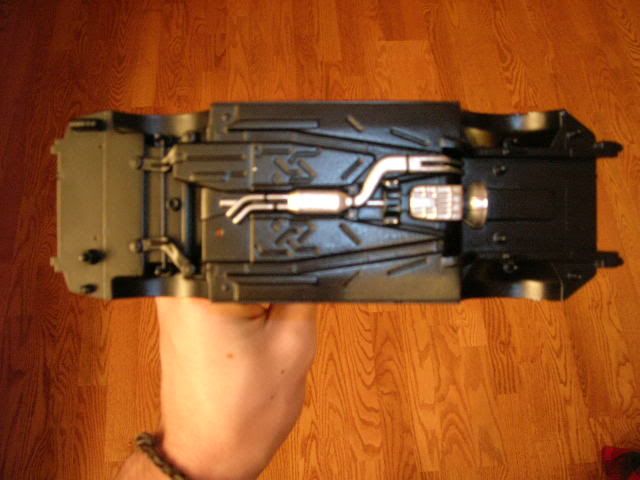 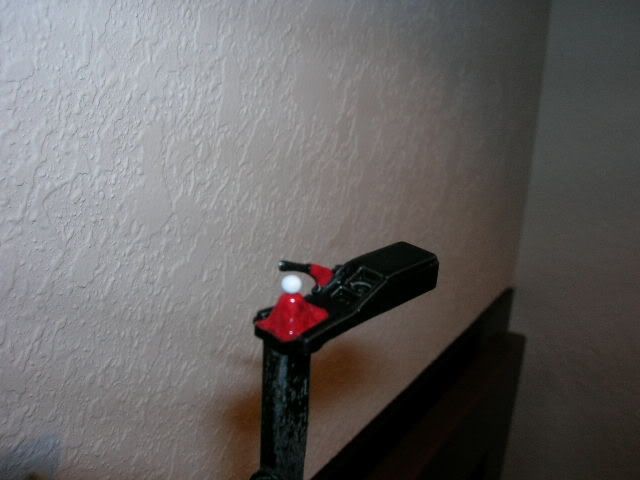 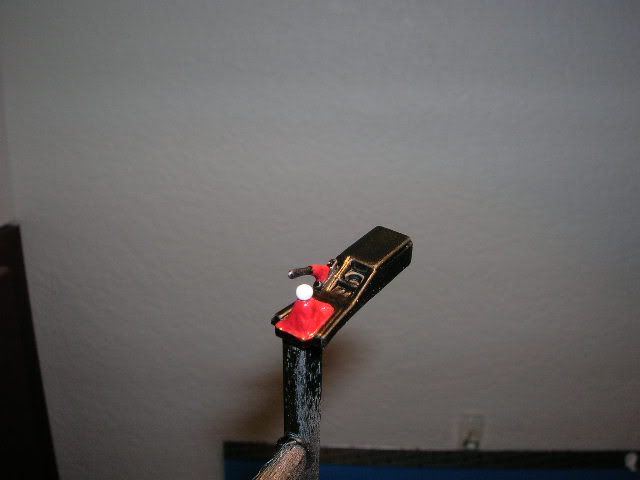 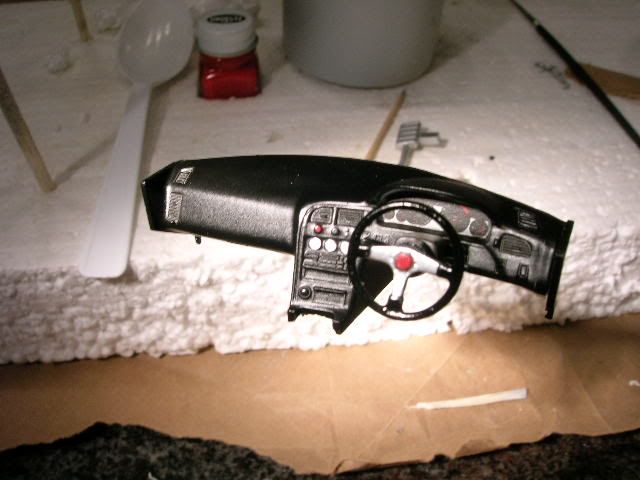 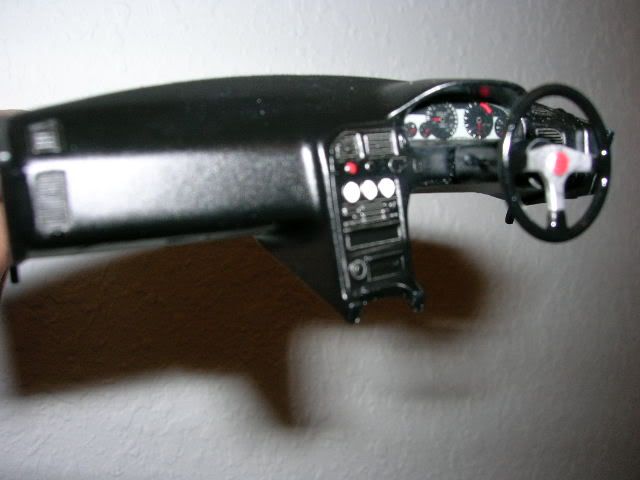 and 1 disk, cause i wanted to see what it would look like :laugh: 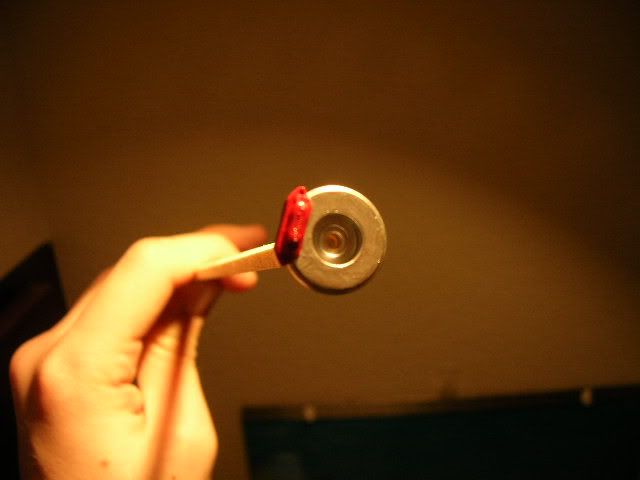 I plan on painting it Arctic Blue Metallic, and have already applied 4coats of "Pure White" paint so the blue wouldn't be so dark. I personally wanna thank GTI1800 for the "How-to: Make Wide Brimmed Wheels" I added a bit something so the rim had a nice slant into the lip. 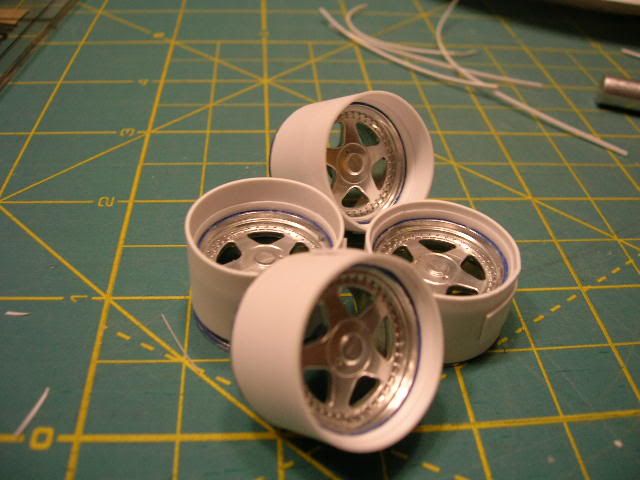 Took a strip of stryene and sanded down the edge on one side. So it kinda looked like this < , then got a straight edge and cut the slant off the strip. After attaching the lip to the wheel, i then glued in these slants to have a nice gradual slope, instead of a harsh edge. This alone took me half a day  i plan on priming and painting them tomorrow. i plan on priming and painting them tomorrow.I'm also going to apply the first coat of Blue tomorrow and am lookin forward to it. Thanks for looking, any comments and/or suggestions are more than welcome 
|
|
#2
01-03-2006, 12:42 AM
|
||||
|
||||
|
Re: W.I.P Veilside R33 (first model, 56k uhoh)
Coolness, good work. Never seen that kit.
|
|
#5
01-03-2006, 01:04 AM
|
|||
|
|||
|
Re: W.I.P Veilside R33 (first model, 56k uhoh)
Thanks for the compliment
well it ain't easy lemme tell you. I've scrapped several bits, having to start over a couple times. I mean GTI's writeup makes it look easy, but man, its fairly tough for a n00b like myself
|
|
#6
01-04-2006, 06:41 PM
|
|||
|
|||
|
Re: W.I.P Veilside R33 (first model, 56k uhoh)
Well heres a small update. While making the deep dished wheels, i had to dump my seats in a sealable container of brake fluid (thank you AF). The masking didn't stick right, so black was all over the red accent inserts of the seats.
Anyewho, i sprayed the body with about 4coats of white and wet sanded it the other day. Yesterday i was able to spray my first coat of Arctic Blue Metallic. This shits a bit tricky spraying with my Iwata Eclipse. You need to spray at something else every once in a while to keep it from globbing up and shooting boogers at the car. Anywho on with the pics 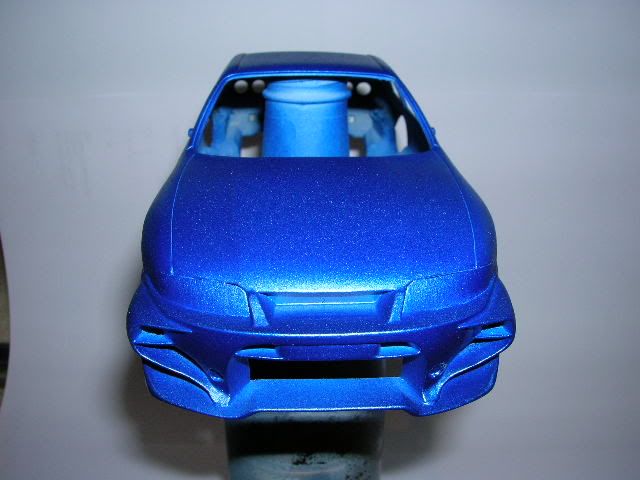 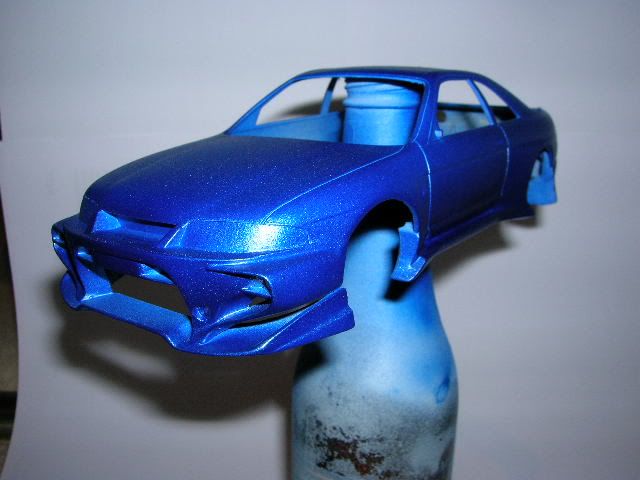   today i was able to finish the 5th coat of Blue. Still gonna put about 2more and then i'll be happy with clearing it. Also wanna thank AF for a paint tip when using Metallic paints. I also put the interior together yesterday 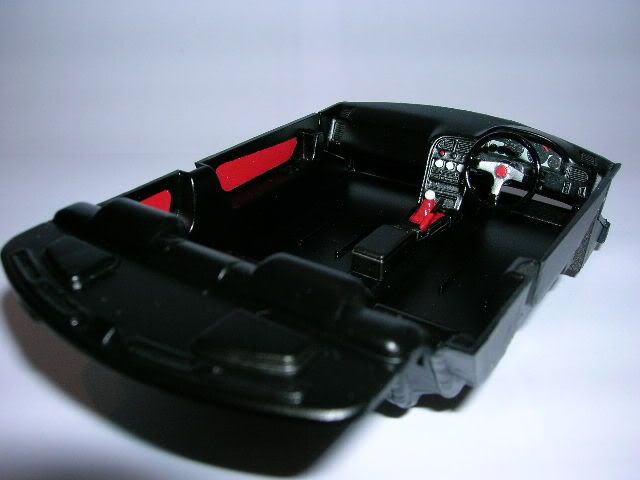  i'm somewhat happy with the interior, though this being my first build, i wish it was less shiney. After seeing other interiors, i wish i knew how to get it to look like leather rather than vinyl. 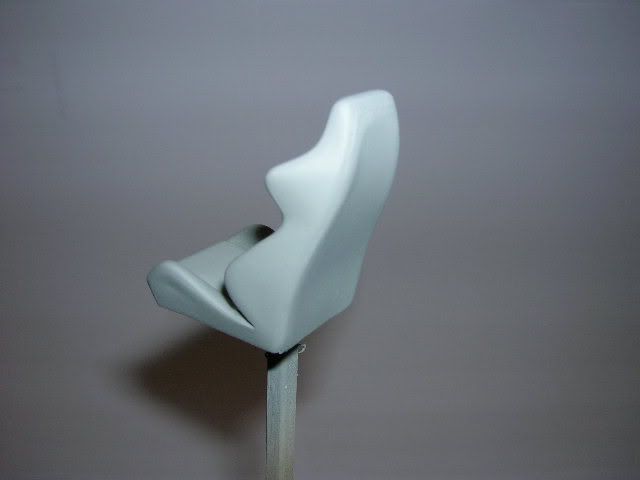 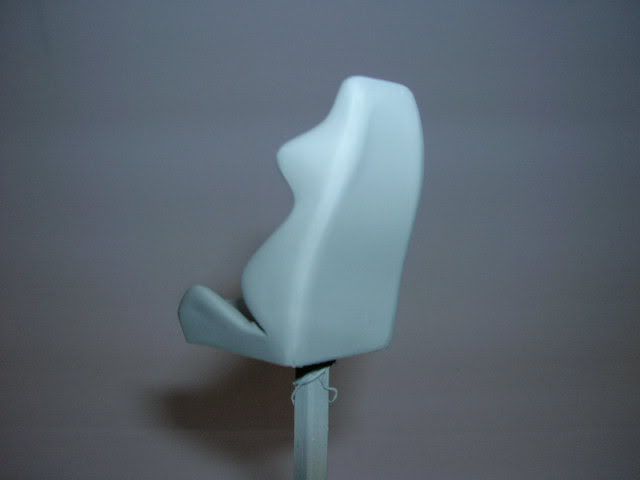 When the paint was stripped of the seats i thought it would be a good time to fill in the backs (also thanks to AF). I cut out some styrene in the shape of the seat back and glued it in place. I got another piece of styrene a bit bigger than the first and glued it to the first and the edges of the seat. Cut off the excess and then sanded the rest, kinda creating a slight curve light some real seats. I guess that about it, thanks for looking and any comments are more than welcome.
|
|
#7
01-04-2006, 07:50 PM
|
|||
|
|||
|
Re: W.I.P Veilside R33 (first model, 56k uhoh)
Nice work so far. Looks like a good color combination.
|
|
#8
01-04-2006, 08:07 PM
|
||||
|
||||
|
Re: W.I.P Veilside R33 (first model, 56k uhoh)
you sprayed the headlights too?
i have this kit but i messed up the pass side door good kit tho pretty damn heavy because its white metal
__________________
 Project Lexus Revive Project Lexus Revive 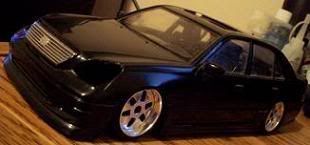
|
|
#9
01-04-2006, 08:17 PM
|
|||
|
|||
|
Re: W.I.P Veilside R33 (first model, 56k uhoh)
Wow, what a deep color! I also have to wonder about those headlights, too.
Any suggestions on how to PROPERLY mask seats? I might have trouble with that myself!
__________________
 
|
|
#10
01-04-2006, 09:39 PM
|
|||
|
|||
|
Re: W.I.P Veilside R33 (first model, 56k uhoh)
thanks alot guys for the comments.
yah the car's pretty heavy, i couldn't believe the body kit was made of metal, took a while to keep the kit attached to the body. The headlights are stationary (unlike alot of the kits here i've seen) so i had primed the whole thing and sprayed them black. Then i had masked the headlight lenses and popped them in. *fingers crossed* i'm really hoping it turns out ok :laugh: or it could prove to be one UBER n00b move 
|
|
#15
01-05-2006, 01:11 PM
|
||||
|
||||
|
Re: W.I.P Veilside R33 (first model, 56k uhoh)
Very nice!
Some semi-gloss clear will knock down the interior gloss a notch.
__________________
SCCA 7, The lost Z Contest entry thread: Mystery? Beetle + Boxster = Bugster, P.T. Panel:click here Diablo Roadster: click here, & Porsche C2 Cab
|
|
|
POST REPLY TO THIS THREAD |
 |
|
|