|
|
| Search | Car Forums | Gallery | Articles | Helper | Air Dried Fresh Beef Dog Food | IgorSushko.com | Corporate |
|
|||||||
| WIP - Motorsports Post topics for any "Work In Process" motorsports vehicles in this sub-forum. |
 |
 Show Printable Version | Show Printable Version |  Subscribe to this Thread
|
|
|
Thread Tools |
|
#1
 01-04-2005, 04:08 AM
|
||||
|
||||
|
Howdy all,
The STUDIO27 BAR006 finally arrived in the mail today (my first resin kit!), and I'll be honest... I was grinning like an idiot for a loooong time, and it felt like Christmas had come again... after just 10 days! Now the first thing that struck me with this kit was the packaging. It's just so different from what I'm used to, like they seem to put a bit more thought into it than just dumping all the parts in a box and sending it off. As it's my first resin/white metal/photo-edged kit also, I was pleasantly surprised with all the 'bits'... it's all so new! I must admit, I'm now convinced the best part of modeling is opening the darn box...! Anyone with me on this one...? Anyway, I thought I'd try to show you all through the kit and packaging, and basically what you get for your $$$. This first section of pics will probably be nothing new for those of you who've built a resin kit before, but I think it'll be interesting for the rest who've yet to get there. 1. The tell-tale red box of a STUDIO27 kit. Ive only just noticed all the boxes are identical, and simply tagged with a label denoting the kit inside. Nice to see the BAR colours on the label as well. 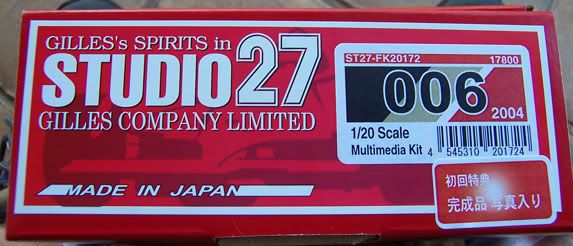 2. Now this impressed me - I open up the lid (it's a very sturdy box by the way), and the first thing I lay my eyes on is a nice photograph of the finished kit! It probably costs them very little, but it was a very nice touch. Like I said, I'm very impressed already!  3. The instructions - nice to see a splash of colour on the instructions for a change. There's Japanese and English wording, and it all looks fairly straight forward at first glance. 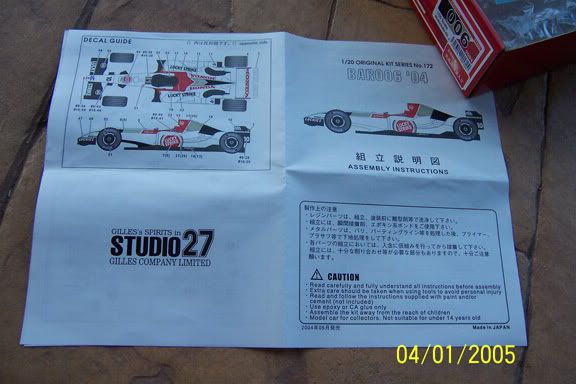 4. Now we're starting to get somewhere... damn I love that first look through a new kit! 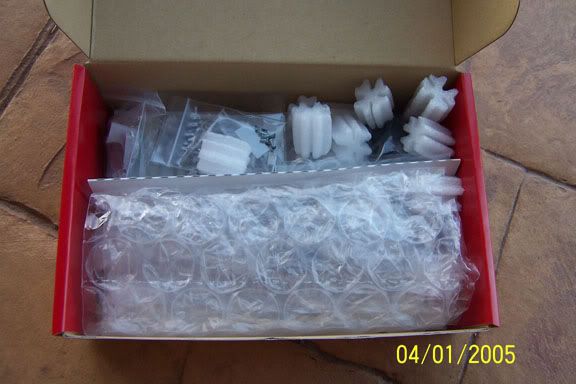 5. And under the top packaging... it was all very nice and neat. 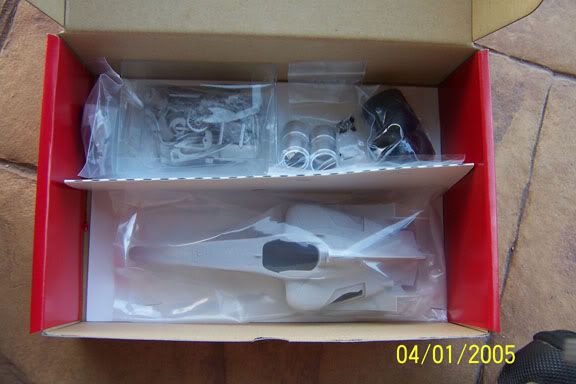 6. All the parts, minus the main body section. You can see the tires and wheels on the top left, white metal parts all in a small packet to the right (sitting on a clear plastic box they came in), and at the bottom is the resin seat and various screws, clear parts, and other odds and ends. No idea what the screws are for yet... there's 13 of them in assorted sizes. 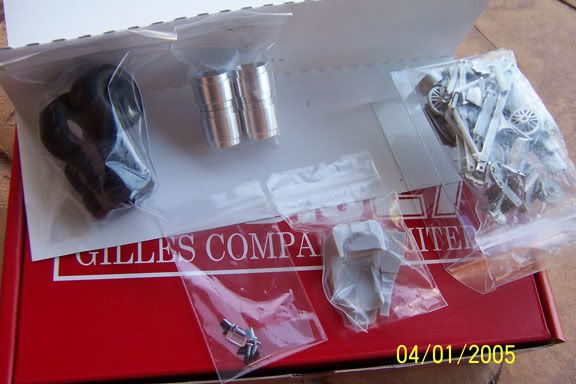 7. Close-up of the tires and wheels. I haven't actually taken the tires out of the packet yet, but so far they look nearly good to go - I don't think I'll need to do much work on them at all. 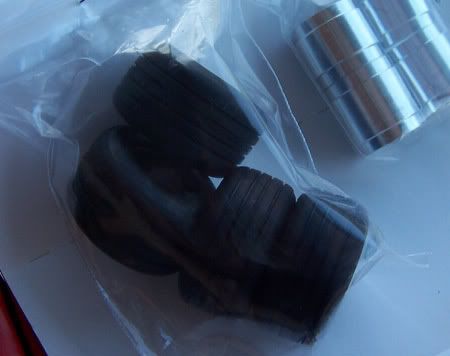 8. The screws and odds and ends. I'm rather intrigued with these parts... what are the screws for... why the flat piece of clear film... is the wire an aerial... etc, etc... 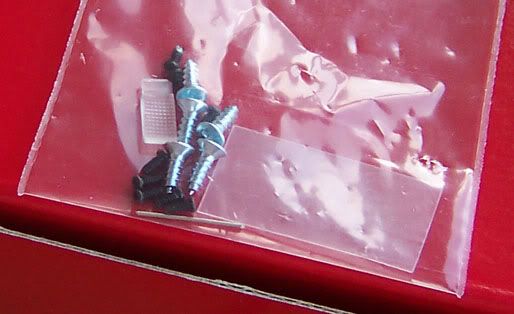 9. White metal parts. They're packed together pretty tightly, but look to all be in good condition. I'm surprised to see the wheels come in three parts, one of which you can see below (the spokes). The other parts are machined aluminium (I believe), and I think there's some photo-etched parts as well. I could be wrong however... I really zoomed through my first look. 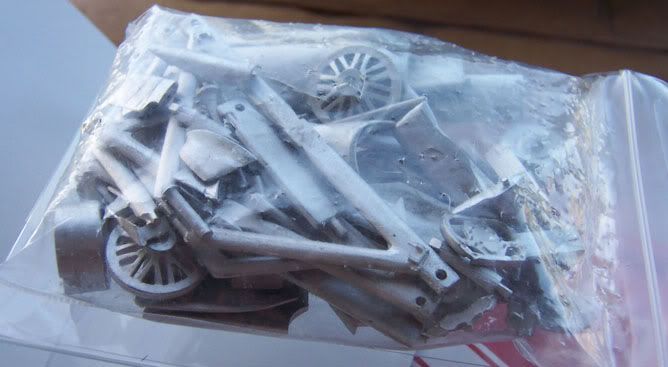 10. The body. I didn't actually realise that resin was a type of plastic. Quite heavy actually. The detail is amazing though!!! This kit is going to be stunning when it's finally complete! 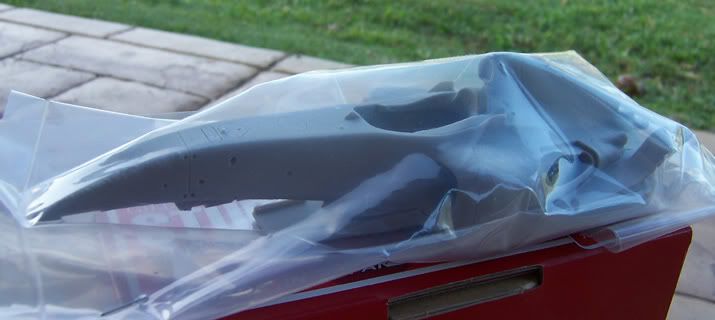 11. Decals and photo-etched parts. I've never even seen photo-etched parts before, so I'm pretty happy to finally have some to tinker with. 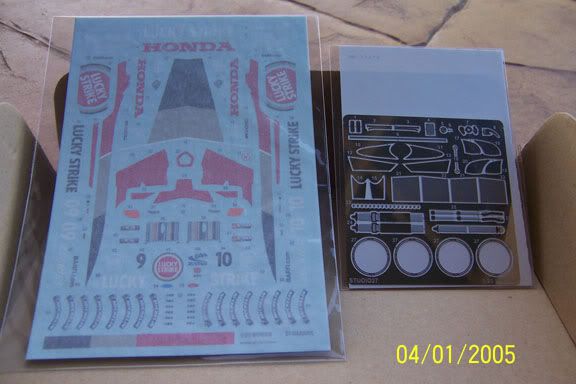 12. Photo-etched parts up close, for those of you who are interested. I'm drooling over these seat belts! 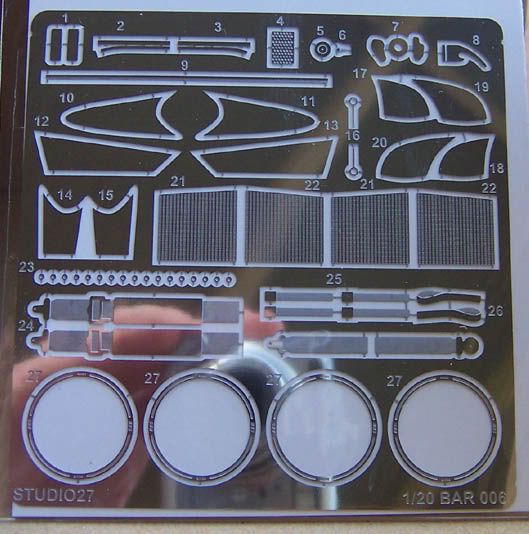 13. Some handy instructions on how to start building resin kits. It's the little additional touches like this, that are rather unexpected, that start to make you feel like the money was really worth it. 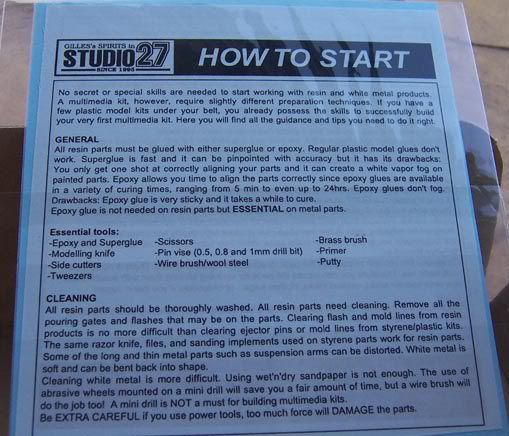 14. The kit! 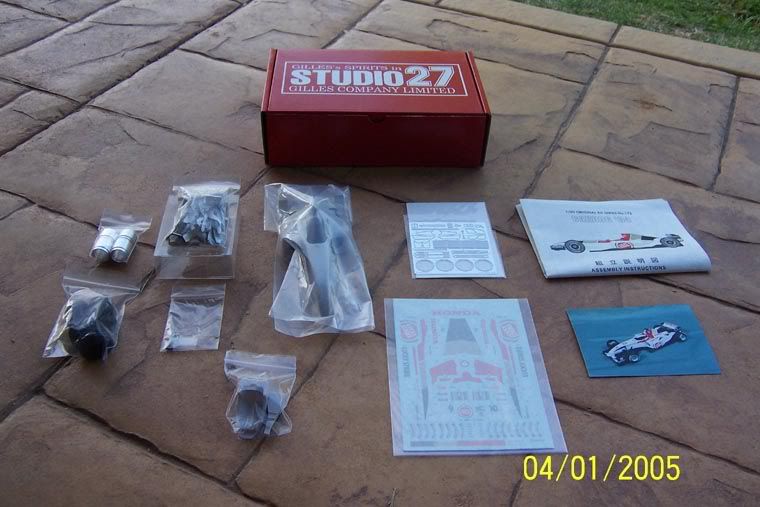 Here's hoping I can do my first resin kit justice! I've been out of it for a while now, but my skills are picking up again very quickly, and I'm confident I can do great job given time and patience. It'll be a month or so before I begin though, there's one or two other F1 projects lurking at the moment. Although when this build finally launches I'll be sure to post anything that may be of interest or help to everyone. Cheers all. And Merry Xmas... again! Mark 
|
|
#2
01-04-2005, 07:58 AM
|
||||
|
||||
|
Re: F1 - STUDIO27 BAR 006 (1/20) - Progress Pics
Although i'm not much of an F1 fan anymore, it does look like a nice kit which will build into a great model. Which version are you planning, Sato or Button's car?
__________________
Completed: Tic Tac Porsche 962C Completed: Avex Dome NSX JGTC Completed: Kremer Porsche 911 GT1   
|
|
#3
01-04-2005, 08:18 AM
|
||||
|
||||
|
Re: F1 - STUDIO27 BAR 006 (1/20) - Progress Pics
You're about to lose your resin and PE virginity.
 Thanks for the great photo essay of the kit contents. Good luck with the build, I suspect you will need it at times with that kit.
|
|
#4
01-04-2005, 08:47 AM
|
||||
|
||||
|
Re: F1 - STUDIO27 BAR 006 (1/20) - Progress Pics
Wow! Looking great!
My dream is to get one of S27 kits one day, but they are too expensive for me. How much you paid for it Mark?
__________________
Zeljko Segin http://www.hrmodeler.com - Fast wheels - my pages My current project - ..... 
|
|
#6
01-04-2005, 09:23 AM
|
||||
|
||||
|
Re: F1 - STUDIO27 BAR 006 (1/20) - Progress Pics
I think you should do the Button version, he is an awesome driver and future WC in my opinion (maybe I am a little biased though!).
The kit looks great, I would like to build one of these resin kits, probably not an open wheeler though. I have the S27 transkit for the Celica ST165 and want to get hold of another S27 kit to practice before I crack into that.
|
|
#7
01-04-2005, 11:53 AM
|
||||
|
||||
|
Mark,
Congrats on your new purchase! I have just started building this model too and the diary is being continuously updated on my website. I don't want to discourage you, but these S27 kits do require quite a bit of work to put together...there is lots of cleanup to do and it's vital that test fitting is done throughout the whole build. It's important to anticipate potential problems such as ride height, wing angles, etc. Check my website for tips on building this model and please feel free to email me with any tips you have encountered. http://members.shaw.ca/bil_attridge/ http://members.shaw.ca/motorsportsin...ldup_Part1.htm Good luck.
__________________
Bil Attridge  
|
|
#8
01-04-2005, 03:35 PM
|
||||
|
||||
|
Spitfire7 & Technoman - While I'm a fan of both drivers, I'll be doing the Button car.
hrmodeler - I ended up paying about AUS$190, which converted is about US$140ish. That included postage from the States. I believe it's about 30% off the regular store price, so I'm pretty happy with that. Sure it's by far the most expensive kit I've bought, but I've got 4 F1 kits and 2 sportscar kits ready to go now, so that'll do me for most of the year no doubt. bilinvic - what luck! I couldn't ask for a better walk-through for this kit than what you're showing on your site! I kept a close eye on your Jordan build which turned out exceptionally nicely, so I'll have to steal a tip or two from you on this build as well. Definitely heeding all of your advice too! Do you by any chance have a link to the F1 Modelers Magazine you mention on your website??? Last edited by Captain Mark; 01-04-2005 at 05:34 PM.
|
|
#9
01-04-2005, 04:47 PM
|
|||
|
|||
|
Re: F1 - STUDIO27 BAR 006 (1/20) - Progress Pics
I always have fitment problem on the front wing in all my Studio27 (8)kits.....still waiting money for the Benetton B191 and F2004..and of course F2005...etc...I really want Studio27 to make Michael Schumacher's F3, F3000 and his Go-Karts.
__________________
FORZA FERRARI!!
|
|
#10
01-05-2005, 12:28 AM
|
||||
|
||||
|
Re: F1 - STUDIO27 BAR 006 (1/20) - Progress Pics
Quote:
Available through the most Japanese online shops, like HLJ or R10. But they're not last long, so be fast if you want some issue ;-)
__________________
Best Regards, Steffen 
|
|
#11
01-05-2005, 03:44 AM
|
||||
|
||||
|
Thanks Hueb_s.
Looks like a handy magazine to have lying around!
|
|
#12
01-05-2005, 04:08 AM
|
||||
|
||||
|
Hobby search has some sample shots from current issues:
http://www.1999.co.jp/asp/GoodsDetai...op_right_e.asp http://www.1999.co.jp/asp/GoodsDetai...op_right_e.asp http://www.1999.co.jp/asp/GoodsDetai...op_right_e.asp http://www.1999.co.jp/asp/GoodsDetai...op_right_e.asp (Use the links near "Other Page A")
__________________
Best Regards, Steffen
|
|
#14
01-09-2005, 05:55 AM
|
||||
|
||||
|
I've taken the first steps on this kit - preparing the body. There definitely are a lot of mould lines, flash, and general muck that needs cleaning up. A couple of things I've noticed...
1. Resin sands VERY easily! Don't get caught out! I find it sands down very much quicker and easier than plastic, so for the newbies, just take it easy at first until you get familiar with how the resin will react to various grades of sandpaper. 2. Resin gives off a strange scent when sanded... curious. I mist admit it is oddly pleasant though. Will post pics when there's something worthwhile to show.
|
|
#15
01-09-2005, 06:00 AM
|
||||
|
||||
|
Re: F1 - STUDIO27 BAR 006 (1/20) - Progress Pics
Quote:
Tim
|
|
|
POST REPLY TO THIS THREAD |
 |
|
|


