|
|
| Search | Car Forums | Gallery | Articles | Helper | Air Dried Fresh Beef Dog Food | IgorSushko.com | Corporate |
|
|||||||
| Diecast Car Modeling Discuss and show diecast vehicles that you have modified, or that you have collected. |
 |
 Show Printable Version | Show Printable Version |  Subscribe to this Thread
|
|
|
Thread Tools |
|
#1
 08-29-2004, 09:21 PM
|
||||
|
||||
|
How To- Flip Flop Trunk
Materials needed
-Diecast model -Super Glue or Putty -Cabinet Hinges (I got mine at Walmart for $1.74. The size is 3/4" x 5/8" and they are brass hinges) -Dremel with cut-off wheel or sanding band -Screwdriver (Philips) -Drill with 11/64" or 3/16" drill bit (I used 11/64") 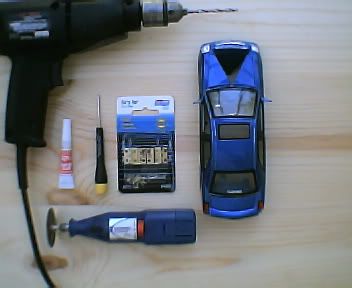 **** You have the option of painting the brass cabinet hinge to match the car. I would recomend painting it by hand**** Remove the chasis and interior to access the trunk hinge. Remove the piece of metal that holds the trunk in the hinge area. Then take the trunk off of the body 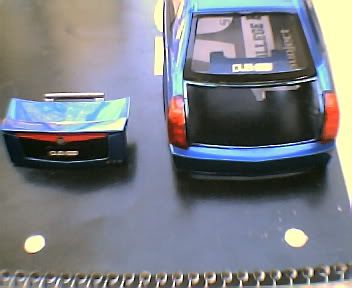 Now look at the inside of the trunk, you should see 2 rivets that hold the trunk to the hinge. They are circled in red in the picture. 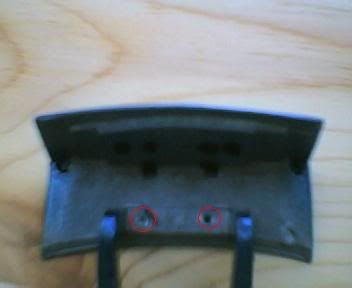 Use the drill and drill out the rivets, then the hinge and trunk will be 2 seperate pieces 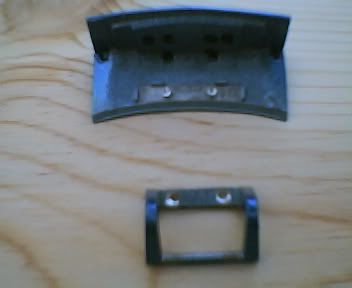 See how there are posts where the rivets are? Now take you Dremel and grind down the posts so that it is flat with the rest of the trunk BEFORE 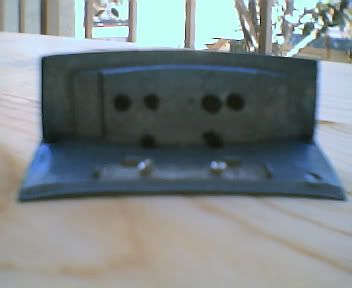 AFTER 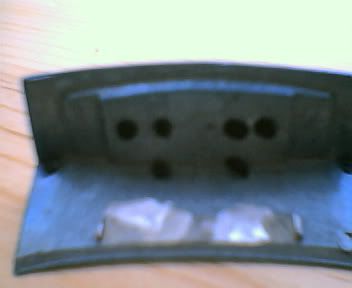 Now take the trunk hinge and carefully place a drop of super glue in between the 2 rivet holes (or put some putty there) and then carefully place the cabinet hinge in the middle of the trunk hinge make sure the back of both hinges line up evenly, see pics 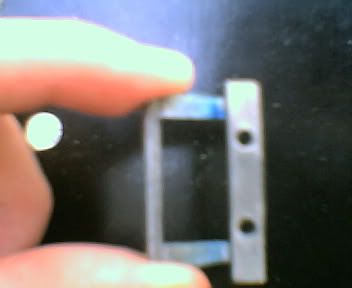 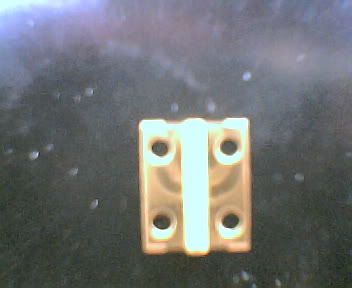 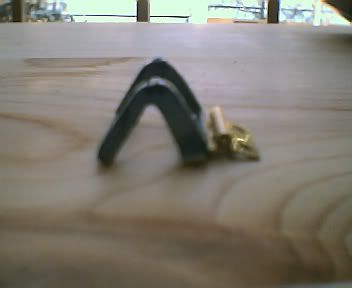 If you cant tell what I did, lay the cabinet hinge so it lays flat on a flat surface, then take the trunk hinge and lay it on one side of the cabinet hinge. Then put the trunk hinge with the newly attached cabinet hinge, back onto the diecast. It should look like this 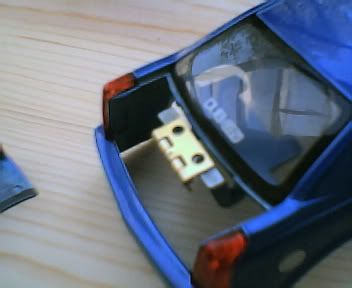 Notice how one side of the cabinet hinge is attached to the top of the trunk hinge and the other side is flopped over Now take your trunk and place it back into its original space on the back of the car, it really helps if you tape the trunk in place 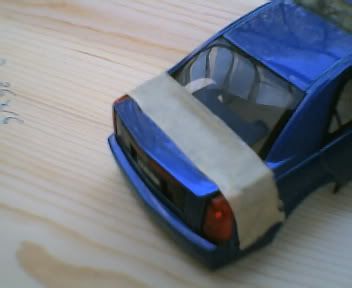 Now turn the diecast over. It will look something like this 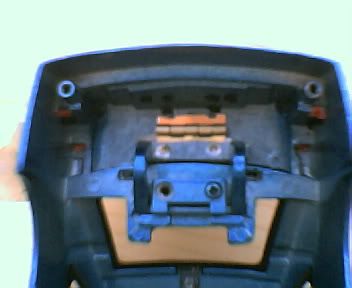 Look at the cabinet hinge, it should fit right onto the trunk, if not, take your dremel and cut the hinge so it will fit (this was necessary on this CTS). After the hinge fits, take the super glue (or putty) and place it carefully in between the trunk and the other side of the cabinet hinge that is not attached to the trunk hinge (if using superglue, be VERY careful not to lock up the cabinet hinge, this happens by the super glue getting on the 2 pieces of brass that make up the the cabinet hinge). Wait until the super glue or putty dries and enjoy! Here is the finished modification, along with a few other diecasts I have done this modification on 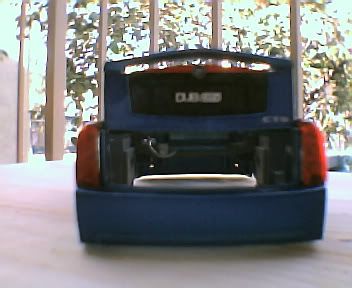 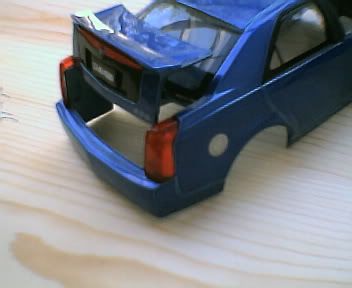   Here is the Mustang that has the Flip Flop trunk done to both the trunk and the hood  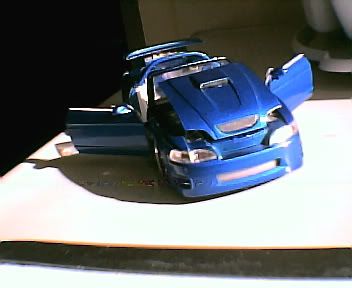
__________________
Click ME for progress thread  Diecast Gallery Diecast How To Modified Diecast Contest 
|
|
#2
08-29-2004, 09:28 PM
|
||||
|
||||
|
Re: How To- Flip Flop Trunk
very good.
|
|
#4
08-29-2004, 10:04 PM
|
|||
|
|||
|
Re: How To- Flip Flop Trunk
Sweet How-To . . .Thanks a lot . . . time to mod hehe.
__________________
|
|
#7
08-29-2004, 11:30 PM
|
||||
|
||||
|
Re: How To- Flip Flop Trunk
If you look very close at it, or pay alot of attention to detail you can see it. That is why I said it can be hand painted to match the color of the car so it blends in more.
__________________
Click ME for progress thread Diecast Gallery Diecast How To Modified Diecast Contest
|
|
|
POST REPLY TO THIS THREAD |
 |
|
|