

|
| Search | Car Forums | Gallery | Articles | Helper | Air Dried Fresh Beef Dog Food | IgorSushko.com | Corporate |
|
|||||||
| Car Modeling Share your passion for car modeling here! Includes sub-forum for "in progress" and "completed" vehicles. |
 |
 Show Printable Version | Show Printable Version |  Subscribe to this Thread
|
|
|
Thread Tools |
|
#1
 07-13-2010, 09:37 PM
|
||||
|
||||
 I just don't get it
For years i have been reading this and other modeling forums and looking with great envy at the high level of some of these cars
In particular how "clean" the cars are whilst being built from start to finish I mean, when i paint a part and leave it to dry on my bench come back the next day and there a little dust particals in the paint Yet i look at some of the "pro's" builds on the forums and they are spotless the whole way thru the build! I have only just started placing my still wet parts straight from being painted into a air tight plastic container, this helps a fair bit, but still never as good as the pro's It's just an observation, but i sure would love to know how these guys do it, i just don't get it! 
__________________
   

|
|
#2
07-14-2010, 04:41 PM
|
||||
|
||||
|
Re: I just don't get it
It will depend on the kind of paint you use and the way you apply it, paints with fast drying time (like Tamiya enamel or acrylics) when applied through airbrush, dry so fast that don't allow dust particles to stick to them, but some colors when applied with brush don’t dry as fast, so it gives time to dust to stick.
When it comes to body paint, since wet coats are normally applied, some dust particles normally find their way to the surfaces, but then, some sanding will get rid of them Also, try to paint in rooms with no dust around or people coming by; any movement around your working area will create air flows that carry dust all around. I personally wouldn’t recommend air tight plastic containers they don’t allow the paint to cure correctly since the paint fumes won’t dissipate easily. Hope this helps.
__________________
Happy modeling! Ramon Garcia Puebla, Mexico
|
|
#3
07-15-2010, 02:49 AM
|
||||
|
||||
|
Re: I just don't get it
If you are building more than e.g. 3 models a year, you can't go wrong getting a dehydrator. Your paint will dry very quickly and usually dust free (unless it got on the model while painting).
You can pick up simple but adequate ones for around 20-25 US$. You won't regret it and an added bonus is that you can even use them for their intended purpose and dry fruits and meat in them also 
__________________
Guideline for happy modeling: Practice on scrap. Always try something new. Less is more. "I have a plan so cunning, you could put a tail on it and call it a weasel" - Edmund Blackadder
|
|
#4
07-15-2010, 05:03 PM
|
|||
|
|||
|
Re: I just don't get it
Before thinking of going out to buy or build a dehydrator - try to get your environment as dust-free as possible. For example: a wooden or stone floor that has been cleaned not too long ago helps a lot in keeping the air clean... a (thick) carpet in your modeling room will create a lot of dust in the air whenever you walk around. The same goes for ventilators, turn them off an hour or so before you start painting anything and allow the dust to settle down.
Easy rule of thumb: no dust in the air - no dust on the model. Just my 
|
|
#5
07-15-2010, 05:45 PM
|
|||
|
|||
|
Re: I just don't get it
There's another angle on this, and that's the wear and tear factor. Parts look bright and clean when they're first painted, but by the time my ten sweaty thumbs have tugged and fitted and glued them into place, they've lost their luster. The glossy pieces are dull and the matte pieces are mottled.
That's a particular problem with "chromed" pieces. The good sprays - Alclad and Spaz Stix - are not all that durable. I just Spaz Stix'd a dropped axle, and I hate the thought of that sparkly chrome wearing off as I'm assembling the front suspension. Aside from "Wash your hands, DDMS!", any thoughts on how keep that fresh-painted look?
__________________
D D M S
|
|
#6
07-15-2010, 06:12 PM
|
||||
|
||||
|
Re: I just don't get it
What I do to minimize this problem that happens to everybody, is to do all the modifications, required adjustments and test fitting to every part before painting, so the manipulation once the part is painted is minimal.
__________________
Happy modeling! Ramon Garcia Puebla, Mexico
|
|
#7
07-15-2010, 07:01 PM
|
|||
|
|||
|
Re: I just don't get it
Quote:
Do you "wing it"? Or do you have a system for keeping track of all the parts without their handy numbers? What about bagging the parts from each tree with a list of the part numbers in the bag? At least that would narrow it down. Maybe it would be better to bag stuff by "region" - front suspension, cockpit, etc. (Thinking out loud here.) What do you think?
__________________
D D M S
|
|
#8
07-15-2010, 08:18 PM
|
||||
|
||||
|
Re: I just don't get it
Quote:
|
|
#9
07-15-2010, 08:47 PM
|
||||
|
||||
|
Re: I just don't get it
Quote:
 I used to put all my parts on toothpicks on a foam pad in my microwave. Also my bodies were put in the microwave as soon as i got done painting it. And leave it there to dry, also no dust never got on them. But ive been getting yelled at by my mom when i used to live with her and now my g/f does all the yelling. So i resorted to getting big plastic toperware containers. I plan on getting a dehydrator which is excellent at helping with dust and also makes the drying/curing time a lot faster.
__________________
In Progress 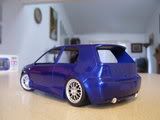 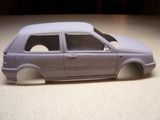 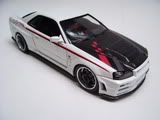 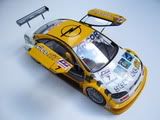
|
|
#10
07-15-2010, 09:05 PM
|
|||
|
|||
|
Re: I just don't get it
Quote:
Once a painted part is dry, do you put it back in the same ziploc until you're ready to assemble that section? That would seem to solve two problems: it would keep the dust off, and the parts would stay organized. The downside would be that you've got painted parts rubbing together in a plastic bag.
__________________
D D M S
|
|
#11
07-15-2010, 11:21 PM
|
||||
|
||||
|
Re: I just don't get it
I do the same thing like Ramon said, PLANNING is important, even an OOB built
 First, i test fit the body, window, headlight & lamps, interior, chassis & suspension. i make sure no bad fitting, gaps or misalignment. After that, i also consider to modified poor gluing parts like side mirrors with a secure brass rod. I don't really test fit everything, only those that i felt might affected the final assembly, things like steering wheel & dashboard are not so critical so i'll skip them
|
|
#12
07-15-2010, 11:50 PM
|
|||
|
|||
|
Re: I just don't get it
I would not put painted parts into a plastic bag of any kind. The plastic bag will react with the paint and ruin the finish irreparably, trust me, I ruined a 5 week long paint job project in a matter of 1 night thinking I could keep dust and finger prints by sealing my 350Z in a ziplock freezer bag.
I suggest a trip to your local department store and picking up some craft organizer boxes that have several chambers. you can use masking tape to label each compartment as to what part number or group of parts for what model it goes to. I like to use 2 or 3 of them for each model being built, and keep them in a cardboard box large enough to contain the organizer boxes, the kit box and what ever other parts/tools that are specific to the model contained therein. I have modeling A.D.D. though, so I usually have 8 or 19 projects going at the same time. If cost is a concern, stay away from hobby shops as they prey on the uninformed about where you can find these items at lower costs. I noticed Hobby Lobby charges about $5-$10 for each organizing bin where as I can get almost exactly the same bins for $1-3 at sewing stores and beauty supply shops. Oh, and while I'm on the subject (this won't take long, I promise) While you are at your local sally beauty supply, pick up some of those nice emery boards that are about 1" wide and 5" long in every available grit they have. they are PERFECT for building models, they can be cut to shape to suit your needs and are very cheap, usually 4 for $1 or so. If you are a fisherman or know someone who is, the little hard plastic boxes that Rattle Traps and other fishing tackle comes in make for nice small parts organizers as well. As my father and neighbor are both avid anglers, I have no shortage of little plastic boxes in my arsenal of organization. I also have a tackle box that holds 5 or 6 of those organizer trays as well as 6 or 7 of the much smaller trays. It also has provisions for holding spinner baits which make nice paint brush holders and it has lots of room for glues, paints and other plastic addict's paraphernalia. Just take a trip through Hobby Lobby, your local Bass Pro Shop or other stores that might carry such items. You might also hit up garage sales and sewing shops for organizing items, you never know what you'll find or where you'll find it.
__________________
There is a very fine line between "hobby" and "mental illness." 
|
|
#13
07-16-2010, 12:06 AM
|
|||
|
|||
|
Re: I just don't get it
Quote:
For the unpainted stuff, labeled bags will be a big improvement over tangled sprues stacked in a box. After painting, I'll store the parts in cardboard or plastic boxes. A much neater way to work! Thanks to all for the good advice.
__________________
D D M S
|
|
#14
07-16-2010, 01:10 PM
|
||||
|
||||
|
Re: I just don't get it
Agree!
That is exactly what I do, those organizer boxes are great! And what I do is to separate by section of the car, as mentioned, engine, interior suspension, in these small boxes with multiple divisions in the interior like those used to storage of fishing supplies and when it comes to recognize parts, that is not much of a problem except with parts with similar geometry, then what I do is to engrave the part number in any inconspicuous area with a knife or a permanent marker.
__________________
Happy modeling! Ramon Garcia Puebla, Mexico
|
|
#15
07-16-2010, 02:15 PM
|
||||
|
||||
|
Re: I just don't get it
Use paints that dry quickly and polish easily. Use a dehydrator or Mr Dry Booth to 'bake' the parts to speed up the drying process. Do as much as possible to minimise dust before you paint. Also wear latex gloves whilst painting and also a hat or hair net can help stop stray hairs in the paint. Make sure all your painting equipment is clean before use, not just after. Strain the paint before use, a lot of people overlook this. Use a tack rag on the surfaces before you paint.
Very few people can produce an absolutely first class finish 'straight from the gun' even the 'pro's' get dust and dirt nibs in the paint. As long as you apply enough paint you can always polish the dirt nibs and dust away.
__________________
Steve Noble
|
|
|
POST REPLY TO THIS THREAD |
 |
|
|


