|
|
|

|
|
| Search | Car Forums | Gallery | Articles | Helper | Quality Dog Food | IgorSushko.com | Corporate |
|
| Latest | 0 Rplys |
|
|||||||
| WIP - Muscle Car / Hot Rod Post topics for any "Works In Progress" Muscle Car-Hot Rod vehicles projects in this sub-forum. |
 |
 Show Printable Version | Show Printable Version |  Email this Page | Email this Page |  Subscribe to this Thread
|
|
|
Thread Tools |
 07-21-2007, 12:29 AM
|
#76 | |
|
AF Enthusiast
Thread starter

Join Date: Aug 2006
Location: Portland, Oregon
Posts: 633
Thanks: 2
Thanked 7 Times in 1 Post
|
Re: 1969 Firebird 'mild' custom--bringing new life to an absolutely lousy kit
Well...today I discovered that soaking in water is NOT a good way to remove polishing compound from panel lines. I'll be repainting/clearing tomorrow and hope to repolish by next Saturday. Guess I don't have to live with the sub-par paint job, eh? Live and learn. Veeeeerrrrryyyy slowly.
Alex
__________________
|
|

|

|
|
07-22-2007, 04:56 PM
|
#77 | |
|
AF Regular

Join Date: Jan 2007
Location: Denver, Colorado
Posts: 381
Thanks: 1
Thanked 3 Times in 3 Posts
|
Re: 1969 Firebird 'mild' custom--bringing new life to an absolutely lousy kit
Don't feel too bad- I once painted/stripped a model 7 times before I was happy with it.
__________________
|
|
|
|
|
|
08-06-2007, 02:29 PM
|
#78 | |
|
AF Enthusiast
Thread starter
Join Date: Aug 2006
Location: Portland, Oregon
Posts: 633
Thanks: 2
Thanked 7 Times in 1 Post
|
Re: 1969 Firebird 'mild' custom--bringing new life to an absolutely lousy kit
Well, its been a long time coming, but Ive finally got some substantial work done. Unfortunately, much of this work was a sort of regression, as I got some new reference photos that showed flaws in my work. I guess its like the saying, Taking a step backward to take two forward. The most significant revision was in the chassis. For whatever reason, my Chilton diagram was severely inaccurate, showing the tie rod being in front of the crossmember, which is typical. However, it seems that early F-body cars had a rear-mounted tie rod, which meant that my steering knuckles were improperly placed. However, this was actually good news, because Id been struggling trying to make a tie rod fit properly, and I had accidentally mounted my scratchbuilt front brakes with the calipers straight back, instead of at an angle. Here are the remounted spindles/brakes.
 Continuing with the steering system, here is the steering gear box/shaft. This was borrowed and modified from AMTs 1970 Monte Carlo (a very good AMT kit compared to this one, and which I have two of. Its my GM parts donor), which had a typical front-tie rod configuration. Obviously it still needs paint. 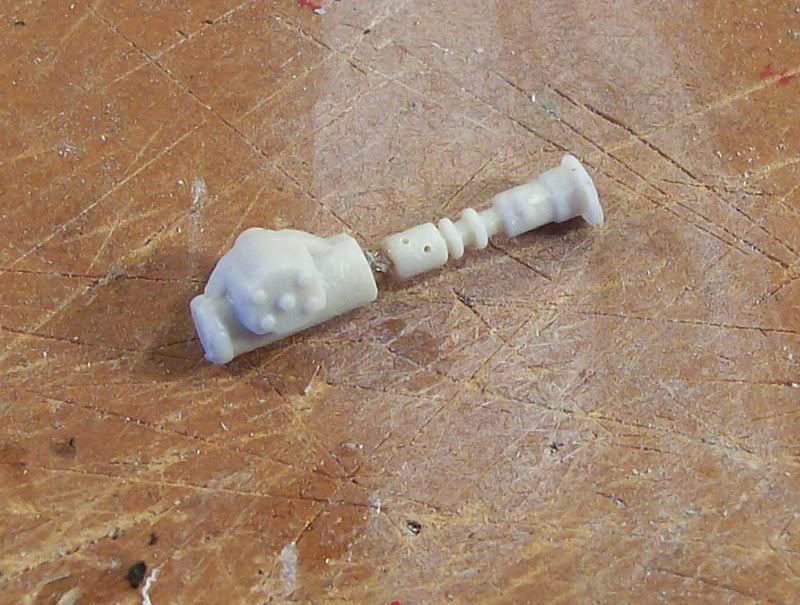 The same reference picture that revealed the steering system configuration also showed me how the front crossmember was supposed to look. I had the right basic shape, but my part (recall that I did a lot of styrene and putty work in that area) was pretty wimpy. The inadequate size of the rear portion of the crossmember in particular interfered with the proper mounting of the lower A-arms, so this change was good. Here is the new assembly, after styrene/putty/filing but before paint.  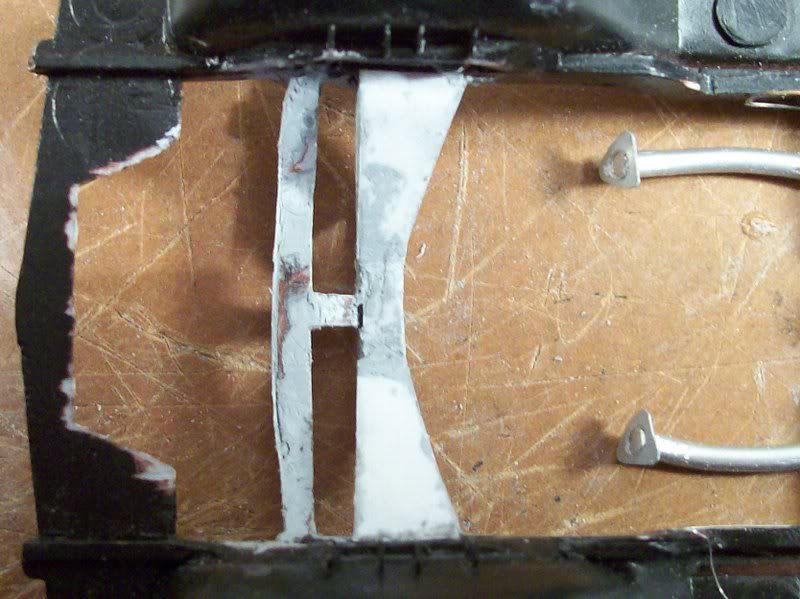  And with paint: It looks a little rough, but the whole chassis will get a wash and dirt spray, so no big deal. 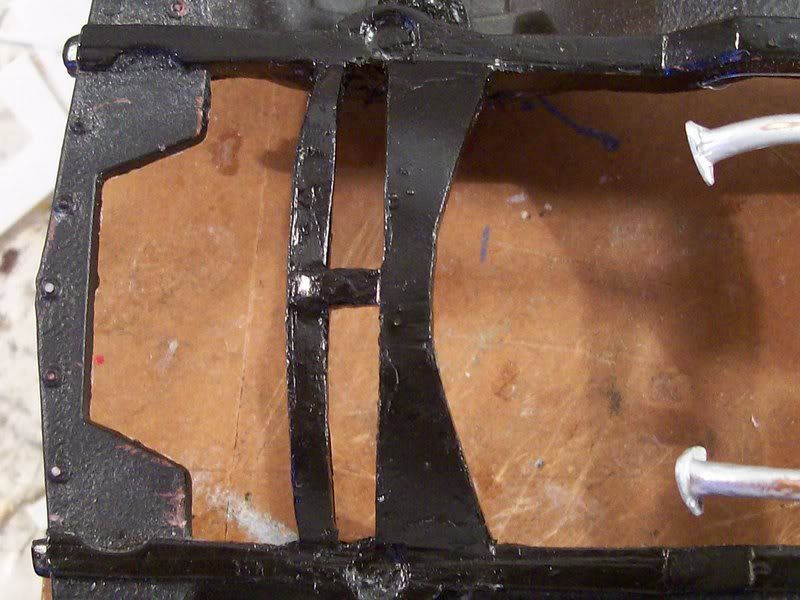 I got the rear axle hung. You cant see it, but the brake flex hose is in place. You may also notice my e-brake cables; once I repaint them (Testors steel enamel wears off very fast with handling due to its super-slow-drying nature) I will photograph the whole parking brake system. The rear axle still needs the shackles, which on the real car attach the trailing ends of the leaf springs. I have found some shocks (from a Mustang) and still need to paint and mount them. 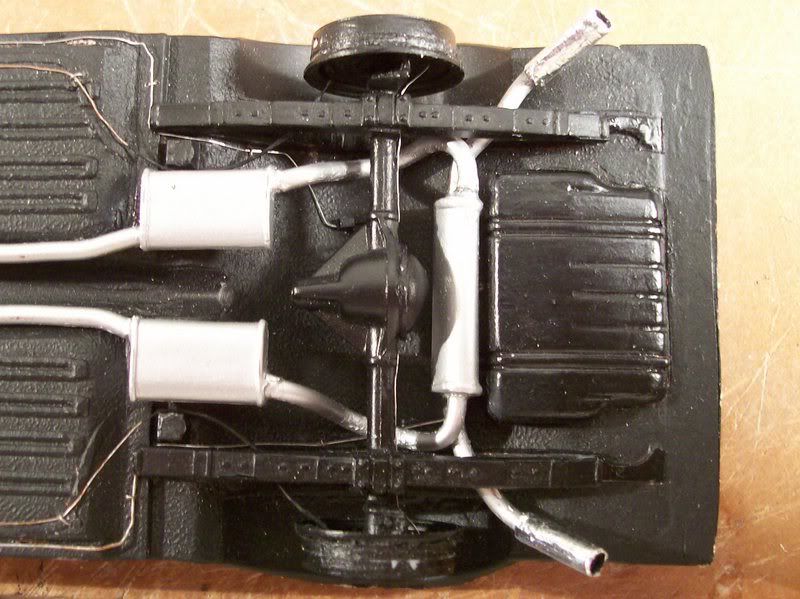 Here is my scratchbuilt rear anti-roll bar. .62mm copper wire and styrene. Ill show it mounted once I install the shackles and shocks. 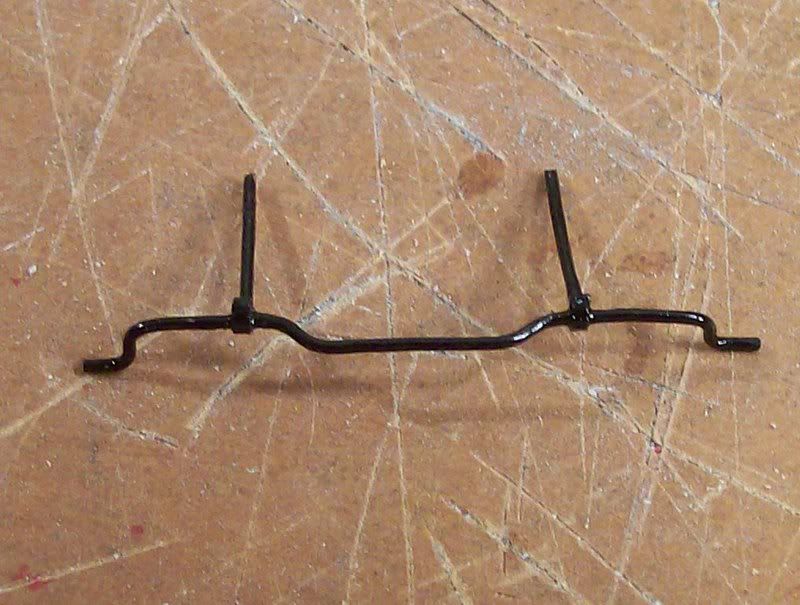 Here is the center link for the tie rod. I still need to make the two ends, the pitman arm and the idler arm. Its not a particularly fun piece to build but Ill have to get around to it soon. 1mm copper wire and styrene. 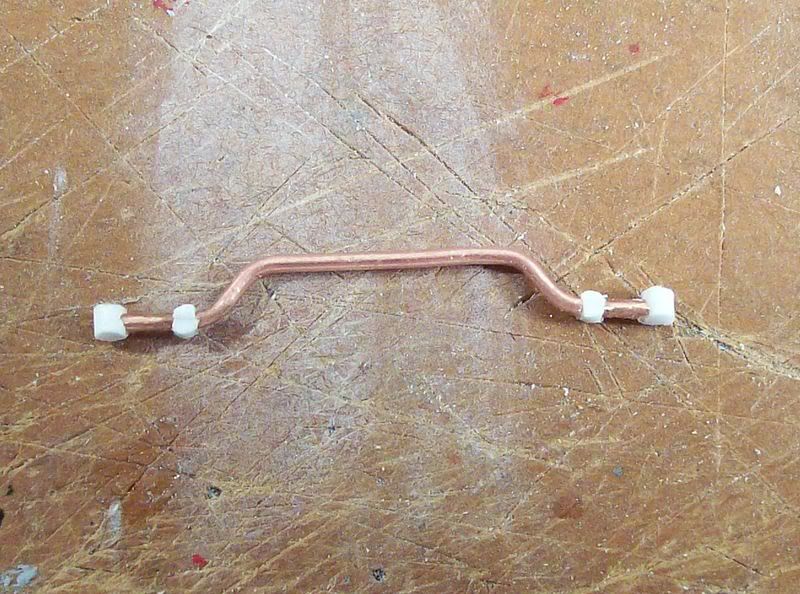 On to the body. The body has been repainted and clear-coated with Tamiya acrylics (which Im very pleased with now that I now how to use them) and is awaiting polishing. The paint went on so smoothly that I wont need Micromesh cloths, just polishing compound. The kits taillight panel looks like this. It fits (Im not sure whether the big gouge is a kit defect or something I did accidentally when I got this kit years ago) and has nice texture, but is lacking the backup lamps. 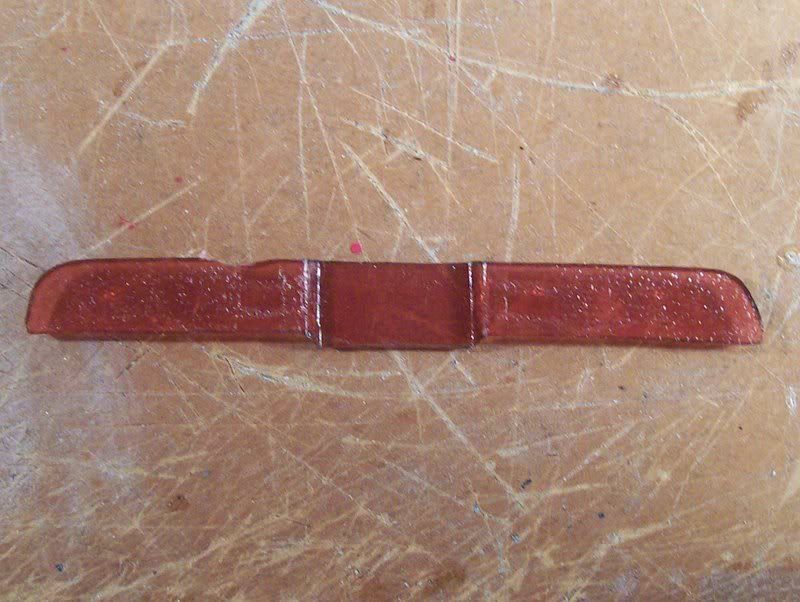 I added them. 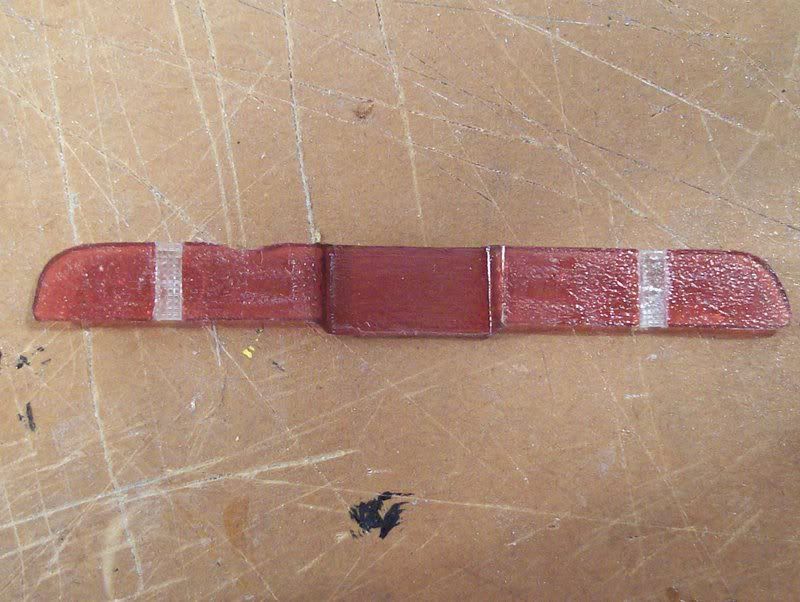 After modifying the rear bumper some time ago, I covered it with Bare-Metal Ultra-Brite Chrome foil in a rather poor fashion. It was wrinkled and Ive since learned that the Ultra-Brite Chrome is not as good as the original. Having acquired some of the original, I peeled off my old work and reapplied it in a much smoother manner. Since then, Ive noticed that the bumper seems too wide, so I may have to redo it again, but Im still awaiting more info on that subject. 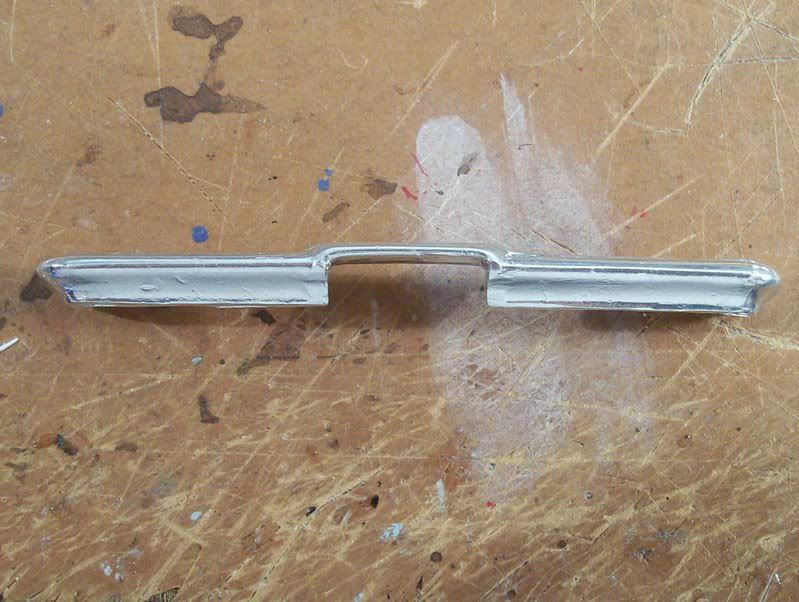 Here are the wheels and tires I picked for this car. I didnt really care for the stock Firebird wheels, and these ones suit it well. Theyre from AMTs 1968 El Camino. (Contrary to appearances, I do not love AMT kits. I keep getting them as gifts) I added valve stems, but since I painted them silver chrome, theyre hard to see. Theyre at the top of the wheels as I have them set up here. 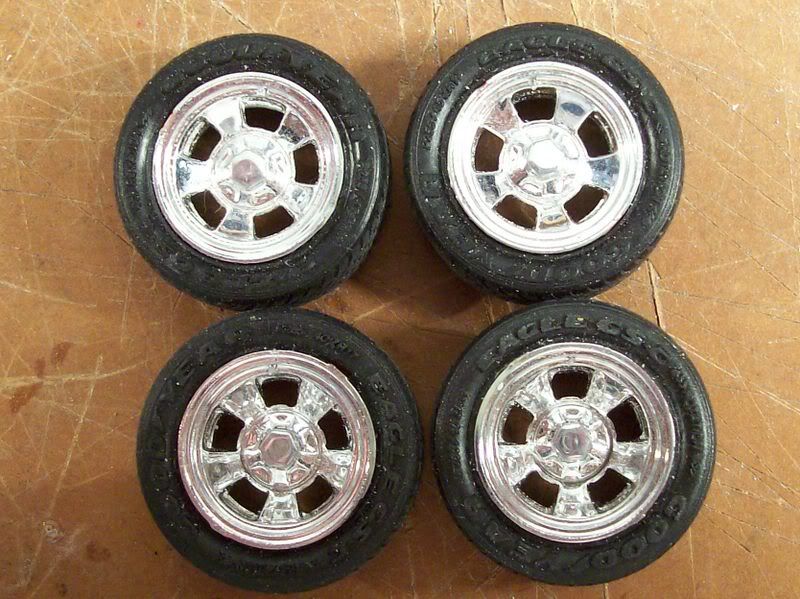 Here are some of the engine bay panels I scratched. The orange ones are fillers between the fenders and wheel wells; the black one is the front nose panel to which the latch panel bolts. I may end up redoing these once the body is permanently installed.  I decided to add power steering since I have power disc brakes. This pump is borrowed from the 70 Monte Carlo, with a styrene bracket piece and a pulley from the spares box. 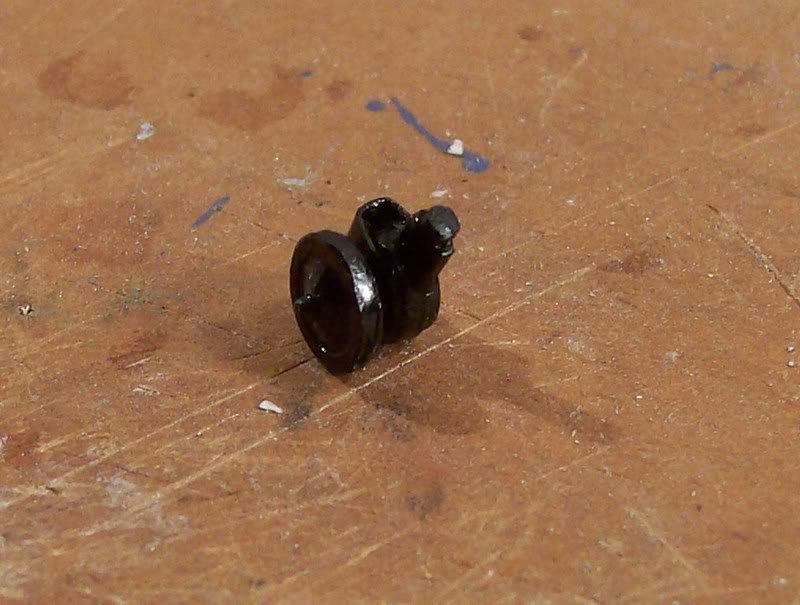 Here are my handbuilt pulleys, P/S pump, and alternator installed to the engine. 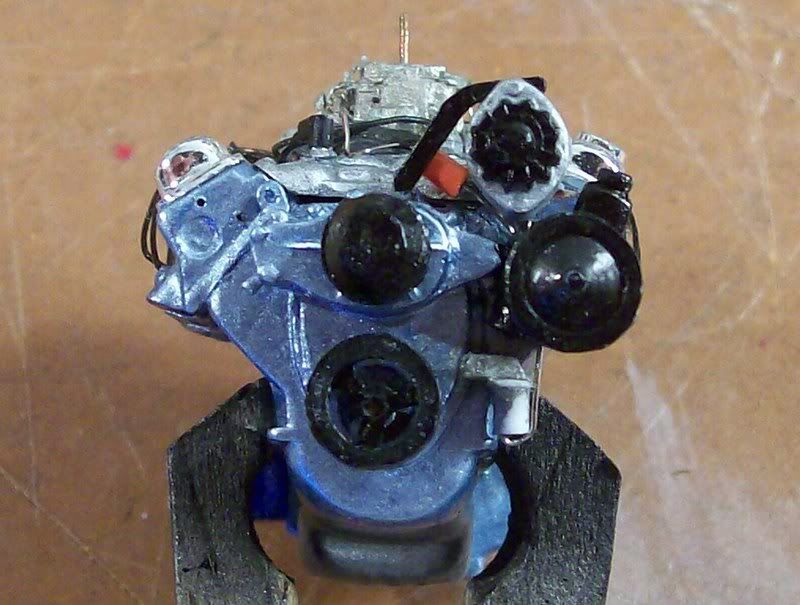 I painted and added a rust wash to my exhaust manifolds. 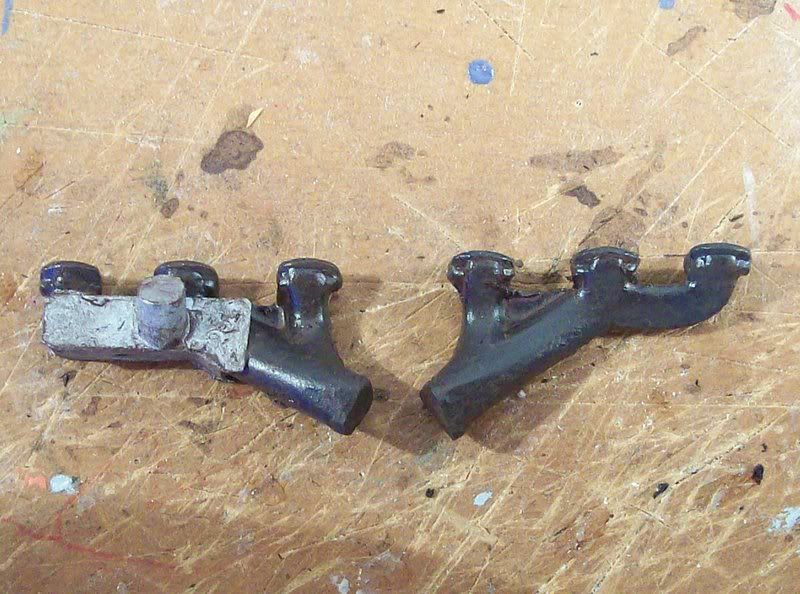 Here are the manifolds and belts installed. The belts, made from masking tape, arent perfectly straight due to the sketchy installation on the accessories. However, once assembled, this will be hardly noticeable. I dont like flaws, but its hard to work with entirely scratchbuilt parts; with a scratched timing cover, water pump, and alternator bracket, I had trouble making everything fit properly. 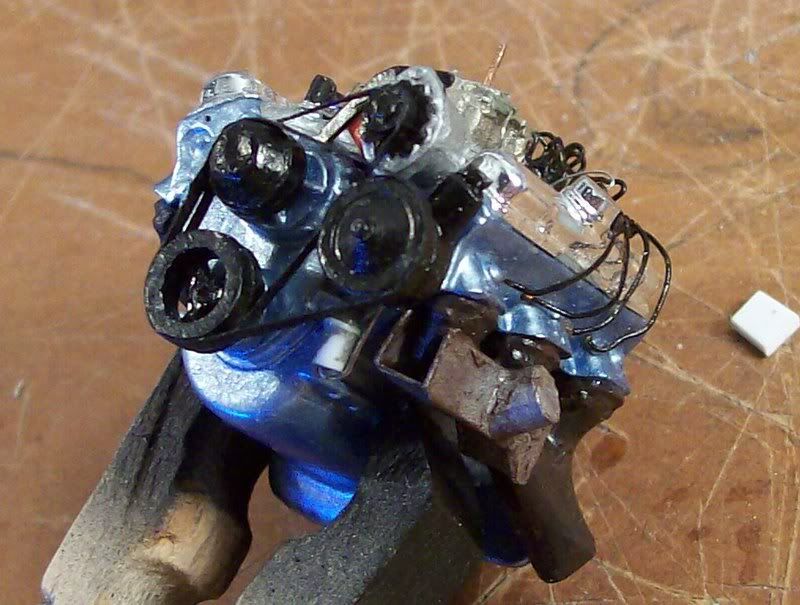 After painting my air cleaner, I learned that the 400 engines were given a chrome air cleaner cover. So I used BMF to cover it. 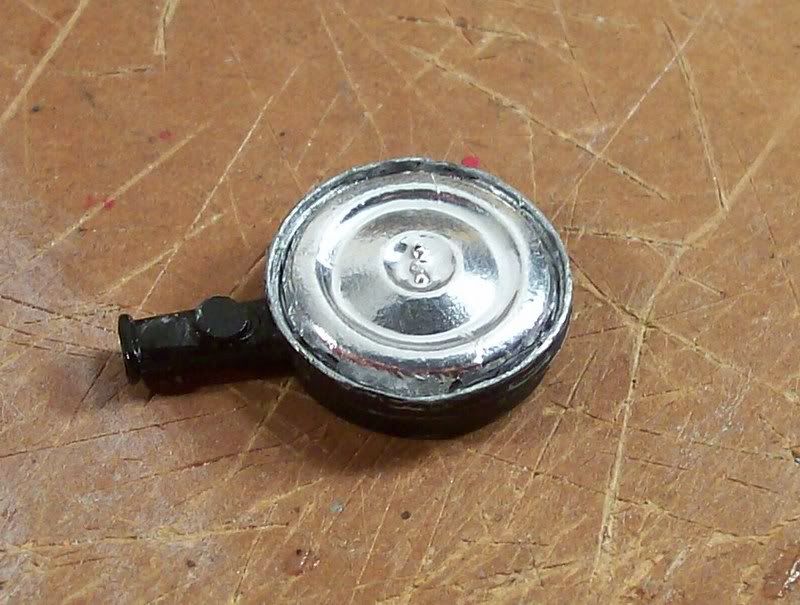 I made the positive battery cable and attached it to the starter. I got the camera to focus on the most significant partthe photoetched clamp. This was a nice little touch. 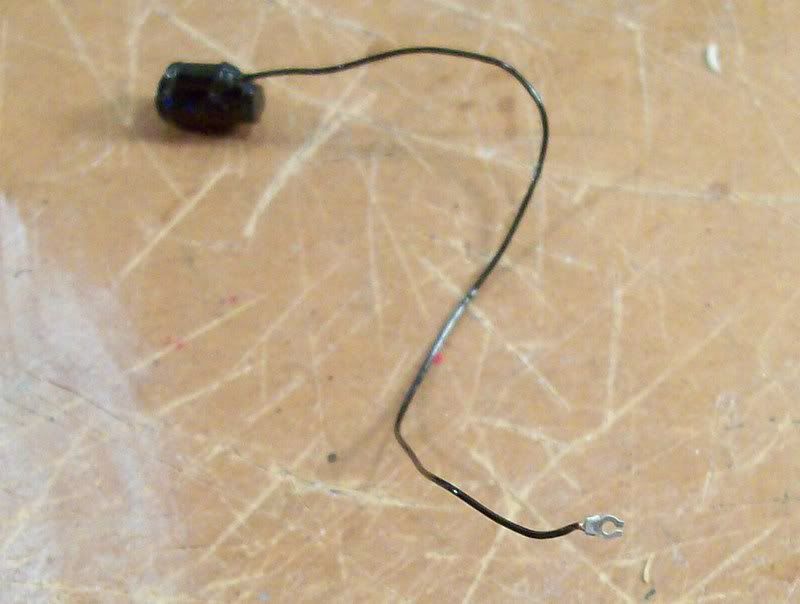 And, finally, the heat riser tube that connects the heat stove on the exhaust manifold with the thermactor valve on the air cleaner snorkel. I bent 2mm copper wire to shape, then wrapped the lower part with .13mm wire and coated it with superglue, then painted. 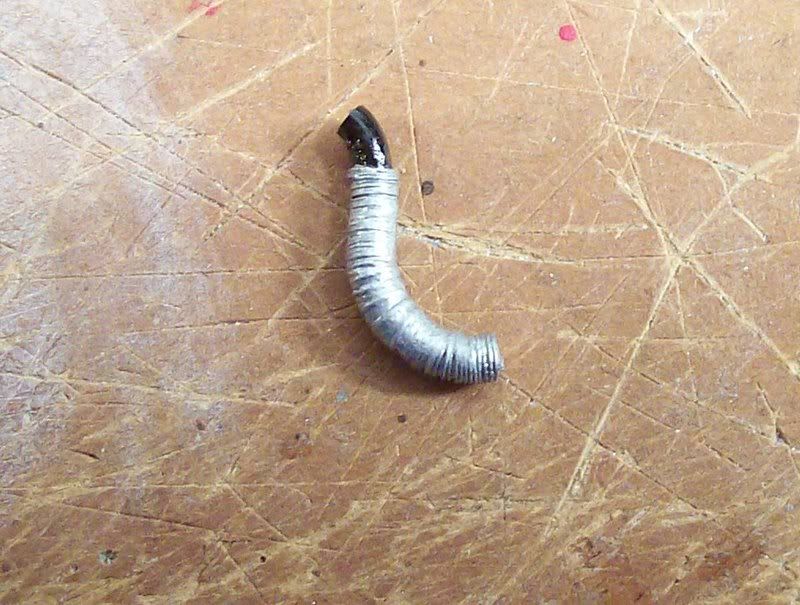 Thats all for now; however, I will soon have the engine finished, body polished, and suspension further underway, so expect some progress soon. I need to finish this within 3 weeks before I leave for college! No more modeling until Christmas break. Thanks for looking; as always, comments, criticism, or advice is welcome. Alex
__________________
|
|
|
|
|
|
08-06-2007, 04:20 PM
|
#79 | |
|
AF Enthusiast
Join Date: Sep 2004
Location: Tuttle, Oklahoma
Posts: 2,176
Thanks: 0
Thanked 24 Times in 21 Posts

|
Re: 1969 Firebird 'mild' custom--bringing new life to an absolutely lousy kit
great work, as usual. I personally would have donated that kit to a model contest for a door prize, and bought a more accurate kit to start with, but if you can't find what you want...you have to make it, right?
I REALLY like that heat riser hose. I have never thought of doing that. it looks absolutely real.
__________________
There is a very fine line between "hobby" and "mental illness." 
|
|
|
|
|
|
08-11-2007, 06:35 PM
|
#80 | |
|
AF Enthusiast
Thread starter
Join Date: Aug 2006
Location: Portland, Oregon
Posts: 633
Thanks: 2
Thanked 7 Times in 1 Post
|
Re: 1969 Firebird 'mild' custom--bringing new life to an absolutely lousy kit
Some more work.
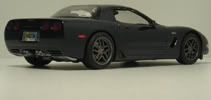
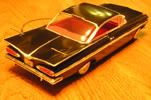
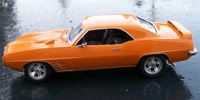
The kit's windows are pretty much awful. Although unscratched, they look like they could repel 7.62mm NATO rounds on the real car. I couldn't live with the warped view of the interior that they provided, so I located some clear packaging (from a webcam) and cut out my own windows. 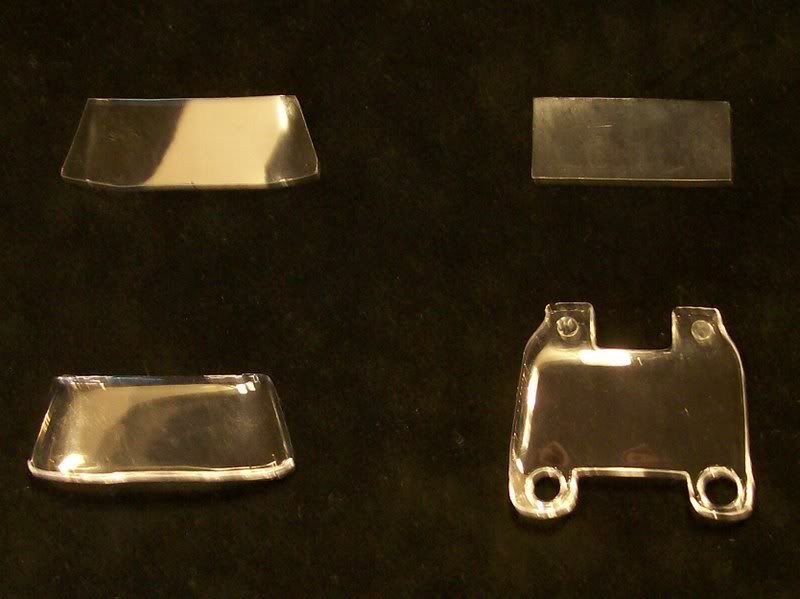 The bottom ones are the kit's original parts. Next, I painted the grille with flat black and scraped it off the "Pontiac" lettering. The grille is supposed to be entirely black, so a wash was not necessary. I also had to do a ton of filing and cutting on the top and bottom surfaces to make the grille fit in the body opening. This kit is really frustrating... 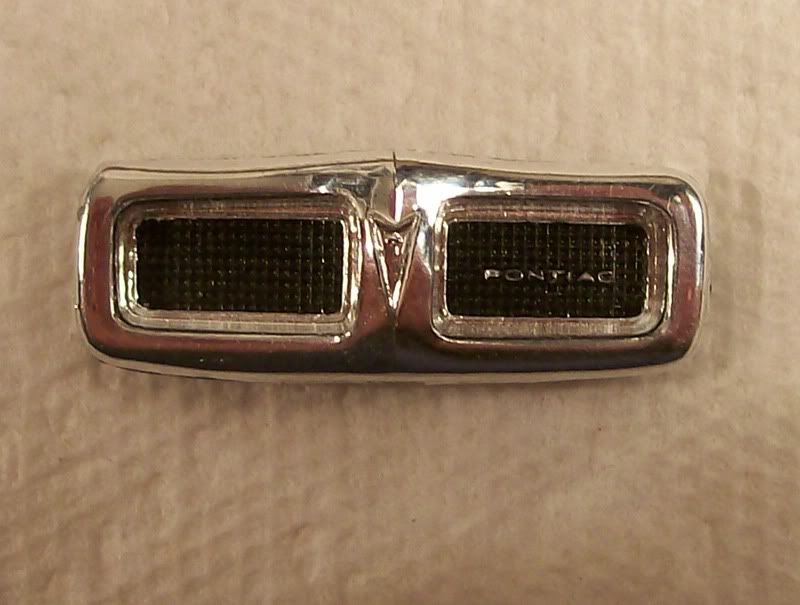 This was a quick piece; just a reflector for the taillights. The foil's not even and it doesn't matter. It still covers way more than what the taillight slits show. 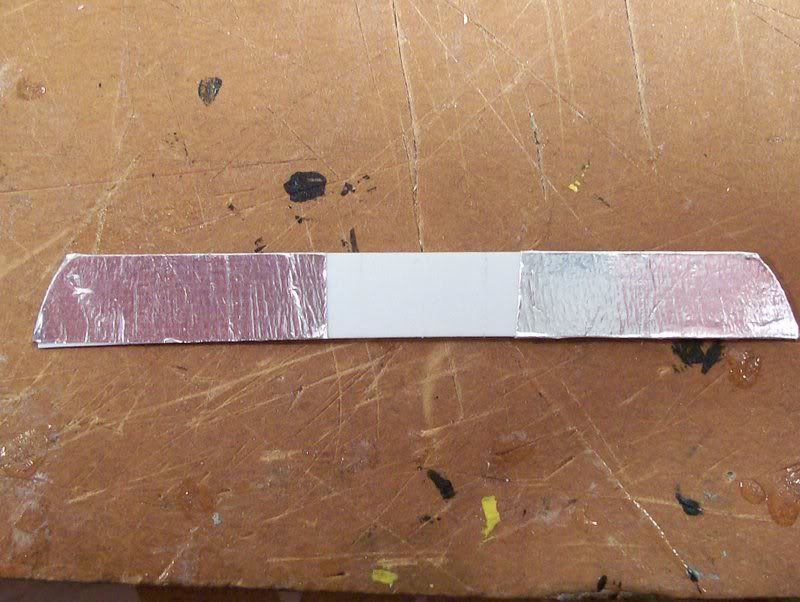 I painted the inside of the hood with semi-gloss and flat black.  Finally, here is the body after all my painting woes. I got it redone with Tamiya acrylics, learning a lot about painting through this process. (Thanks for all the help, MPWR and others). It's clear-coated, polished with coarse, fine, and finish compound, and adorned with foil, and, in a few places, silver chrome paint. (This is not a good substitute for foil but I still lack Alclad II, which is almost essential for my rear bumper. I may finish the model before college, then get the paint for Christmas and re-do the bumper. Foil just won't cover it well) However, these details--like the rear lettering, don't exactly lend themselves to airbrushing, and the Alclad is airbrush paint. So this part of the job is about as good as it's going to get. Front: (headlight bezels are painted)  Side: The side vents turned out really nice with foil. At last, AMT does something good! 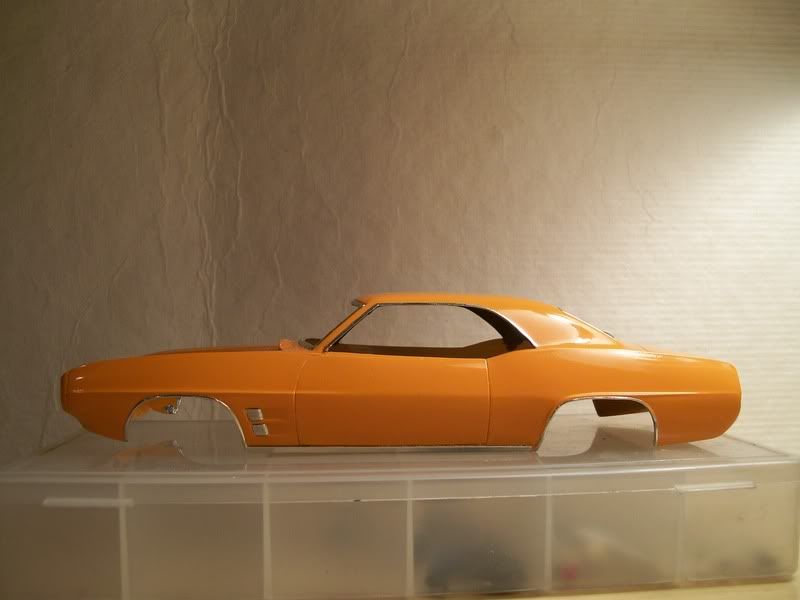 Back: Lettering is painted. Focus is off. 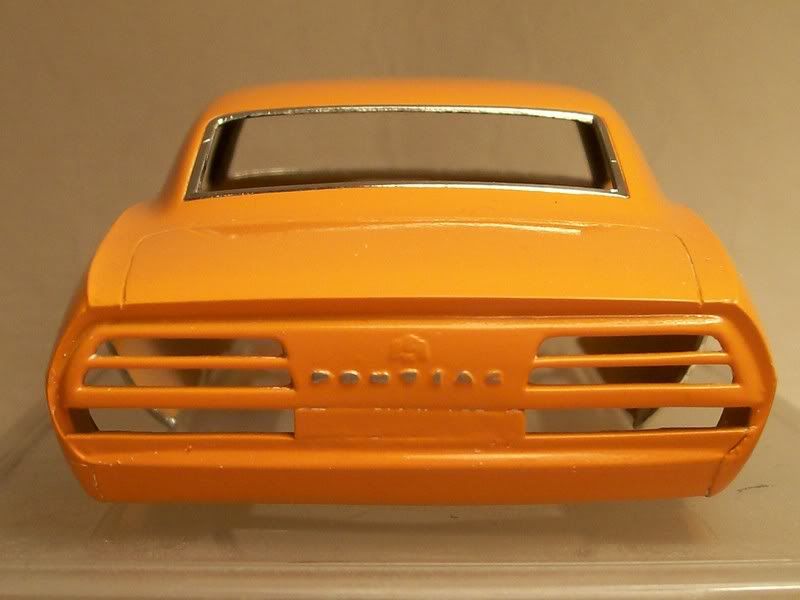 Overall: Just to show the shine. Ignore my extremely messy desk. I shoved all my tidbits aside to do the foiling and other tasks.  Tonight, I will attempt to do some major work on the front suspension and the engine, which is nearly done. I just have to scratchbuild a fan, fan clutch, part of the clutch linkage, breather hose, thermactor hose...OK, maybe it's not quite done  Not much time left before college, but I will try. Thanks for looking, and be sure to comment or criticize. Although any criticism about my painted "chrome" will go unheard because I have no substitutes at the moment. Alex
__________________
|
|
|
|
|
|
08-12-2007, 12:44 AM
|
#81 | |
|
AF Enthusiast
Join Date: Sep 2004
Location: Tuttle, Oklahoma
Posts: 2,176
Thanks: 0
Thanked 24 Times in 21 Posts
|
Re: 1969 Firebird 'mild' custom--bringing new life to an absolutely lousy kit
paint turned out great! I can't believe you could make such a great representation of such a HORRIBLE kit. the wheels will look fantastic with that orange paint.
__________________
There is a very fine line between "hobby" and "mental illness."
|
|
|
|
|
|
08-15-2007, 05:14 PM
|
#82 | |
|
AF Enthusiast
Thread starter
Join Date: Aug 2006
Location: Portland, Oregon
Posts: 633
Thanks: 2
Thanked 7 Times in 1 Post
|
Re: 1969 Firebird 'mild' custom--bringing new life to an absolutely lousy kit
A TEENY bit more progress... I actually have more done than this, but no pics yet. Coming up ASAP. I stayed up til 3 last night trying to get some work done and not getting much done. My "10-minute" details end up as hour-long ordeals. Of course it doesn't help when parts break incessantly, superglue tube is clogged and nearly empty, I misplace tools, little parts fall to the carpet, tweezers break, I'm staying awake on coffee but that makes my hand shake and Dremel accidents occur
 And helping my parents build a new pation during every single minute of daylight; then I get called in to work at 8:30 (three hours early) three days in a row. I'm starting to get worried about finishing this before college. My life is busy. But again, I will try!! Here are my two measly pictures. And helping my parents build a new pation during every single minute of daylight; then I get called in to work at 8:30 (three hours early) three days in a row. I'm starting to get worried about finishing this before college. My life is busy. But again, I will try!! Here are my two measly pictures.I got the steering gearbox mounted and painted. 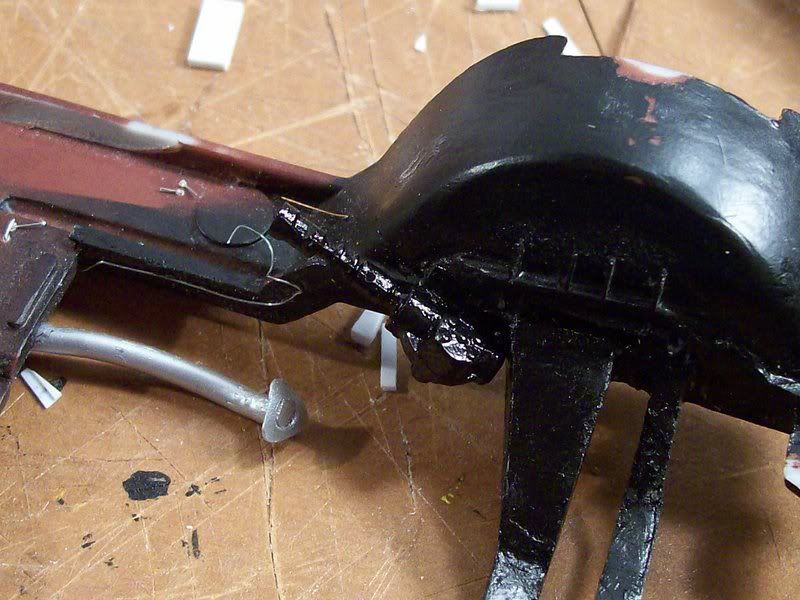 I built the Pitman and idler arms for the tie rod and installed and painted them. Tie rod ends are also made and will be painted once on the car. 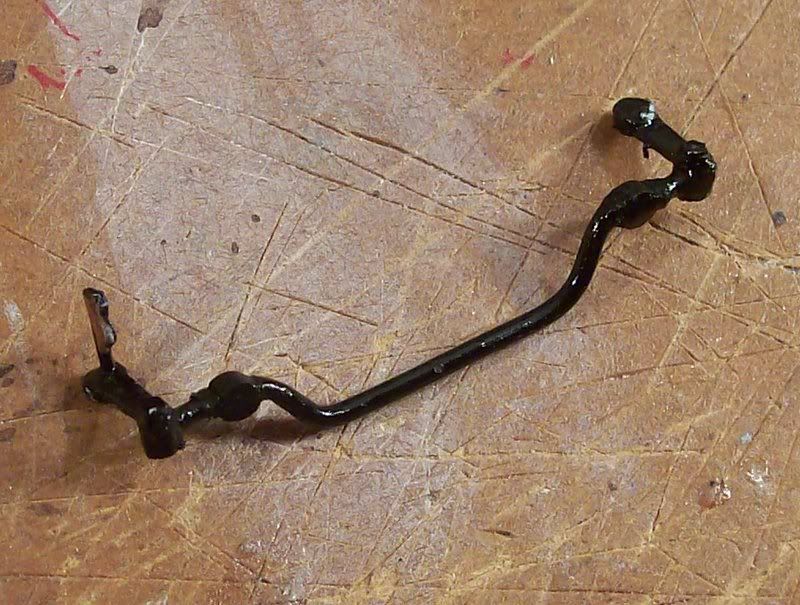 More pictures tomorrow I hope. Thanks for looking; again, comments are welcome. Alex
__________________
|
|
|
|
|
|
08-20-2007, 04:59 PM
|
#83 | |
|
AF Enthusiast
Thread starter
Join Date: Aug 2006
Location: Portland, Oregon
Posts: 633
Thanks: 2
Thanked 7 Times in 1 Post
|
Re: 1969 Firebird 'mild' custom--bringing new life to an absolutely lousy kit
Well, I'm really down to the crunch time now! Earlier in the thread I arrogantly assumed that I would be able to "easily" finish this during the summer. However, the summer quickly dwindled away, and now with only 3 days left the model is still not done! Rather than giving up on it, however, I have put my buidling efforts into "overdrive." This doesn't mean I'm rushing; I haven't come this far to do a shoddy finishing job. I am using every spare minute, though, and staying up late to get this thing done. It's still debatable whether or not I'll be able to get done; I have basically no time for unexpected problems, and considering how many have come up already, I wouldn't be surprised if more came along. But I'm giving it my best effort!
My first unexpected problem came when I attempted to install the tie rod that I showed/mentioned in the last post. It didn't fit, and besides that the A-arms couldn't be installed with it in place. A little more studying of my teeny reference pictures and a consultation with Dad revealed that I was mounting my A-arms wrong AND assembling my tie rod wrong. The A-arms are supposed to sit in pockets in the crossmember, not behind it. Out came the Dremel and I hacked into my finished work. During this mess, I also installed strips of styrene in front of and behind the crossmember to represent the metal lip. 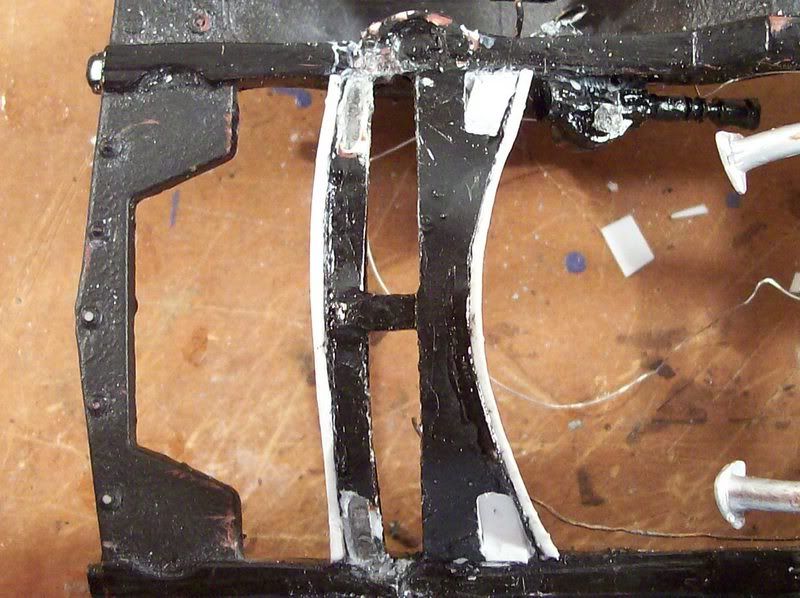 With superglue for filler and some paint, the mess looks better. Not perfect, but my dirt spray should hide the imperfections. 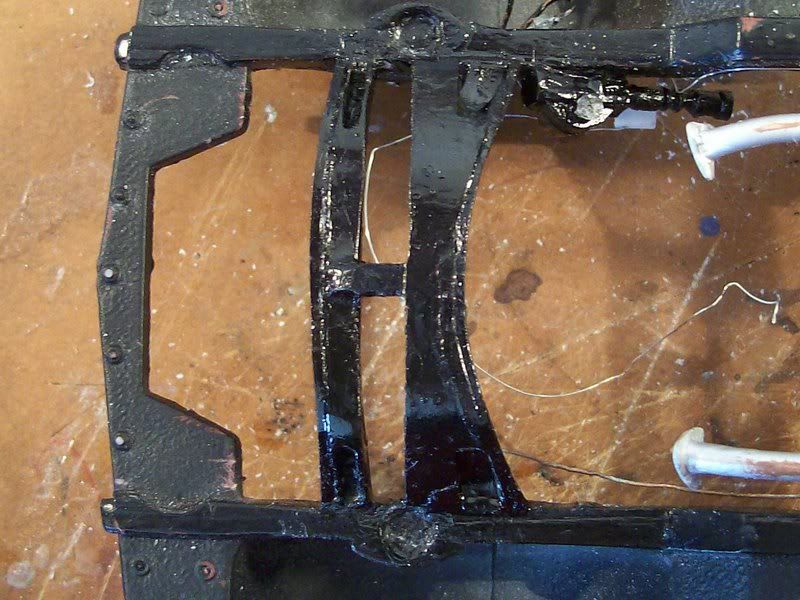 My new tie rod: slightly different from the first one. 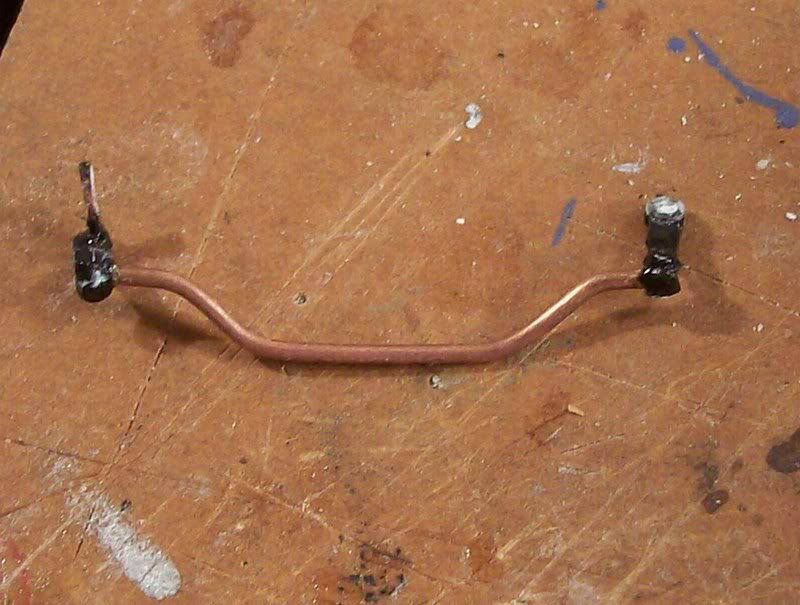 I moved to the rear and painted my Mustang-sourced shocks. 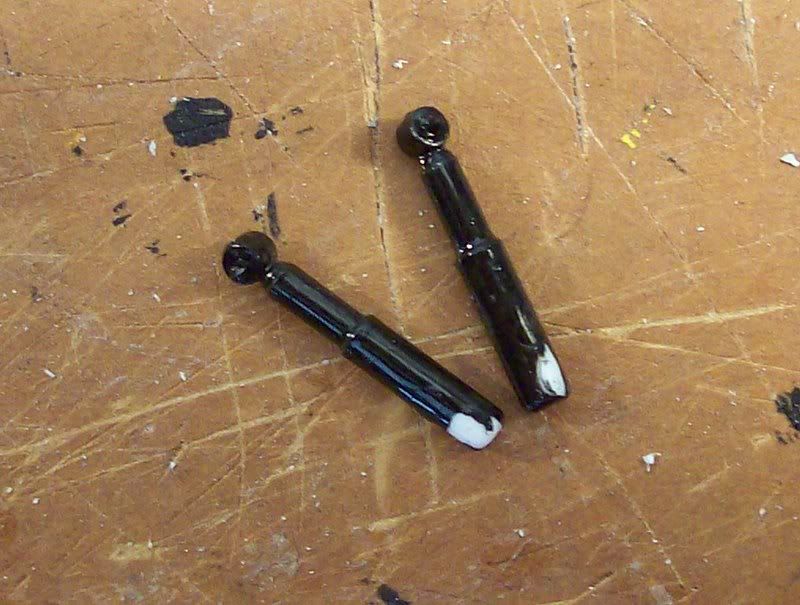 At that point, I took a break from suspension and got to work on the fan. The model had included a chunky 7-blade fan, whereas the real car had a six-blade. I intended to build the fan and fan clutch (and wasn't looking forward to it), but I fortunately found this fan in the spares bin. It's from the '66 Olds that donated the rear axle as well. The kit fan is shown at right. 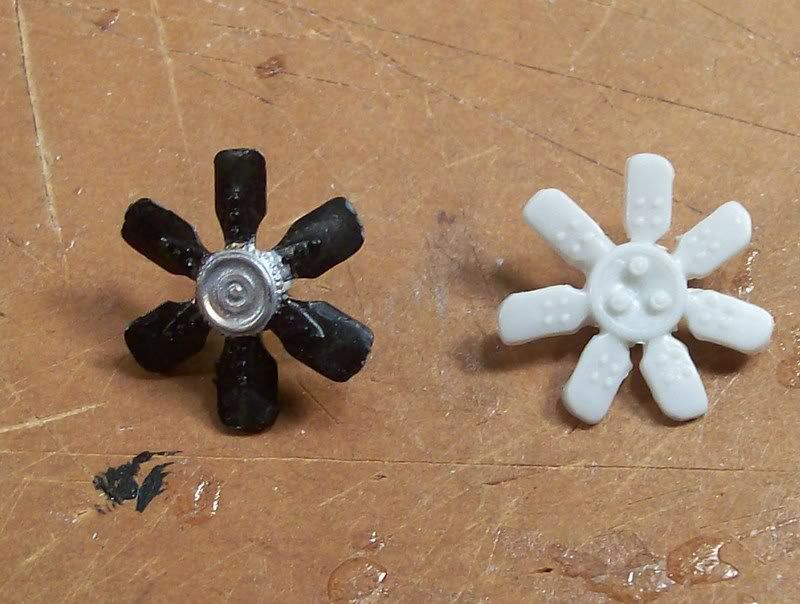 The Olds fan was already painted, but no worries there. I added the mounting sprocket: 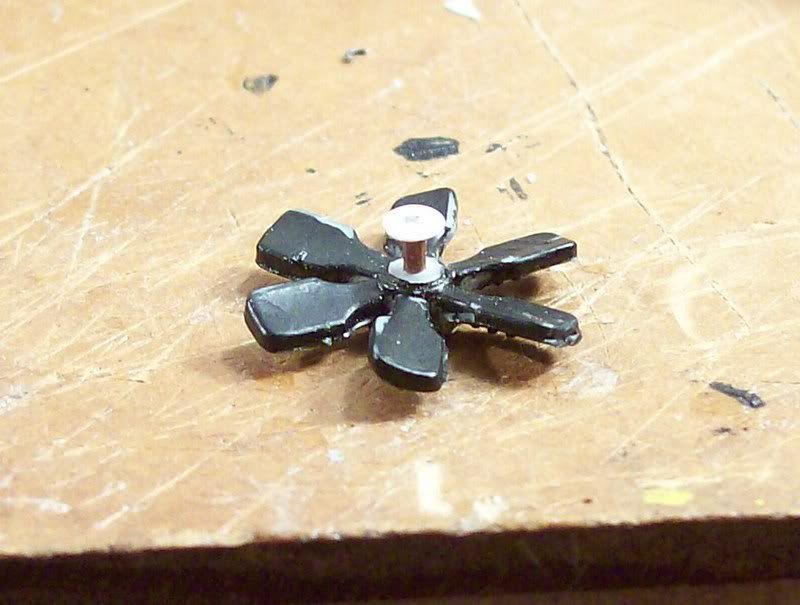 And then painted the fan a little more carefully. 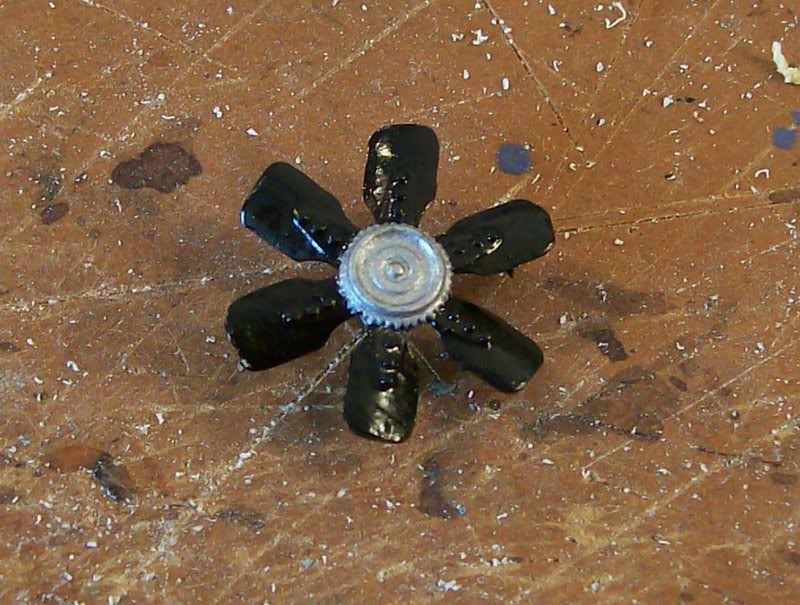 Back to the suspension. The fan will be shown in place once I finish the engine (almost there!) and take multiple pics of that. Here are my new tie rod ends, complete with adjuster sleeves/bands. 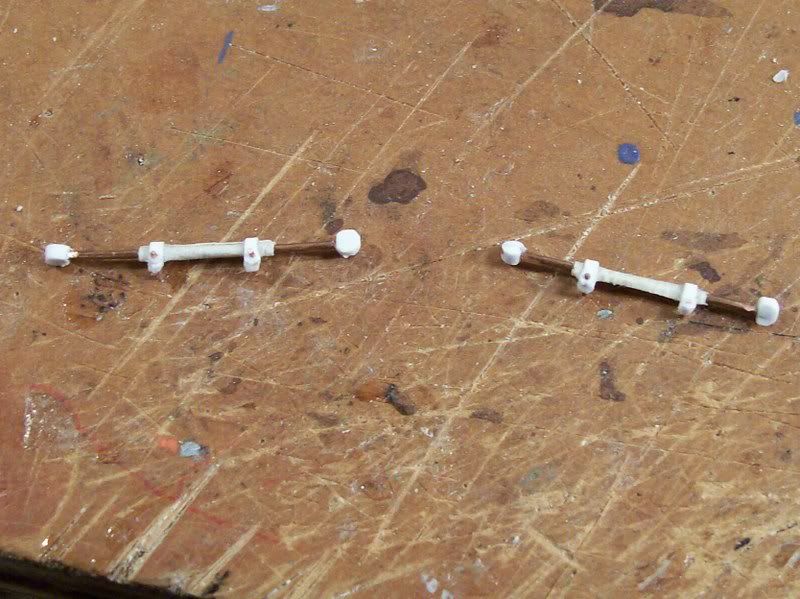 My new stablizer bar, a simple matter of wire and styrene: 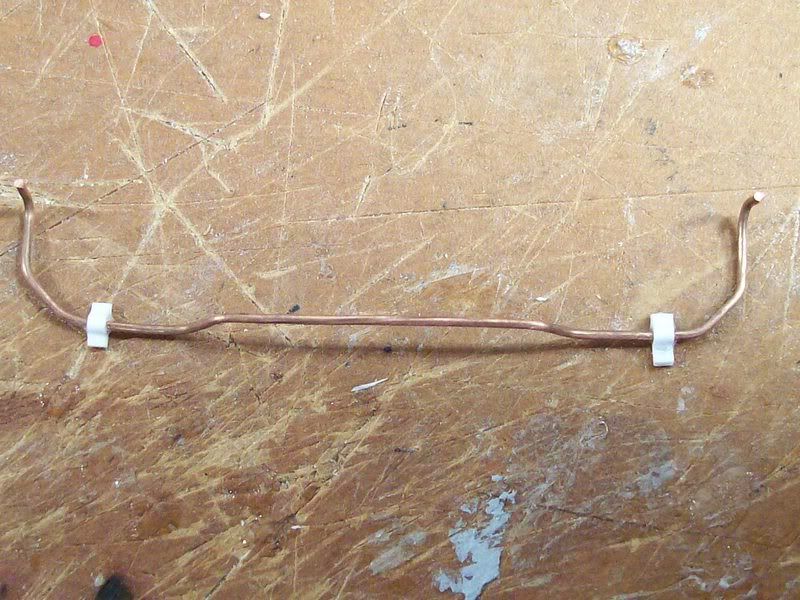 And all suspension parts in place, including my springs. 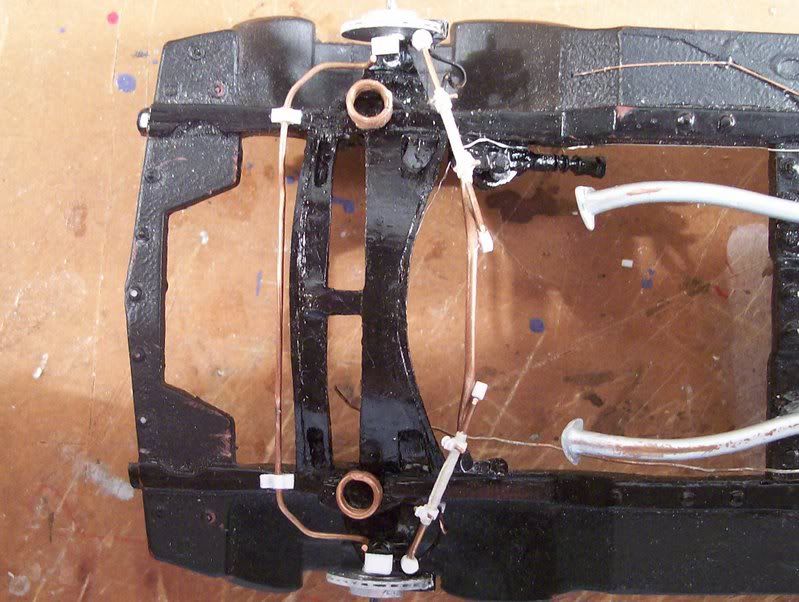 Painted: 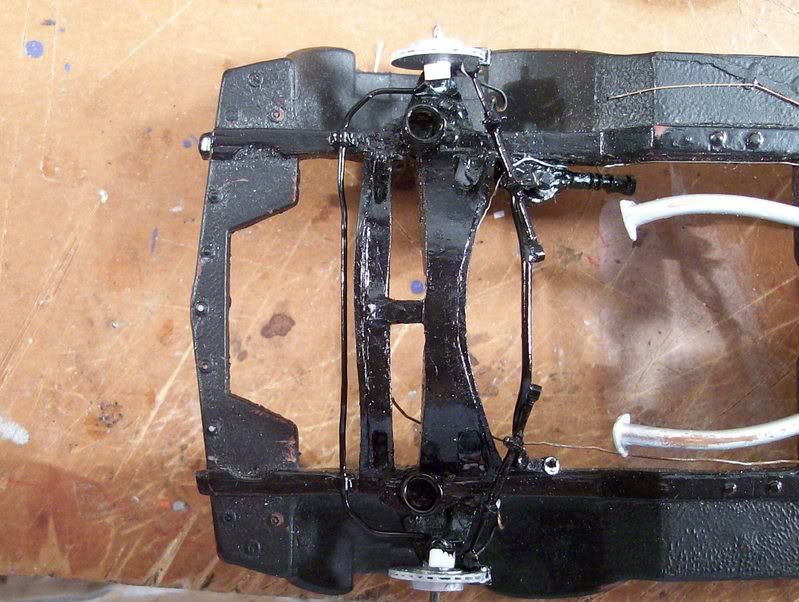 And finally, the lower A-arms properly in place, and the front suspension DONE!!  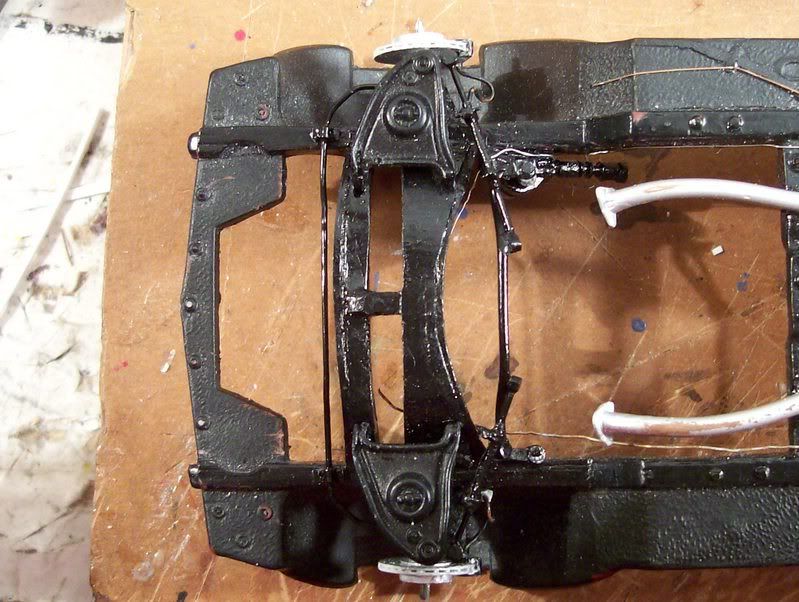 Still to do: power steering hoses (25% done), throttle cable and upper clutch rod, wiper motor, wiring harness, install engine and driveshaft, paint headlights and parking light backs and install, install taillights and windows, make rearview mirror arm and paint/install mirror, finish radiator (90% done) and paint, make wipers, door handles, and side mirror, final assembly, all body details install, make hood hinges, install horn and washer bottle, wheels on, and then I'm done!!! I will try hard, I promise. Thanks for looking! Alex
__________________
|
|
|
|
|
|
08-21-2007, 05:04 PM
|
#84 | |
|
AF Enthusiast
Thread starter
Join Date: Aug 2006
Location: Portland, Oregon
Posts: 633
Thanks: 2
Thanked 7 Times in 1 Post
|
Re: 1969 Firebird 'mild' custom--bringing new life to an absolutely lousy kit
Well, with only 2 days left, my frantic work continues
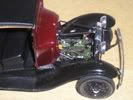
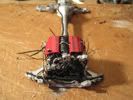
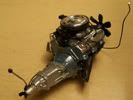
I managed to finish the engine. Here is that mighty, 400ci powerplant (I havent looked up the HP rating but Im sure it was pretty high). After all the fuss I made about a removable air cleaner to show my detailed carb, I glued it on. Theres just too many hoses going into it. Notice the clutch fork and linkage, and the dipstick. 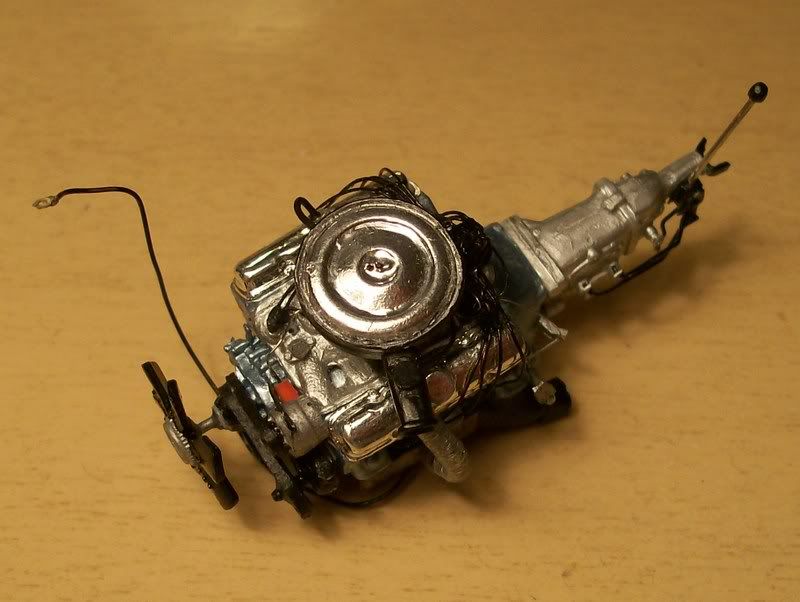 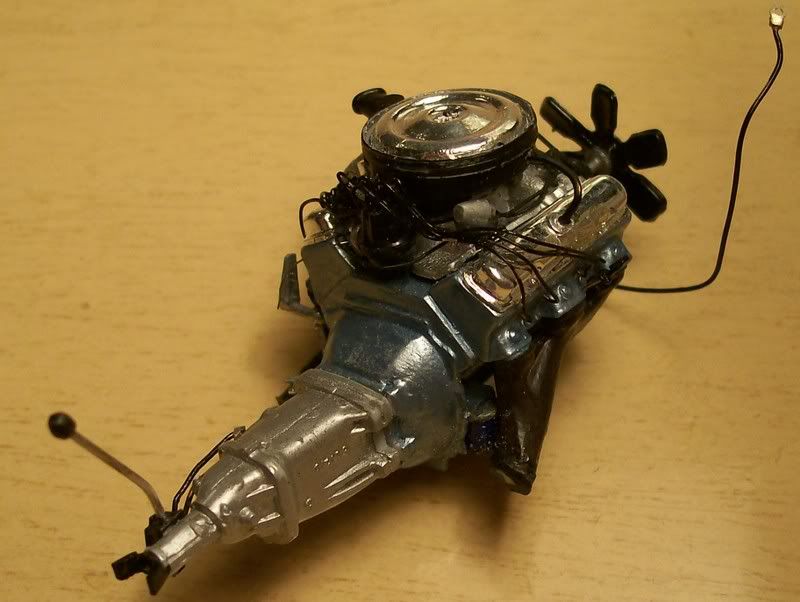 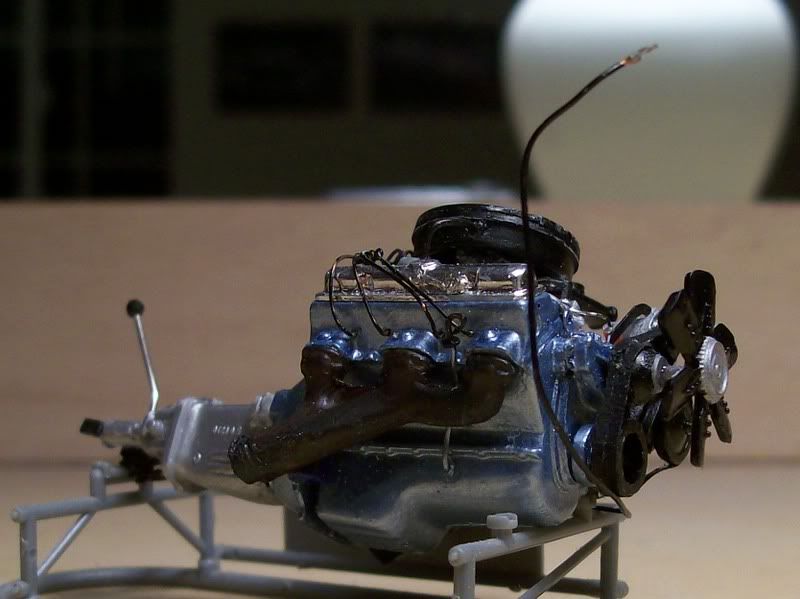 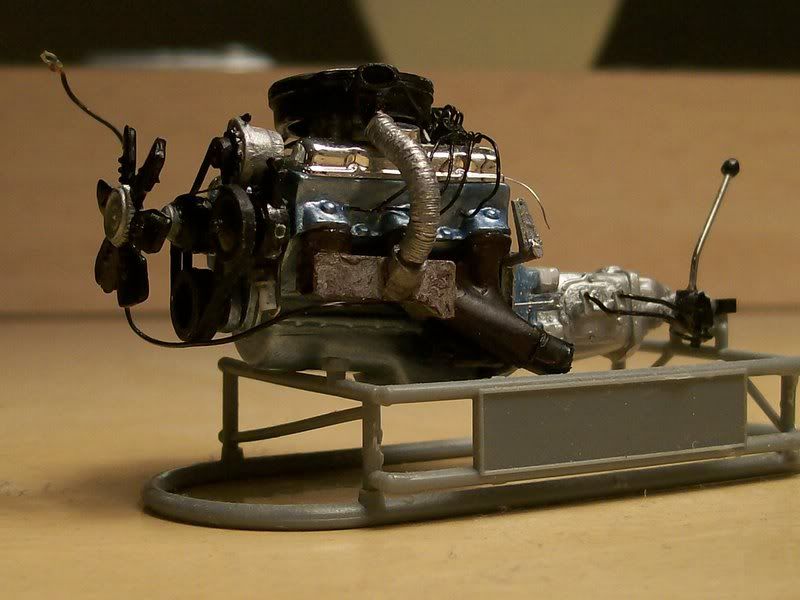 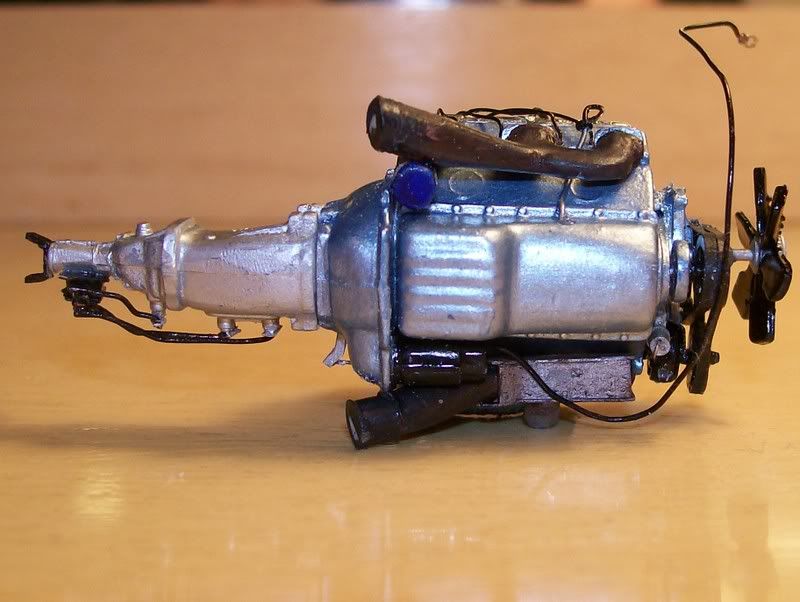 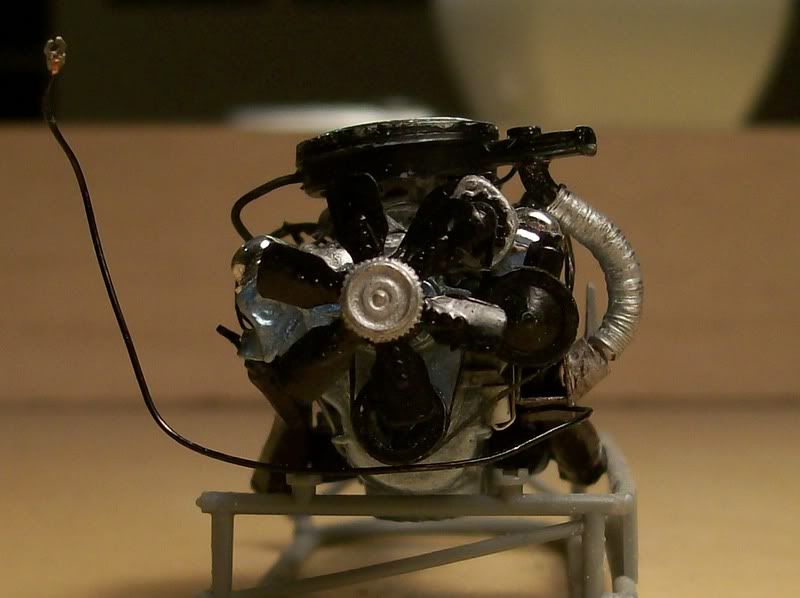 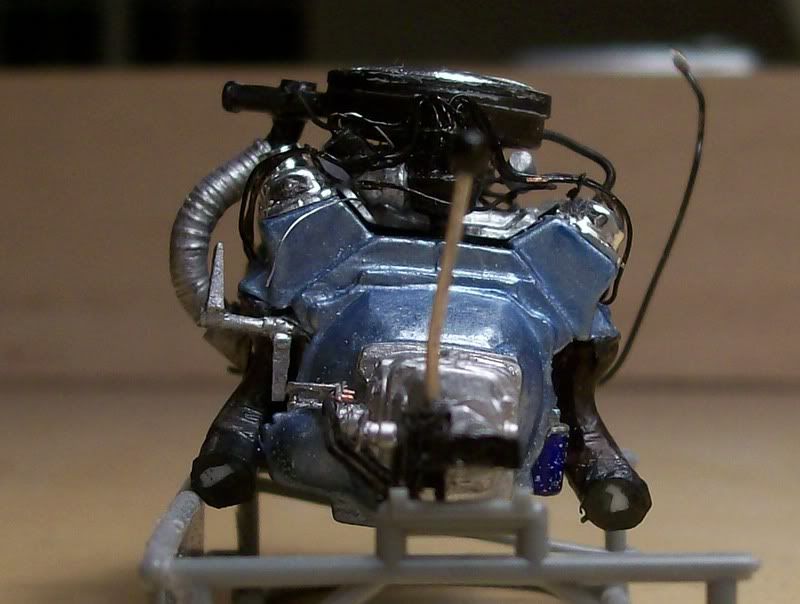 After rebuilding the radiator core support twice, I realized that it still wasnt accurate. I finally did a decent job. There is styrene, a spare parts box radiator (same one Ive been using), soda can aluminum, and putty on this thing. Notice the brace/panels on the front. These are mostly aluminum. 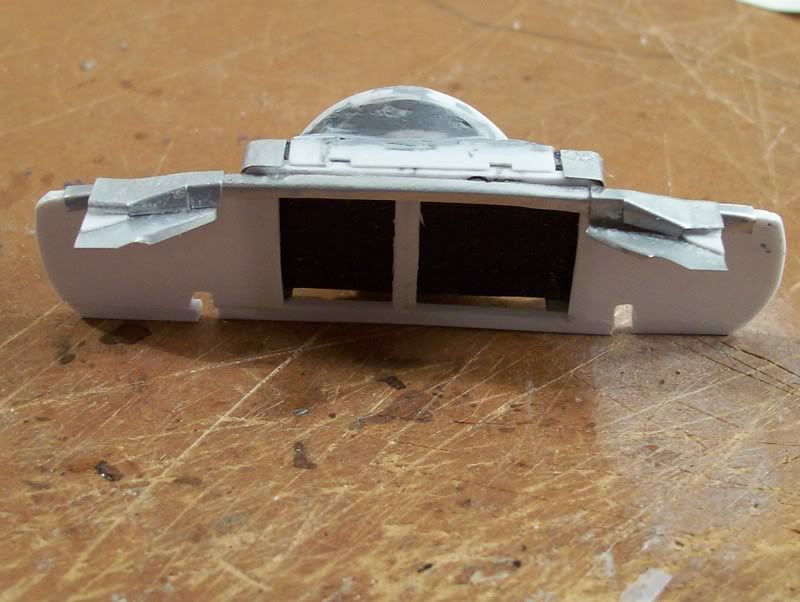 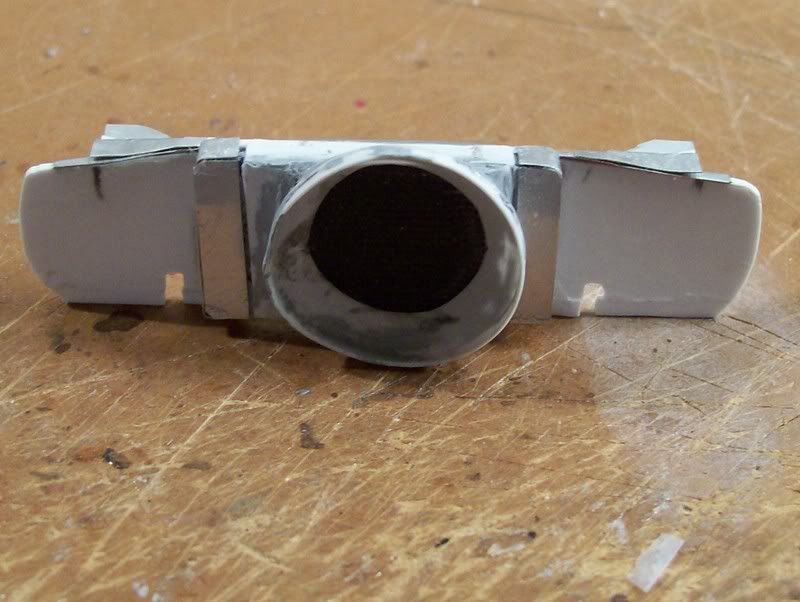 Here are my power steering hoses, made with .62mm and 1mm wire. I join them with a piece of styrene, then file it down. 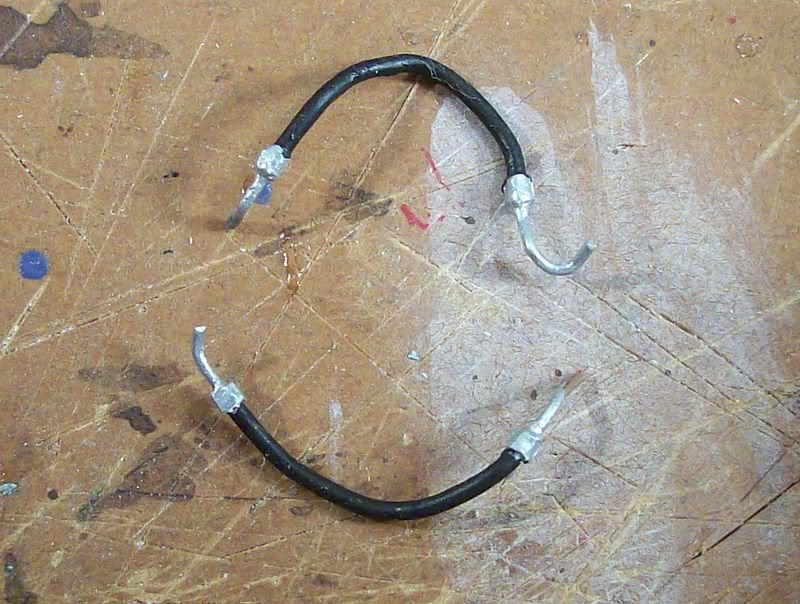 I got the headlights and parking lights installed, and the headlight trim painted silver to match the bezels. The taillights were also installed at this time. 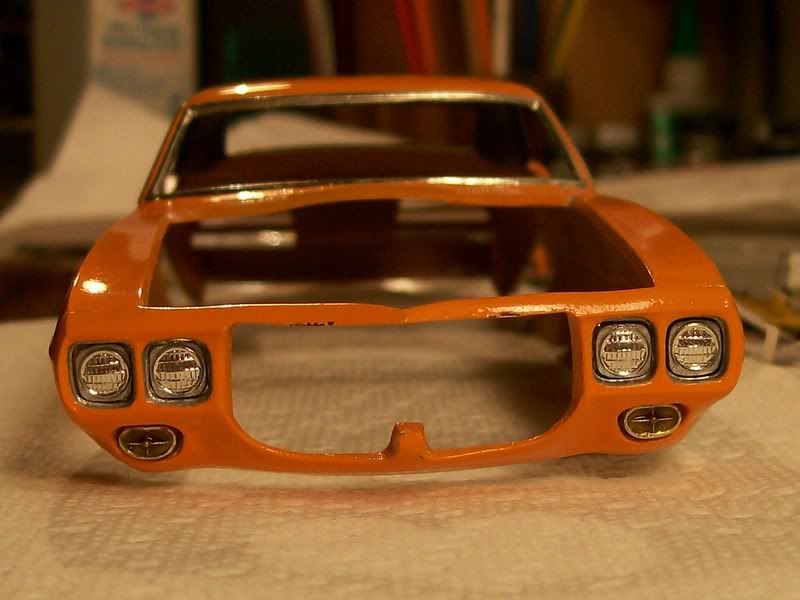 I wasnt about to make functional versions of the Firebirds typical muscle car hood hinges, which are scissor-type affairs with springs and multiple moving parts. (I tried this once with an Impala and it was a pain that eventually broke). Since I wanted the hood to be removable anyway, I just made some fixed hinges for looks. They are in the upright position. 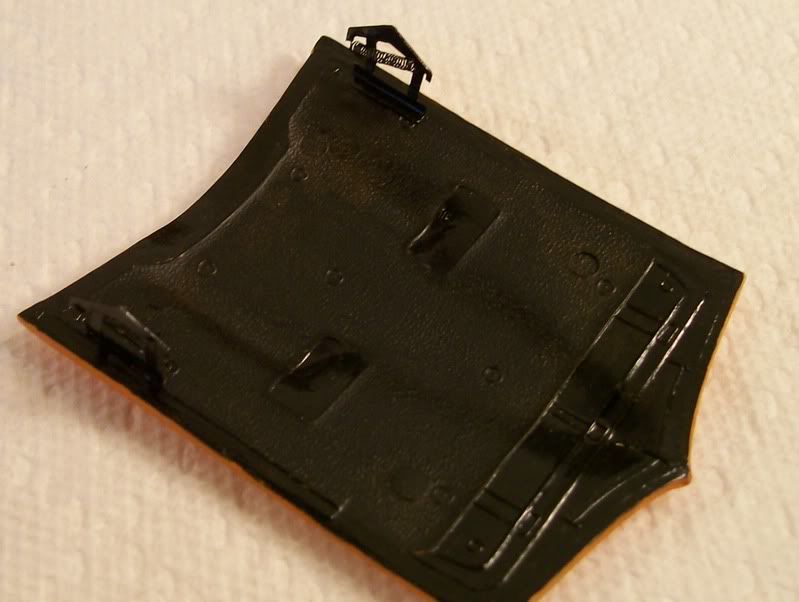 Here is my completed, assembled chassis just before final weathering. I added heat staining to the exhaust and a rusty wash to the panels. Notice the brake, fuel, and e-brake lines that I mentioned earlier. 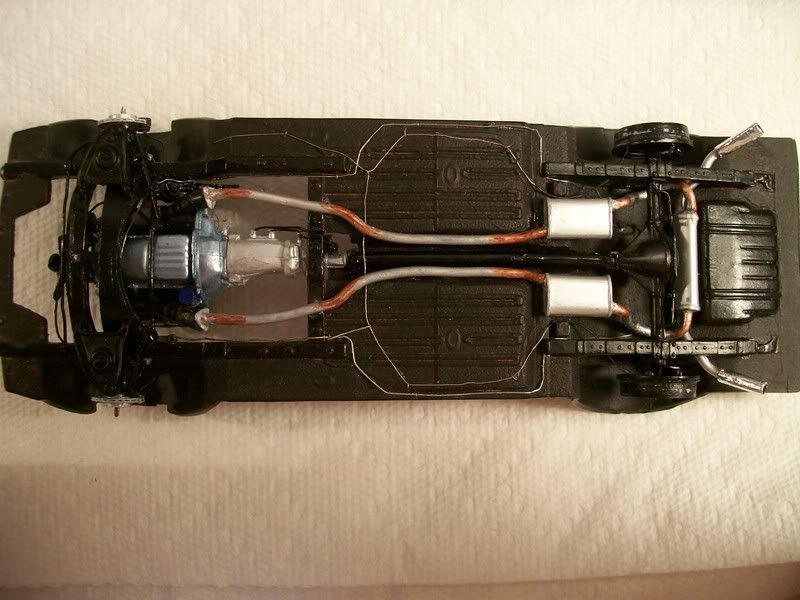 This morning, I managed to airbrush that muddy spray, but no pics yet. I have also installed the windows and mirror and tonight will build the parts that remain to be scratchbuilt, plus do final assembly of body/interior/chassis/radiator. IF all goes well, I should be able to finish this just in the nick of time. If not youll have to wait for the holidays when I return from college. Thanks for looking! Comments welcome as always. Alex
__________________
|
|
|
|
|
|
08-22-2007, 09:32 AM
|
#85 | |
|
AF Regular
Join Date: Jan 2007
Location: Boelus, Nebraska
Posts: 208
Thanks: 3
Thanked 0 Times in 0 Posts
|
Re: 1969 Firebird 'mild' custom--bringing new life to an absolutely lousy kit
WOW this thing took off from me lol looks awesome man keep it up
__________________
I stepped on a Cornflake, and now I am a cereal killer. 
|
|
|
|
|
|
08-24-2007, 05:10 AM
|
#86 | |
|
AF Enthusiast
Thread starter
Join Date: Aug 2006
Location: Portland, Oregon
Posts: 633
Thanks: 2
Thanked 7 Times in 1 Post
|
Re: 1969 Firebird 'mild' custom--bringing new life to an absolutely lousy kit
Well, I'm afraid to say that I did not finish the F-bird. Packing my belongings and saying goodbye to my friends was more important. But no problem--I will finish during the holidays, so this will still be a 2007 model! Be sure to check it out again. Thanks for the interest and support--I'm only about 2 or 3 days out from getting done (once I can work on it again).
Alex
__________________
|
|
|
|
|
|
08-24-2007, 11:29 AM
|
#87 | |
|
AF Enthusiast
Join Date: Sep 2004
Location: Tuttle, Oklahoma
Posts: 2,176
Thanks: 0
Thanked 24 Times in 21 Posts
|
Re: 1969 Firebird 'mild' custom--bringing new life to an absolutely lousy kit
you put in a valliant effort, and I don't blame you for hanging out with friends and loved ones. though I was looking foreward to seeing this thing done. It's only a model, it will still be where you leave it (as long as no one jacks with it), but friends move away, family...well it's family, you have to take care of each other.
good luck, and hope to hear/see from you again in a few months
__________________
There is a very fine line between "hobby" and "mental illness."
|
|
|
|
|
|
12-22-2007, 02:10 AM
|
#88 | |
|
AF Enthusiast
Thread starter
Join Date: Aug 2006
Location: Portland, Oregon
Posts: 633
Thanks: 2
Thanked 7 Times in 1 Post
|
Re: 1969 Firebird 'mild' custom--bringing new life to an absolutely lousy kit
Well, I'm back from a great and successful semester at college, for three weeks of relaxation, Christmas, and FINISHING THE FIREBIRD!!! Let's get started with these two measly pictures, which show the most extensive scratchbuilding left in the completion process. More to come as I recover from a semester of sleep deprivation and actually get to work for real on this thing.
First, the wiring harness attached to the firewall. This connects to the voltage regulator, wiper motor, and the engine stuff (starter, coil, oil pressure and coolant temp senders, etc.) It is made using my standard wiring harness method, with the "old car material", that being tape rather than wire for the external wrap. I need to get around to making a tutorial of that... 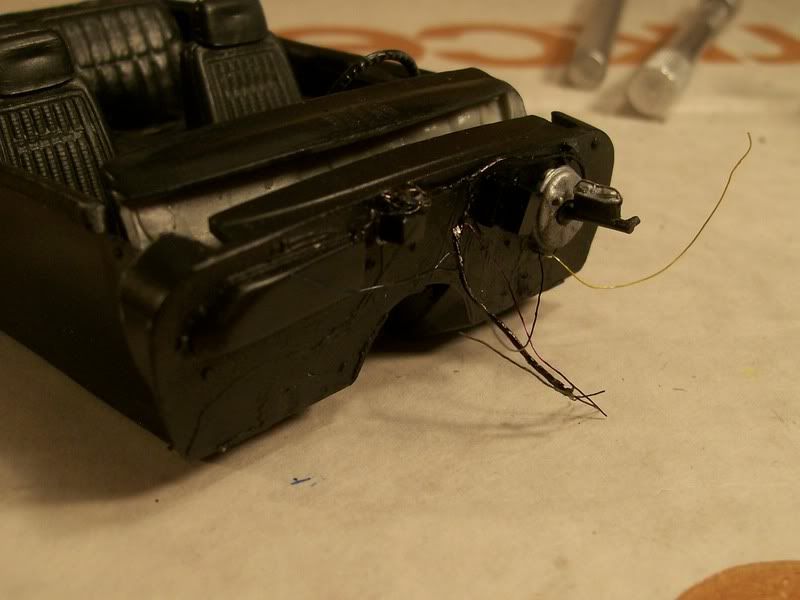 And, the other pic: the forward lighting harness (for the lights and horn). 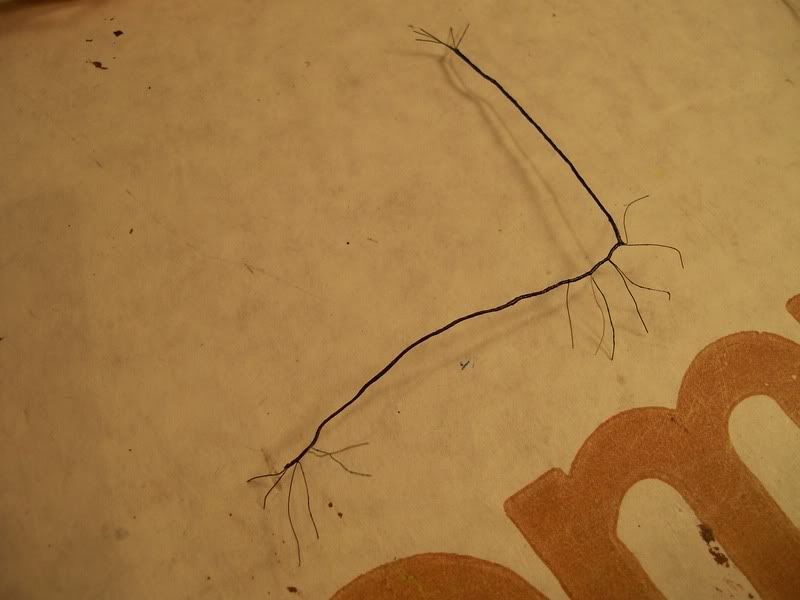 The next steps will be some detail work (hoses and such) and the final assembly of all my sub-assemblies. Stay tuned! This WILL be done during my break! Alex
__________________
|
|
|
|
|
|
12-22-2007, 03:17 PM
|
#89 | |
|
AF Regular
 
Join Date: Dec 2006
Location: Wisconsin Rapids, Wisconsin
Posts: 216
Thanks: 0
Thanked 0 Times in 0 Posts


|
Re: 1969 Firebird 'mild' custom--bringing new life to an absolutely lousy kit
Looking Good! As we speak I am curently working on my Cuda. Im going back ang forth form the model table and the Computer. lol. Where do you get the chrome paint from?
|
|
|
|
|
|
12-22-2007, 04:43 PM
|
#90 | |
|
AF Enthusiast
Thread starter
Join Date: Aug 2006
Location: Portland, Oregon
Posts: 633
Thanks: 2
Thanked 7 Times in 1 Post
|
Re: 1969 Firebird 'mild' custom--bringing new life to an absolutely lousy kit
Which chrome? The chrome paint I've used so far is just Testors "silver chrome" enamel, which is basically just silver. The real chrome stuff is Bare-Metal Foil. And, the bumper will now be repainted with Alclad II chrome, which actually IS chrome paint. I got it off Ebay from a hobby store. I'll show that once I paint the bumper.
__________________
|
|
|
|
|
|
|
POST REPLY TO THIS THREAD |
 |
|
|