|
|
| Search | Car Forums | Gallery | Articles | Helper | Air Dried Fresh Beef Dog Food | IgorSushko.com | Corporate |
|
|||||||
| WIP - Street Post topics for any "Works In Progress" street vehicles projects in this sub-forum. |
 |
 Show Printable Version | Show Printable Version |  Subscribe to this Thread
|
|
|
Thread Tools |
|
#17
 10-31-2003, 11:55 AM
|
||||
|
||||
|
off to a great start can't wait to see more pics! I'd say go for yellow, i haven't seen a yellow one yet but plenty of red and one black!
__________________
My real name is Justin don't be afraid to use it.
 
|
|
#18
01-04-2004, 02:56 PM
|
||||
|
||||
|
Re: My Enzo Ferrari progress
Any updates?!

__________________
Pedro Click the picture to check my progress thread: 
|
|
#19
05-15-2006, 09:11 PM
|
|||
|
|||
|
Re: My Enzo Ferrari progress
Sorry if I revived this very old thread of mine. Well, finally decided to finish my Enzo after a two year hiatus. I've done some progress here and there in that time but forgot to take pics. So I'll try to post whatever pics I had available back then and some new ones.
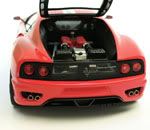
Well here are the exhaust pipes covered with tin foil and painted the heat stains with clear orange and blue.  Here's the plenum chamber covered in carbon fiber from museum collection + tamiya metal sticker on it. I like to work with museum collection cf decals, because they're cheap, 1000 yens for a sheet that is almost twice the size of an SMS one. They're thick but they still manage to register all the detail under them and are forgiving. They have shrink wrap like properties, I can pull them, stretch them and cover any curved or irregular surface pretty easily. The downside is the pattern printed on them has more silver than black, so you have to tone them down a lot with tamiya smoke.  Here you can see the exhaust glued to the engine. The heatshielding on the headers and transmission was made from cigarette foil.   From the pictures I have of the bare monocoque, ferrari used plain weave cf in the cockpit section and twill weave in the engine and trunk. Here's the cockpit section covered in plain weave cf and clearcoated. I decided to use sms twill weave cf on visible parts only since they're kinda expensive, and i'd be spending at least 2-3 sheets to cover it completely  And museum collection didn't have twill weave pattern decals available back then. And museum collection didn't have twill weave pattern decals available back then.   Here are the headlights covered in CF, I'd have been able to cover them with a single piece of decal, but in the end I needed 1-2 small pieces on the sidewalls because they didn't get covered completely    Cockpit floor CF'd and clearcoated. I don't remember how many pieces I used to cover it but the hardest part was the tunnel.  Here I glued the cockpit walls, the back wall I left it as semi-gloss black. From the reference pics I got it, you can manage to see it's not covered in clearcoated CF, and looks more like the fabric used on the F360/F430. Still need to glue the PE net in the middle of it.   These are the seat's back covered in CF and clear coat.  After this I think I glued the cockpit floor to the monocoque as well as the engine and then I took my hiatus. More pics to come, any comments or criticism are welcome
Last edited by Inquisitor; 05-15-2006 at 11:29 PM.
|
|
#20
05-15-2006, 10:15 PM
|
||||
|
||||
|
Re: My Enzo Ferrari progress
Super decal work! very clean!!!
you may want to clearcoat with smoke instead of clear. i have never tried it but ive seen amazing results from very respectable modelers here. they argue that many times the weave pattern is printed too bright, when the actual shade is more toned down and dark. smoke works to clear and darken a bit to give a more realistic result. you can test it on a junk part first. cheers
__________________
|
|
#21
05-16-2006, 01:01 AM
|
|||
|
|||
|
Re: My Enzo Ferrari progress
Here are some pics of the dashboard, it was a bitch to decal it. I had to cut out many small bits of decal just for the central console.
 In this pic you can see I drilled out the upper part of the dashboard, in the real Enzo those holes seems to be covered by a very fine mesh, you can see the pedals and steering column thru that mesh. In the scaled down case, I can't find a mesh convincing enough yet, guess i'll leave it till later.    Air intakes and doors with cf. The Studio 27 PE mesh for the air intakes is a bit oversize, you may also notice some of the decals on the doors overlapped, but oh well I think it'll be hardly noticed with the doors assembled. 
Last edited by Inquisitor; 05-16-2006 at 04:13 PM.
|
|
#23
05-16-2006, 08:47 PM
|
|||
|
|||
|
Re: My Enzo Ferrari progress
Nice start.
|
|
#24
05-17-2006, 12:51 AM
|
|||
|
|||
|
Re: My Enzo Ferrari progress
Ok, let's move to the undertray and all the CF in it has certain direction on each different panel. My first reference I had and I'd say it was the best one so far was a picture from the japanese Super Ferrari Mook by Rosso. It's a single pic of the whole underbody of the Enzo and it clearly shows all the CF direction/pattern on it.
 Of course this was later confirmed by other reference pics and the SMS CD pics.   Here is the CF on the model.   
|
|
#26
05-17-2006, 06:36 PM
|
||||
|
||||
|
Re: My Enzo Ferrari progress
I am very impressed by how meticulous you are about getting the direction of the weave correct. Very nice work.
__________________
-Mike AF Director of Media / Photographer  [email protected] | AutomotiveForums.com | Flickr Gallery
|
| ||||||||||||||||||||||||||||||||||||||
|
POST REPLY TO THIS THREAD |
 |
|
|


