|
|
| Search | Car Forums | Gallery | Articles | Helper | Air Dried Fresh Beef Dog Food | IgorSushko.com | Corporate |
|
|||||||
| WIP - Motorsports Post topics for any "Work In Process" motorsports vehicles in this sub-forum. |
 |
 Show Printable Version | Show Printable Version |  Subscribe to this Thread
|
|
|
Thread Tools |
|
#16
 08-29-2011, 06:50 AM
|
||||
|
||||
|
Re: Alpine A110 1/24 - Acropolis 1970
Another update on this little beauty...
First of all, I decide to cut the windows handles, and I plan make it for scratch... 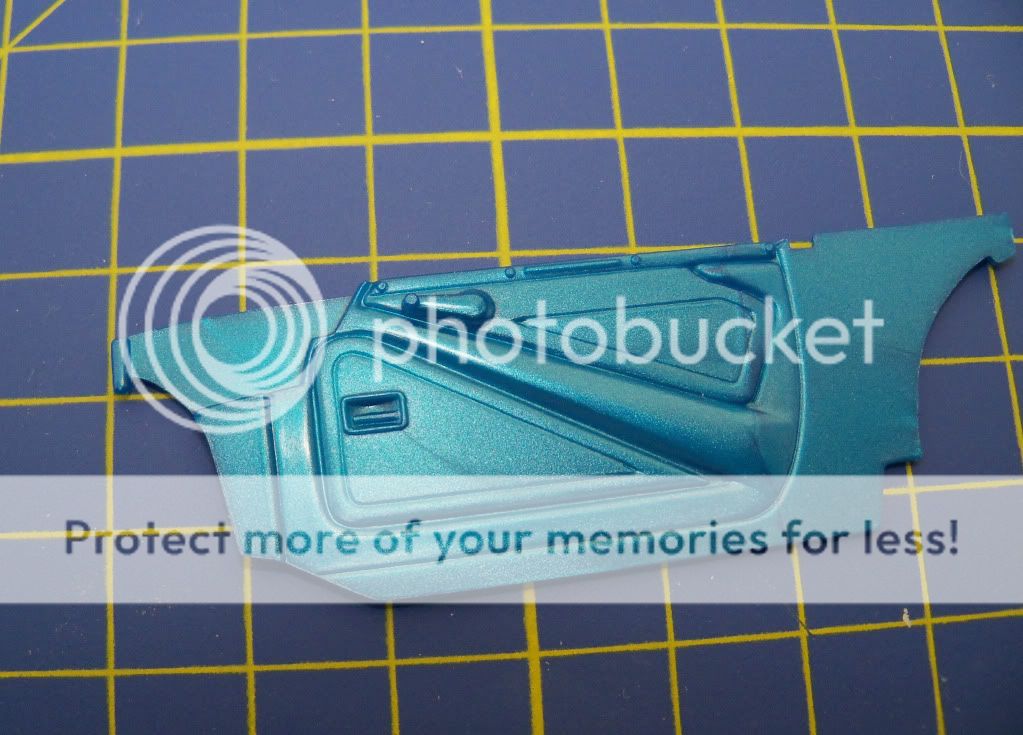 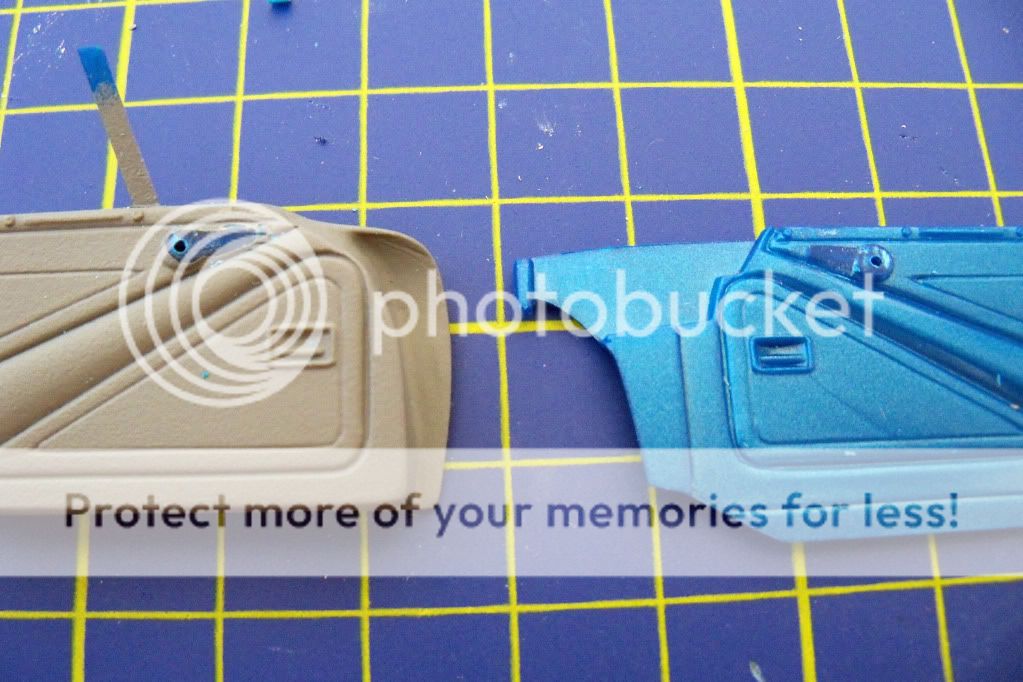 Also, I add a plastic sheet in open door's connection point, to hide the gap. 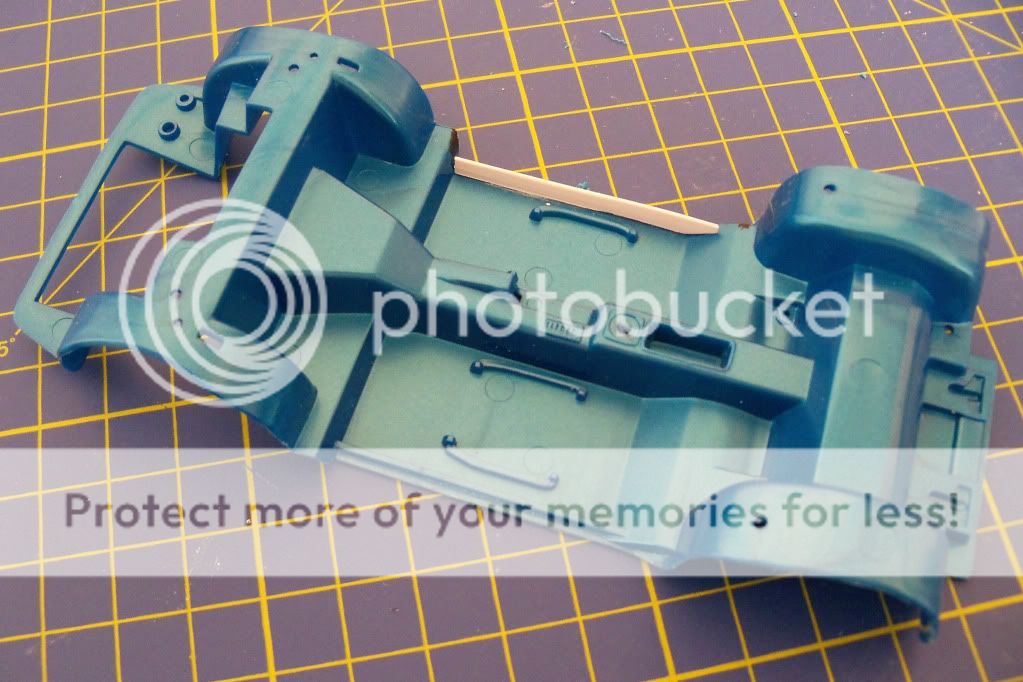 The its time for the paint job... I use Tamiya TS-56 straight for the can. Not the best result, cause the 30-40 Celsius in Greece, during the summer. I stored it 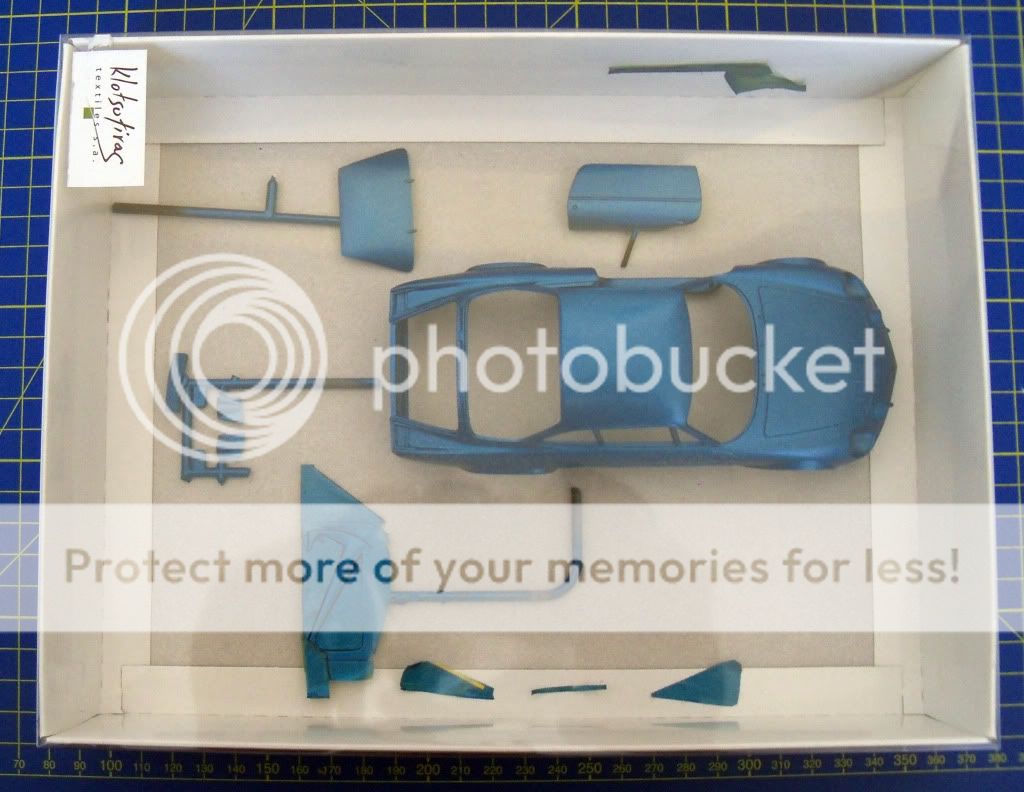 and meanwhile I start to "play" with the decals for 1970 Acropolis. Not perfect, but wife of my friend and AF member Est1976 make for me a new better set, which I print and test soon. For now, my first attempt to make decals... 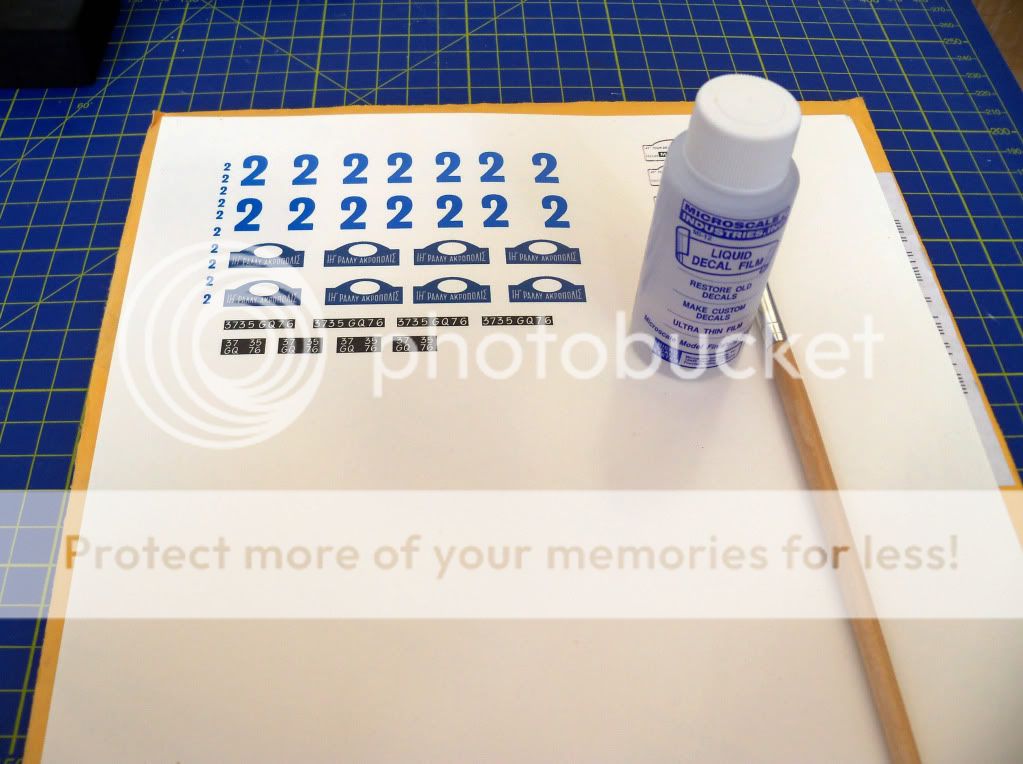 Some days after paint-job, I start to polish the body... I think the Alpine body is quite difficult to polish, cause of many edges. Here the (not perfect ) result... 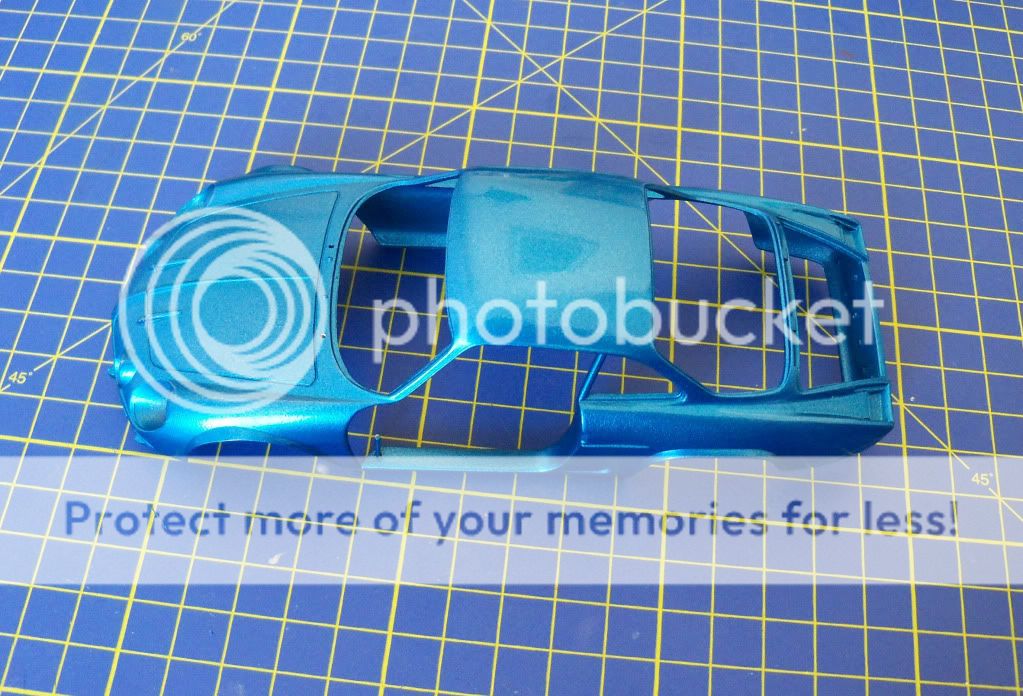 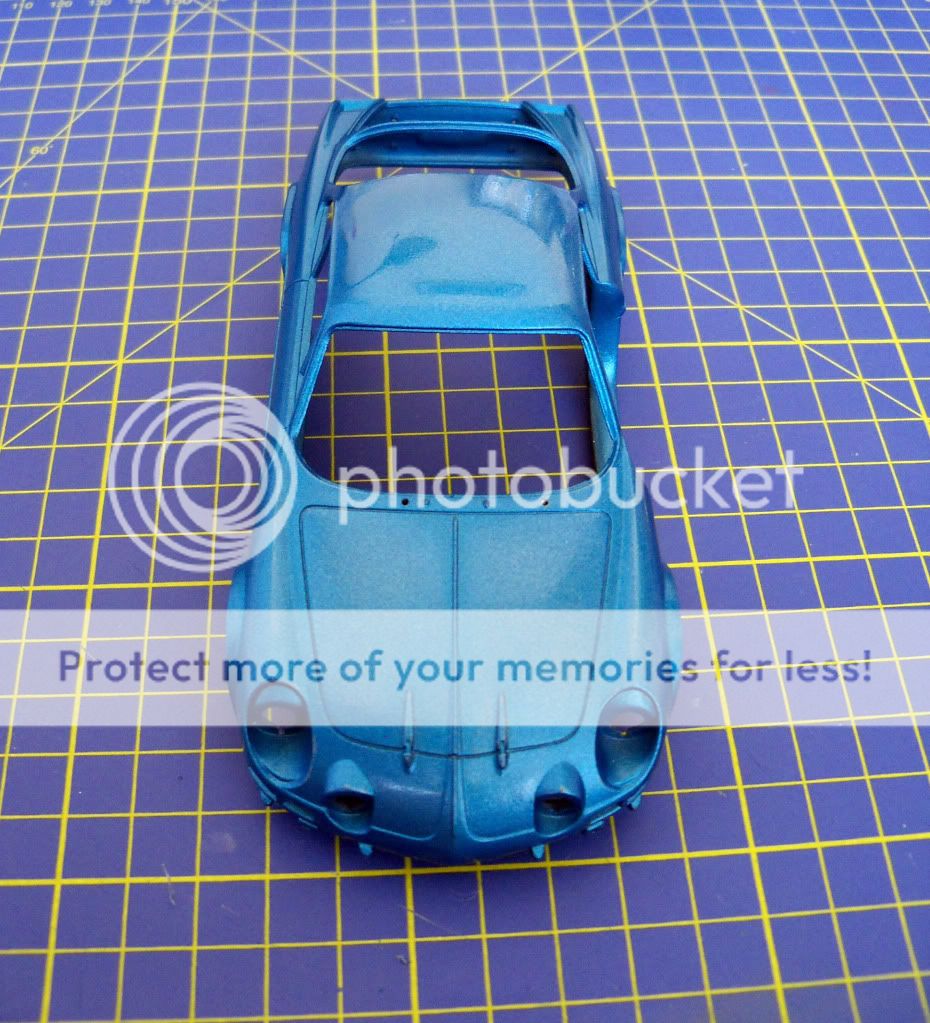 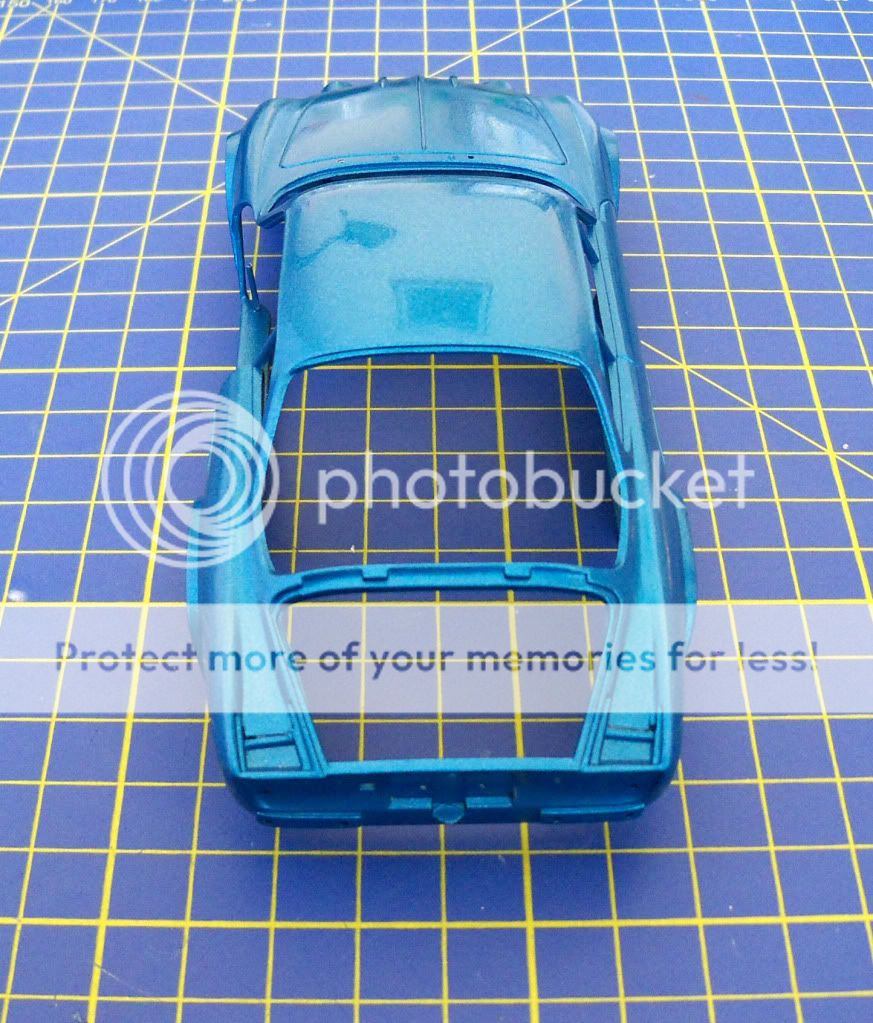 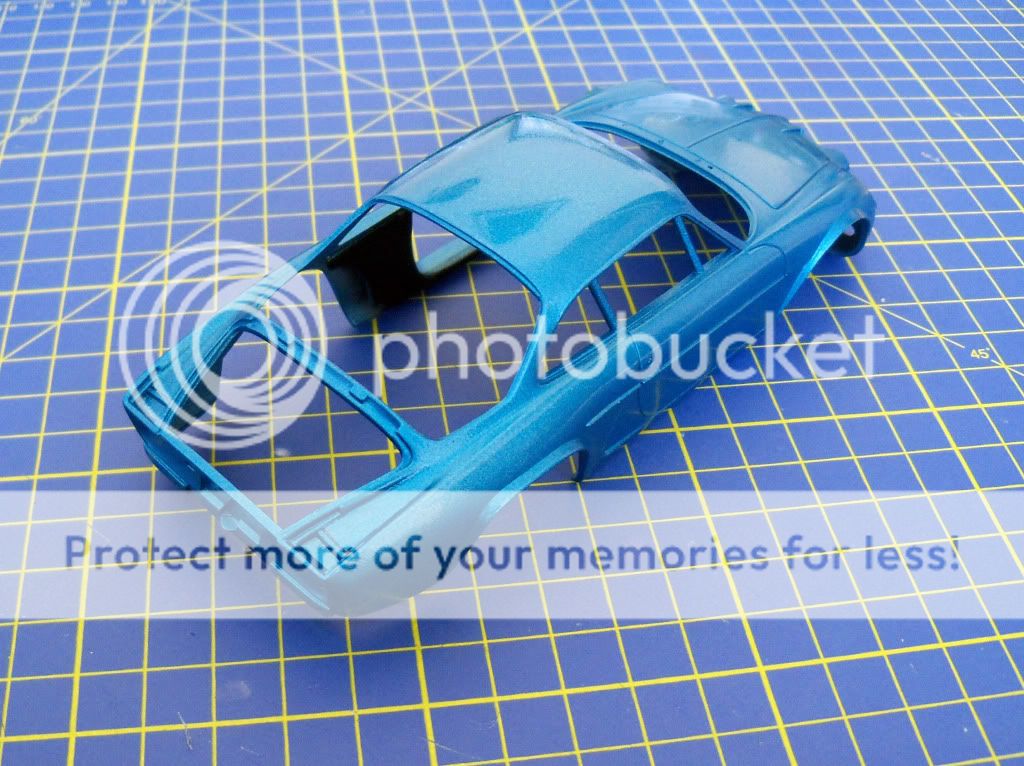 Hope you like it... Comments and criticism are welcome. Thanks for your time. 
|
|
#17
09-07-2011, 04:00 PM
|
||||
|
||||
|
Re: Alpine A110 1/24 - Acropolis 1970
Time to a new update on my Alpine...
I start to build some interior parts, and the first of these is the dashboard. My reference image is... 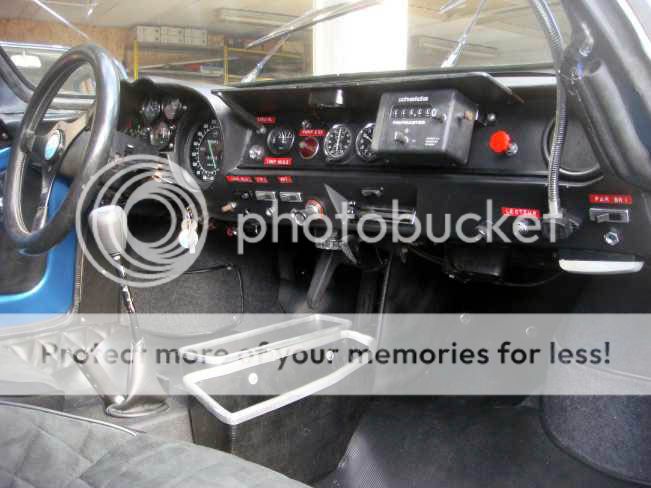 The starting point is this... 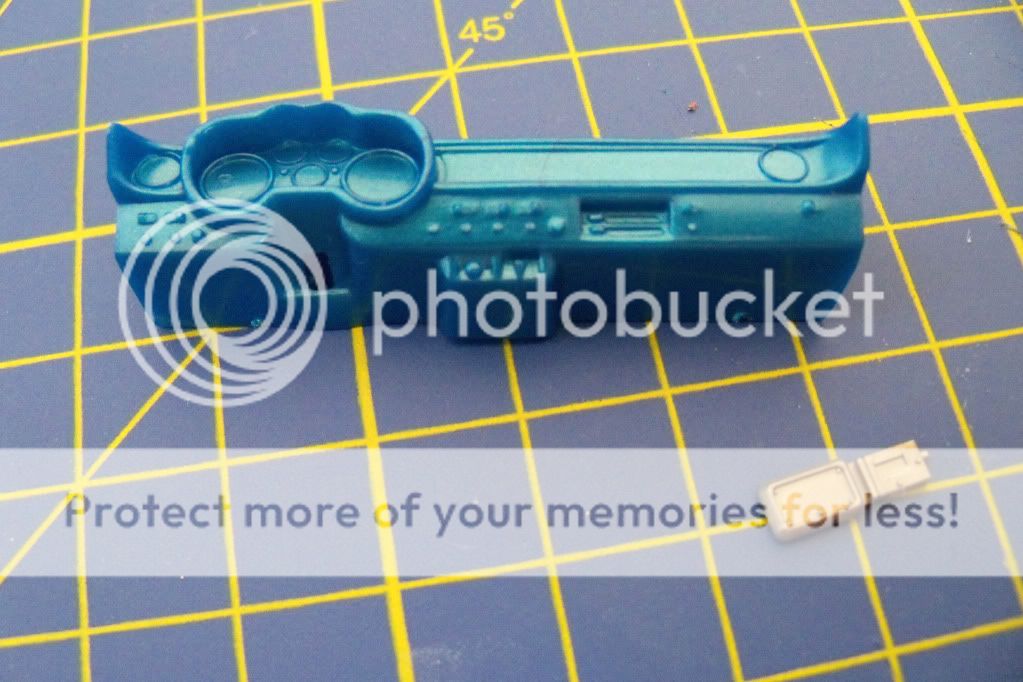 The improvements on the dashboard are some switches, an new base for chronometer, a new teratrip, a sun visor, etc. 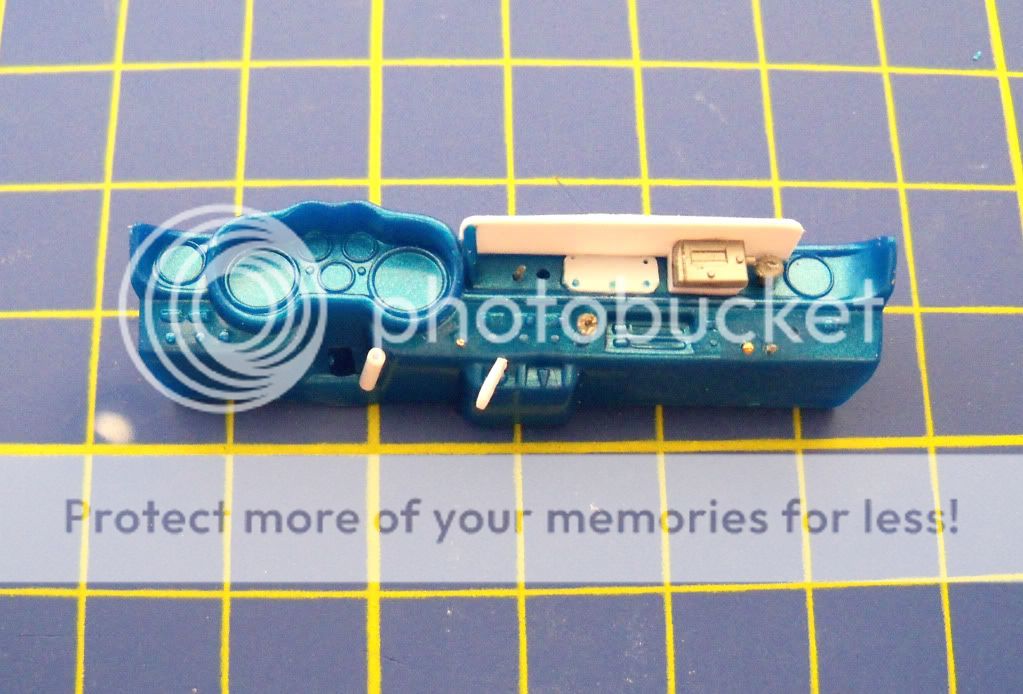 Finally, I add the co-driver's lamp... 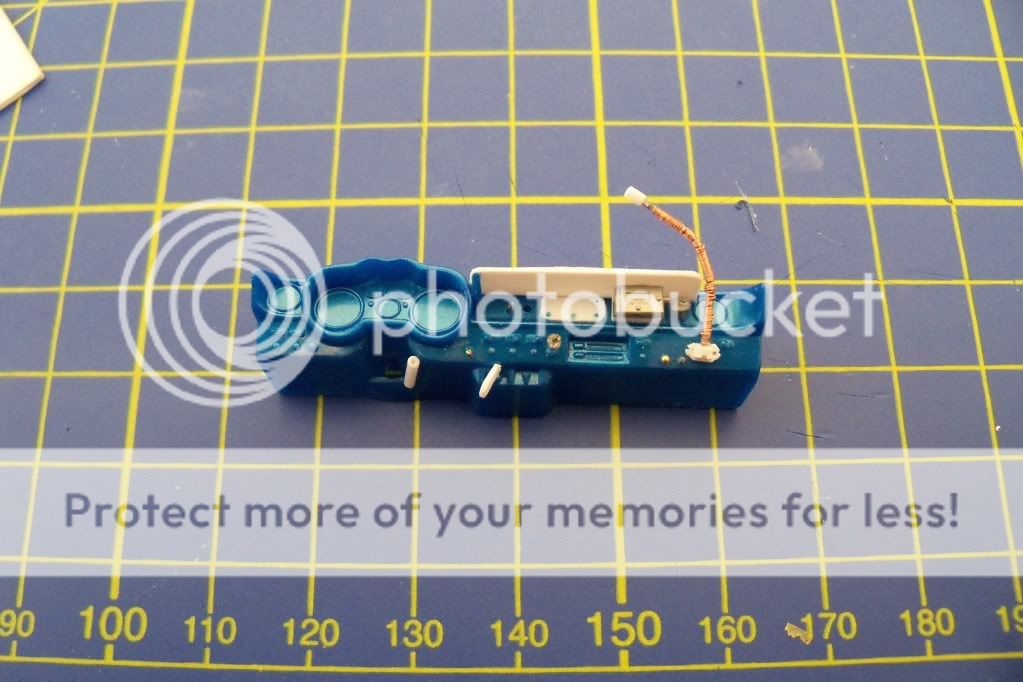 After some painting.. the result is : 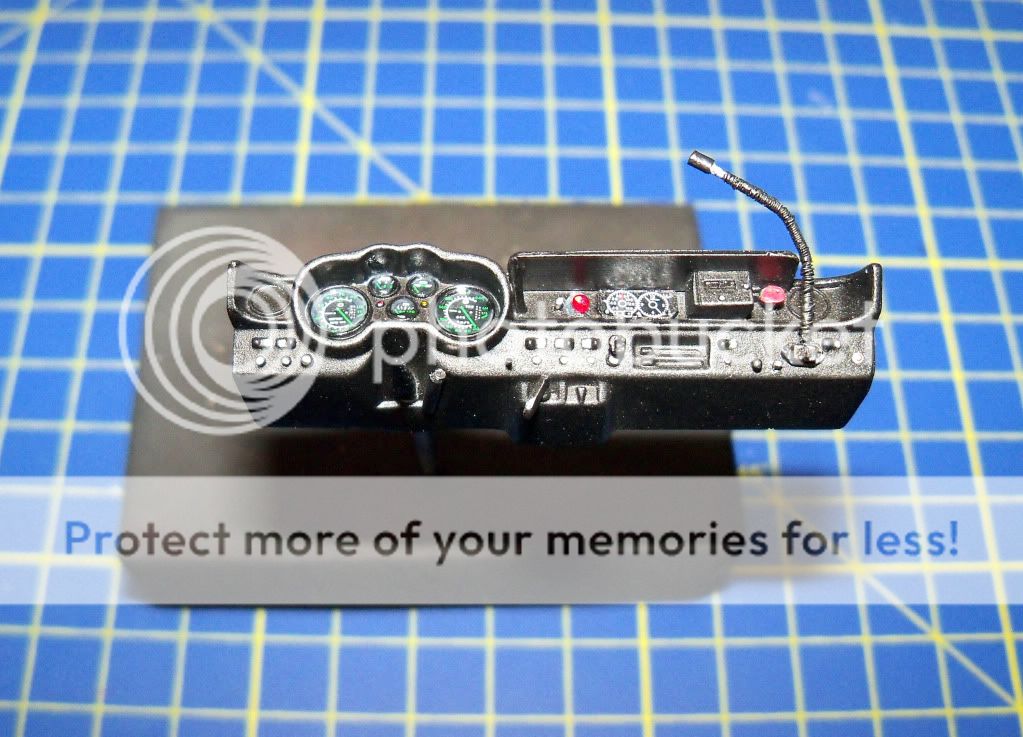 Also, I make some progress, with other interior parts... First I open the steering wheel's holes, make some seat bars and fill the steering column. 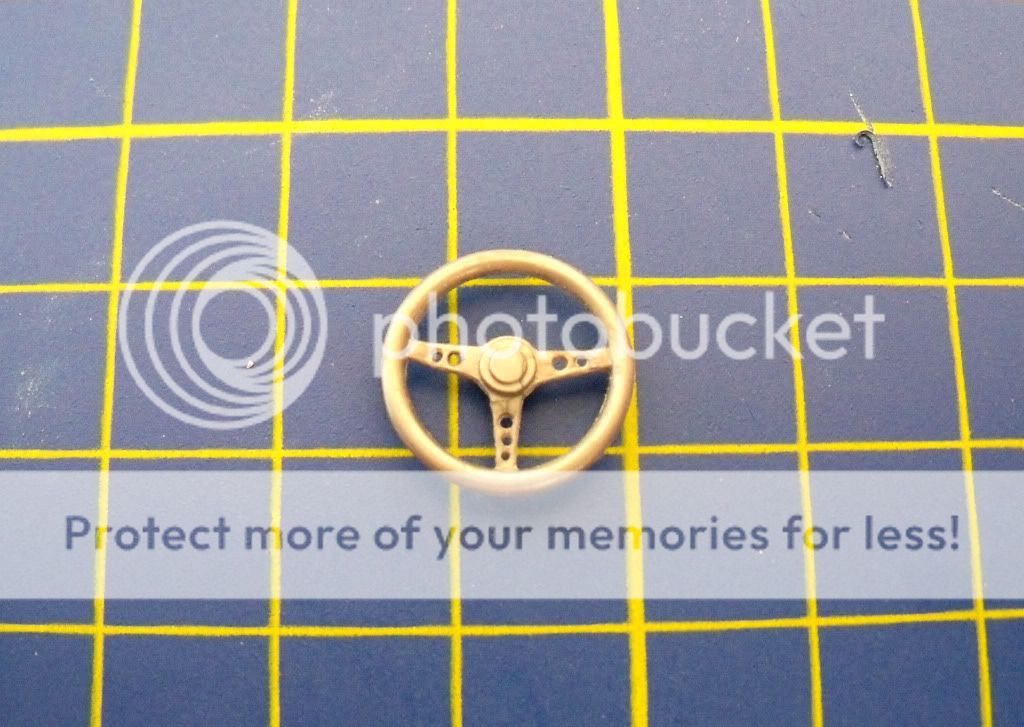 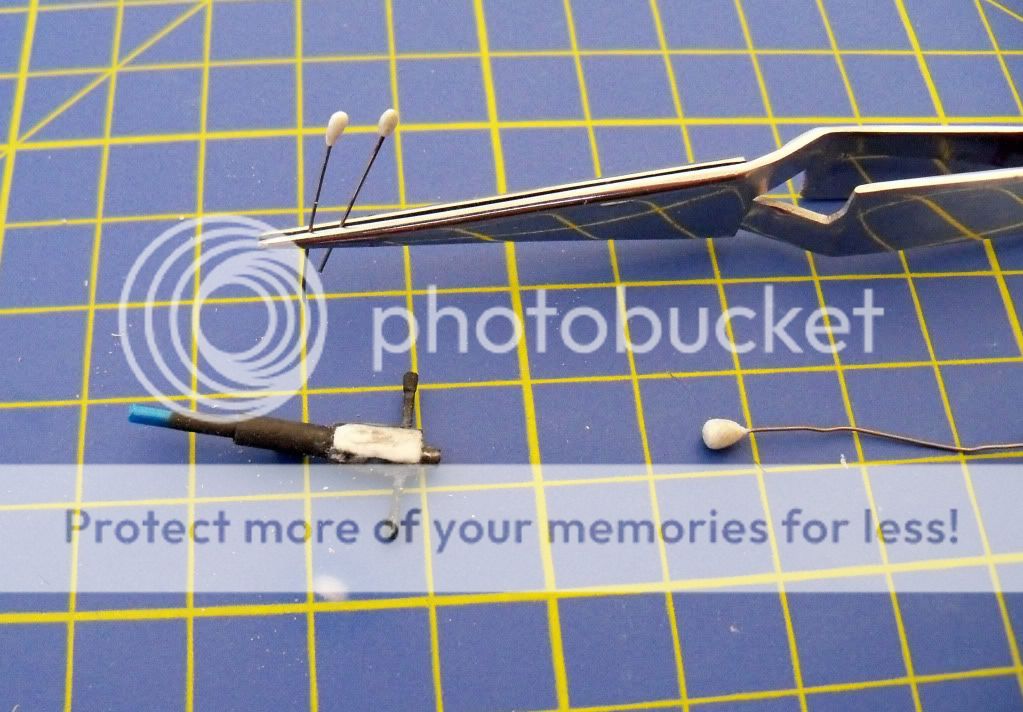 From evergreen rods I make the seats base... 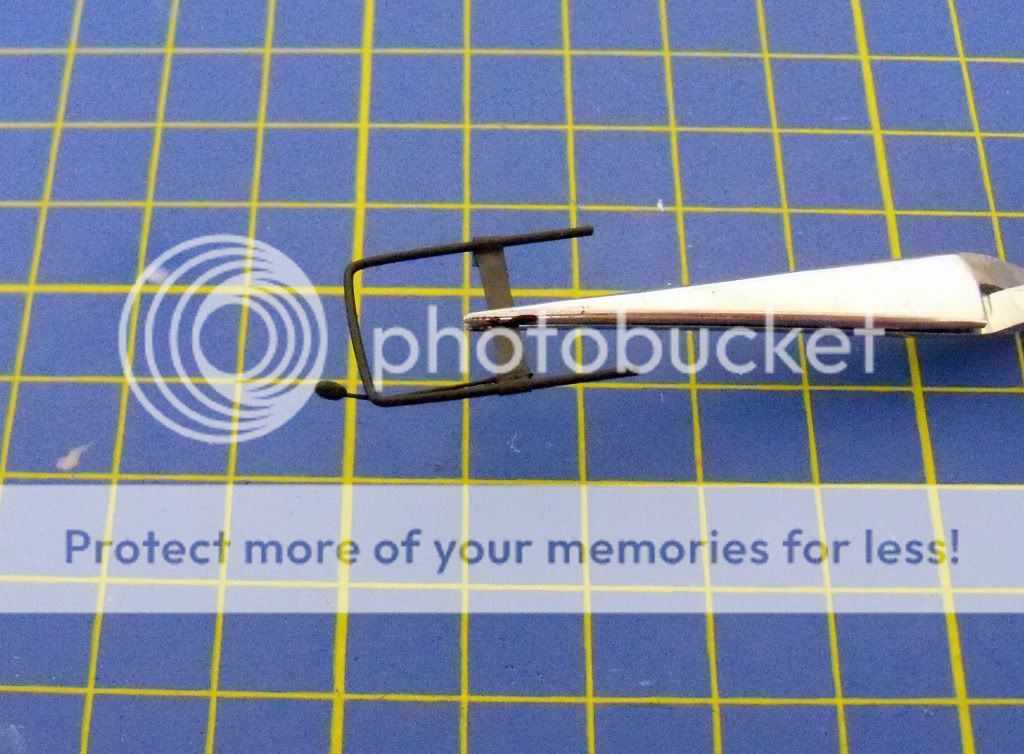 The seats obtained back and painted with semi gloss and matt black. With same colours, I paint the interior. 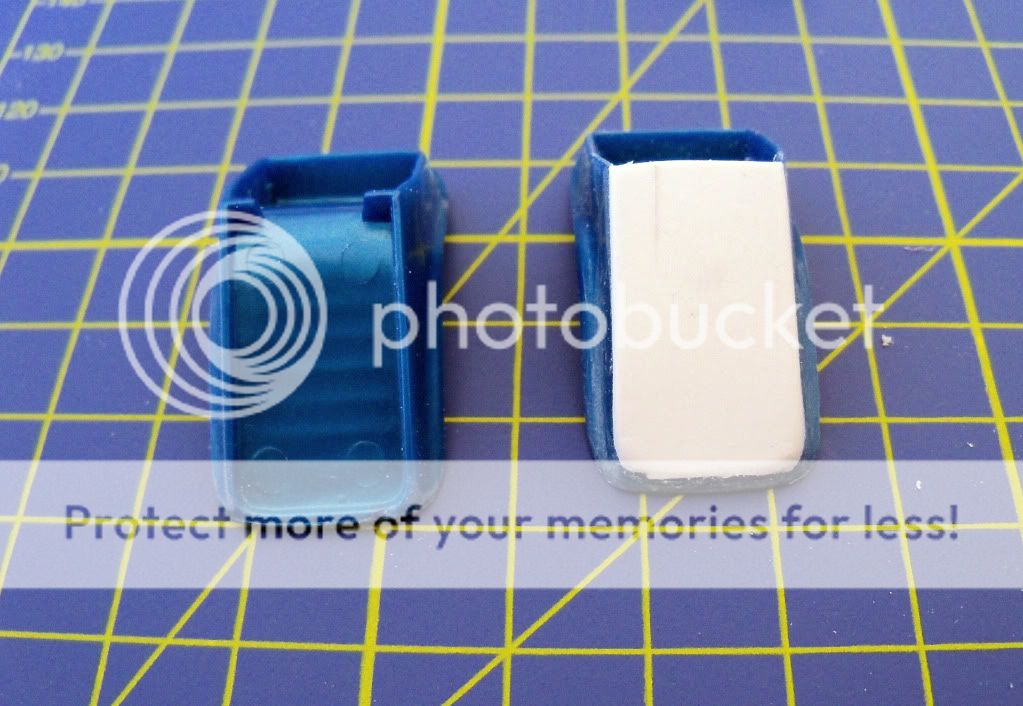 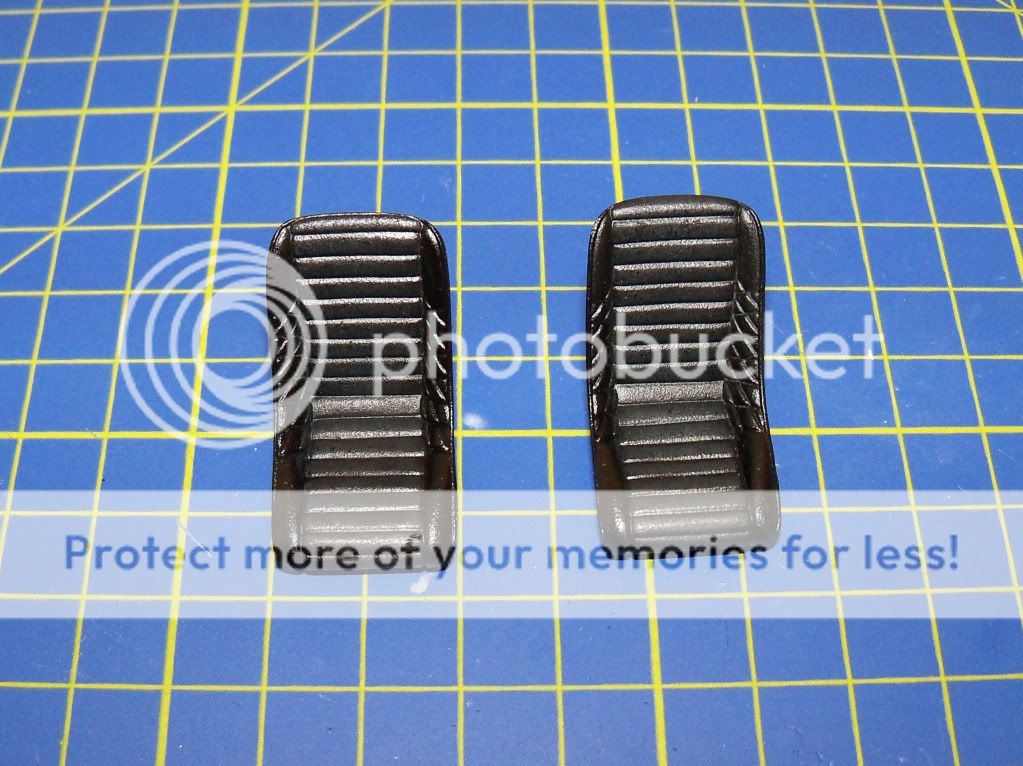 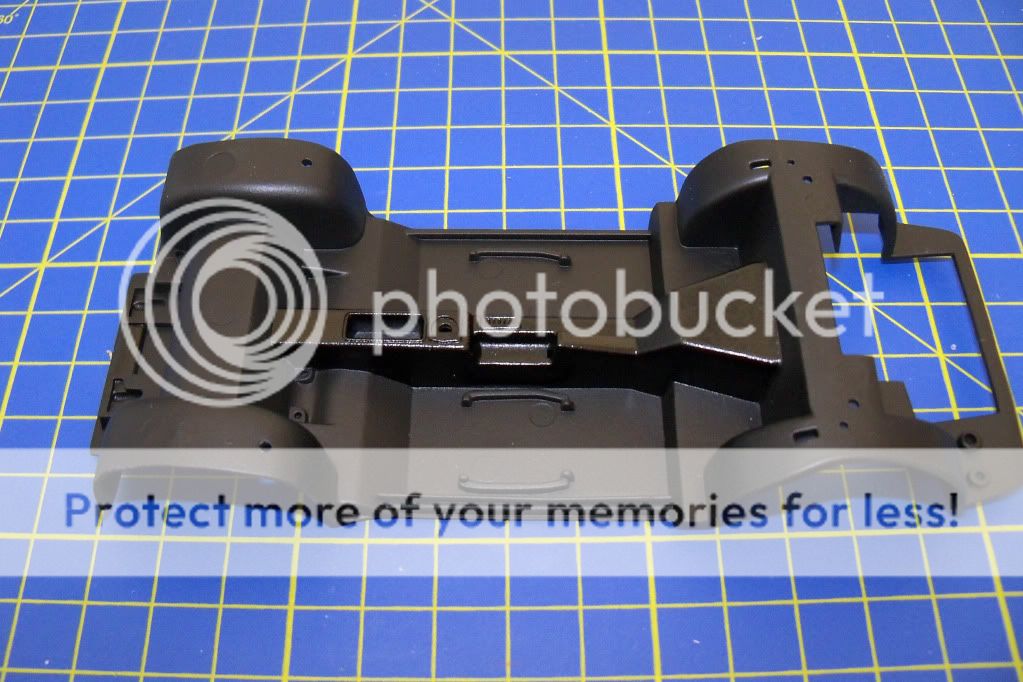 Hope you like it... Comments are welcome... 
|
|
#18
09-07-2011, 04:35 PM
|
||||
|
||||
|
Re: Alpine A110 1/24 - Acropolis 1970
Sir, you are an artist!! Everything looks flawless!
I can't wait to see the finished model!
|
| The Following User Says Thank You to sam01contact For This Useful Post: | ||
gtziaf (09-10-2011)
| ||
|
#20
09-08-2011, 04:55 AM
|
||||
|
||||
|
Re: Alpine A110 1/24 - Acropolis 1970
Amazing detailing on the interior my friend!
It is absolutely marvelous! Definitely a ref build!
|
| The Following User Says Thank You to Souplaman For This Useful Post: | ||
gtziaf (09-10-2011)
| ||
|
#21
09-10-2011, 09:44 AM
|
||||
|
||||
|
Re: Alpine A110 1/24 - Acropolis 1970
My friends sam01contact , Luis Pacheco and Souplaman thanks for your comments.
For sure, I 'm not such a good modeller, but I try to improve my builds. Pleased that you like it. I try my best, to well finish it...
|
|
#22
09-10-2011, 12:09 PM
|
||||
|
||||
|
Re: Alpine A110 1/24 - Acropolis 1970
Hi George,
Nice paint job and scratchbuilding. Keep up the good work, my friend. Lesley
|
| The Following User Says Thank You to eyckles For This Useful Post: | ||
gtziaf (09-12-2011)
| ||
|
#23
09-23-2011, 01:18 PM
|
||||
|
||||
|
Re: Alpine A110 1/24 - Acropolis 1970
It 's long time ago, than my previous update, so this is my work on engine and suspension parts...
First of all, I correct, a little bit, the chassis scheme (the engine base) 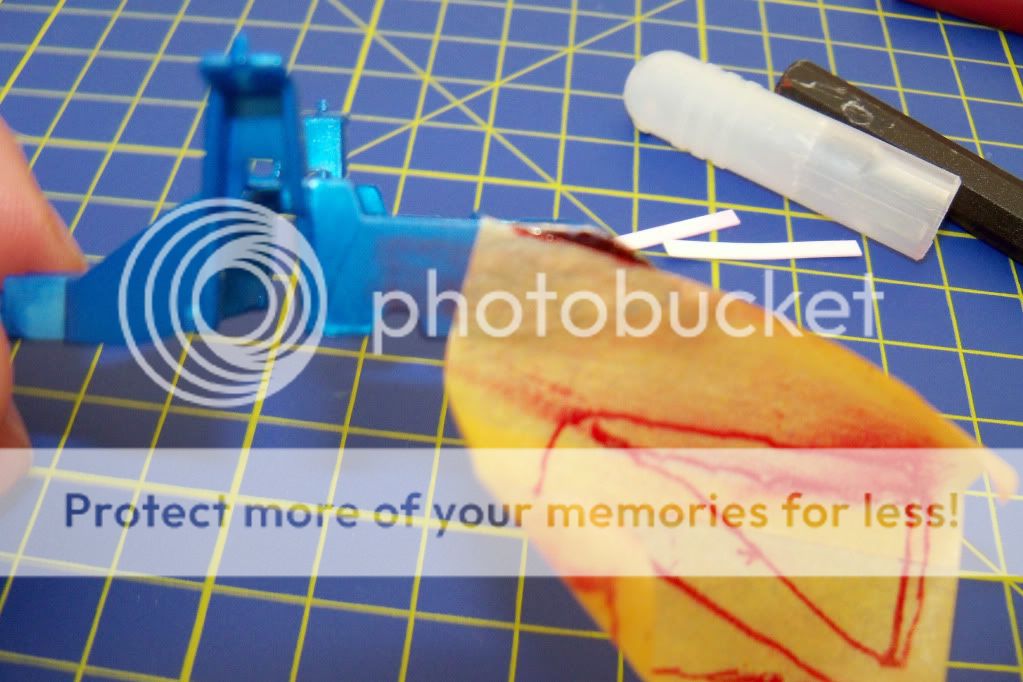 Also, I make an update to shocks... 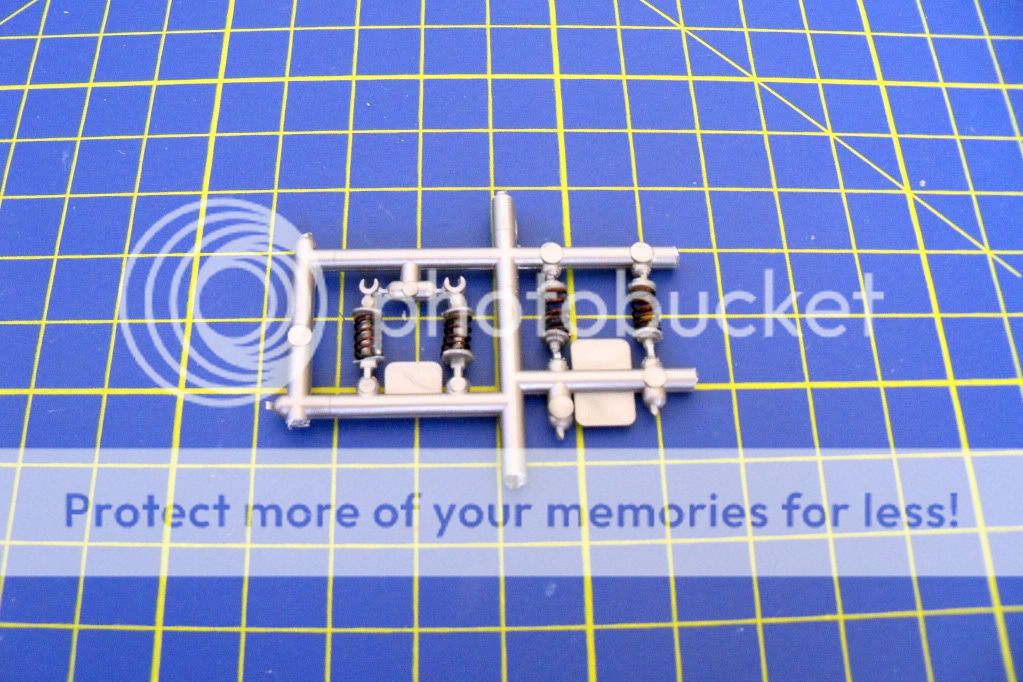 For Next, I worked in engine parts and paint it with Alclad and Humbrol colors. 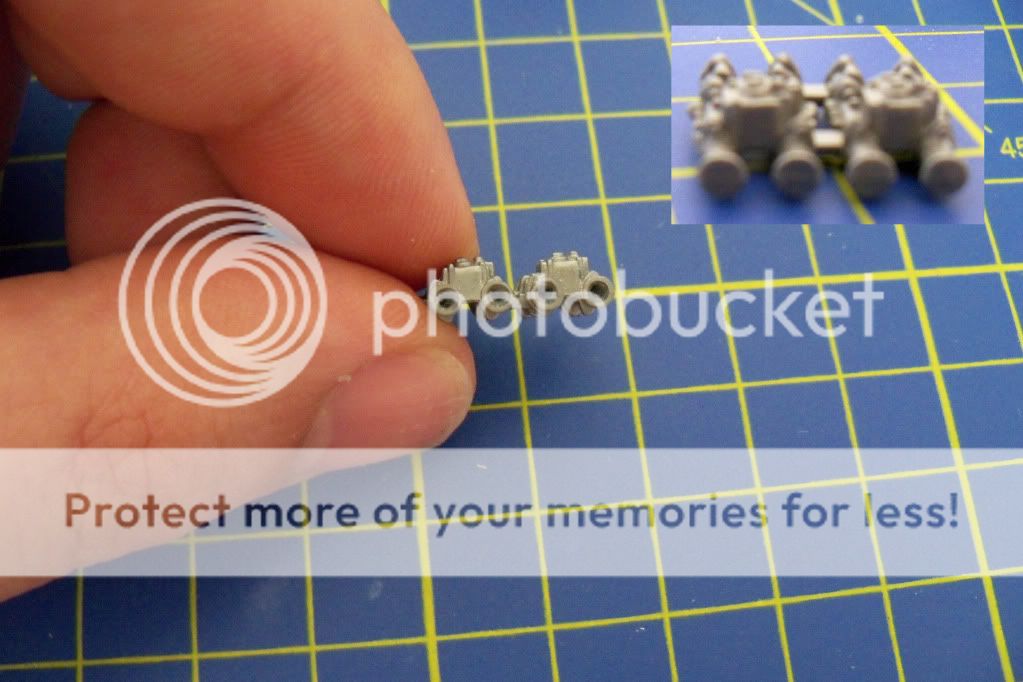 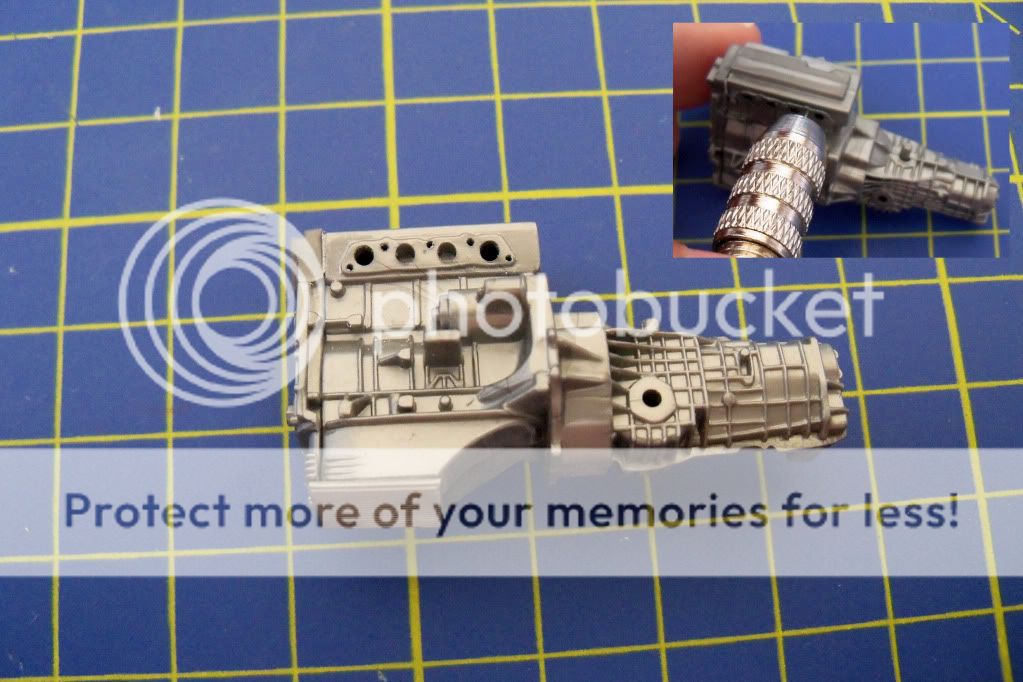 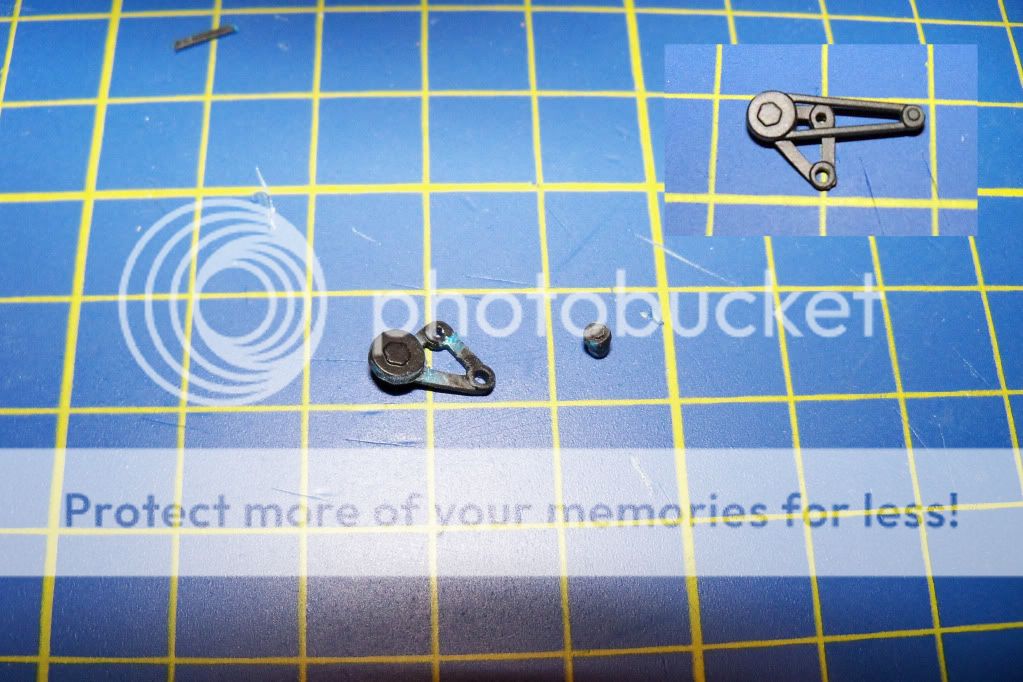 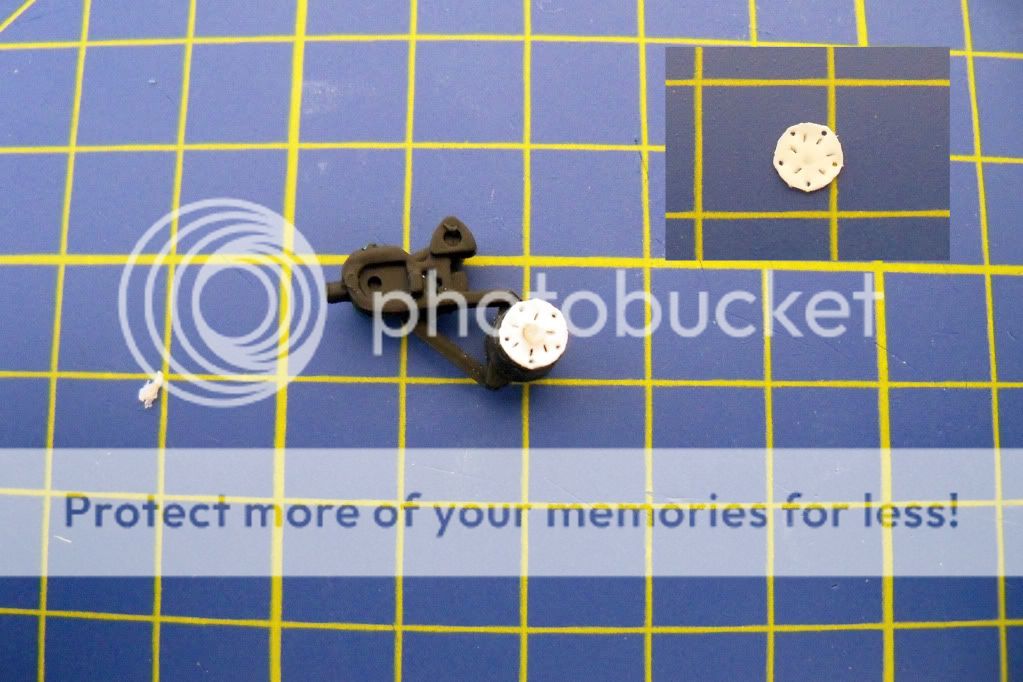 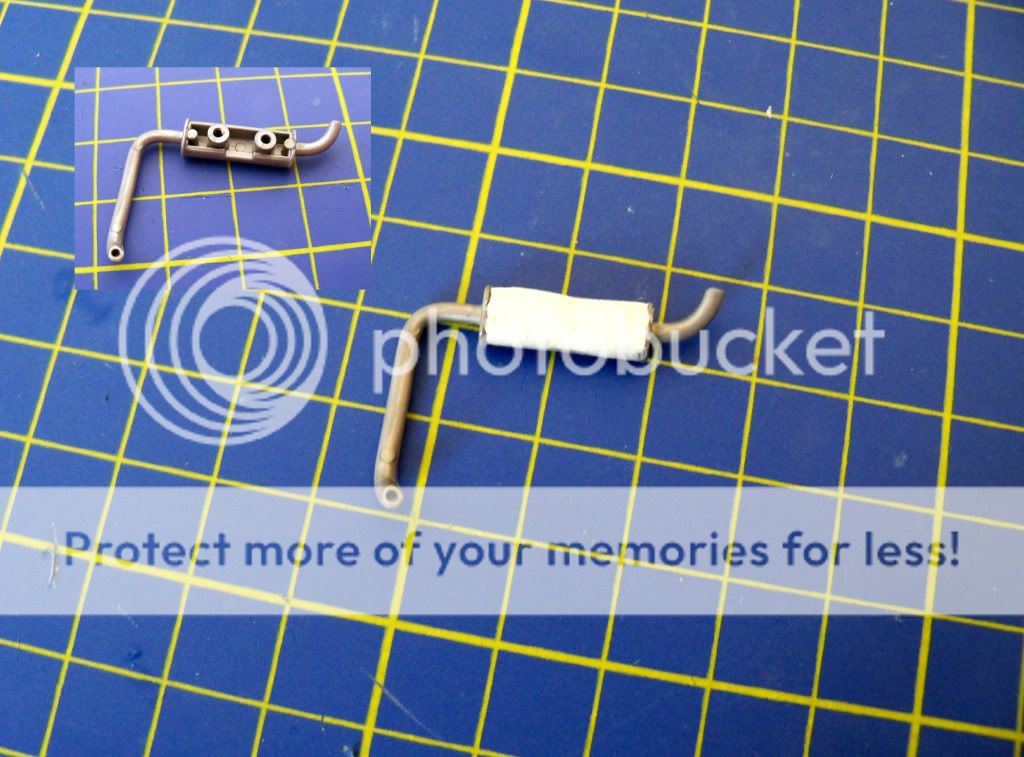 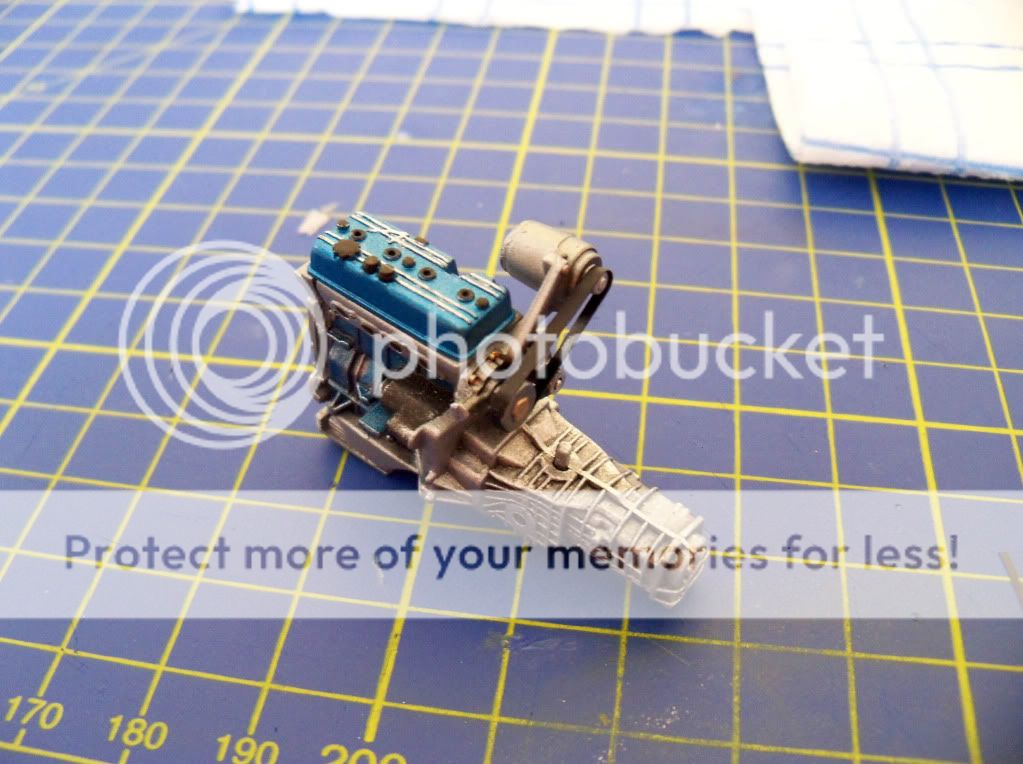 After that I worked in chassis main assembly. I add some bolts to suspension arms, I insert the brake lines and throttle wire and finnaly the engine attached to the chassis. 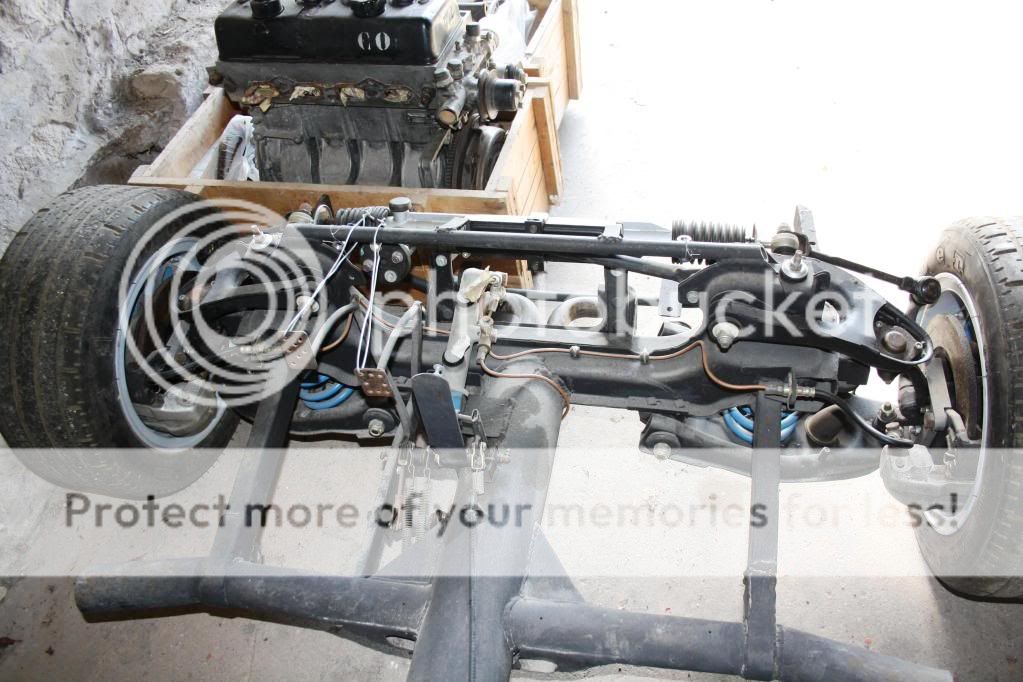 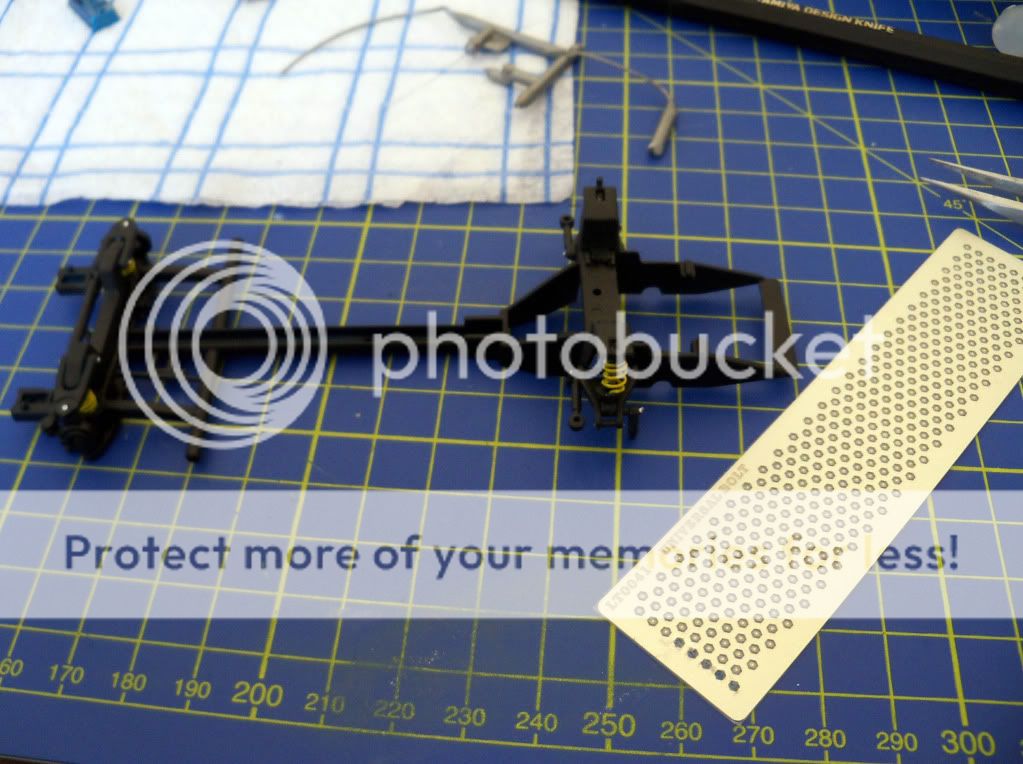  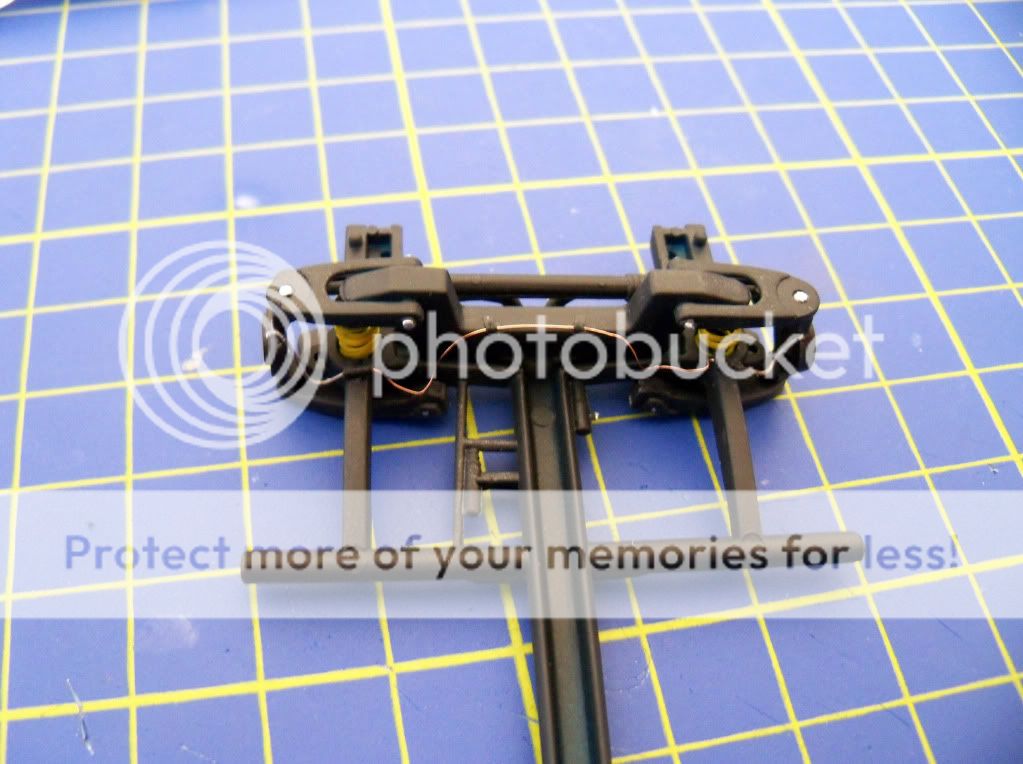 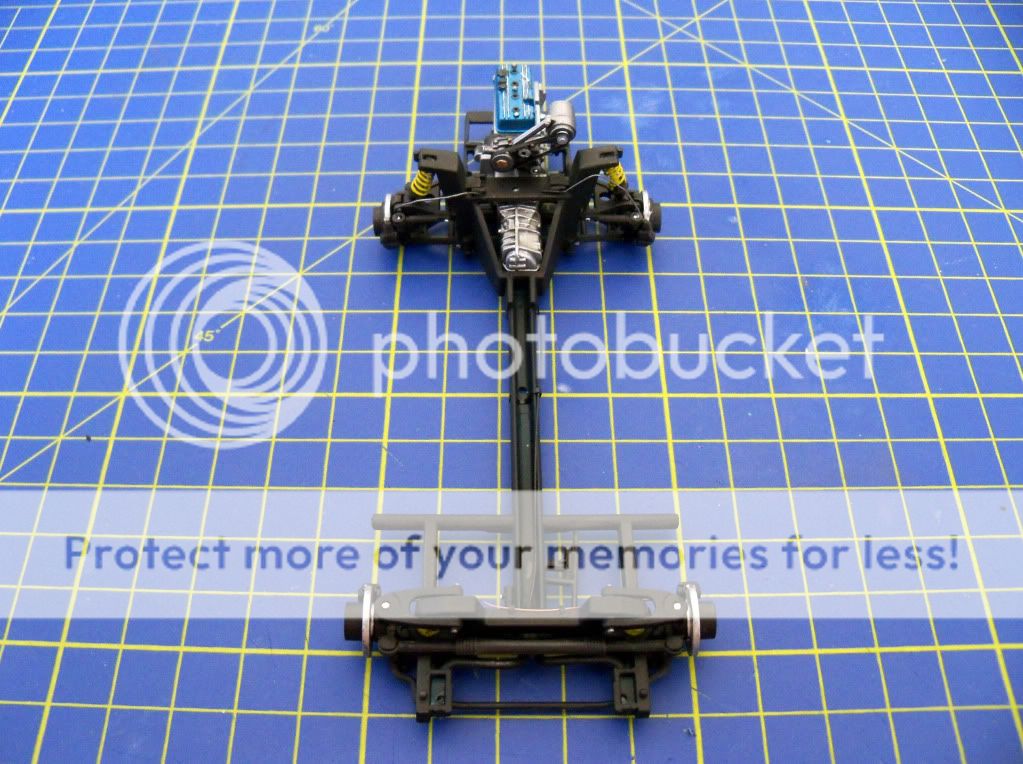 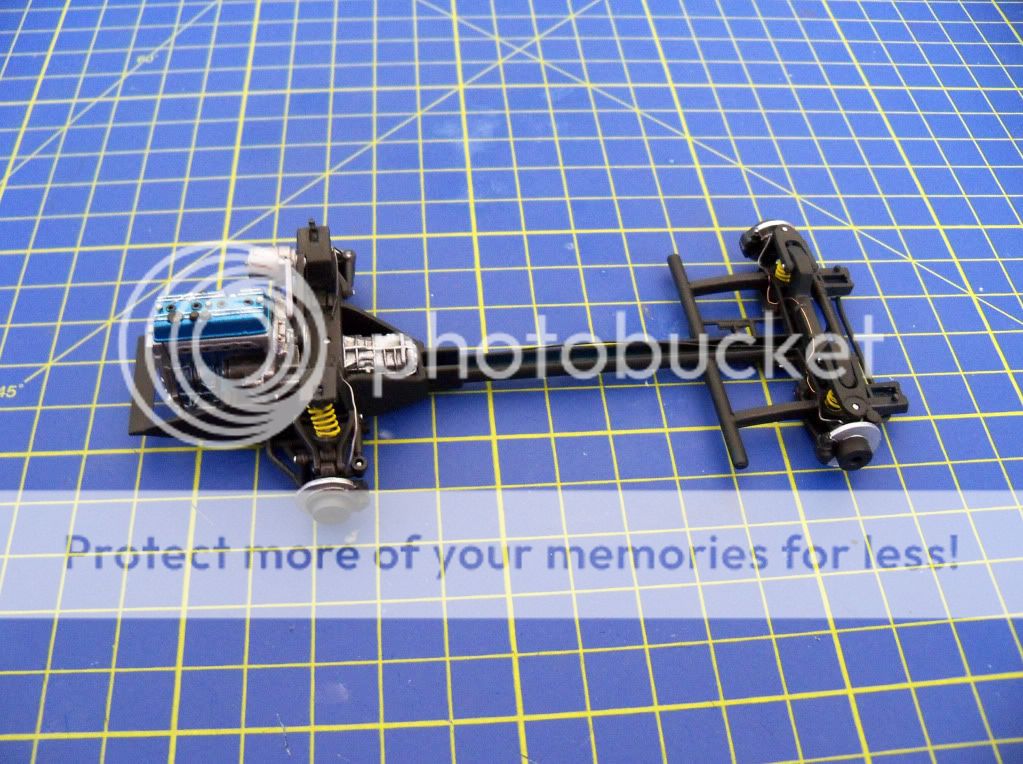 Some engine wires and interior work, will follow... Hope you like it... With best regards and wishes for a nice weekend to all in this great community.
|
|
#24
09-25-2011, 05:14 AM
|
|||
|
|||
|
Re: Alpine A110 1/24 - Acropolis 1970
Fantastic job you are doing.
I´m enjoying a lot.
|
|
#25
09-25-2011, 05:52 AM
|
||||
|
||||
|
Re: Alpine A110 1/24 - Acropolis 1970
Quote:
|
|
#27
09-29-2011, 06:23 AM
|
||||
|
||||
|
love the detail work on dash and interior i wish tamiya had done their homework on the rally specs of this car !
the early cars had a tube backbone chassis the rear suspension was lifted from the Renault 8 Gordini and had swing arm axles not wishbones the coil springs had 2 shock absorbers ether side and not in the centre this is not a criticism of your work but of tamiya who picked the wrong car to base this kit on i know you are making this model to a time scale and when built should be a cracker keep up the very good work
|
|
#28
09-29-2011, 12:40 PM
|
||||
|
||||
|
Re: Alpine A110 1/24 - Acropolis 1970
My friend thanks for your support... For sure Tamiya make a lot of mistakes, with this kit and I don't know so much for Alpine's. So my build have many "issues", compare with the real car, but I 'll try my best to represent a good model...
|
|
#29
10-05-2011, 02:49 PM
|
||||
|
||||
|
Re: Alpine A110 1/24 - Acropolis 1970
Hello again, with Alpine's next update...
Some interior work... 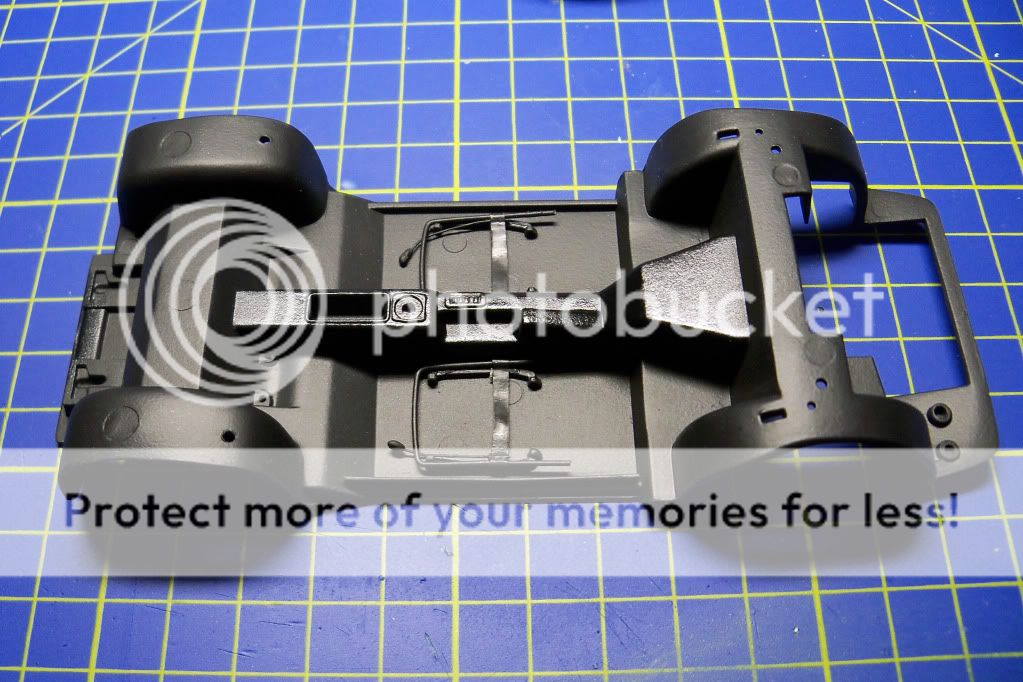 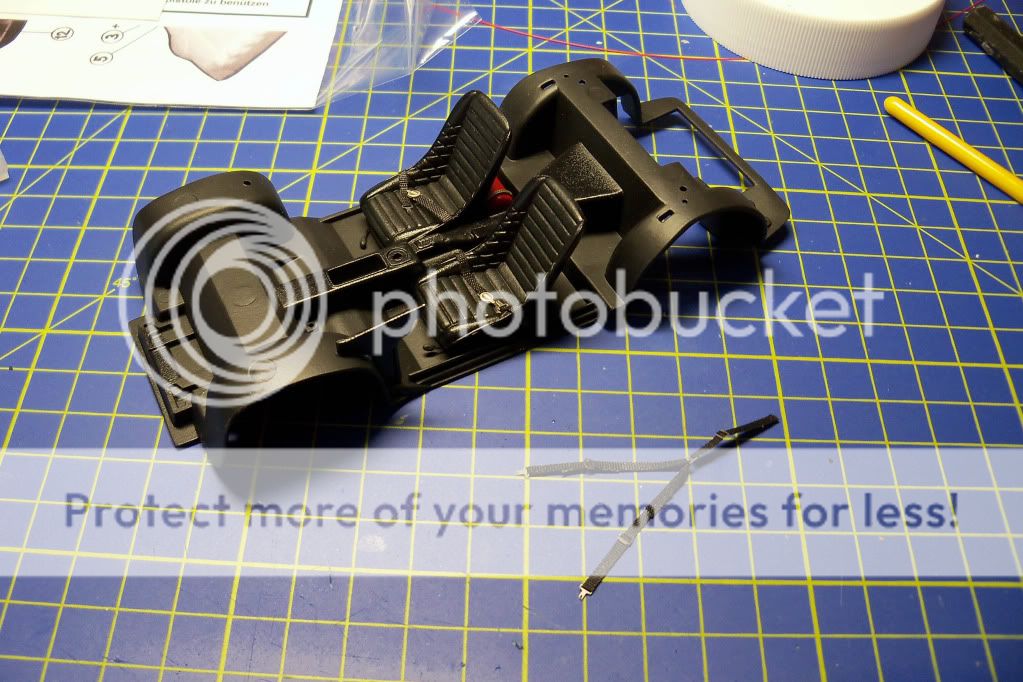 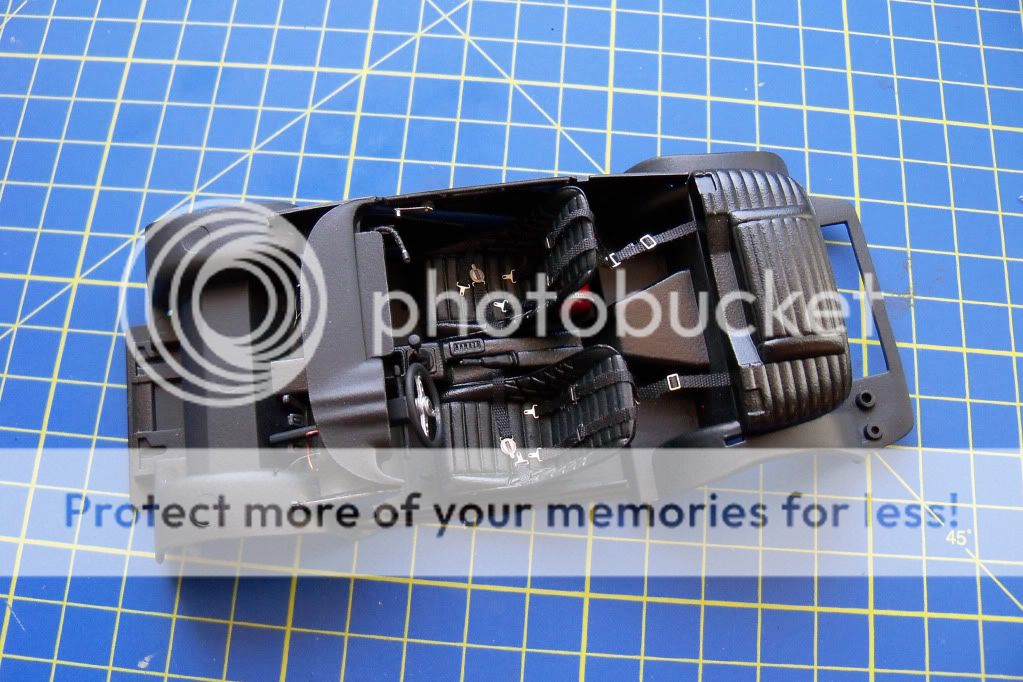 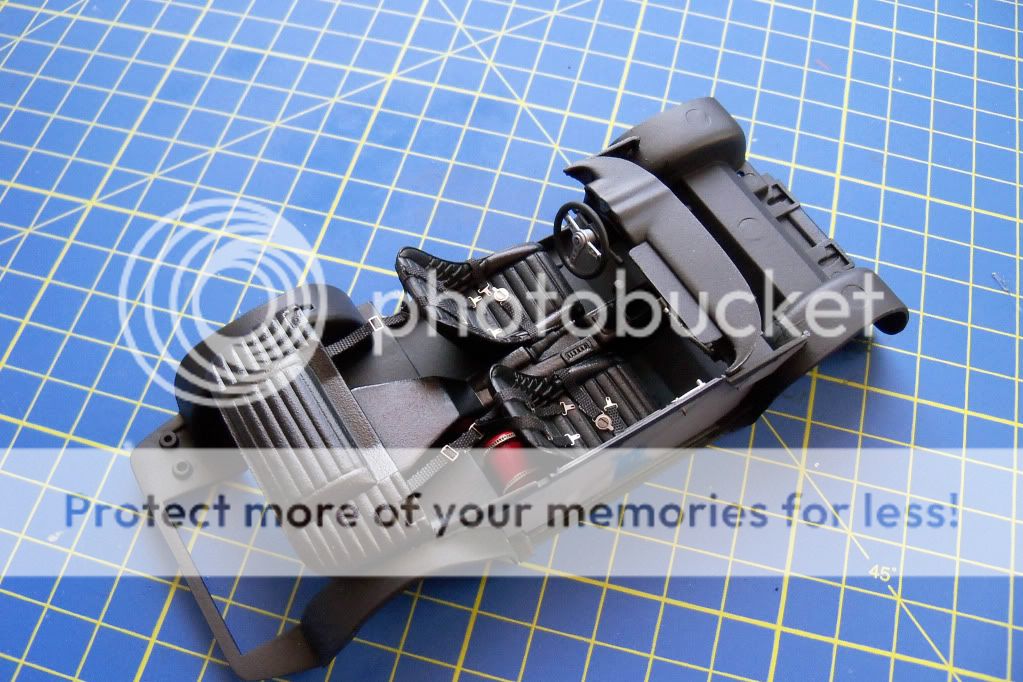 And the engine's work... First I make some engine parts from spares and scratch. 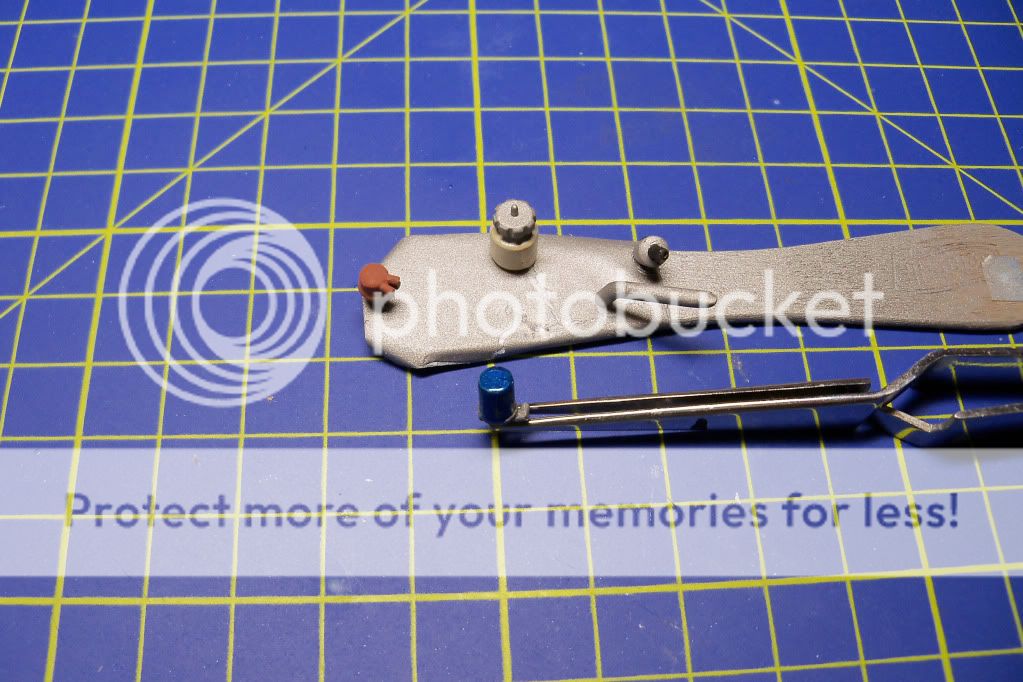 And, then I attached the engine in chassis.  Finally I add some details in the engine... 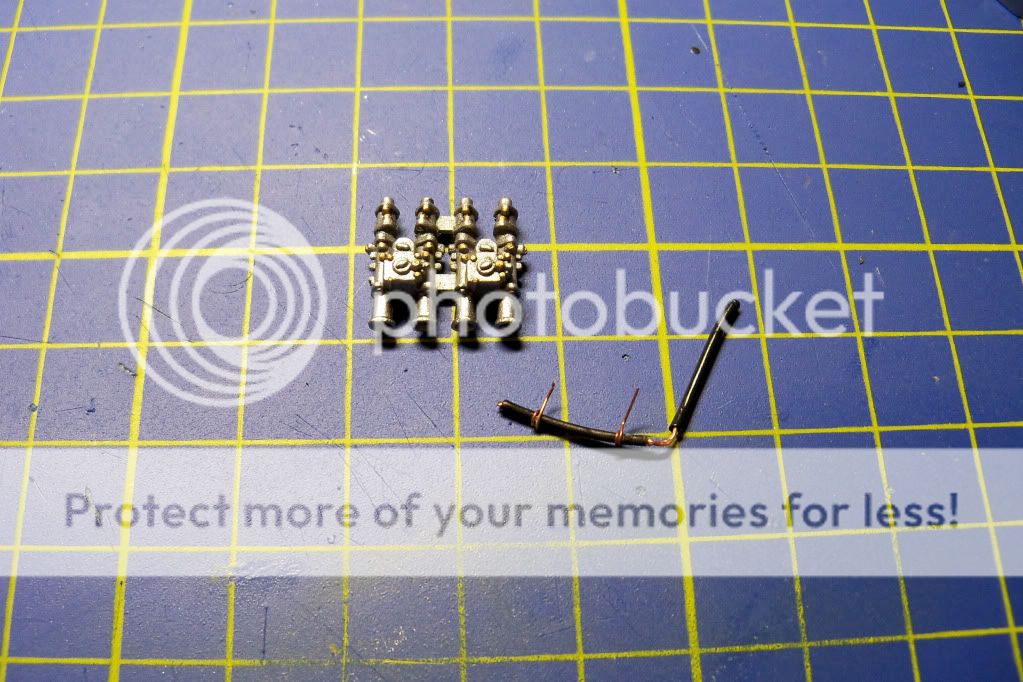  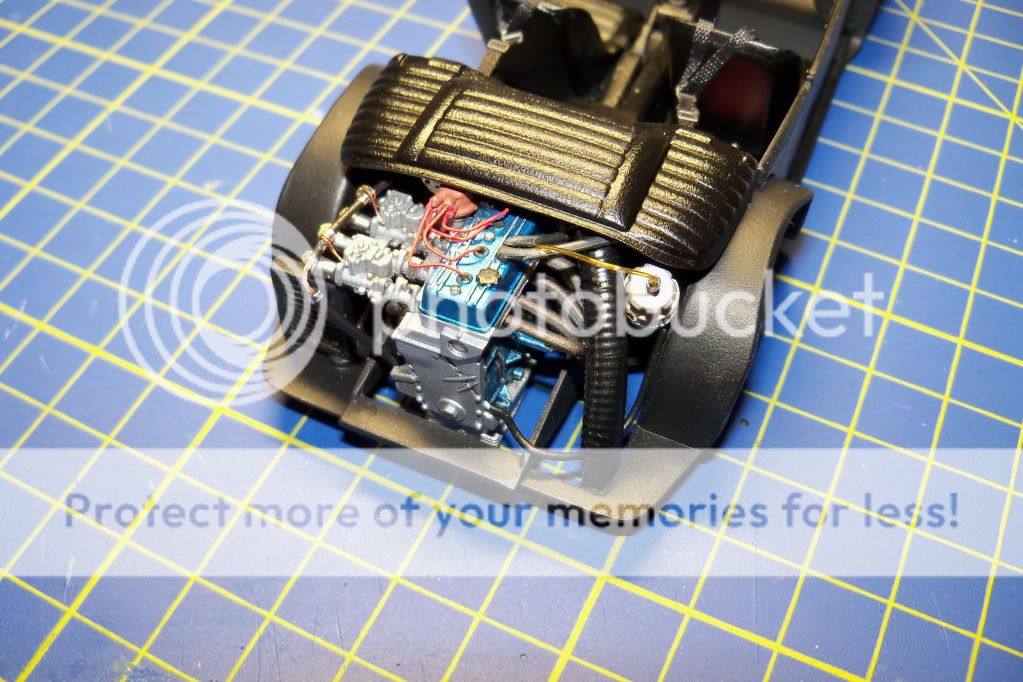 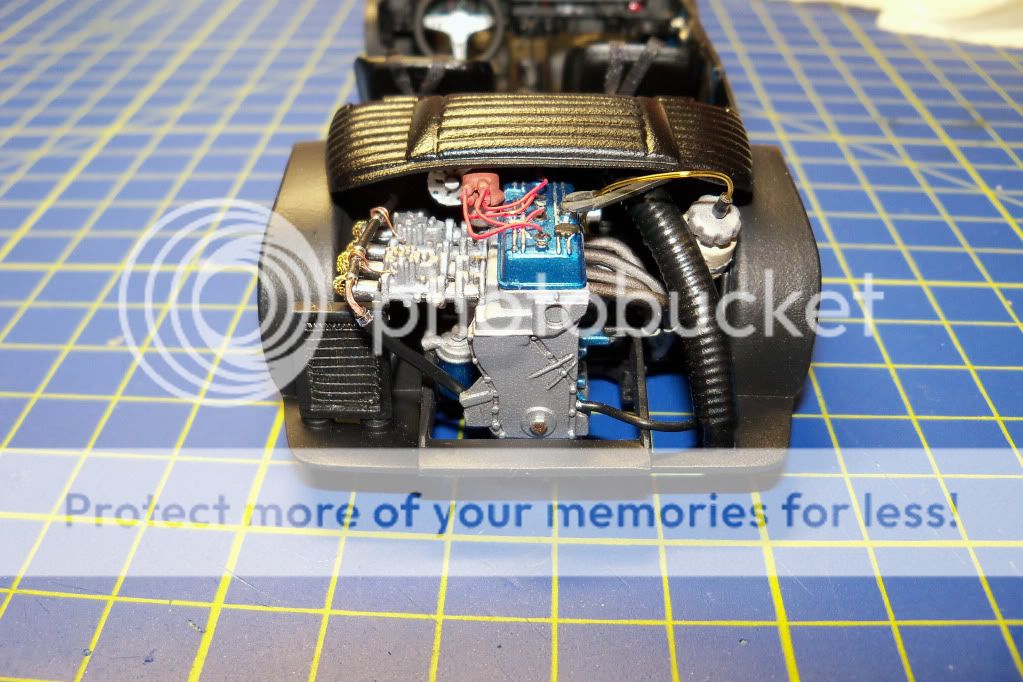 Hope you like it. Comments and opinions are welcome. Thanks for your time
|
|
#30
10-09-2011, 01:17 PM
|
||||
|
||||
|
Re: Alpine A110 1/24 - Acropolis 1970
This is the last update with my Alpine...
The work starts with the additional lamps... 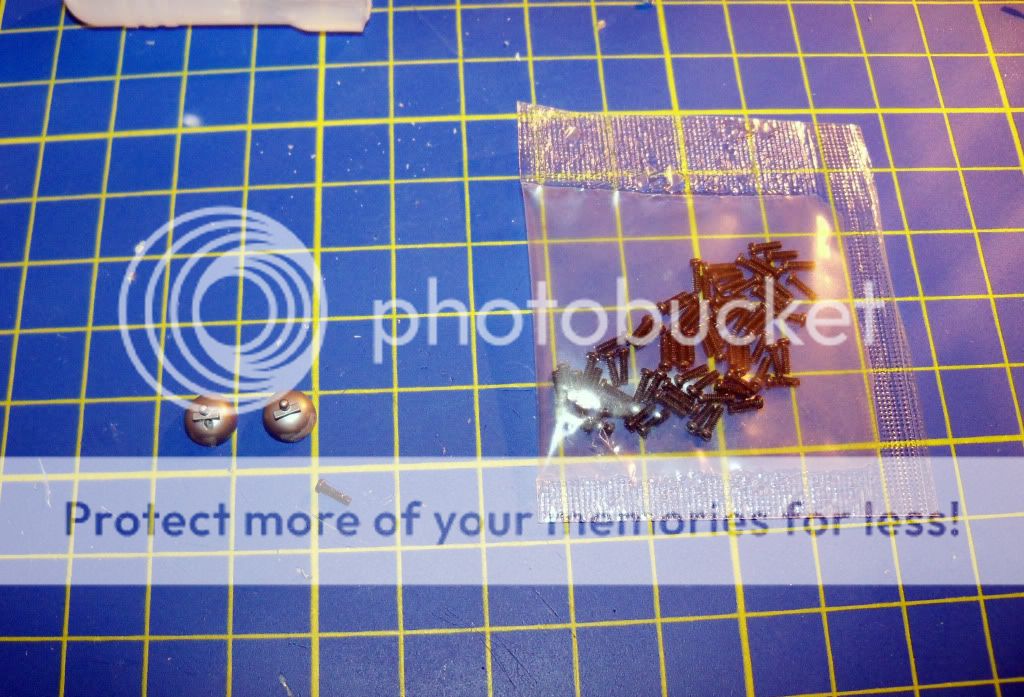 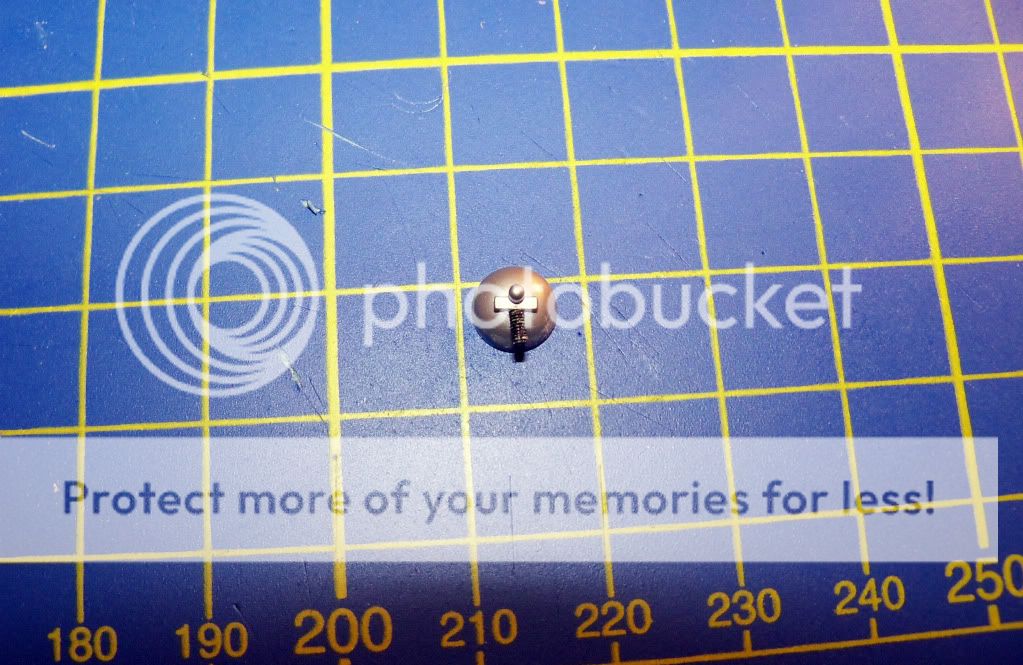 ...continues with the rims and wheels (I add valves from 0,5 rivets)... 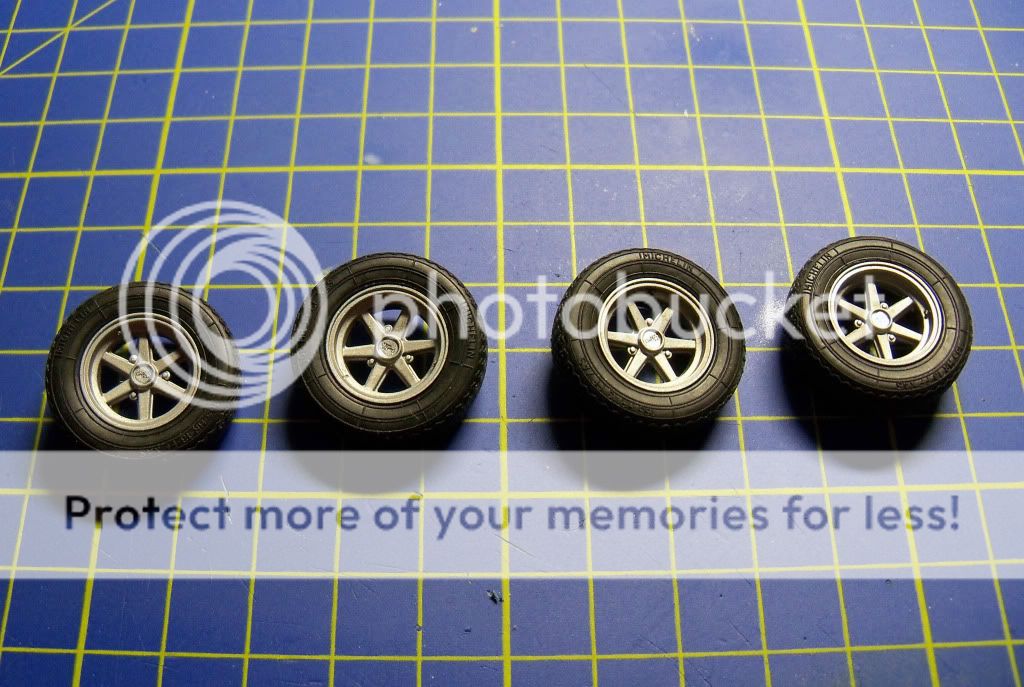 After that, I move to interior and I make a net case for helmets and headphones. Not sure if is accurate, but finally the addition, in my opinion, improves the interior... 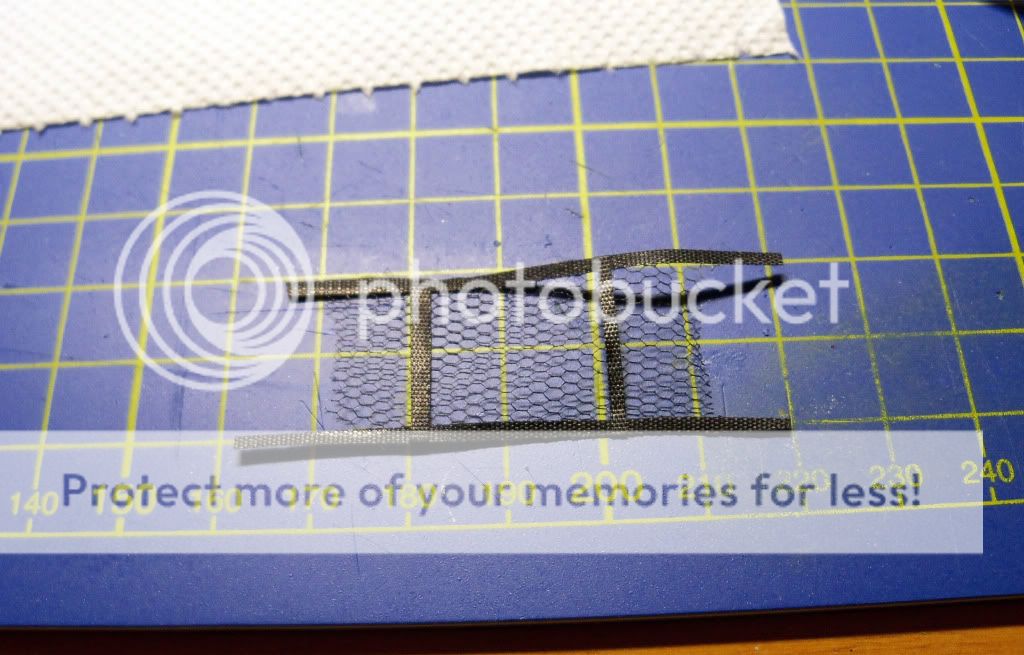 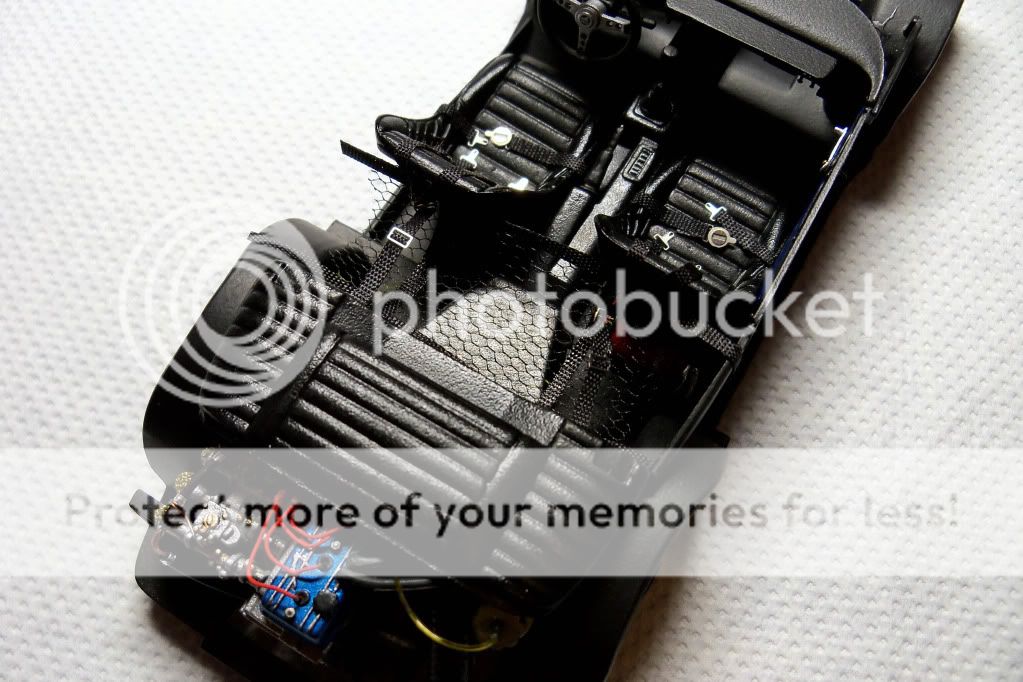 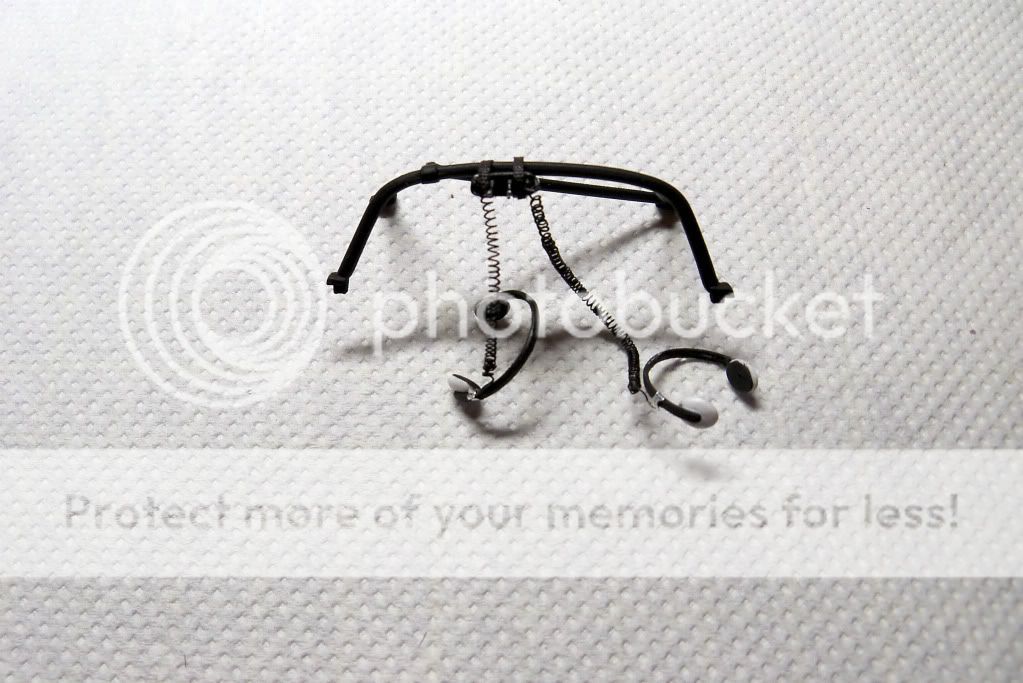 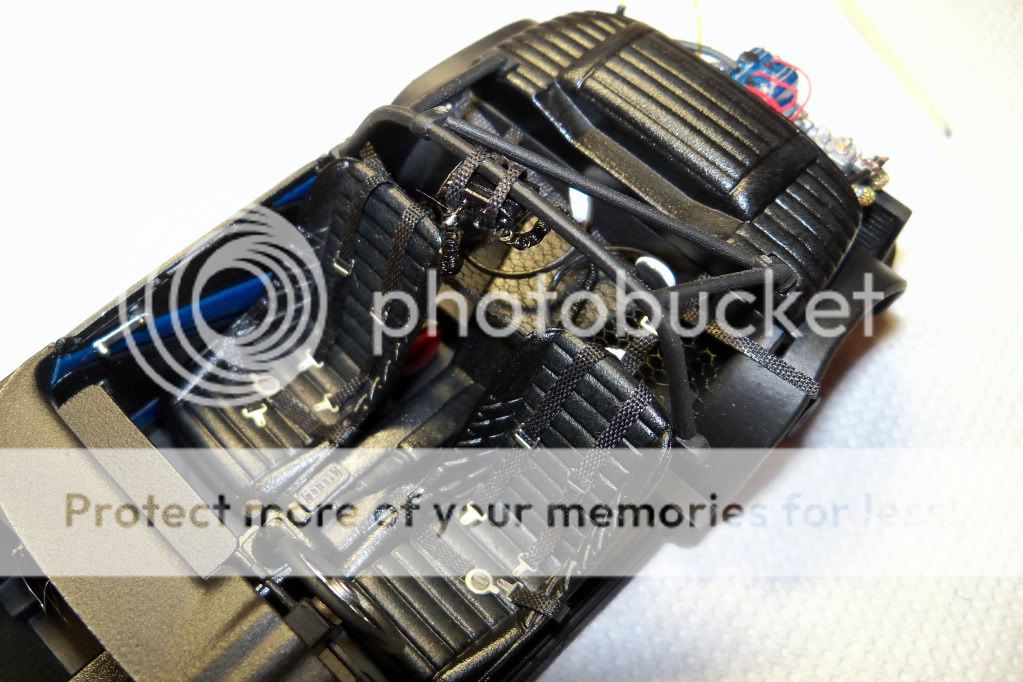 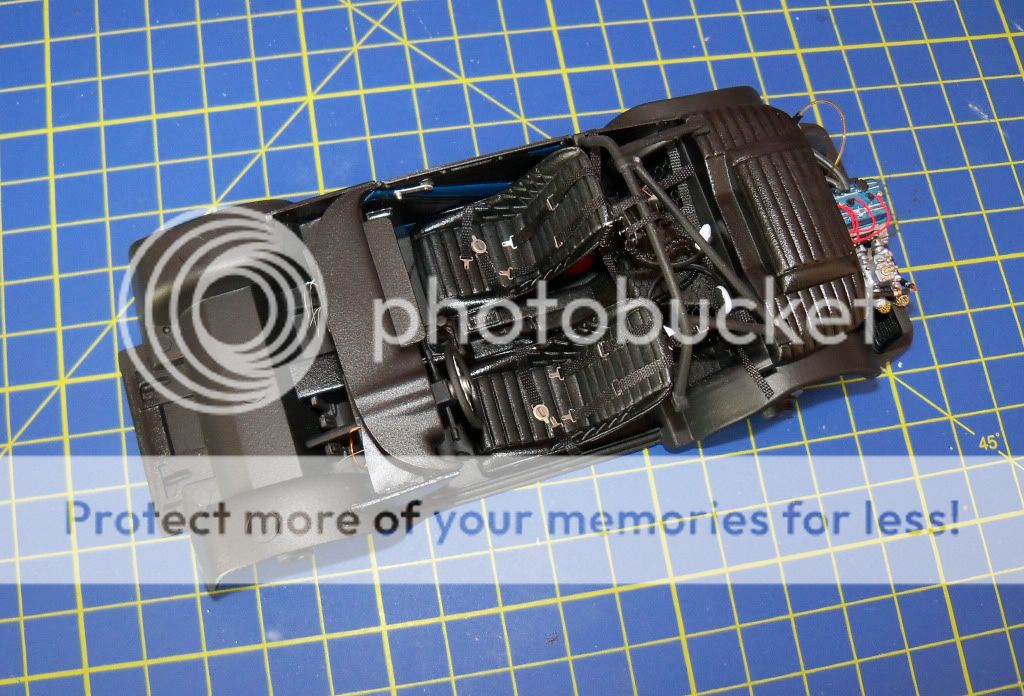 And the construction next stage, is the decals work. Some tamiya decals and some custom for 1970 Acropolis. 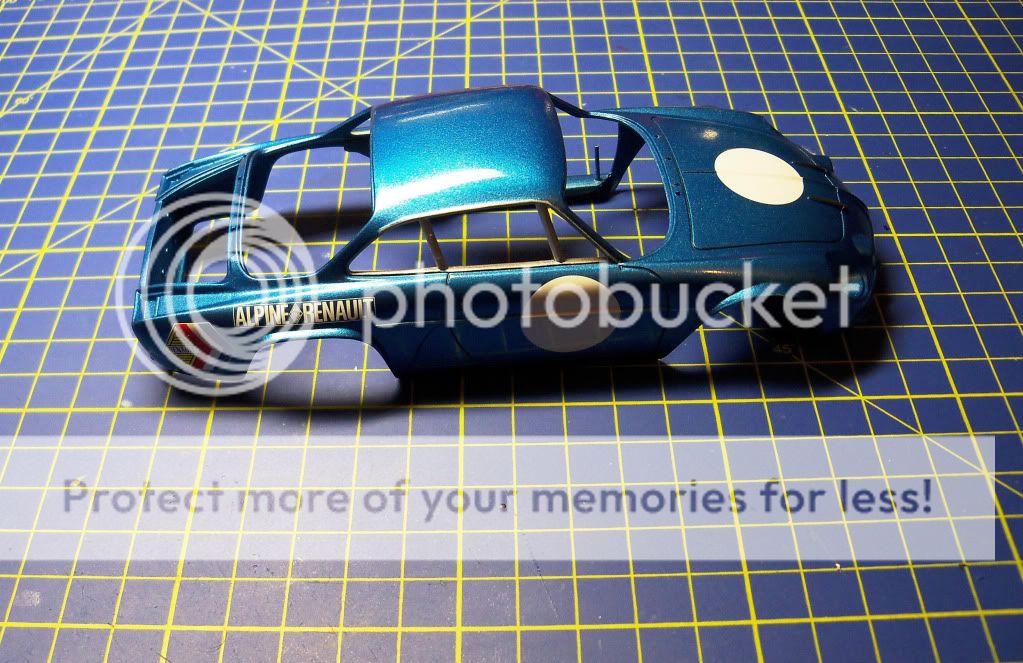  I didn't seal the decals with clear, because my source (a great friend and modeller - Est1976) tell me that the 70's logos are almost matt. The only thing I do, it to semi-seal them, with wax Some exterior details follows... 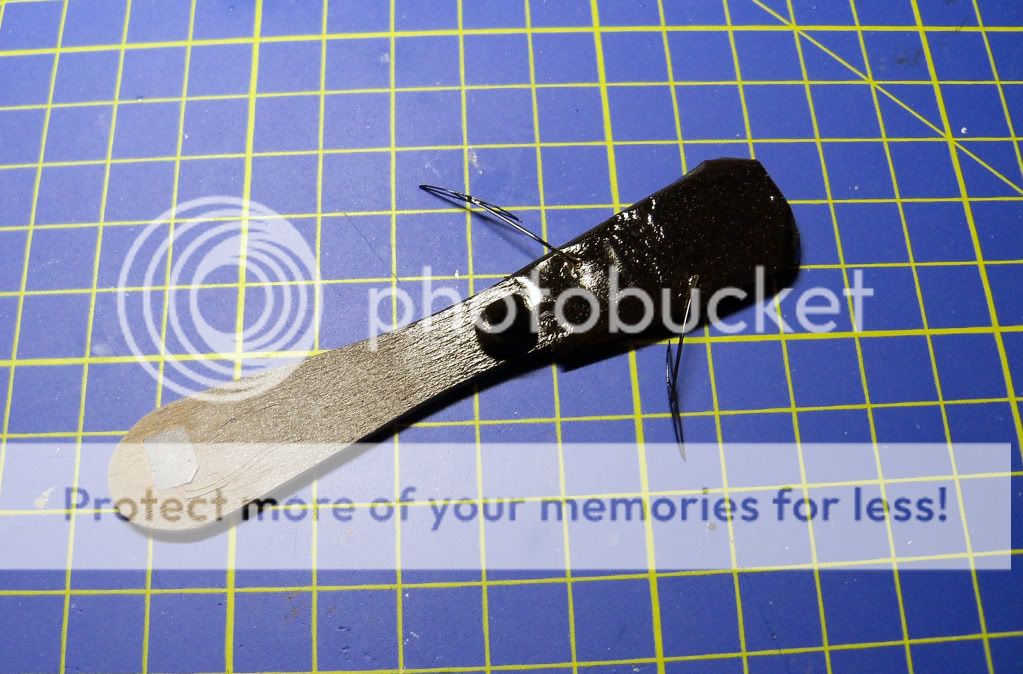 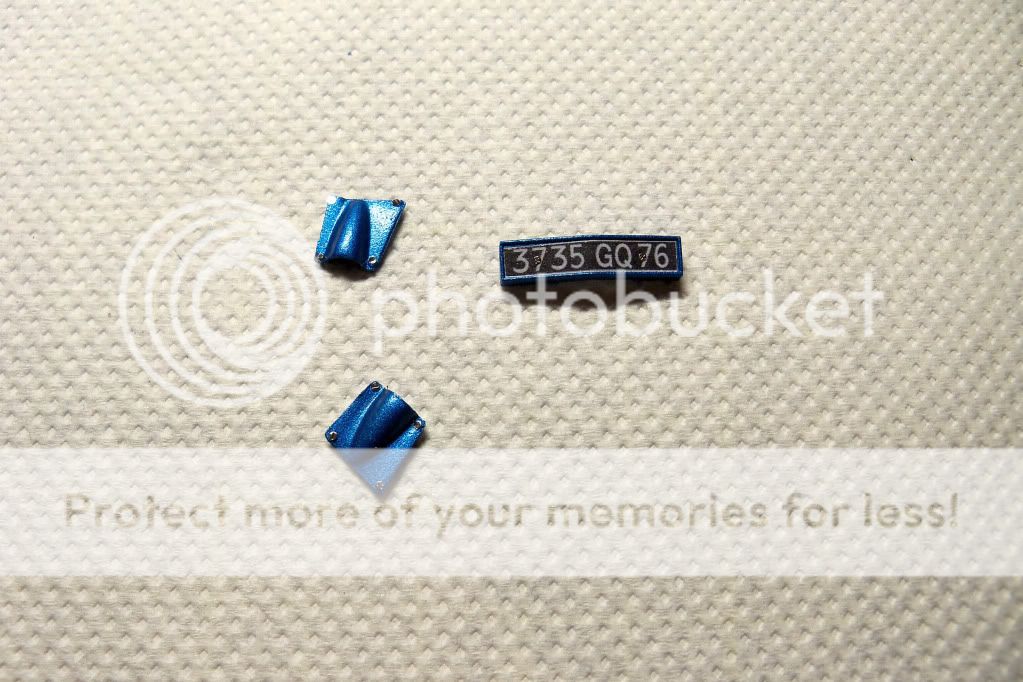 And finally I manage to close the body with the chassis. Not the easiest work, but all done... 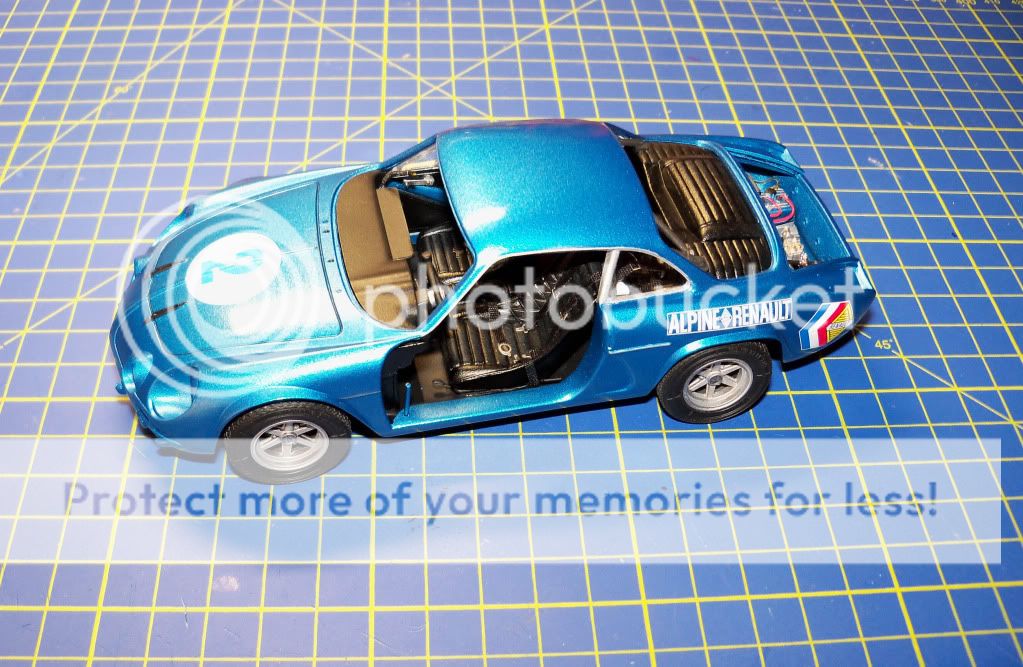 After that, I add some extra components and wires in the engine bay and finish the rear hood... 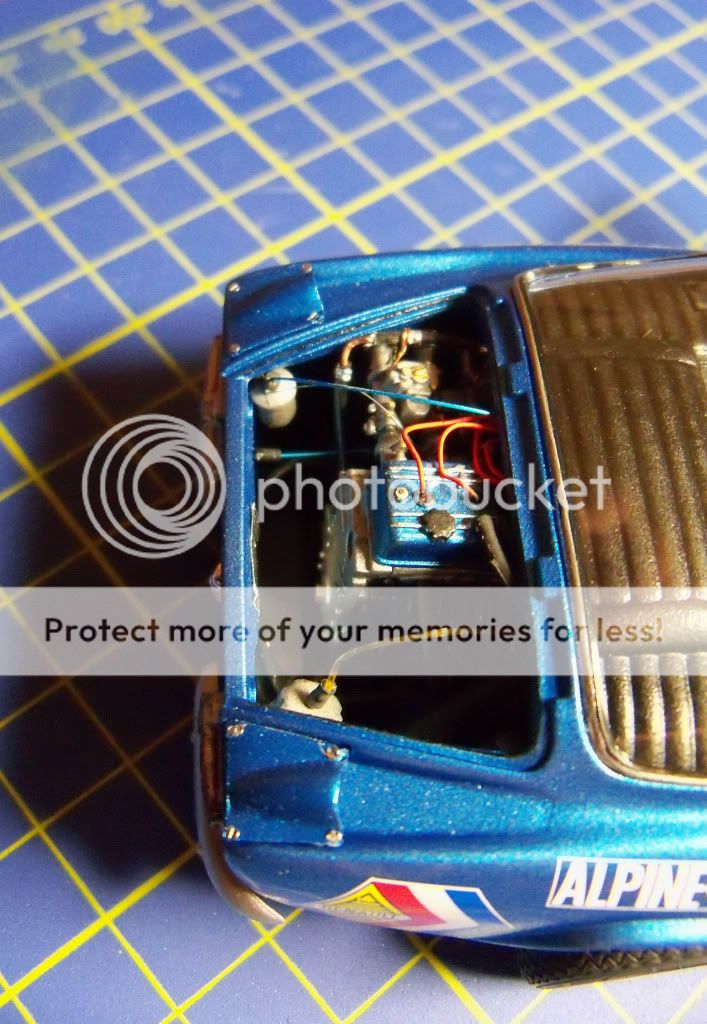  In next post, I 'll present it, finished... Hope you like it... PS. Sorry for the lots of photos, but it's a big update... Have a nice week... With best regards George
|
| ||||||||||||||||||||||||||||||||||||||
|
POST REPLY TO THIS THREAD |
 |
|
|


