|
|
| Search | Car Forums | Gallery | Articles | Helper | Air Dried Beef Dog Food | IgorSushko.com | Corporate |
|
|||||||
| WIP - Street Post topics for any "Works In Progress" street vehicles projects in this sub-forum. |
 |
 Show Printable Version | Show Printable Version |  Subscribe to this Thread
|
|
|
Thread Tools |
|
#17
 11-20-2011, 06:03 AM
|
||||
|
||||
|
Re: 1/43 1950 356 cab conversion
Very nice indeed.
Can you tell more on the working hinges you made for the doors and hoods? Did you make your own hinging mechanism or did you improve the kit parts? I can imagine that it is not an easy task on this scale. Furthermore, how did you solder the brass parts onto the white metal? It is known that white metal will melt rapidly, so what is the maximum heat you can use on this material? 
|
|
#18
11-20-2011, 07:29 PM
|
||||
|
||||
|
Re: 1/43 1950 356 cab conversion
Dominique, I made most of the hinges. For the front trunk I used the hinges from the kit and soldered .005 tubing to the body. I also add some bondo blocks inside the body that the hinges rub against to make some friction to hold the lid up. The rear lids hinges were replace with copies I cut from brass sheet and made a c channel that I used to mount to the body. The doors I first made up some door jambs. To those I add a piano hinge made from 4 peices of .005 tubing soldering 2 peices to the jamb side first. Then I drill holes in the door where the hinge parts will meet. I then take the 2 peices of tubing that will mount to the door and add some drips of solder. Then I pin those tubing peices to the other peices on the door jamb and hang the door lining up the drilled holes with the solder drips. Then add enough heat to through the holes in the door to join the hinge peices to the door without fusing the entire hinge together. I hope this makes some sence
 The maximum heat you can use will depend on the thickness of the material. I use a 40watt iron and will add heat to the brass and use the molten solder to heat white metal and not the iron.
|
|
#20
11-21-2011, 02:15 PM
|
||||
|
||||
|
Re: 1/43 1950 356 cab conversion
Quote:

|
|
#21
11-23-2011, 06:48 AM
|
||||
|
||||
|
Re: 1/43 1950 356 cab conversion
Lovely model and very classy modelling. I like your approach, if the kit part is poor or missing make your own. I try to work the same way, the results will hopefully be worth all the extra effort.
Cheers, Lee.
|
|
#23
11-23-2011, 10:30 PM
|
||||
|
||||
|
Re: 1/43 1950 356 cab conversion
Lee, I like your approach too... I used your hinge technique for making hinge supports by folding sheet brass I saw on your GTO build
 Yup... The steering is a little tricky getting the linkage right. Hooking it all up at the end is going to be a pain. Here's a pic of the Bosica wheels from the kit. I polished the hub caps and I'm using whitewalls I got from a diecast. 
|
|
#24
11-24-2011, 07:44 AM
|
||||
|
||||
|
Re: 1/43 1950 356 cab conversion
Joe, the wheels look amazing quality, are they resin centres on turned rims?
I was considering giving modelling a rest after my DBR1 build but quite like the idea of trying a 1/43 project; how's the quality of the bosica kit? Cheers, Lee
|
|
#25
11-28-2011, 06:38 PM
|
||||
|
||||
|
Re: 1/43 1950 356 cab conversion
Lee, The wheels have turned rims with formed photoetch centers. Those wheels are awesome!!! The quality of the parts in the Bosica kits is great. They come with alot of photoetch parts, many turned parts, nice white metal castings and brass or nickel for the doors & lids. There are fitting issues with the doors and I end up replacing the floor. Considering that they are @ 30 years old now they are great. There has been a few updates on this kit over the years with subtle body changes and better detail on some of the parts. If you ever end up building a 1/43 356 I have molds for some improved parts.
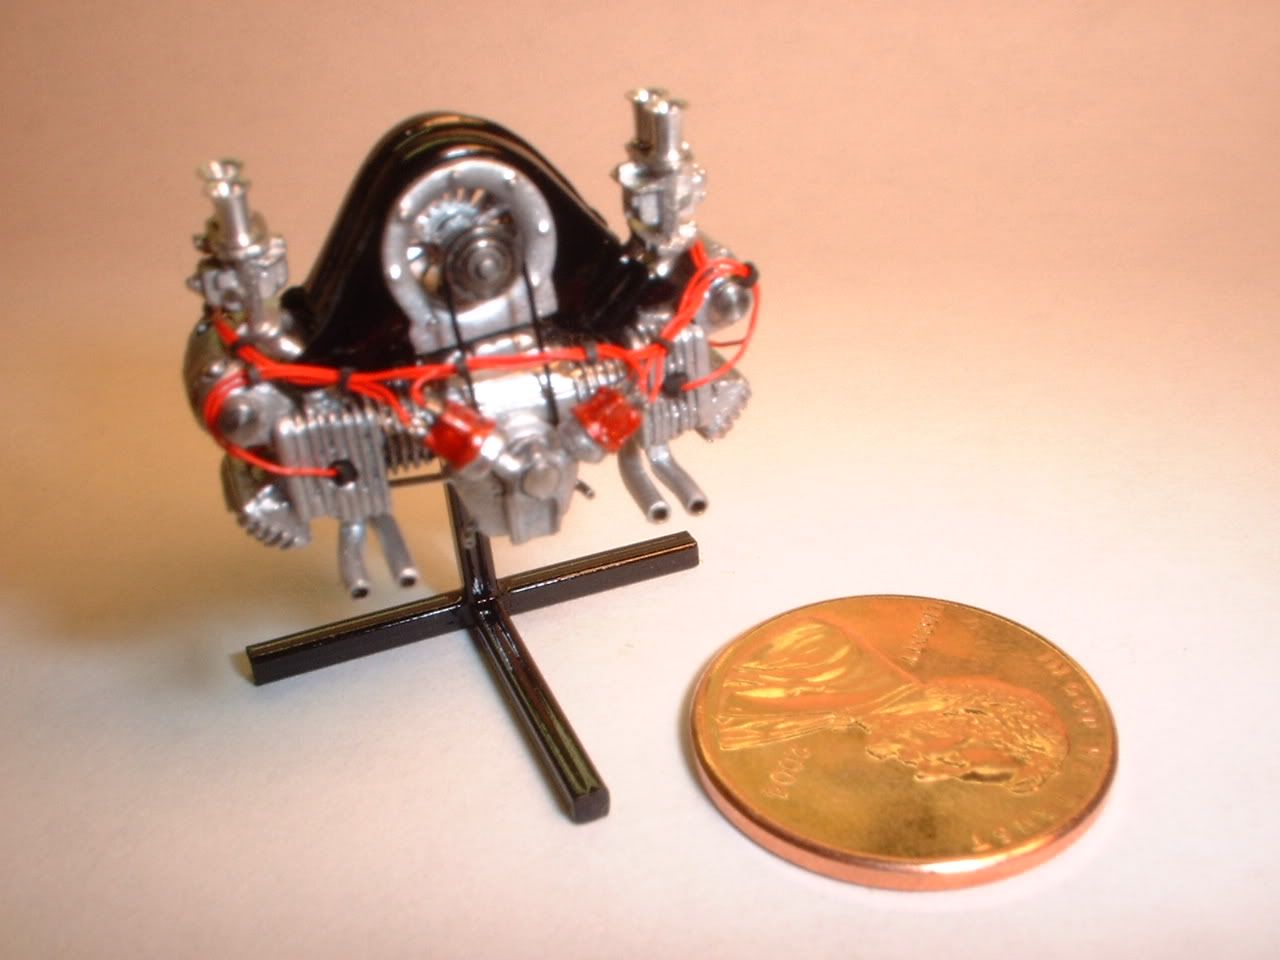
I finished detailing the motor this week. I'm happy with how it turned out but a little dissapointed with how crowded it became once everything is in place. I had carb linkage to install but ran out of room. All the inginition parts need to be a hair smaller next time. 
|
|
#29
11-28-2011, 07:13 PM
|
||||
|
||||
|
Re: 1/43 1950 356 cab conversion
Hi Tom, I'm planning on doing the #159 Fletcher Aviation car from 1953. I may end up doing the #160 car too. There is a pit scene pic of the 2 cars with their motors out and being worked on in the dirt. I'd like to model the whole scene but I'll start by doing the 159 car first.
|
|
#30
11-28-2011, 07:28 PM
|
|||
|
|||
|
Re: 1/43 1950 356 cab conversion
Quote:
Sounds very cool. Don't forget to add a few palm trees. I think they make some real nice ones in 1/48th scale for military scenes. Tom Tanner/Scale Designs/Ferrari Expo 2012-Chicago March 2012
|
| ||||||||||||||||||||||||||||||||||||||
|
POST REPLY TO THIS THREAD |
 |
|
|


 Here's a pic of another motor next to a penny