|
|
| Search | Car Forums | Gallery | Articles | Helper | Air Dried Fresh Beef Dog Food | IgorSushko.com | Corporate |
|
|||||||
| WIP - Street Post topics for any "Works In Progress" street vehicles projects in this sub-forum. |
 |
 Show Printable Version | Show Printable Version |  Subscribe to this Thread
|
|
|
Thread Tools |
|
#226
 05-09-2008, 11:20 AM
|
|||
|
|||
|
Re: WIP: 2CV Rock and Roll-Bar
Hi Stevenski,
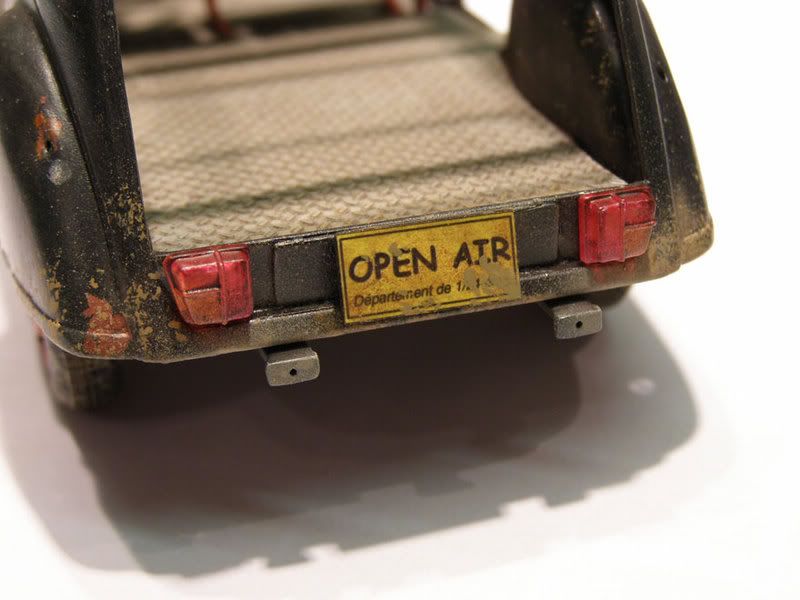
awesome work and great attention to details you show in this build, I enjoy every update. One little thing, though: the taillights need a bit more detail. 2CV taillights are not completely glass, the "lip" needs to be painted flat or semi gloss black to simulate the plastic. Quote:
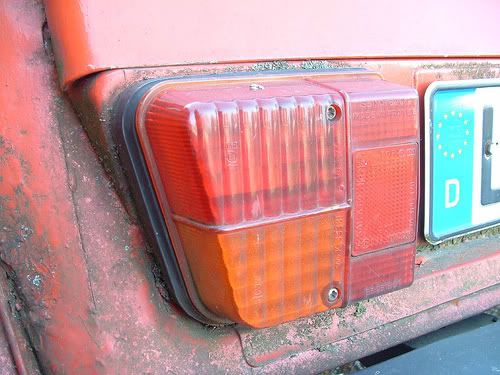  Cheers PS: I really like the license plate 

|
|
#227
05-09-2008, 11:45 AM
|
||||
|
||||
|
Re: WIP: 2CV Rock and Roll-Bar
I'm not sure painting it would cut it.
Off the top of my head, I'd say maybe sand down the clear part a bit so that the plastic lip is thinner, then mounting that onto sheet styrene that has been shaped give an additional lip, which can then painted black.
__________________
AF's Guidelines Read them. __________________  Currently in the process of re-hosting my photos. If any go missing, drop me a PM.
|
|
#228
05-10-2008, 05:21 AM
|
||||
|
||||
|
Re: WIP: 2CV Rock and Roll-Bar
Damn! You're getting pretty good at this I'd say. Just curious, is your earlier weathering still standing up? I can't see anything wrong with it mind you, but the latest stuff is just off the hook. The last pic from above looks superb.
__________________
Mark R
|
|
#229
05-10-2008, 07:27 AM
|
||||
|
||||
|
Re: WIP: 2CV Rock and Roll-Bar
Quote:
__________________
 gio gio
|
|
#230
05-10-2008, 03:34 PM
|
||||
|
||||
|
Re: WIP: 2CV Rock and Roll-Bar
Thanks gents - I'm glad you like it.
Thanks for pointing out the mistake  I have blackened the edges of the lights with a marker pen - it was all I could do since the lights are glued in place but it looks OK. I have blackened the edges of the lights with a marker pen - it was all I could do since the lights are glued in place but it looks OK.Quote:
1. The hood is primed and painted with satin black acrylic paint (Vallejo). It was then dry-brushed all over with a dark grey to add highlights and to age the finish. The hood was thinned out from behind in a few places with my Dremel, held over a candle to soften the plastic and then dented with the handle of my hobby knife. I added traces of bare metal at the bottom of the dents with Humbrol Aluminium Metalcote and the tip of a toothpick dots and scratches. This was followed up with little dabs of rust colored paint added to the dents and other places using the ripped off corner of a coarse dish washing sponge. The whole hood was given a wash of artist oils paint (Raw Umber). For this project I added some mud splatters using a mud colored paint and the same sponge techniques as for the rust color. Finally it was given a VERY light misting of heavily thinned Tamiya XF-Buff for a dusty kind of look. 2. The underside was given more brutal treatment to reflect how these places really look they are NEVER washed or cleaned. I gave the underside a coat of Vallejo Matte to start things because it gives a better key and finish to the dirty effect I want. Bare metal and rust spots were applied as described above and then it was rusted with a product called Rustall 2-3 randomly applied coats allowed to dry between each. I tried to encourage it to gather along the edges and on the areas that had been Dremeled. This was given a black wash to add depth and them the Rustall Matte stain was applied the same way was the main Rustall. Light orange acrylic paint was applied with a toothpick around the edges of the rust holes and mud platters with a sponge. Finally I applied a very light local application of rust colored MIG pigment and MIG dust pigment. It might sound a lot but the whole operation lasted 30-40 minutes (admittedly with the help of a dehydrator to help speed up drying times) Here's where i am now more or less Head light guards added in place and detailed with some Czech 1/35. I have installed teh oil filler cap and working dipstick I made 2 years ago. 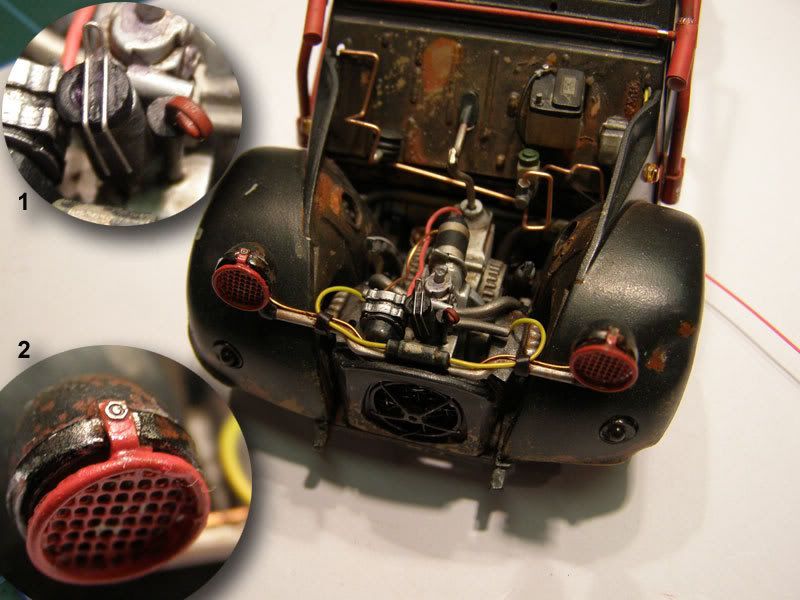 I have tried to reproduce a wiring splice on the main battery cable. The additional ires were CA-ed in place and insulated with a thin strip of Tamiya tape. 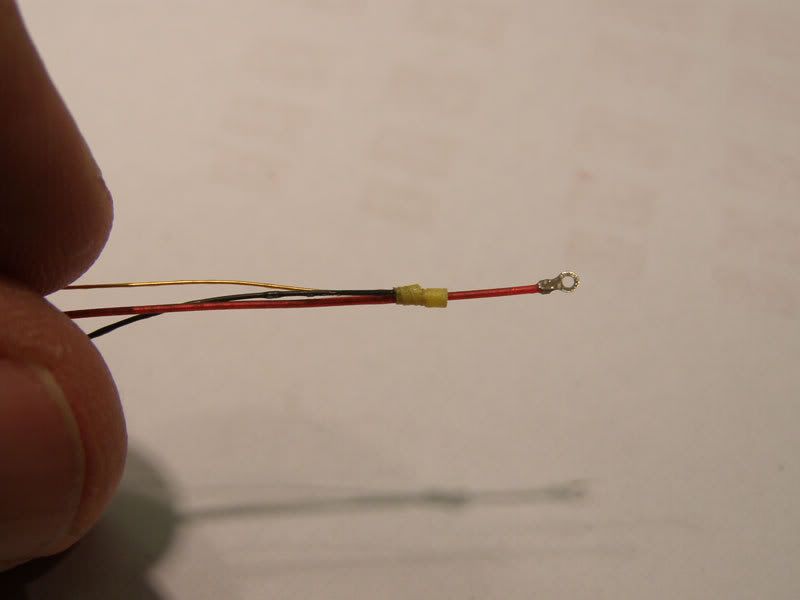 The engine bay has been wired up and th majority of remaining parts put in place. Just needs a final wash to even it out. 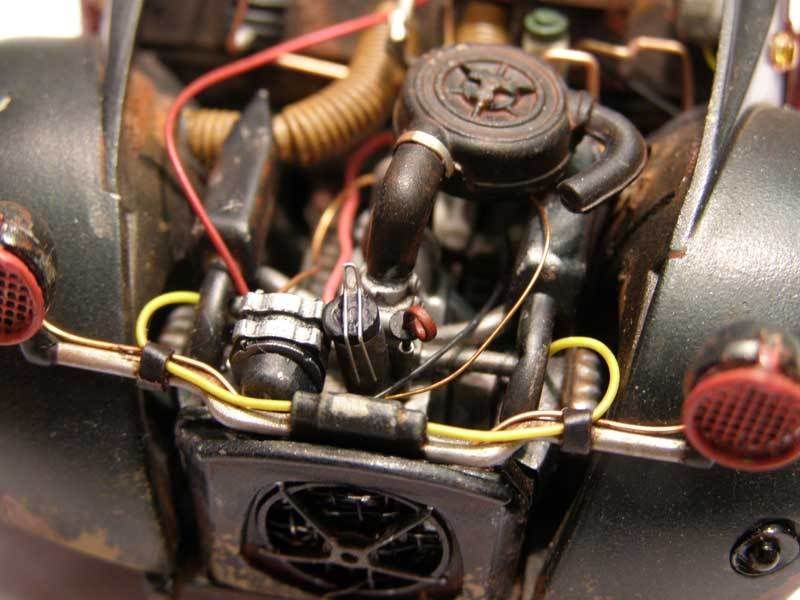  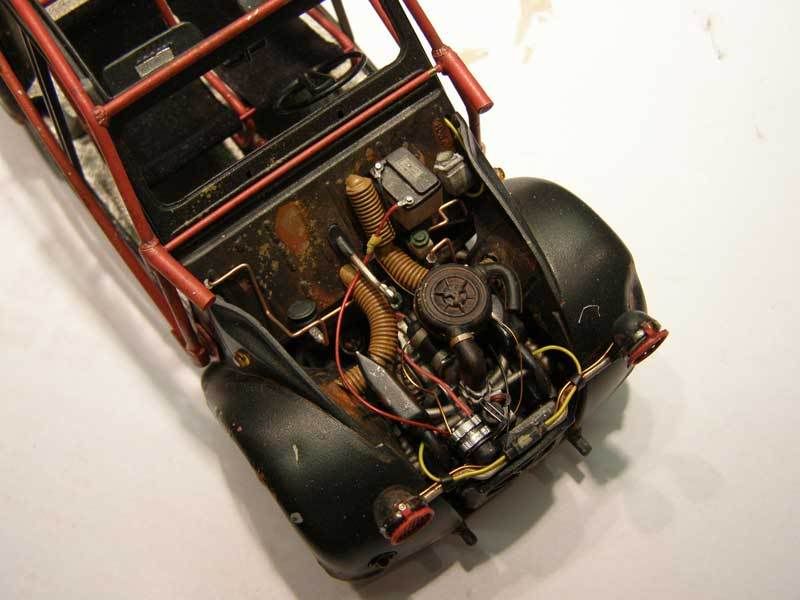 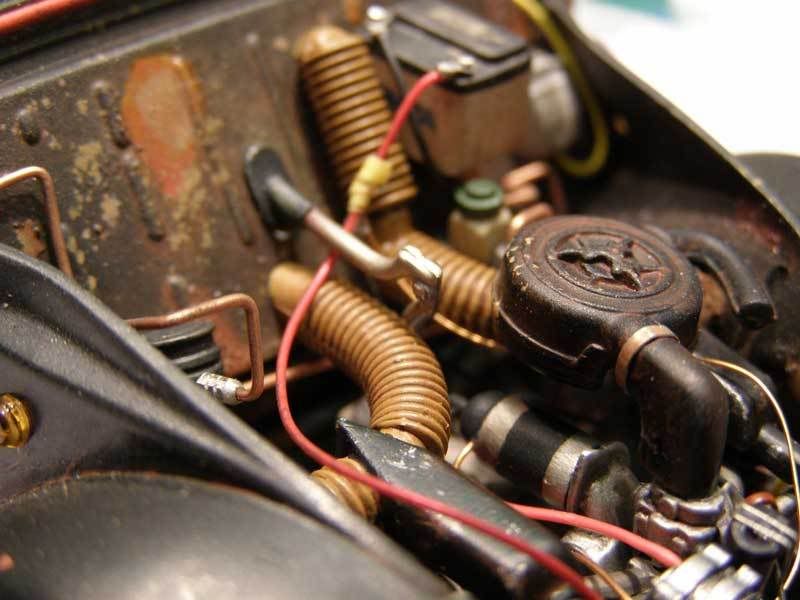 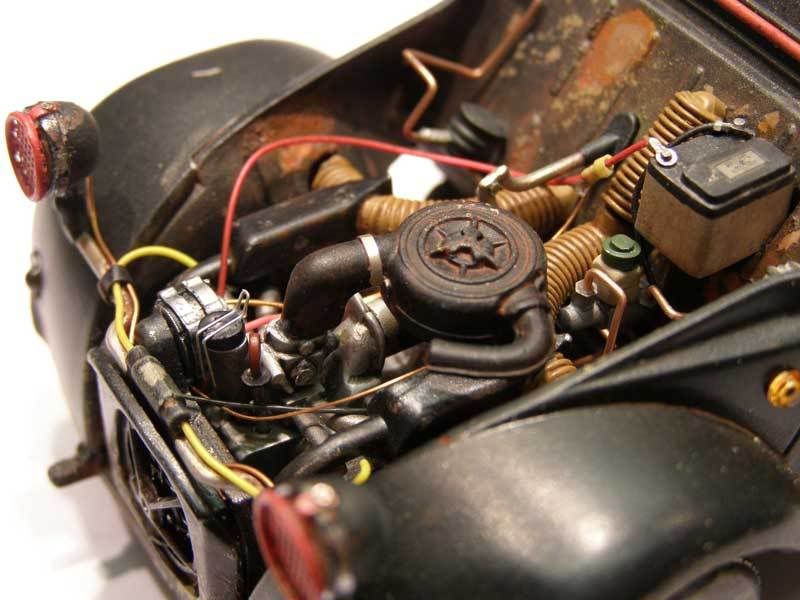 I am still debating what to do about the hood for display so in case I have it open in place I have made this psuedo-hinge to funtion as a temporary holding system. It will not be in place permanently, just fixed with white glue when needed (and look better than a bloody toothpick LOL). I think it looks quite good considering it is just one piece of styrene cut into a "chevron shape with circles and semi-circles glued on to look like hinge points. PE bolts were added after I too this photo. It is not intended to be based on a real 2CV hinge. 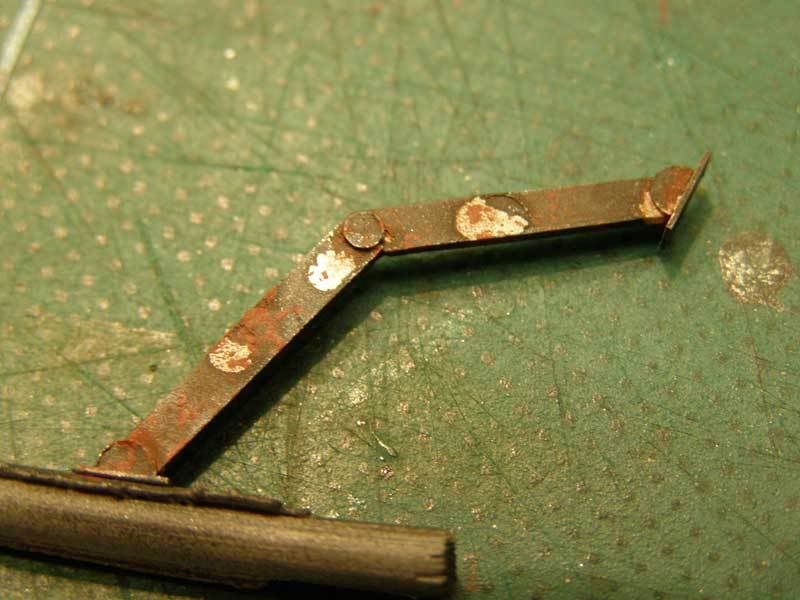 In place. 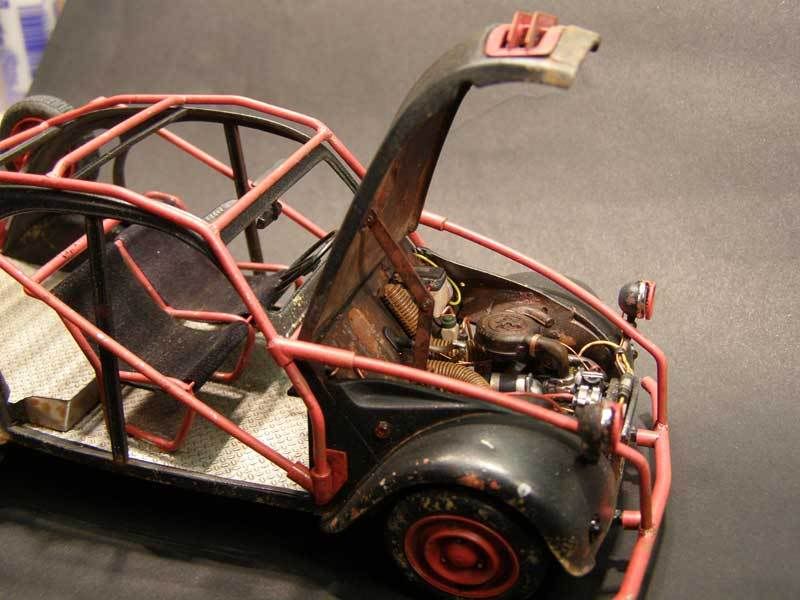 So close...... 
__________________
Guideline for happy modeling: Practice on scrap. Always try something new. Less is more. "I have a plan so cunning, you could put a tail on it and call it a weasel" - Edmund Blackadder
|
|
#231
05-11-2008, 07:39 PM
|
|||
|
|||
|
Re: WIP: 2CV Rock and Roll-Bar
How have I not replied? This is one of the most amazing models I've ever seen. Just... awesome in every way. Great inspiration, great details, and great skill pulling it all together. I've nothing to add, I'm just in awe!
__________________
It ain't cool 'till your wife hates it. Imagine a world without Alabama Recent builds: Rocket Bunny FR-S and stock BRZ Toyota bB Bro-style Civic K20 powered SiR converted EK WIP I build slowly and poorly. 
|
|
#232
05-12-2008, 09:15 AM
|
||||
|
||||
|
Re: WIP: 2CV Rock and Roll-Bar
What an outstanding piece of work mate. The rusty bits are to close to real rust :O.
Definitely a car that screams for a diorama surrounding! Maybe one where the hood would be lying next to it, as in motor repairs or so?  And thanks for sharing this all with us.
|
|
#233
05-13-2008, 04:09 AM
|
||||
|
||||
|
Re: WIP: 2CV Rock and Roll-Bar
Incredible work, just sensational in every way. Thanks for the great descriptions too. This just made it into my ultra-selective classic models bookmark folder...
__________________
Mark R
|
|
#234
05-13-2008, 07:07 AM
|
||||
|
||||
|
Re: WIP: 2CV Rock and Roll-Bar
This is insane, every time I think that nothing more could be done to improve this build you slap me with new update.
Best build ever.
|
|
#235
05-13-2008, 02:49 PM
|
||||
|
||||
|
Re: WIP: 2CV Rock and Roll-Bar
Aaaah!
You are nuts my friend... Good thing you put the grills in front of the lights. It improves realism by masking the modelkit's lights... which usually look a bit toyish on modelcars... The final frontier is here!
|
|
#236
05-13-2008, 04:19 PM
|
||||
|
||||
|
Re: WIP: 2CV Rock and Roll-Bar
I´m speechless by your creativity. This looks almost real...very real. Thanks for sharing Klutz. This will be awesome - promised - when done. All that rust and the different shades of brown...neat, neat, neat...
Robert
__________________
Recently finished Projects:
Porsche 911 Carrera RS 3.0 Current Projects: Ferrari 250 GTO LM 1962 (chassis #3387)  
|
|
#237
05-16-2008, 07:22 PM
|
||||
|
||||
|
Re: WIP: 2CV Rock and Roll-Bar
Fanta-bulous skills, insanely awesome mad thread. I like it.
__________________

|
|
#238
05-25-2008, 10:51 AM
|
||||
|
||||
|
Re: WIP: 2CV Rock and Roll-Bar
I have started working on the display for the 2CV.
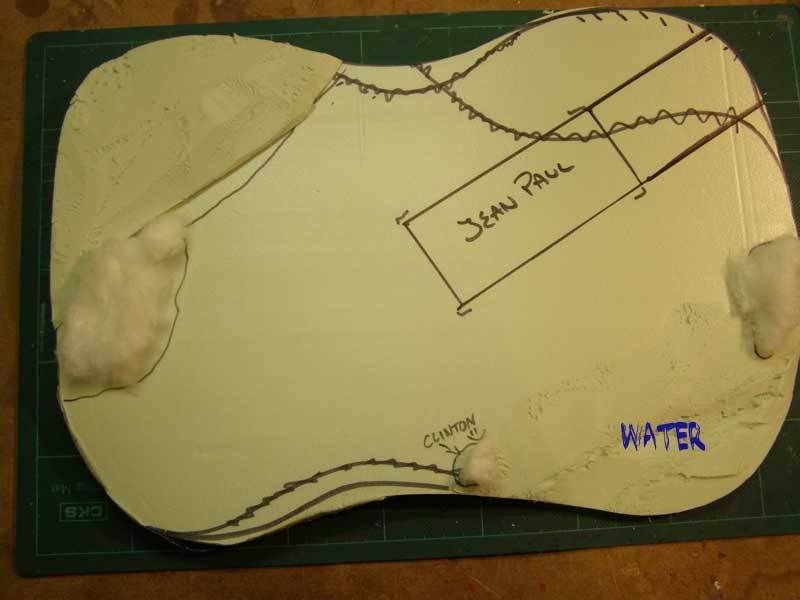 I have cut a piece of styrodur to the general shape I want, added a mound at the back and cut away the lake shore at the front and marked out the general placement of some of the details I will want to add as it develops (you can see that I changed my mind a few times LOL). I have used cotton wool to test placement of some rocks. Needless to say, the Little Rock by the shore has been christened "Clinton" 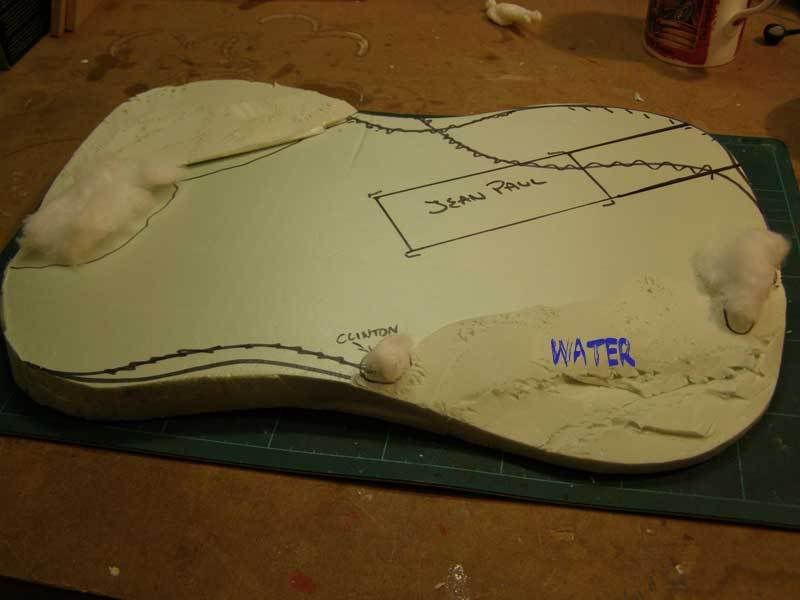 My TV broke today and I couldn't watch the Monaco Grand Prix, so I spent the time in the workshop and... Quote:
 The design of the easel is actually based on a real one I found on the internet. I will be adding a few p/e nuts and add some paint drips later. 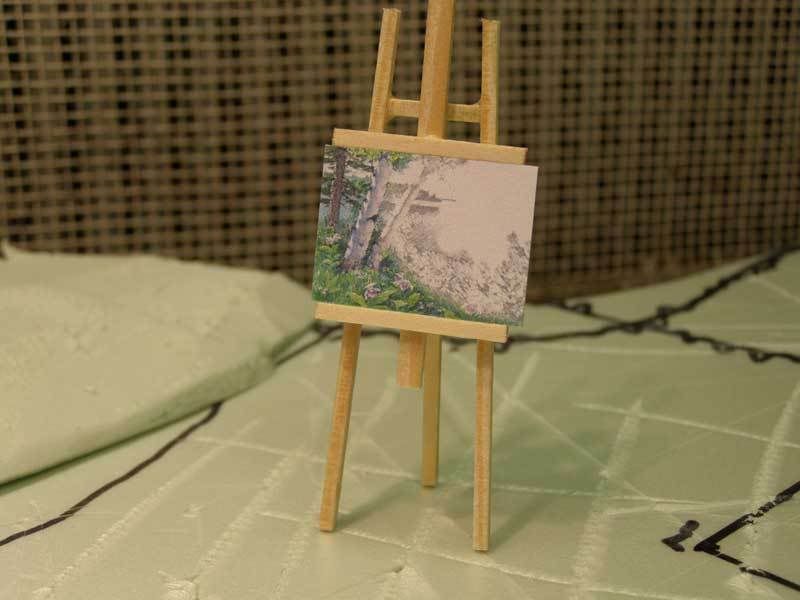 As you can see, Jean Paul is quite prolific in his painting and also has a wide variety of styles  (the one on top is dedicated to Oli (the one on top is dedicated to Oli  ) )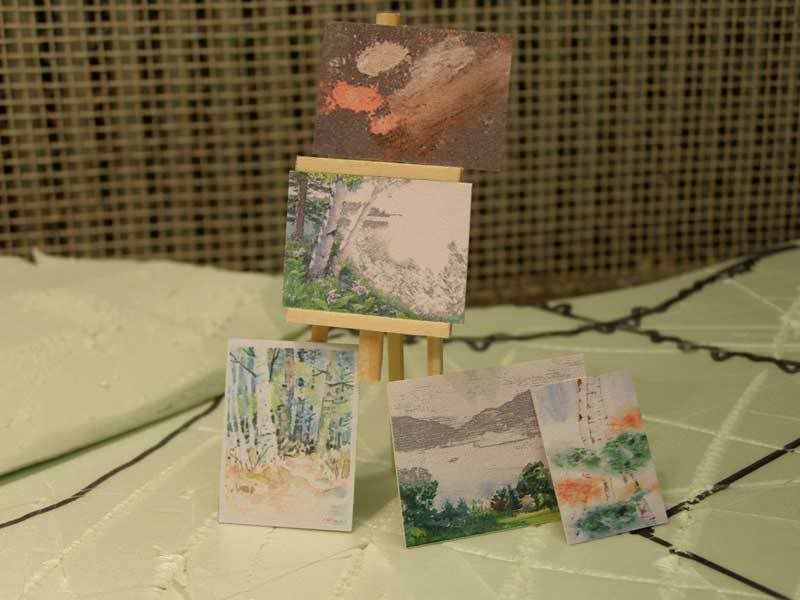 The images were taken from the web, re-sized, printed and glued onto this styrene sheet. The "WIP" paintings were images that I edited in PhotoShop by converting part of the image to charcoal sketch and then erasing parts of it Thanks for looking in (still...LOL)
__________________
Guideline for happy modeling: Practice on scrap. Always try something new. Less is more. "I have a plan so cunning, you could put a tail on it and call it a weasel" - Edmund Blackadder
|
|
#239
05-25-2008, 12:01 PM
|
||||
|
||||
|
Re: WIP: 2CV Rock and Roll-Bar
I 'm, as they say in French, on my ass. (sur le cul)
I have finished trying to figure out what's going on in that nutcase head of yours, cause there are no words. It's original, doable and very very very well done. I 'm totally loving it! Great pictures and I 'm super-anxious to see how it will all look together. I hope the detail you've put in the car won't be detracted by the detail you've put in the rest of the build. Although, you know, scrap that comment. Just go nuts. PS, Brilliant painting!
|
|
#240
05-25-2008, 12:05 PM
|
|||
|
|||
|
Re: WIP: 2CV Rock and Roll-Bar
Damn Steven, that build gets better and funnier every time you post an update.
Jean-Paul really is an artist. Just to challenge (him?) you and your creativity... how about a naked girl next to the water, posing for him / inspiring him? He can't really drive all the way out there all by himself and only paint the landscape?!?
|
|
|
POST REPLY TO THIS THREAD |
 |
|
|