|
|
| Search | Car Forums | Gallery | Articles | Helper | Air Dried Fresh Beef Dog Food | IgorSushko.com | Corporate |
|
|||||||
| WIP - Street Post topics for any "Works In Progress" street vehicles projects in this sub-forum. |
 |
 Show Printable Version | Show Printable Version |  Subscribe to this Thread
|
|
|
Thread Tools |
|
#16
 11-25-2016, 01:38 AM
|
||||
|
||||
|
Re: Tamiya LaFerrari 1/24
nice progress so far !
__________________
Micha       

|
|
#17
11-26-2016, 08:18 AM
|
||||
|
||||
|
Re: Tamiya LaFerrari 1/24
Quote:
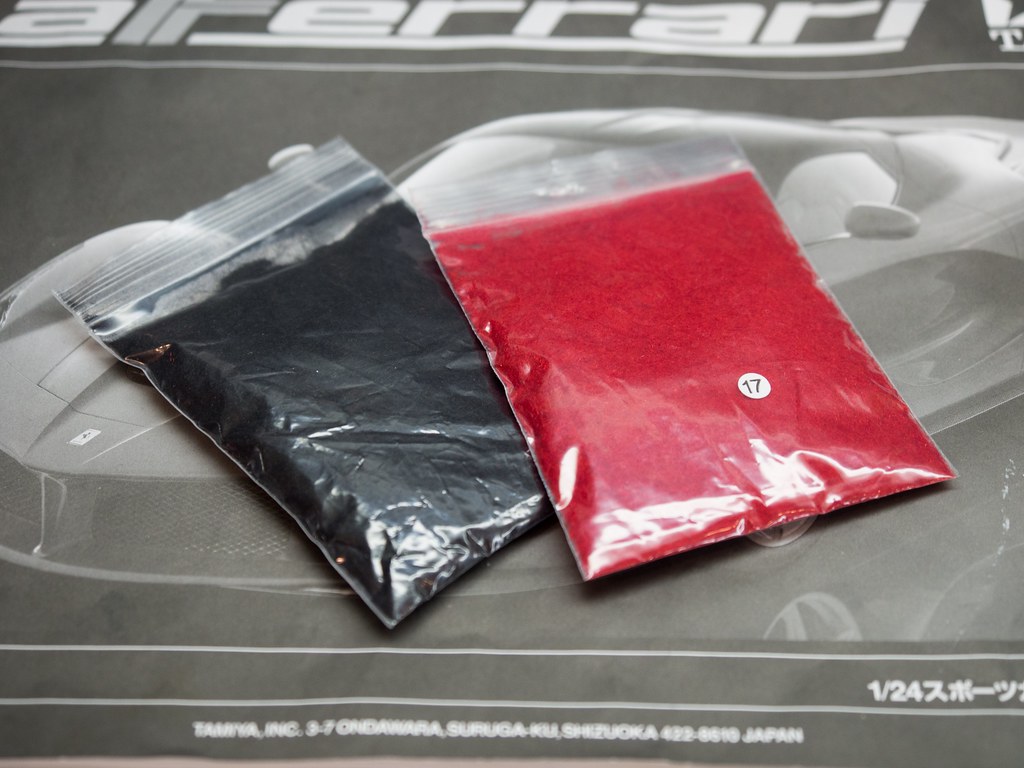
On the FXX-K, the sides on the dash are microballed and painted black. The steering wheel is microballed and not covered with paint again. The baby seat is covered in microballs and painted red plus flat clear. In comparison the floor and rear cover are flocked. Maybe it helps.  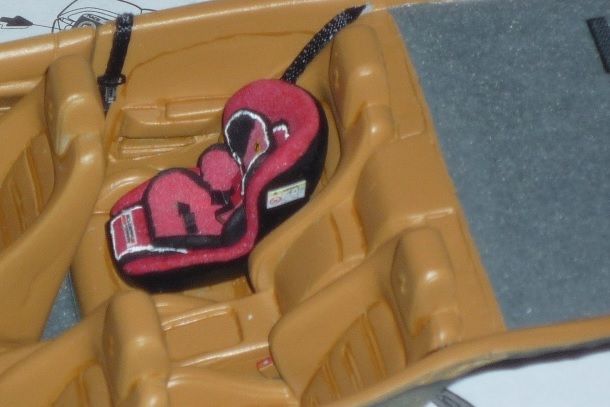
__________________

|
|
#18
11-26-2016, 10:21 AM
|
|||
|
|||
|
Re: Tamiya LaFerrari 1/24
Quote:
|
|
#20
12-10-2016, 12:18 AM
|
|||
|
|||
|
Re: Tamiya LaFerrari 1/24
Thanks for the tips guys. Small update. After waited weeks for my flocking order to arrive, I set out to work with flockings for the first time. I went cheap and ordered some nail flocking from ebay. I ordered red and black, but I will only use the red on this LaFerrari.
 I basically just want to put flocking to create the 2 floor mats. Here is the before. 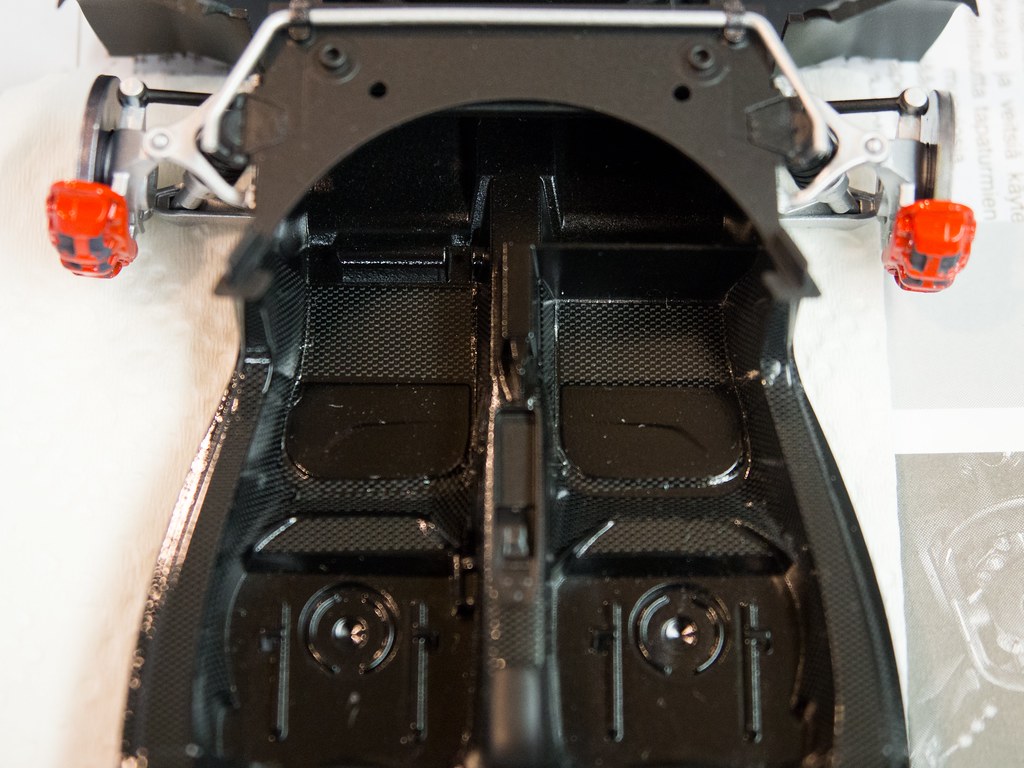 Here is the result. I hand painted 2 coats of red first, then applied the flocking on the 3 coats. LOL, after I applied it and I noticed the red flocking had sparkles in them... oh shoot, but good enough for the first time. What do you think? Ha ha...  Other updates you see are wheels are on, and the fire wall divider window is up. 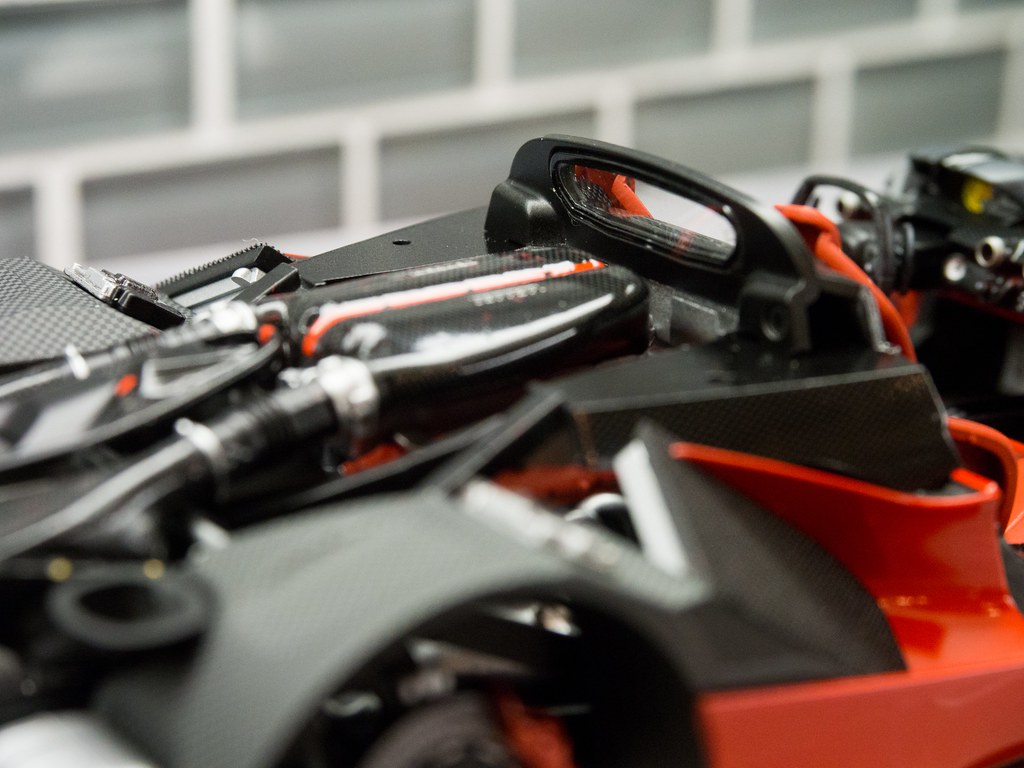 I haven't ordered black seatbelts yet which I will do, and couple more things then I am done with the interior. I still need to fix the roof which I polished through the black paint. Still need to apply carbon fiber decals on the side mirror supports and clear, and also the rear need to be detailed as well. Here is another test fit with wheels on which are not being shown in the photo. 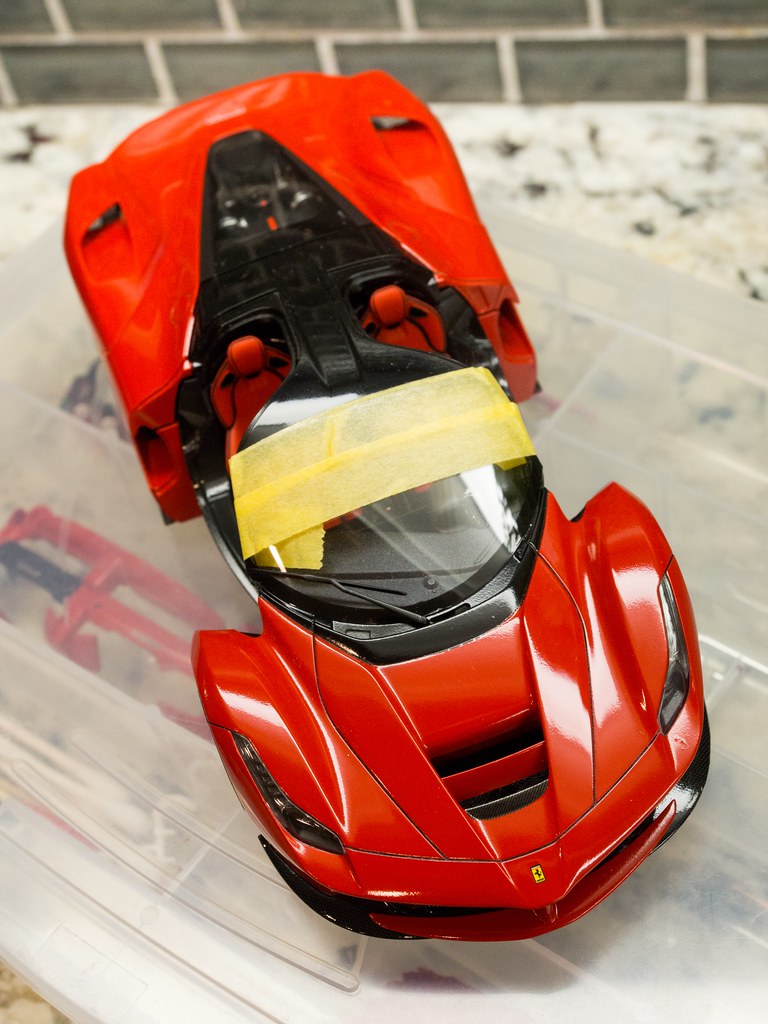 Somehow, the progress is really slow. Not much motivation, maybe it's because I got this kit as a gift, and I never really like the LaFerrari, I like the P1 much better out of the 3 hypercar holy trinity. Anyway, Christmas came early for me, cause I got this. Now, this motivates me. I like cars with soul, the E30 M3 race car definitely has soul.  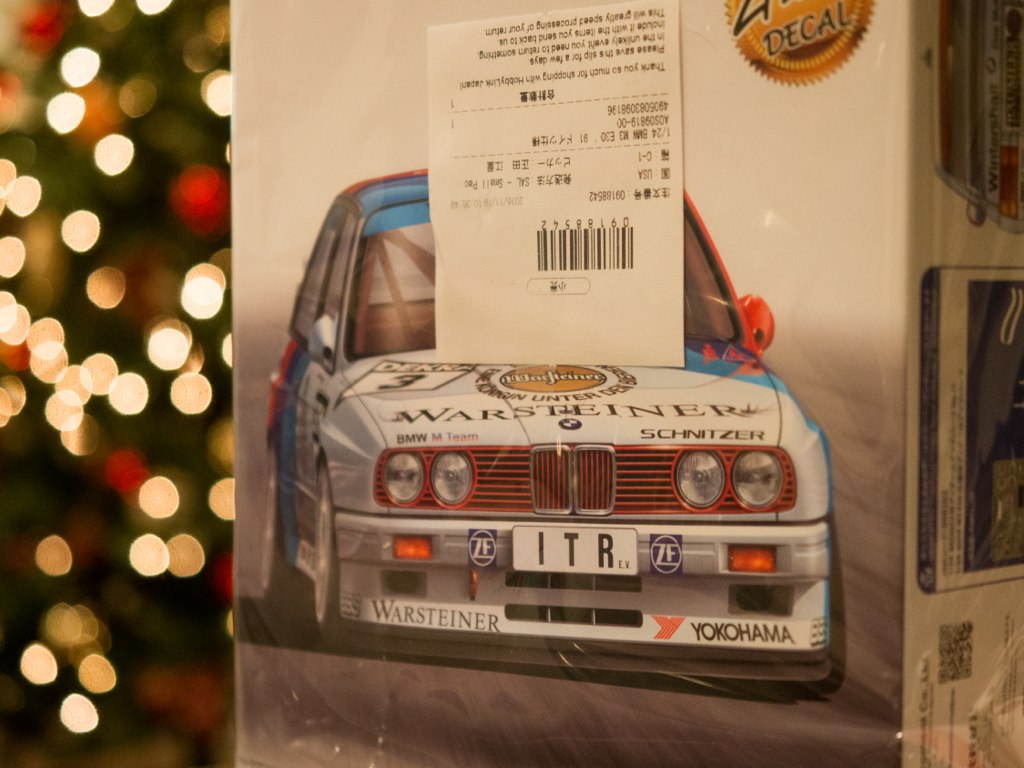
Last edited by E46nm52; 12-10-2016 at 06:07 PM.
|
|
#21
12-22-2016, 03:39 PM
|
|||
|
|||
|
Re: Tamiya LaFerrari 1/24
Another update, it's almost there. Completed the mirrors by applying carbon fiber decals from Tamiya, and then cleared with Mr. Super Clear.
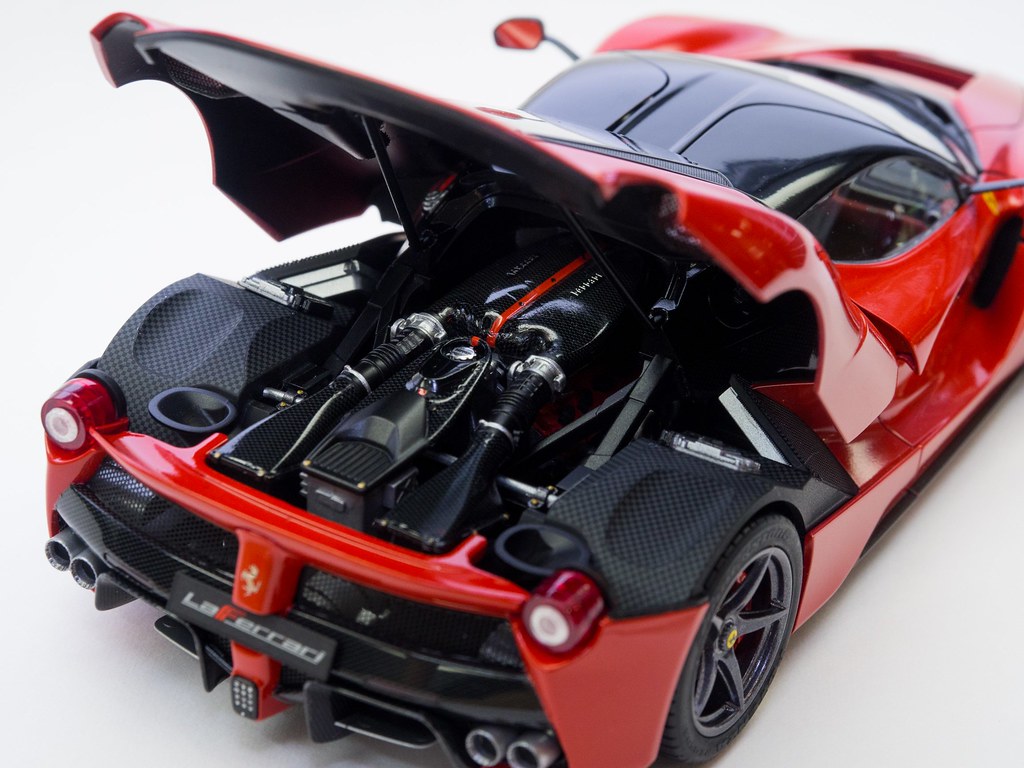
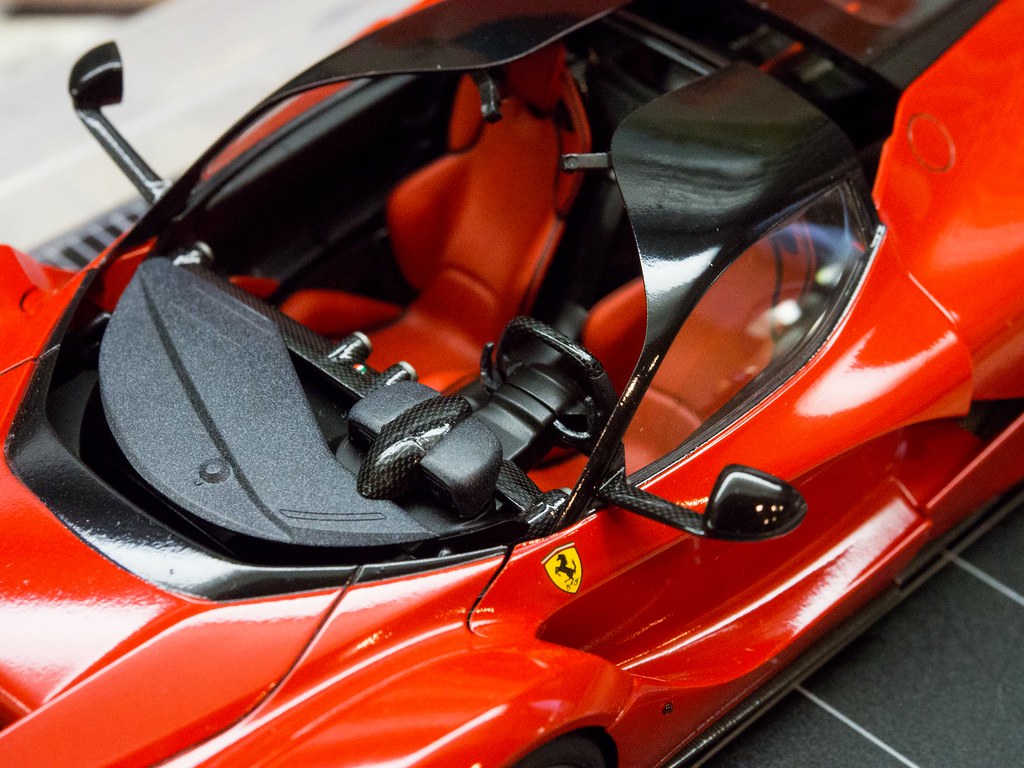 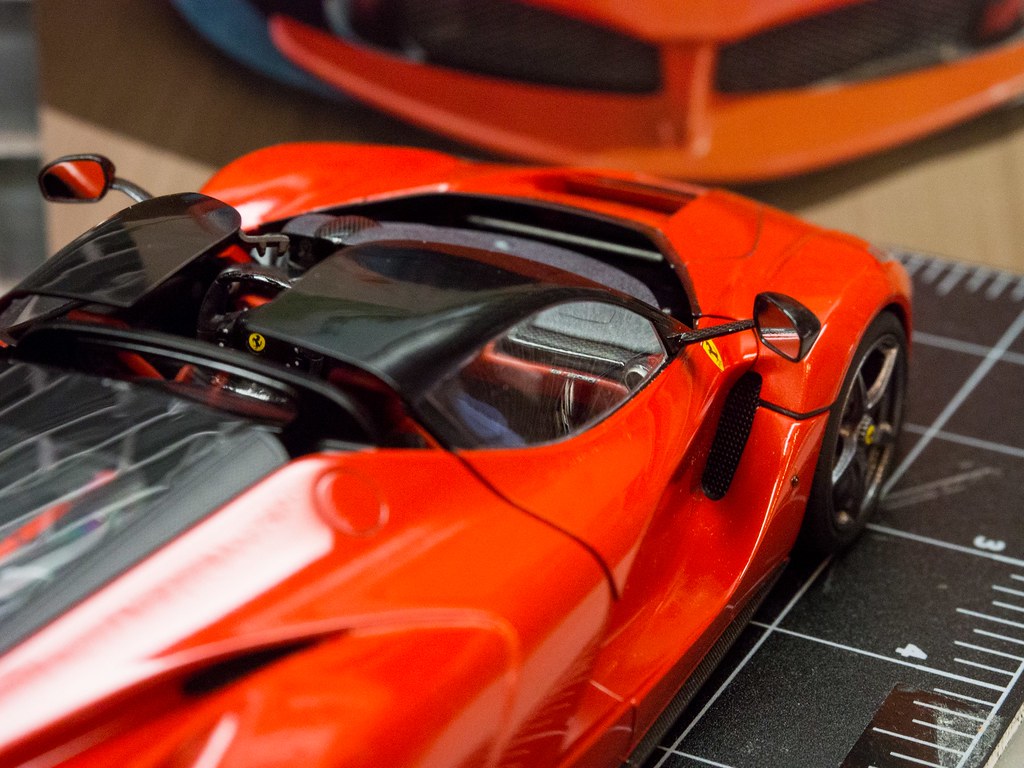 The rear is almost complete, just missing the exhaust tips and the rear fog(?). I used photo etched parts from Tamiya for the rear mesh because I don't want to use the clear parts with mesh decals that came with the kit. 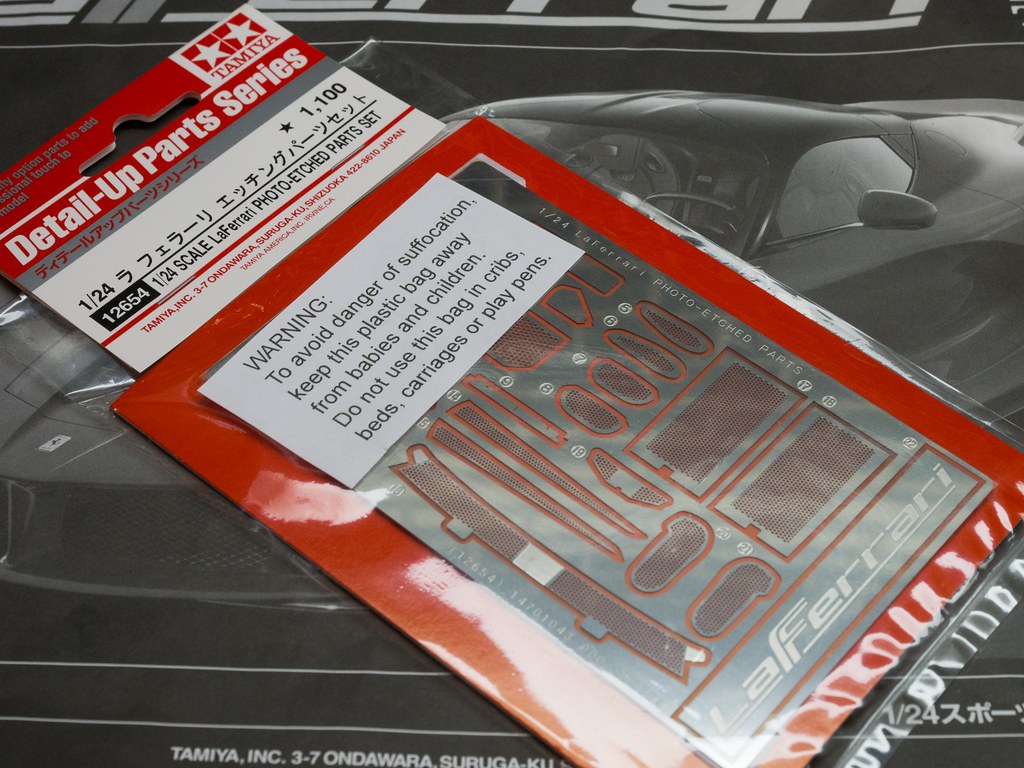 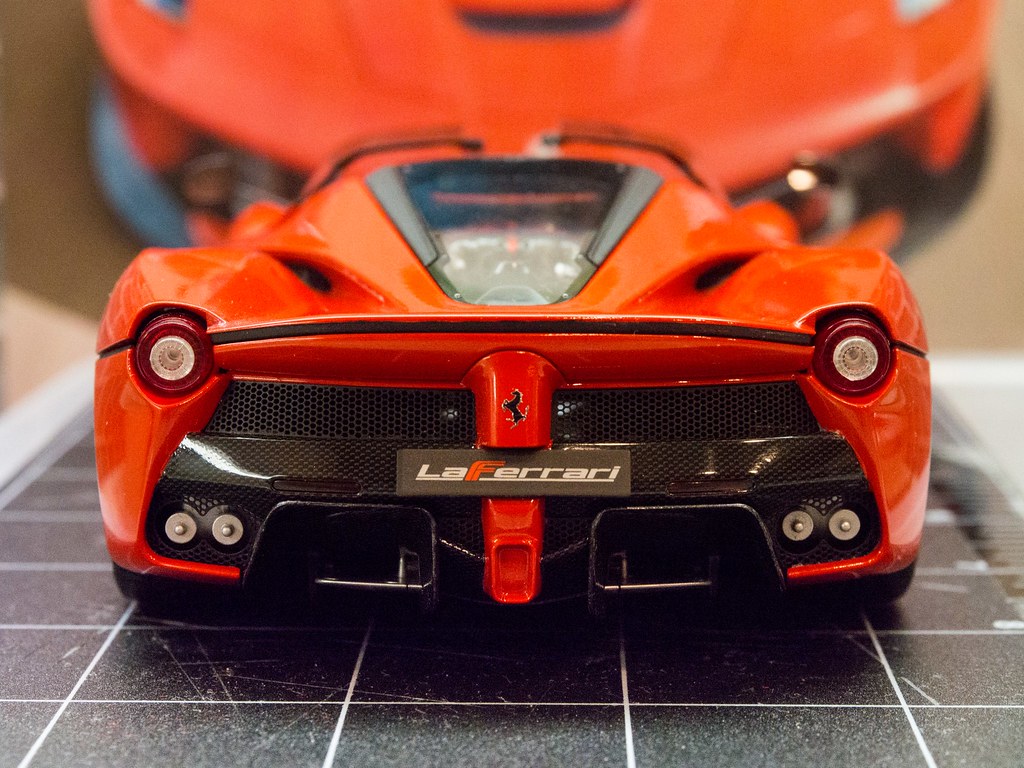 Just stripped the chrome off the exhaust tips using Windex, not sure if other countries have Windex, it's basically a window/glass cleaner available in the US. 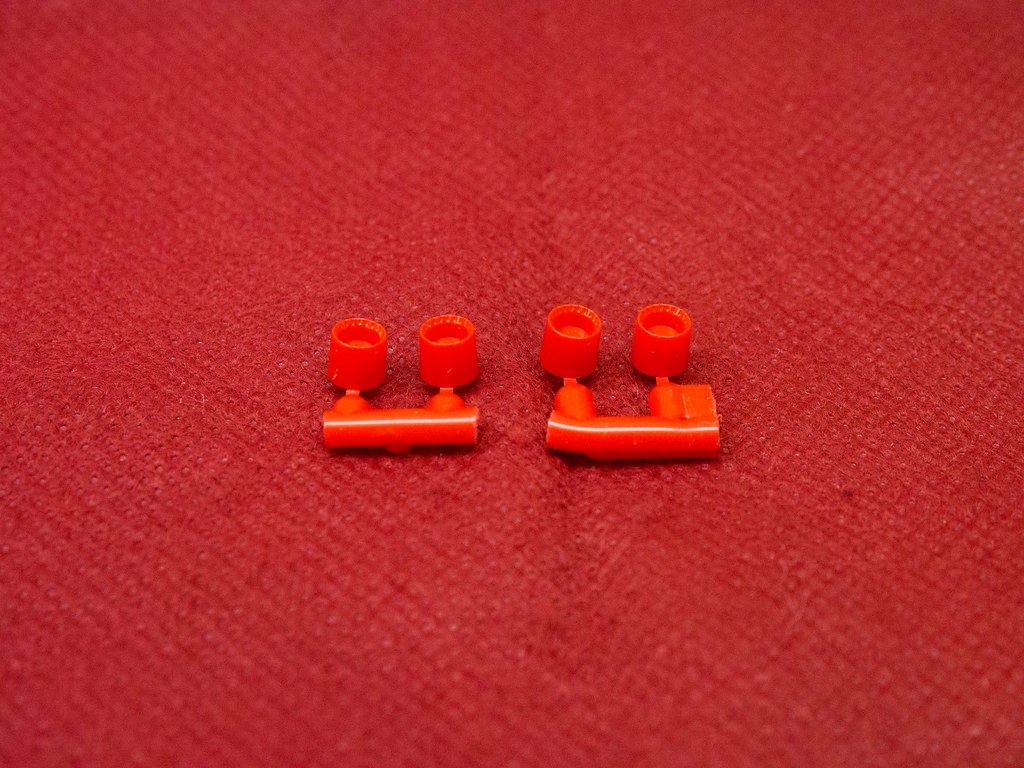 This interior piece needs clear and detailing.  And I haven't done the batteries which will be hidden 100% of the time. 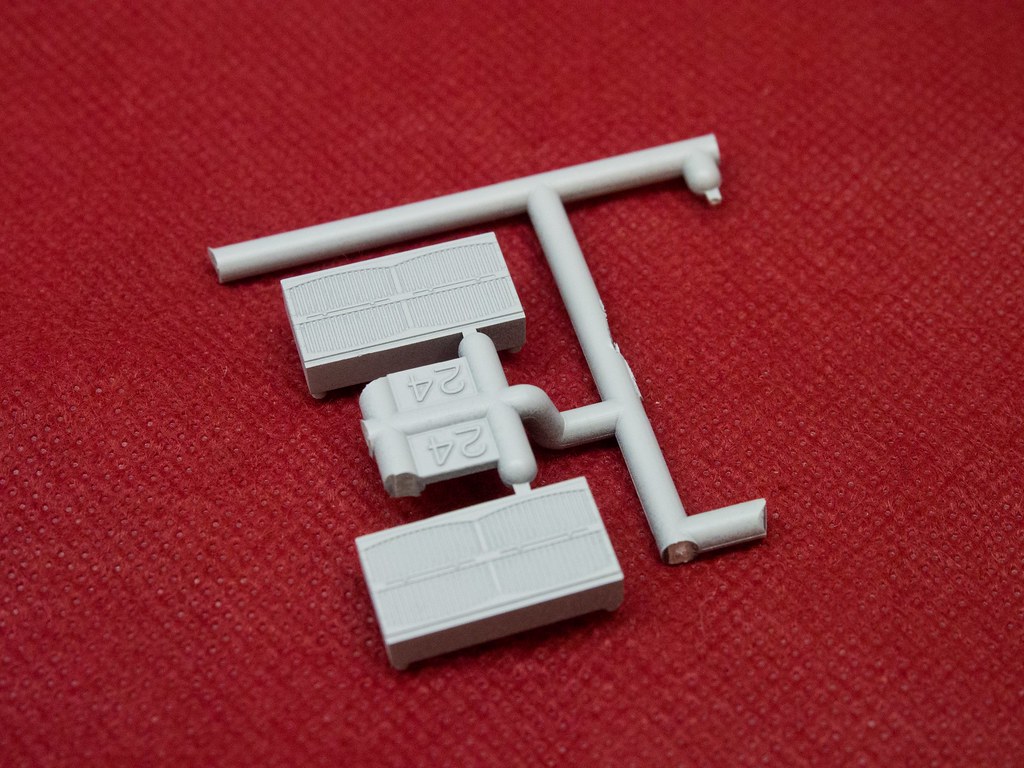 This is the current state now. 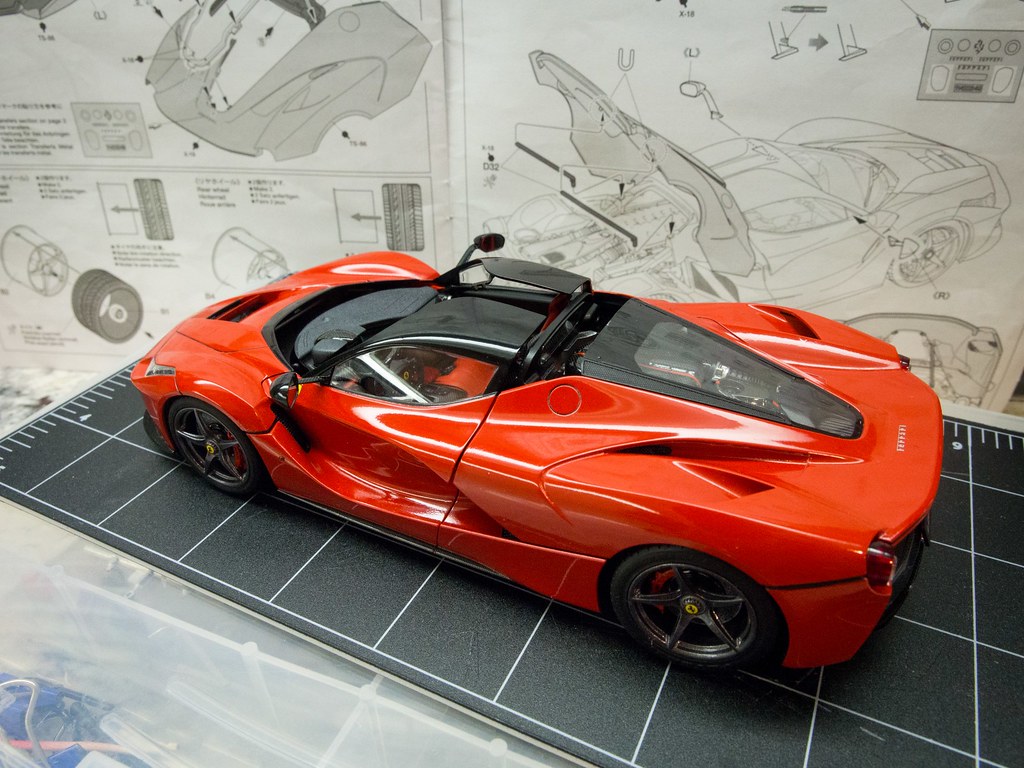
|
|
#22
12-30-2016, 02:15 AM
|
|||
|
|||
|
Re: Tamiya LaFerrari 1/24
Still waiting for seatbelt material to come. In the meantime, made a road for photographs with markings using sandpaper, masked with masking tape, and sprayed with white primer for the markings. Need to make another one to extend it so I can use it for wider shots. Here are couple test shots.
|
|
#24
01-01-2017, 12:38 AM
|
|||
|
|||
|
Re: Tamiya LaFerrari 1/24
Quote:
|
|
#25
01-01-2017, 01:00 AM
|
|||
|
|||
|
Re: Tamiya LaFerrari 1/24
Really looks amazing!
|
|
#26
01-21-2017, 02:28 PM
|
|||
|
|||
|
Re: Tamiya LaFerrari 1/24
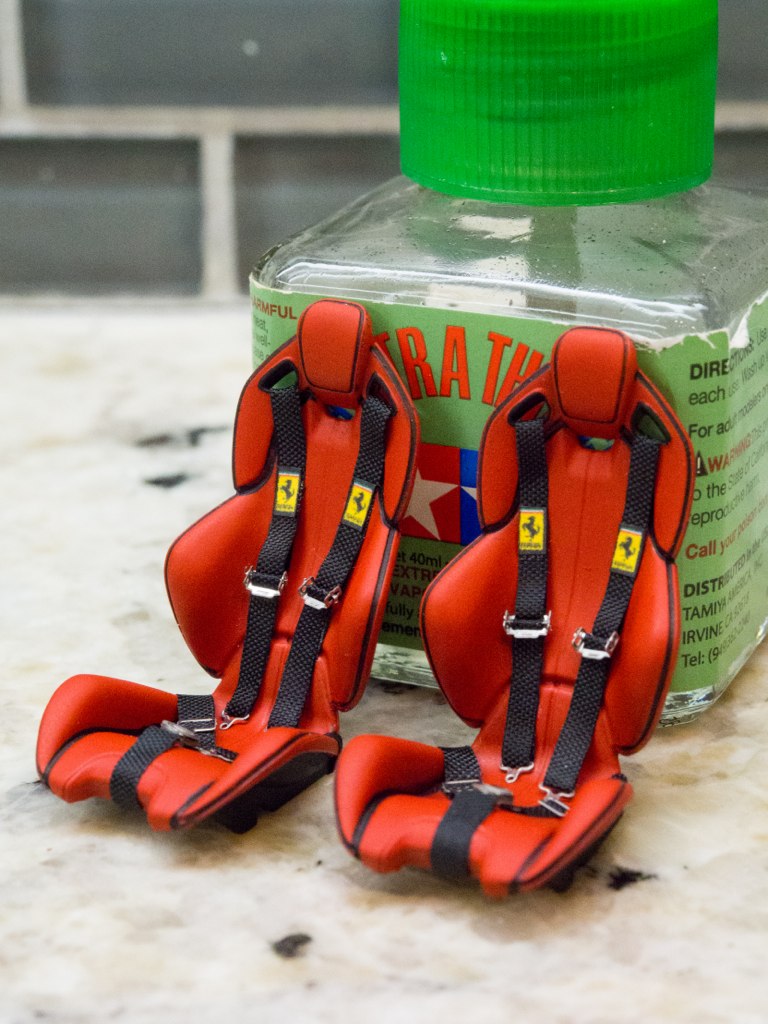
Finally have time to work on the seatbelts after all the required parts were received last week. Putting seatbelts together is pain in the bottom, took a lot of patience. This is my second time and as I was putting them together, I told myself I would never do one again! But then after seeing the result, I think it does make a difference. I also added the Ferrari logo printed from my printer to the seatbelts. It should be on a pad, but oh well, I just directly added to the seatbelts.
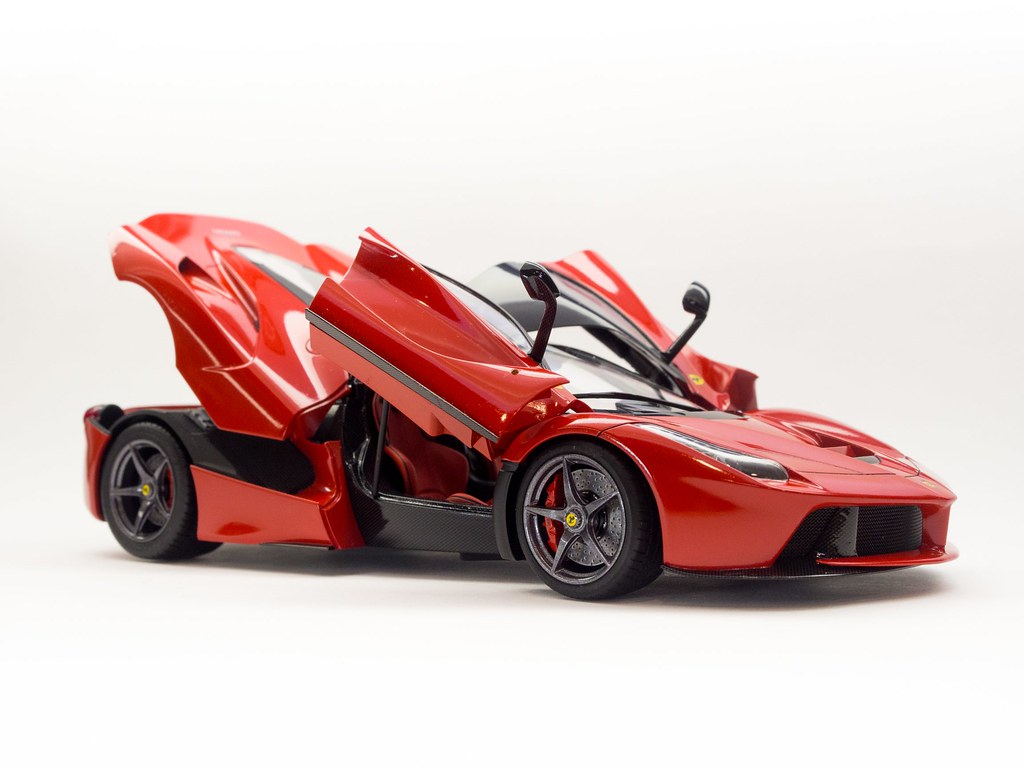
  I can finally glued the top in place. Will take more photos for the completed gallery. Anyone had this kit having trouble making the doors stayed open? I couldn't figure it out even after reading the manual multiple times. Wanted the door to stay open for the finishing photos. Any tips?
|
|
#29
02-01-2017, 03:28 AM
|
|||
|
|||
|
Re: Tamiya LaFerrari 1/24
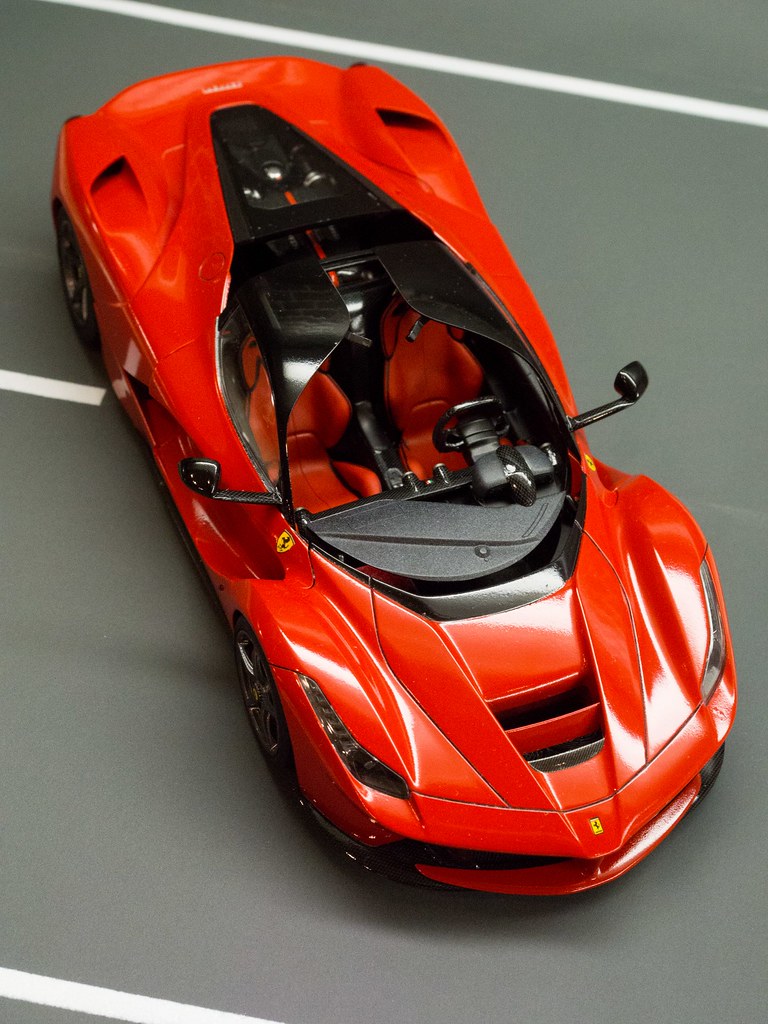
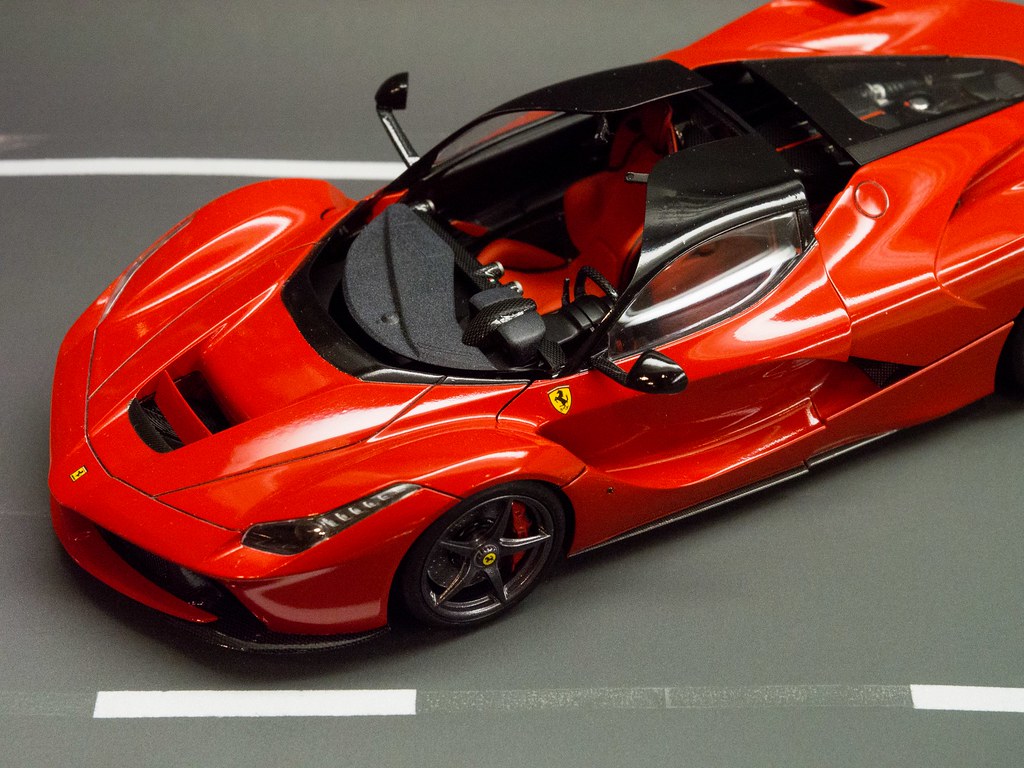
For complete photos, here is the completed thread -> http://www.automotiveforums.com/vbul....php?t=1149857
Thanks for checking it out.
|
|
|
POST REPLY TO THIS THREAD |
 |
|
|


