|
|
| Search | Car Forums | Gallery | Articles | Helper | Air Dried Fresh Beef Dog Food | IgorSushko.com | Corporate |
|
|||||||
| WIP - Street Post topics for any "Works In Progress" street vehicles projects in this sub-forum. |
 |
 Show Printable Version | Show Printable Version |  Subscribe to this Thread
|
|
|
Thread Tools |
|
#76
 04-28-2013, 07:44 AM
|
||||
|
||||
|
Re: Ferrari 288GTO Revell + Fujimi 2 in one 1/24
Sorry again, I was away so long...
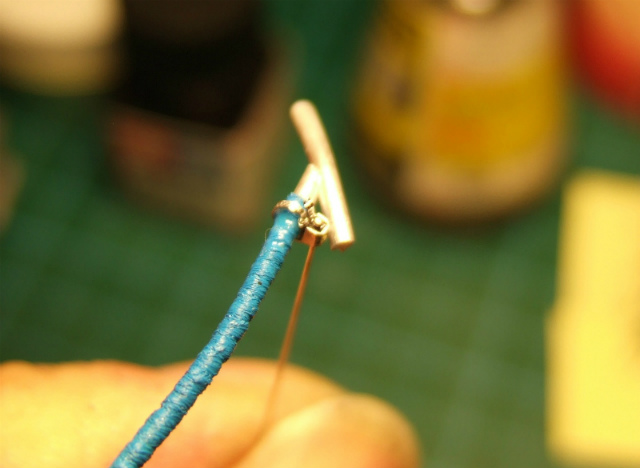
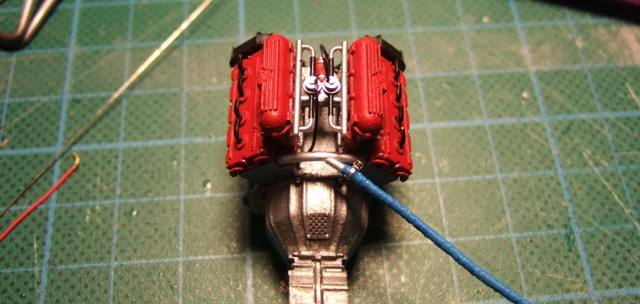
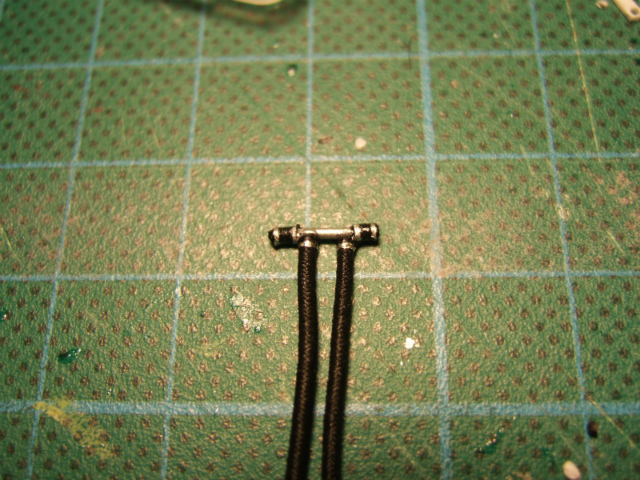
Just to let you know I'm still alive, let's start posting   Hinges for engine hood. 0.5mm nickel silver rods and 0.6mm (inside) brass tubes. Plastic pieces are the stays for hood. 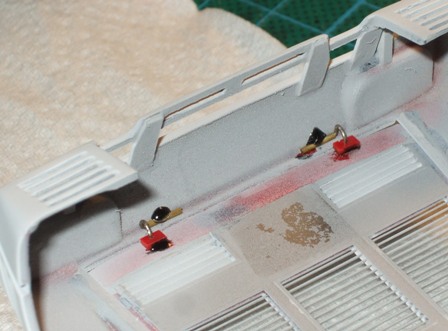  Adjusted several times, then I was satisfied.  But the hinges hit to the air cleaner parts... again I cut and pasted. Upside is the cut one.  Attaching the exhaust pipes. I again put the magnets 'cause I found these pipes have to be movable when the body and chassis joint, otherwise these pipes will hit to the body. 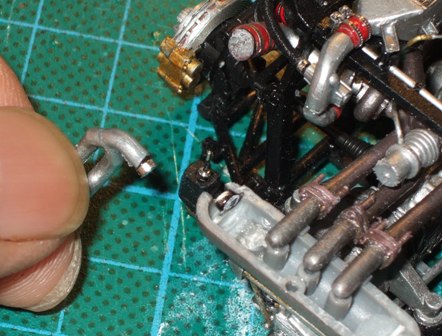   Adjusted to certain position. That's all today I'll do my best to make time and finish this project ASAP.Thanks for looking!
__________________
Umihito We can learn from mistakes. 

|
|
#77
04-28-2013, 11:23 AM
|
|||
|
|||
|
Re: Ferrari 288GTO Revell + Fujimi 2 in one 1/24
no need to rush things
nice update though, looking forward to the rest of the build.
__________________
olly olly oxen free
|
|
#78
05-02-2013, 10:57 PM
|
||||
|
||||
|
Re: Ferrari 288GTO Revell + Fujimi 2 in one 1/24
This progress is FANTASTIC!!! I am now searching for a Revell 288 GTO to add to my collection. I am eagerly awaiting more progress pictures! Thanks for sharing!

__________________
http://public.fotki.com/tonioseven/
|
|
#79
05-03-2013, 06:58 PM
|
||||
|
||||
|
Re: Ferrari 288GTO Revell + Fujimi 2 in one 1/24
very nice build, the magnets are a neat idea! bravo!
|
|
#81
05-07-2013, 09:30 AM
|
||||
|
||||
|
Re: Ferrari 288GTO Revell + Fujimi 2 in one 1/24
Quote:
Quote:
Quote:
Quote:
I myself is eagerly looking forward to seeing the finished work. I think I'm kinda doing too much, but surely think this would be one of the best in my life. I'll keep on!
__________________
Umihito We can learn from mistakes.
|
|
#82
07-07-2013, 07:59 AM
|
||||
|
||||
|
Re: Ferrari 288GTO Revell + Fujimi 2 in one 1/24
Loong time no see.....!!!!! I am so sorry for long absence. I've been working, working and working... The worst thing was, I got terrible numbness on my left hand. I could hardly hold my precious GTO's parts.
But just gradually, I'm keeping it in progress. First of all, the report of an terrible accident....  Homicide scene?? No, don't be afraid. 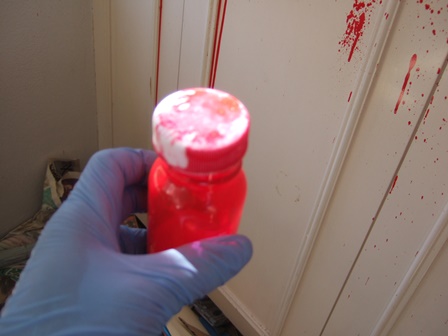 This is the criminal. I replaced the paint from tin spray into the bottle, then I close the lid not taking enough time for the pressure to go out. When I was happily trying to paint my GTO's body I released the lid... then, "BANG!!!". .... Please learn from my stupid, shocking experience. If you are replacing the tin spray's paint into the bottle, don't close the lid so soon. Let it just release the pressure in the paint (it contains pressure much more than you think). I should have leave it for hours without closing the lid on. Anyway, I've cleaned the mess finally. The best thing was, my GTO's body had escaped from this unexpected paint attack!! God bless my GTO.... I really appreciate. So I can't post the paint thing 'cause my day ended up with cleaning, but I'll post some other progresses. 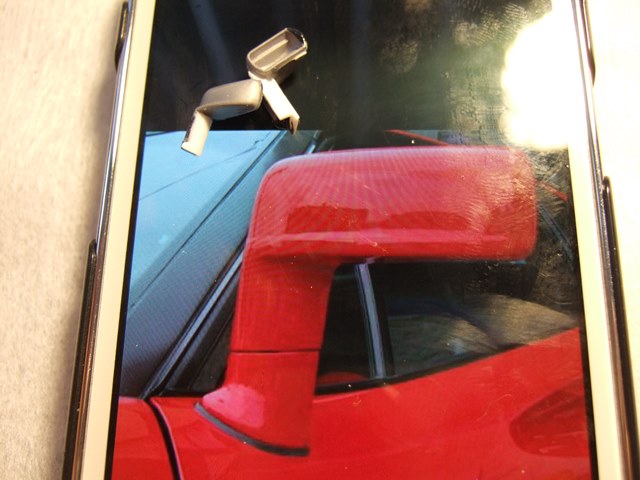 I choose Revell's mirror. Fujimi's are too small. But still Revell's mirror stay were too skinny. So I applied 0.5mm plastic papers on the stay, as you can see. 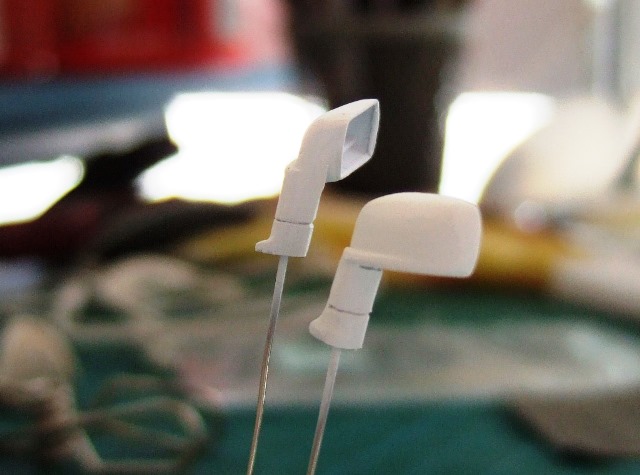 Using files and sand papers, the mirrors were made to be preferable shapes. 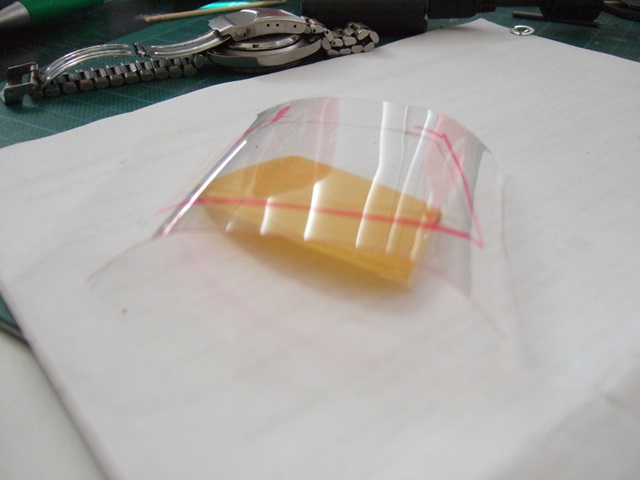 Then front window. I don't use the "heat press' technique (don't say I have no press machine), but simply curved by putting in boiled hot water (of course I curved after taking the part off from hot water). I used 0.2mm transparent plastic board. 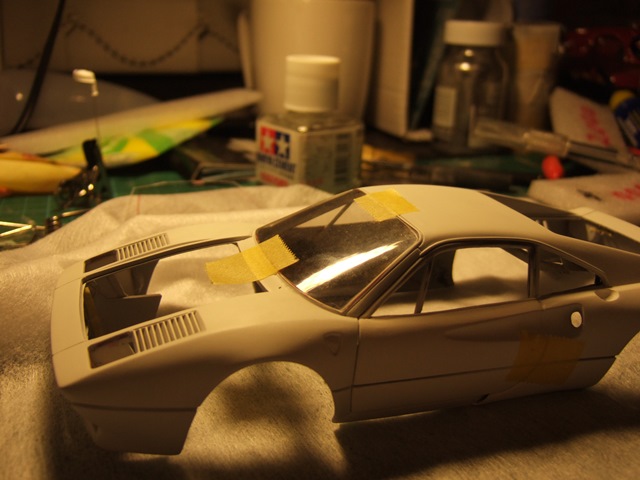 It took nearly 2 hours to adjust it. 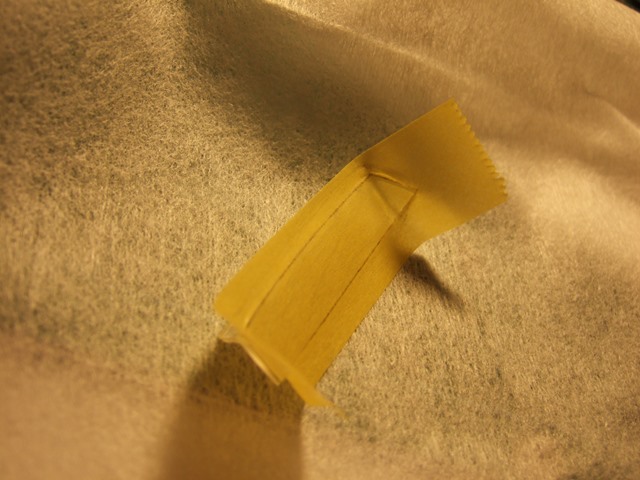 Copying the rear window's shape to the masking tape... 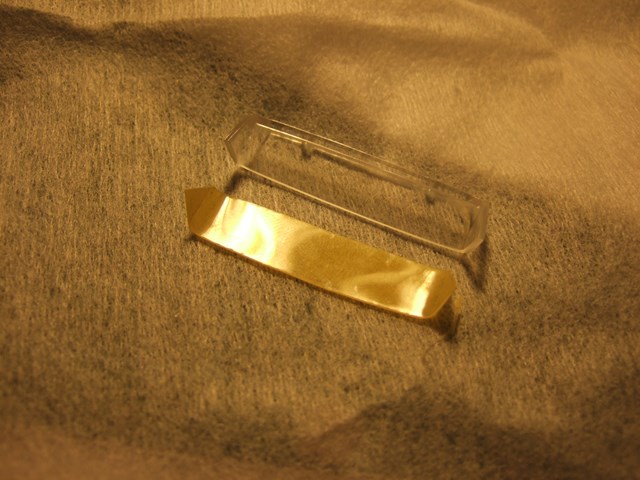 I used the same technique on the rear window, by putting it in hot water. I believe it's much easier than the heat press.  The side-rear windows were a bit easier. 0.3mm white plastic papers were glued onto the 0.2mm transparent plastic board.  Then curved in the same method. The transparency is much better than the original parts!  Still sober works continued before painting the body. These tiny small things were cut from plastic rod.  Pointing the preferable position by using the maker... 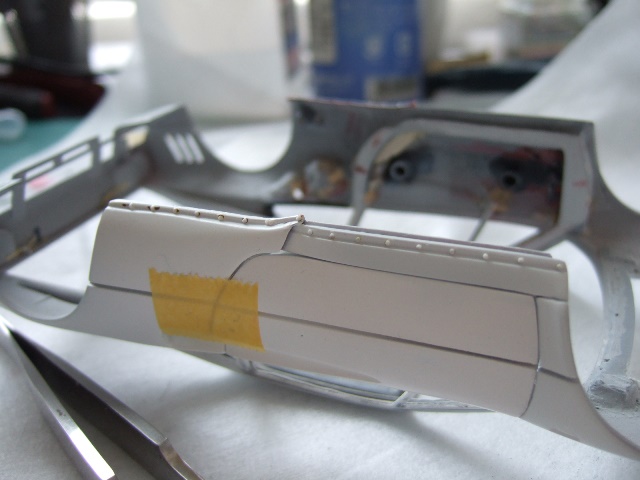 The tiny small things were glued with acrylic bond. 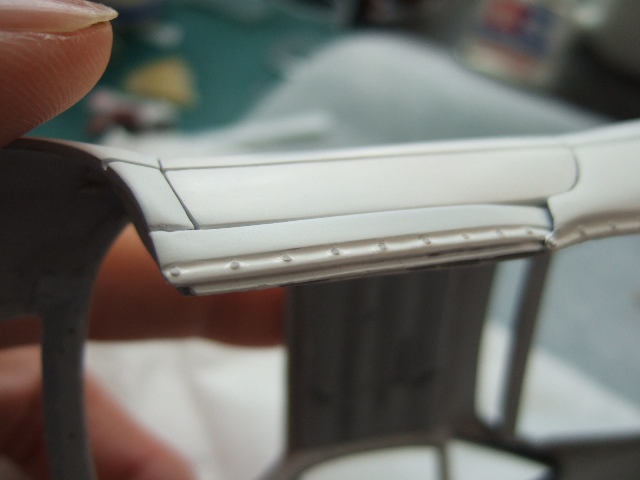 I sanded on top because I found they were a bit exaggerated.  From plastic pipes and rod, I made the radiator tank. Over there you can see Hasegawa's 328GTB's radiator tank, as reference.  This is rear bumper. Since the original was just plane, I dug it and reshaped by applying 0.5mm plastic papers. The stay of the plate light bulb was cut from plastic rod. After painting, I'll put the light bulb parts from my junk. 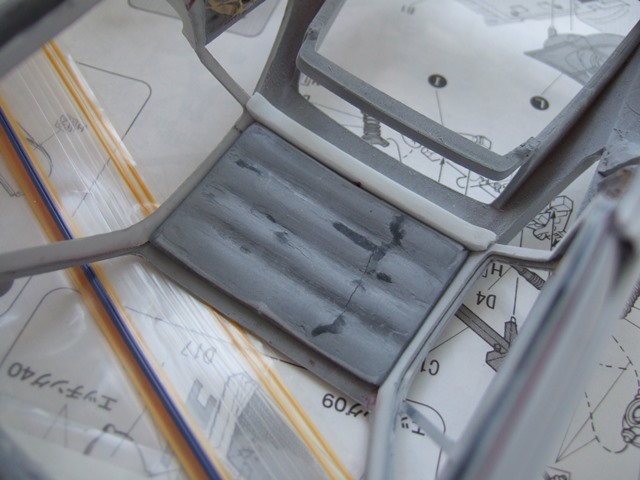 The ceiling was originally from Revell's transparent part. Putty and sanding were applied. The roll cage... was made from plastic rods, but need to be lengthen up to the bottom of side windows. 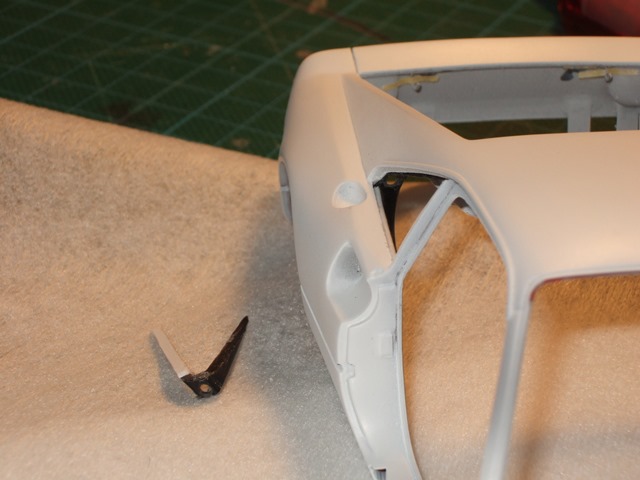 And side air intakes. The holes were applied. ..... I was supposed to post the painting progress, indeed. Please put it aside until next post. Thanks for looking (and thanks for waiting so long) See you soon!
__________________
Umihito We can learn from mistakes.
|
|
#84
07-07-2013, 10:42 AM
|
|||
|
|||
|
Re: Ferrari 288GTO Revell + Fujimi 2 in one 1/24
looking great with the new update. and that criminal sure is nasty, fortunately the GTO was safe
__________________
olly olly oxen free
|
|
#86
07-31-2013, 08:17 AM
|
||||
|
||||
|
Re: Ferrari 288GTO Revell + Fujimi 2 in one 1/24
Fantastic work, I´m really impressed
 As I worked as a car mechanician long time ago (from 1980 to `87 I think) I will try to answer some questions you asked in an older post: Quote:
Quote:
Quote:
|
|
#87
08-01-2013, 05:03 AM
|
||||
|
||||
|
Re: Ferrari 288GTO Revell + Fujimi 2 in one 1/24
Thanks all, I'll post about the painting the body very soon. So far it's going fairly well. Have a nice day!!

__________________
Umihito We can learn from mistakes.
|
|
#88
08-01-2013, 03:53 PM
|
|||
|
|||
|
Re: Ferrari 288GTO Revell + Fujimi 2 in one 1/24
wow ratman...that eurospares site sure has a ton of reference pics. thanks!
can't wait to see the next update, umihito
__________________
olly olly oxen free
|
|
#89
08-02-2013, 01:22 AM
|
||||
|
||||
|
Re: Ferrari 288GTO Revell + Fujimi 2 in one 1/24
Quote:
|
| The Following User Says Thank You to Ratman_2004 For This Useful Post: | ||
nugundam93 (08-04-2013)
| ||
| ||||||||||||||||||||||||||||||||||||||
|
POST REPLY TO THIS THREAD |
 |
|
|