|
|
| Search | Car Forums | Gallery | Articles | Helper | Air Dried Fresh Beef Dog Food | IgorSushko.com | Corporate |
|
|||||||
| Car Modeling Share your passion for car modeling here! Includes sub-forum for "in progress" and "completed" vehicles. |
 |
 Show Printable Version | Show Printable Version |  Subscribe to this Thread
|
|
|
Thread Tools |
|
#1
 04-08-2009, 09:17 AM
|
||||
|
||||
|
Pins and Needles. . .
Well, Finally got situated after a move to MI so I started workin on my Hasegawa Miura once again.
The Plan . . . I got around to the interior and wanted to replace the stock turn signal with a better lookin plated pin needle. My idea was to simply cut away the kit-supplied part, drill out the thicker end of the stalk and super glue it onto a section of a small needle that was clipped down to size. 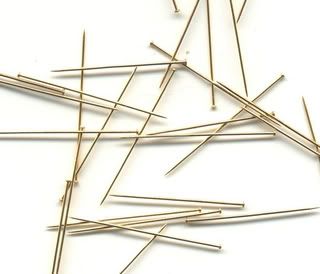 The solution . . . As ya know, the kit parts are very small and dont take to drillin very well. So I stretched some sprue and chucked the clipped needle in my Dremel to use as a "drill bit" to get the right diameter of hole. I was then going to glue this to the needle end and work the sprue down to size much like ya would with a lathe. As I started to insert the spinnin needle into the end of the sprue it was spinning at quite a high rate of speed to get the hole started (13,000 rpm). Before I had a chance to adjust to a lower speed, the plastic began to melt and adhere to the needle end (no glue required). 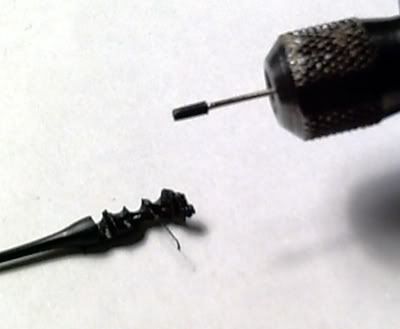 This was perfect! I then lowered the speed to around 6500 applied a little pressure as a thin coating of the plastic continued to melt and build up on the end to the approximate size I needed. I also switched from the end of the sprue to working from the side Once I was happy with the size, I then worked the plastic with an X-acto blade (again just as you would with a lathe and at a lower speed) to get a precise size and taper. Followed up by a light sanding with a sanding stick and then polishing with plastic polish. Tip - Keep your blade flat on the needle as you work the end where it meets the plastic or you could scratch the plating. 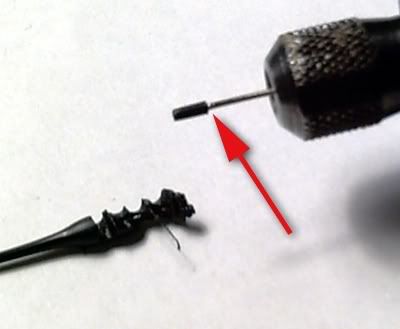 Before removing it from the dremel, I adjusted the turn signal in my Dremel to where there was a bend in the 1 to 1 turn signal and gave it a slight bend also. All that was left to do was to drill out the steering column and install the new stalk. 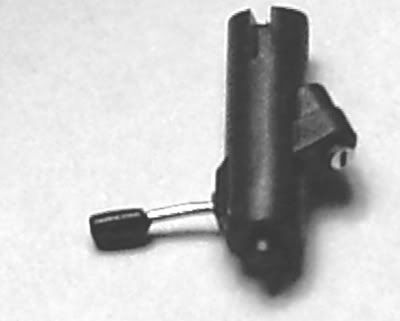 (looks horribly out of scale here. . . but it's just the camera and lighting.) I also used this technique on the shift knob (pictured below) and plan on trying it with other small and larger parts such as CV joints using tubing. 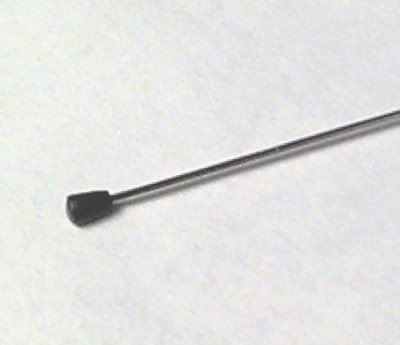 Sorry for the crappy phone cam pics. . . I'll take better ones later this afternoon and post 'em up. . . Hope you can use this technique. . . 
__________________
Chuck

|
|
#2
04-08-2009, 10:10 AM
|
||||
|
||||
|
Re: Pins and Needles. . .
Wanted to try it out on some larger stock. . .
These are on 2-1/2 inch 8d Galv finish nails that I had layin' around which I sanded the coating off before applying the plastic. . . Standard CV boot not modeled after any particular one. . . 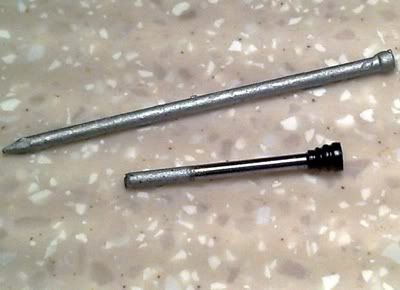 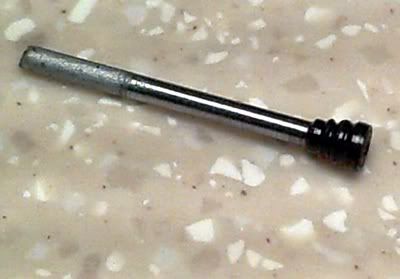  I would work the end down so the nail protrudes and acts as a locater pin. . . This also eliminates the parts being off center (even slightly) from the drilling out of kit parts. These are dead center. . . 
__________________
Chuck
|
|
#3
04-08-2009, 10:54 AM
|
||||
|
||||
|
Re: Pins and Needles. . .
Interesting stuff.
I've never had plastic stick to something spinning in a motor tool to a positive effect. nice to see you building again too.
__________________
SCCA 7, The lost Z Contest entry thread: Mystery? Beetle + Boxster = Bugster, P.T. Panel:click here Diablo Roadster: click here, & Porsche C2 Cab
|
|
#5
04-08-2009, 07:30 PM
|
|||
|
|||
|
Re: Pins and Needles. . .
Excellent! What a great idea! Thanks for sharing!
__________________
It ain't cool 'till your wife hates it. Imagine a world without Alabama Recent builds: Rocket Bunny FR-S and stock BRZ Toyota bB Bro-style Civic K20 powered SiR converted EK WIP I build slowly and poorly. 
|
|
#7
04-09-2009, 02:44 AM
|
||||
|
||||
|
Re: Pins and Needles. . .
Reproduced! I couldn't get it to work with Plastruct styrene, but it works with Tamiya PS. Very neat discovery. It worked fine at my lowest speed setting too (~1k).
__________________
Mark R
|
|
#8
04-09-2009, 05:34 AM
|
||||
|
||||
|
Re: Pins and Needles. . .
Very cool and simple technique.
Thanks for sharing your discovery.
|
|
#9
04-14-2009, 04:02 PM
|
||||
|
||||
|
Re: Pins and Needles. . .
 Very nice, thanks for sharing. Sometimes things go wrong for the better.
__________________
"There´s light at the end of the tunnel...it is the train coming towards you..." - Murphy´s Law
|
|
|
POST REPLY TO THIS THREAD |
 |
|
|


