|
|
| Search | Car Forums | Gallery | Articles | Helper | Air Dried Beef Dog Food | IgorSushko.com | Corporate |
|
|||||||
| WIP - Street Post topics for any "Works In Progress" street vehicles projects in this sub-forum. |
 |
 Show Printable Version | Show Printable Version |  Subscribe to this Thread
|
|
|
Thread Tools |
|
#1
 12-12-2008, 07:02 AM
|
||||
|
||||
|
Land Rover Defender LWB - Italeri 1/24
This is the project I am currently working on - a present for a friend of mine who loves the Land Rover Defender (but has never owned one)
The kit itself has an interesting provenance. It started out as a Ferrari which I later traded for a 1940 Ford which I in turn traded for this kit. You could say that, in a way, it's the first off-road ferrari  hehe heheI want this to be a quick(ish) build so I am really going to just whack it together and hope that weathering will cover my mistakes  Speed will be helped by the fact that this is a curbside kit so there is no engine to distract me. The kit itself is rather simple with a fairly low parts count. The molding is acceptable but it took me a week to clean up all the parts form flash and major parting lines etc. Since this is going to be a WELL used and beaten up version, the first thing I did after cleaning all the parts was to trash them. The body has been Dremmeled from inside and then dented and rust holes poked out. I have also applied dabs of CA glue and sprinkled it with baking powder to get a rust texture in places. 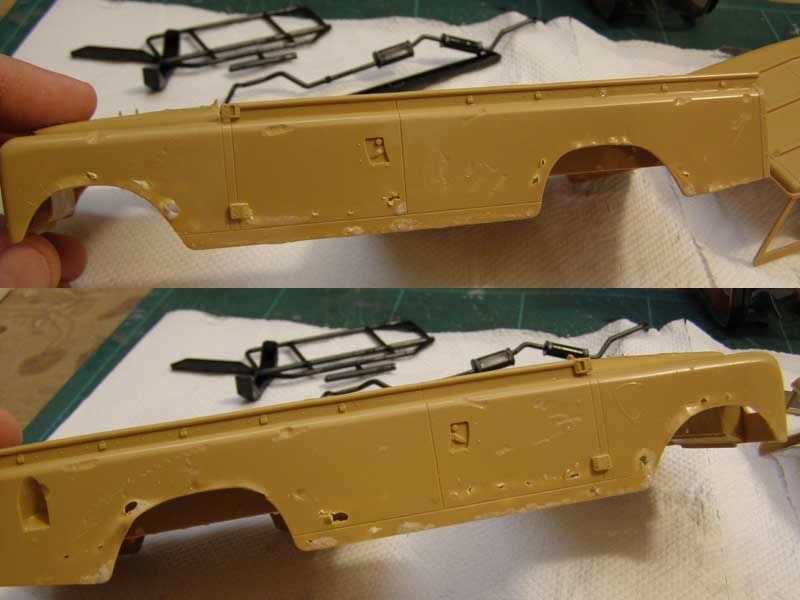 The roof was also dented as was the hood (which I forgot to photograph LOL) 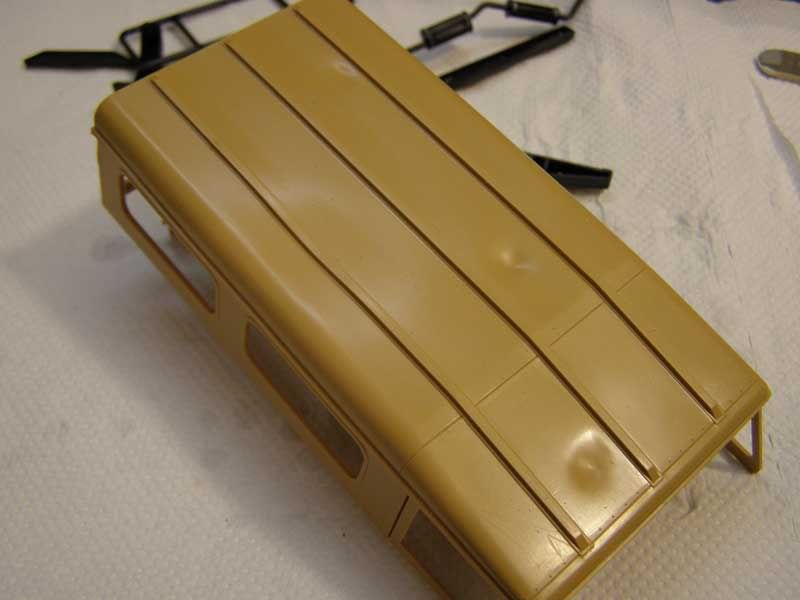 Chassis parts were also treated to CA and baking powder... 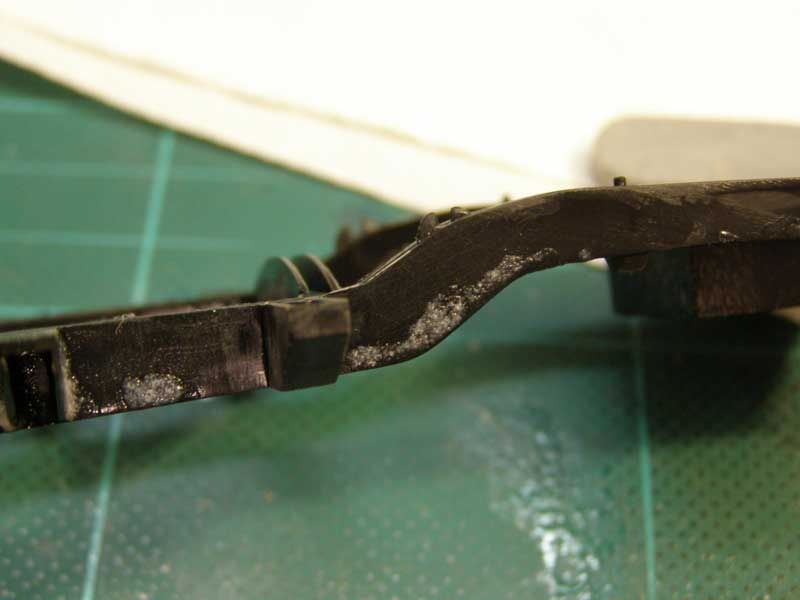 The exhaust train was also textured and I replaced the tail pipe with a piece of steel tubing. 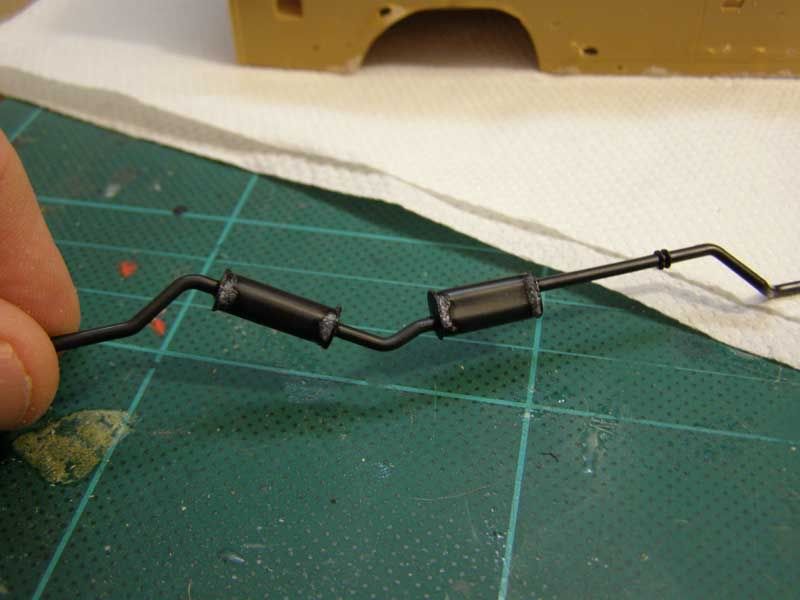 I couldn't wait to try out Lutz's aged seat tutorial. All I can say is that IMHO it ranks among one of the best ideas I have ever seen - deadly easy and the results are just amazing. All in all 40 mins work for all three seats :o 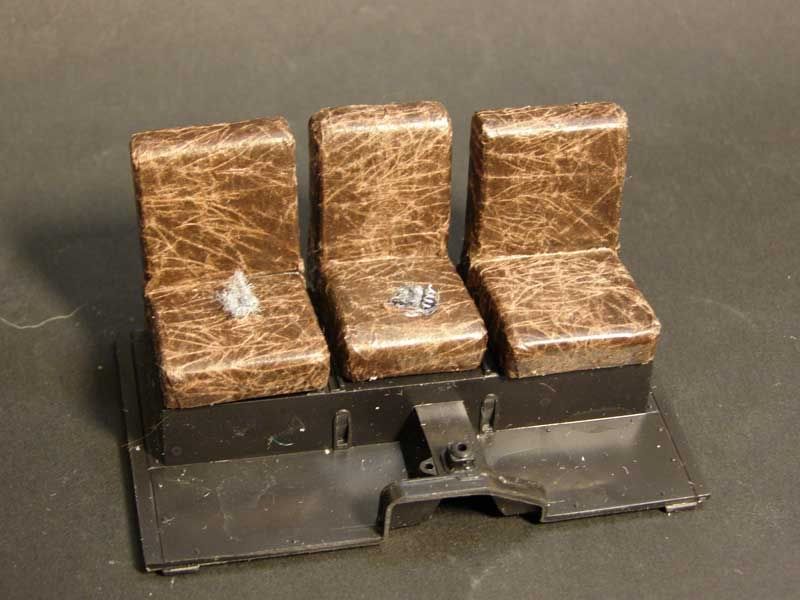 I proceeded exactly as Lutz suggests although I added a little touch of my own by earlier Dremelling out the back of the seat (lust like making rust holes) to make them look even more abused. The spring was made with some thin wire and the seat stuffing.... 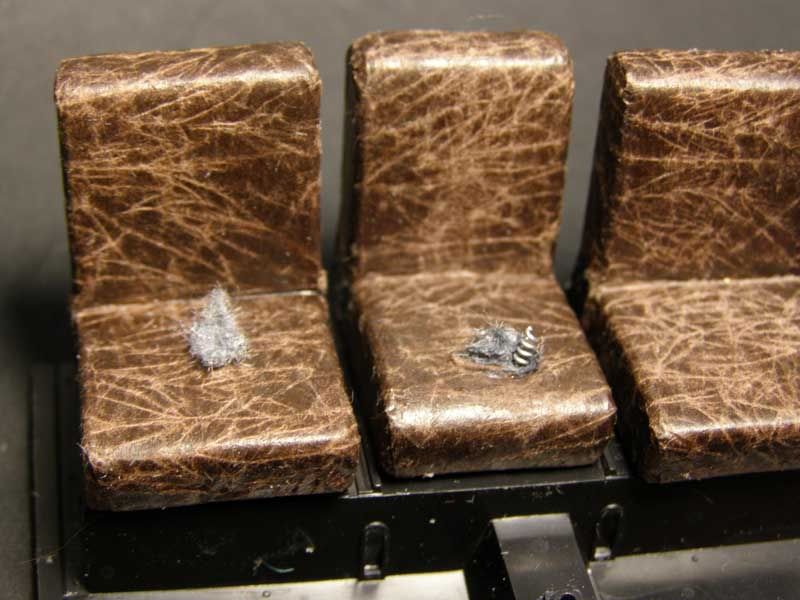 ...is some of that fluff from the clothes dryer fixed with white glue LOL 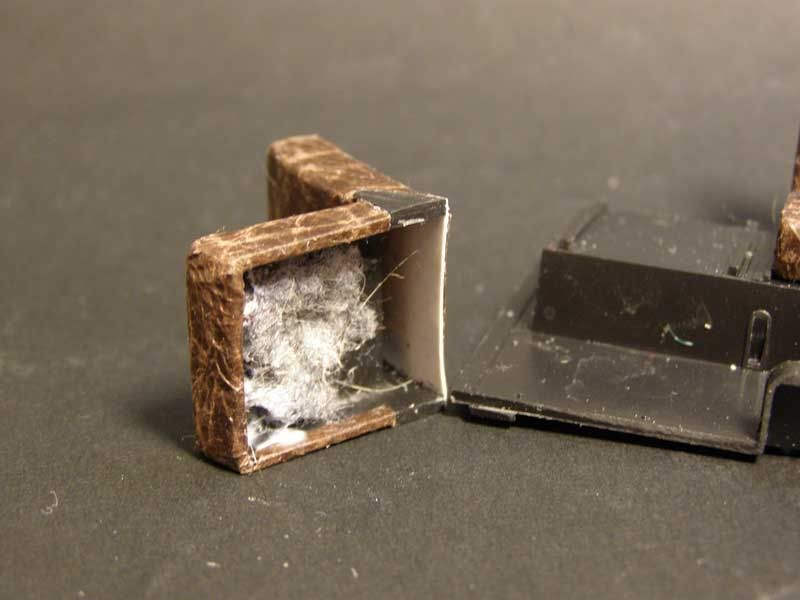 I thought I would try some armor techniques I have seen so I pre-shaded some areas of the body for extra shadow. 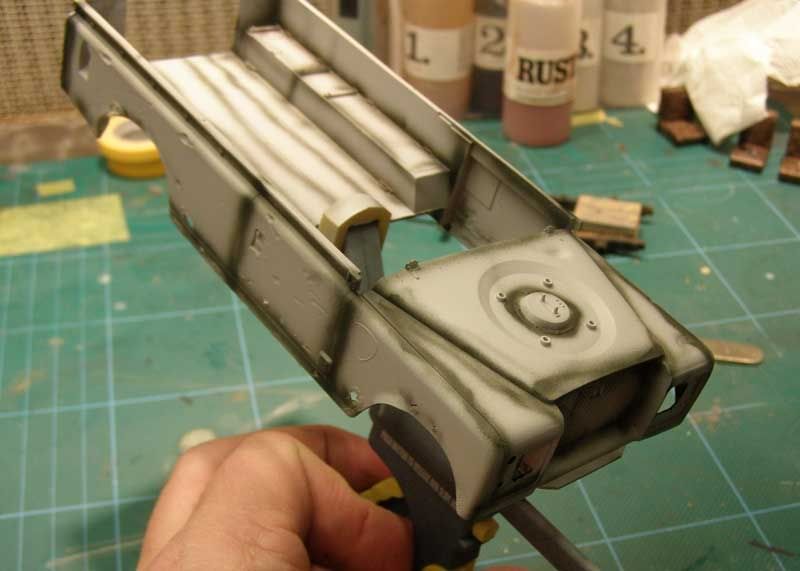 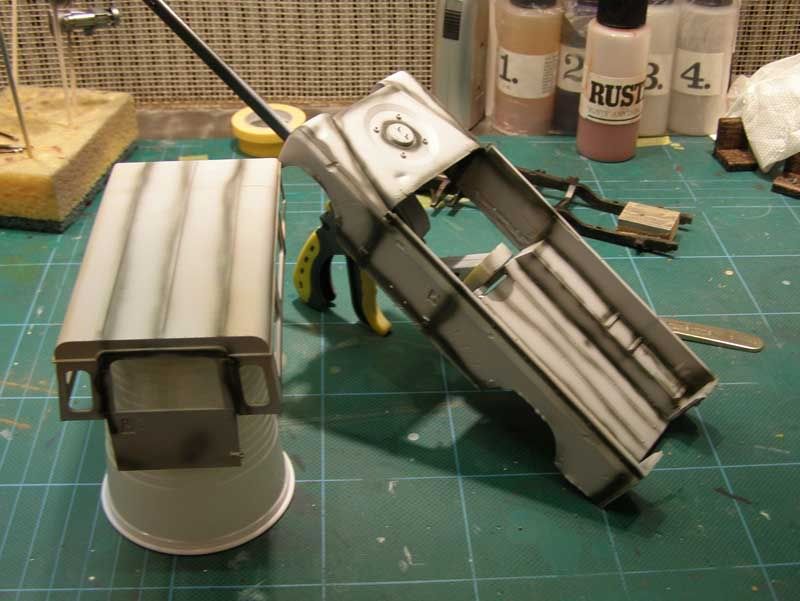 The body was painted with a custom mix of Vallejo acrylics (40% French Blue / 60% Dark Sea blue) and followed with some shading using the same color lightened with some white. The roof and wheels are painted with Vallejo white. Interestingly, the photos do not catch the final results. In reality, the shading etc have give quite a good effect and the body color is sort of "patchy" 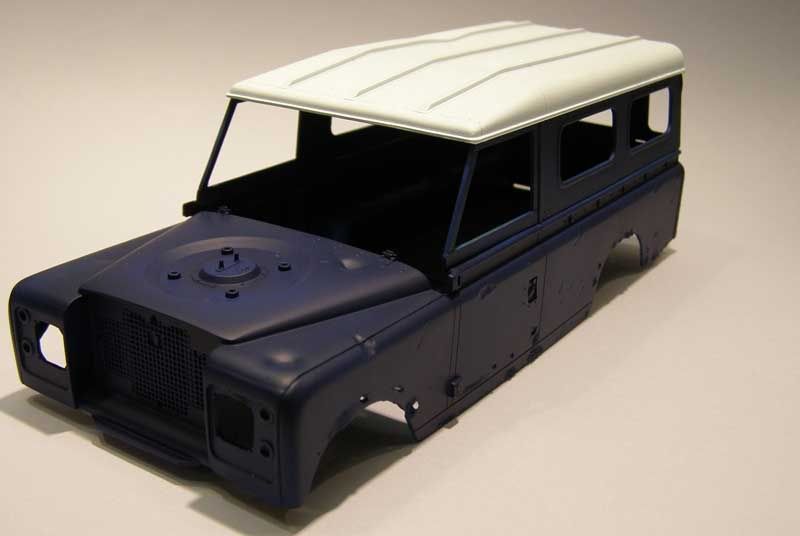 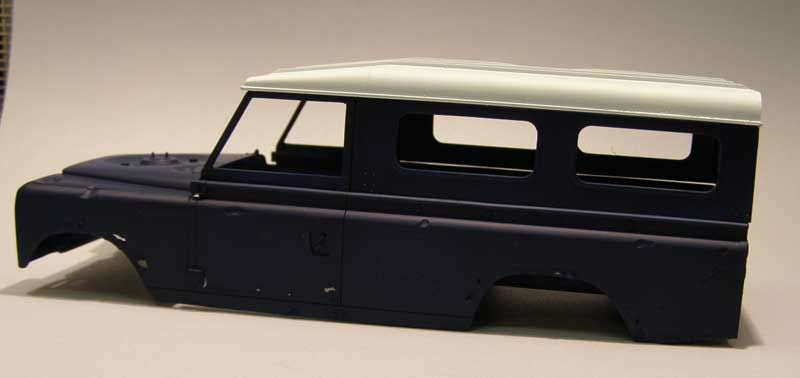 The undercarriage also has seen the beginning of the weathering process. Rustall dirt sprinkled over wet matt black paint in places. 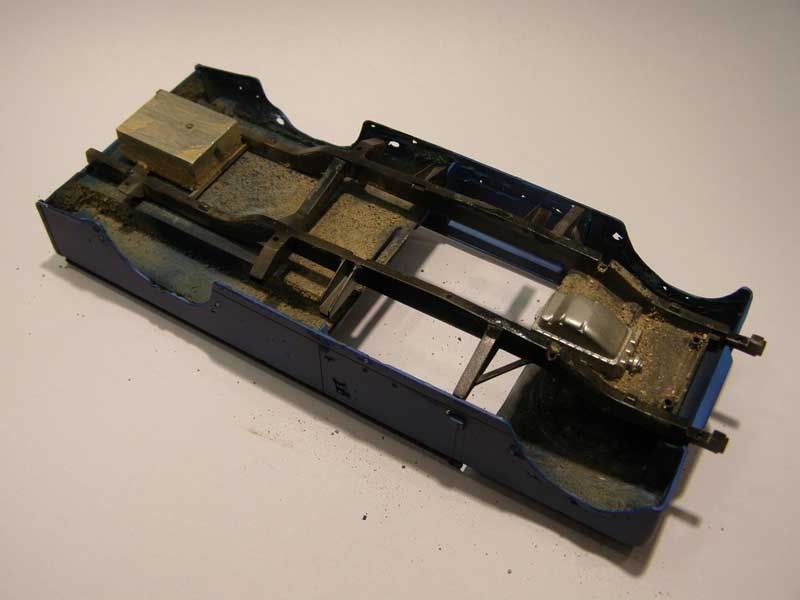 Thanks for looking in :thumbup: I assembled the suspension parts and attached them to the chassis frame. Despite being a curbside, the kit has quite an interesting suspension layout and has the option of either a left-hand drive or right-hand drive set-up. This shot gives you a good view of just what a haphazard modeler I am  Who else do you know that would have parts of the underside weathered and other parts untouched?!?! 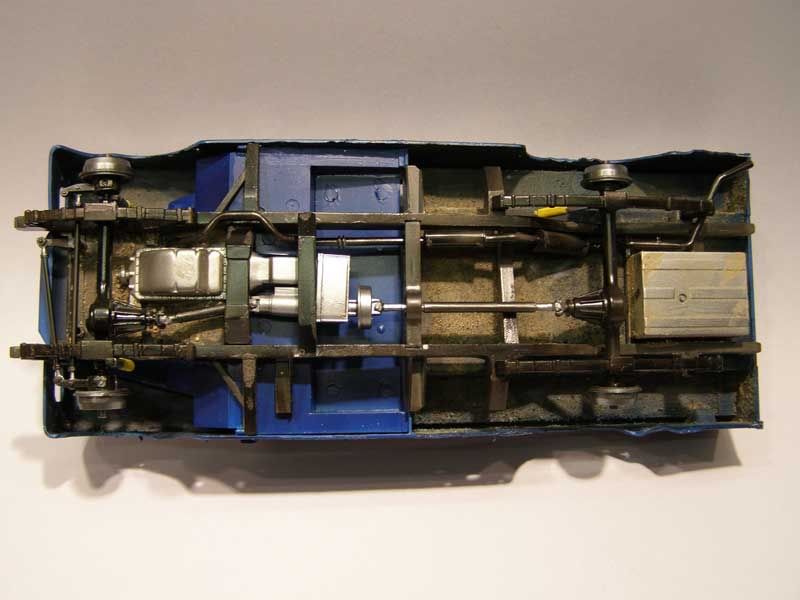 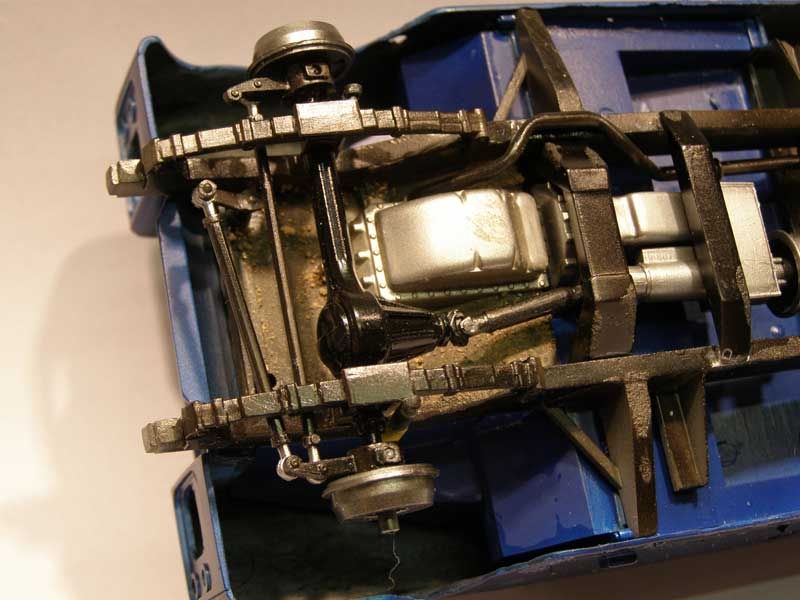 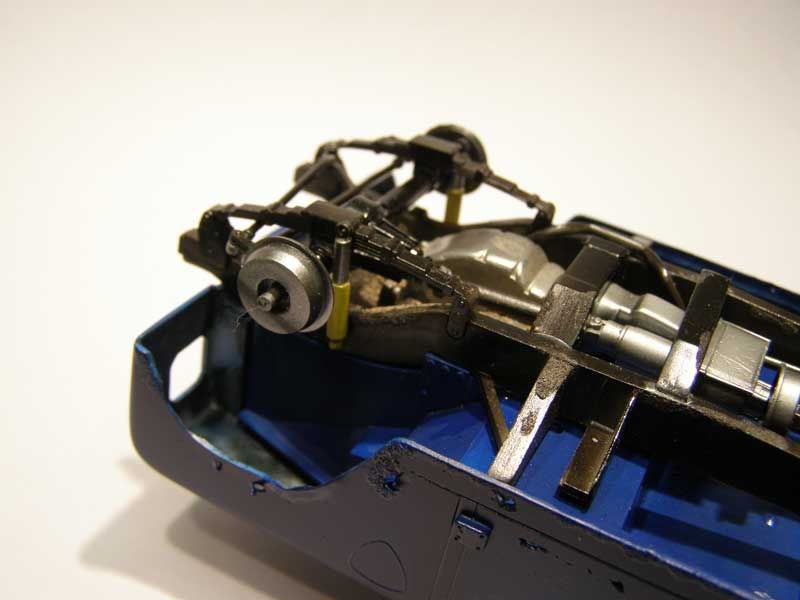 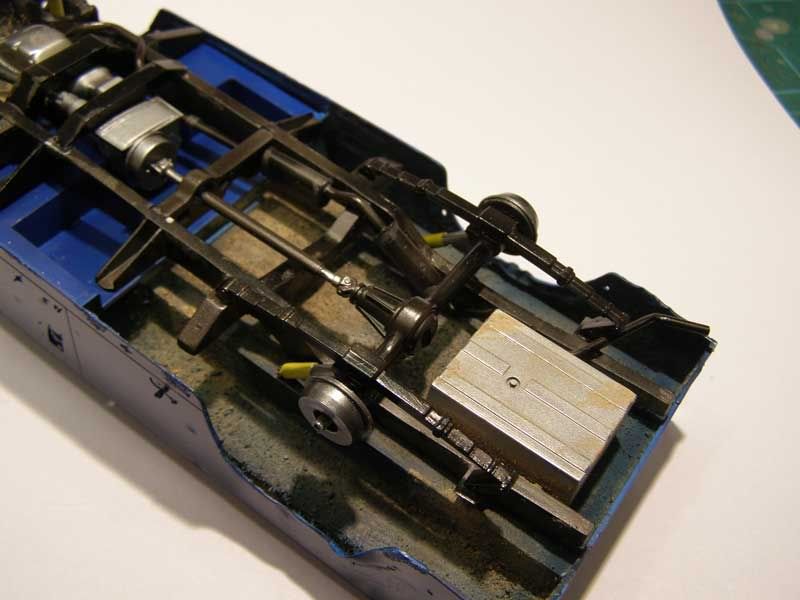 And a test fit to see if it has 4 paws on the ground 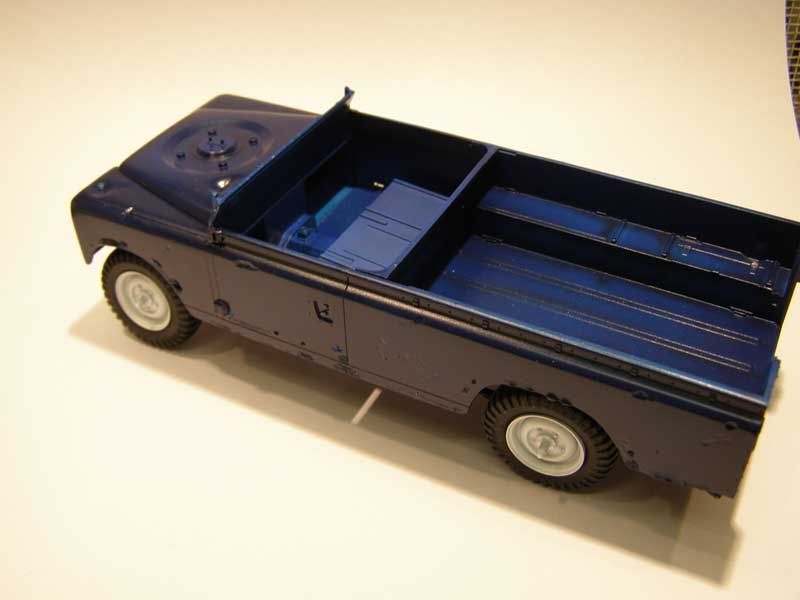 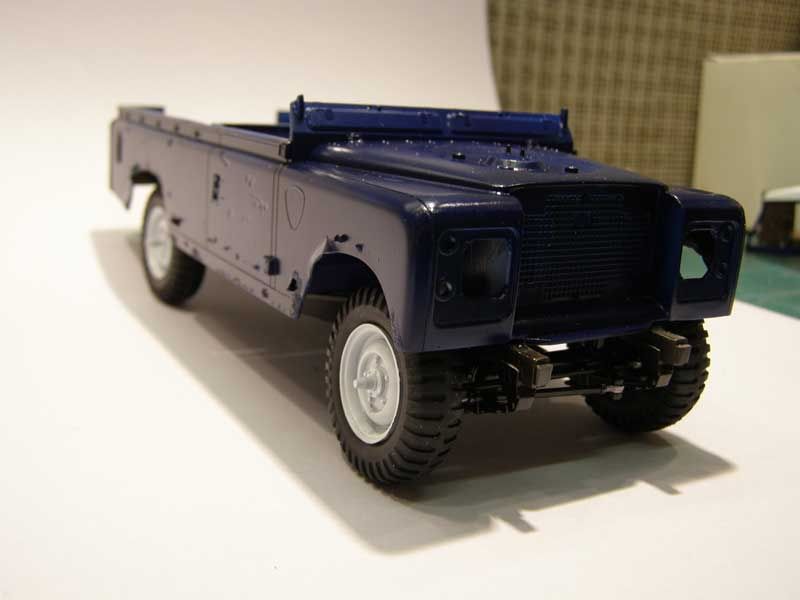 The cabin tub sub-assembly completed. I have added some scratches and dirty wash. I will add (or not) some dust and debris once I have solved my conundrum below This is how the cabin looks at present. 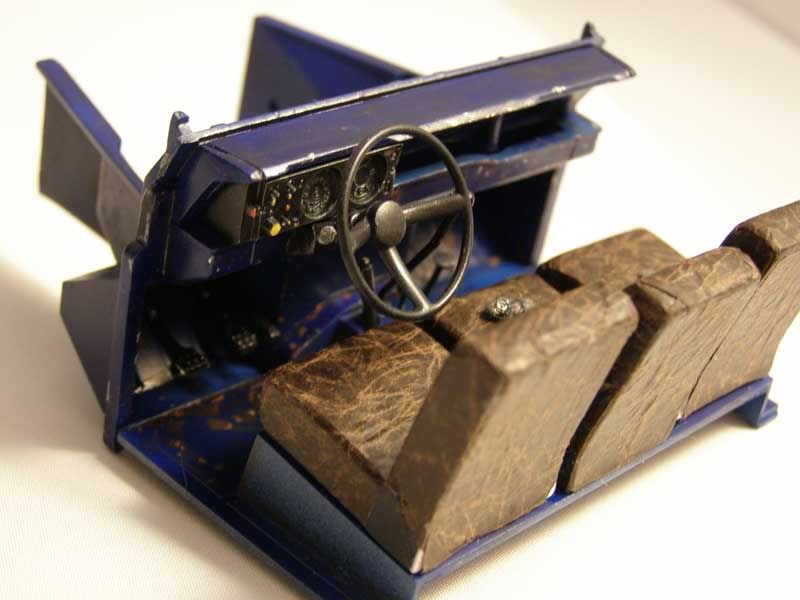  My dilemma... Italeri have kindly included an alternative rear door solution on the tree that is not supposed to be used in this version but I painted it up anyway. If I were to use it, I would be able to make the Landy as a "topless" version. 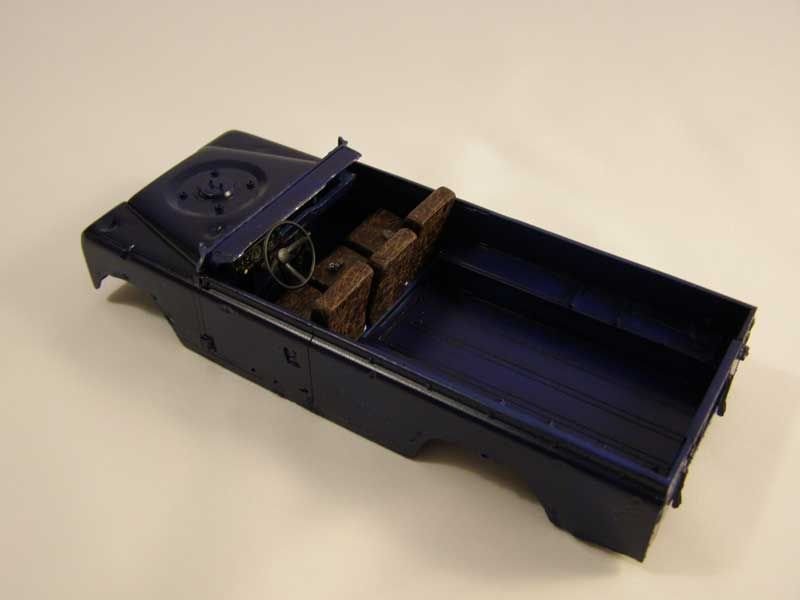 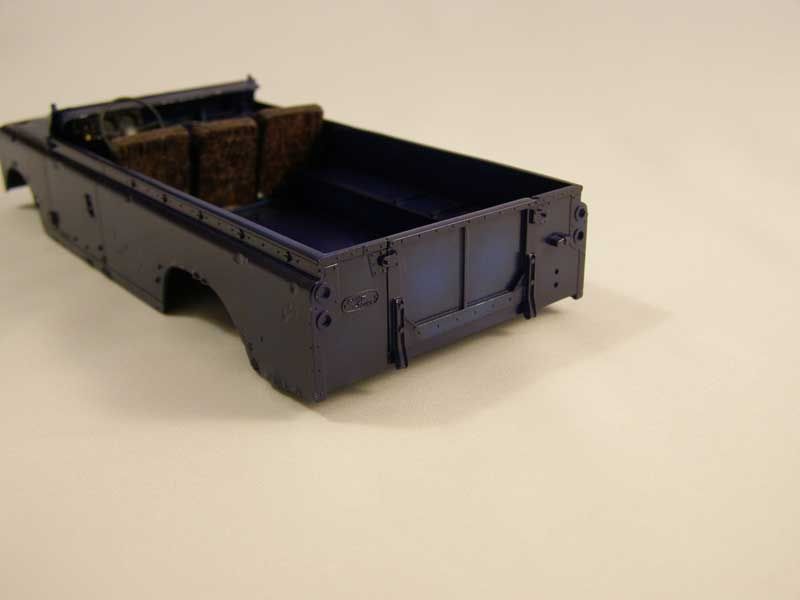 Full-top version... 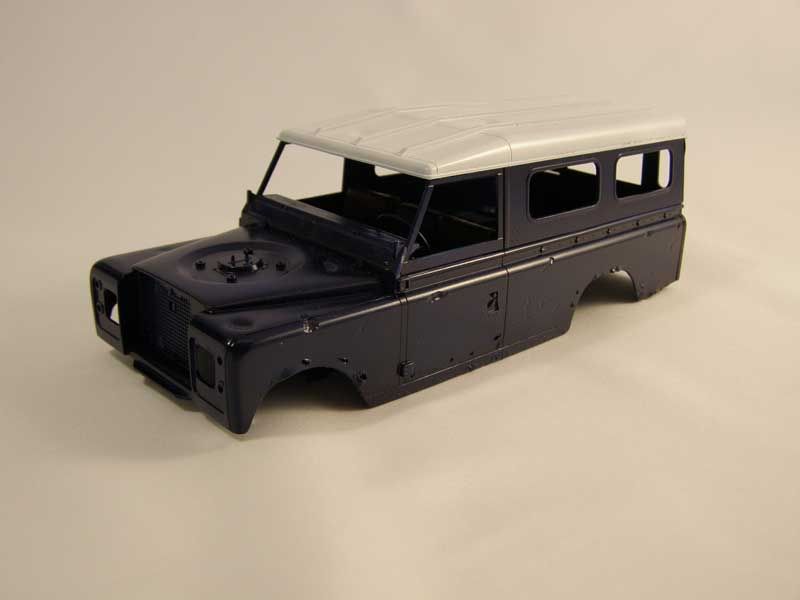 The up-side would be that the seats and any detailing would actually be visible. The down side is that it would mean quite a lot more work to make the interior more worth looking at. In the meantime, I have been invaded by The Blobby-Thing Monster !!!! (see below) I thought I would make a start on a possible base - a waterfall scene with the LR in the front. I made an L-shaped base out of Styrofoam but, instead of using "normal" ways to make the rock face, I wanted to experiment with a material I have never used before - the polyurethane expanding foam used to fix doors and windows. Boy, when I get it wrong, do I get it wrong!!! What a disaster!!! Firstly, while I was applying the foam to the base, the base fell apart and two sticky, foamy pieces of Styrofoam fell on the floor. Naturally enough, it fell sticky side down just like the proverbial slice of bread and butter LOL Believe me, this stuff makes a mess!!! Luckily for some reason I had decided to do this in the garage rather than my workshop. I had this gunk in my hair, on my hands. on my clothes...everywhere. And boy, is it sticky!!! Secondly, while I went back to my bench to make a second base, unknown to me the original foam was expanding....and expanding....and expanding...and expanding. I nearly wet my pants laughing when I returned and found that the stuff had blobbed out all over the place LOL 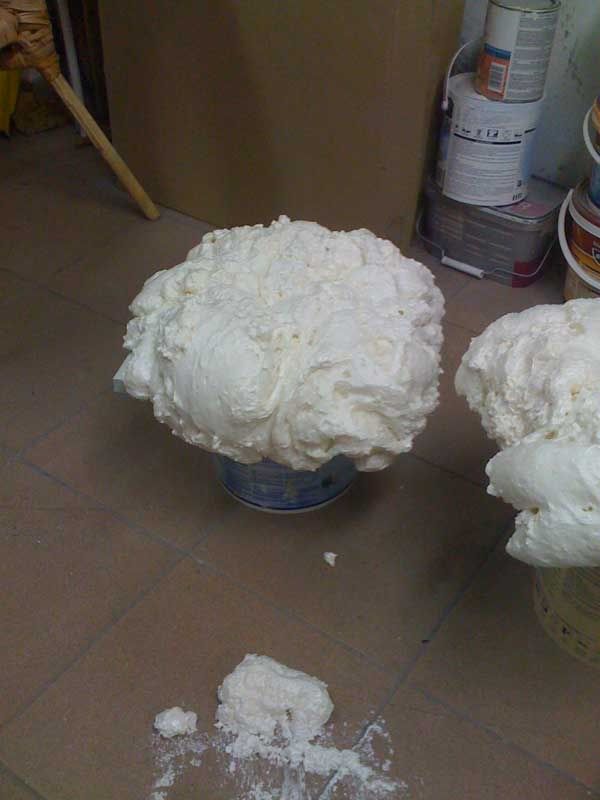 To top it all off, even when I tried to be more conservative with the foam on the second base, it has still expanded so much that I don't think there is enough room there now for the LR!! hehe 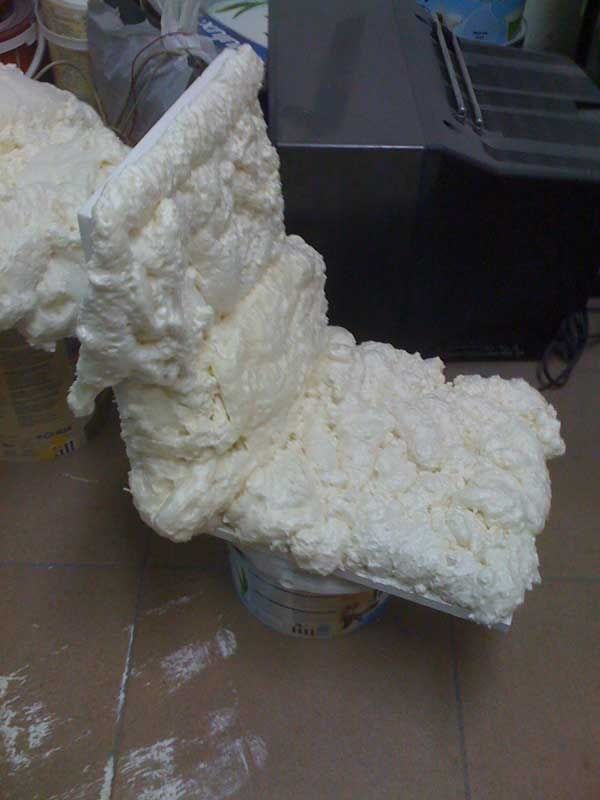 The Rescue plan Cut away the excess foam and make channel for water fall. Added bonus is that I found a huuuge hollow place in the middle which might make a cool grotto or something 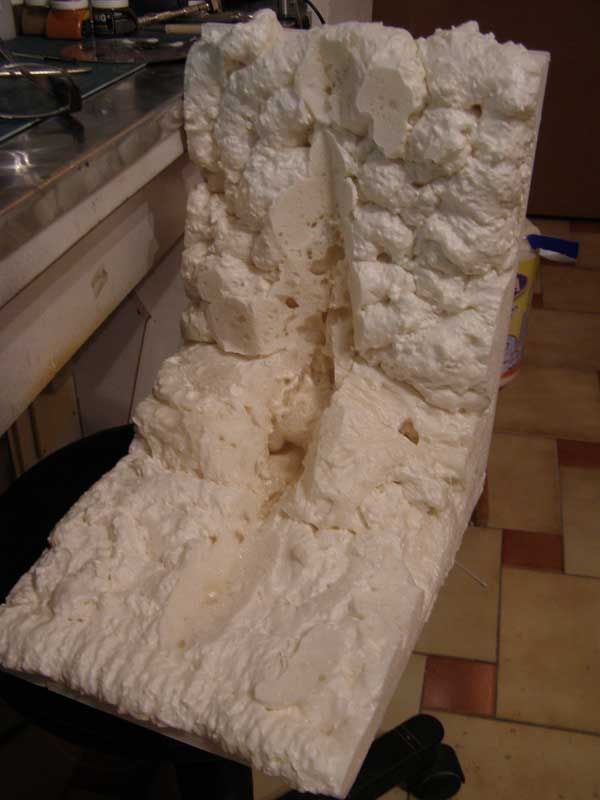 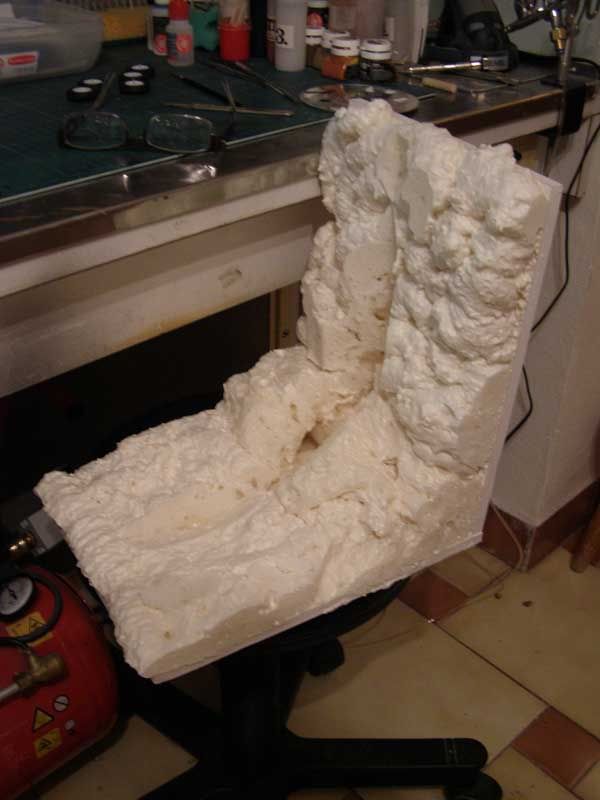 It will look something like this: 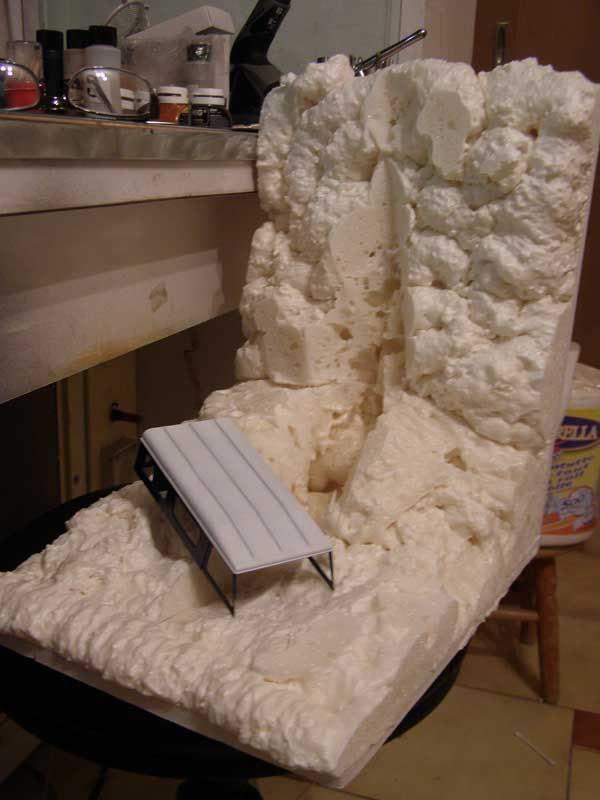 I have opened a Little Rock factory. I am casting 2 million plaster rocks to stick to the places I had to cut flat hehe 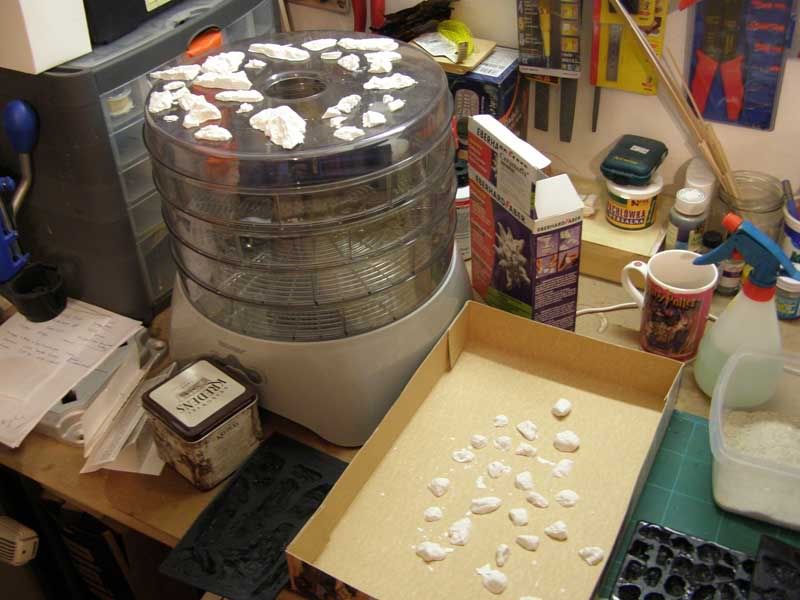 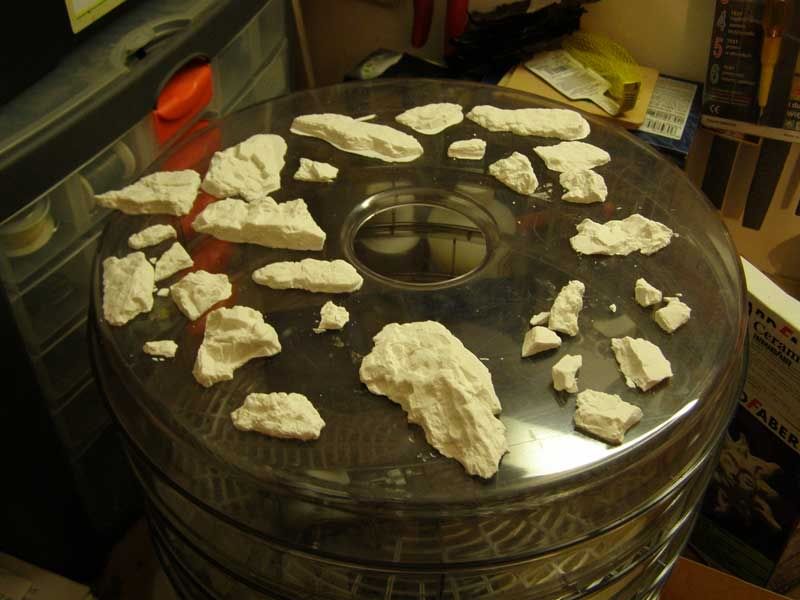
__________________
Guideline for happy modeling: Practice on scrap. Always try something new. Less is more. "I have a plan so cunning, you could put a tail on it and call it a weasel" - Edmund Blackadder 
|
|
#2
12-12-2008, 08:15 AM
|
||||
|
||||
|
Re: Land Rover Defender LWB - Italeri 1/24
 I always like to read your WIP´s! It´s a guarantee for seeing something unusual. I always like to read your WIP´s! It´s a guarantee for seeing something unusual.Those seats are looking fantastic! As for your waterfall scene: Ever tried gypsum over steel-mesh? Railway-modelers do their landscapes like that. You can give your rocks their rough structure very easy that way.
__________________
Julian
|
|
#4
12-12-2008, 10:53 AM
|
|||
|
|||
|
Re: Land Rover Defender LWB - Italeri 1/24
 I'm impressed by your modeling techniques more and more each day! I'm impressed by your modeling techniques more and more each day! You're not only mastering the weathering techniques but you're excellent at building dioramas too!  PS: I'll give you a call as soon as I have some doors and windows to fit! 
|
|
#5
12-12-2008, 01:50 PM
|
||||
|
||||
|
Re: Land Rover Defender LWB - Italeri 1/24
Quote:
__________________
  
|
|
#6
12-12-2008, 02:42 PM
|
||||
|
||||
|
Re: Land Rover Defender LWB - Italeri 1/24
Quote:
I?m wondering why destroy a good havana cigar to do 3 wrecked seats  Bravo!
__________________
 gio gio
|
|
#7
12-13-2008, 02:16 AM
|
||||
|
||||
|
Re: Land Rover Defender LWB - Italeri 1/24
Quote:
Bolders have been glued in place and now it just needs to be covered with plaster and primed for painting. 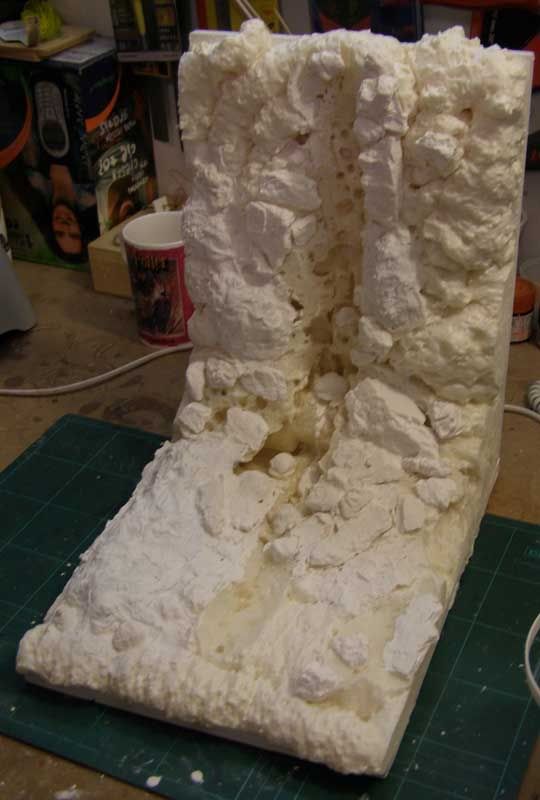 The chassis is now finished. No more weathering to be done here I think. When I think that a week or so ago this was just a bunch of bits of black plastic... I smile 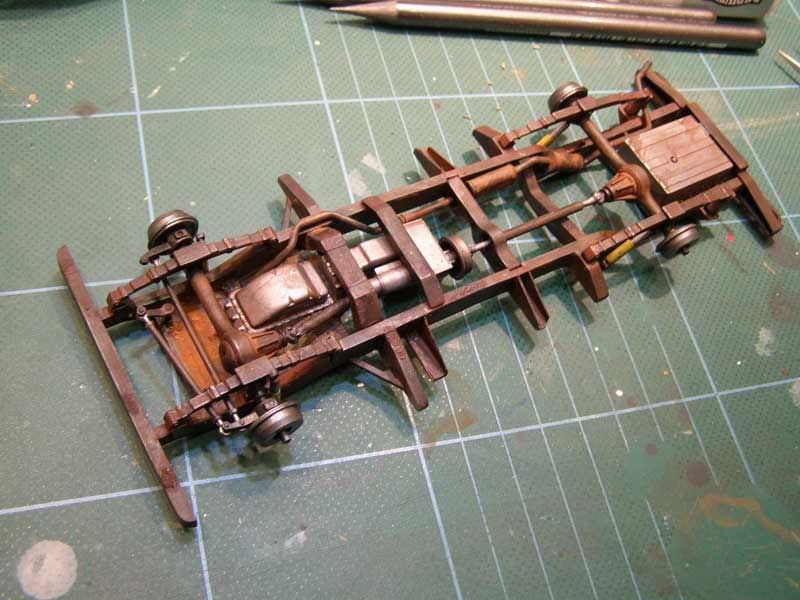 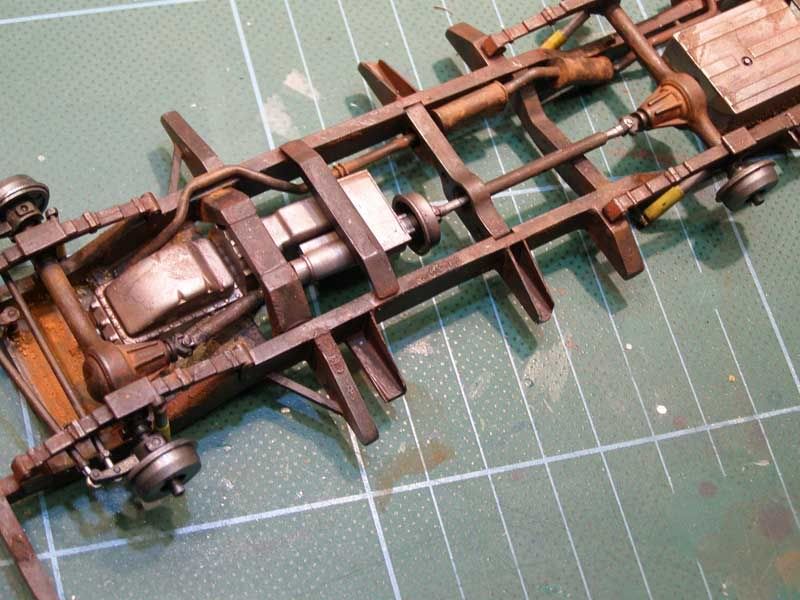 The rocks have been primed with automotive grey primer and then given a light disting with Tamiya white primer. This is more or less how the layout will look (big word for a car body in the middle of grey plaster! ).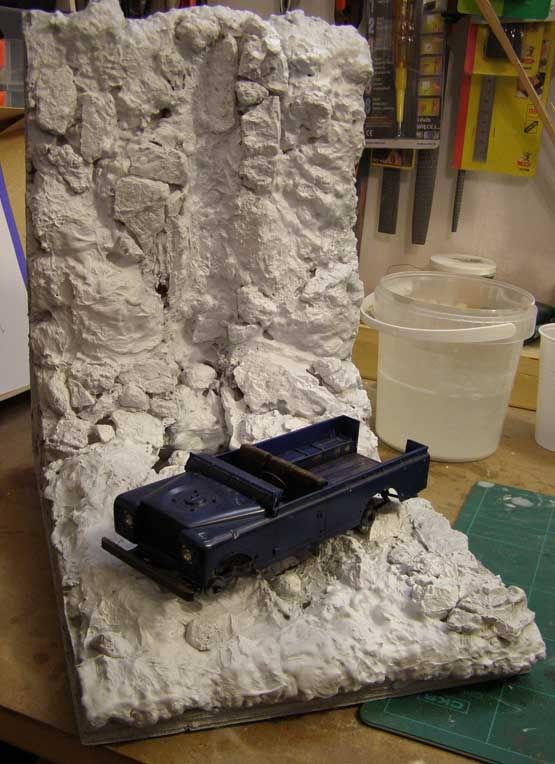 Closer view 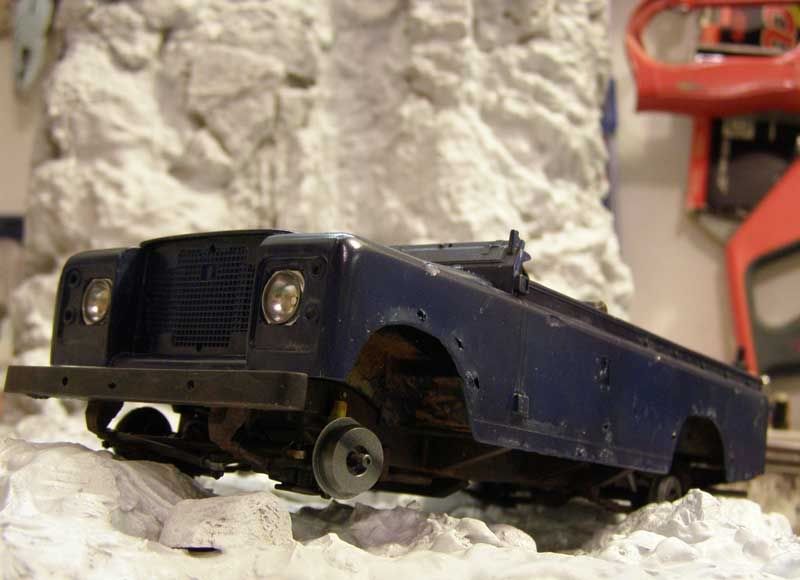 A bit of 4x4 action (well it woudl be if the wheels were on )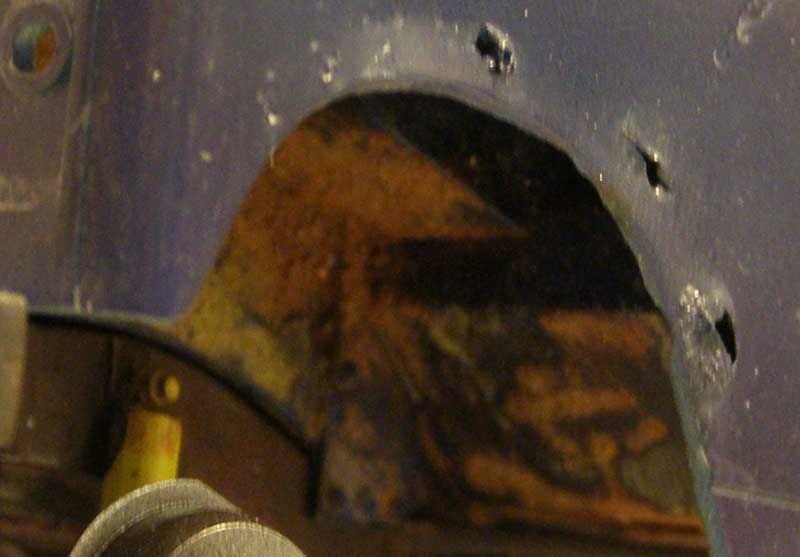 Cheers
__________________
Guideline for happy modeling: Practice on scrap. Always try something new. Less is more. "I have a plan so cunning, you could put a tail on it and call it a weasel" - Edmund Blackadder
|
|
#8
12-13-2008, 02:44 AM
|
||||
|
||||
|
Re: Land Rover Defender LWB - Italeri 1/24
Hi Steve,
cool project so far. Weathering job on the chassis is great, unfortunately hardly to be seen later.
__________________
Micha      
|
|
#9
12-13-2008, 04:43 AM
|
||||
|
||||
|
Re: Land Rover Defender LWB - Italeri 1/24
Excellent as always! Topless looks good to me, unless you could do something a bit more dramatic with the roof - big scratches, rips, rust, dings, plaster rocks(!). Right now it looks a bit like a tour truck or something! Anyway, fantastic work, it'll be very interesting to see how you do the water this time. And the chassis looks awesome.
__________________
Mark R
|
|
#10
12-13-2008, 09:52 AM
|
||||
|
||||
|
Re: Land Rover Defender LWB - Italeri 1/24
Great work!
__________________
My Fotki Album
|
|
#11
12-13-2008, 11:14 AM
|
||||
|
||||
|
Re: Land Rover Defender LWB - Italeri 1/24
 Looks great!
__________________
Jonathan Current projects: 1/12 Testors Lamborghini - http://www.automotiveforums.com/vbul...d.php?t=930745 Completed projects: 1/12 Porsche 934 Turbo RSR - http://www.automotiveforums.com/vbul...d.php?t=933988 No trees were harmed in the sending of this message; however, millions of electrons were terribly inconvenienced.
|
|
#12
12-13-2008, 02:19 PM
|
||||
|
||||
|
Re: Land Rover Defender LWB - Italeri 1/24
Quote:
__________________
Guideline for happy modeling: Practice on scrap. Always try something new. Less is more. "I have a plan so cunning, you could put a tail on it and call it a weasel" - Edmund Blackadder
|
|
#13
12-13-2008, 06:38 PM
|
||||
|
||||
|
Re: Land Rover Defender LWB - Italeri 1/24
I've seen weathering done before, but that rust looks like............RUST. And with that waterfall in progress, I think you should get a job with Disneyland with your skills.
__________________
|
|
#14
12-13-2008, 10:04 PM
|
||||
|
||||
|
Re: Land Rover Defender LWB - Italeri 1/24
Land Rovers bodies we're made of aluminum...so No rust....
|
|
|
POST REPLY TO THIS THREAD |
 |
|
|


