|
|
|

|
|
| Search | Car Forums | Gallery | Articles | Helper | AF 350Z | IgorSushko.com | Corporate |
|
| Latest | 0 Rplys |
|
|||||||
| WIP - Street Post topics for any "Works In Progress" street vehicles projects in this sub-forum. |
 |
 Show Printable Version | Show Printable Version |  Email this Page | Email this Page |  Subscribe to this Thread
|
|
|
Thread Tools |
 01-12-2010, 09:07 PM
|
#1 | |
|
AF Enthusiast
Join Date: Sep 2003
Posts: 637
Thanks: 24
Thanked 16 Times in 16 Posts
|
Aston Martin DB4-1/25 Revell Monogram...a detailed story!
This will my build on the 1/25 Revell Monogram Aston Martin DB4. Although it's one of the most exquisite sport luxury car of all time, at the hobby stores shelves is almost a none exist subject. Despite being a 40 years old design already, this little 1/25 little friend gives plenty of possibilities and space to our mind's creativity. This is not common on those old days model cars, where were not today's fine standards like the ones from Tamiya and Fujimi, just to name a couple.
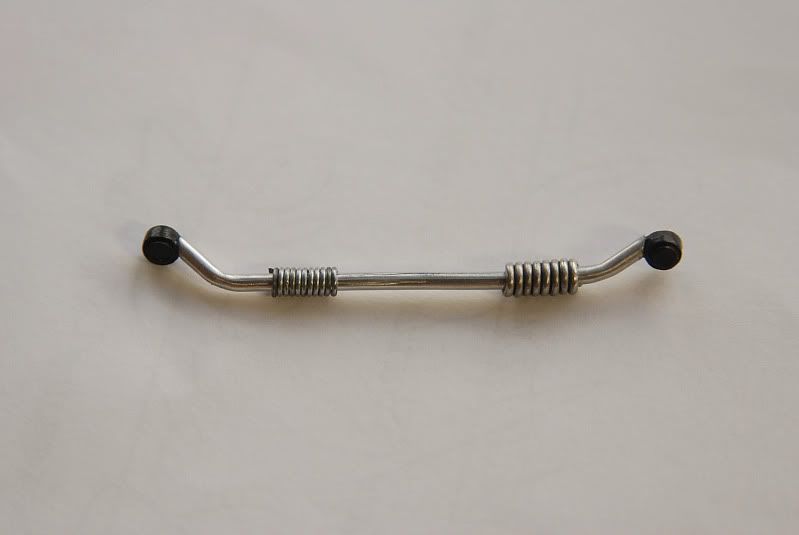
There have been several releases on this Aston Martin Db4, a couple from Monogram (different box art) and also a couple from Revell itself. Mine is the 1997 one. I'm also including a couple of pictures of the DB5, the real James Bond's car. I found doing my research that sometimes the DB4 is also named as the Bond's car. They are almost the same car, what better identify one from the other are the head lights buckles. Here are a couple of pictures of the art boxes. 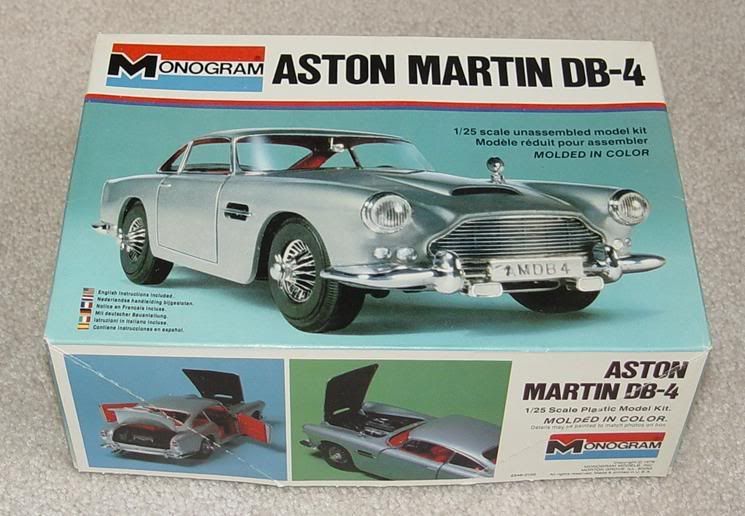 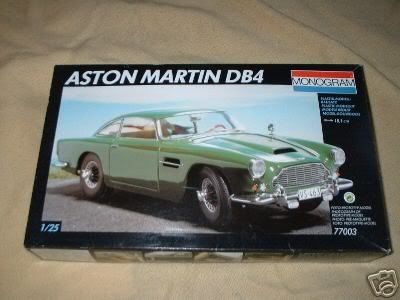 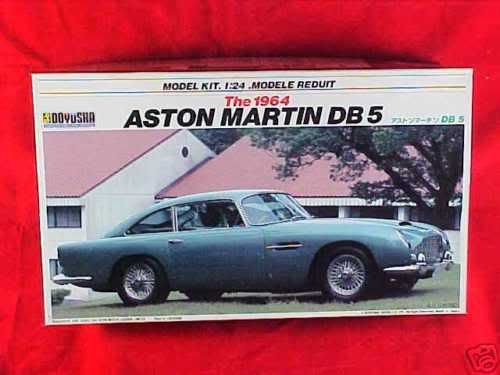 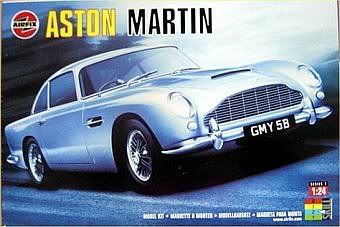  My goal is to make a high detailed version of it, since there is of the lack of buildings on this Aston, most of them Box Stock with an upgraded wheels set from Tamiya's Jaguar MK II and the Aoshima MGB. The version I selected will be the DB4 Series 5. Although at first sight one can say they all look the same, they have significant differences. Here's a picture of a nice preserved and aggressive look silver DB4 Series 3 and another for the one I selected, a red Series 5 one. 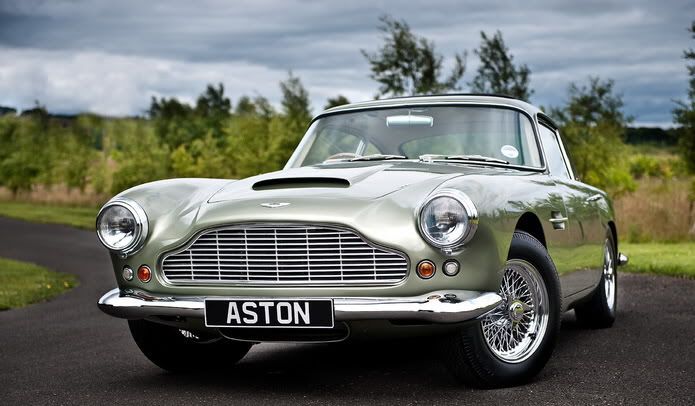 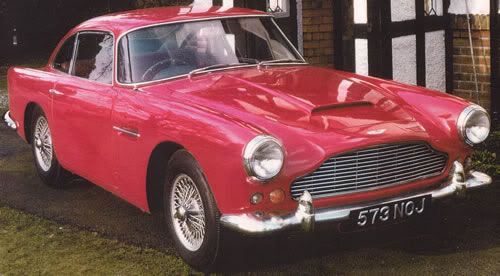 Ok, now let's go to do some modeling.... Opposite to basic model car modeling and to the instruction sheet itself, I will start this model coming from the chassis and suspension components going up to the interior, body, ending at the engine bay...What an odd way, isn't it?  Here's a look to the chassis and interior components. Typical from those old days, several parts are used to do one component. Among the several nice features of this model, the seats have some reclinable movement. 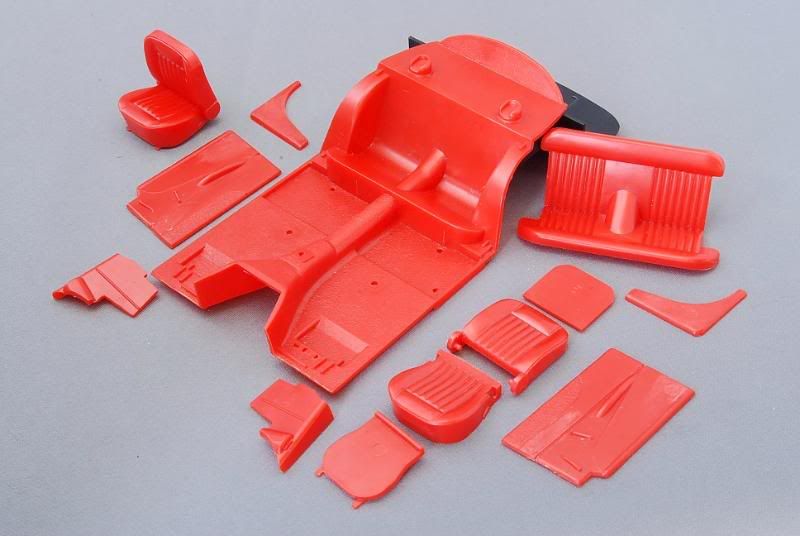 The chassis and spare tire compartment has been glued together:  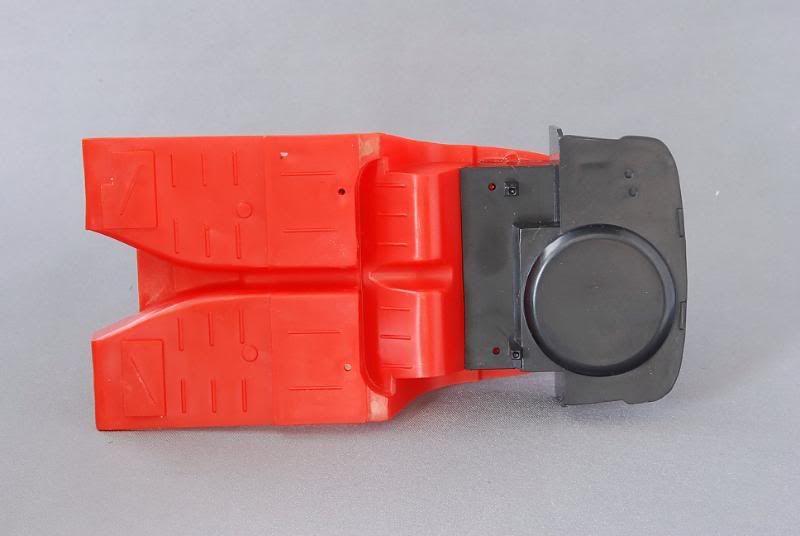 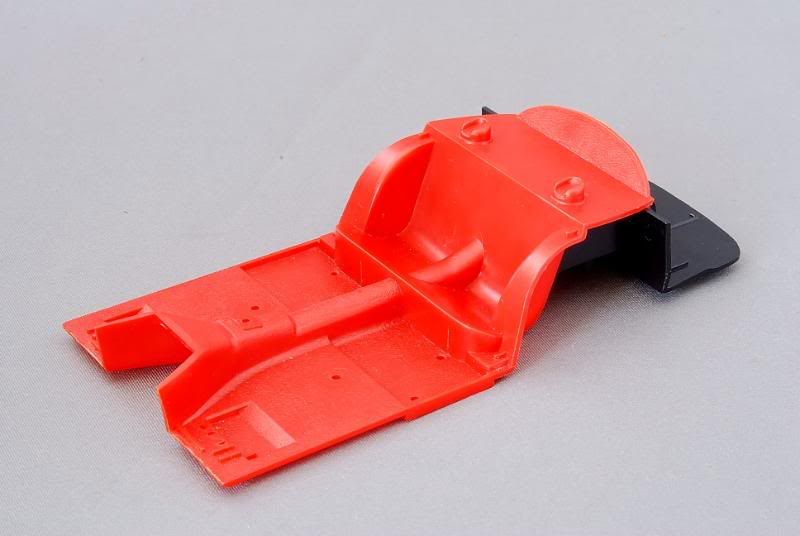 Moving on now to the underside of this model, since I've been doing a lot of research for this model lately, so I found that the swing link is too large, so, I cutted it, shaved the simulated plastic bolt and glued a real aluminum one. Another alteration I did was in the rear axle cover, were I added more aluminum bolts from R&B Motion, aluminum sheet for the Watt link assemblies connectors, and aluminum tubing for the Watt link assemblies itself. I found that the rear axle cover comes as a separate part and it will be great at detailing paint time, since it's supposed to be painted in a different color than the axle itself and this will eliminate future tricky masking there. Real part: 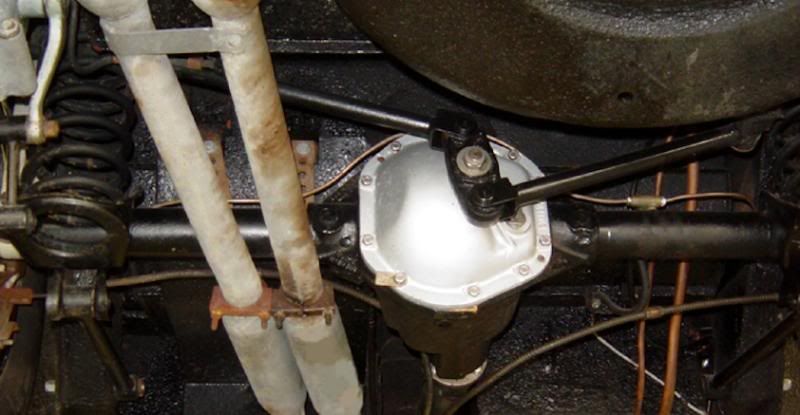 altered part: 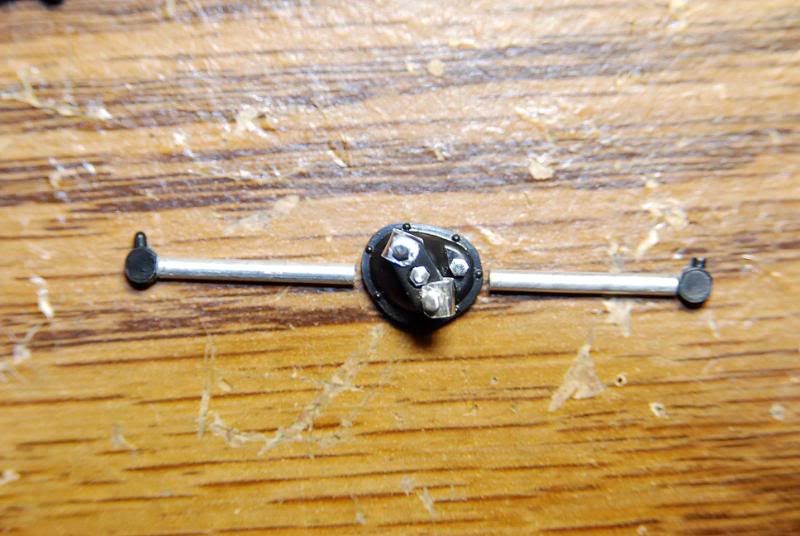 I taped down everything together on the chassis along with the Radius Arm assemblies..Let’s see how it looks... 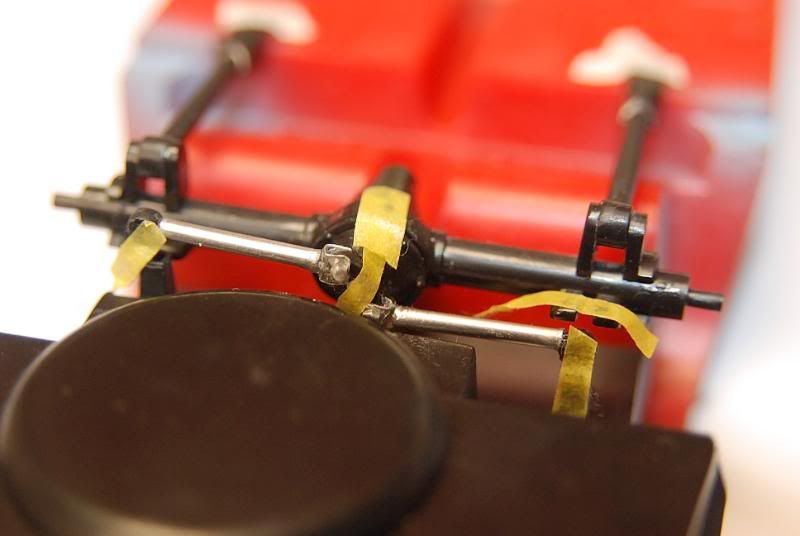 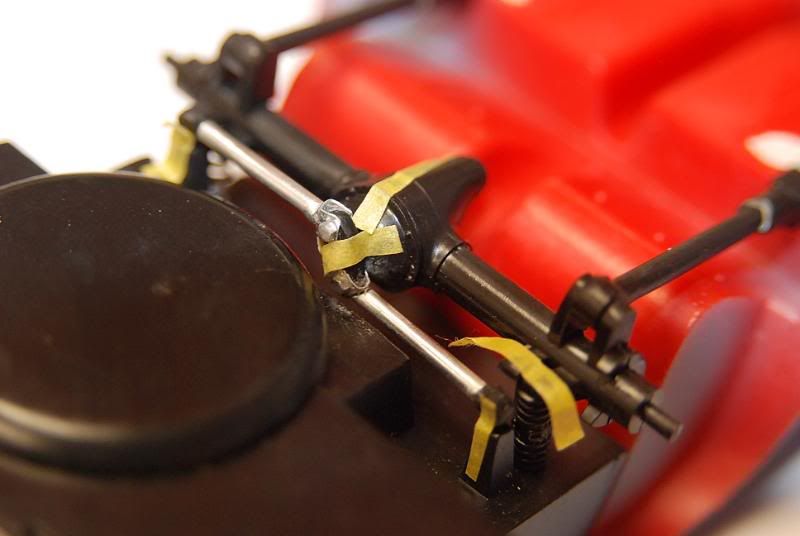 I like how it being, buuuut, to me something is still missing...I made the road springs out of solder ans its bases from plastic sheet Now...we have a complete family: 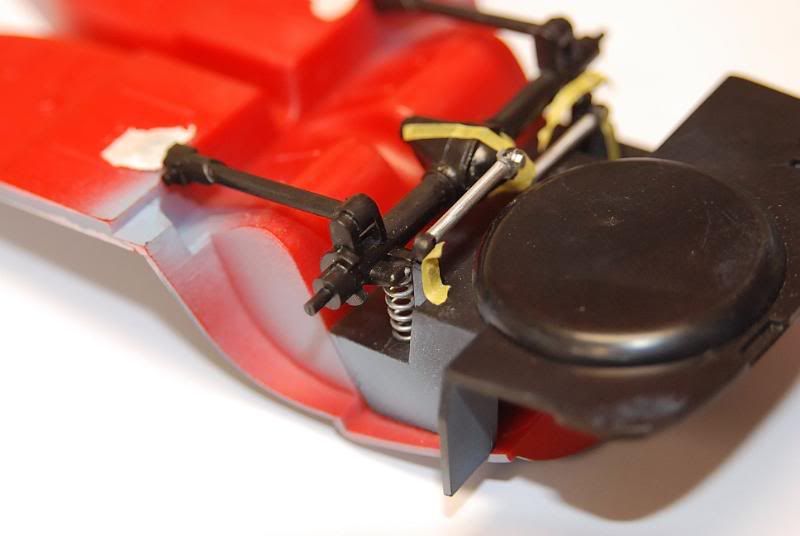 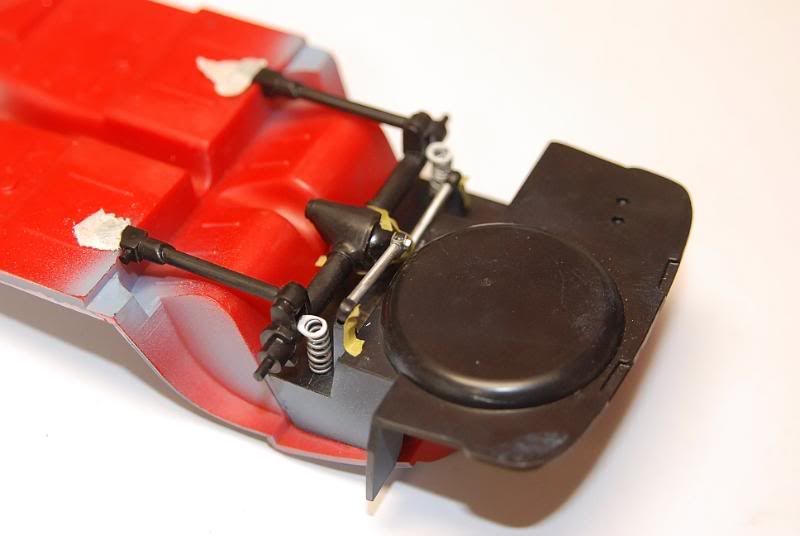 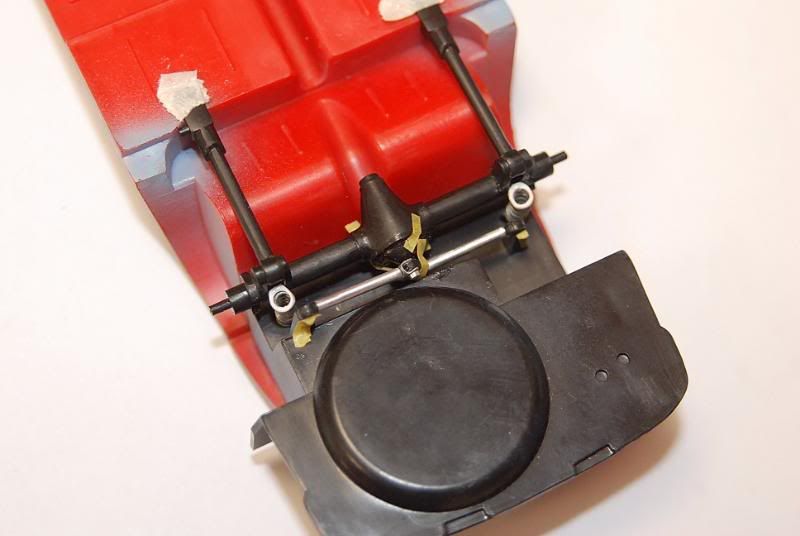 Here I even added the aftermarket wheels and they fitted perfectly without any alteration! 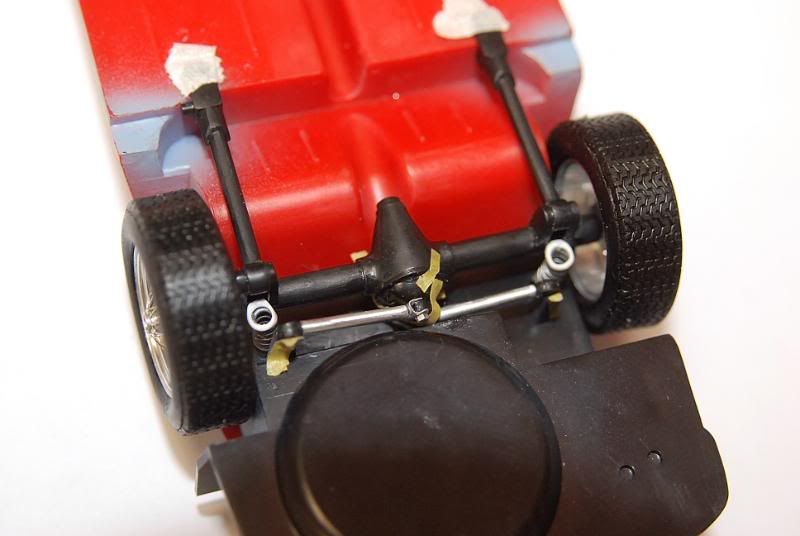 Last edited by Porsnatic; 05-20-2012 at 09:30 AM. |
|

|

|
|
01-12-2010, 09:39 PM
|
#2 | |
|
AF Vendor-TBT's Owner
 
Join Date: Jul 2008
Location: Calgary
Posts: 940
Thanks: 0
Thanked 1 Time in 1 Post
|
Re: Aston Martin DB4-1/25 Revell Monogram...a detailed story!
This looks like a promising little kit-the reclining seats are a nice touch.
|
|
|
|
|
|
01-14-2010, 05:16 PM
|
#3 | |
|
AF Enthusiast
Thread starter
Join Date: Sep 2003
Posts: 637
Thanks: 24
Thanked 16 Times in 16 Posts
|
Re: Aston Martin DB4-1/25 Revell Monogram...a detailed story!
Today I have a quick update. After being working in the rear suspension components, now I’m moving to the front. Like in the rear, box stock suspension is OK but, I feel it allow space for something more.
I started gluing together the engine bay and cutting the attachment ends to the plastic sway bar with some brass tubing I did a new one. 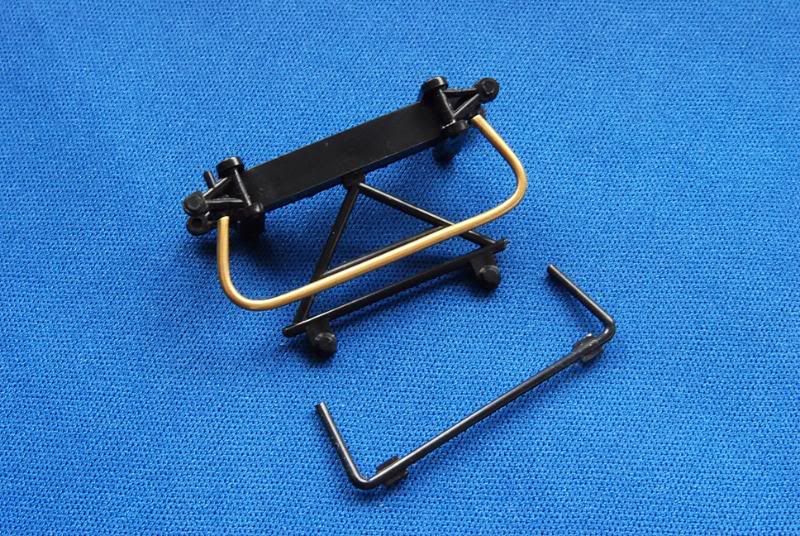 Same method was done with the steering rack, rolling some thin solder around the tube to simulate the boot. 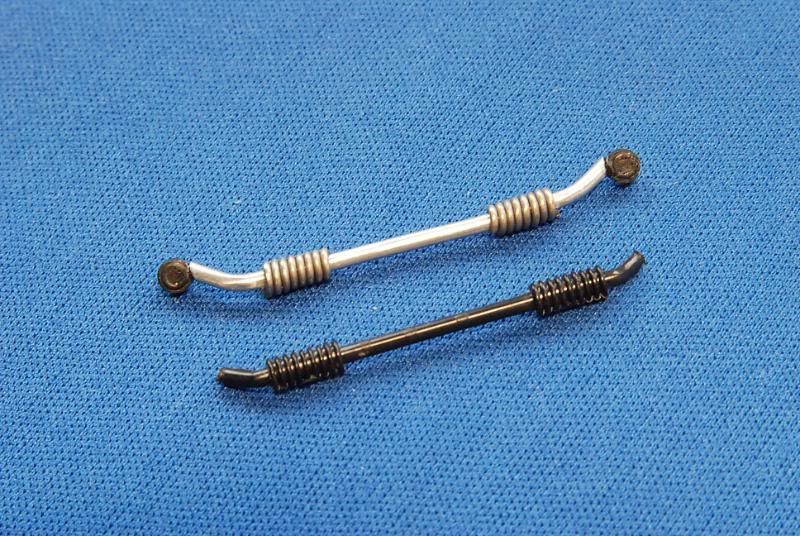 The shocks and spring plastic combo also suffer a transformation with some solder, plastic rod, aluminum tubing, and aluminum sheet. I didn’t put much attention on the exposed epoxy since it will be later covered by the brake disc and the wheels. 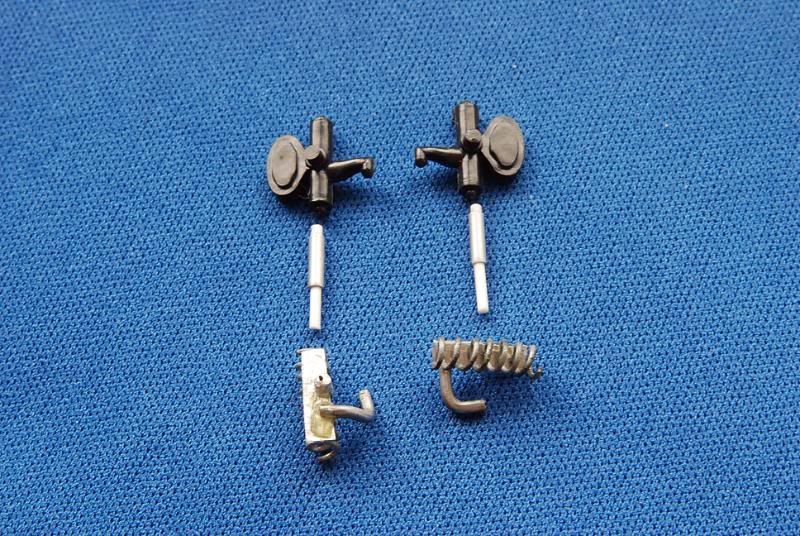 Everything was installed and this is how it looks: 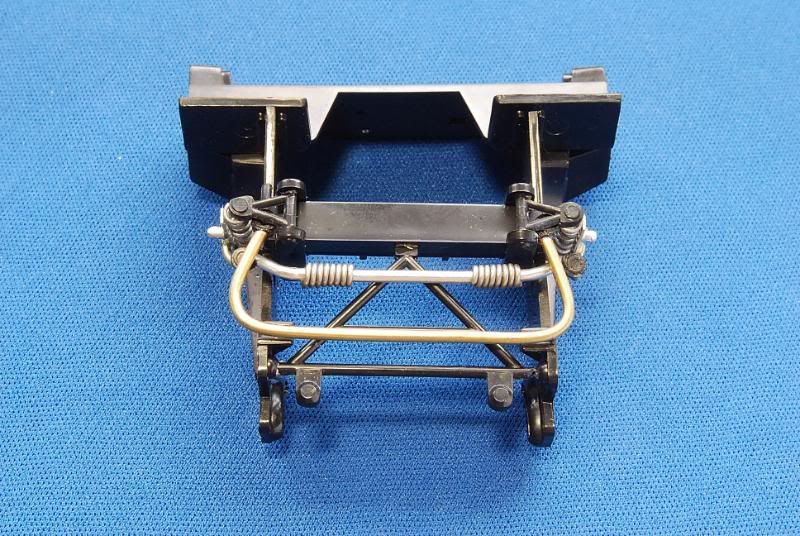 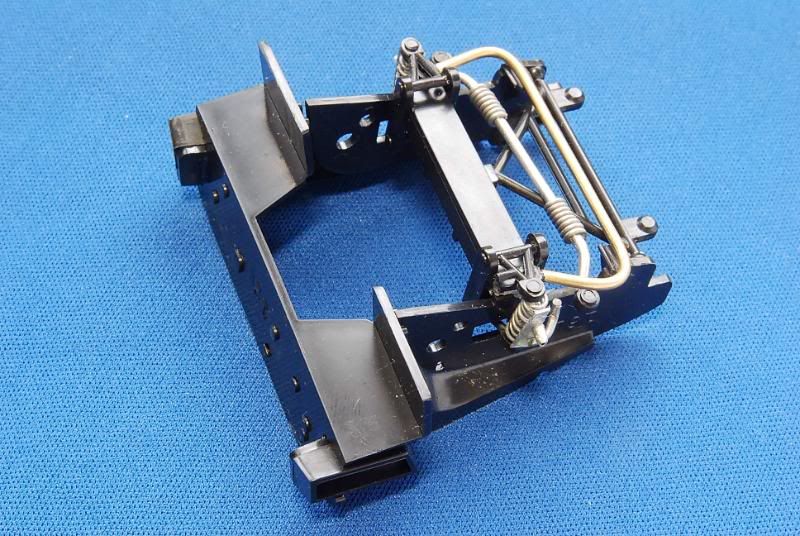 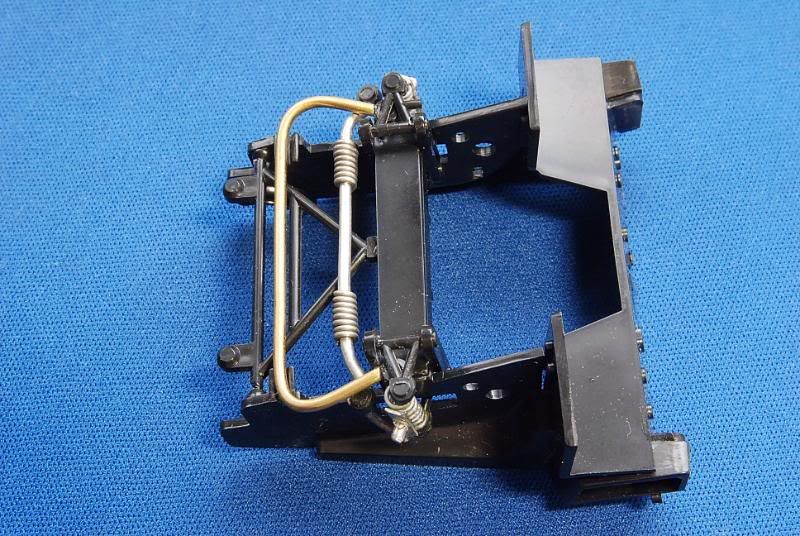 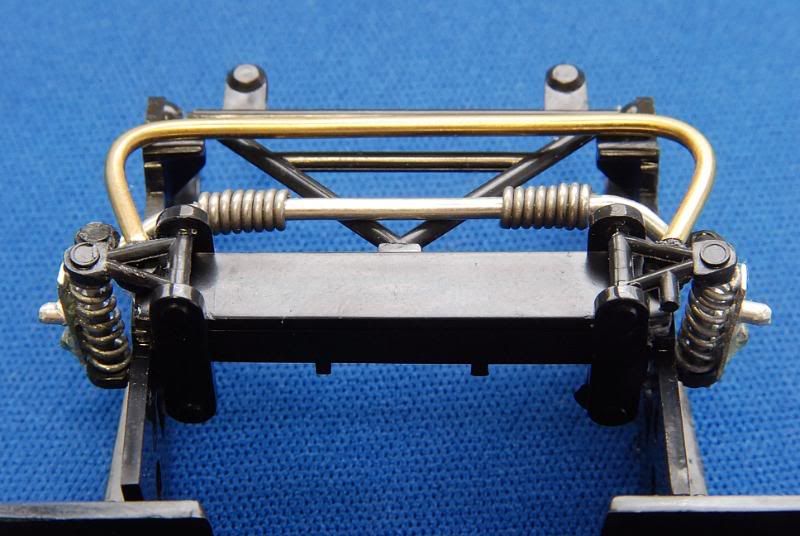 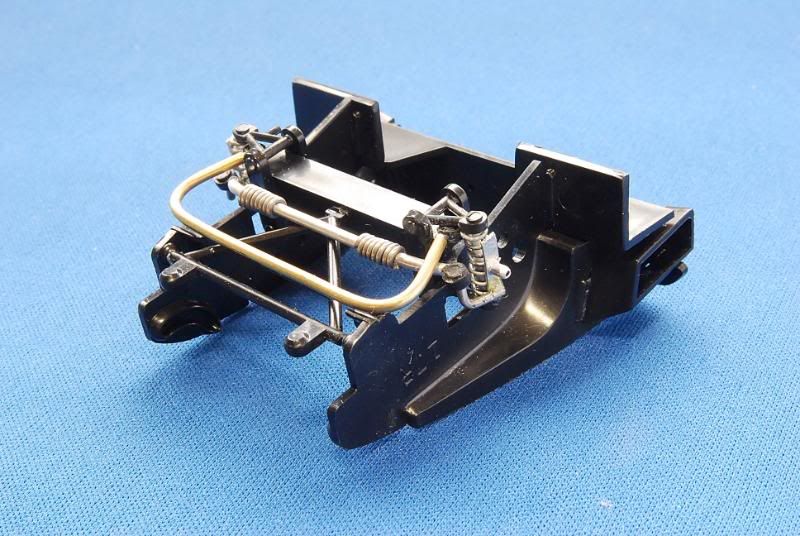 After carved a bit of plastic rectangle bar, I did a chassis bar where I mounted the scratch built brakemaster cylinders. 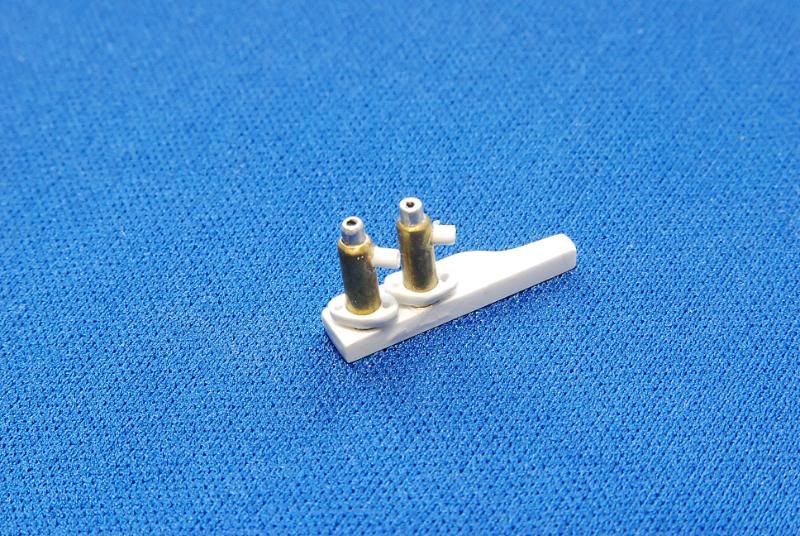 I also did a tryout to see how they look. 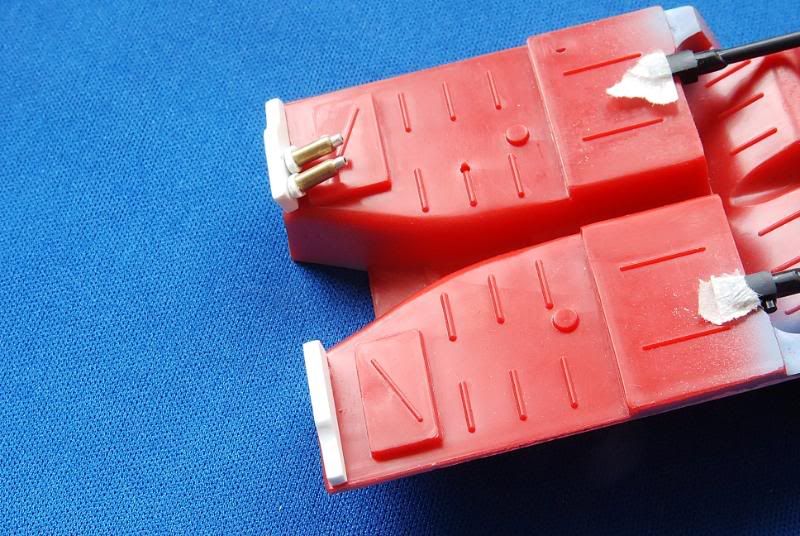 Now I just need to shoot some paint to the parts and do final adjustments. Then, I will complete everything with wire and nuts in order to complete the plumbing. |
|
|
|
|
|
01-16-2010, 12:42 PM
|
#4 | |
|
AF Enthusiast
Thread starter
Join Date: Sep 2003
Posts: 637
Thanks: 24
Thanked 16 Times in 16 Posts
|
Re: Aston Martin DB4-1/25 Revell Monogram...a detailed story!
This is a real quick update. Jerry Quick, my good friend from the T.A.M.S. club in Norfolk, VA, give me an important advise in order to get this right. The solder I used to recreate the boots at the steering rack was to thick. I used another that is a little bit thinner and the look changed.
 Simón P. Rivera Torres |
|
|
|
|
|
01-16-2010, 12:48 PM
|
#5 | |
|
AF Enthusiast
Join Date: May 2007
Location: Chicago, Illinois
Posts: 1,006
Thanks: 5
Thanked 29 Times in 26 Posts
|
Re: Aston Martin DB4-1/25 Revell Monogram...a detailed story!
Very nice start. Keep us updated.
Tom Tanner/Scale Designs/Ferrari Expo 2010 model/photo contest-Chicago April 24th 2010 |
|
|
|
|
|
01-17-2010, 12:43 AM
|
#6 | |
|
AF Enthusiast

Join Date: Jul 2003
Location: New Orleans, Louisiana
Posts: 1,609
Thanks: 0
Thanked 0 Times in 0 Posts

|
Re: Aston Martin DB4-1/25 Revell Monogram...a detailed story!
Nice work on a very iffy kit. Good luck.
__________________
Friends dont let friends buy die-casts... "If it can't run 24hrs., it aint sh!t...." -me   
|
|
|
|
|
|
01-17-2010, 11:56 AM
|
#7 | |
|
AF Fanatic

Join Date: Feb 2004
Location: Hartford, Connecticut
Posts: 5,601
Thanks: 7
Thanked 108 Times in 103 Posts
|
Re: Aston Martin DB4-1/25 Revell Monogram...a detailed story!
Cool upgrades you got done. Looking forward to more. Its unbelievable that i've seen the airfix model on ebay for $249.00.

__________________
In Progress    
|
|
|
|
|
|
01-24-2010, 09:29 PM
|
#8 | |
|
AF Enthusiast
Thread starter
Join Date: Sep 2003
Posts: 637
Thanks: 24
Thanked 16 Times in 16 Posts
|
Re: Aston Martin DB4-1/25 Revell Monogram...a detailed story!
After I checked the steering boots scale, I also noticed that the brake master cylinders also needed some attention. After I measured, I saw that they were out of scale and that instead being attaching master cylinders I was attaching flashlights!
Here the face to face comparison. 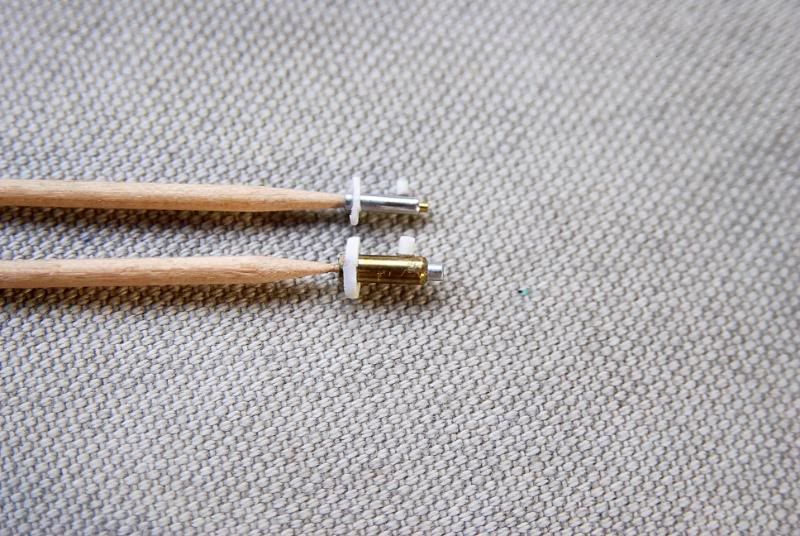 I also did again the chassis part were they will be mounted. 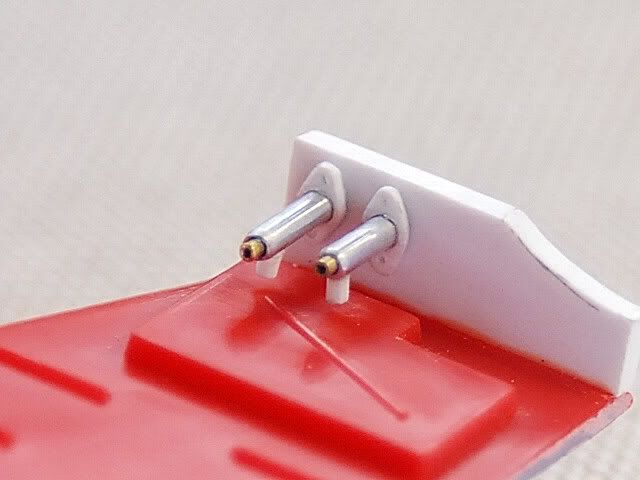 How they look from some distance. 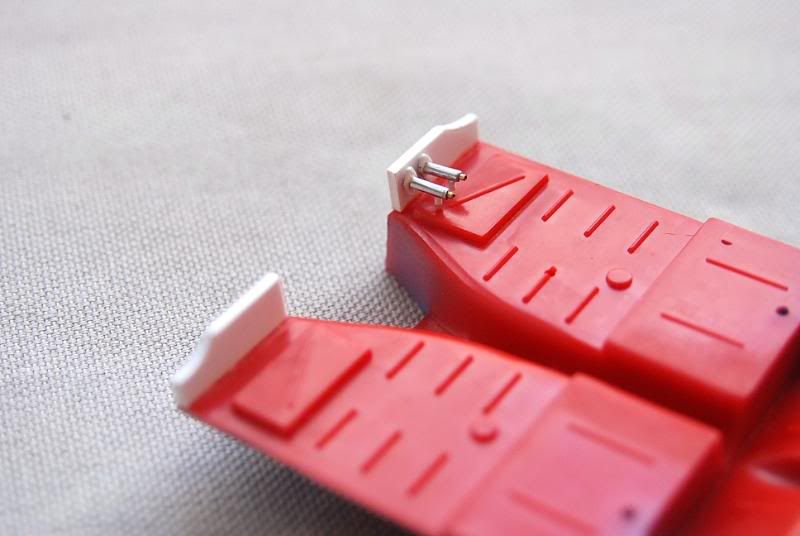 Chassis received an airbrush coat of Faux Fabric in order to replicate the rust undercoating. Aslo a close up of the part. 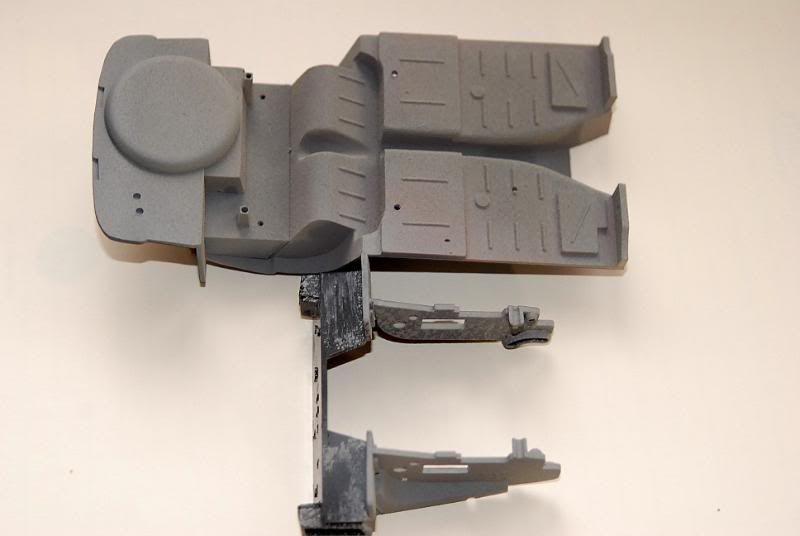  Here I shooted a coat of Tamiya Semi Gloss black lacquer at night time and with the doors of my garage open to eliminate of some of the high gloss this tamiya spray has. Precisely, I selected Tamiya semi gloss black, because is not as satin as other semi gloss are, it has a little bit more shine and the aston martin undercoat is like this. The cylinders already on the chassis. 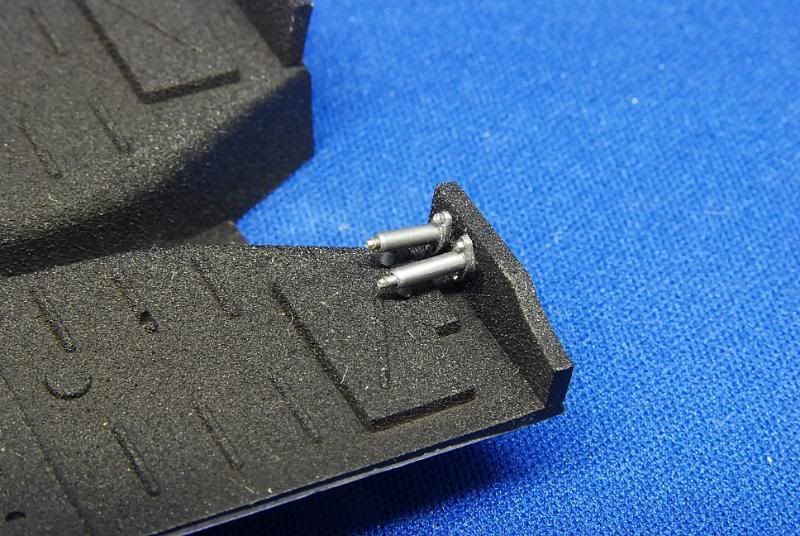 My favorite part of the chassis, the rear end. I liked a lot how the Watt link assembly being with the so in scale semi gloss from Gunze Sangyo Mr color #92. The rear axle cover was treated with the rare seen aluminum from the mr. color metalizer line. After I shooted Gunze the semi gloss black to the suspension components, I airbrushed a light coat of the same mr color lacquer gloss black to give it the scale look. Everyting during nightime to avoid excessive gloss caused by warm temperatures. The last detailed I give to this section was some Boyd's enamel clear to the springs, I also did the same with the front ones. 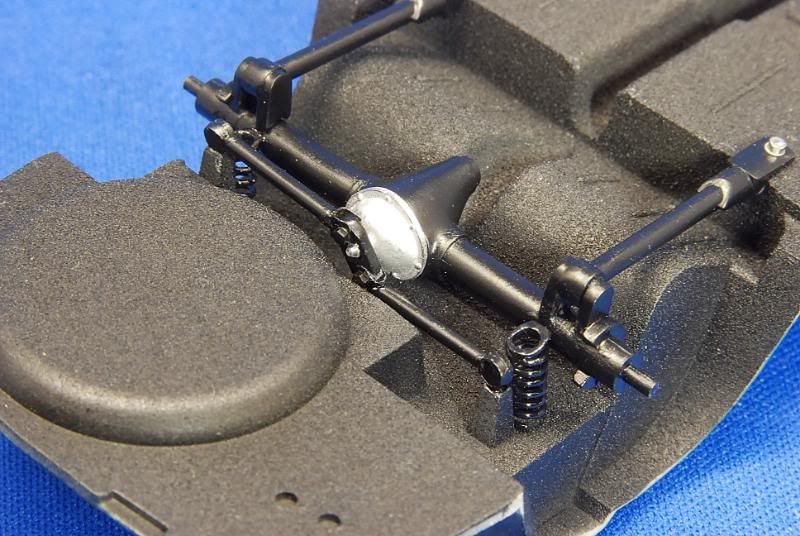 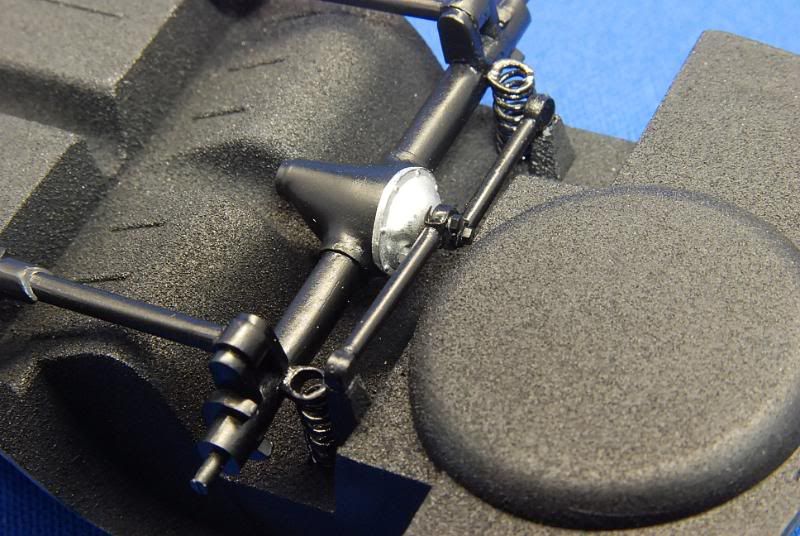 Some bolts from Galtran and washers for detail. Here can be seen the almost dull effect over thte chassis, but, with some gloss. 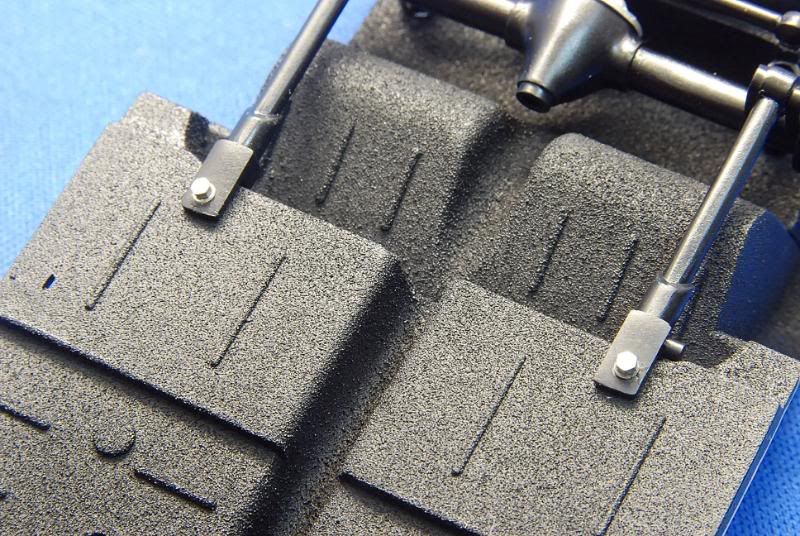 The whole rear chassis/suspension components together finally. 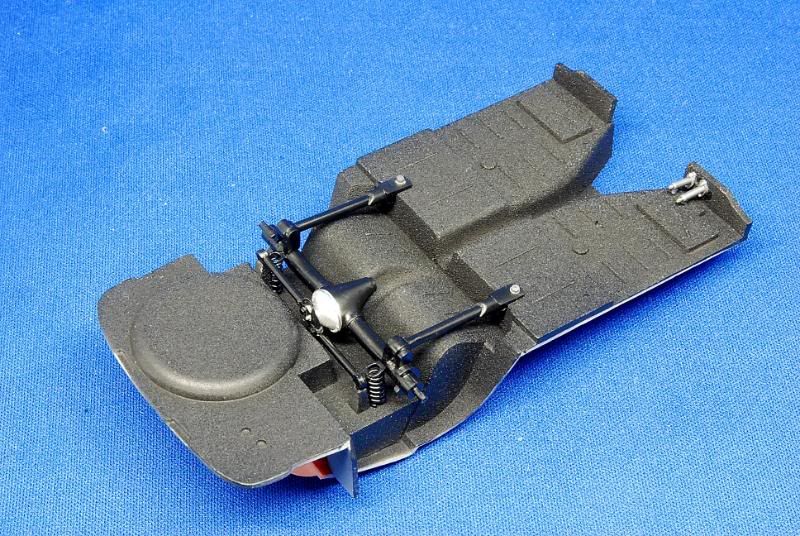 For the front suspension tubing I painted the with the Gunze Mr color gloss black, but, the steering boots that received the semi gloss black, but, from Gunze not the Tamiya. 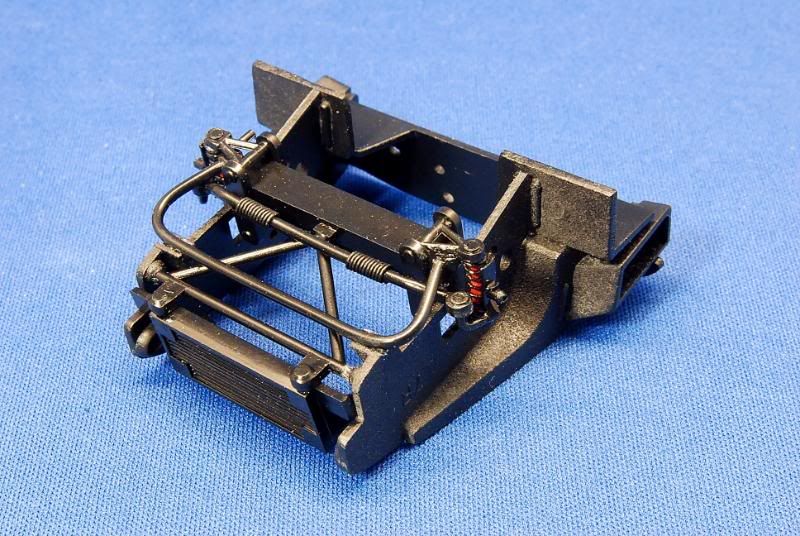 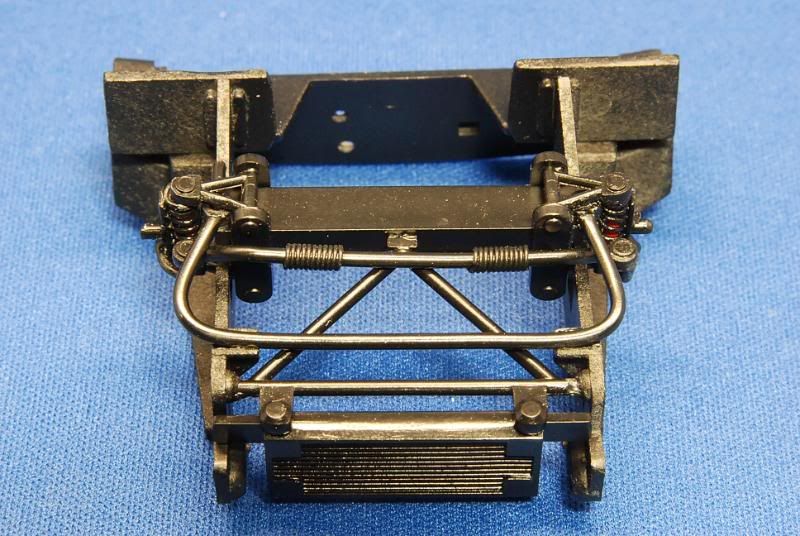 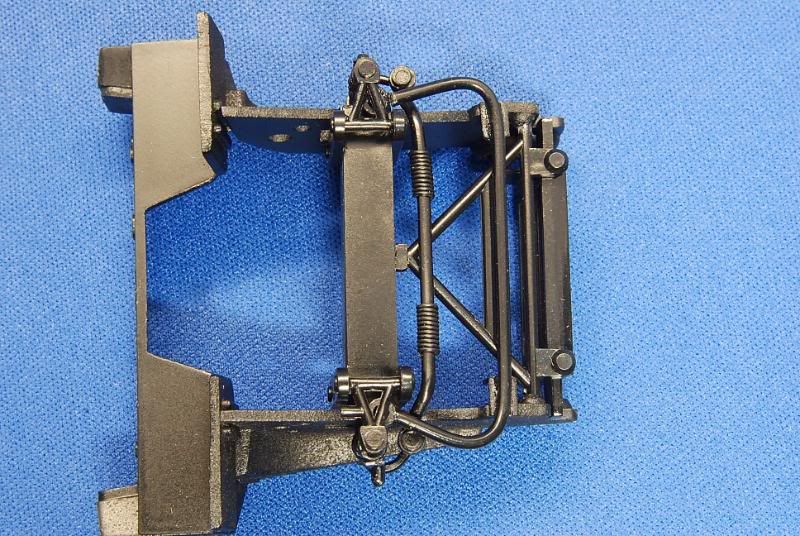 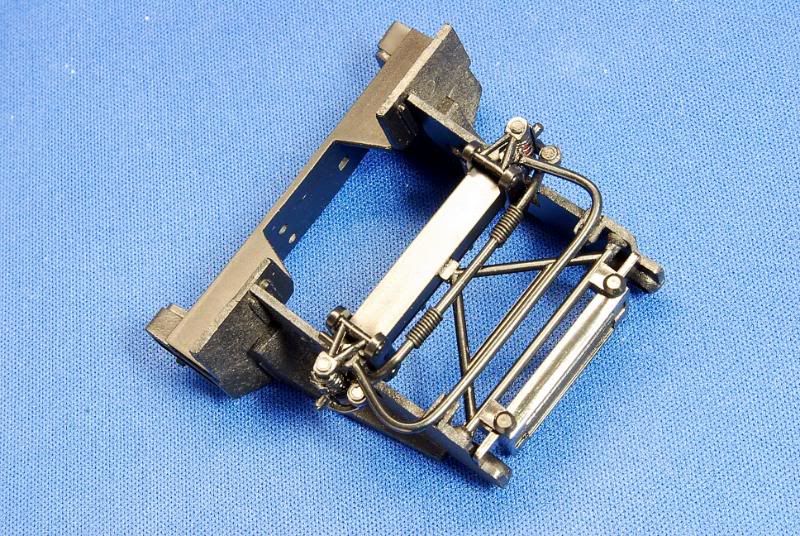 Everything is mocked up to see how it looks. 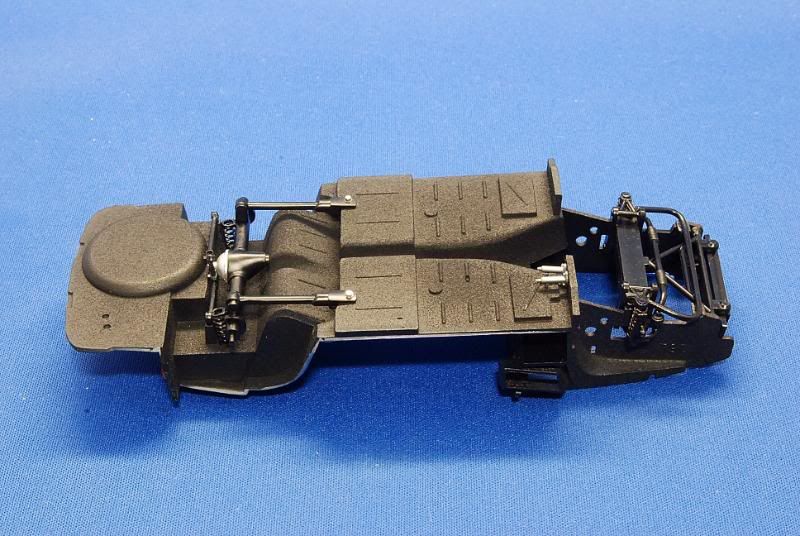 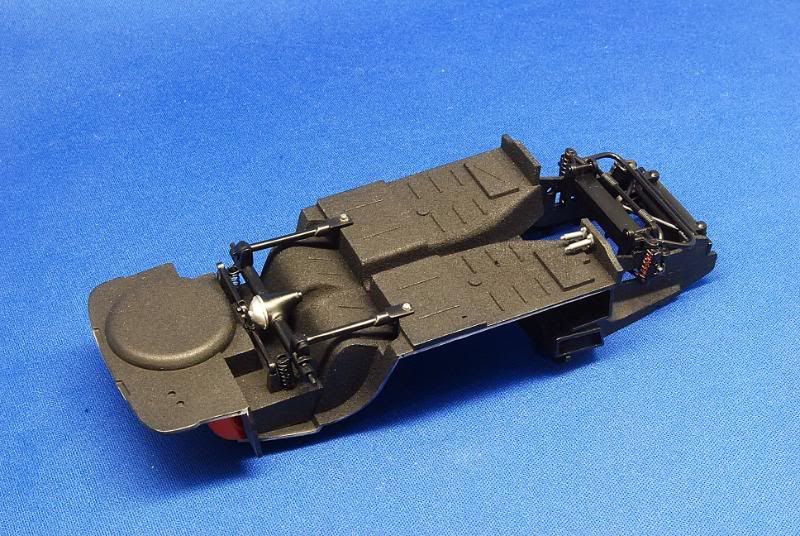 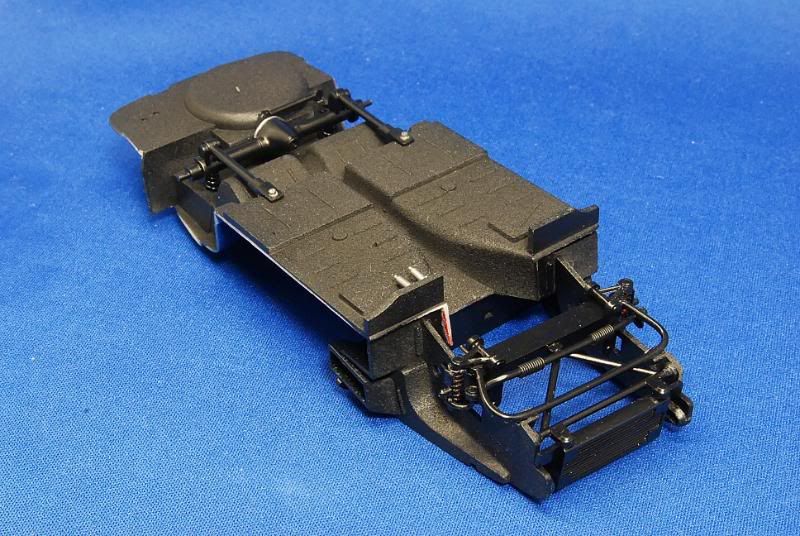 This parts now will received complete wiring and plumbing detail. Last edited by Porsnatic; 01-25-2010 at 12:11 AM. |
|
|
|
|
|
03-18-2010, 10:59 AM
|
#9 | |
|
AF Enthusiast
Thread starter
Join Date: Sep 2003
Posts: 637
Thanks: 24
Thanked 16 Times in 16 Posts
|
Re: Aston Martin DB4-1/25 Revell Monogram...a detailed story!
In this update I will covering the plumbing of thet brake system under the car.
I started working on a scrathbuild caliper, since the model comes just with a engraved over the plastic disc. I cutted it in order to used it as a template to make new ones from a plastic sheet. 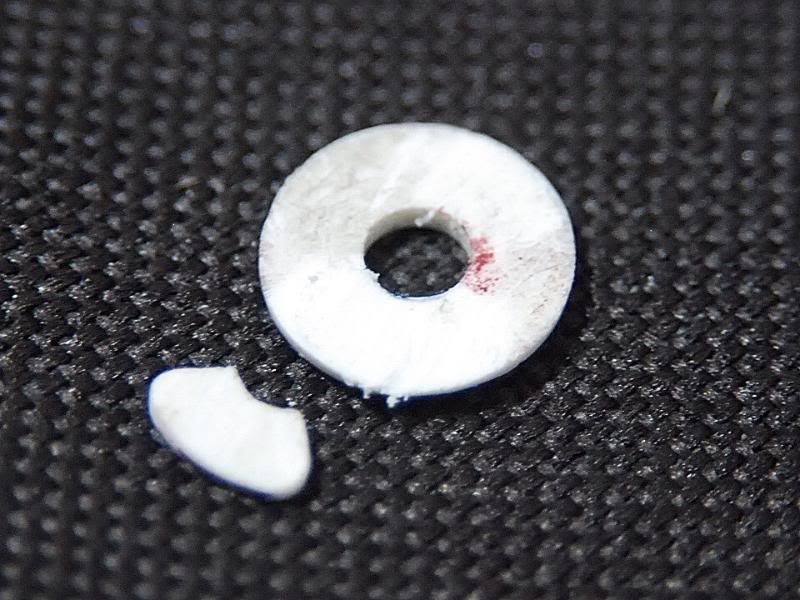 After I discarded the plastic disc, I picked up a Detail Master solid one which I chucked to my Dremel in order to have a better used look. 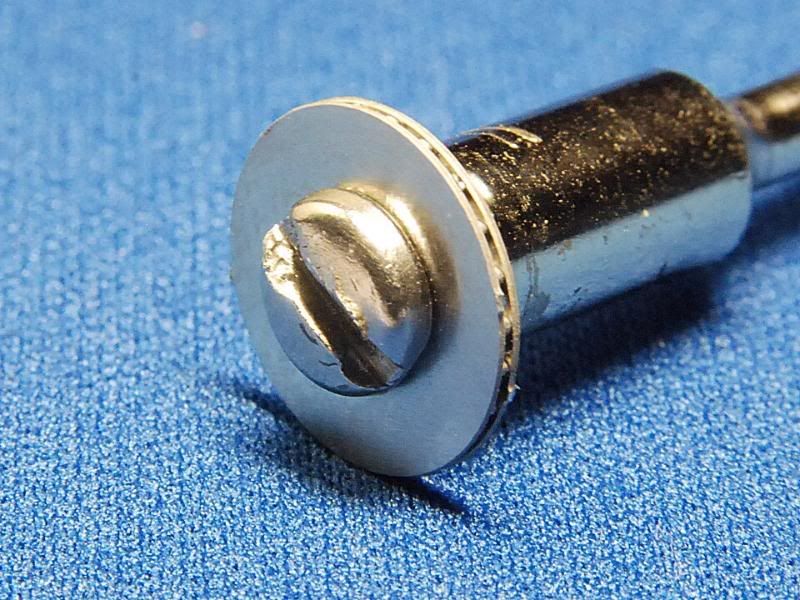 After I did the Dremel treatment, this is how it looks in comparison to an untreated on. Looks more real. 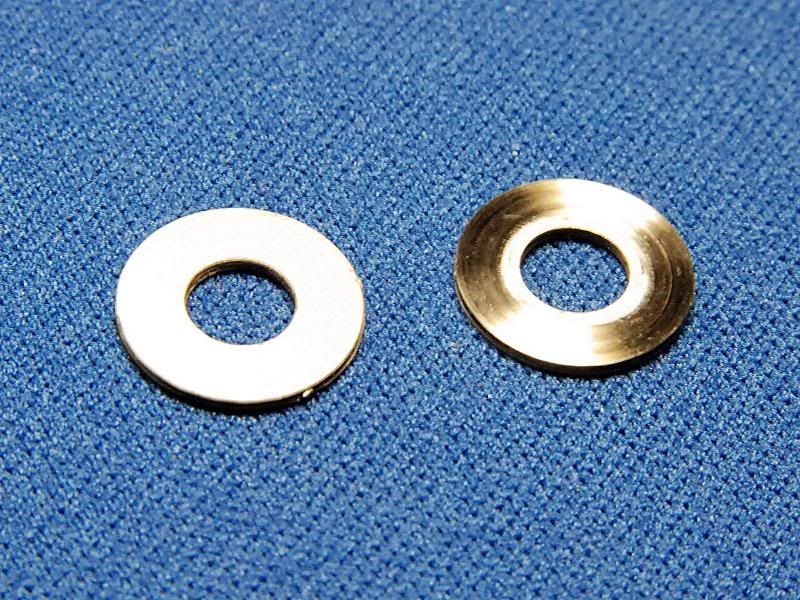 Using a plastic rod, I sliced it to make discs that will simulate the piston housing. Then, I primed them and painted them closely so the paint cover the crack between the caliper and this housing so it can be shown as just one part.  Worked an aluminum sheet to make the caliper 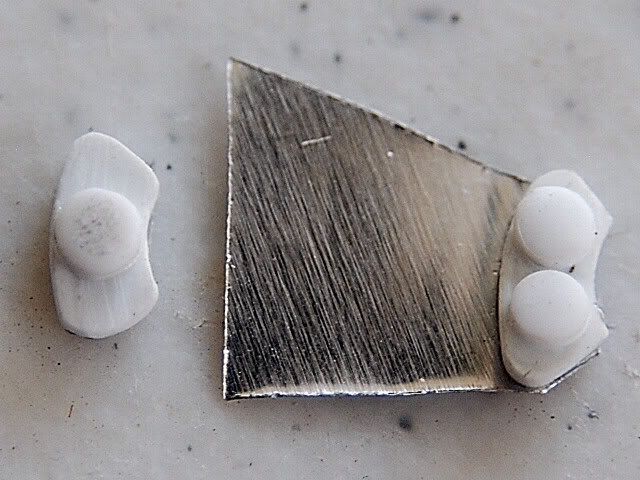 Some primer 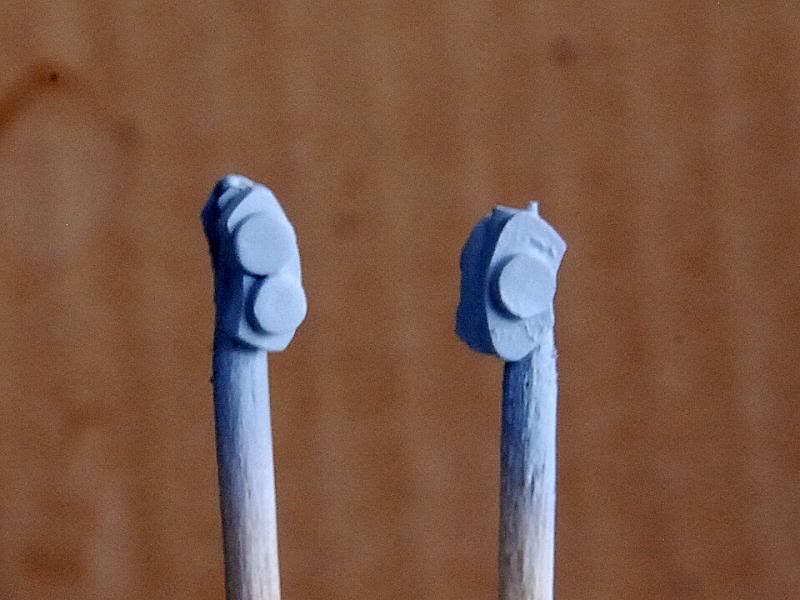 A silver paint base 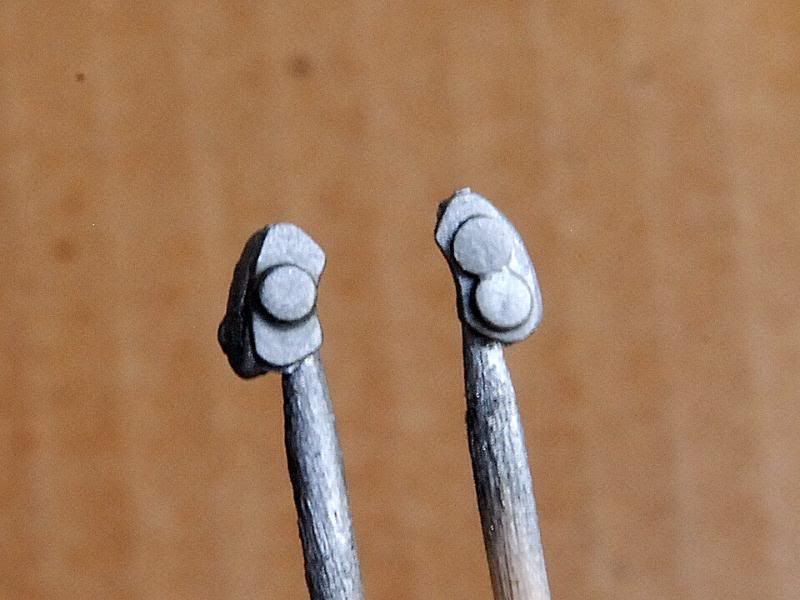 Finally the silver-gold color 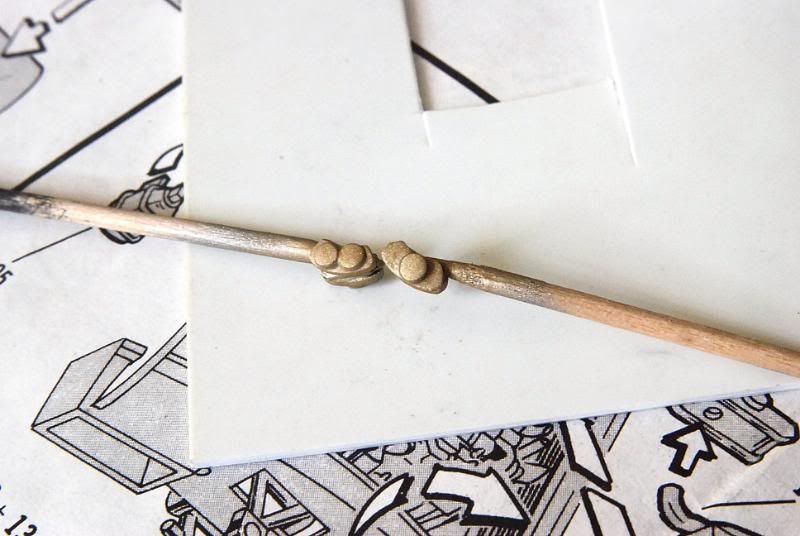 The bridge pipe assembly made out of cooper wire and tiny nuts. 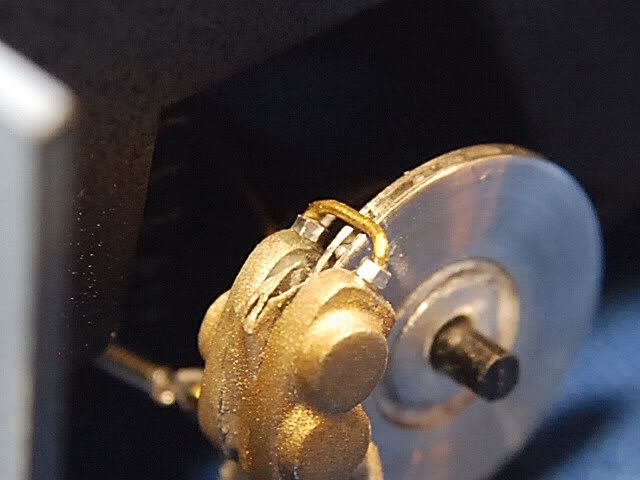 I used this picture in order to make the rear emergency system. Plastic sheets, wire and plastic rod used to make the system..uff..lots of work! 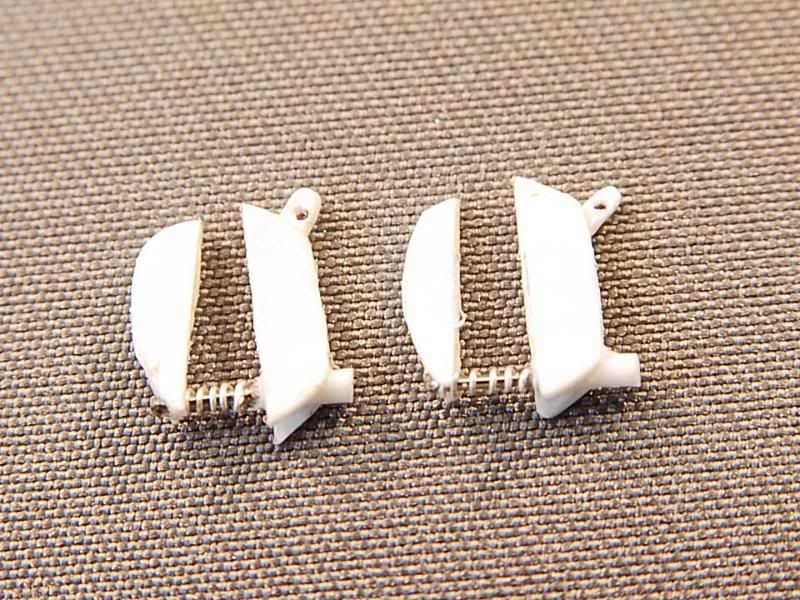 Already in place along with the calipers. 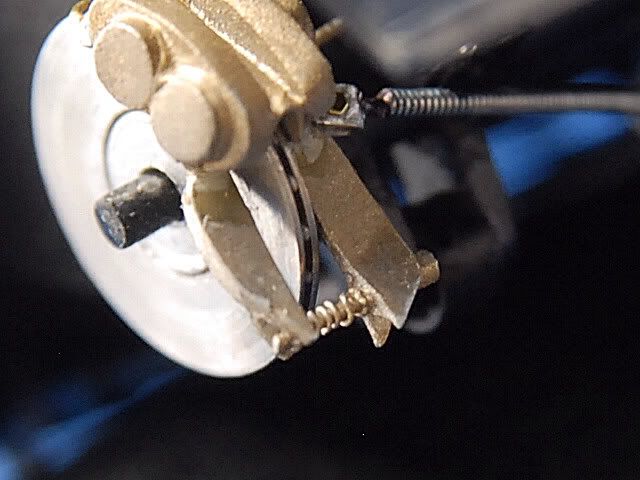  Another view 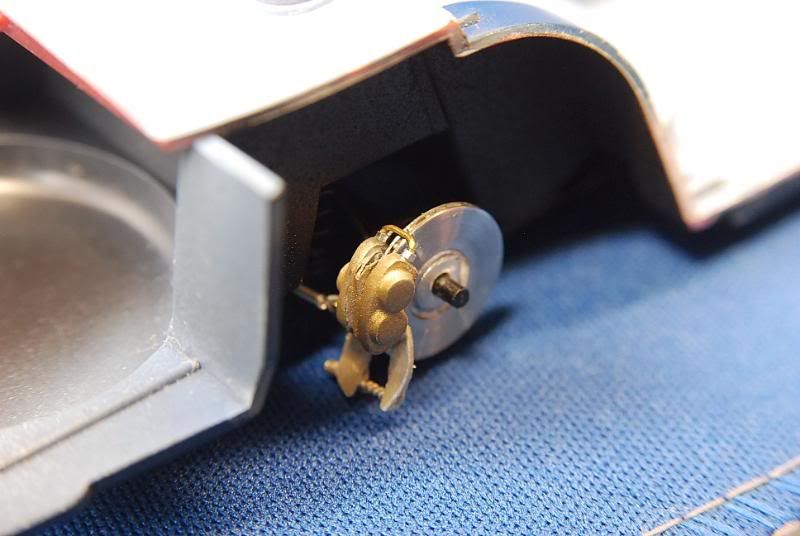 This picture was used to make the three way union for the brake fluid feed. I used plastic rod, cooper wire and nuts. 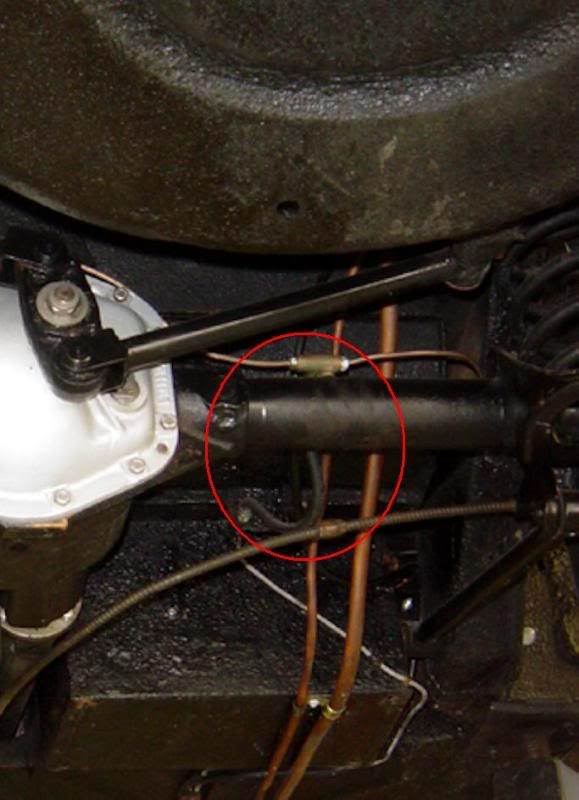 The parts in place. 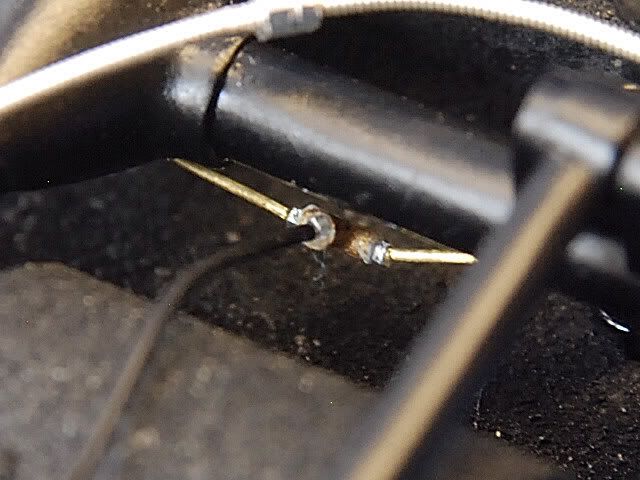 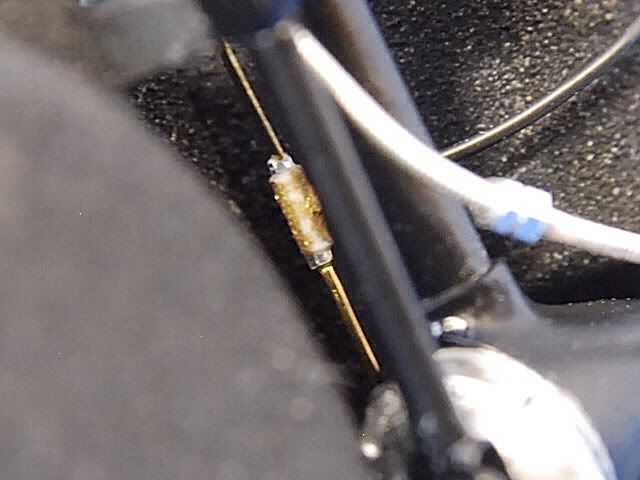 The connector for the brake master cylinder. 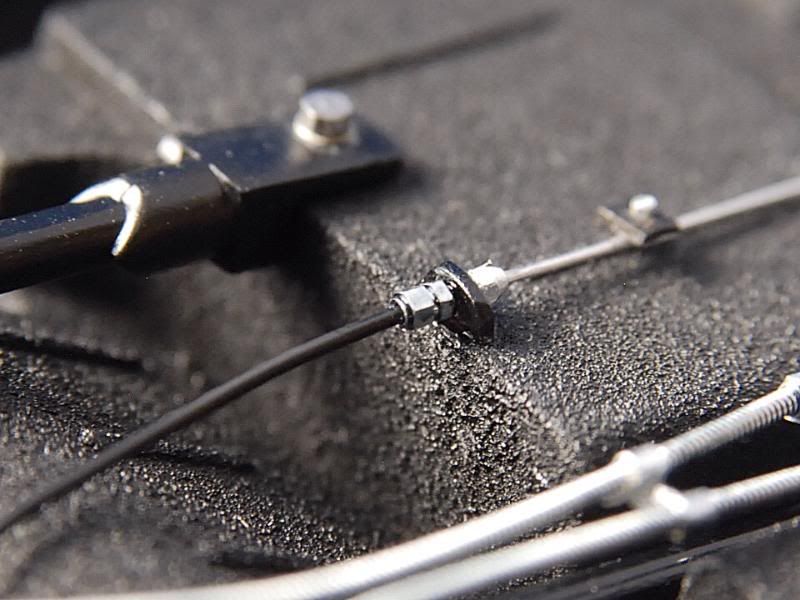 The hardest part to design..the mechanism that action the emergency cables by the handbrake lever. In the red circle section the part intended to replicate. 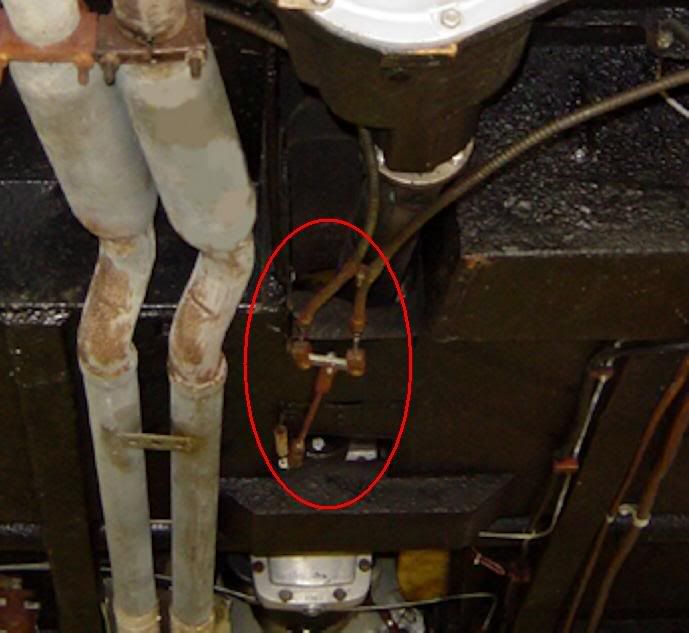 I started using a guitar string that has the perfect scale look and grooves. Aluminum sheet again to replicate the connectors. 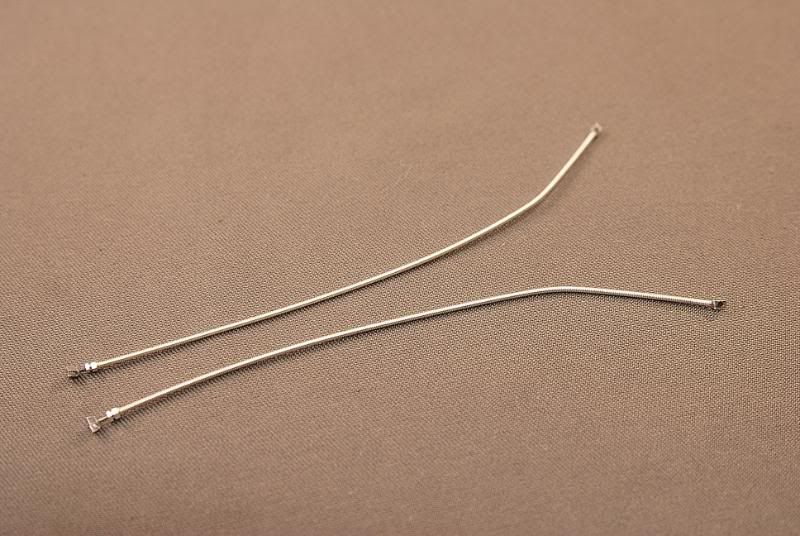 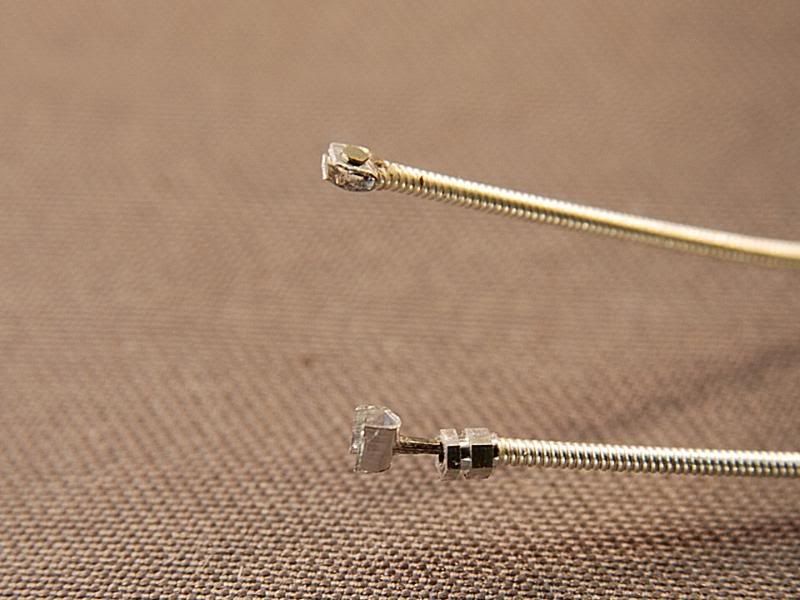 More plastic using to make the other unions...ufff more, and more trying and hard work with so small parts! 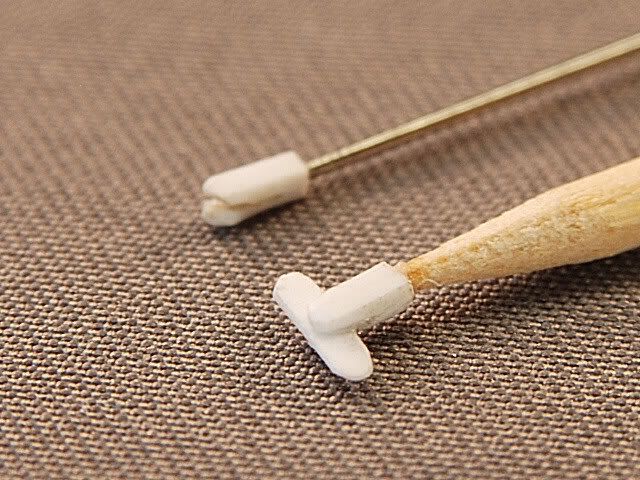 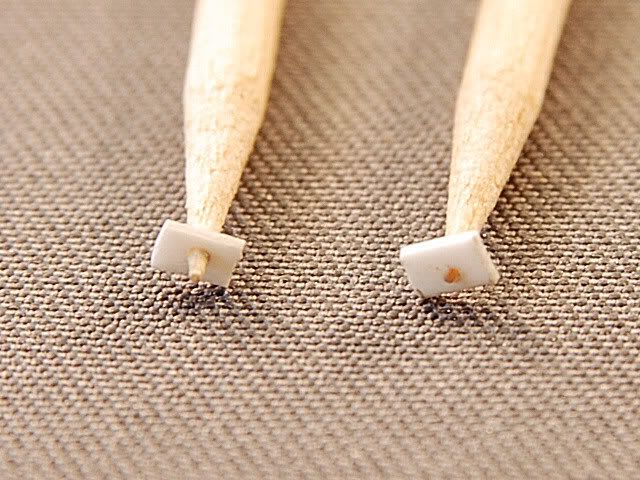 All the the components before painting. 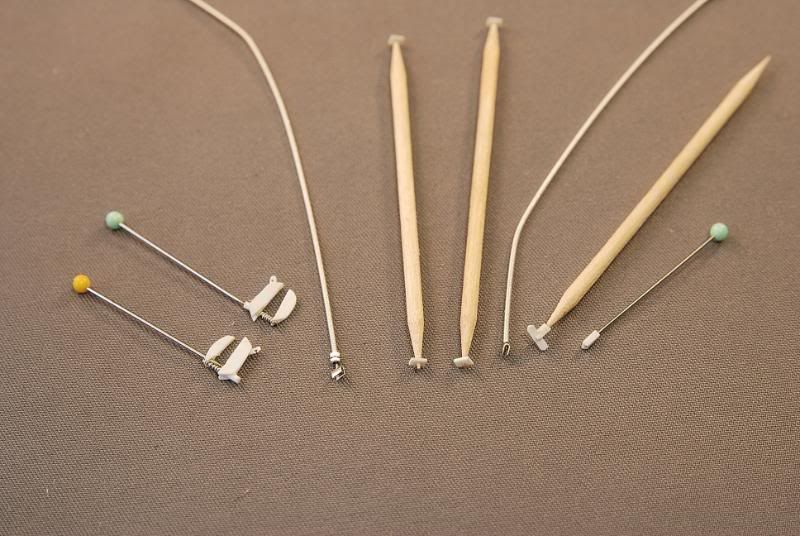 This photo etched alternator bracket was used to make the connector to the whole assembly with the tube that comes from the lever. 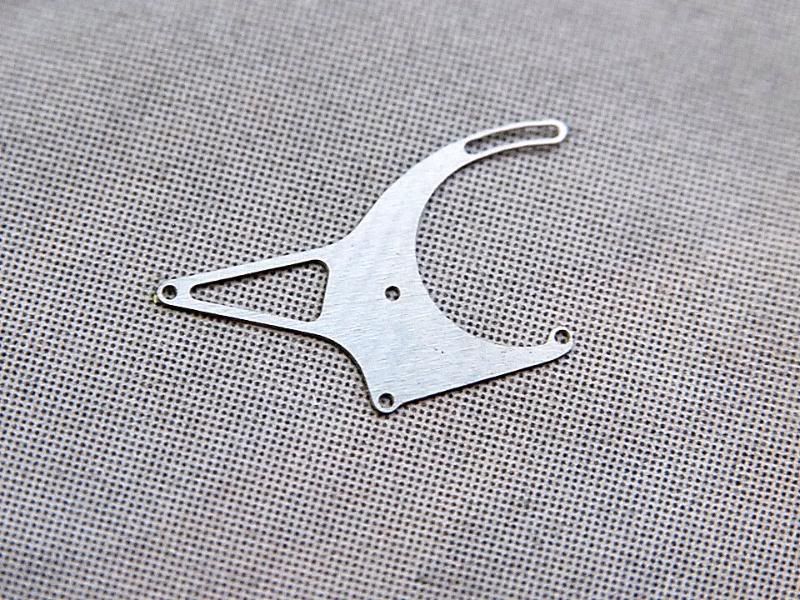 Already in place. 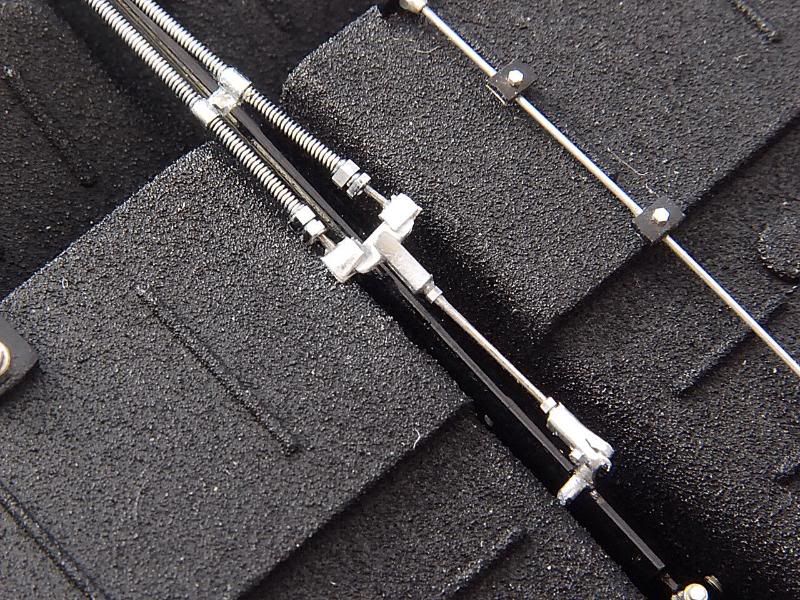 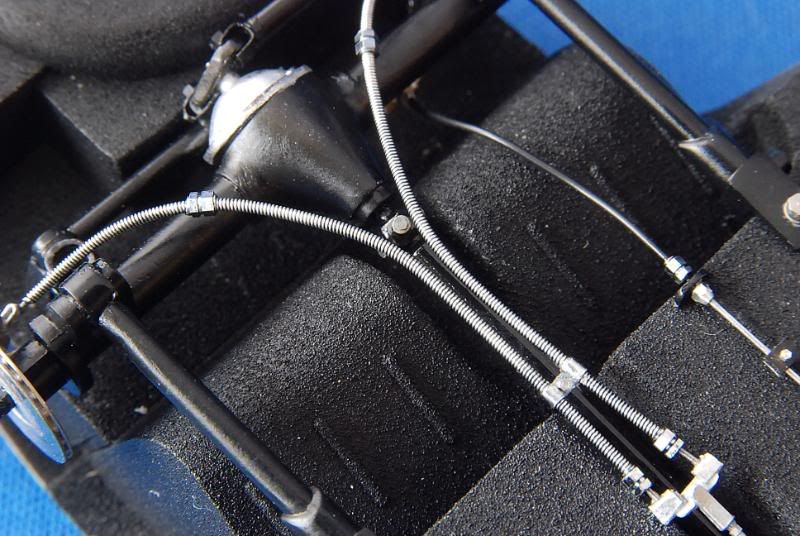 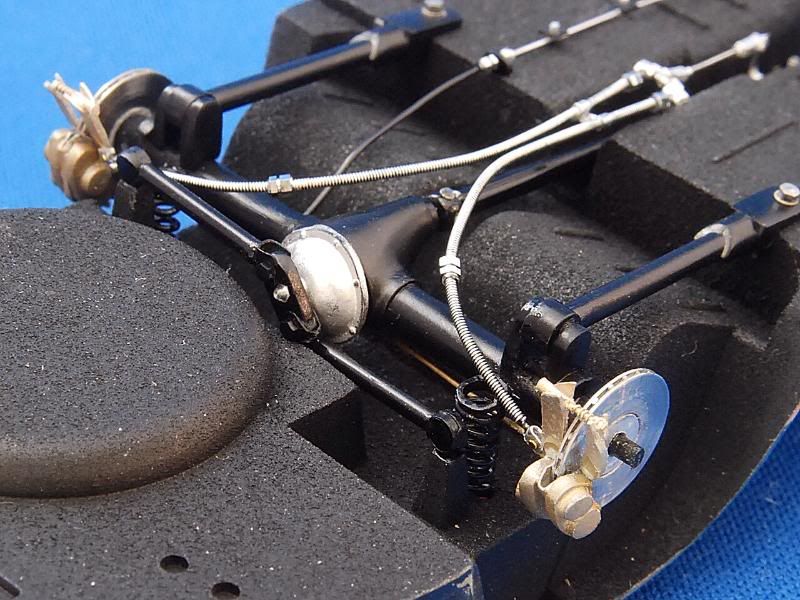 I use THE DETAILER black ink to enhance the grooves in the guitar string. 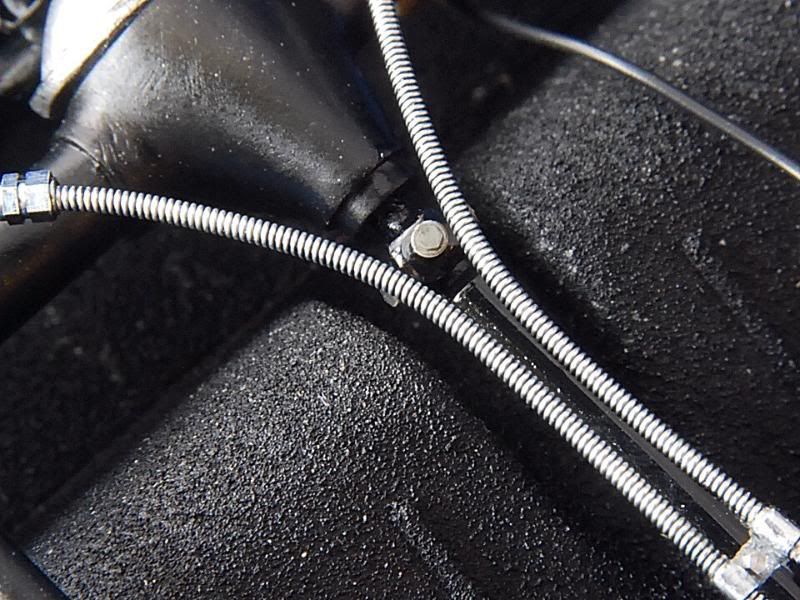 Plastic squares used to make the brake fluid line on the chassis. 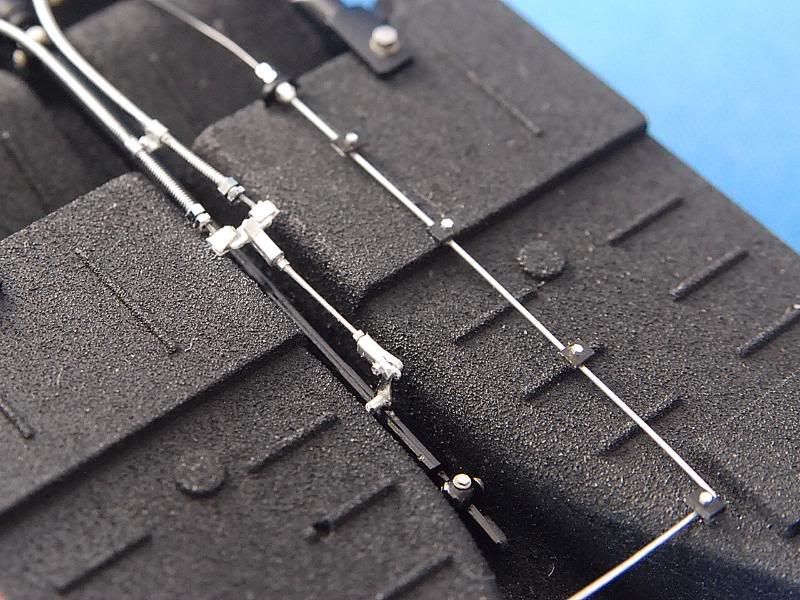 The caliper section. 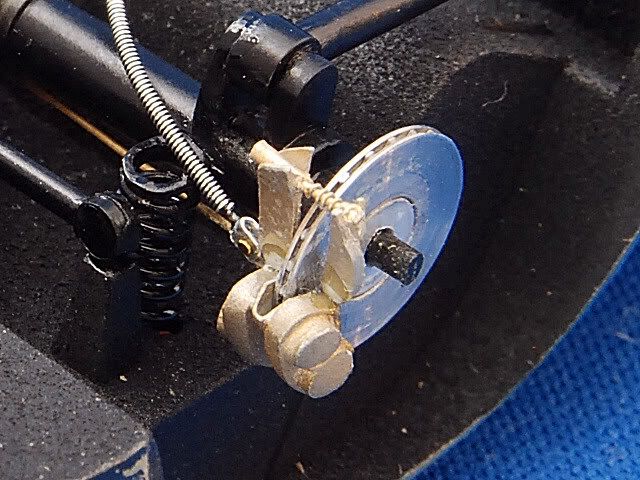 Gereral view of everything together. 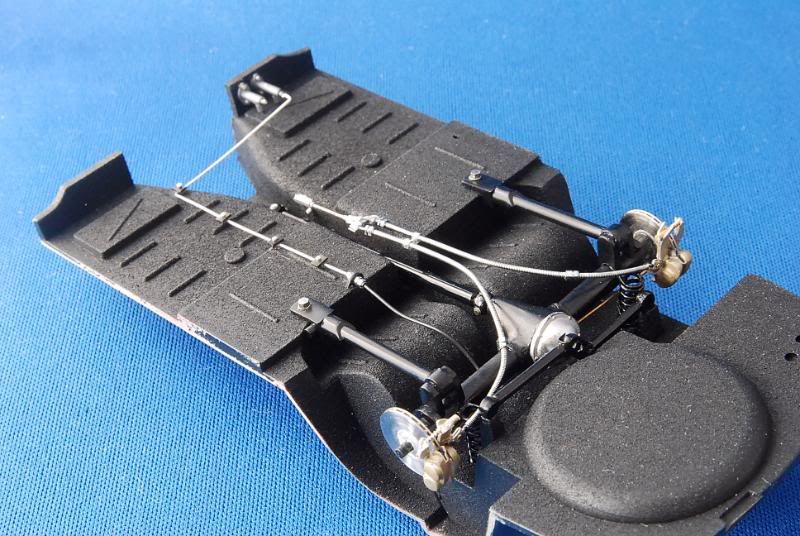 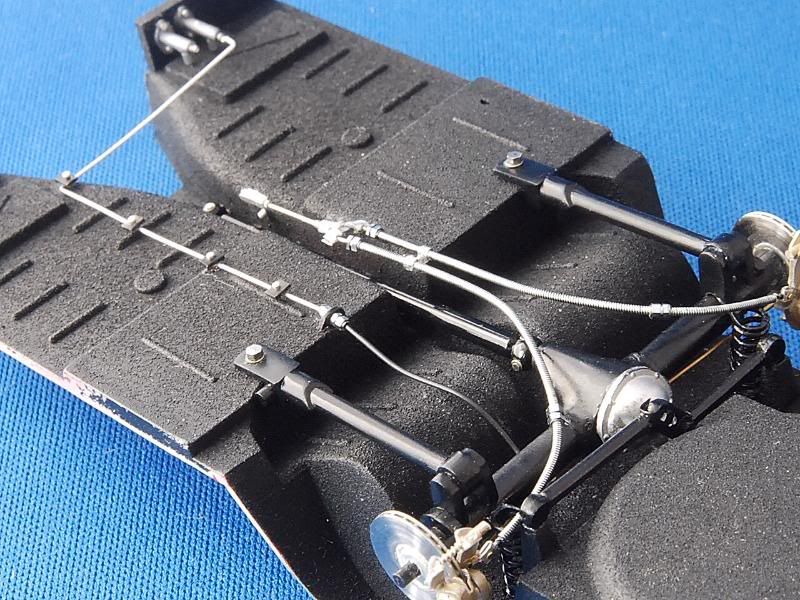 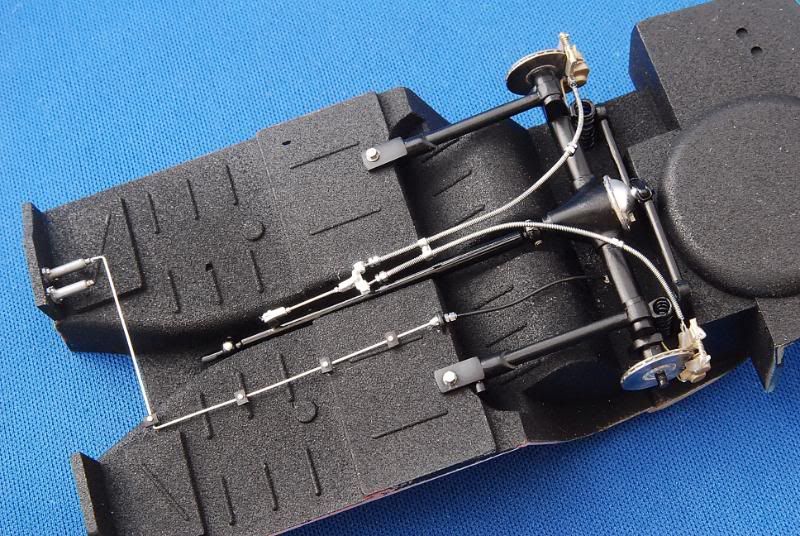 Last edited by Porsnatic; 03-18-2010 at 09:47 PM. |
|
|
|
|
| The Following User Says Thank You to Porsnatic For This Useful Post: |
kitefighter (05-10-2012)
|
|
03-18-2010, 11:48 AM
|
#10 | |
|
AF Enthusiast
Join Date: May 2007
Location: Chicago, Illinois
Posts: 1,006
Thanks: 5
Thanked 29 Times in 26 Posts
|
Re: Aston Martin DB4-1/25 Revell Monogram...a detailed story!
Really nice work. The brake lines look almost real.
Tom Tanner/Scale Designs/Ferrari Expo 2010 model/photo contest-Chicago April 24th 2010 |
|
|
|
|
|
03-18-2010, 11:51 AM
|
#11 | |
|
AF Regular
Join Date: Aug 2008
Location: Hamilton, Illinois
Posts: 304
Thanks: 3
Thanked 12 Times in 9 Posts
|
Re: Aston Martin DB4-1/25 Revell Monogram...a detailed story!
Stop it! I don't know how much more of this I can take, Simon. You are driving me nuts with your awesome scratch building and detailing. And you are making me feel like an inadequate modeler as a result!
By the way, great job finding a way to use guitar string. |
|
|
|
|
|
03-18-2010, 03:18 PM
|
#12 | |
|
AF Enthusiast
Join Date: Dec 2009
Location: Ilkley
Posts: 604
Thanks: 4
Thanked 45 Times in 39 Posts
|
Re: Aston Martin DB4-1/25 Revell Monogram...a detailed story!
That's awesome, Simon... incredible scratch building work! Where did you find all these amazing detail pictures of the prototype?
bestest, M. |
|
|
|
|
|
03-18-2010, 05:17 PM
|
#13 | ||
|
AF Enthusiast
Thread starter
Join Date: Sep 2003
Posts: 637
Thanks: 24
Thanked 16 Times in 16 Posts
|
Re: Aston Martin DB4-1/25 Revell Monogram...a detailed story!
If you PM, I can send you some of them and even the factory parts book.
Quote:
|
||
|
|
|
|
03-18-2010, 06:35 PM
|
#14 | |
|
AF Enthusiast

Join Date: Oct 2008
Location: Auckland
Posts: 2,761
Thanks: 51
Thanked 136 Times in 134 Posts
|
Re: Aston Martin DB4-1/25 Revell Monogram...a detailed story!
Amazing building so far, great project, Cant wait to see more!!
__________________
 It's Not wheather you Win or Lose, its how you look while you play the Game |
|
|
|
|
|
03-19-2010, 03:27 AM
|
#15 | |
|
AF Enthusiast
Join Date: Nov 2008
Location: Highland, California
Posts: 652
Thanks: 1
Thanked 7 Times in 7 Posts
|
Re: Aston Martin DB4-1/25 Revell Monogram...a detailed story!
man oh man, that is some nice detail. looking really good bro.
|
|
|
|
|
|
|
POST REPLY TO THIS THREAD |
 |
|
|


