|
|
|

|
|
| Search | Car Forums | Gallery | Articles | Helper | Air Dried Beef Dog Food | IgorSushko.com | Corporate |
|
| Latest | 0 Rplys |
|
|||||||
| WIP - Street Post topics for any "Works In Progress" street vehicles projects in this sub-forum. |
 |
 Show Printable Version | Show Printable Version |  Email this Page | Email this Page |  Subscribe to this Thread
|
|
|
Thread Tools |
 01-29-2007, 06:11 AM
|
#1 | |
|
AF Newbie
 
Join Date: Dec 2006
Location: Doncaster
Posts: 20
Thanks: 0
Thanked 0 Times in 0 Posts
|
1/24 Toyota Celica GTfour ST205 - with neons !!!
i've been meaning to post this WIP for over a month now lol.
the model is actually now about 80% complete so i'll make this first post a quick one to bring you upto date.  the kit i'm using is the Tamiya 1/24 Celica GTfour ST205, with a few mods including sideskirts, wheels, neons etc. this was my first model so i was learning as i went. the first job was the engine bay. nothing too difficult here, just stuck to the instructions in the booklet. 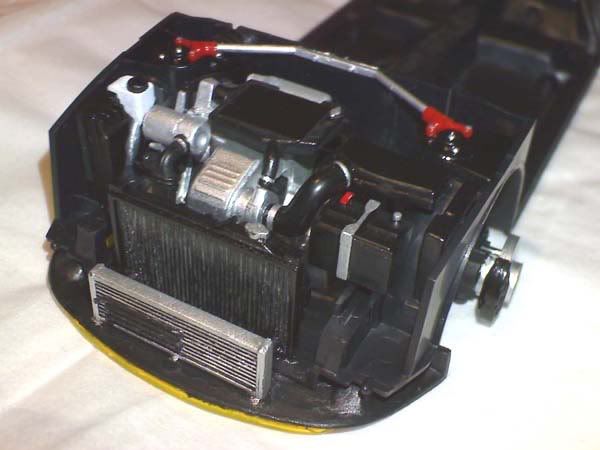 (sorry about the quality of the photos, they're from my phone) the chassis (including suspension, exhaust etc.) was also assembled as per instructions. i wanted to get to this stage as quickly as i could so i could start fitting the neons. these were made using an electro-luminescent wire kit which i bought off ebay. holes were drilled in the chassis and engine bay and the wire was fed through. this was quite tricky through the engine bay as i'd already fitted the finished engine, doh!!! 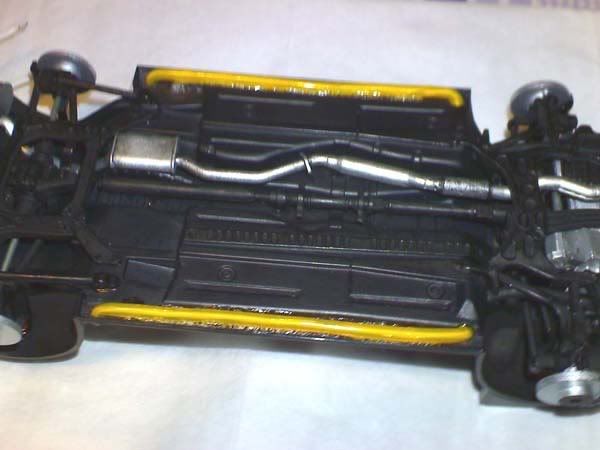   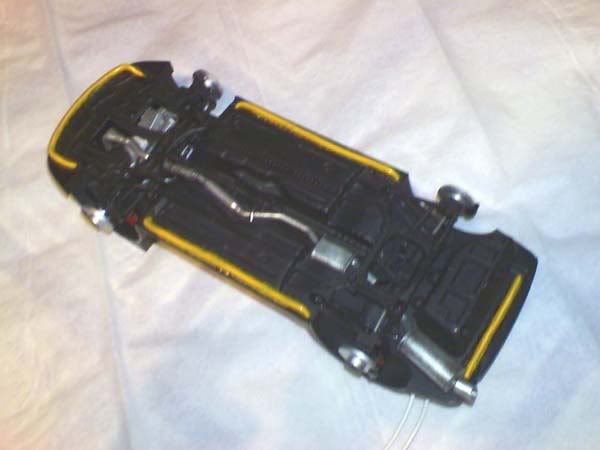 the control unit is situated in the rear of the car and is mounted in such a way that the neons can be turned on/off by a button on the underside of the chassis. 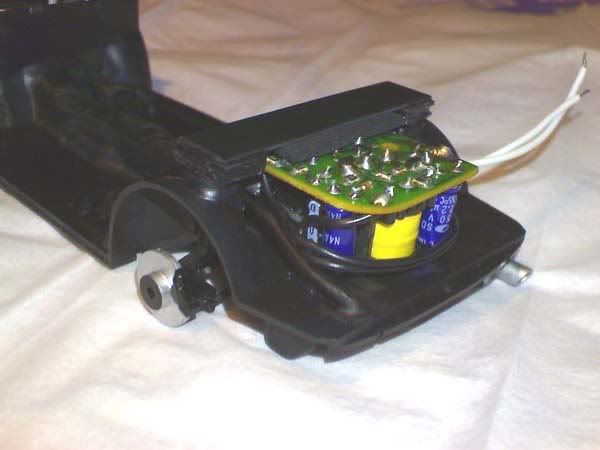 locating the battery was a bit of a challenge. i originally wanted to use some little button cells (watch batteries) located alongside the control circuit, however there wasn't enough space. after a few other ideas, i decided to use a camera battery located inside the dashboard. i made a holder for the battery, allowing it to be changed when dead. 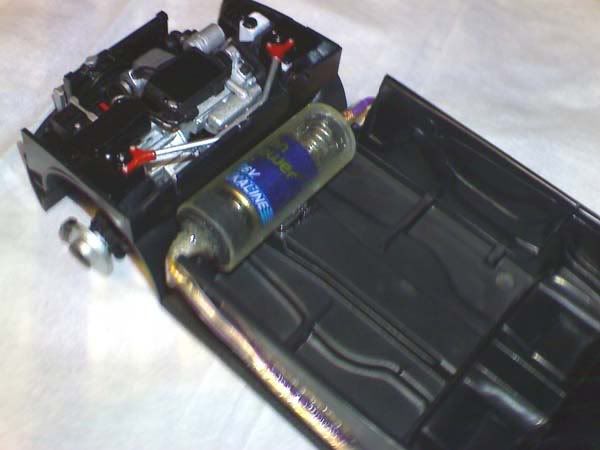  next, i started thinking about the bodywork. firstly, i wanted to add some fog lights to the front bumper as these are factory fitted on the full size car. i made the light mountings using some plastic tube and fitted them in the grille. 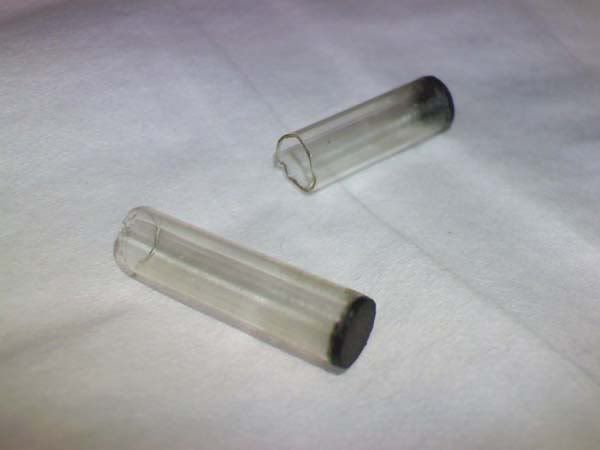 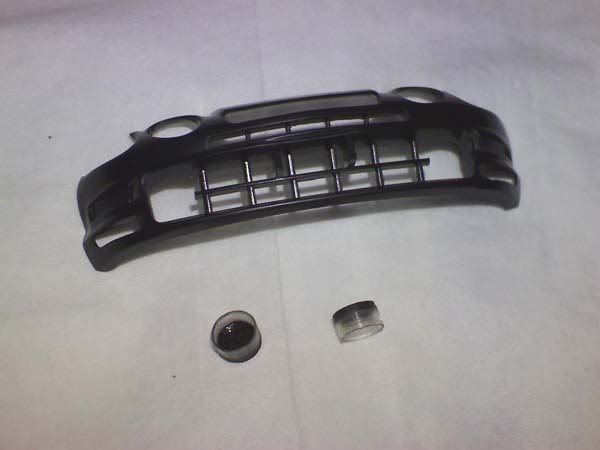 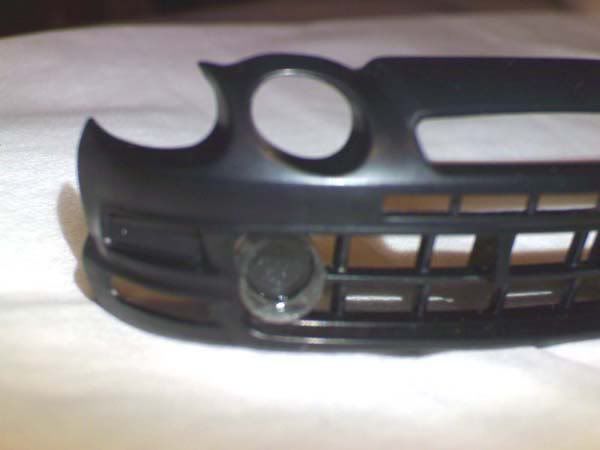 i'm not sure what i'll use for the actual lenses yet but i'll figure something out. anyway, that's all for now. sideskirts, front splitter, rear spats, wheels and interior to follow... |
|

|

|
|
01-29-2007, 09:41 PM
|
#2 | |
|
AF Newbie

Join Date: Jan 2007
Location: Chippewa Falls, Wisconsin
Posts: 51
Thanks: 0
Thanked 0 Times in 0 Posts
|
Re: 1/24 Toyota Celica GTfour ST205 - with neons !!!
Looks good so far. Do you have a pic with the lights on and the body mocked up?
__________________
Current Projects '06 Mustang, custom aero kit Eclipse GSX (factory aero conversion) 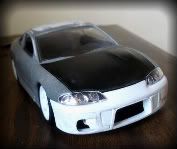  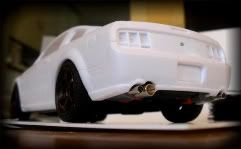
|
|
|
|
|
|
01-29-2007, 10:43 PM
|
#3 | |
|
AF Enthusiast
 Join Date: Jul 2005
Location: Cheshire, Connecticut
Posts: 872
Thanks: 0
Thanked 1 Time in 1 Post


|
Re: 1/24 Toyota Celica GTfour ST205 - with neons !!!
Whoa, that looks great. Very slick installation!
__________________
 
|
|
|
|
|
|
01-30-2007, 05:33 AM
|
#4 | ||
|
AF Newbie
Join Date: Dec 2006
Location: Doncaster
Posts: 20
Thanks: 0
Thanked 0 Times in 0 Posts
|
Re: 1/24 Toyota Celica GTfour ST205 - with neons !!!
Quote:
thanks for the comments guys. |
||
|
|
|
|
01-30-2007, 03:22 PM
|
#5 | |
|
AF Regular
Join Date: Oct 2006
Location: Metuchen, New Jersey
Posts: 128
Thanks: 0
Thanked 0 Times in 0 Posts
|
Re: 1/24 Toyota Celica GTfour ST205 - with neons !!!
Nice creativity, man! I think I should work something like that into my Tamiya Supra!
|
|
|
|
|
|
02-02-2007, 02:08 PM
|
#6 | |
|
AF Newbie
Join Date: Dec 2006
Location: Doncaster
Posts: 20
Thanks: 0
Thanked 0 Times in 0 Posts
|
Re: 1/24 Toyota Celica GTfour ST205 - with neons !!!
ok, this one should bring you up to date with where i'm at now...
the interior was done pretty much to the book. here it is dry fitted after being primed. 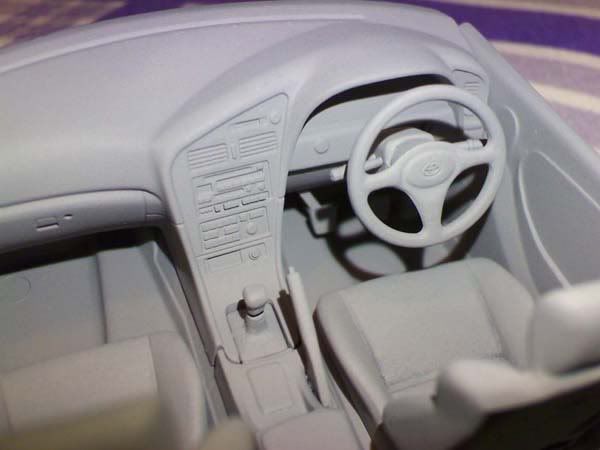 i haven't taken any pics since painting it (probably because i'm not 100% happy with it) but it's basicly all black with a few dashboard details painted in. the wheels were a little tricky as the fujimi ones i used were a different fitment to the tamiya model, so i had to convert them. also, as the front and rear offsets were different, i had to shorten the lip on the front wheels. however, this worked quite nicely and gives a sort of drift look with the rear rims looking wider. 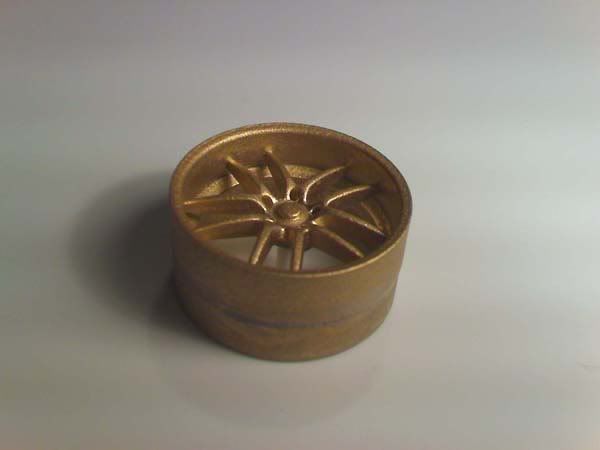 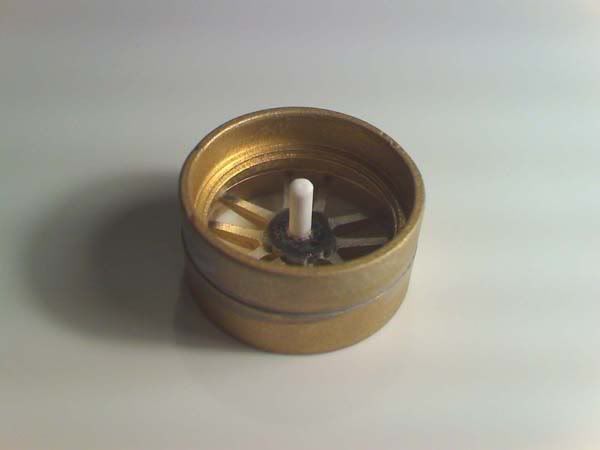 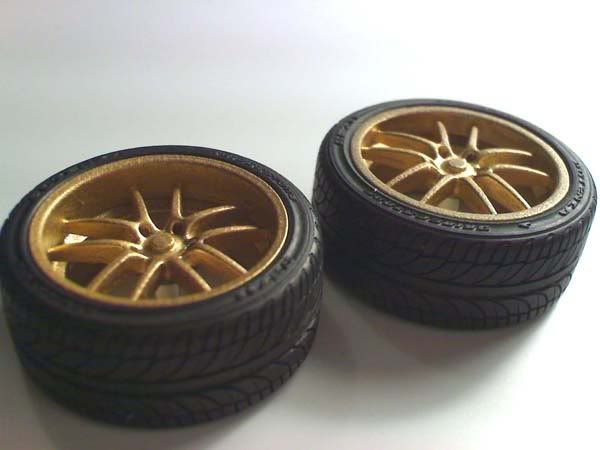 next, i set about adding the skirts etc. i fabricated the front splitter by layering plasticard and shaping it to the front bumper.  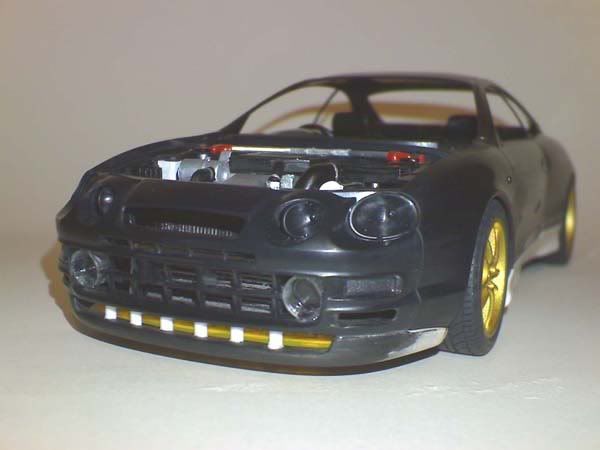 then the sideskirts and rear spats were made using plasticard and half-round styrene, then shaped with putty.  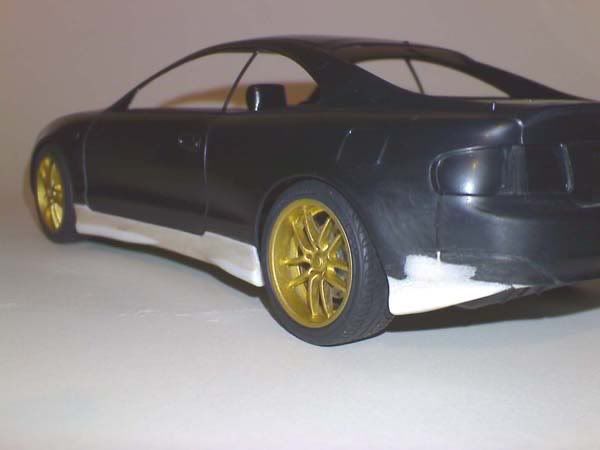 all the bodywork was then primed and any little imperfections sanded out before another coat of primer. at this stage it actually starts to look like a car lol. 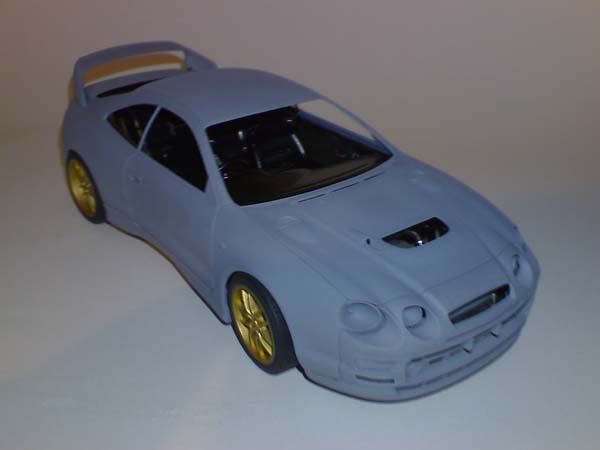 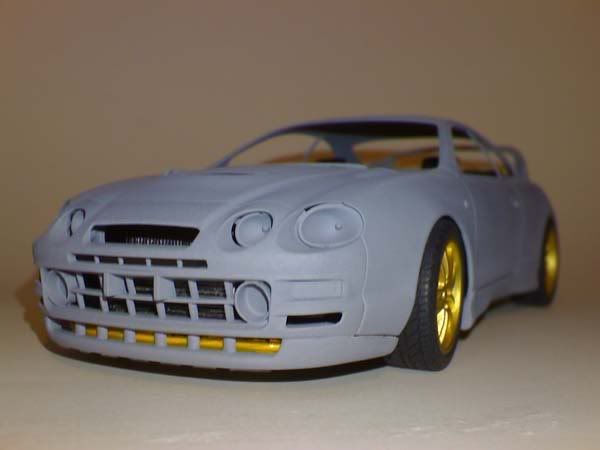 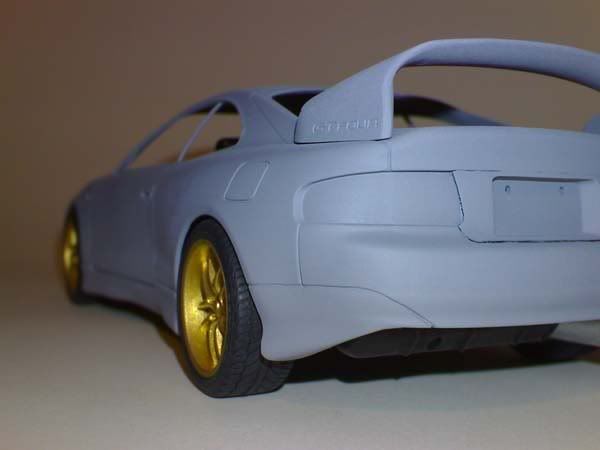 in this pic you can see the speakers in the parcel shelf (made from drawing pins). 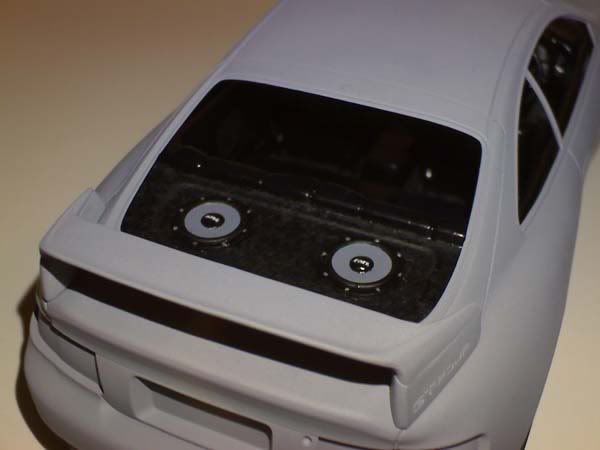 and here's a couple of pics of the neons working. 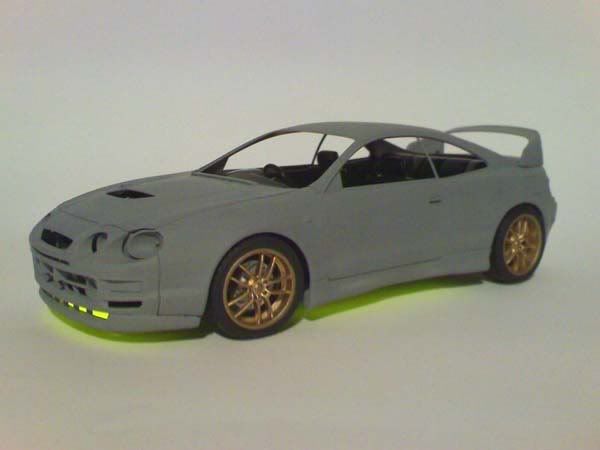 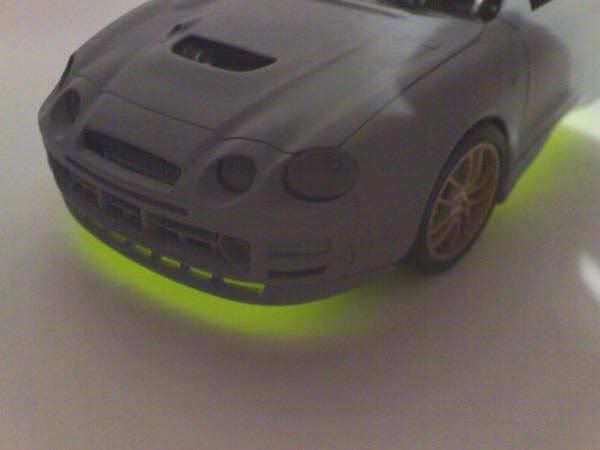 i reckon we're just about up to date now. i've actually started painting the final body colour but i ran out of paint after 2 coats so a trip to the model shop is needed. when the top coat goes on, i'll try to get some good quality pics of the finish. comments welcome.  EDIT: here's a couple of pics i just took of the interior. 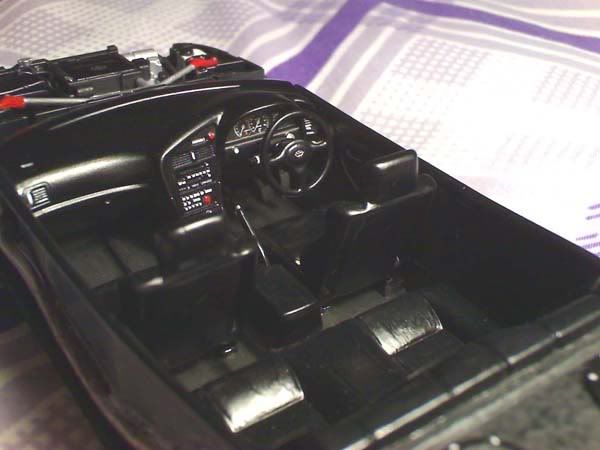 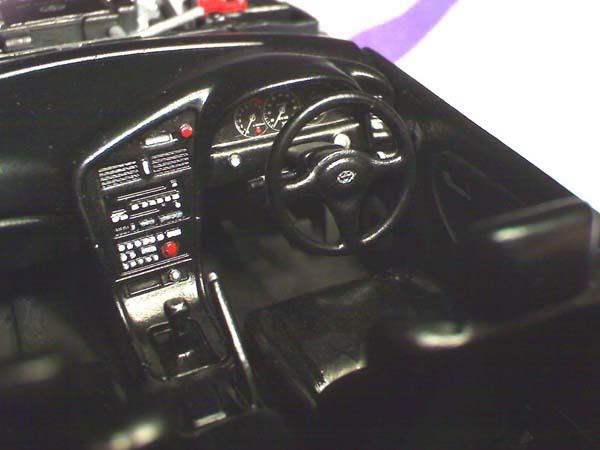 as you can see it's not particularly special, but i'm not too fussed as i'll be tinting the windows so it won't be seen in any great detail anyway. Last edited by jazzywheelz; 02-02-2007 at 02:56 PM. |
|
|
|
|
|
02-02-2007, 06:26 PM
|
#7 | |
|
AF Newbie
Join Date: Jul 2004
Location: Stockholm
Posts: 39
Thanks: 0
Thanked 1 Time in 1 Post
|
Re: 1/24 Toyota Celica GTfour ST205 - with neons !!!
Really nice! Love the neons! I have just ordered this kit for myself
 |
|
|
|
|
|
02-03-2007, 04:52 PM
|
#8 | |
|
AF Regular
Join Date: Sep 2004
Location: Vantaa
Posts: 376
Thanks: 0
Thanked 5 Times in 5 Posts
|
Re: 1/24 Toyota Celica GTfour ST205 - with neons !!!
NICE! I love the bodykit! Keep it up!!
__________________
My tribute to the red 60 yrs group build 
|
|
|
|
|
|
02-03-2007, 04:59 PM
|
#9 | |
|
AF Enthusiast

Join Date: Nov 2004
Location: Calgary
Posts: 843
Thanks: 12
Thanked 5 Times in 5 Posts
|
Re: 1/24 Toyota Celica GTfour ST205 - with neons !!!
Bodykit was perfectly done!! I have never thought of using round styrene rods for the contours!
|
|
|
|
|
|
|
POST REPLY TO THIS THREAD |
 |
|
|

