

|
| Search | Car Forums | Gallery | Articles | Helper | AF 350Z | IgorSushko.com | Corporate |
|
| Latest | 0 Rplys |
|
|||||||
| WIP - Street Post topics for any "Works In Progress" street vehicles projects in this sub-forum. |
 |
 Show Printable Version | Show Printable Version |  Email this Page | Email this Page |  Subscribe to this Thread
|
|
|
Thread Tools |
|
|
#1 | |
|
AF Enthusiast
Join Date: Sep 2003
Posts: 637
Thanks: 24
Thanked 16 Times in 16 Posts
|
Testors/Fujimi Ferrari Dino 246GT
This time I'll be doing this classic and historic car that Enzo did to honor his only late son, and the only one didn't wear the Ferrari badge. The kit I'll be using is a Fujimi Kit that Testors re-boxed in the late 80's with 200+ parts. As an interesting addition, I 'll be using also the awesome detailing kit from Model Factory Hiro with around 125+ more parts. As always, Hiro standars bring us a quality multimedia kit with lots of parts in white metal, vacuuformed glass, turned parts, an exquisite photo-etch set, etc. To add for a little push, parts from Hobby Design and Top Studio will also in this build....So, let's start...
Here's the great Model Factory Hiro Super Detaling kit with lots and lots of parts.  close view:  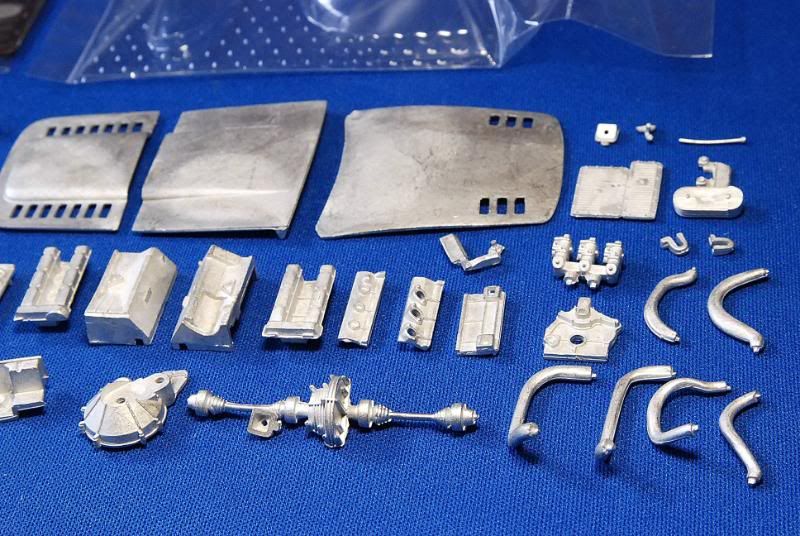 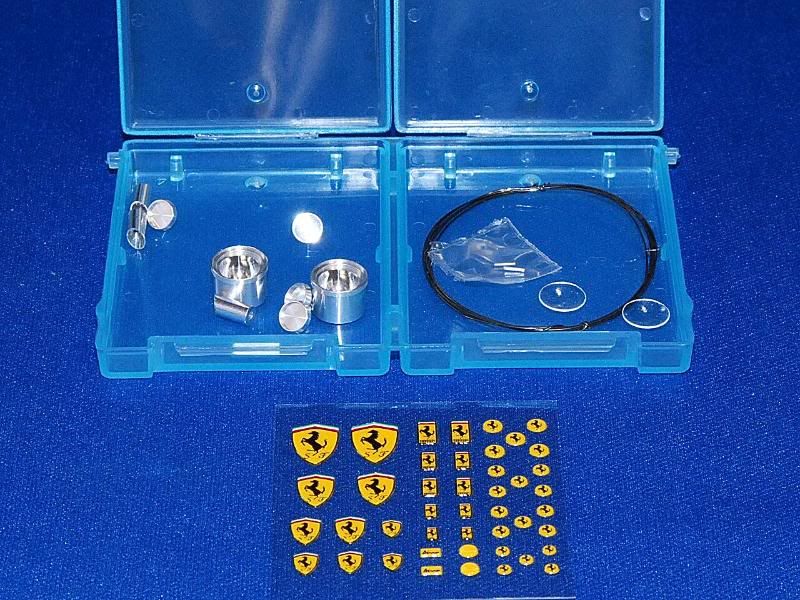 Some more aftermarket help: 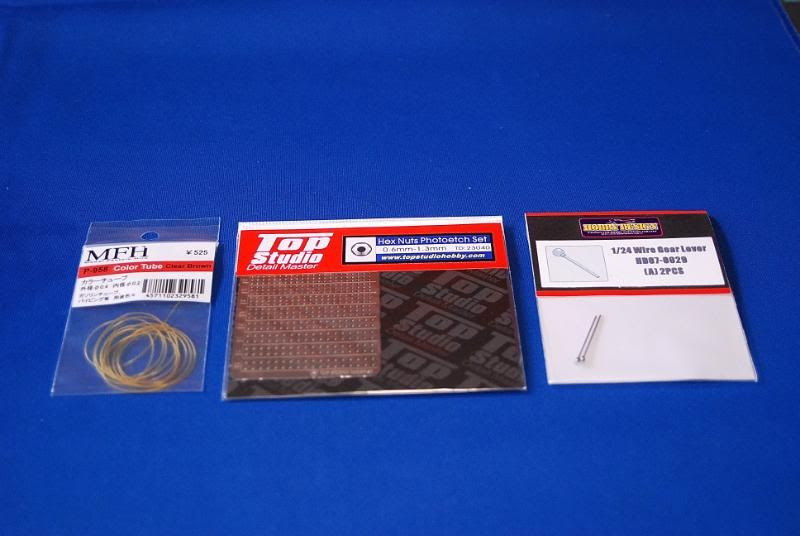 I'll be starting with the nice casted white metal valve covers. The one at the left had already received the dremel's wire brush treatment:  The other parts will do the combo for the clinder heads:   Something its has been already polished and glued:  Now is the turn for the transmission...5 parts will do the completed part:   All the components of the engine..cilinder heads, transmission, engine block, distributor, weber carburators.  The exhaust headers also made of with metal, the ones at the right were already polished, the ones in the left still waiting: 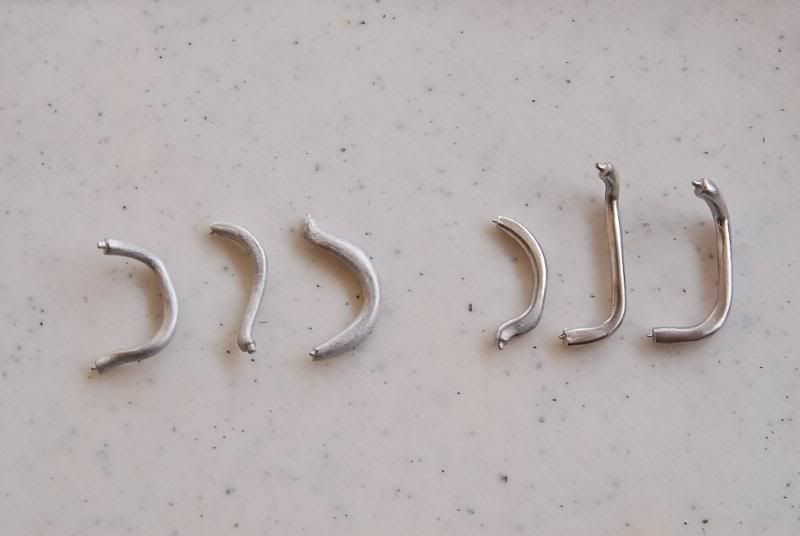 Some more parts like the air cleaner, oil filter, engine mounts, starter, rear axles are already cleaned and mounted for painting. Here we can see all the parts together:  Some parts already painted with some different kinds of metalizers paints: 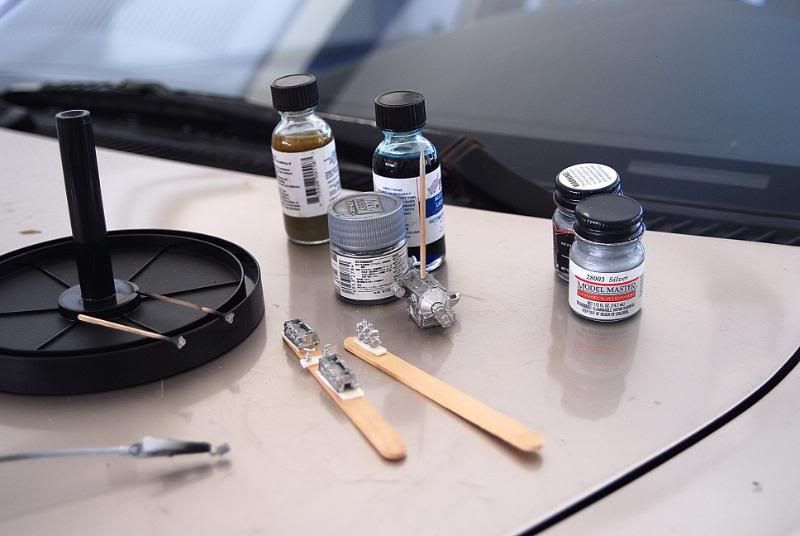 As an interesting add-on, the rust dust on the thinner can will also be added to the party..nothing looks more real like the real thing: 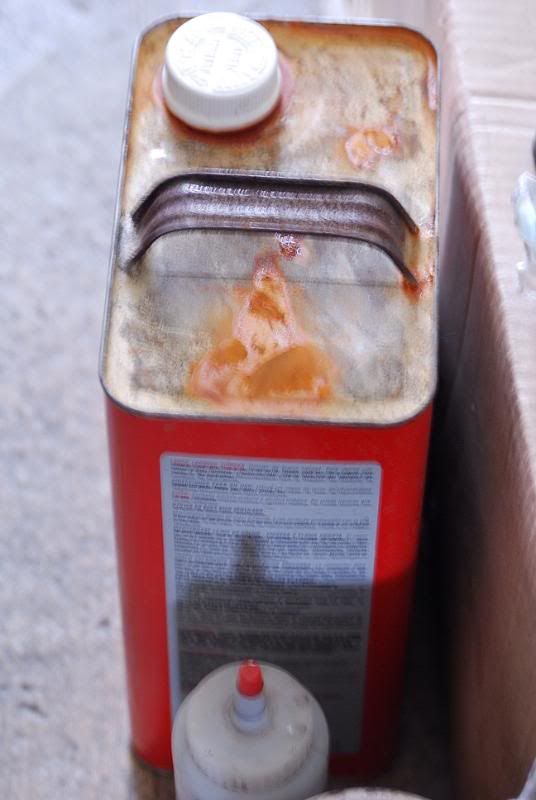 Finally everything painted and glued together:  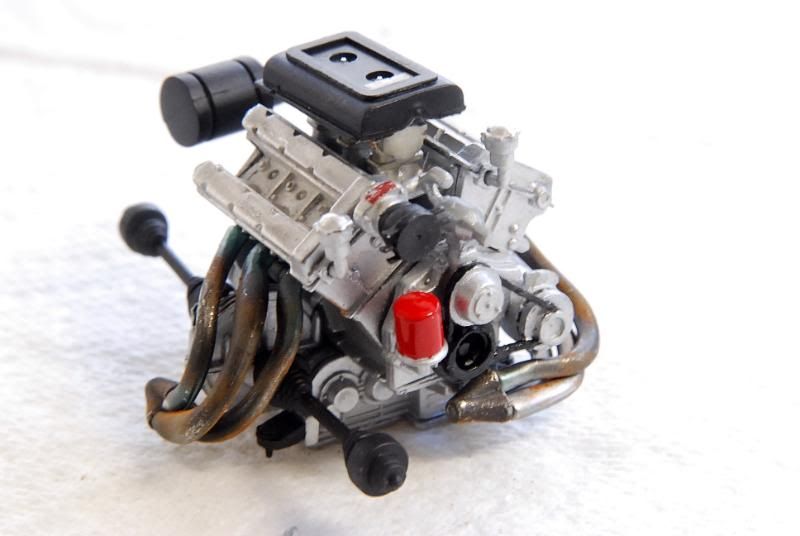 This is something will enhance the engine but, will give me a little of hard time of work. For the spark plugs boots I will place a .6mm stainless steel tube inside another .9mm one. The stainless steel tubing is so hard that any knive or cutter can do the job. I used a diamond dust disc with my Dremel and it could be done... 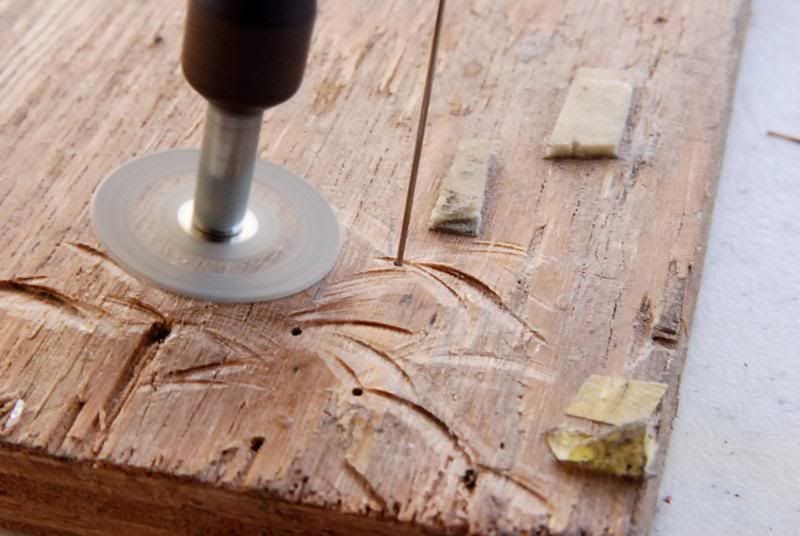 After some hours, the tubing is cutted off and ready. At the top we can see the spark boot sample and at its right the boot I will use fot the distributor caps. 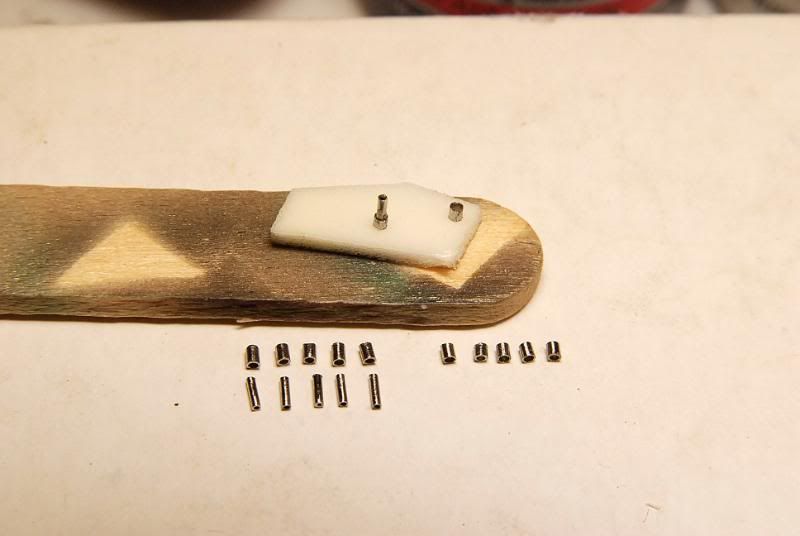 All the parts together and ready to be painted:  Here more components for the suspension, exhaust system, chassis, gas tanks, etc. 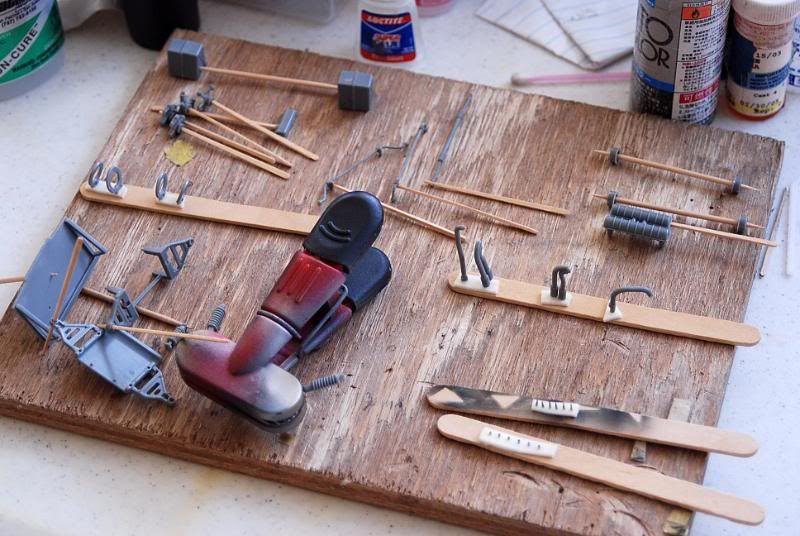 Everything inside the dehydrator already painted: 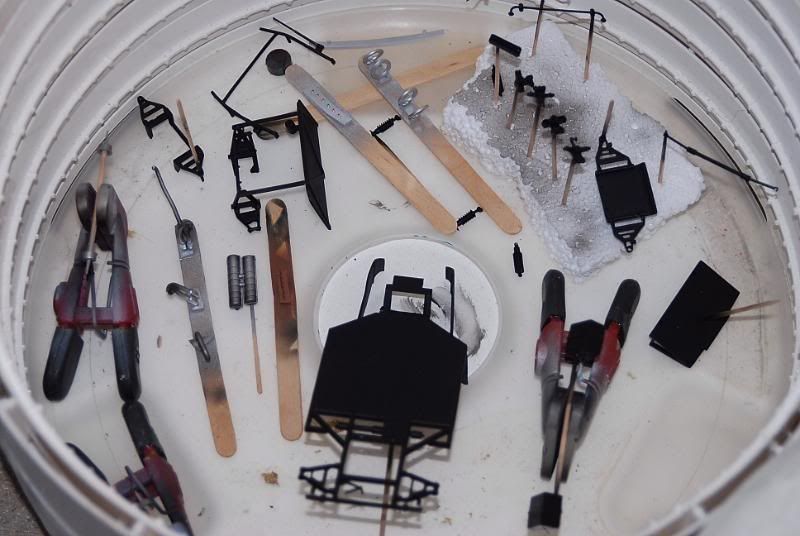 The engine over the chassis...remember what I told you about the real look or real rust dust?... 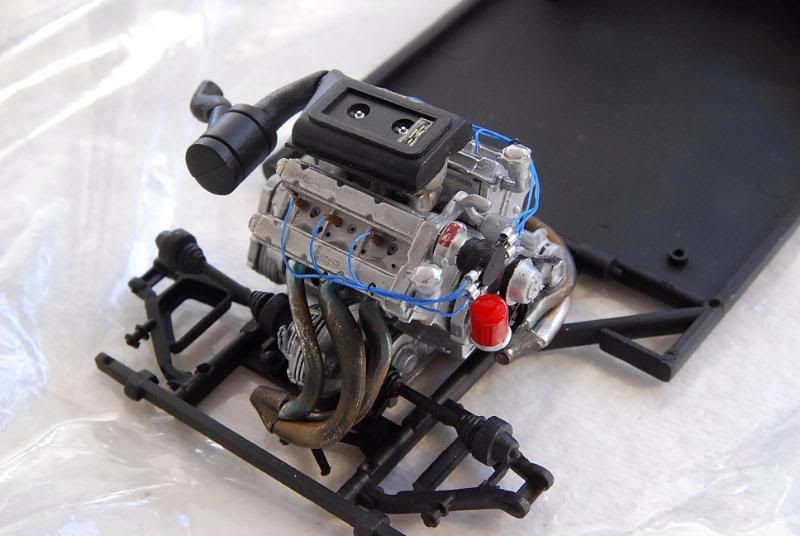  More of the chassis parts and some plumbing were added:  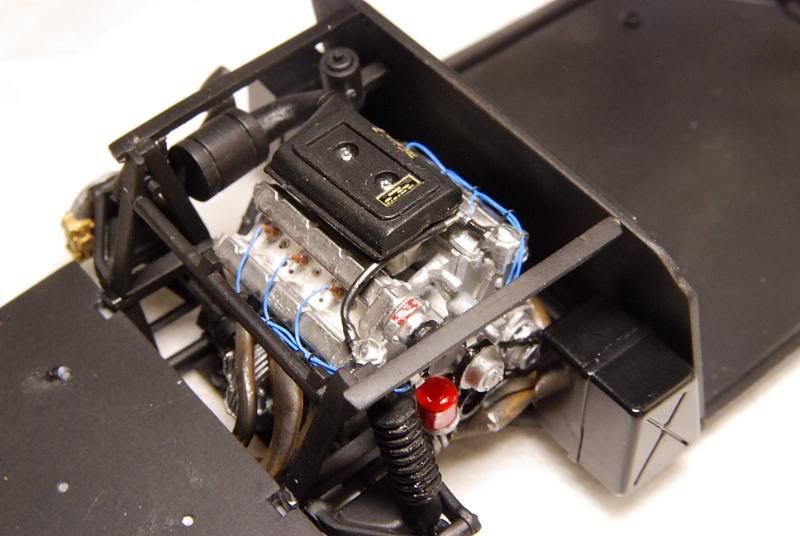 This is it..for now. Last edited by Porsnatic; 03-07-2012 at 12:39 PM. |
|
|
|

|
|
|
#2 | |
|
AF Enthusiast
Join Date: Mar 2004
Location: Oakland, Minnesota
Posts: 1,015
Thanks: 31
Thanked 57 Times in 55 Posts
|
Re: Testors/Fujimi Ferrari Dino 246GT
Wow! Very impressive work on an impressive lot of parts! I'll be following
 |
|
|
|

|
|
|
#3 | |
|
Blarg! Wort Wort Wort!
Join Date: Mar 2006
Location: Quezon City
Posts: 2,120
Thanks: 64
Thanked 101 Times in 100 Posts
|
Re: Testors/Fujimi Ferrari Dino 246GT
impressive work! the real rust sure beats any painted-on effect anytime

__________________
olly olly oxen free |
|
|
|

|
|
|
#4 | |
|
AF Regular
Join Date: Jul 2011
Location: ...
Posts: 250
Thanks: 12
Thanked 10 Times in 10 Posts
|
Re: Testors/Fujimi Ferrari Dino 246GT
that looks great so far, how did you apply the real rust?
|
|
|
|

|
|
|
#5 |
|
AF Enthusiast
Thread starter
Join Date: Sep 2003
Posts: 637
Thanks: 24
Thanked 16 Times in 16 Posts
|
Re: Testors/Fujimi Ferrari Dino 246GT
|
|
|

|
|
|
#6 | |
|
AF Premium User
          Join Date: Dec 2002
Location: Melbourne
Posts: 1,746
Thanks: 9
Thanked 12 Times in 12 Posts
|
Re: Testors/Fujimi Ferrari Dino 246GT
Wow looks fantastic so far. Looking forward to more updates as you go along!
|
|
|
|

|
|
|
#7 | |
|
AF Enthusiast
Thread starter
Join Date: Sep 2003
Posts: 637
Thanks: 24
Thanked 16 Times in 16 Posts
|
Re: Testors/Fujimi Ferrari Dino 246GT
After some days working on the model, here are some updated pictures...
Here we can see different shots of the engine now with some hoses and the bands: 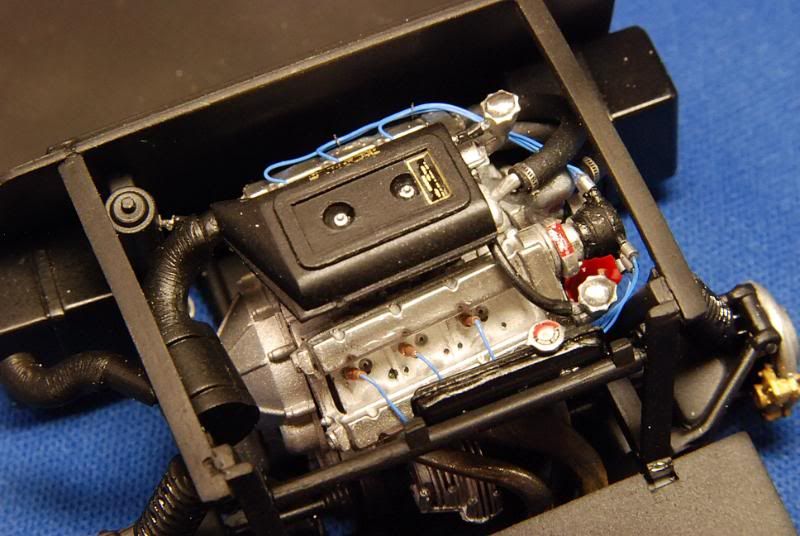 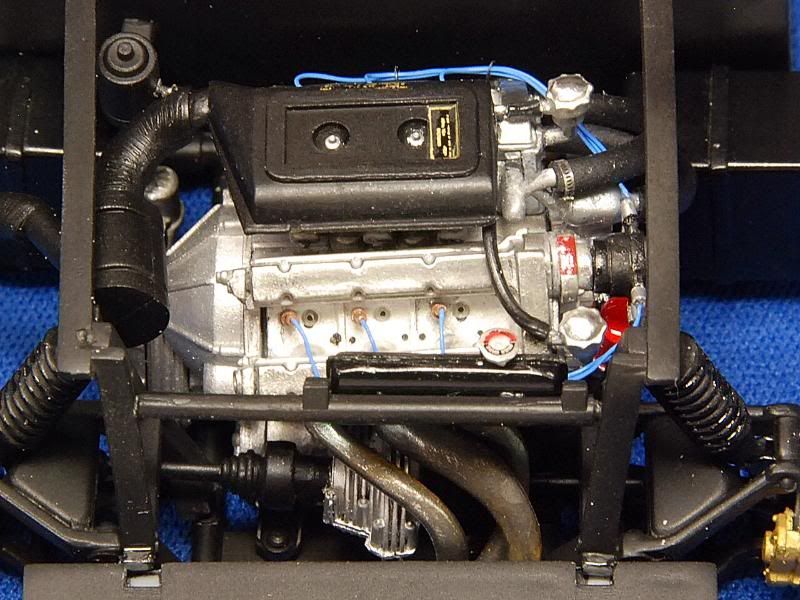 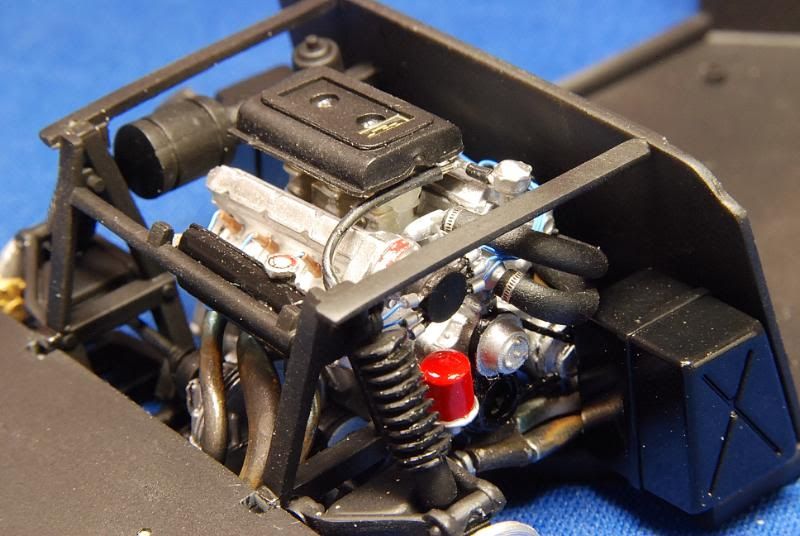 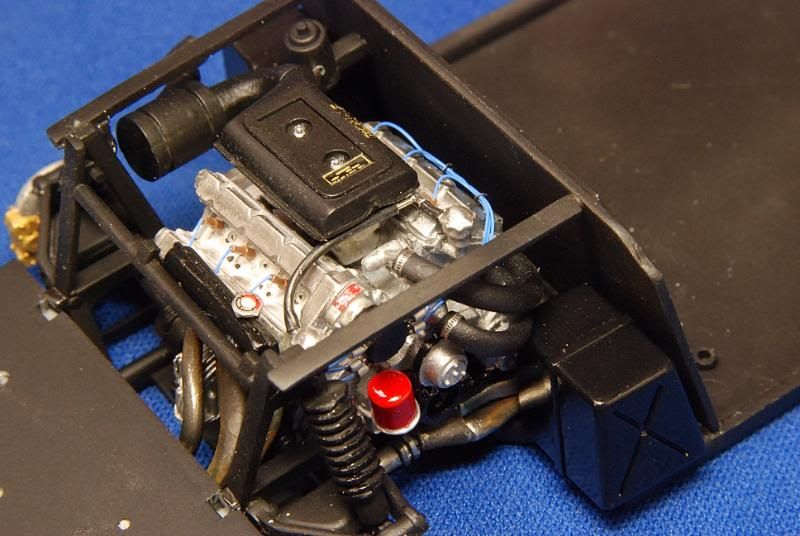  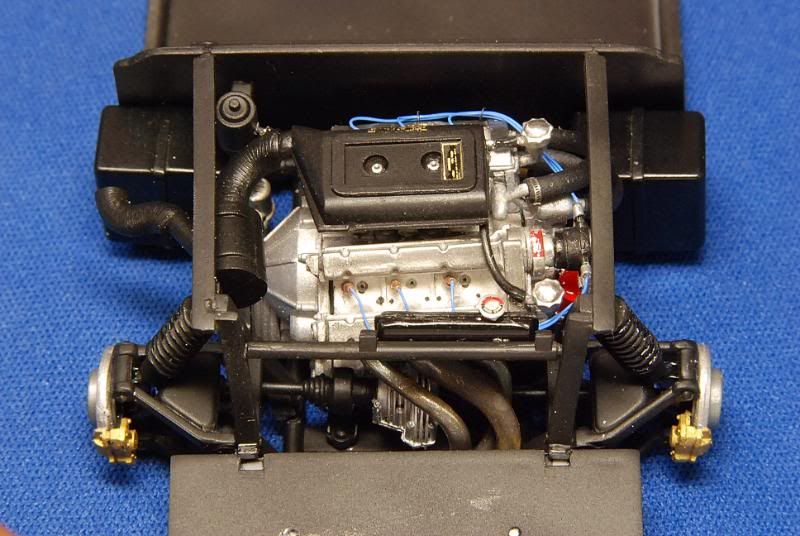 The bottom of the chassis plus the engine: 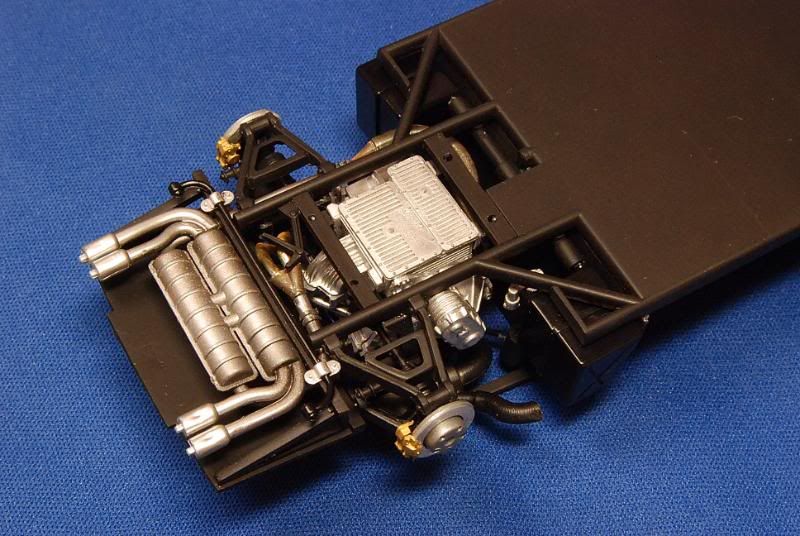 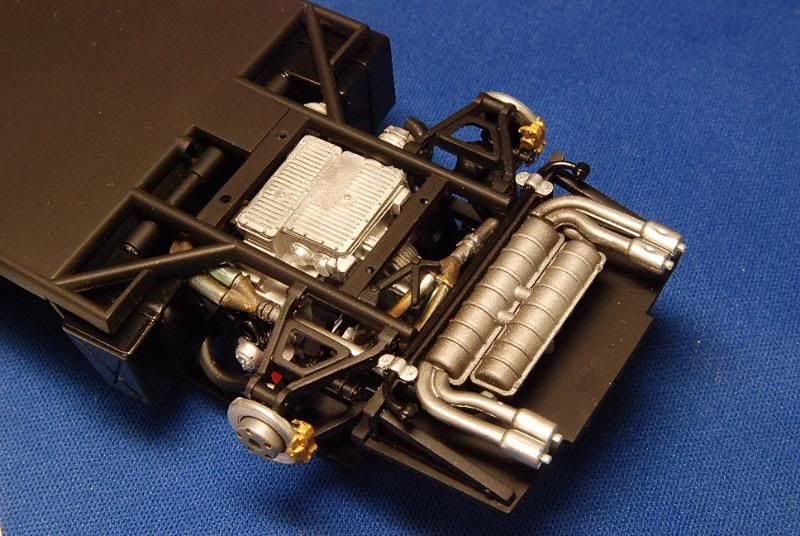 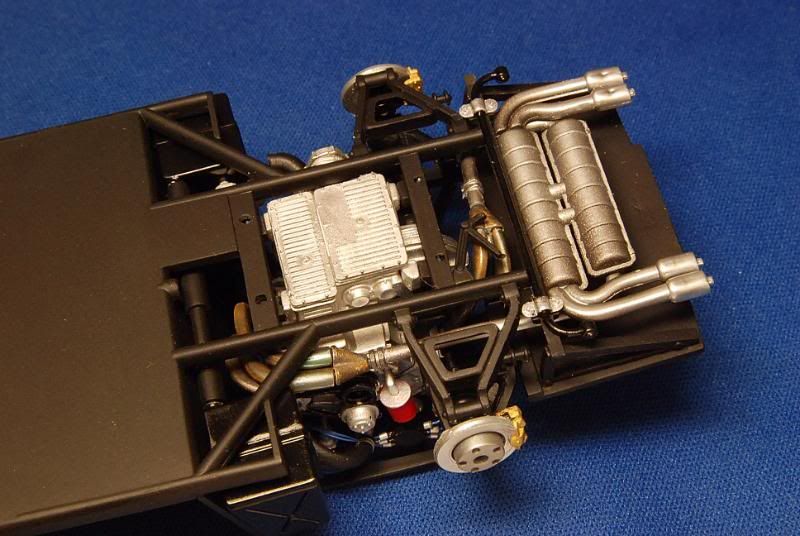 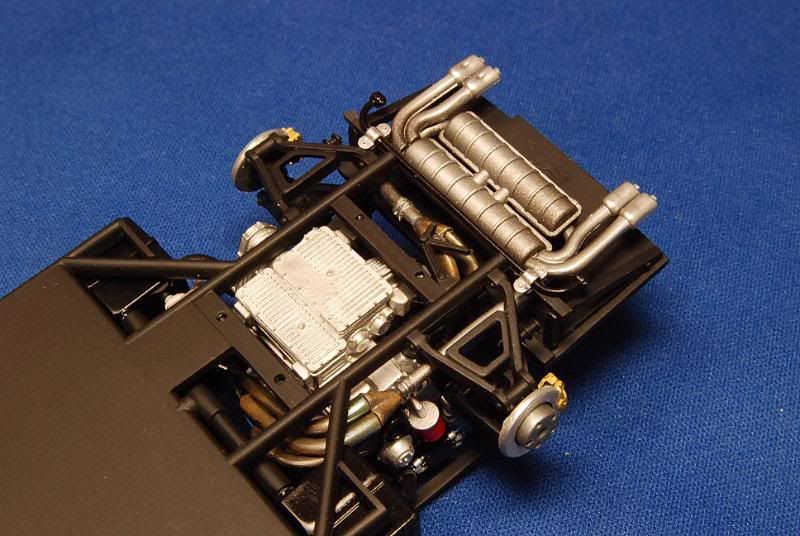 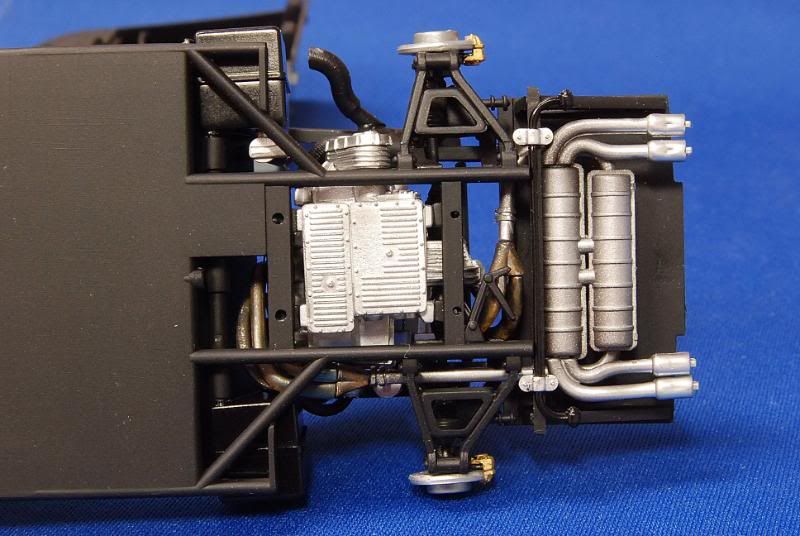 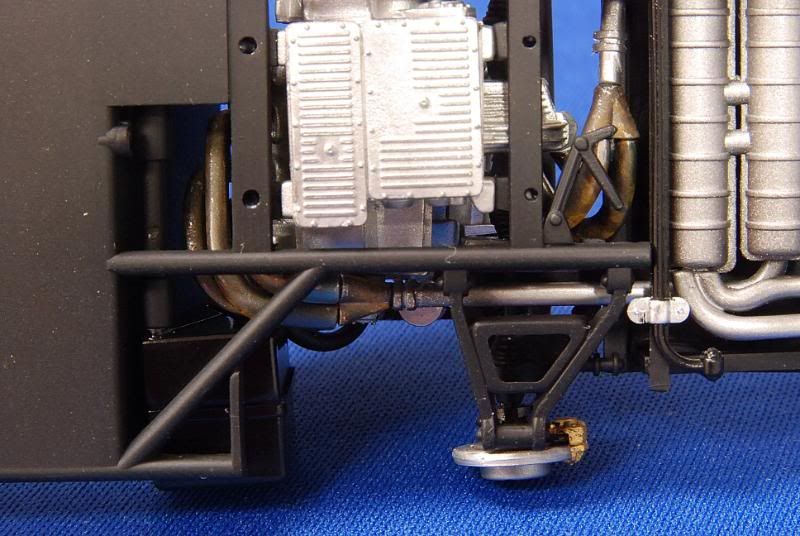 For the front compartment, I added some plumbing for the brake master cylinder and scratchbuilt the battery connectors out of plastic... 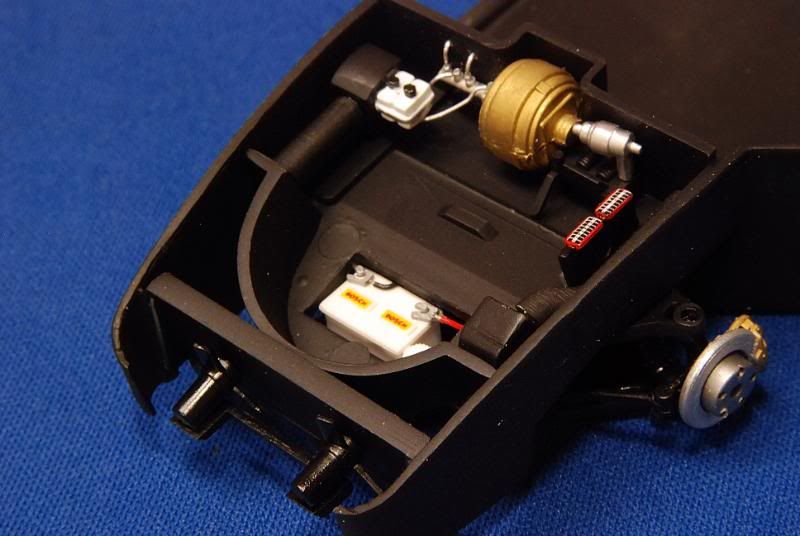 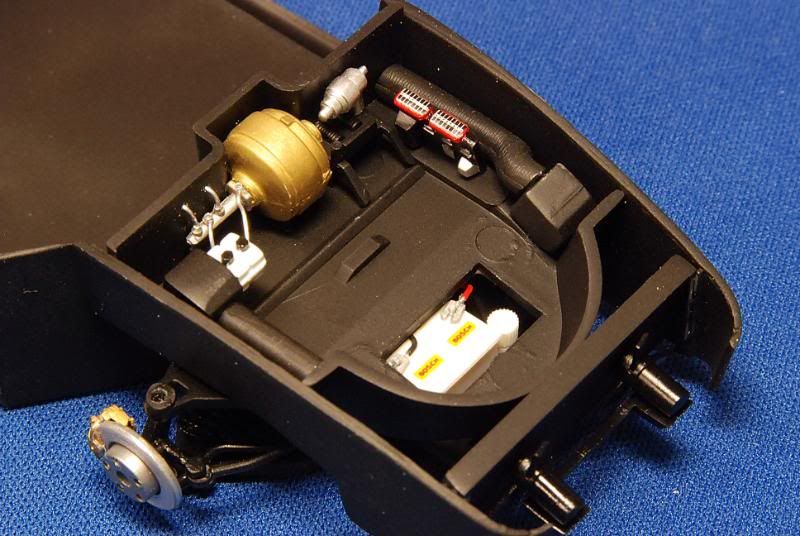 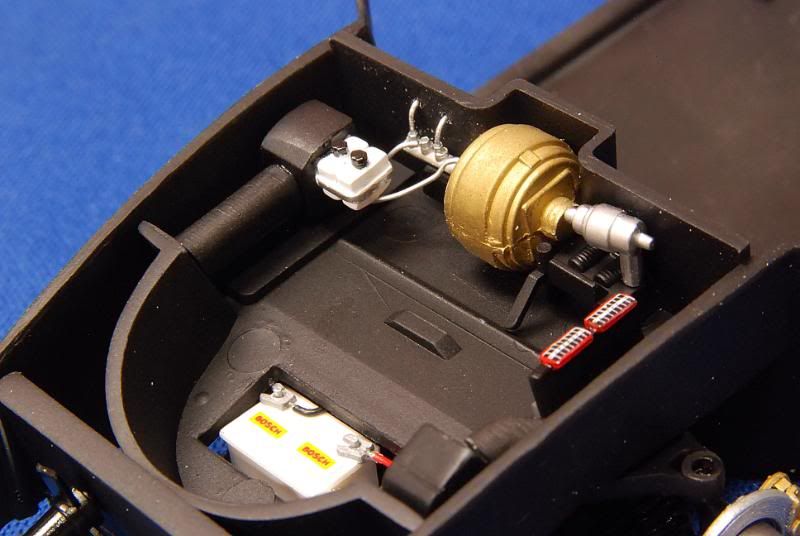 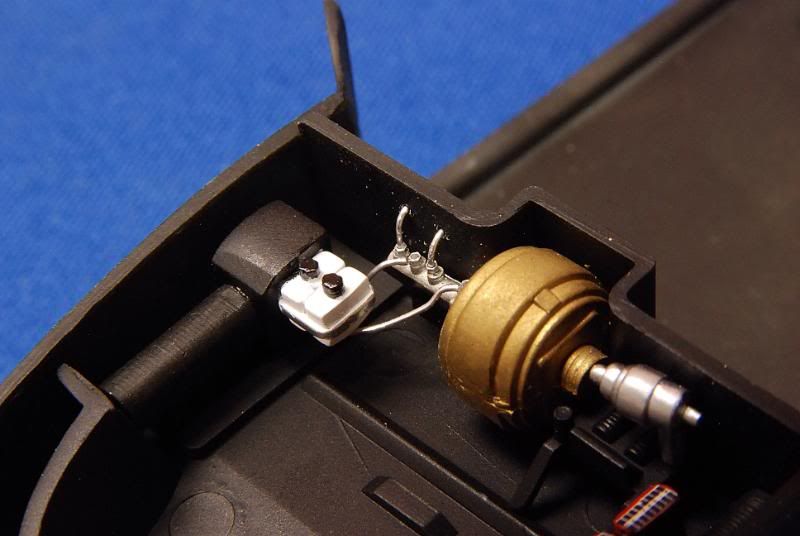 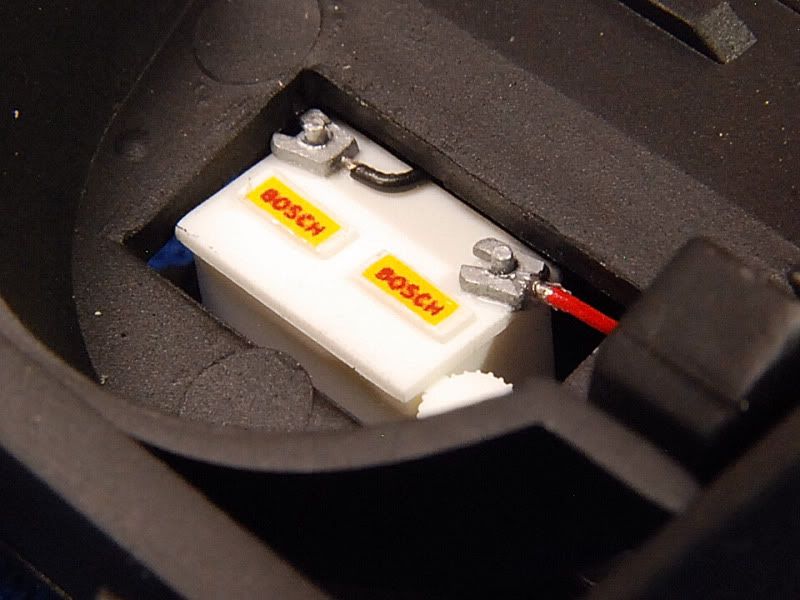 Here I started to take advantage of the great Model Factory Hiro detailing kit, I started shaving the radio buttons and placing the radio photo-etch face. I save the buttons and glued them over. Some of the switches algo gone to replaced latter with the photo etches ones: 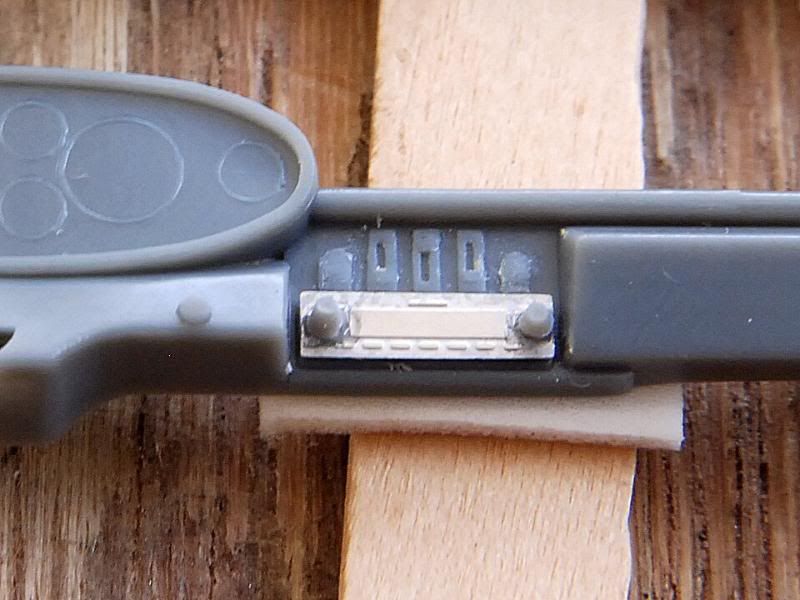 How it looks after being completed: 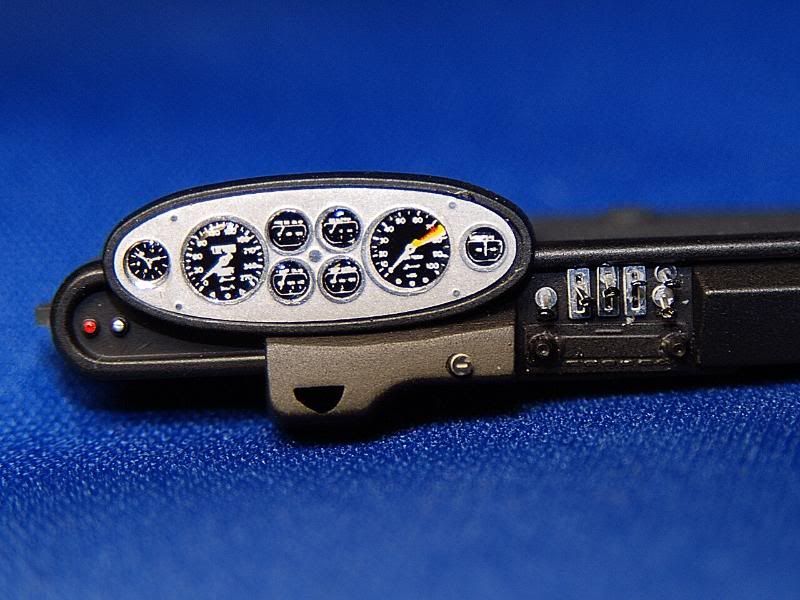 The turn signal, hi-low beam and wiper selectors also suffered a transformation. I shaved the knobs and used pins as the rod: 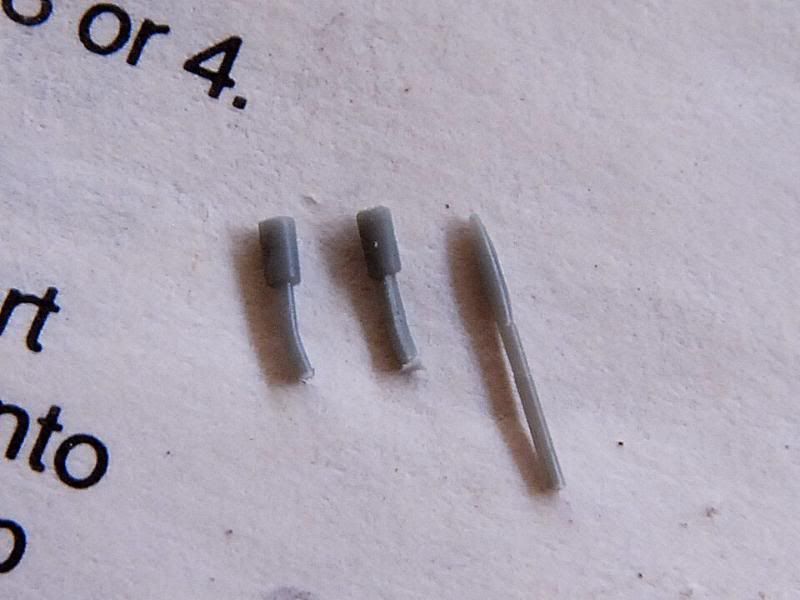 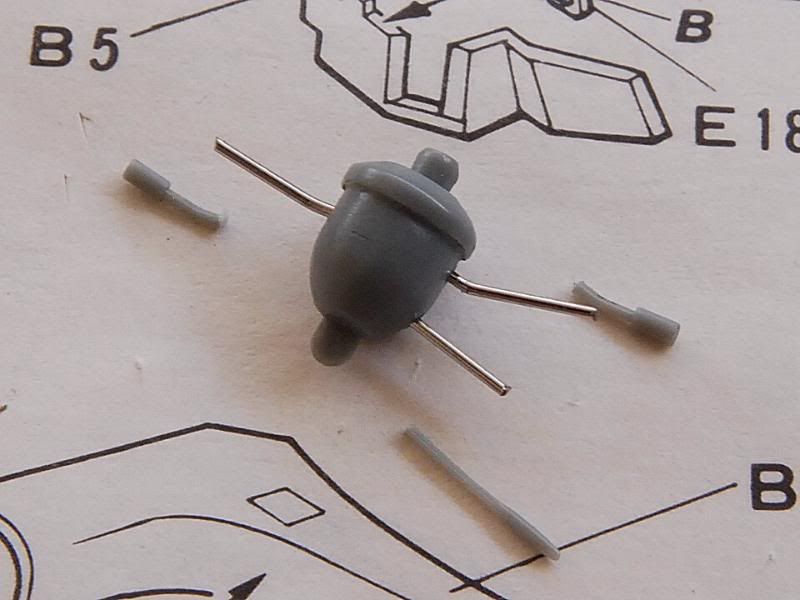 Completed: 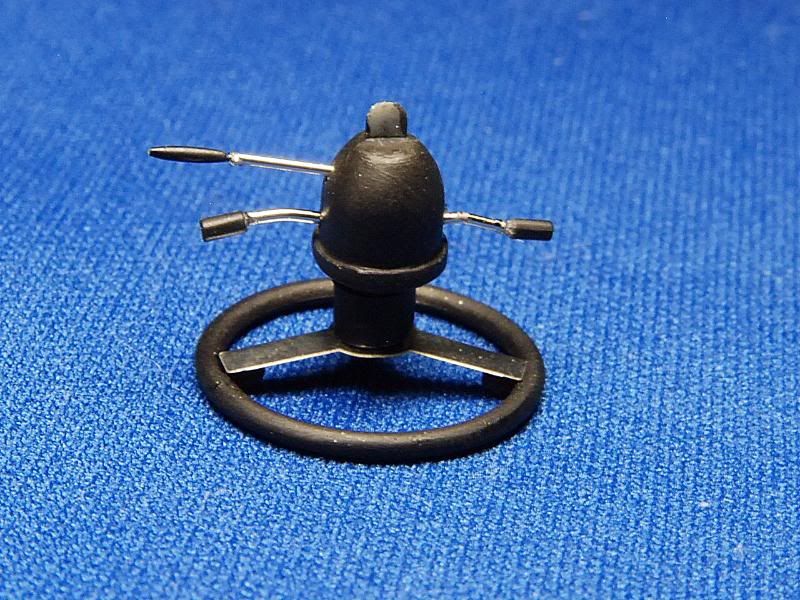 I used the white metal steering wheel plus the photo etch wheel center for the combo. The base of the steering wheel its the plastic part: 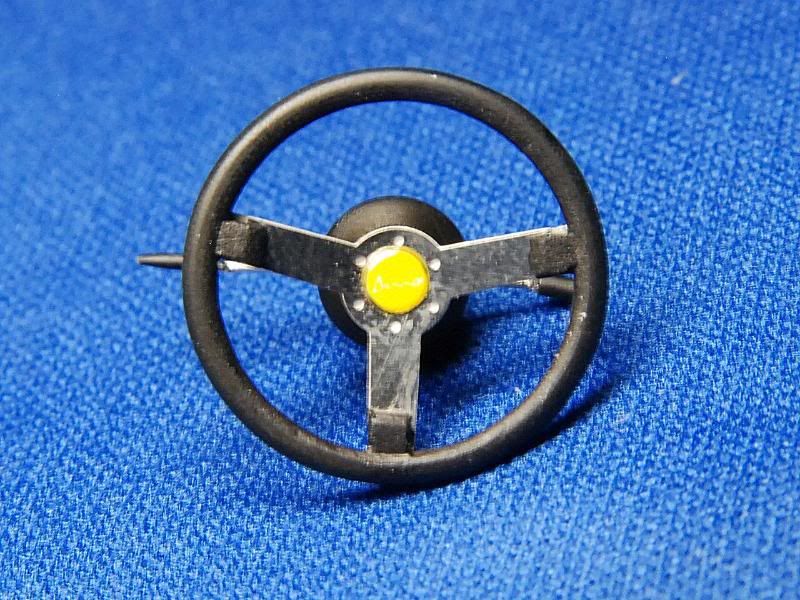 For the seats head rest, I also shaved the plastic rod and again used a pin for the metal part: 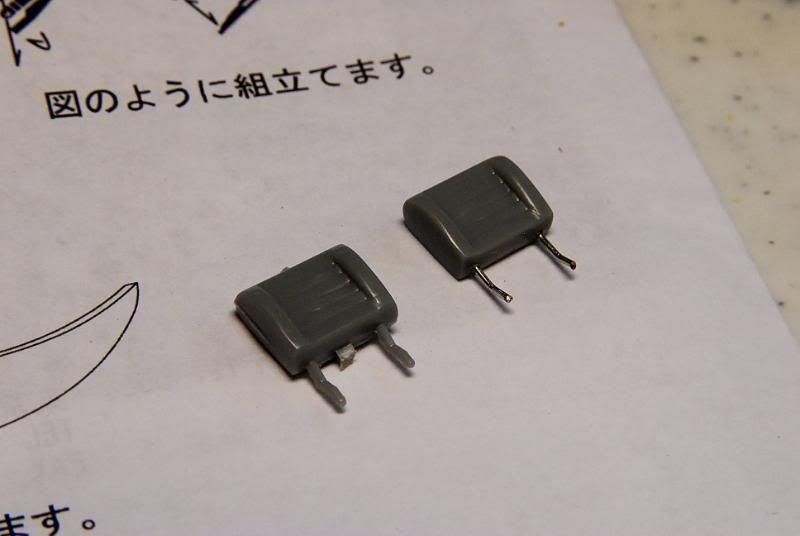 Some tape was wraped over the emargency lever in order to get a more real leather look: 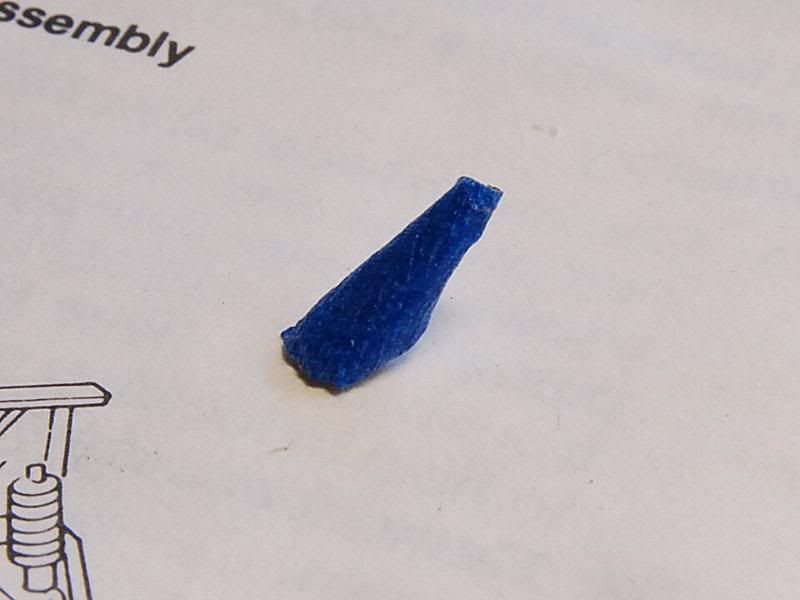 A good amount of parts ready to be painted: 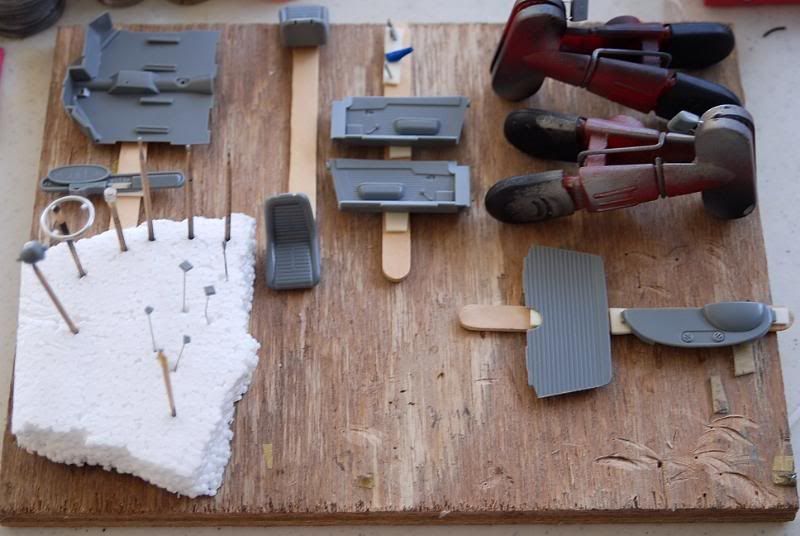 Dash already painted plus the steering wheel assembly. I used a product named Dr Toffano Synthaglass Vetero Syntetico that I got from Italy Ebay. This product is used to make plastic glass and gives you a cleaner glass look than white glue or other products around in my opinion. The only problem was that I had to wait wo months to arrive here to Puerto Rico!:  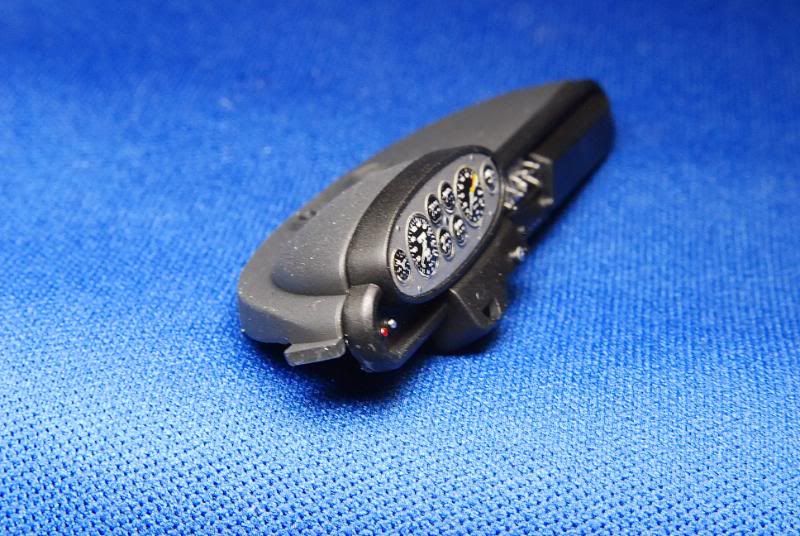 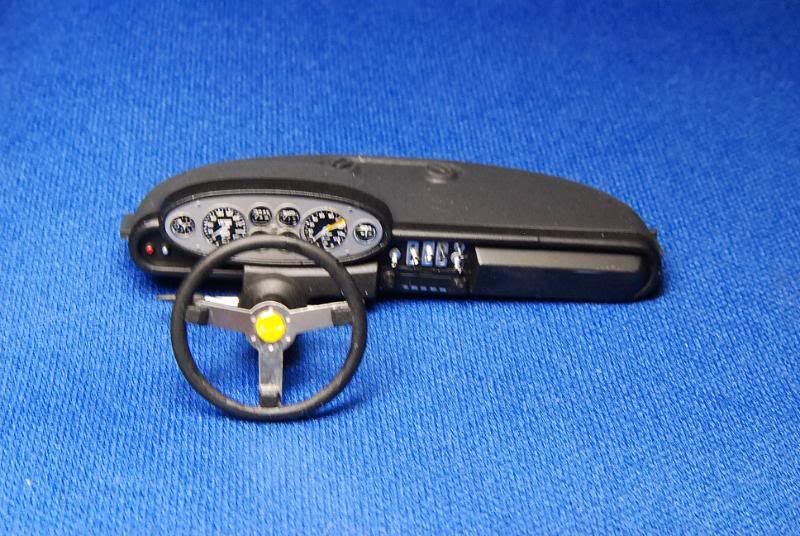 The interior tub after completed:  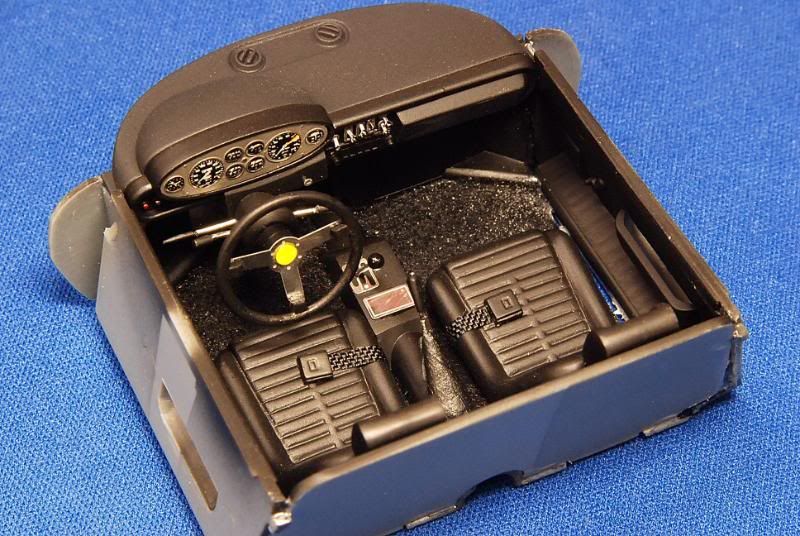 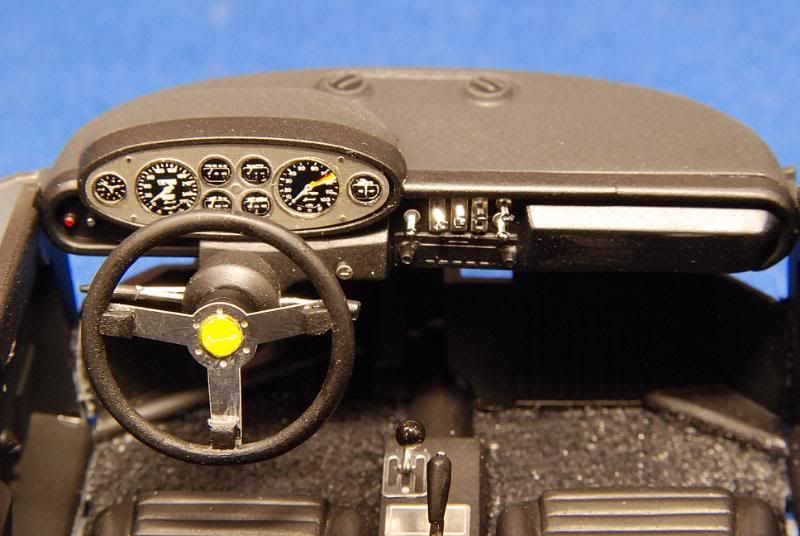 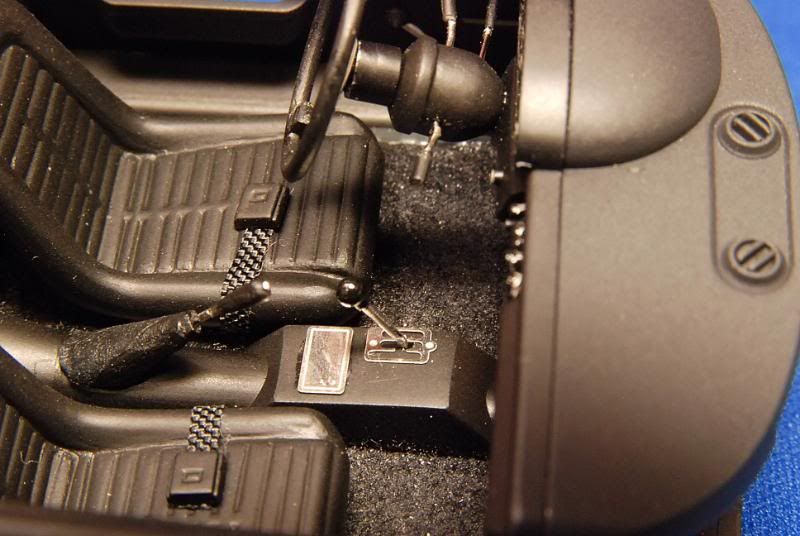 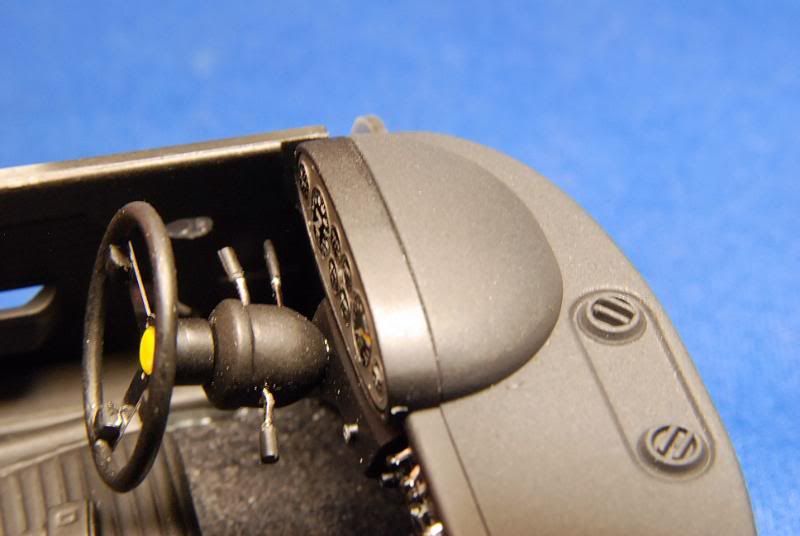 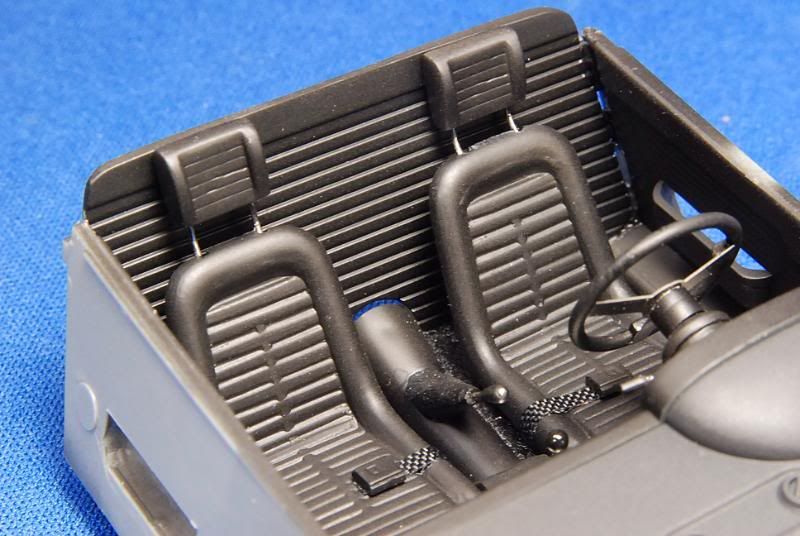 Both chassis and interior tub meet for the first time: 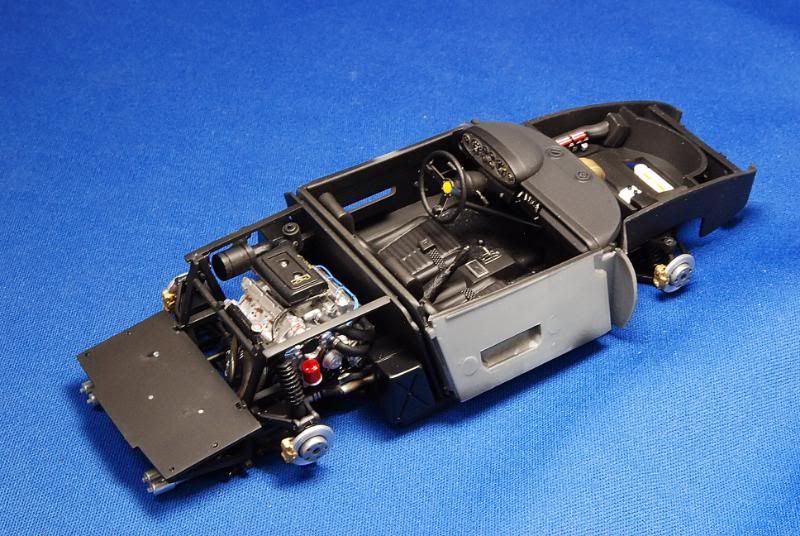 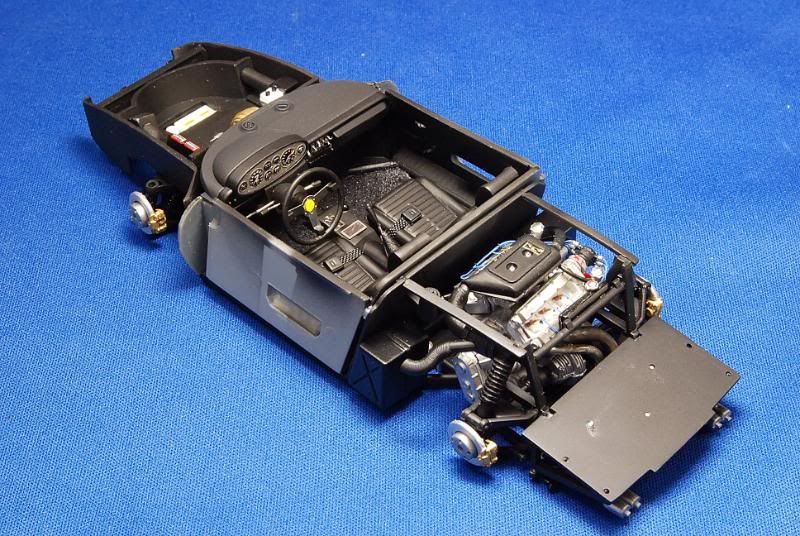 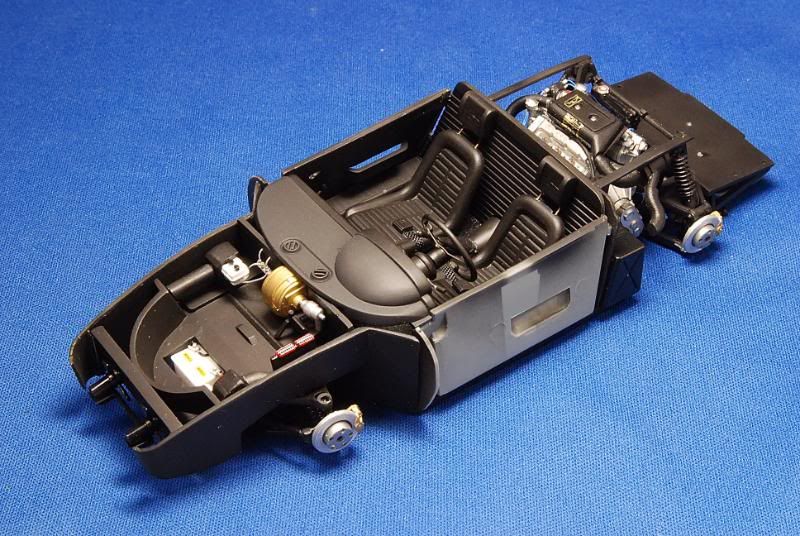 |
|
|
|

|
|
|
#8 | |
|
AF Enthusiast
Join Date: Mar 2004
Location: Oakland, Minnesota
Posts: 1,015
Thanks: 31
Thanked 57 Times in 55 Posts
|
Re: Testors/Fujimi Ferrari Dino 246GT
Great work! I'd like to try that glass product. I can't really tell from the photos...
|
|
|
|

|
|
|
#9 | |
|
AF Enthusiast
Thread starter
Join Date: Sep 2003
Posts: 637
Thanks: 24
Thanked 16 Times in 16 Posts
|
Re: Testors/Fujimi Ferrari Dino 246GT
This last update will start with some minor, but, important goodies added to the engine.
I added the dry sump oil tank hose: 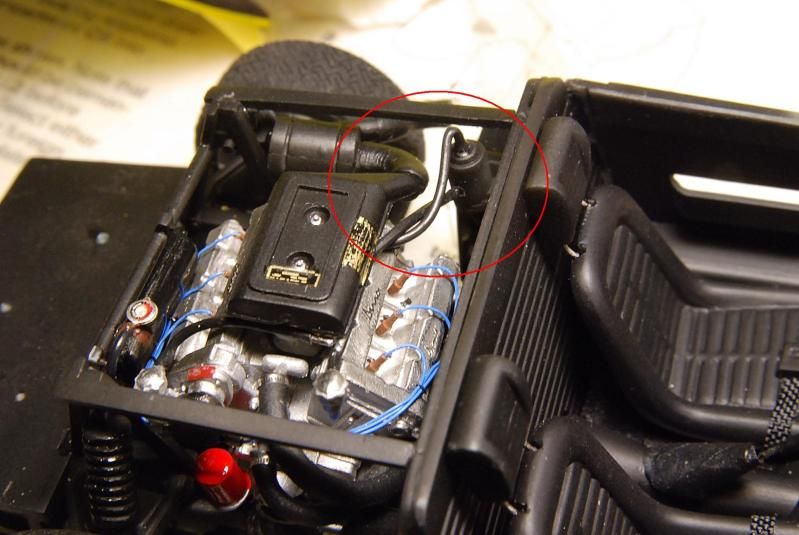 The expansion tank for the radiator: 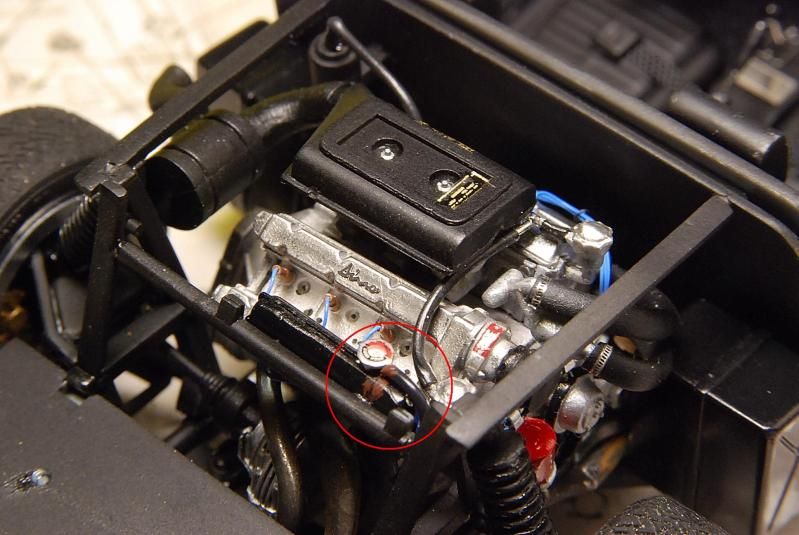 The DINO lettering for the cylinder heads, they are really tiny, you guys can see how small it is placed on the top of a penny: 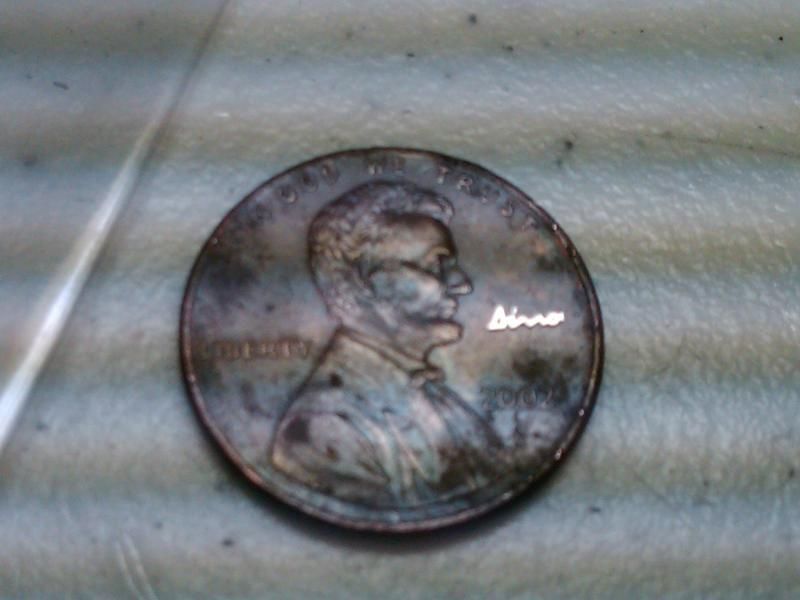 How it looks in place: 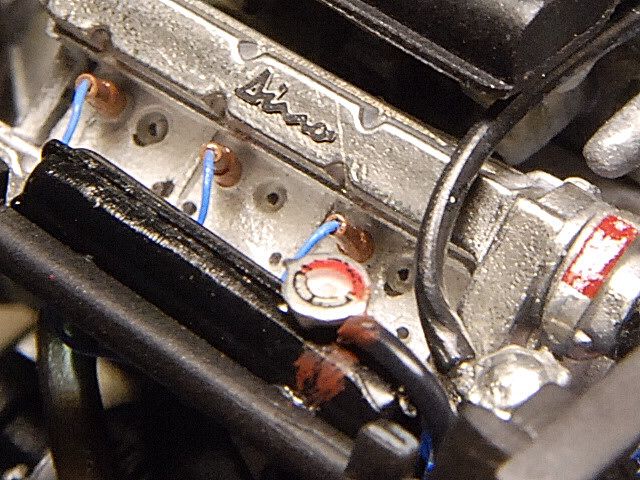 With the engine completed, then I moved to the body. Besides the plastic main body and the rear panel that holds the trunk, I will use the white metal’s trunk, engine cover, and the hood. 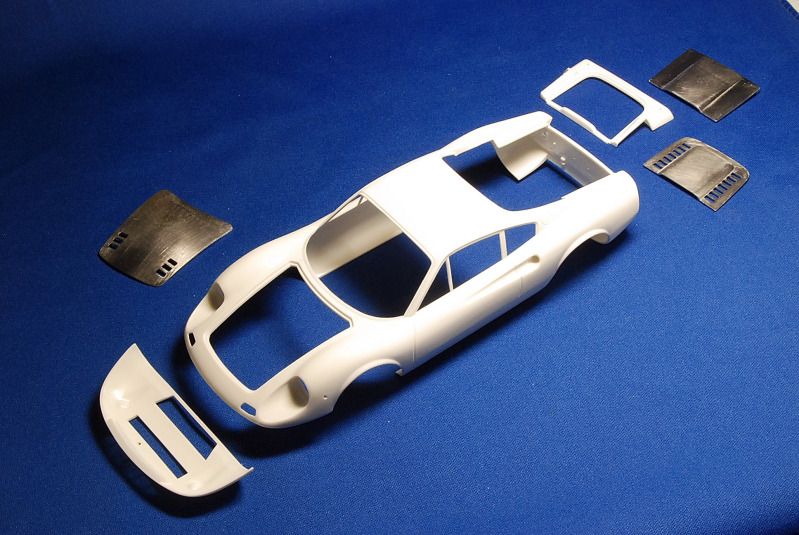 Test fit: 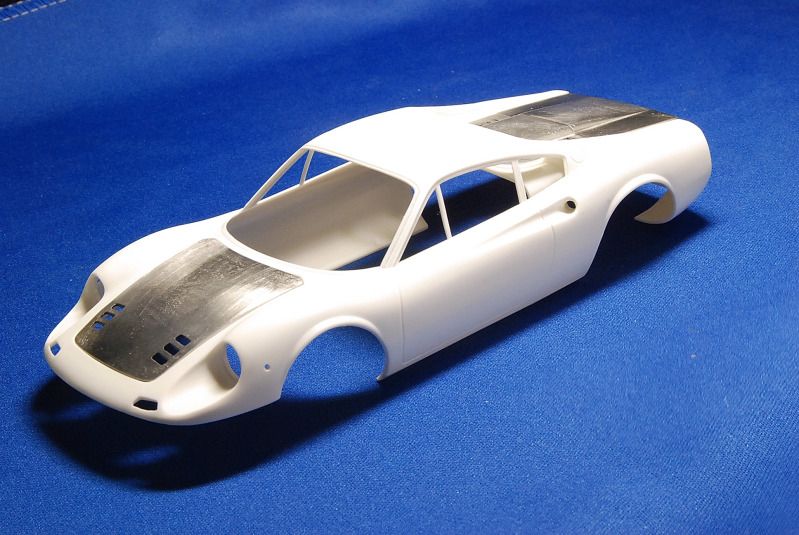 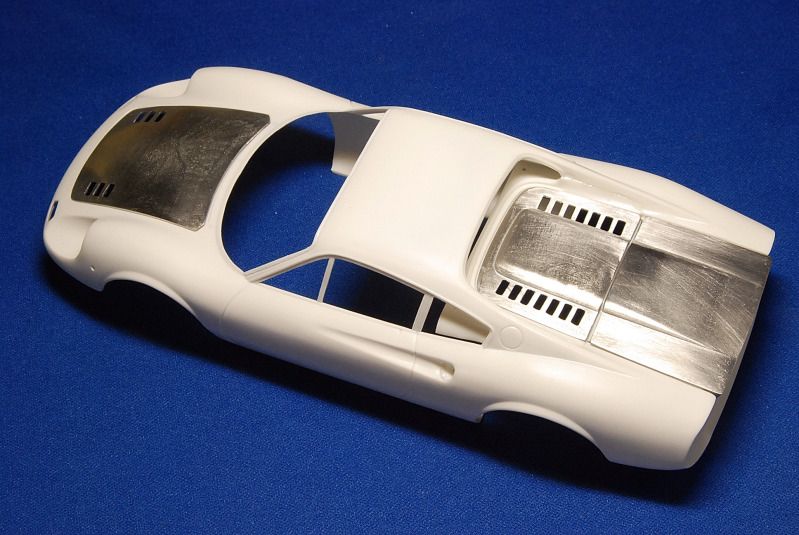 I will start working the front lower panel, which has plastic and thick bars. 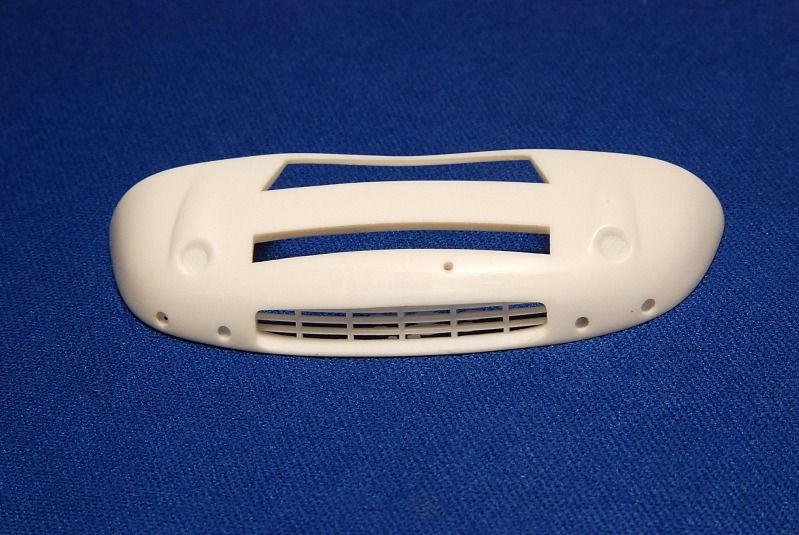 The bars has to go: 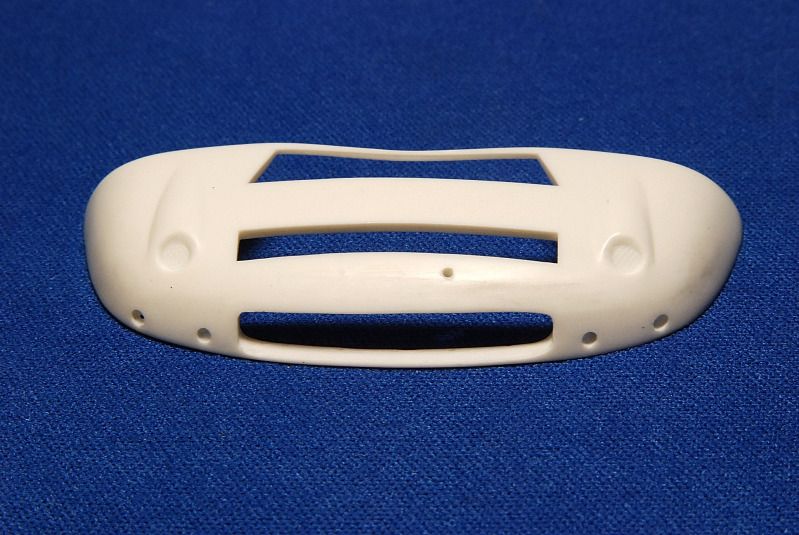 The panel was aligned and glued in place. 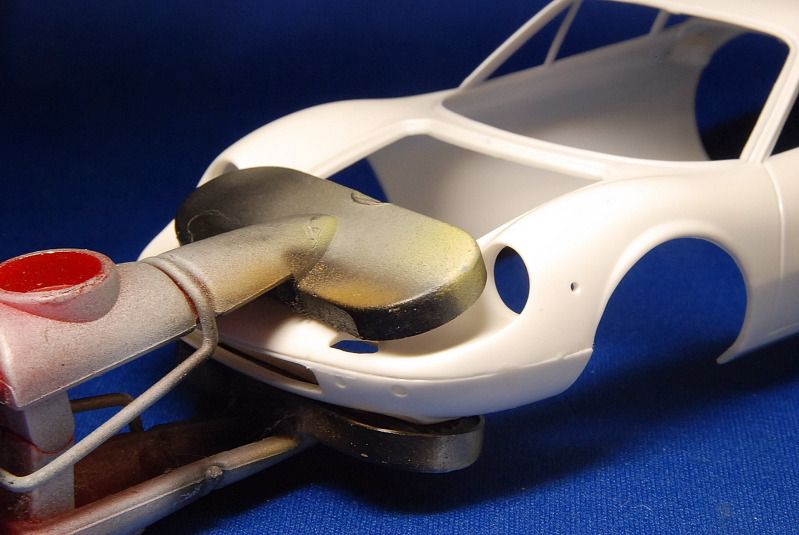 It glued nicely, but, some care has to be taken. I has a deep seam that has to be corrected with some putty: 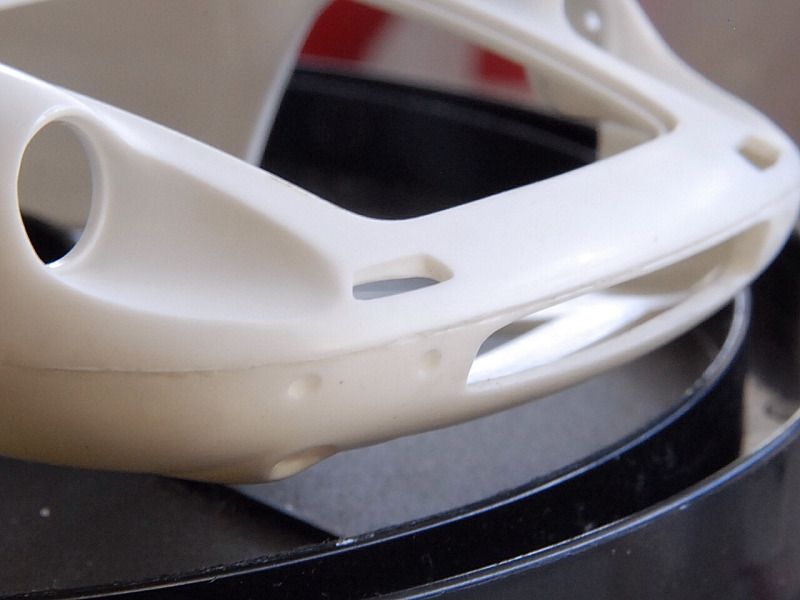 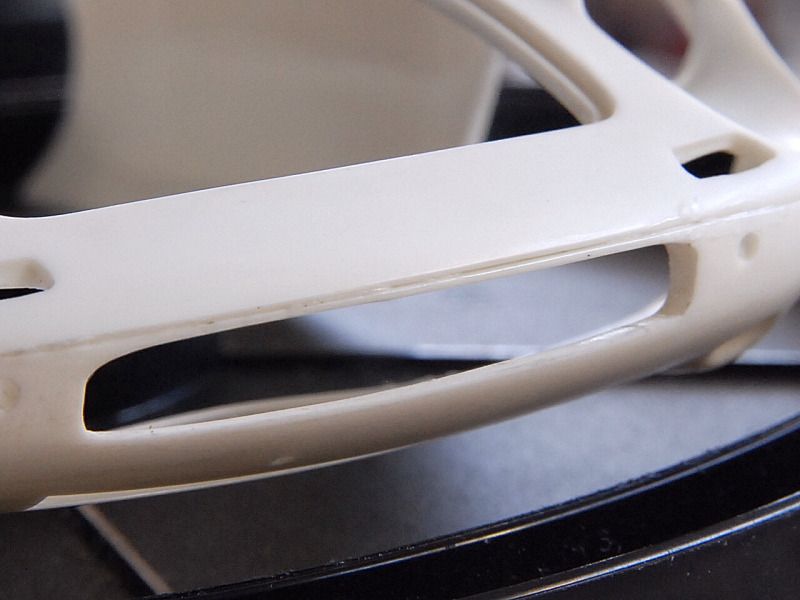 Instead of putty I will use a better method, at least to me. I will do a mix of micro ballons with super glue. The result is a plastic hard paste that doesn’t shrink and sands smooth with almost no trace of what was here before: 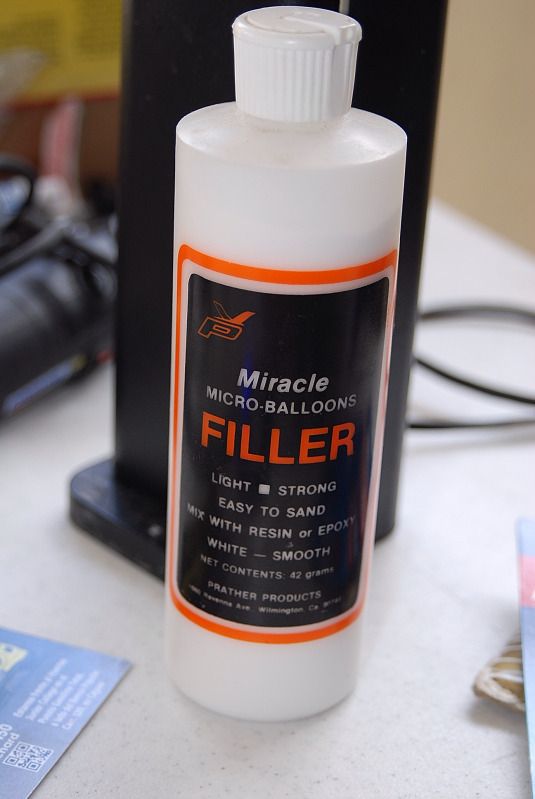 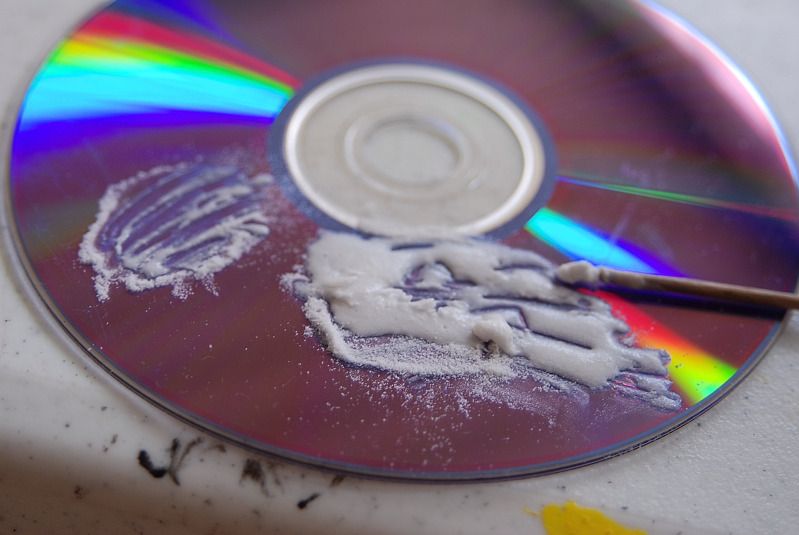 It was applied all over: 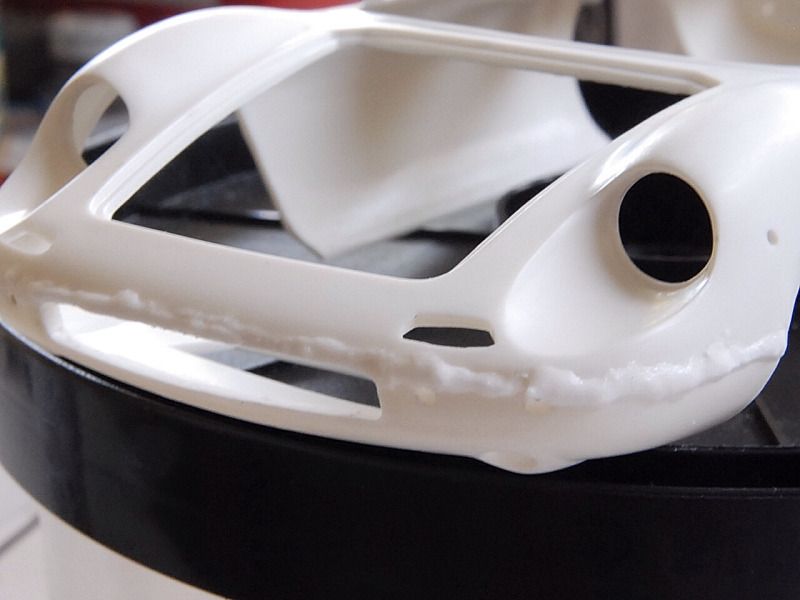 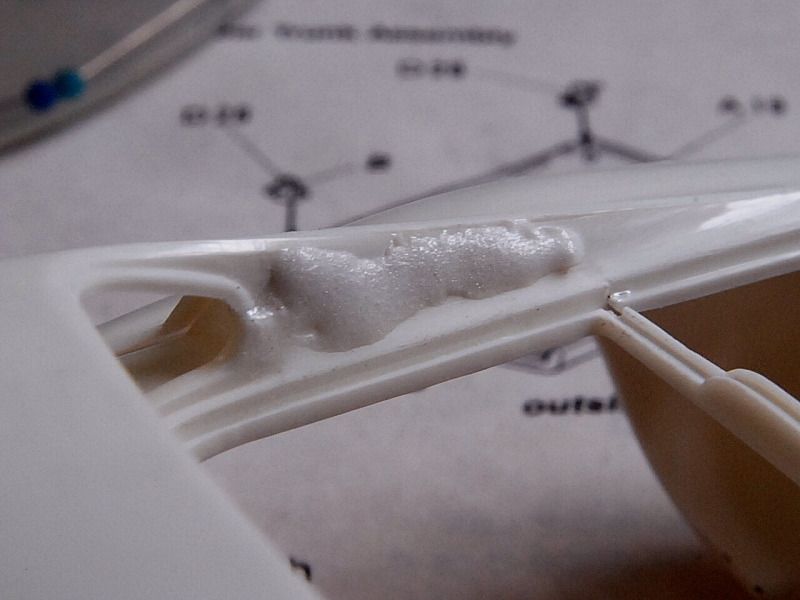 For the rear panel these sanding sticks from micro mark are a great help for the hard shape of these panel: 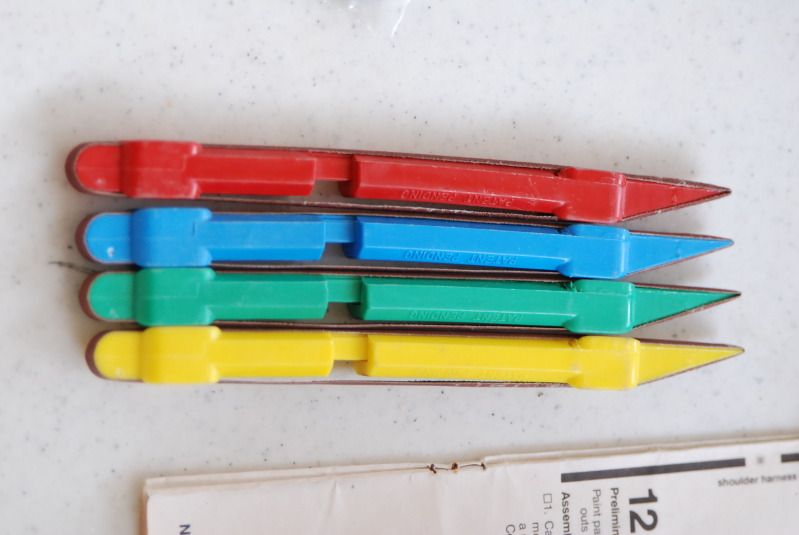 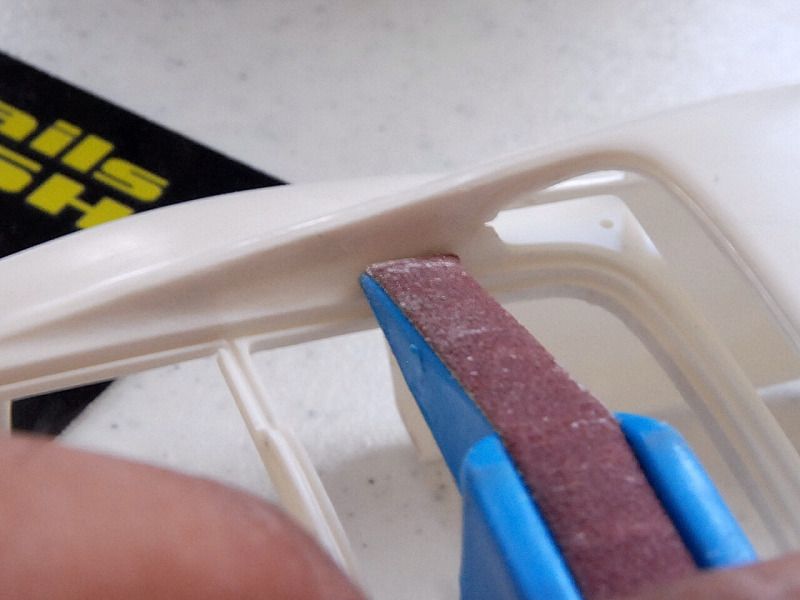 Here you guys can see how it looks after dry, it almost invisible were it was a seal before: 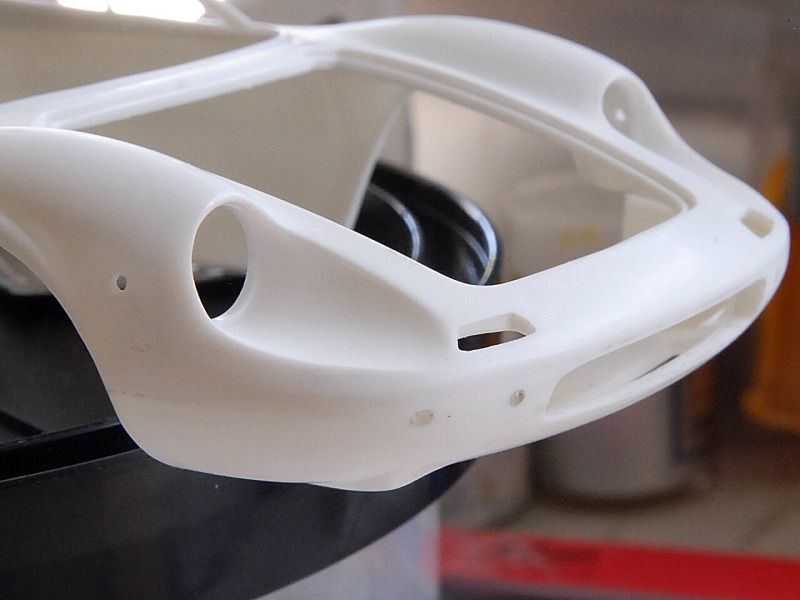 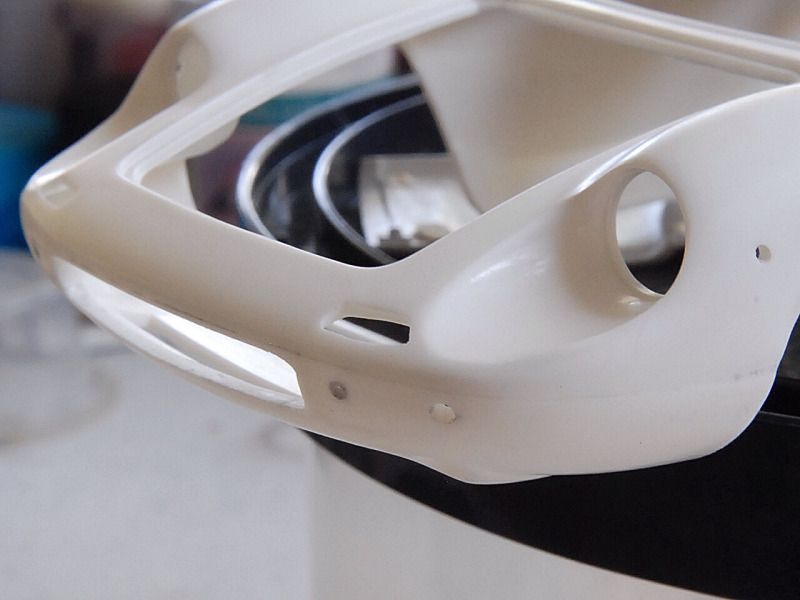 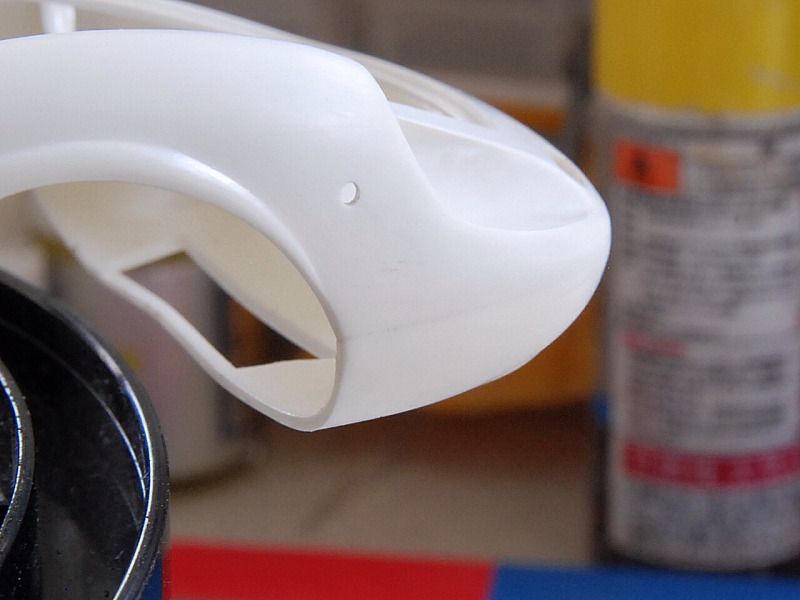 Going back to the front panel were I removed the plastic grill, I will use the photo etch one from the detail set. I was built from 10 parts: 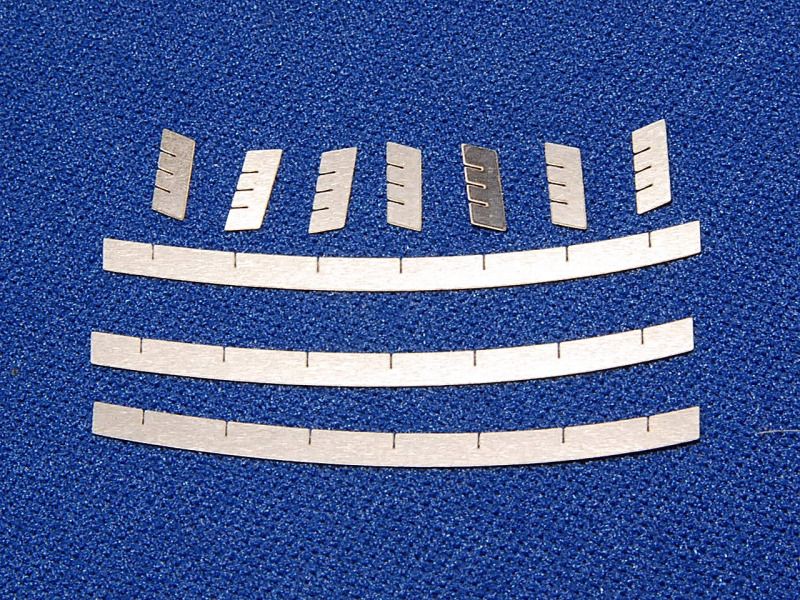 This how it looks in place in this mock up, big difference, isn’t?: 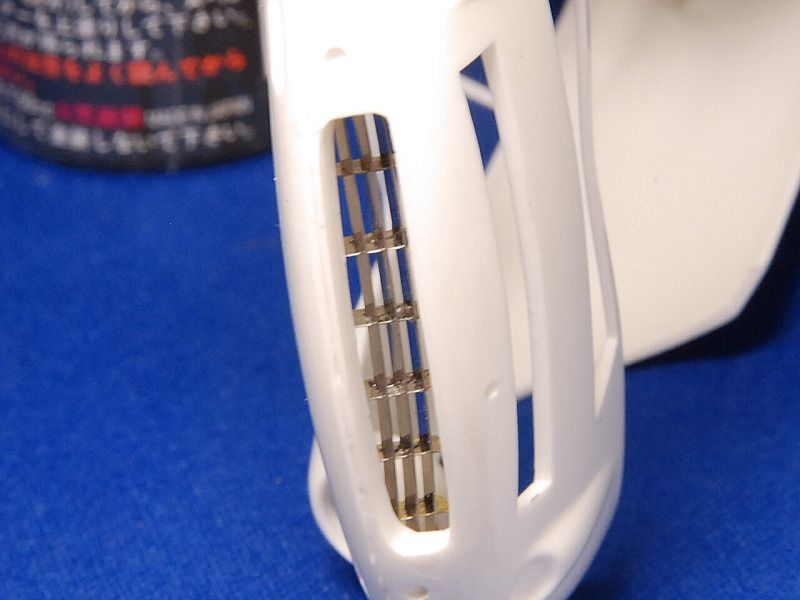 To help to a more strength union, I added a line of Gunze Sangyo’s Mr Surfacer 500 liquid primer: 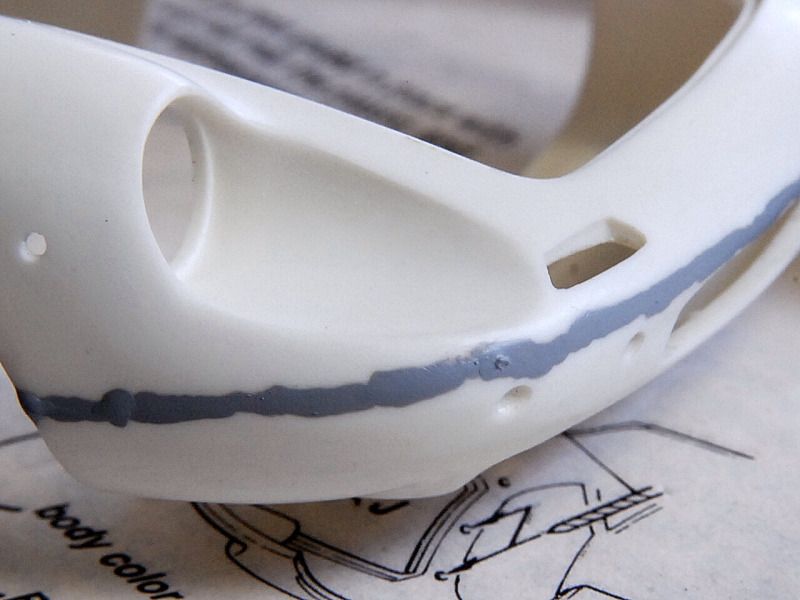 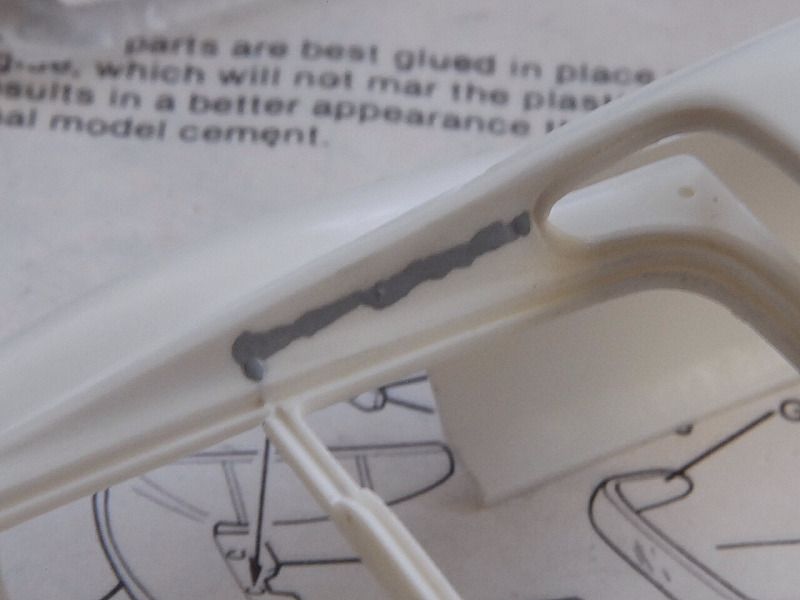 In this area I even used some white putty: 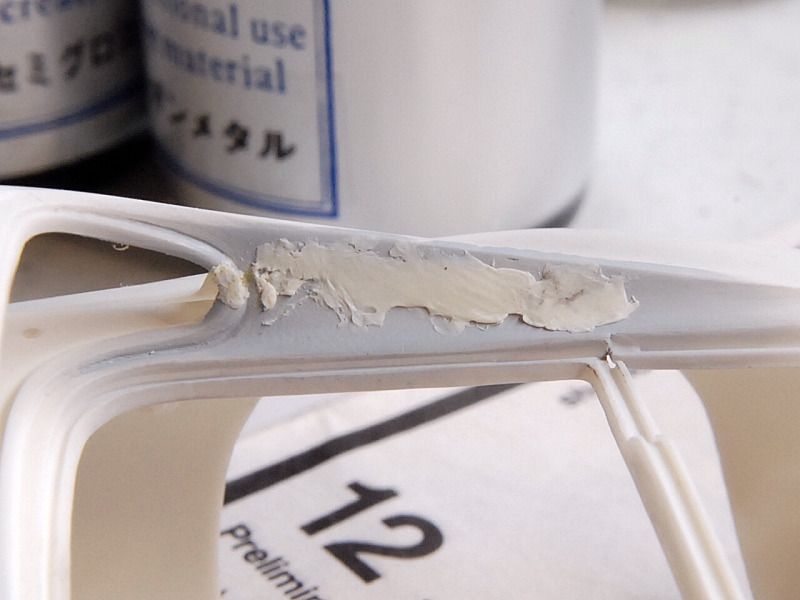 Now it looks much better, specially at the rear where I had to re-srcribe and putty the window moulding. Some Gunze Mr Surfacer 1000 thinn primer sealed everything: 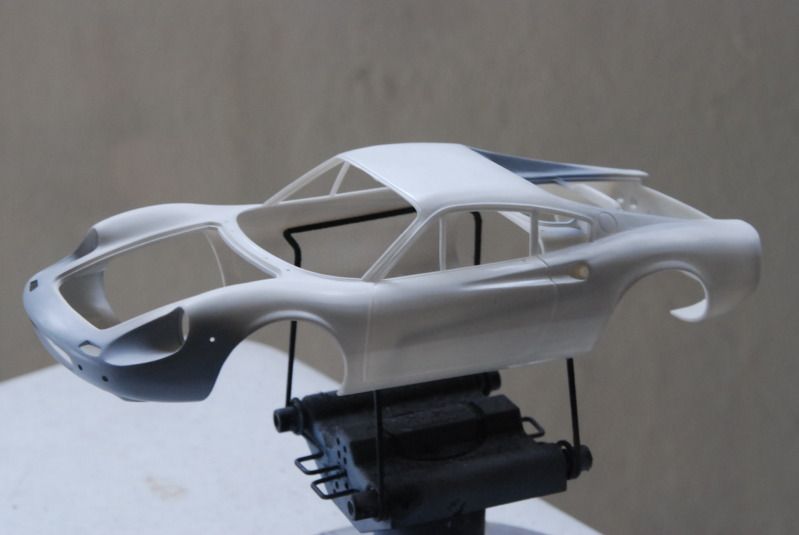 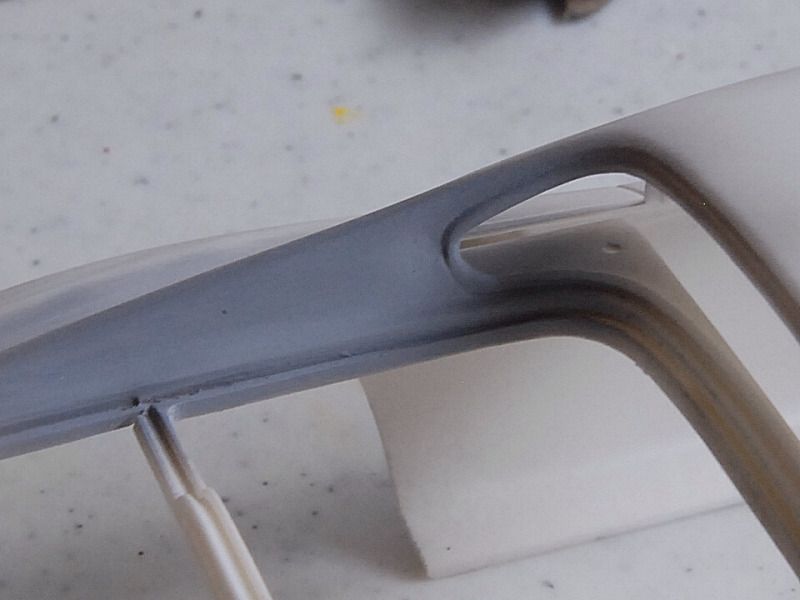 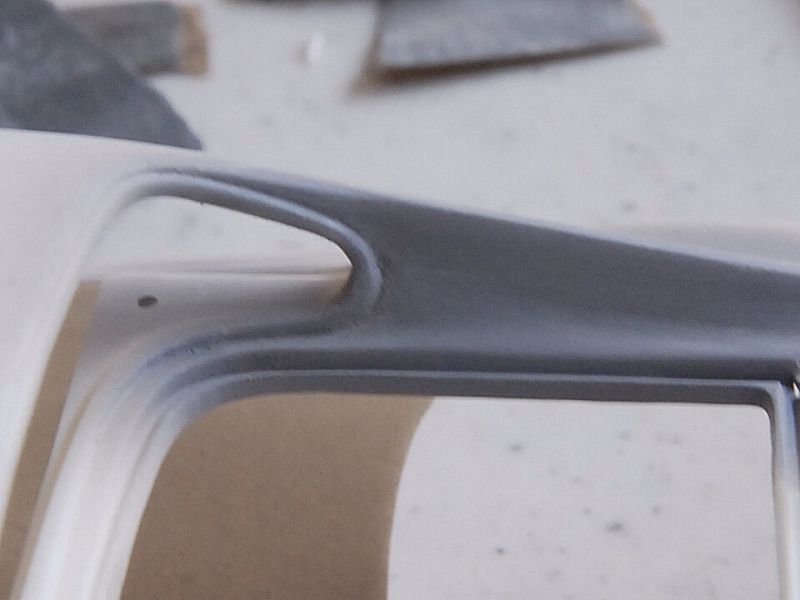 After I added the metal primer to the white metal parts, the same surfacer 1000 primer prepared the parts for the white and final primer, since I planned to paint the model in yellow: 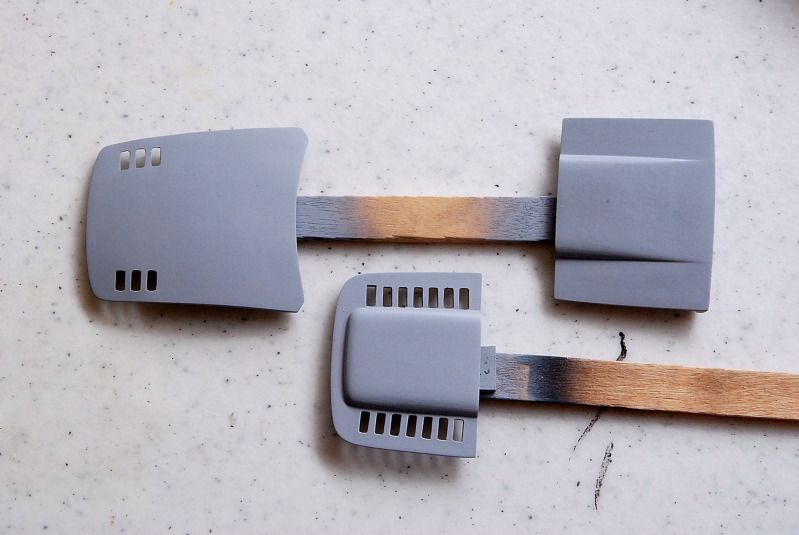 This is a great primer with almost no trace of sanding: 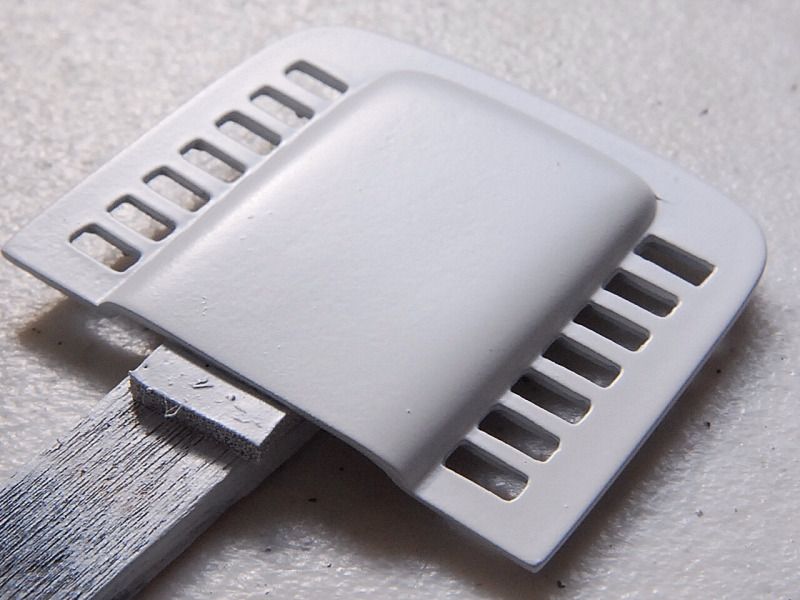 Some white primer was shoot direct from the can: 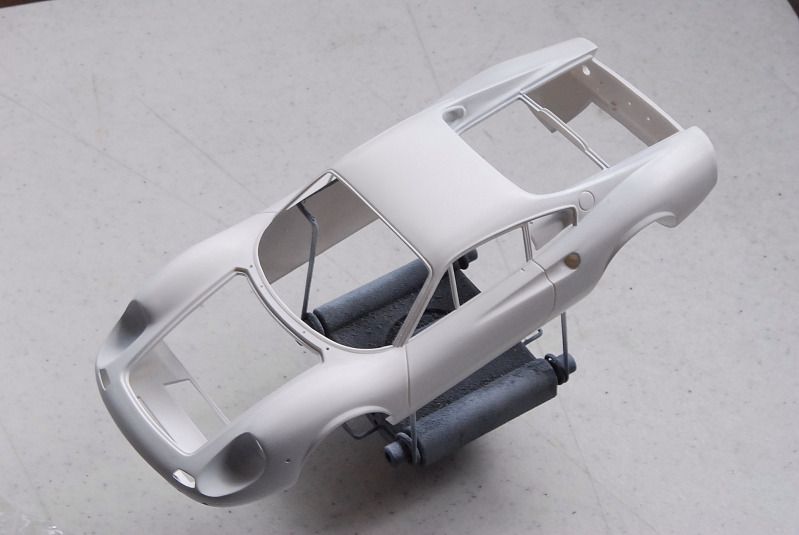 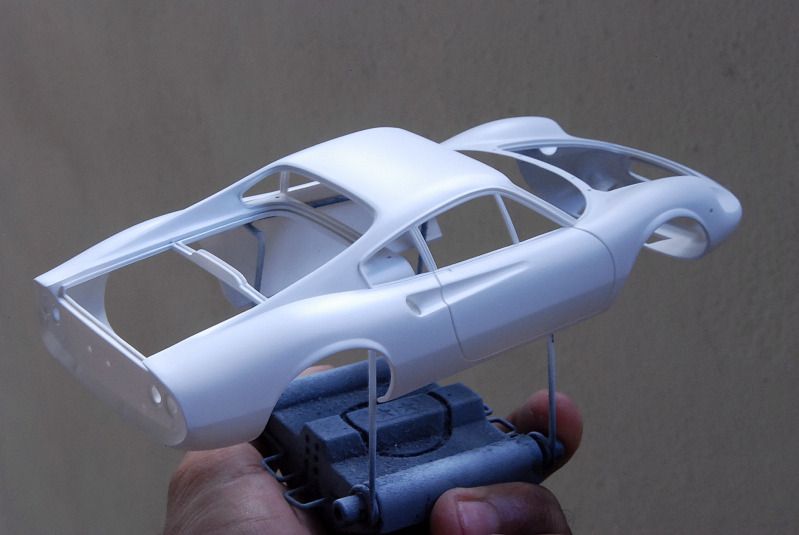 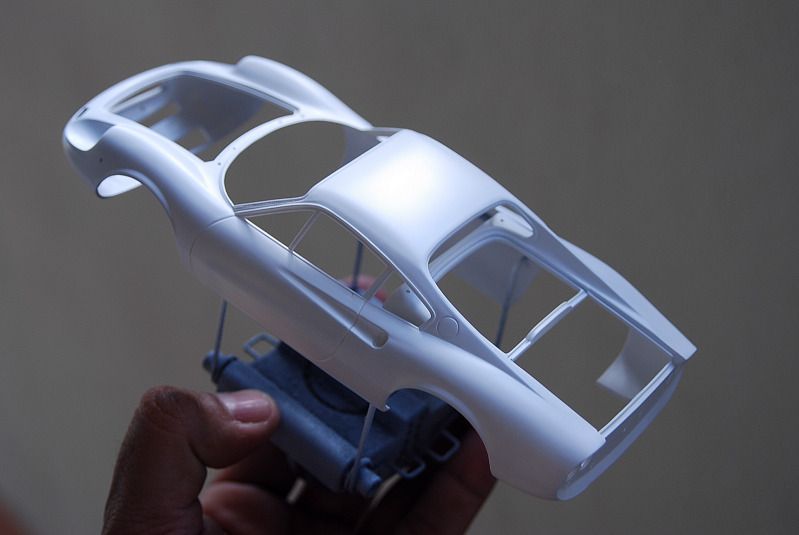 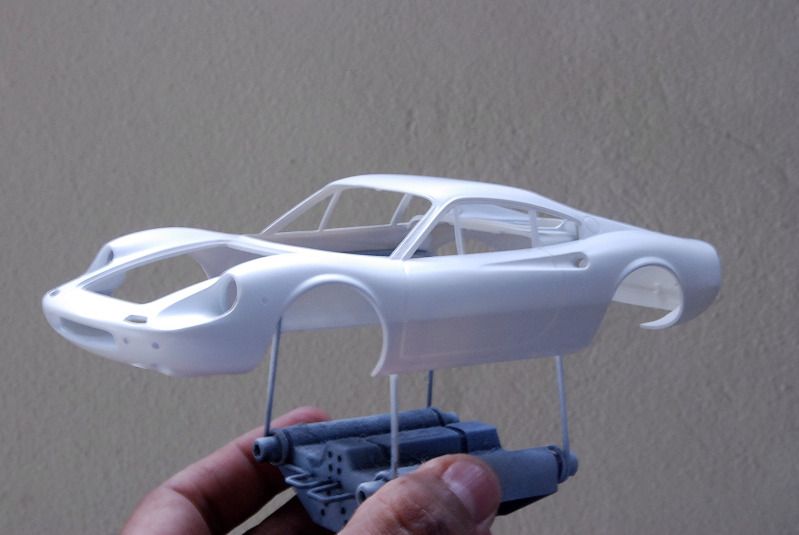 These are the colors I planned to use; Gunze pure yellow, Ferrari Yellow from the Gunze Auto Color line(hard to find), Finisher’s Pure Yellow, and Lemon Yellow. To me they all looks great, but, the Ferrari yellow looks to “creamie”(correct Ferrari shade) that I didn’t like, and the Finisher’s Pure Yellow its to deep. So I have to decided among Gunze pure yellow and Finisher’s Lemon Yellow…My selection…I will use both! The Finisher’s lemon is at the top with a glossier look and the Gunze yellow at the bottom with a typical lacquer semi gloss look. The Finisher’s lemon will give a crispier-vivid look while the Gunze will give a solid shine yellow base: 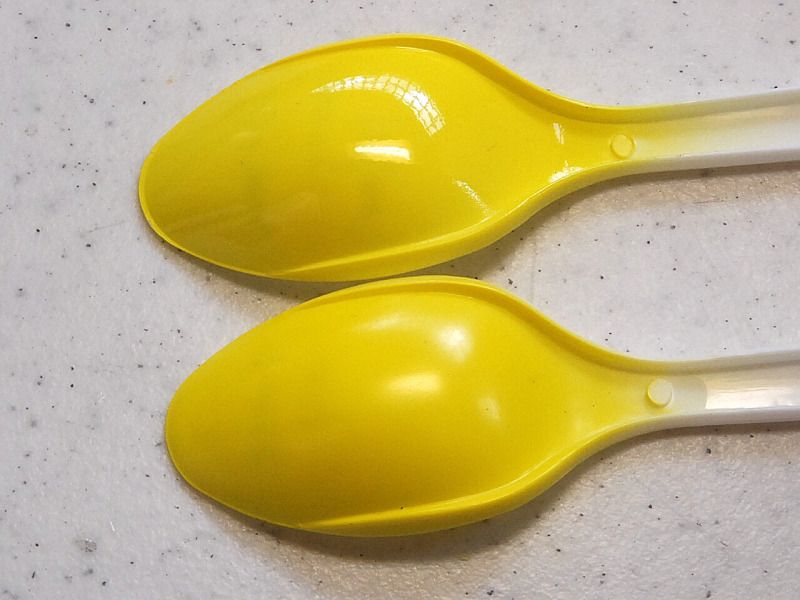 Let’s start the fun…Some color was added first to the recessed areas that will covered when I tape together the doors for an even color: 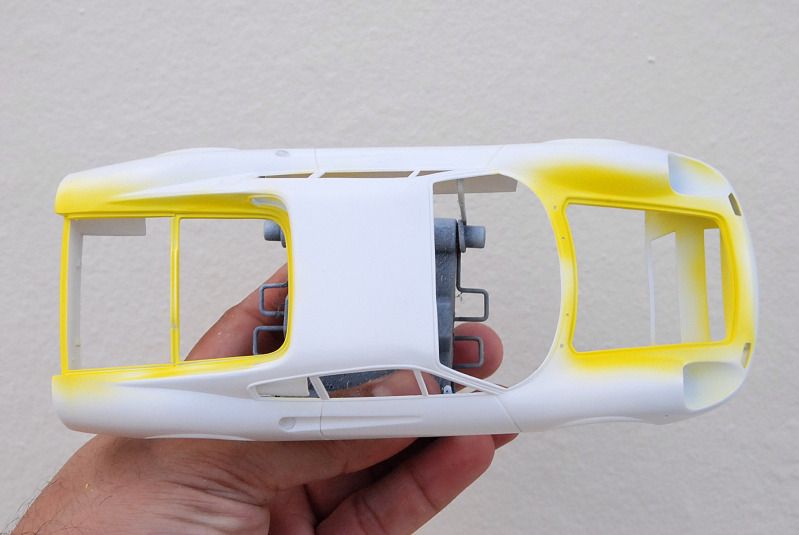 As a result, I got an even beautiful “supermarket” fresh lemon look: 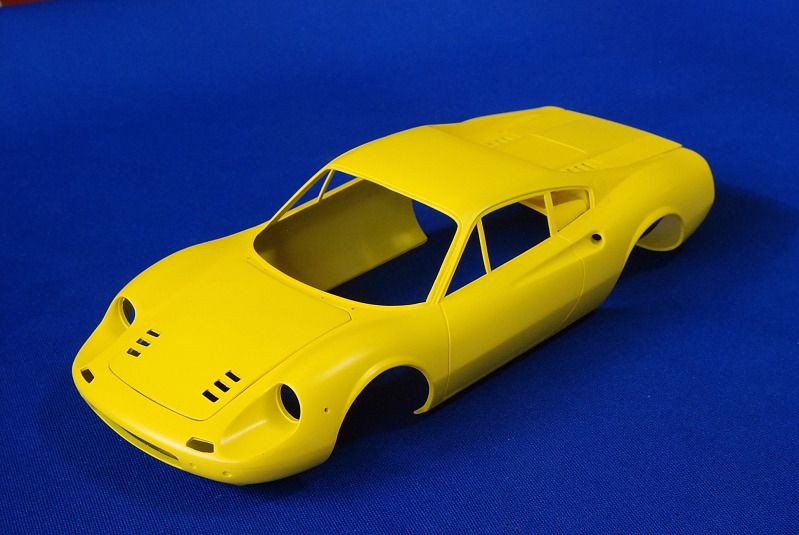 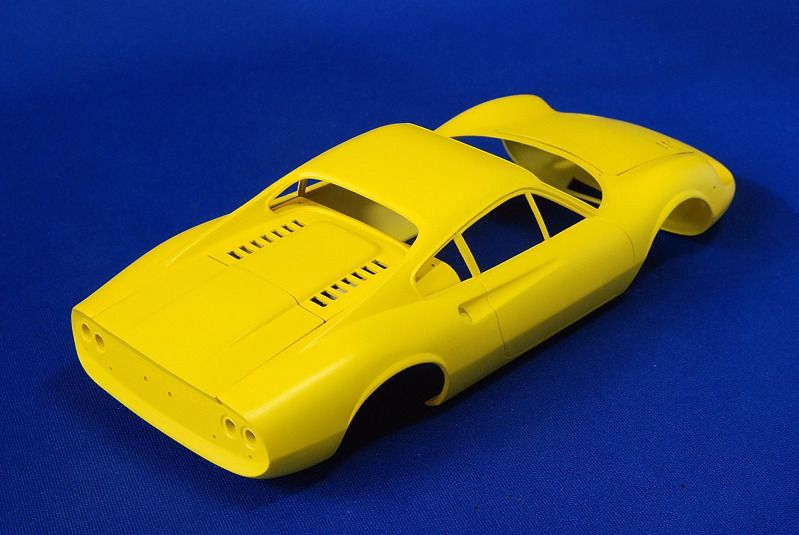 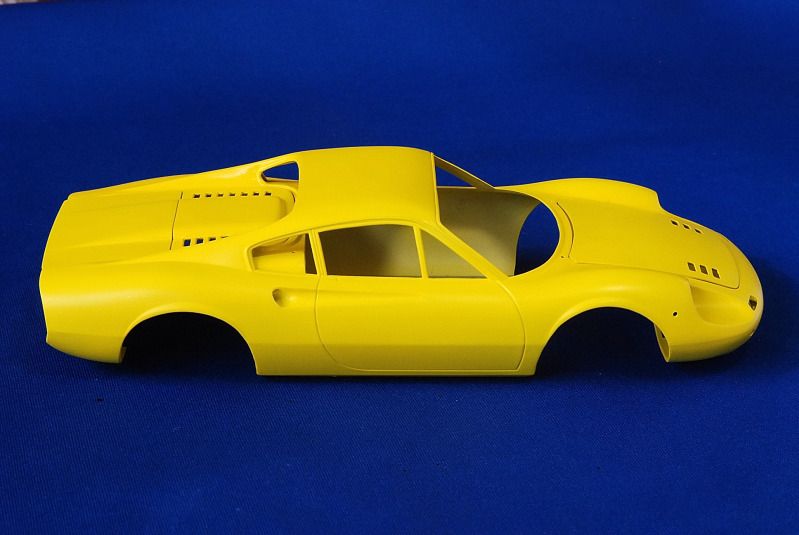 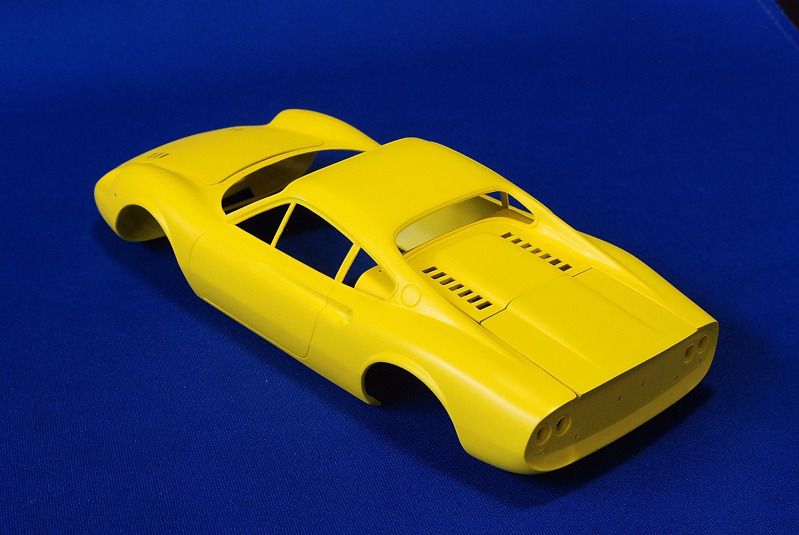 Giving the body a final light sanding to prepare it for the clear, I discovered something typical of lacquers, the seams at the front and at the rear panels where not hide. I always resolve this using some Dupont Variprime primer as a sealer. 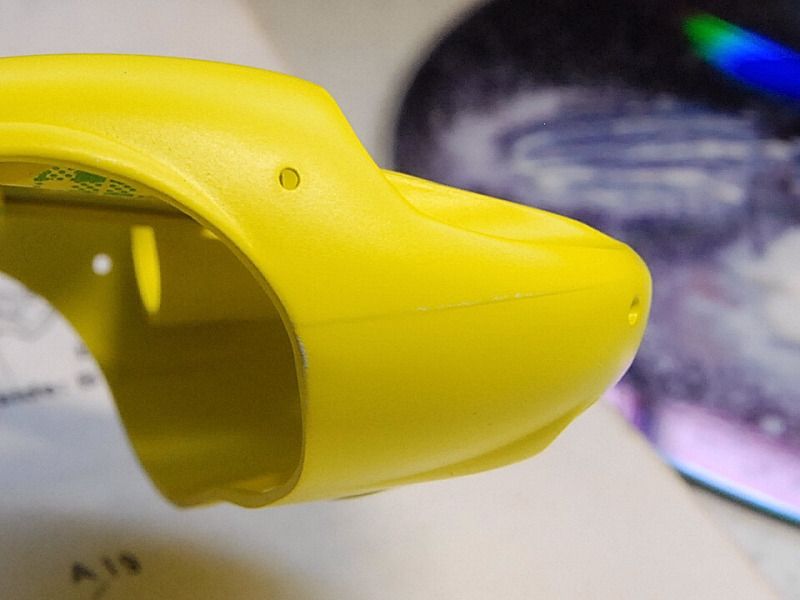 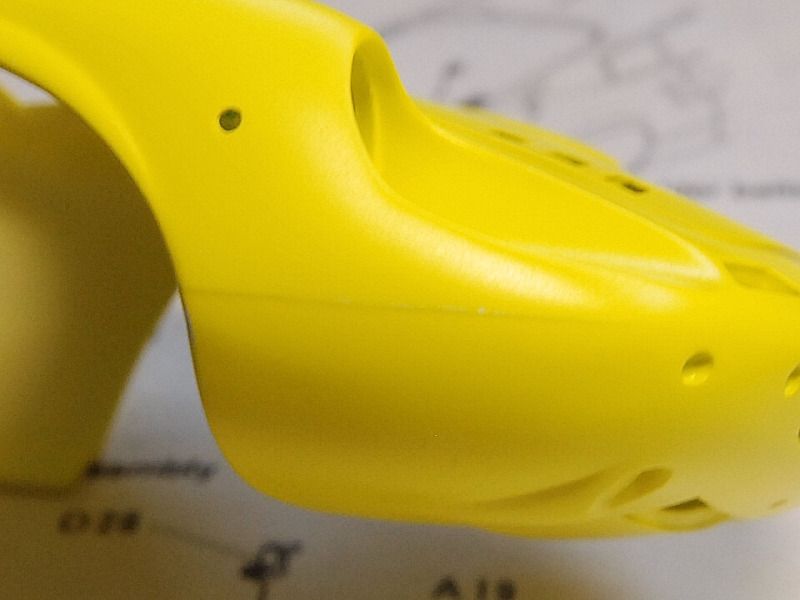 I brushed some Future at the seal but it didn’t work. Then, I could managed the situation, I airbrush a little bit of clear as a sealer, then, airbrushed more clear and finally got the result I was looking for. Everything looked fine and I airbrushed some Finisher’s Urethane GP-1 Clear, but, again…another surprise, the airbrush spitted some remains of black paint over the left quarter panel…: 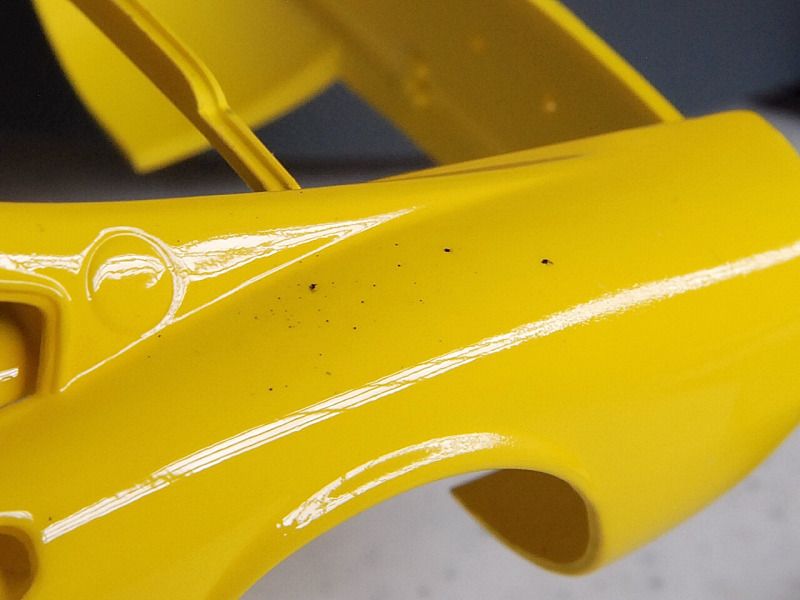 I though a light sanding will fix it, but… 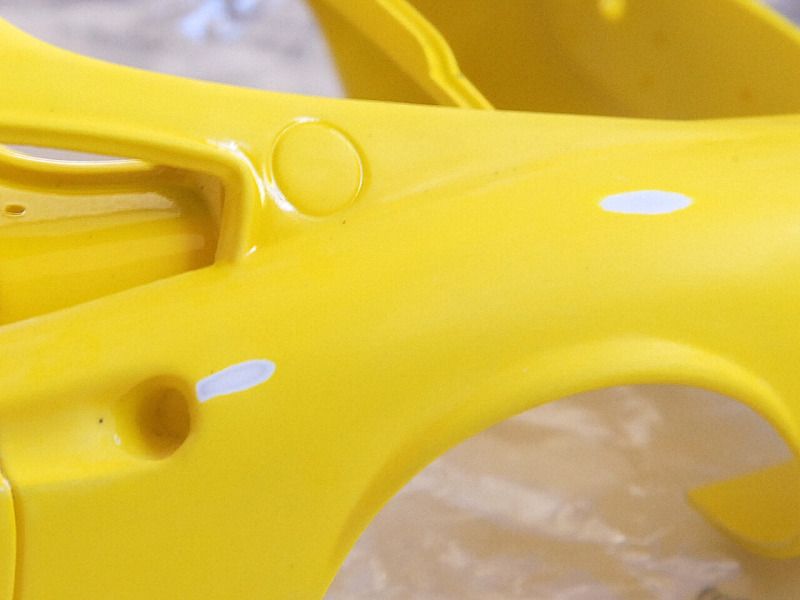 I give it a general deeper sanding and could fixed it, then another shoot of paint and finally we were ready to go: 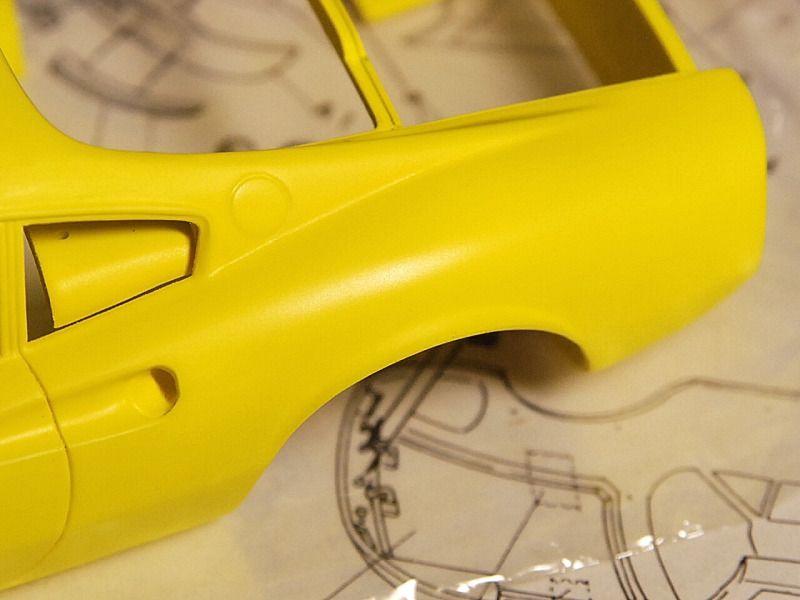 Here you can see the results after I used Finisher’s Urethane GP-1 Clear: 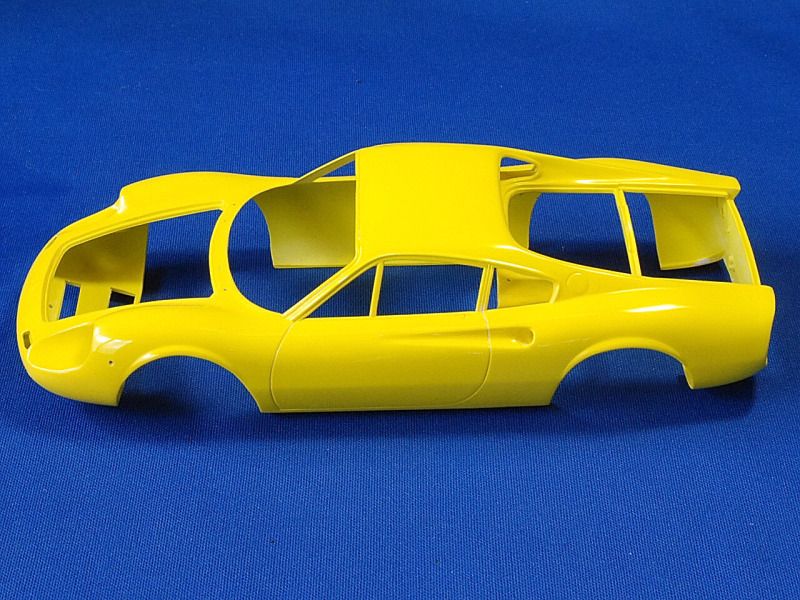 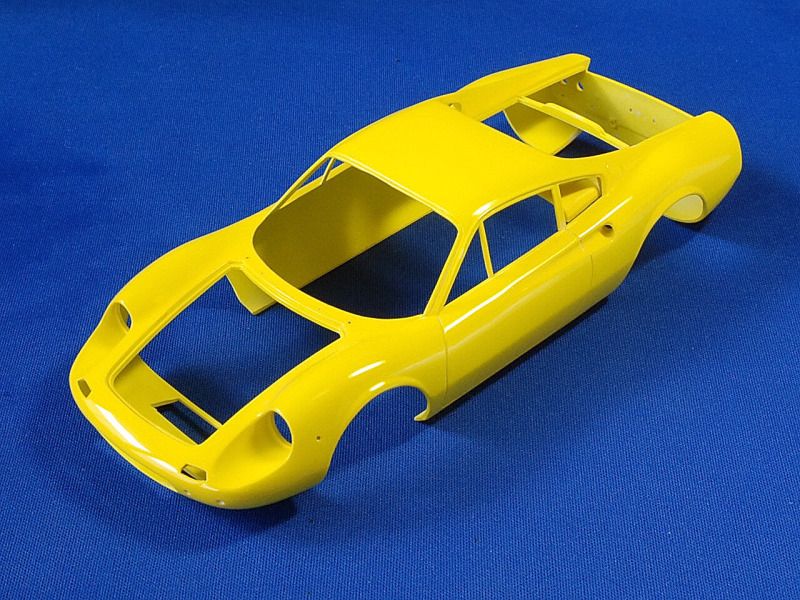 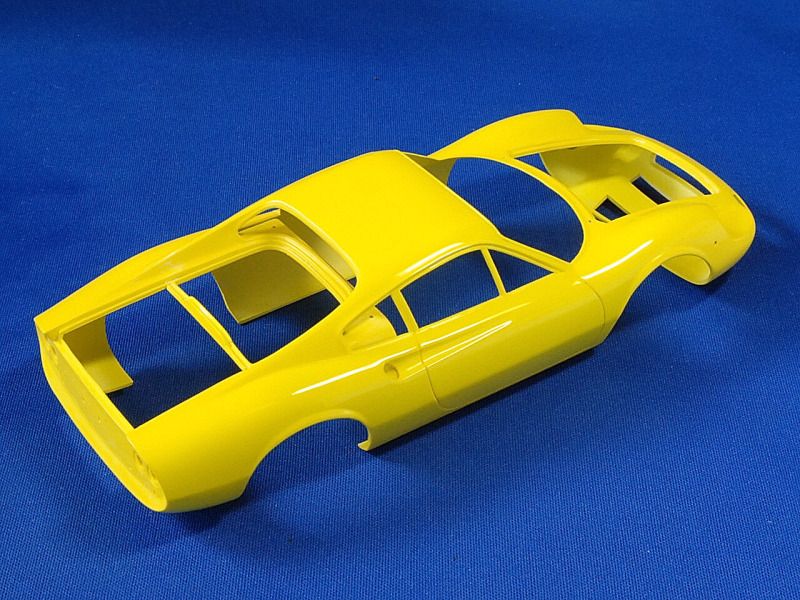 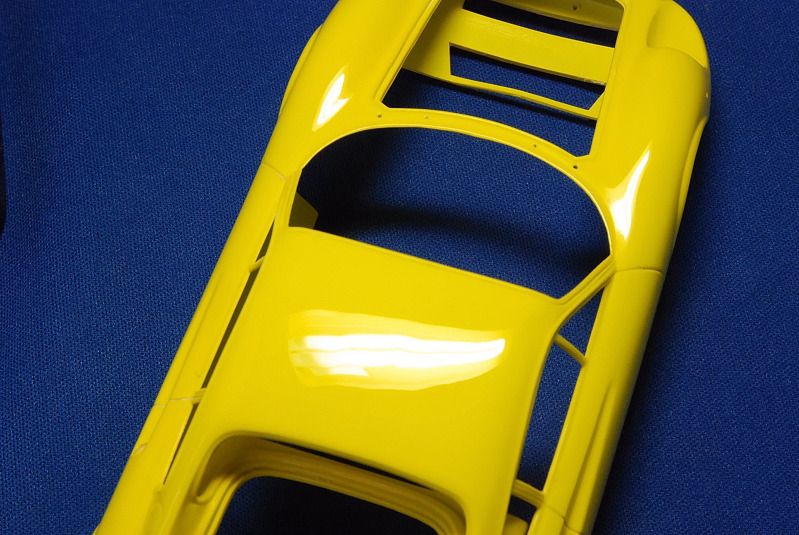 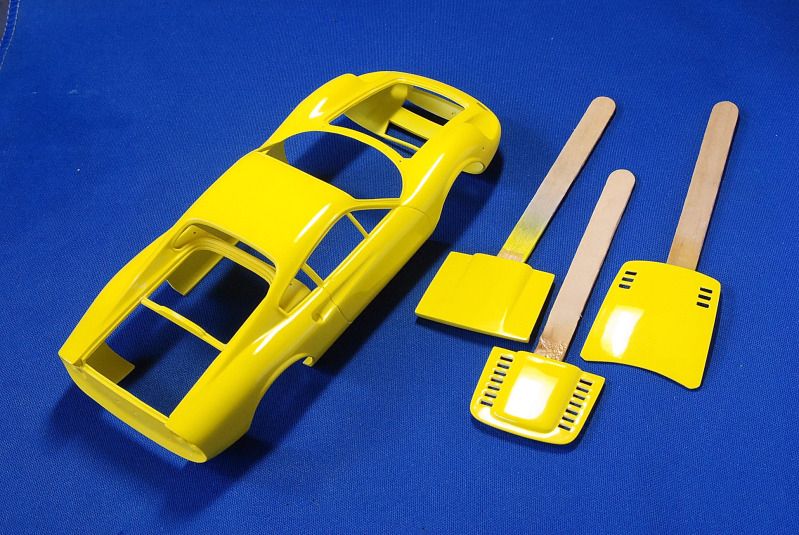 What a great glossy clear…: 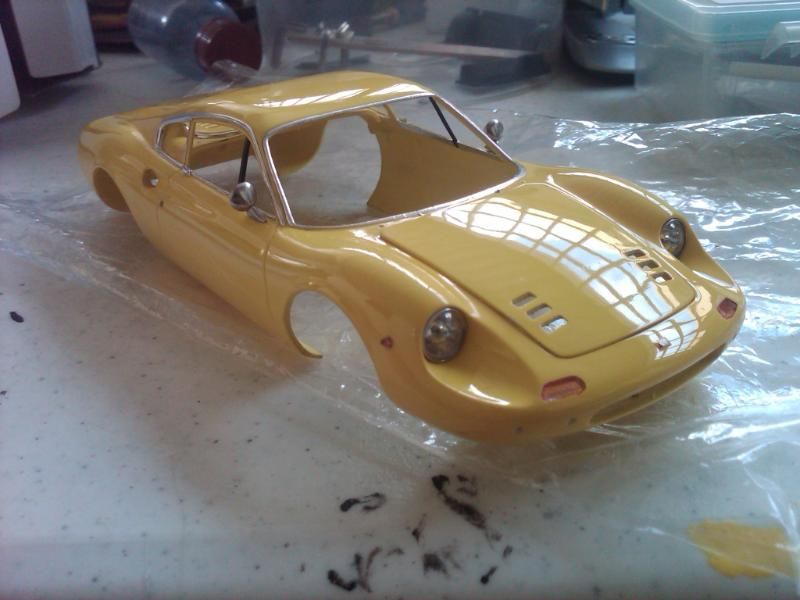 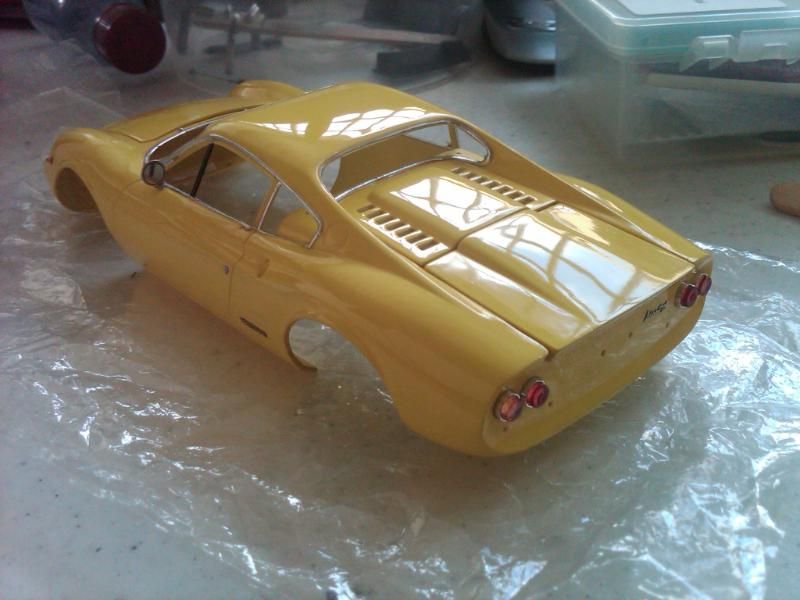 After I polished the body, I started to add the details to the body. First I added this photo etch disc that will serve as the base to the plastic lens for the front turn signal. Actually, you guys can notice there’s no trace of the panels seal: 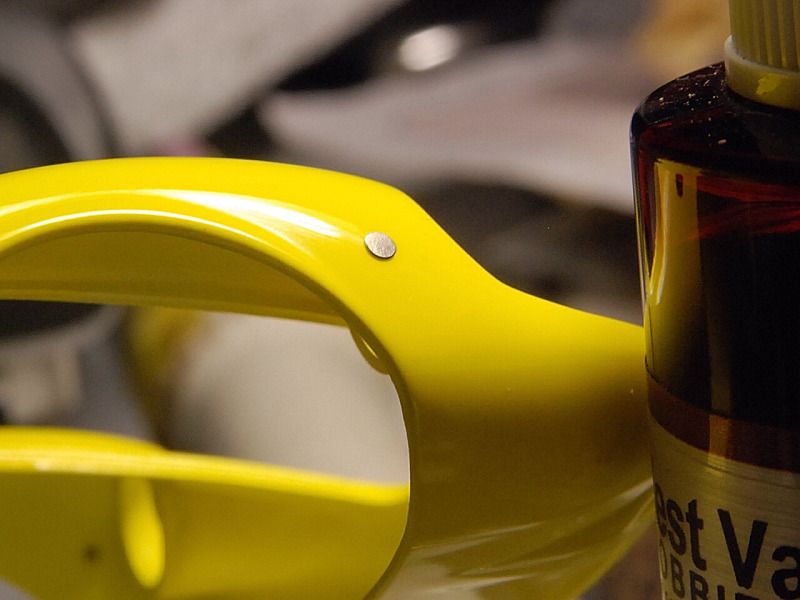 The wipers from the photo etch set...great pair, by the way: 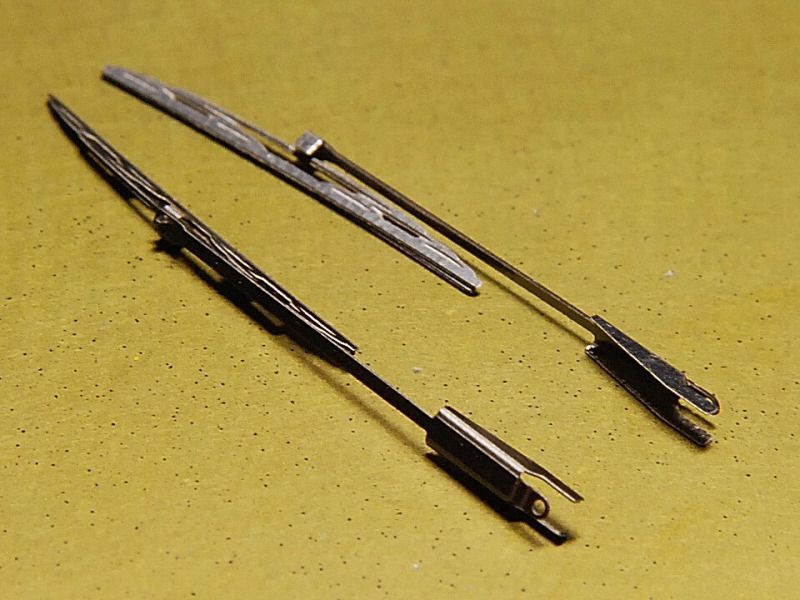 I used the rear lights turned base and the plastic lens, the white metal bumpers were polished to a high shine with the Dremel and some blue magic polishing paste, then were masked for the flat black paint that will double as the rubber, photo etch Ferrari script from the set and the horse one from a Ferrari photo etch set from Crazy Modeler and the license plate complete the rear: 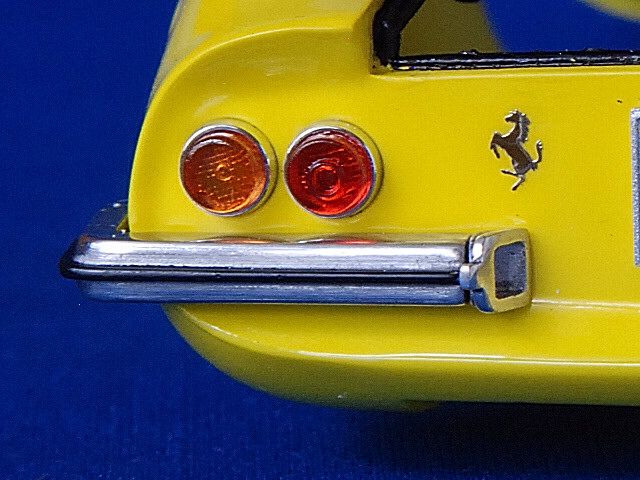 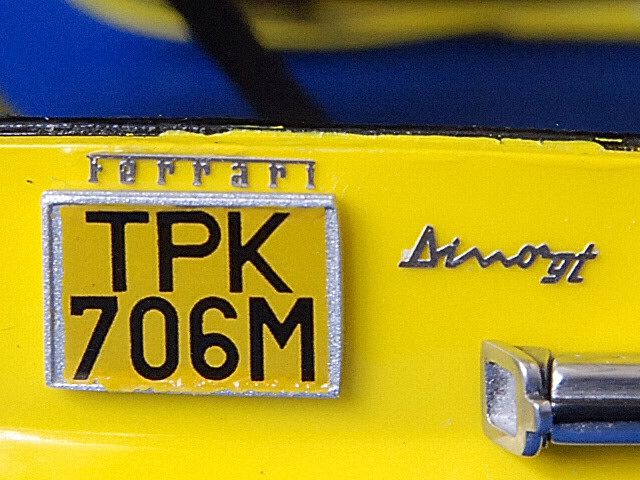 At the hood area I masked everything to paint the rubber seal: 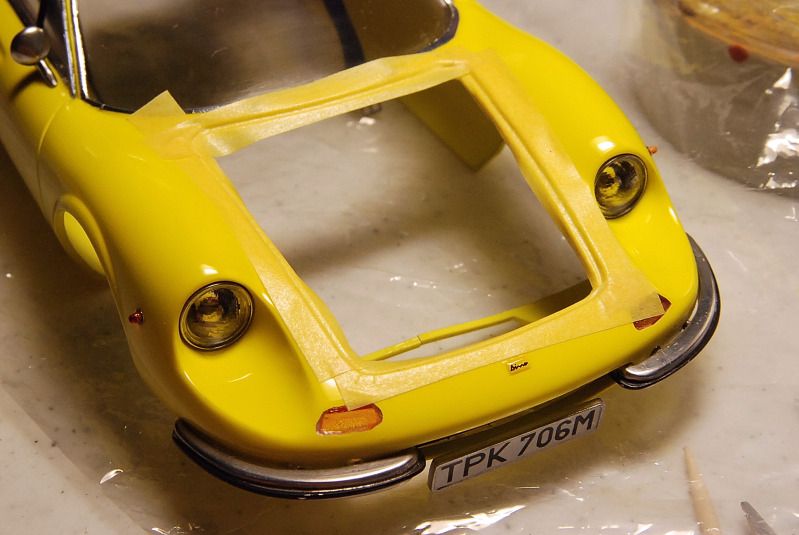 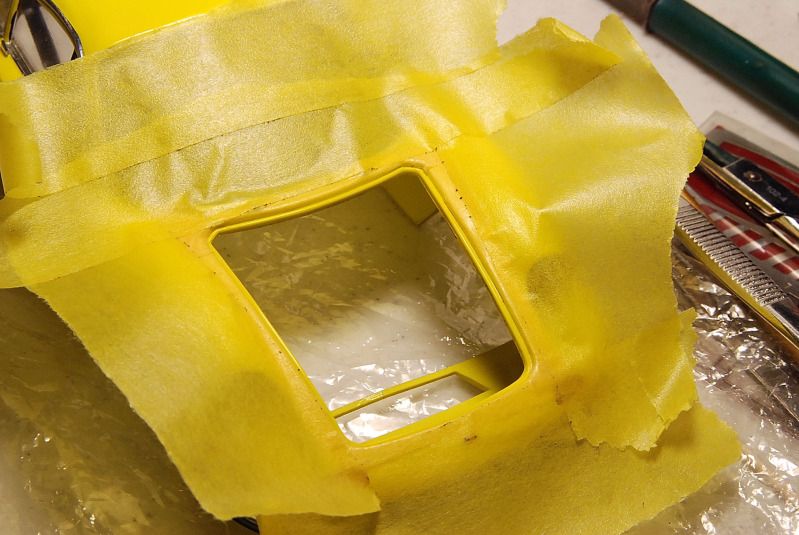 Great results...Can be seen that I gave the same treatment to the front bumpers, I added the Dino emblem, front signals, wipers, foil, rear mirrors and the washers for the wipers that are Model Factory Hiro rivets : 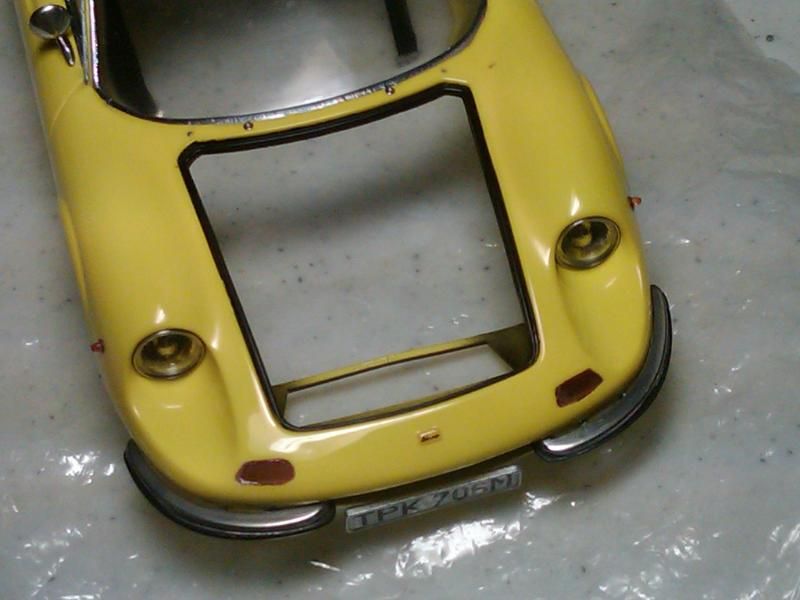 A close up to the wipers and washers area: 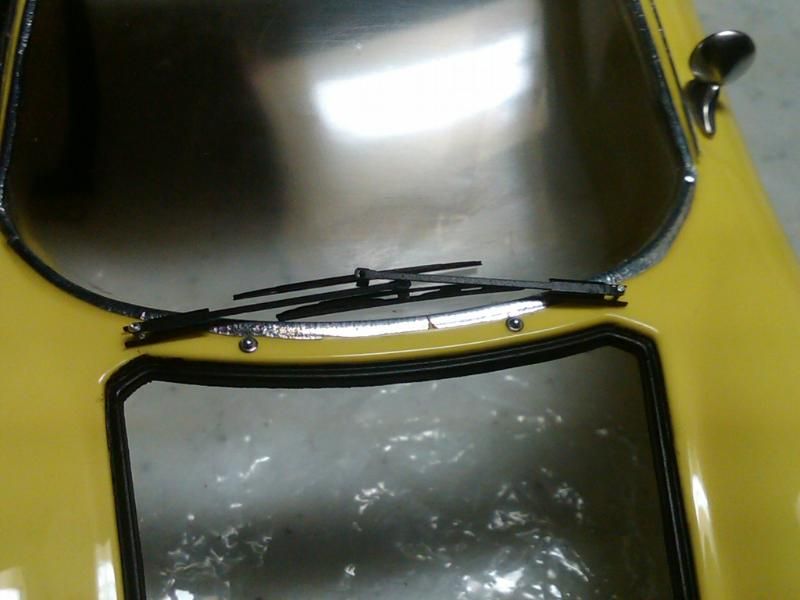 The rear mirrors could been polished to a high gloss polished look. Here you can see the un-polished white metal part from were I start, the final polished part, and the plastic part: 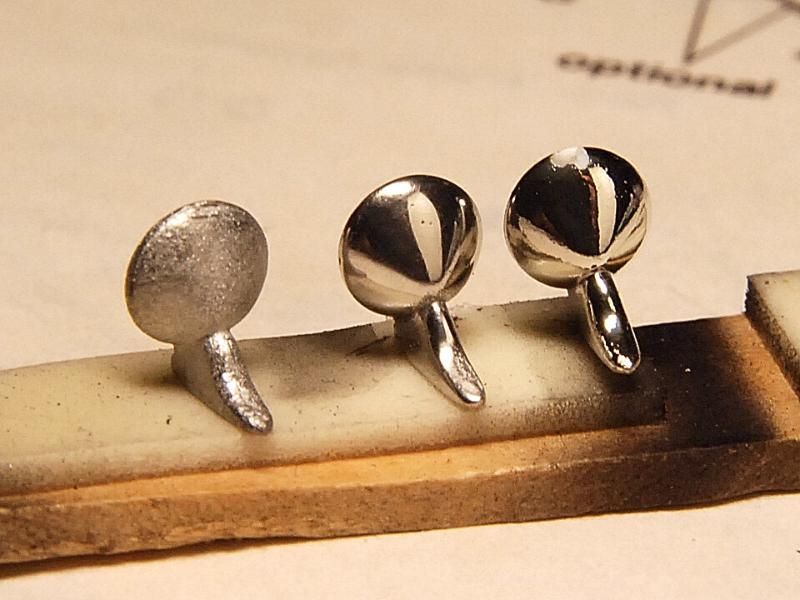 For the doors stand bars, I scratchbuilt them using some plastic and metal rod: 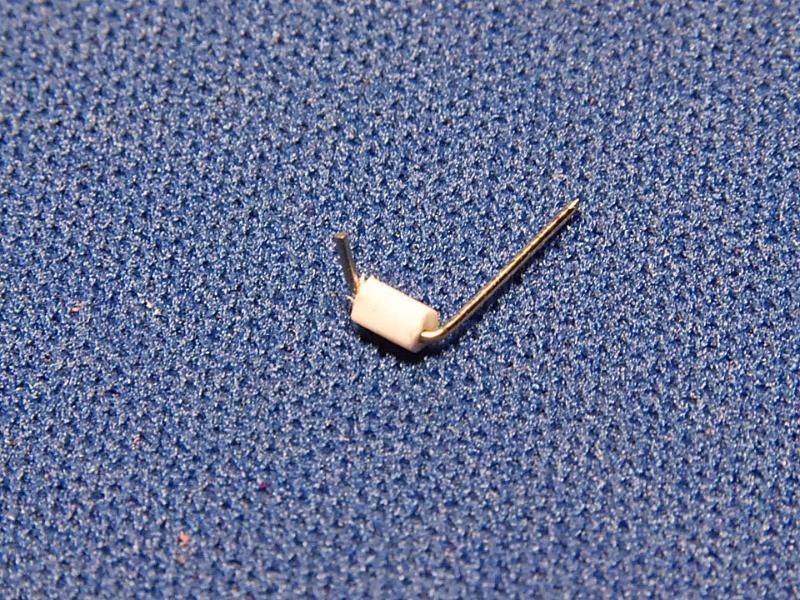 The parts already glued in place: 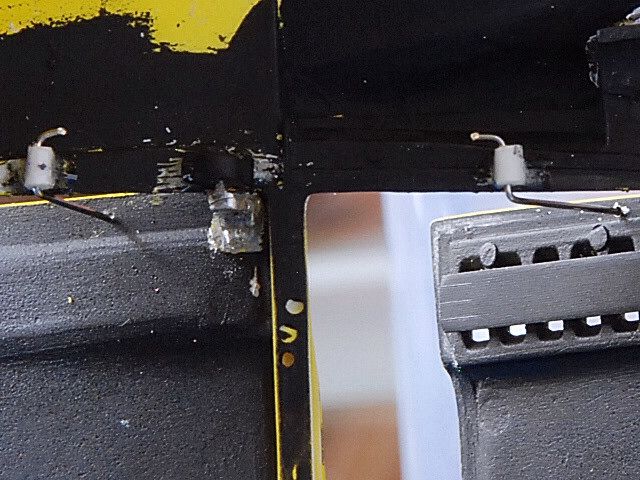 The results: 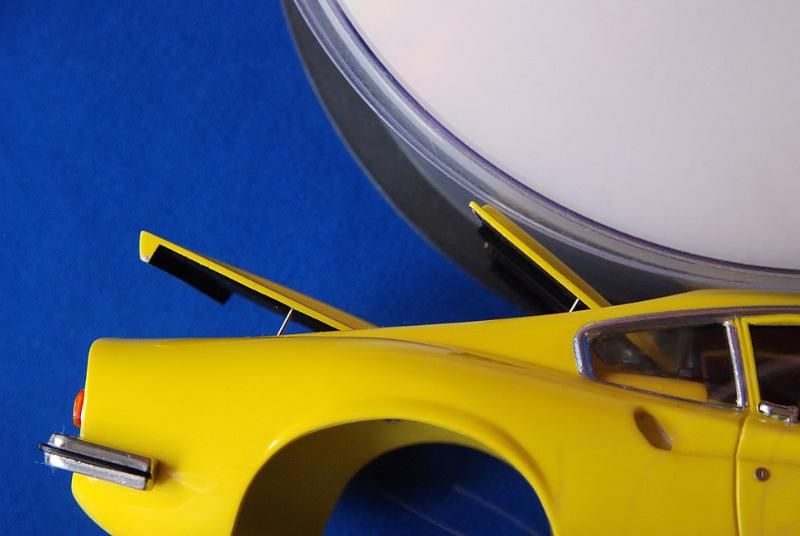 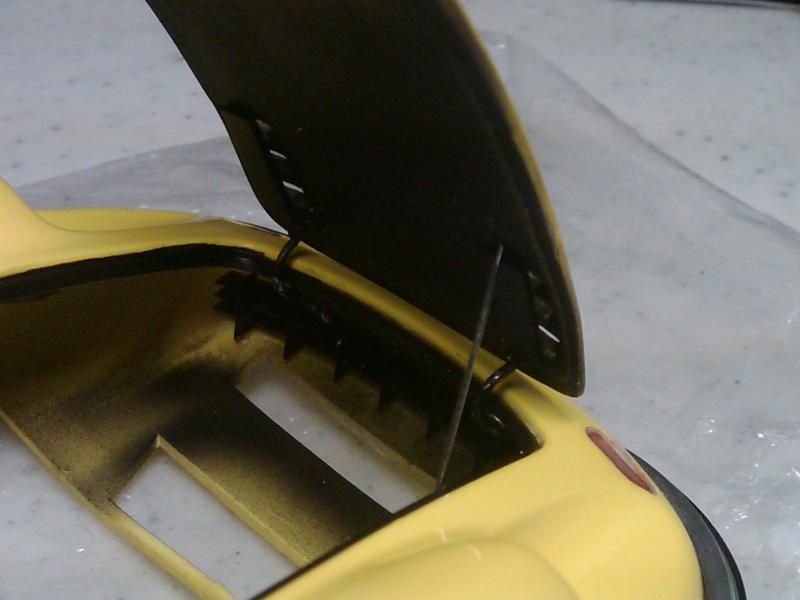 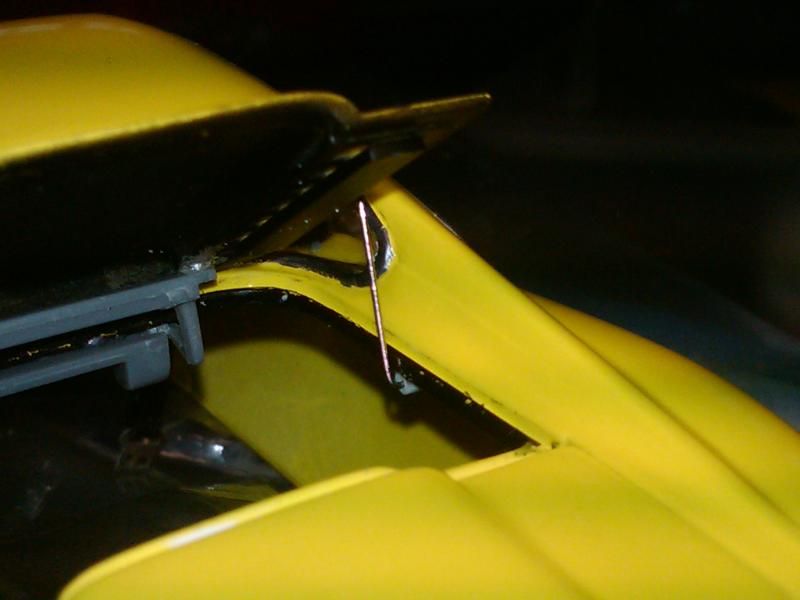 General views: 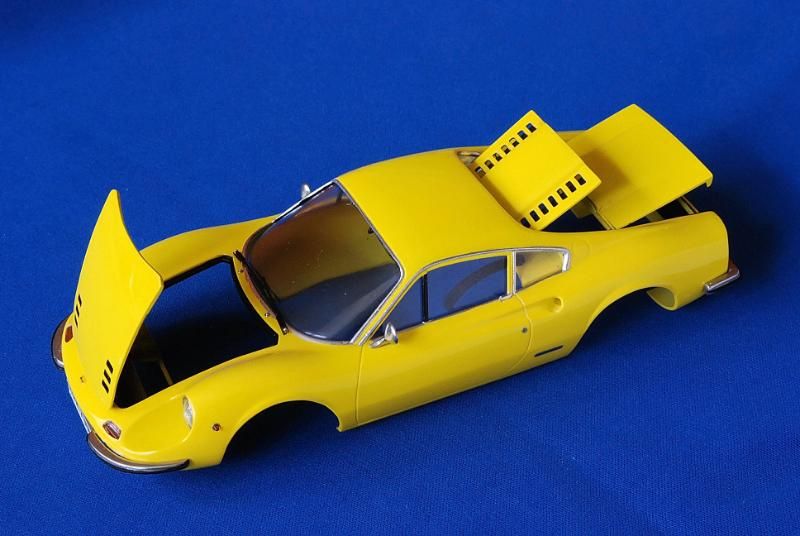 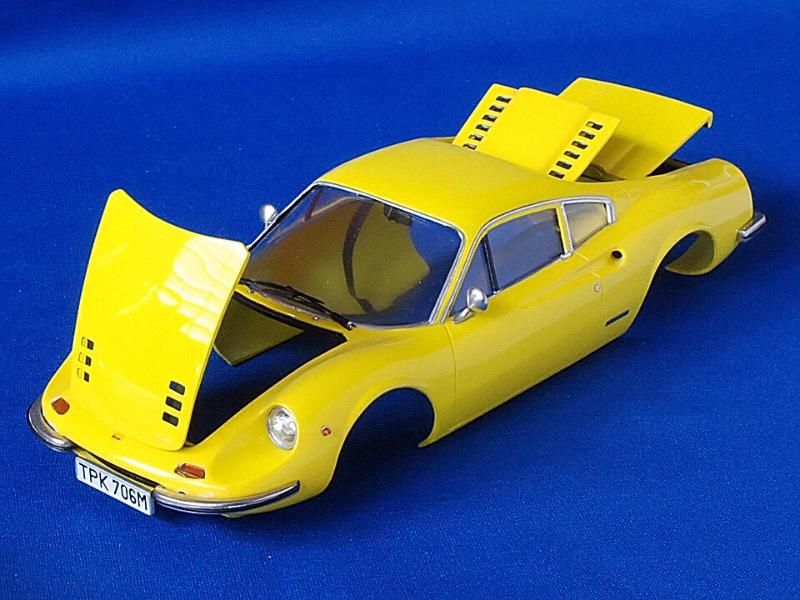 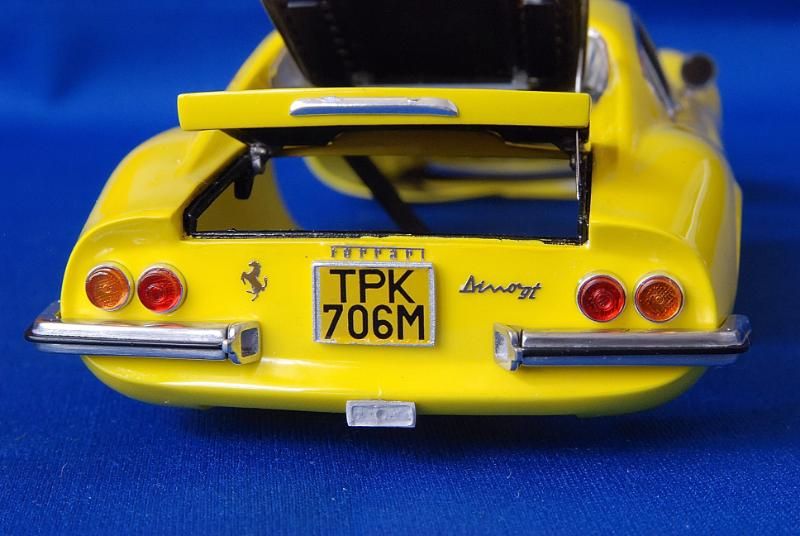 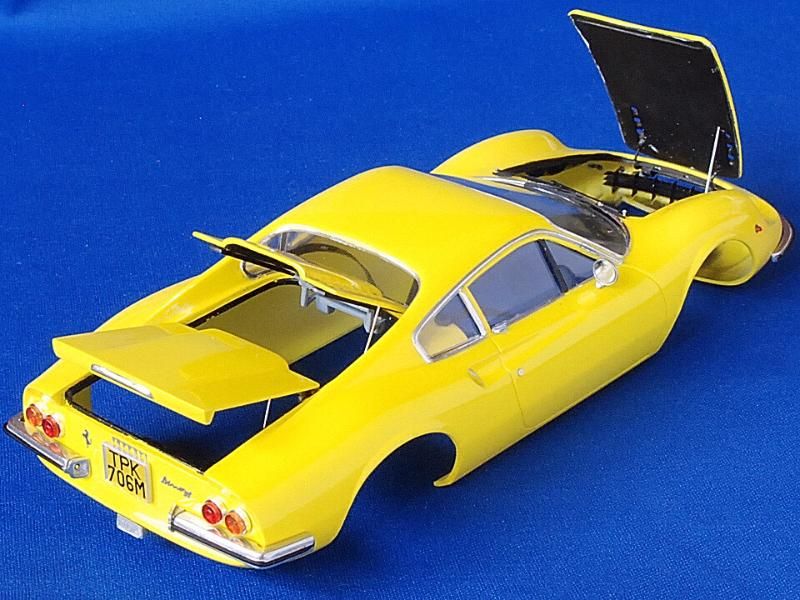 The tires received the valve stems from RB Motion: 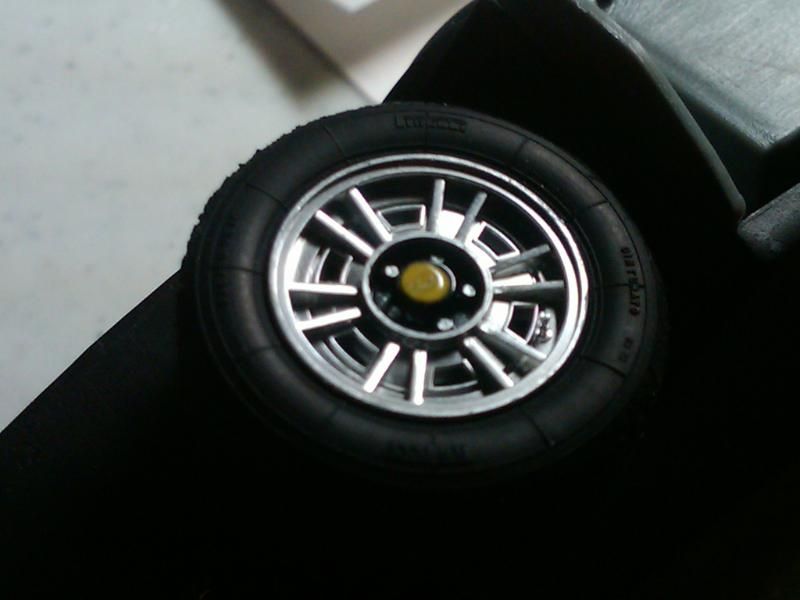 Finally, the chassis met the body...This a picture from the local IPMS where it took for my surprise a second place...Surprise because the model had the best finish and the best detail in European class, at least to my opinion…judge by yourself… To me the best part is that I was able to finish this great model with over 200+ parts and with a piece of history on its shape! 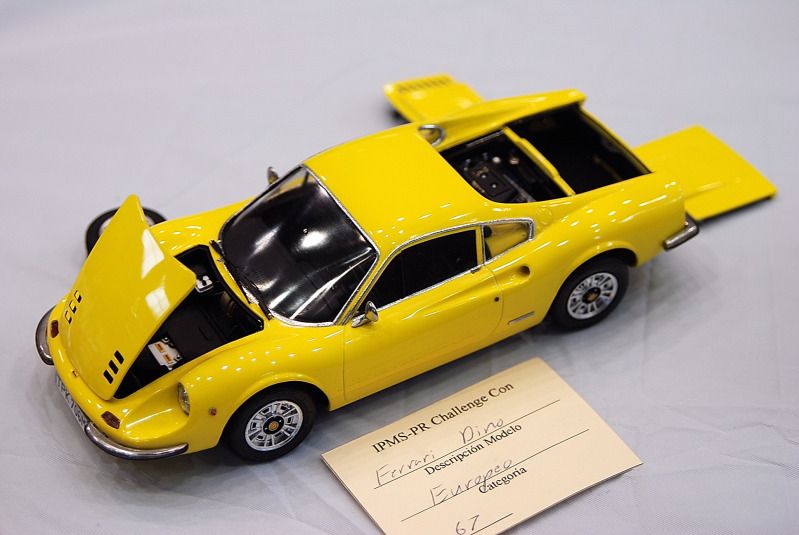 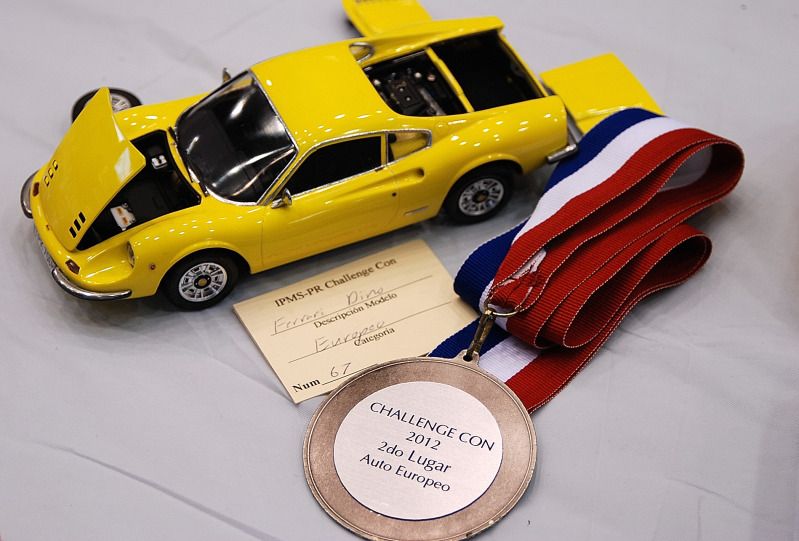 |
|
|
|

|
|
|
#10 | |
|
Loser
Join Date: Aug 2007
Location: Moscow
Posts: 1,171
Thanks: 112
Thanked 248 Times in 195 Posts
|
Re: Testors/Fujimi Ferrari Dino 246GT
Excellent job. Congratulations.
|
|
|
|

|
|
|
#11 | |
|
AF Enthusiast
Join Date: Feb 2009
Location: Palm Desert, California
Posts: 610
Thanks: 108
Thanked 44 Times in 40 Posts
|
Re: Testors/Fujimi Ferrari Dino 246GT
very nice work!
|
|
|
|

|
|
|
#12 | |
|
AF Fanatic
Join Date: Feb 2004
Location: Hartford, Connecticut
Posts: 5,601
Thanks: 7
Thanked 108 Times in 103 Posts
|
Re: Testors/Fujimi Ferrari Dino 246GT
Beautiful model!!!!!!!!
|
|
|
|

|
|
|
#13 | |
|
AF Regular
Join Date: May 2012
Location: Wawa
Posts: 114
Thanks: 0
Thanked 3 Times in 3 Posts
|
Re: Testors/Fujimi Ferrari Dino 246GT
Absolutely fantastic! Grats.
|
|
|
|

|
|
|
#14 | |
|
AF Regular
Join Date: Jul 2011
Location: ...
Posts: 250
Thanks: 12
Thanked 10 Times in 10 Posts
|
Re: Testors/Fujimi Ferrari Dino 246GT
what a stunner, absolutely gorgeous!
|
|
|
|

|
|
|
#15 | |
|
Blarg! Wort Wort Wort!
Join Date: Mar 2006
Location: Quezon City
Posts: 2,120
Thanks: 64
Thanked 101 Times in 100 Posts
|
Re: Testors/Fujimi Ferrari Dino 246GT
congrats on this great work!
__________________
olly olly oxen free |
|
|
|

|
| |||||||||||||||||||||||||||||||||
 |
POST REPLY TO THIS THREAD |
 |
|
|