|
|
|

|
|
| Search | Car Forums | Gallery | Articles | Helper | AF 350Z | IgorSushko.com | Corporate |
|
| Latest | 0 Rplys |
|
|||||||
| Fiberglassing Fiberglasssing explained and the proper techniques on working on a fiberglass project. |
 |
 Show Printable Version | Show Printable Version |  Email this Page | Email this Page |  Subscribe to this Thread
|
|
|
Thread Tools |
 06-05-2005, 02:10 PM
|
#1 | |
|
Forunn Daberator

Join Date: Mar 2004
Location: bumblefuck, Texas
Posts: 10,590
Thanks: 363
Thanked 364 Times in 309 Posts
|
Fiberglass 101 - Tutorial
Fiberglass 101
Tutorial By: TheSilentChamber As fabricators and general car modification enthusiasts; we are often confronted with the dilemma of what materials are practical, reasonable, and best suited for the job. For many applications fiberglass falls in all of these categories. In this tutorial I am going to cover the basics, Fiberglass 101 per say, as I cover the building of a very basic but functional and attractive amp rack. This tutorial is part of a series; soon I will cover more advanced applications, different tricks and techniques, and composites other than fiberglass. This tutorial will cover the building of a fiberglass amp rack that will fit inside a spare tire. 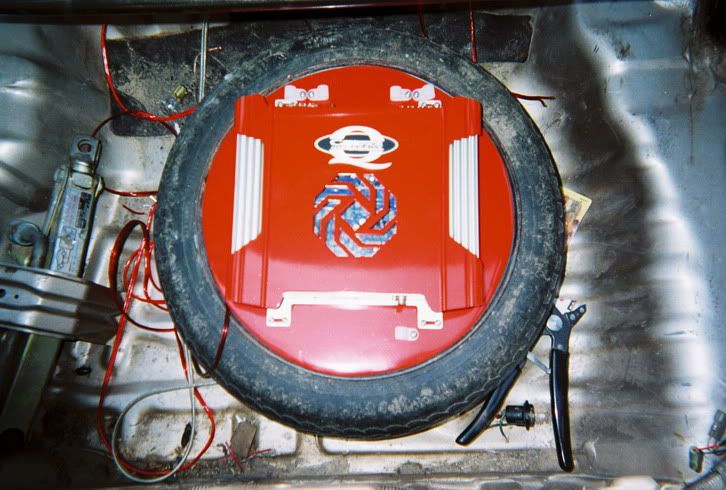 Materials Need: Fiberglass resin (polyester will be the most available) MEKP (Hardener, most of the time it will come with the resin) Fiberglass cloth Paintbrush Body Filler Spreader 150 grit sand paper 220 grit sand paper Foam Foil Measuring cups Acetone (Optional needed if you want to clean and reuse measuring cups and brushes.) Masking tape Dremel (or other means of cutting the fiberglass) Scissors Step one: We are going to start off with one of the most basic of forms, foam. This is insulating foam that can be found at any home improvement or building supply store. To get the basic shape I pressed it down on the lip of the spare, thus leaving the impression of the rim, simple but effective. Next I cut it out and sanded the edges with 180 grit and 220 grit sand paper to a smooth edge. 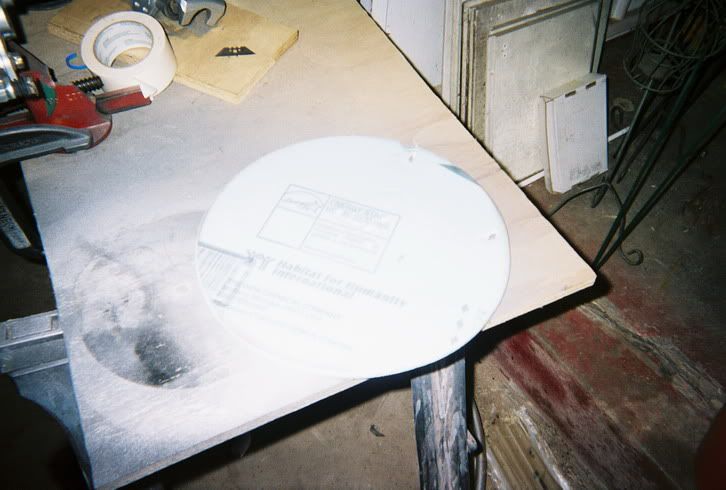 Next we will be covering the foam in foil. If you do not cover it the resin will eat away the foam. Cover it and tape it on the back so it stays in place. If you put the shiny side up, the foil peals off of the cured fiberglass easily.  After you have the foil on, the next step is to cut and lay out the fiberglass you will need. On this I will be using one layer of 18oz cloth and two layers of 4oz cloth. The weight of the fiberglass is how thick/strong the fiberglass will be. Also the heavier the fiberglass the more pattern of the weave will show up in the cured laminate and also how easily it will sand. The 18oz will provide most of the strength while the 4oz top layers will reduce bleed though of the heavier cloth on the bottom and provides a nice sanding surface. Most people will be using hardware store or auto parts store fiberglass, witch is usually around 6-8oz This builds up quick to provide strength and sands easily. If I were to build this amp rack with 8oz cloth I would want to use about 6 layers to provide the strength. I do a lot of fiberglass work so I stock various weights in bulk. 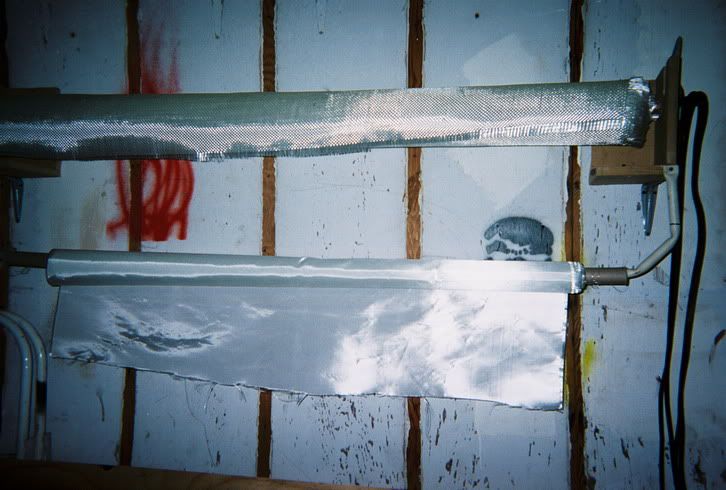  Once you have the cloth cut you will need to mix your resin. Most of your typical resin will be polyester base, it provides good strength, sands easy, and is the cheapest of different kinds of resin. You want to mix at 1-2% resin to MEKP (hardener). I use 1 cup resin to ½ tsp MEKP. You can pick up some stainless steel measuring cups at most all grocery stores and supermarkets. I do not recommend using plastic as they can melt. Once the resin has been mixed you need to cover you foil in a good layer of resin. I use cheep natural hair brushes. They run around 75 cents each so they are disposable if you dont want to clean them. 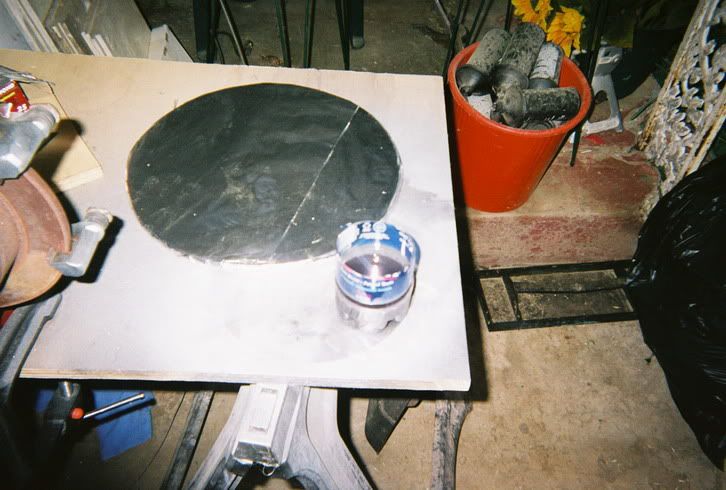 Now lay on your first layer, on this layer I used the 18oz cloth, as it will be on the bottom. Spread more resin on top of this layer working it into it by using the tip of the brush in a dabbing motion. The cloth will start to become almost clear as it is saturated. I also use a putty spreader to work the resin into the cloth. 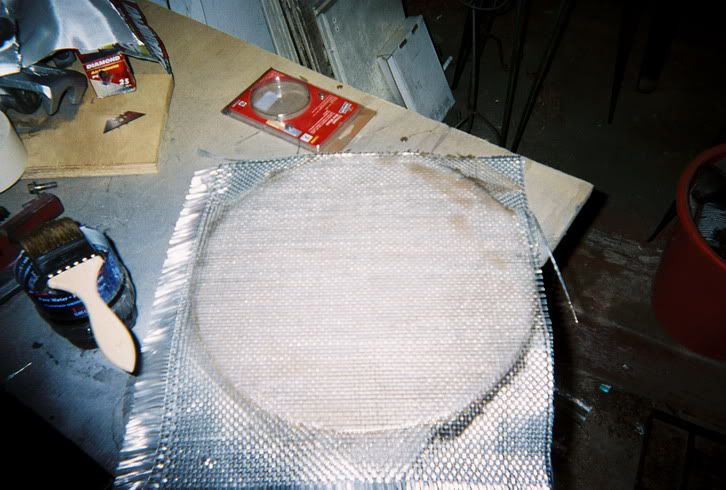 Next we will repeat the last step with the next two layers. You should place the layers on a 90* bias to each other to provide maximum strength. 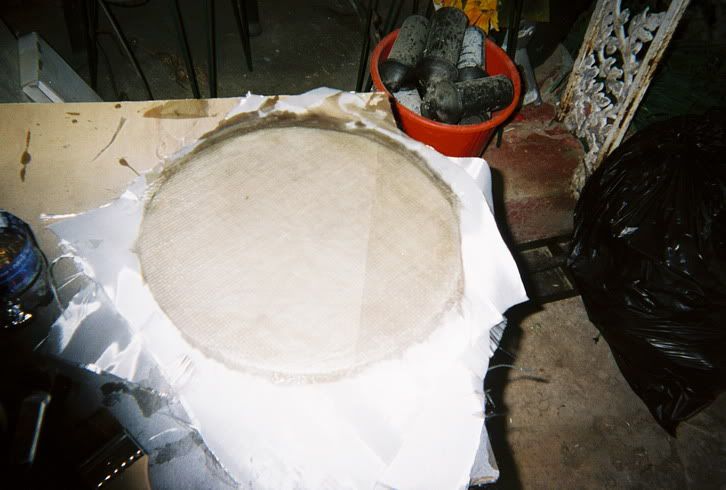 After you have gone over the resin with the spreader to it should look something like this. The spreader will squeeze out the excess resin and help achieve a good wet out. 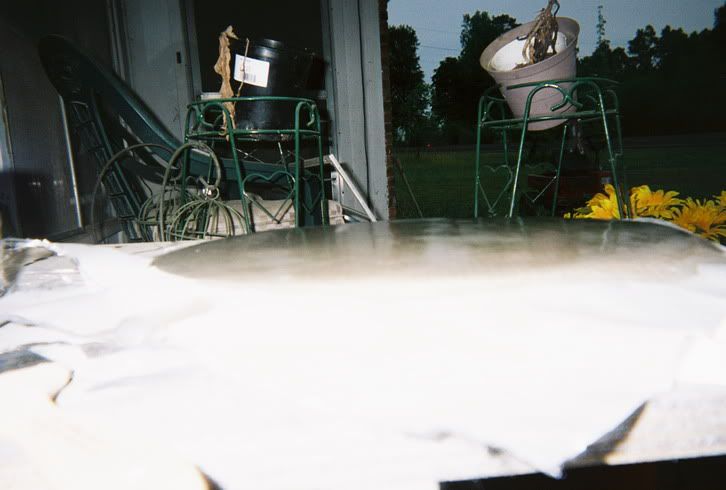 Let the resin cure. Depending on the temperature and the number of layers you put on it should take between 30 minutes and an hour. After it is cured you can remove the foam from the backside and peal off the foil. You could leave the foil on, but I always peal it off, as it will be on bottom and wont be seen you can skip this if you want to. 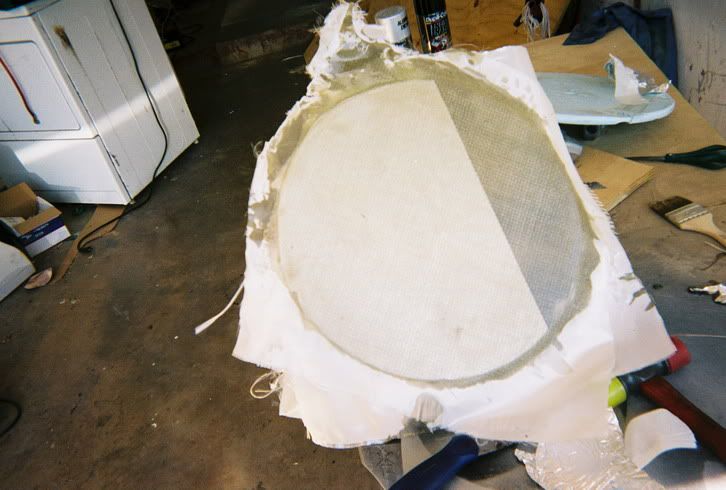 The surface will be relatively smooth already but you will want to sand it with 150 grit to knock down some of the high spots. I did this before I cut out the shape, it can be done before or after though.  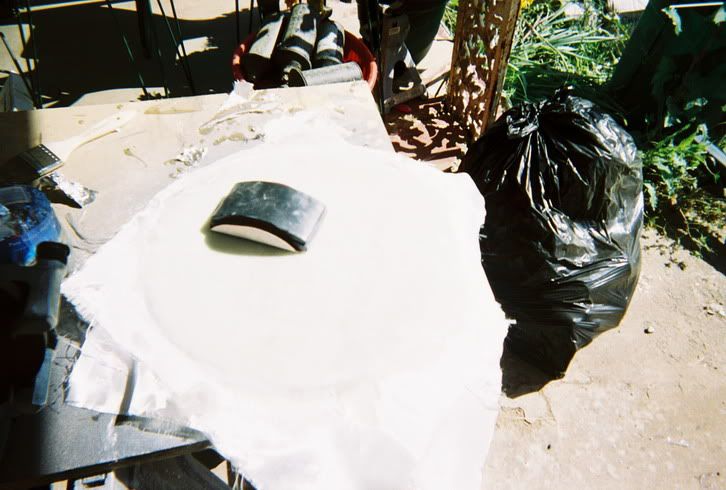 Next I used a Dremel and cut-off wheel to cut the shape. The foam left a perfect outline on the backside that I followed. 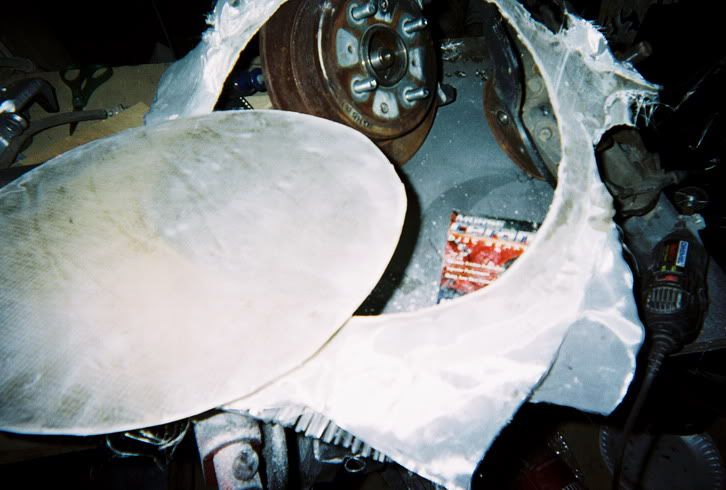 Check for proper fitment and sand the edges with 150 grit. 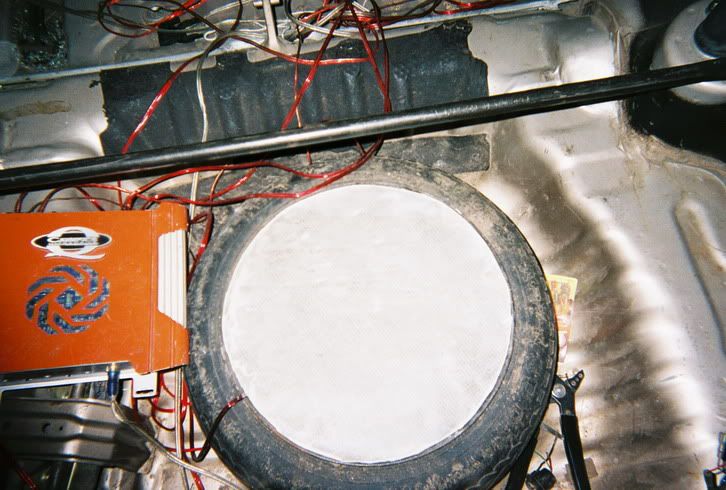 You are now ready to paint. This could also be covered in various materials if you so wish. Primer it with a good quality high build primer 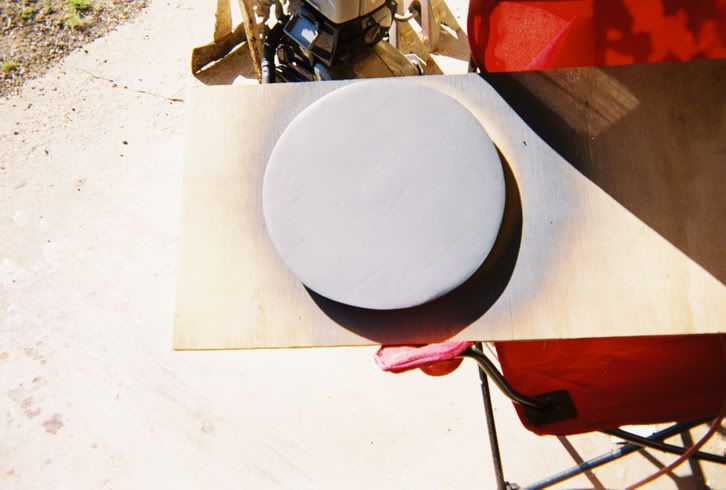 Wet sand with 220 grit with a block to level out the surface. This was smooth enough that it required no body filler, depending on what you are making and things with more complex shapes may require the use of a body filler to smooth out the surface (more on this will be covered in the next tutorial). 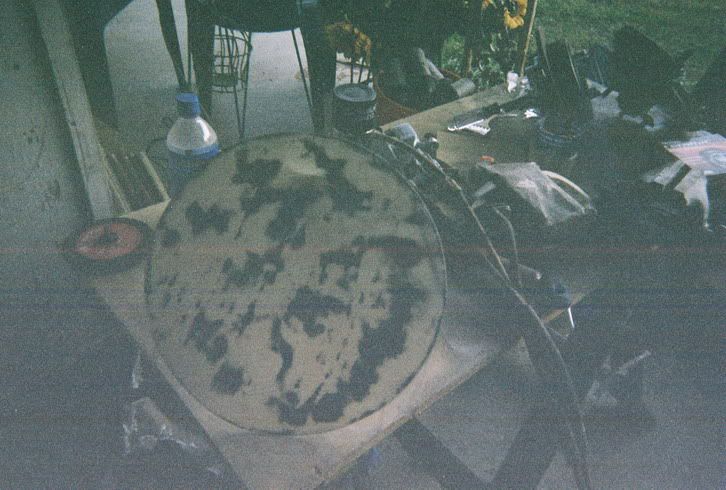 You are now ready to reprimer and finish out with the paint of your choice. I chose to paint it the same color as the amp, orange (yes I know the picture looks red). This is a very simple fiberglass laminate, but is something very easy for the beginner to start with. This tutorial will be followed by a couple more that will proceed to more complex builds and techniques. Feel free to ask any questions.
__________________
 |
|

|

|
| The Following User Says Thank You to TheSilentChamber For This Useful Post: |
Theycalledmedoc (02-21-2014)
|
|
06-05-2005, 08:27 PM
|
#2 | |
|
Captain Over Engineer
 Join Date: Feb 2003
Location: New York, New York
Posts: 6,711
Thanks: 27
Thanked 29 Times in 23 Posts


|
Re: Fiberglass 101 - Tutorial
Awesome tutorial man 'preciate it. I think it may deserve a sticky!
__________________
-Mike AF Director of Media / Photographer  mike.lawrence@automotiveforums.com | AutomotiveForums.com | Flickr Gallery |
|
|
|
|
|
06-05-2005, 08:51 PM
|
#3 | |
|
Banned
 
Join Date: Aug 2004
Location: Lake City, Florida
Posts: 3,705
Thanks: 0
Thanked 1 Time in 1 Post
|
Re: Fiberglass 101 - Tutorial
Finally
 Now we need some more like free standing construction and Fleece streching/glassing. i am contemplating building a fiberglass structure for the computer componets that will be going in my truck for video/mp3 storage, i will probably use mat and fleece streching. If i do cary it out ill post up. good work, something like that is what anyone should start with. |
|
|
|
|
|
06-05-2005, 09:10 PM
|
#4 | |
|
Forunn Daberator
Thread starter
Join Date: Mar 2004
Location: bumblefuck, Texas
Posts: 10,590
Thanks: 363
Thanked 364 Times in 309 Posts
|
Re: Fiberglass 101 - Tutorial
Yeah, more advanced stuff is comming real soon (seriously lol). And yes, it does deserve a sticky lol.
__________________
|
|
|
|
|
|
06-05-2005, 09:12 PM
|
#5 | |
|
Captain Over Engineer
Join Date: Feb 2003
Location: New York, New York
Posts: 6,711
Thanks: 27
Thanked 29 Times in 23 Posts
|
Re: Fiberglass 101 - Tutorial
I might do some welding tutorials and metal working tutorials.
__________________
-Mike AF Director of Media / Photographer mike.lawrence@automotiveforums.com | AutomotiveForums.com | Flickr Gallery |
|
|
|
|
|
06-08-2005, 10:30 PM
|
#6 | |
|
AF Newbie
Join Date: Jun 2005
Location: Benton, Arkansas
Posts: 7
Thanks: 0
Thanked 0 Times in 0 Posts
|
Re: Fiberglass 101 - Tutorial
I had read a post similiar to this in a club I was with. That guy said i could cut the cloth in strips to get the mold I want, and use chicken wire(which im not after reading this). Im going to be doing a door of my car any tips on this?
|
|
|
|
|
|
06-09-2005, 12:52 PM
|
#7 | |
|
AF Newbie
 Join Date: May 2005
Location: Cornfield, Iowa
Posts: 36
Thanks: 0
Thanked 0 Times in 0 Posts
|
Now that you have my attention, I'm also interested in the followups, as I'm planning a major customizing project, including Custom Ground Effects, and Rear Spoiler.
I'd like to see the process for LARGE parts (like a Fiberglass Hood, for example)! Thanks for sharing your skills and techniques with those of us who haven't tried, yet!  |
|
|
|
|
|
06-09-2005, 01:29 PM
|
#8 | ||
|
Ex-Janitor of AF
Join Date: Sep 2002
Location: South Ozone Park, New York
Posts: 8,251
Thanks: 16
Thanked 6 Times in 6 Posts
|
Re: Re: Fiberglass 101 - Tutorial
Quote:
TS out
__________________
The more the members are involved in the process of development, the better we will be as a community of Automobile enthusiasts. Have a suggestion to make the community better, let us know. Remember, the "No" is always there, you are just looking for the "Yes" Members please read: Guidelines |
||
|
|
|
|
06-09-2005, 04:39 PM
|
#9 | |
|
Banned
Join Date: Aug 2004
Location: Lake City, Florida
Posts: 3,705
Thanks: 0
Thanked 1 Time in 1 Post
|
Re: Fiberglass 101 - Tutorial
Chicken wire can be used in aiding free standing constuction... which is probably what he was talking about.
BTW. Fiberglass hood is a HUGE project... |
|
|
|
|
|
06-09-2005, 07:11 PM
|
#10 | |
|
Forunn Daberator
Thread starter
Join Date: Mar 2004
Location: bumblefuck, Texas
Posts: 10,590
Thanks: 363
Thanked 364 Times in 309 Posts
|
Re: Fiberglass 101 - Tutorial
Fiberglass hood can be a weekend project if you have all the materials ready to go friday afternoon. Follow ups with more complex will be posted in two weeks - give or take a couple days. Going to do a speakerbox that I may write a speakerbox tutorial on, but I dont consider that real indepth, so I might throw that up in a week or two, post it in the audio forum also. In the advanced write up I will be major interior work, all starting from scratch. Part three will cover all the differnt types of molds, freestanding buildup materials and such, tips and processes I have learned. Check back offen.
__________________
|
|
|
|
|
|
06-10-2005, 09:34 AM
|
#11 | |
|
Banned
Join Date: Aug 2004
Location: Lake City, Florida
Posts: 3,705
Thanks: 0
Thanked 1 Time in 1 Post
|
Re: Fiberglass 101 - Tutorial
hmmm, i can post up basic surfboard repair...
 if anyone wants it... but it doesnt just apply to surfboards, body repair and other things use the same principals. if anyone wants it... but it doesnt just apply to surfboards, body repair and other things use the same principals.Cant wait for the interior/advanced stuff, the most advanced ive gotten was a ported fiberglass enclosure. nothing special. and i build a short board but that isnt all that advanced eitehr...especially the way it turned out. |
|
|
|
|
|
06-10-2005, 04:44 PM
|
#12 | |
|
Forunn Daberator
Thread starter
Join Date: Mar 2004
Location: bumblefuck, Texas
Posts: 10,590
Thanks: 363
Thanked 364 Times in 309 Posts
|
Re: Fiberglass 101 - Tutorial
I had some people ask, its held to the spair tire rim with velcro, there is also cable looped though it under the amp that is attached to the bottom of the car.
__________________
|
|
|
|
|
|
06-11-2005, 04:23 AM
|
#13 | ||
|
AF Newbie
Join Date: May 2005
Location: Cornfield, Iowa
Posts: 36
Thanks: 0
Thanked 0 Times in 0 Posts
|
Re: Re: Fiberglass 101 - Tutorial
Quote:
I already have a one of a kind Fiberglass Hood that I'd like to repair, mainly, not necessarily build from scratch. It seems to be too thin in some areas, and the edges are very fragile, to where they are cracked and broken. It's a Cowl hood with Ram Air scoops! I'd like to fix it up for a Display, as it's just a pin on hood, and not very functional, anyway. Mostly, I'd like to see how to "reinforce" the Fiberglass that I already have, if there's a way that I can. |
||
|
|
|
|
06-11-2005, 09:06 AM
|
#14 | |
|
Banned
Join Date: Aug 2004
Location: Lake City, Florida
Posts: 3,705
Thanks: 0
Thanked 1 Time in 1 Post
|
Re: Fiberglass 101 - Tutorial
That is very possible.
i would post up thoes repair pictures for you to draw some ideas BUT i cant find them on my computer...so untill next time... |
|
|
|
|
|
11-19-2005, 04:57 AM
|
#15 | |
|
AF Fanatic
 
Join Date: Jul 2003
Location: Fargo, North Dakota
Posts: 5,625
Thanks: 0
Thanked 0 Times in 0 Posts

|
Re: Fiberglass 101 - Tutorial
....so TSC, where's the rest of the fiberglassing tutorials?? it's been awhile and i've been damn patient enough. haha. but seriously, are you currently working on any more about glassing or what's the deal?
__________________
95 Talon TSI AWD 97 Eclipse GST 
|
|
|
|
|
|
|
POST REPLY TO THIS THREAD |
 |
|
|

