

|
| Search | Car Forums | Gallery | Articles | Helper | AF 350Z | IgorSushko.com | Corporate |
|
| Latest | 0 Rplys |
|
|||||||
| WIP - Street Post topics for any "Works In Progress" street vehicles projects in this sub-forum. |
 |
 Show Printable Version | Show Printable Version |  Email this Page | Email this Page |  Subscribe to this Thread
|
|
|
Thread Tools |
|
|
#1 | |
|
AF Enthusiast
Join Date: Jun 2003
Location: San Diego, California
Posts: 758
Thanks: 0
Thanked 2 Times in 2 Posts
|
De-Ricing the F&F Supra
I have always loved the sport-top Supra, but I hate how ricey the F&F Supra is (how ever I do love the green eclipse
 , my next build). , my next build).So here is where I am at so far on day 1. Das hood: Those hood vents where super tacky, I like the nice smooth OEM hood. So I used some putty to fill the holes, sanded, and then shot it with some thick automotive primer. I can still see a faint trace of the vents so I need to sand over it again. (Any tips are welcome). Teh bumper. The bumper was not too bad, but still too busy for my taste, so I proceeded to fill and removed the side vents. I will finish them off and see how it looks. I May choose the open up the two vents that are on either side of the main center one (kind of like the OEM one). El Picturas 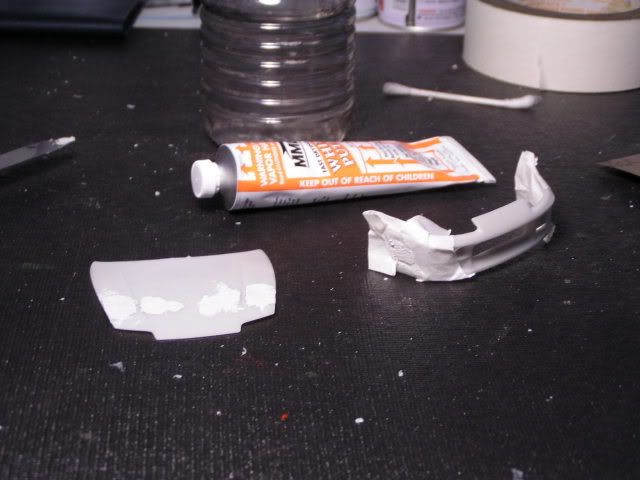 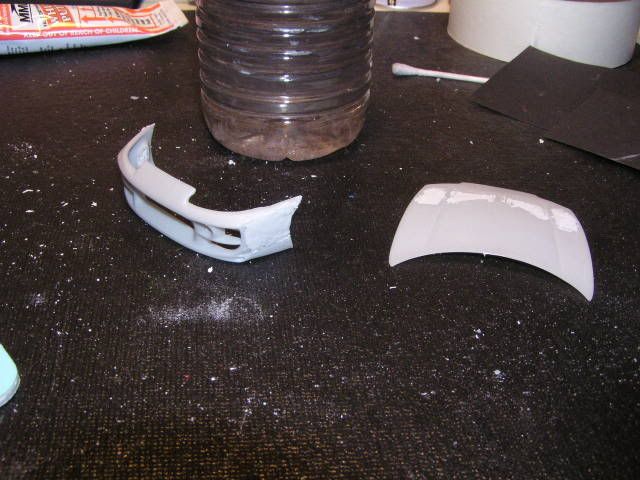 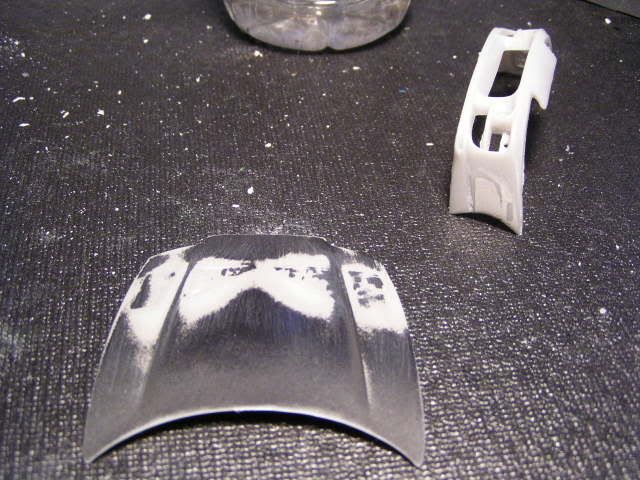 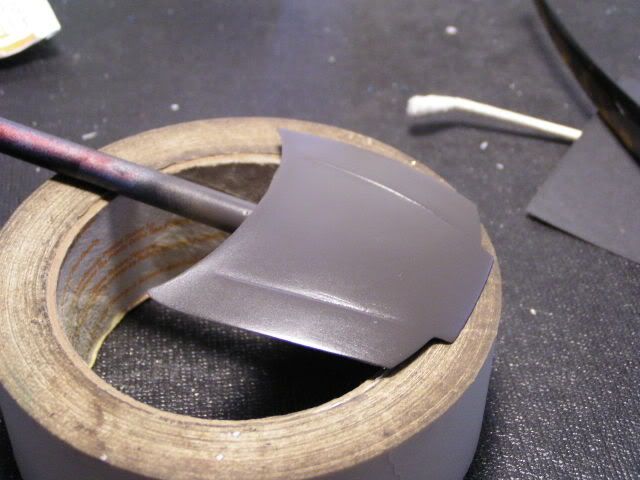 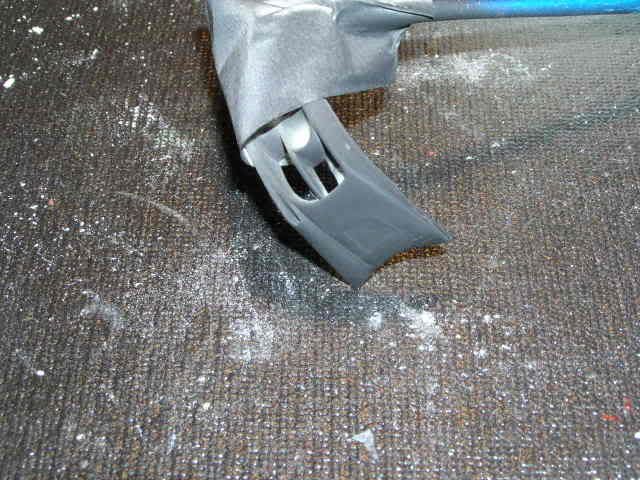 These are the addition parts that I am considering taking out of the bumper. 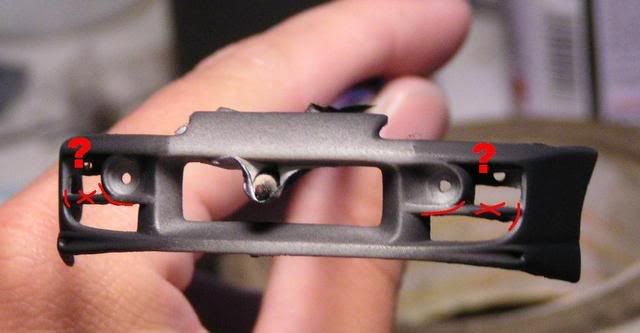
__________________

Last edited by Mojo_stevo; 05-20-2008 at 07:28 PM. |
|
|
|

|
|
|
#2 | |
|
AF Enthusiast
|
Re: De-Ricing the F&F Supra
To get rid of the ghosting from the putty work, you are well on your way. You've got the first part taken care of. now you need to sand that primer LIGHTLY so you don't remove the sunken in area, then spray more primer and repeat, and repeat. It took me 4 coats of primer to relieve my J30/leopard of it's putty and mold marks. Don't keep spraying the whole part, just the areas that need the work.
__________________
There is a very fine line between "hobby" and "mental illness." 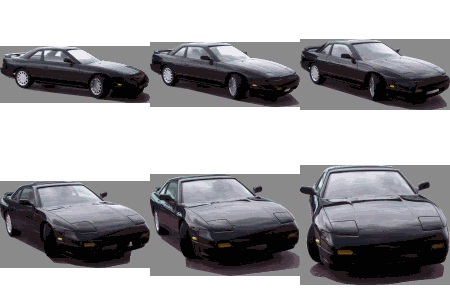
|
|
|
|

|
|
|
#3 | |
|
AF Enthusiast
Thread starter
Join Date: Jun 2003
Location: San Diego, California
Posts: 758
Thanks: 0
Thanked 2 Times in 2 Posts
|
Re: De-Ricing the F&F Supra
Thanks 'rsx' for the tips. I'll try to isolate the spray. I'm getting an airbrush on thursday, i'm sick of rattlecans.
Well I think I am learning my lesson with AMT kits. The fit and finish is awful. I have two more WIP's that are AMT, and then I am going to try to stay away from them. Here are the fitment issue that I have discovered thus far (these are the only parts that I have taken off the tree so far). Hood-to-frame-to-bumper: 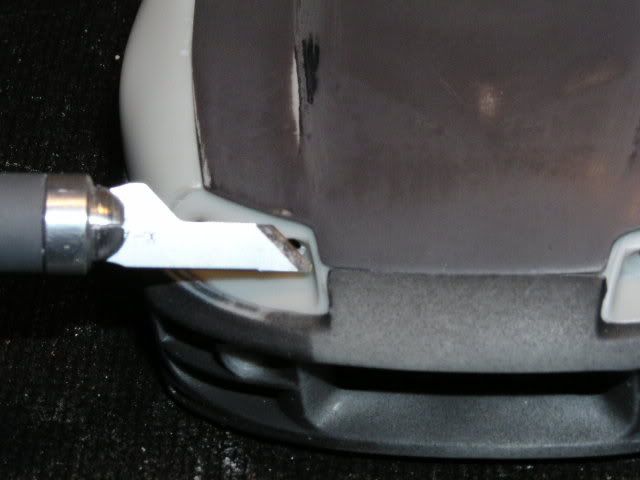 Bumper right, to fender: 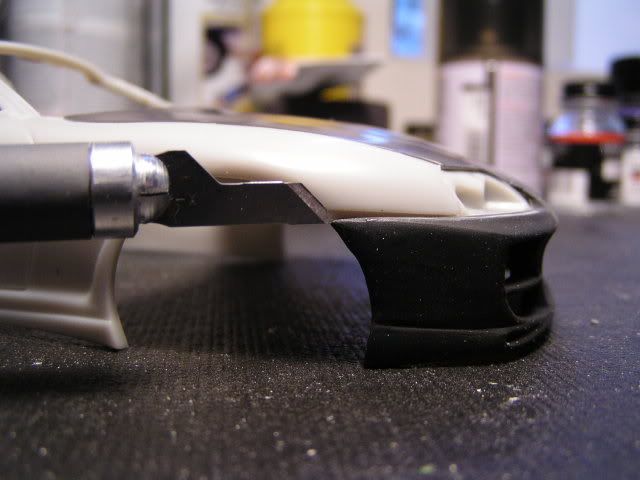 Bumper left, to fender: 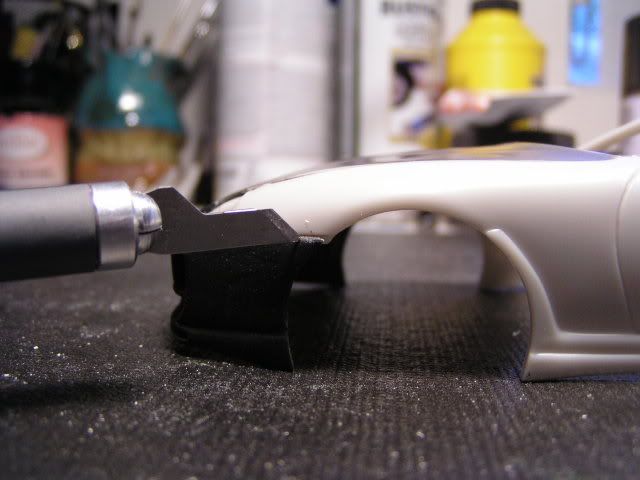 I also picked up some a/m rims for it. I took advantage of the 2 piece aspect of the wheels and ground down the rear lip of the spoke portion to make them sit back farther, creating a better lip. I also pulled the tire out a tad to add a beefier look, so it's not so "rubber band" like.  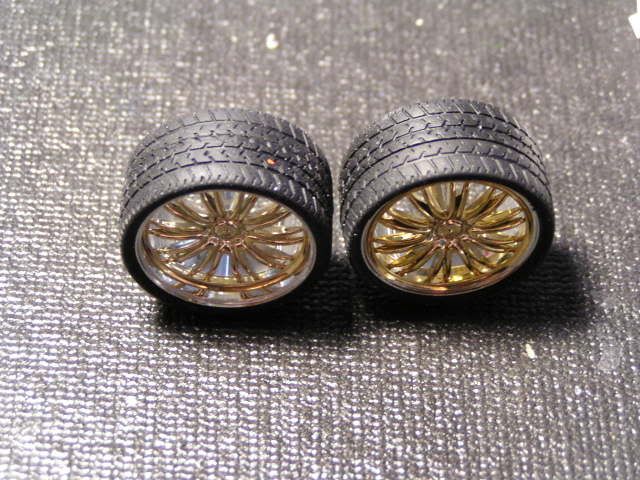 This is the stance that I hope to get (gonna take some work).  I'm not sure if I'm going to leave the rims gold or not. If I paint the car grey-metalic then I will leave them gold. 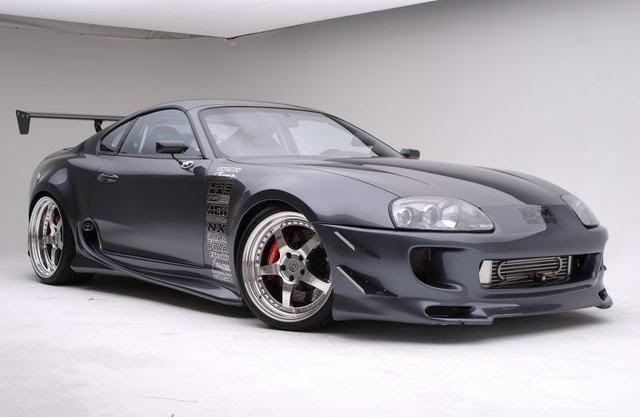 I'm strongly concidering painting the car flat red. If so, I might paint them silver or gunmetal. 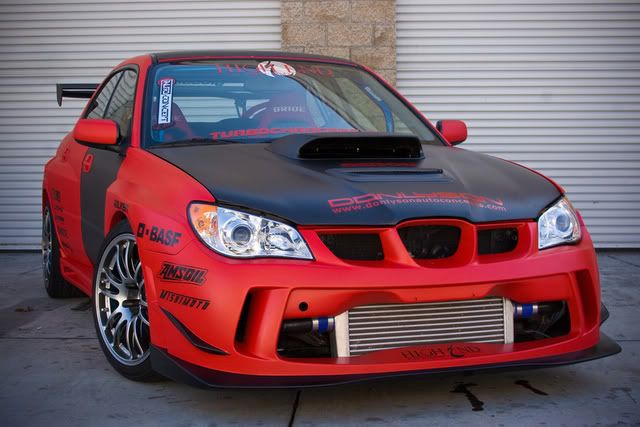 Mishimoto widebody Impreza.^
__________________

|
|
|
|

|
|
|
#4 | |
|
AF Enthusiast
Thread starter
Join Date: Jun 2003
Location: San Diego, California
Posts: 758
Thanks: 0
Thanked 2 Times in 2 Posts
|
Re: De-Ricing the F&F Supra
More on the front bumper.
Well last night I decided to cut and fill a bit on the bumper. The left side (car's left) is the modded side. The right side, obviously, is still stock. I still have a wee bit more sanding to do to blend it all in. But this is more or less how I want both sides to look. This is a constructive environment so please give me your honest opinion, again all critiques and tips are welcome in my threads! 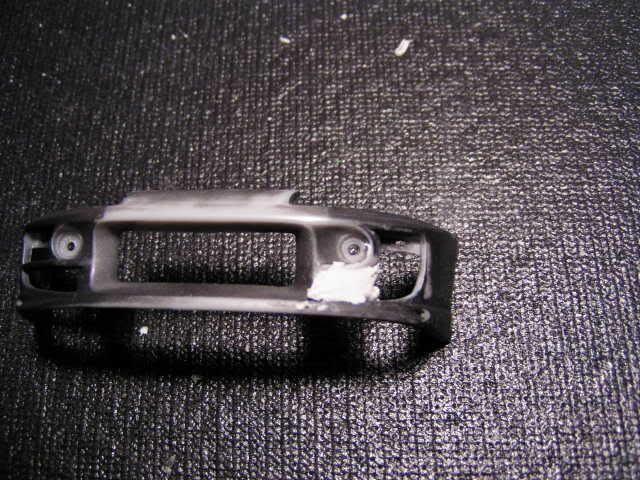 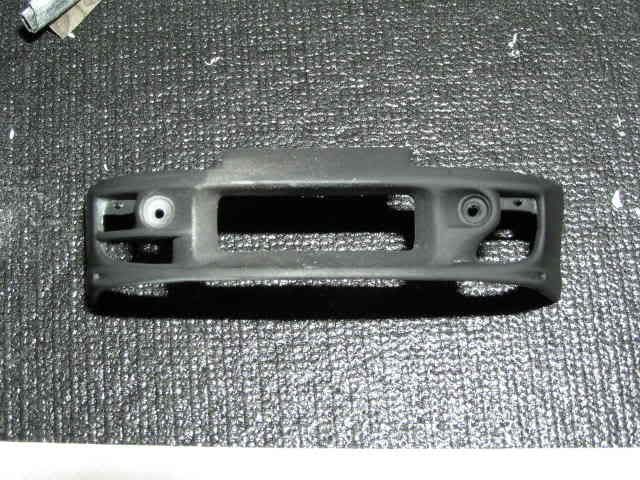
__________________

|
|
|
|

|
|
|
#5 | |
|
AF Newbie
 Join Date: Apr 2008
Location: Houma, Louisiana
Posts: 89
Thanks: 0
Thanked 0 Times in 0 Posts
|
Re: De-Ricing the F&F Supra
Thats coming out nice.
Does that kit come with nitrous bottles, someone told me they did?
__________________
On the work bench  - 2007 Shelby Gt500 (convertible) - 1970 Ford mustang mach 1 - 2006 Corvette C6 ( true red light racer custom ) - Ford Focus SVT ( a 1:1 replica for my grandpa ) just finished ...  - Ford Shelby GT-H - Toyota AE86 - Revell Subaru Impreza WRX STi |
|
|
|

|
|
|
#6 | ||
|
AF Enthusiast
Thread starter
Join Date: Jun 2003
Location: San Diego, California
Posts: 758
Thanks: 0
Thanked 2 Times in 2 Posts
|
Re: De-Ricing the F&F Supra
Quote:
 ). ).Thank you for the compliment btw.
__________________

|
||
|
|

|
|
|
#7 | |
|
Getting Old...
          Join Date: May 2003
Location: Lugano, Switzerland
Posts: 753
Thanks: 0
Thanked 0 Times in 0 Posts
|
Re: De-Ricing the F&F Supra
I'm building this kit right now too, and the fit of the body pieces is definitely a pain. I found the fit of the area around the hood/front bumper/headlights the worst I've found. I've been working on this area for hours now and it's still not right.
I would really suggest taking the clear headlights off the tree though, and trying them in their spot (around the hood/bumper). Maybe yours will fit better than mine, but there were gaps all over around them.... Looking good though... Murray |
|
|
|

|
|
|
#8 | |
|
AF Enthusiast
|
Re: De-Ricing the F&F Supra
You are doing a fantastic job on this. I like how the front bumper is turning out. The wheels look SO much better now with the deeper dish, though the still look a bit huge in my opinion.
Please don't discount ALL AMT kits, as they do have quite a few VERY good kits. Part of what I like so much about AMT kits is that once you get to building AMT kits into show winning models, there is nothing in the modeling hobby you can't handle. lol
__________________
There is a very fine line between "hobby" and "mental illness." 
|
|
|
|

|
|
|
#9 | |
|
AF Enthusiast
Thread starter
Join Date: Jun 2003
Location: San Diego, California
Posts: 758
Thanks: 0
Thanked 2 Times in 2 Posts
|
Re: De-Ricing the F&F Supra
So I finished sanding the hood smooth after filling the Bomex hood vents, and cut a piece of cf decal for the hood. I decided to use Micro Sol decal softener (first time). It looked very wrinkly when I first applied it. I guess that's how it's supposed to look at first. It's been about two hours and it still has some wrinkle to it, and some weird dots on the corner of the hood.
How long does it take for it too dry? Will it completely smooth out or do I need to apply another coat?  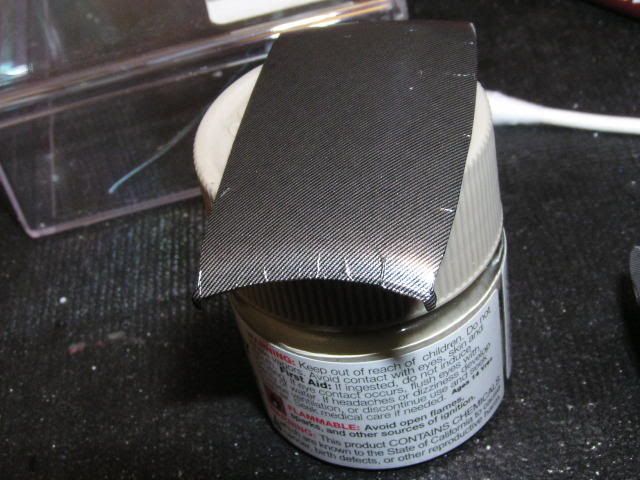 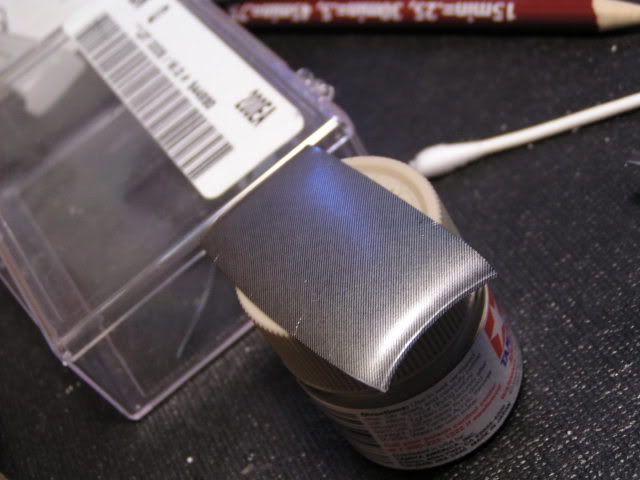
__________________

|
|
|
|

|
|
|
#10 | |
|
AF Enthusiast
Thread starter
Join Date: Jun 2003
Location: San Diego, California
Posts: 758
Thanks: 0
Thanked 2 Times in 2 Posts
|
Re: De-Ricing the F&F Supra
Well the decal appears to be smoothing out, I have just been adding more of the softener to it ever few hours. I also got a bottle of Micro Set, what a waste of money that was... all it is is distilled vinegar, or at least thats what it smells like, it also seems so take the sheen off the decal.
__________________

|
|
|
|

|
|
|
#11 | |
|
AF Newbie
 Join Date: Jan 2008
Location: vancouver
Posts: 29
Thanks: 0
Thanked 0 Times in 0 Posts
|
Re: De-Ricing the F&F Supra
CF hood~!
how was your experience with that? i've always wanted to try it but i'm worryed about how would the sheet of decal conform to the "complex" shape of hood.... do u just cut out a big piece and put it on (with those decal solution or whatever)?? |
|
|
|

|
|
|
#12 | ||
|
AF Enthusiast
Thread starter
Join Date: Jun 2003
Location: San Diego, California
Posts: 758
Thanks: 0
Thanked 2 Times in 2 Posts
|
Re: De-Ricing the F&F Supra
Quote:
Pretty much, I just laid the hood on the back of the decal (paper side) and traced it with a pencil (which naturally gave it about 2mm of over hang for error). I cut it out with a sharp exact-o knife, prepped the hood with Micro Sol (Micro Set, the other stuff, is just vinegar works kinda crappy) soaked the decal in water then slid it on to the prepped hood. It wrinkled then laid out flat once it dried. For the remaining few wrinkles, I just applied more Micro Sol to those specific spot until they pretty much went away. I'm not leaving the hood bare CF though. I coated it with a layer of clear red, I'll post pics tomorrow. I do plan on doing the rest car flat red like the below pictured STi. BTW does anybody know how to get the red to come out like this? (below picture) 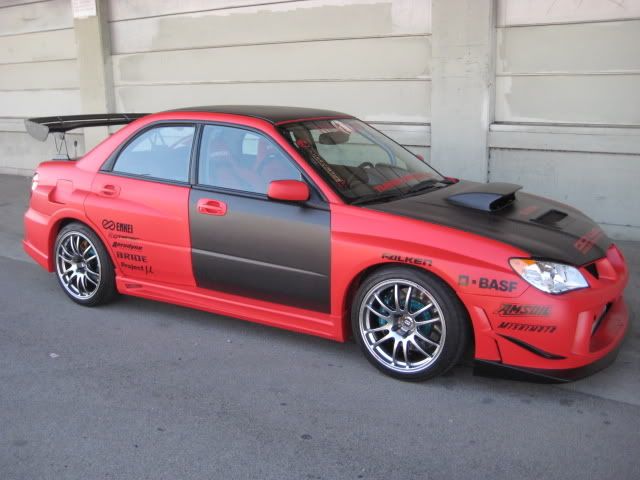
__________________

|
||
|
|

|
|
|
#13 | |
|
AF Enthusiast
|
Re: De-Ricing the F&F Supra
I would say paint it gloss red, wet sand it with 6000 grit to get rid of the orange peel, then spray it with a high quality flat clear.
__________________
There is a very fine line between "hobby" and "mental illness." 
|
|
|
|

|
|
|
#14 | ||
|
AF Enthusiast
Thread starter
Join Date: Jun 2003
Location: San Diego, California
Posts: 758
Thanks: 0
Thanked 2 Times in 2 Posts
|
Re: De-Ricing the F&F Supra
Quote:
6000 grit? Was that a 600 grit typo? I've never seen 6000 grit only 1500. I'm not trying to me a smart-ass, I'm brand new to painting.
__________________

|
||
|
|

|
|
|
#15 | |
|
AF Enthusiast
|
Re: De-Ricing the F&F Supra
6000 grit is found in most polishing kits for models. The problem you run into with using 1500 is that you will most likely be left with swirl marks. If you have a local paint supply store, see if they have some finer grit paper. You might be able to get away with stepping from 1500 to 2000.
__________________
My name is Russell, feel free to use it. I'd rather be hated for Who I Am than be loved for Who I Am Not |
|
|
|

|
|
 |
POST REPLY TO THIS THREAD |
 |
|
|