|
|
|

|
|
| Search | Car Forums | Gallery | Articles | Helper | AF 350Z | IgorSushko.com | Corporate |
|
| Latest | 0 Rplys |
|
|||||||
| Car Modeling Share your passion for car modeling here! Includes sub-forum for "in progress" and "completed" vehicles. |
 |
 Show Printable Version | Show Printable Version |  Email this Page | Email this Page |  Subscribe to this Thread
|
|
|
Thread Tools |
 07-06-2007, 08:40 PM
|
#1 | |
|
AF Enthusiast

Join Date: Jan 2007
Location: South Eastern, Wisconsin
Posts: 667
Thanks: 1
Thanked 0 Times in 0 Posts
|
I was working on some "honey do" items today, and while cleaning out the garage I noticed I had a fair amount of MDF and masonite boards. I figured this would be a good time to upgrade my paint booth. Up until now, I had a 120mm fan taped into a car seat box with a few lights taped to the sides. Better than spraying on a newspaper, but not ideal!
 I'm a huge fan of using whatcha got when it comes to home brew. (I hate reading threads like this, because everyone may not have the same things laying around.) All in all, its pretty simple and VERY effective. A shot showing how/where it's situated in the basement. The stand is an old stand from my chopsaw before I built a rolling cabinet with support wings. It's the perfect height for sitting in a chair and seeing everything in the booth. The compressor tucks in nicely below it. It's fairly quiet (for a tool compressor). I picked it up for $70 from Menards when I was remodeling one of my rentals. 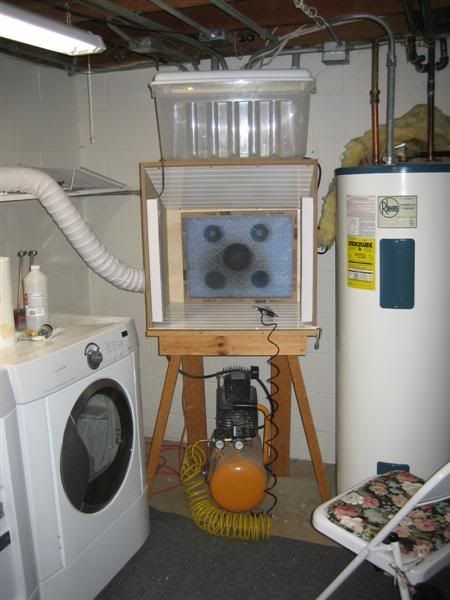 Next is a close up shot with the lights on and the flash off. You can see the airbrush is nicely lit (another Menards purchase -- $15). The lights are the cabinet undermount fluorescent lights which I picked up at Wal Mart for $6 each. I think they're rated at 6 or 7 watts each. Pretty bright anyway. The white boards are masonite wainscoating that is left over from my daughter's nursery room. It is very durable, water proof and wipes down easily. Plus it really reflects the light. The top piece is angled to help direct the air to the fans. 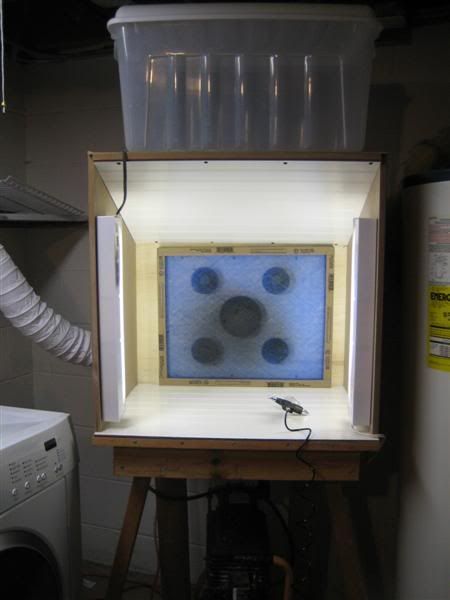 Speaking of fans.... The original cardboard booth had one 120mm fan. Since I found the site silentpcreview.com all of my computers were too loud. All the fans and power supplies were swapped out with quieter components. I have PS and fans all over the place! I have some slick wooden computers that I built if anyone's interested....) The 120mm fan was OK, but it definitely needed some help. I had 4 extra 80mm fans so I thought "What the hell, Jeff, let's slap 'em in there". The mechanical engineer in me was trying to figure out CFM, and losses in the system; the hasty modeler was anxious to slap it all together and try it out. Modeler 1, ME 0.  Here is what the filter looks like after sparying about 30 small parts X-18 black. There was only trace amounts of overspray on the bottom of the booth, and no residue in the air. Seems to work pretty well. You can see the outlines on the filter.  Here is a side and back view of the plenum attached to the back of the booth. I rounded over the side to help with air flow, and mounted the port at the bottom to further increase efficiency. The port is a standard 4" sheet metal flange used in HVAC. I will probably caulk around the plenum to seal off any small air leaks. Side: 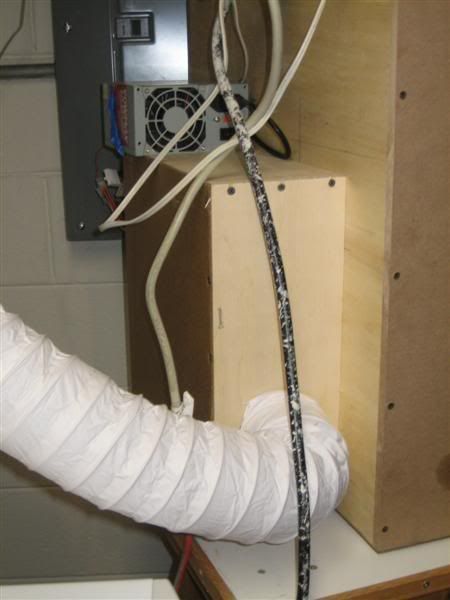 Back: 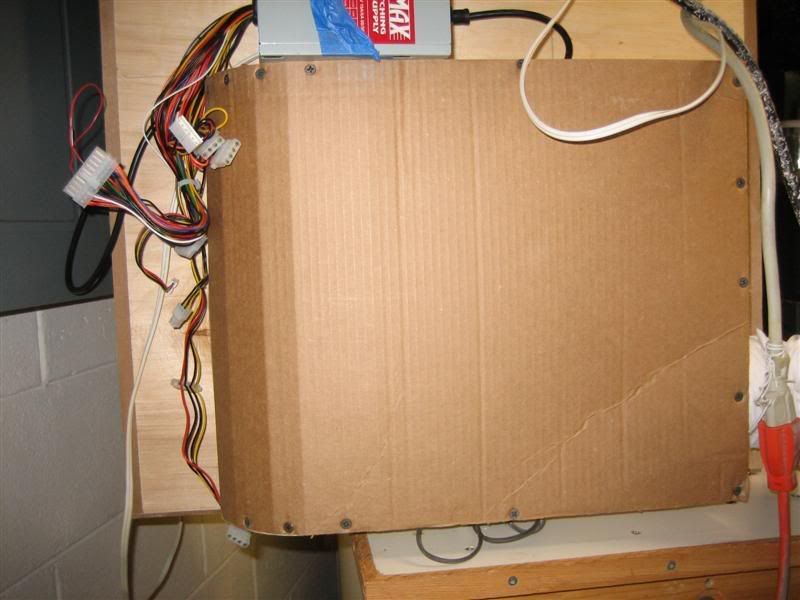 I hooked the exhaust up to my existing dryer vent. Our house is brick, so drilling a dedicate hole for the paint booth exhaust was out of the question. Unfortunenately we have only 3 windows in the basement, none of which were close by so I couldn't put the exhaust there either. This T setup works pretty good. It's a summer/winter dryer port available at all hardware stores. It's designed to allow you to blow the hot dryer air back into the basement in the winter. I used it to direct PB air out and block off the dryer vent. That way dryer exhaust doesn't go into the PB and (more importantly) paint fumes don't go into the dryer. 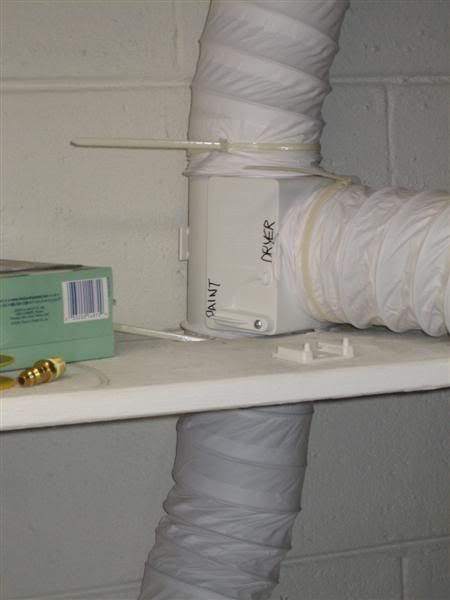 The system works very well! When it's running, you can feel the air at the outside dryer vent. Not as strong as when the dryer is running, but there's a fairly strong exhaust. It was pretty cheap as well. I had the fans, power supply, wood and stand. All I had to buy were the lights ($6 each), 4" port ($4), plastic ducting ($5) and dryer T vent ($8). If you had none of the materials, you could get away with 1 sheet of MDF ($15) some 2"x4"s, fans ($20) and a cheap power supply ($15). I hope this is useful to someone!
__________________
Recently completed projects:      |
|

|

|
|
07-06-2007, 08:46 PM
|
#2 | |
|
AF Enthusiast
Thread starter
Join Date: Jan 2007
Location: South Eastern, Wisconsin
Posts: 667
Thanks: 1
Thanked 0 Times in 0 Posts
|
Re: Homemade paint spray booth for $85 or less
I forgot to mention the filter is the cheap blue fiberglass furnace filter (the 30 day type) that can be picked up for about $0.80 each at hardware stores. The size of the MDF and stand dictated the size and shape of this box. I'm using a 16" by 20" filter as it's one of the most common and easily available.
Thanks! --Jeff
__________________
Recently completed projects: |
|
|
|
|
|
07-07-2007, 08:54 AM
|
#3 | |
|
AF Regular

Join Date: Oct 2002
Location: Nottingham
Posts: 276
Thanks: 0
Thanked 2 Times in 2 Posts


|
Re: Homemade paint spray booth for $85 or less
Price isn't really my primary concern with paint booths at the moment. It doesn't matter how cheap they are because I don't have anywhere to put one or exhaust the fumes.
 Anyway, not that I have any experience of such things, but your setup looks good and like you said, it is definitely important to keep the fumes from going into the dryer. You wouldn't want to turn your white clothes pink now would you? 
__________________
Matt. |
|
|
|
|
|
07-07-2007, 12:37 PM
|
#4 | |
|
Image Hosting Exceeded
 Join Date: May 2003
Location: Flying in circles
Posts: 4,233
Thanks: 23
Thanked 95 Times in 86 Posts
|
Re: Homemade paint spray booth for $85 or less
Looks like some good ideas, but there are some points that could be made better.
The lighting and bright reflective interior are good- being able to see as you're painting obviously helps alot. And routing the exhaust into the dryer exhaust line is certainly clever- wish I'd thought of that! You'll get much better use out of the filter if you build a plenum such that air is drawn thorugh all the filter instead of the five small holes. It only needs to be spaced from the fan faces a few inches- but it would make a huge difference. I'd be curious to know how many CFM you're drawing- as it is the one factor which really determines a paint booth's utility. But the biggest issue is that the fans you're using probably pose an explosion risk. If you're spraying noncombustables (water based paints and cleaners), it shouldn't be much of a problem. But anything enamel or laquer based solvants could be a real danger. Fans for paint booth ventilation must be turned by shielded (nonsparking) motors, and the motors ideally should be outside of the stream of gasses being evacuated. Unless a motor is built specificly for this purpose, it's generally safe to assume the motor is unsafe in this application. This setup may never explode on you, and there are likely many people spraying in similar setups. But you should probably know that it is a possibility- and a volatile vapor explosion in a confined space is not something you want happening in your face. 
__________________
PHOTOBUCKET SUCKS |
|
|
|
|
|
07-07-2007, 04:56 PM
|
#5 | |
|
AF Enthusiast
Thread starter
Join Date: Jan 2007
Location: South Eastern, Wisconsin
Posts: 667
Thanks: 1
Thanked 0 Times in 0 Posts
|
Re: Homemade paint spray booth for $85 or less
These fans are computer fans, so no worries about sparking. All the research I found seemed to conclude that these were safe. I would tend to think that, while not rated explosing proof, a kitchen fan would be heavy duty enough to work as well (isn't the armature coated with epoxy?). At any rate, I'm using Tamiya acrylics, so it should be OK.
I'll cut a 1" spacer to put between the fans and the filter and see if there's any difference. As the filters are only $0.79 each, I can afford to change them every few weeks or so. The 120mm fan is rated at 54 cfm. The 80mm fans are rated somewhere around 32 cfm each. The litmus test was that I could feel air being pulled outside when I put my hand on the outside vent. The solid color paints are extracted almost 100%. Metallics, because of the larger size of the flakes, can hang around a little longer. All in all, better (and I would imagine safer, too) than spraying on a newspaper on the floor! 
__________________
Recently completed projects: |
|
|
|
|
|
07-09-2007, 08:49 AM
|
#6 | |
|
AF Newbie
 Join Date: Sep 2004
Location: Dallas, Texas
Posts: 14
Thanks: 0
Thanked 0 Times in 0 Posts
|
Re: Homemade paint spray booth for $85 or less
This looks great. I'm curios how this or any of thethe spraybooths (homemade or not) do with overall fumes. I seem to remember reading someone with a professionally built spraybooth still had fume in the room after spraying.
I have small kids and want to spray inside, fume are an issue for me, how does yours do? |
|
|
|
|
|
07-09-2007, 09:25 AM
|
#7 | |||
|
AF Enthusiast
Thread starter
Join Date: Jan 2007
Location: South Eastern, Wisconsin
Posts: 667
Thanks: 1
Thanked 0 Times in 0 Posts
|
Re: Homemade paint spray booth for $85 or less
Quote:
When I spray the Tamiya acrylics, my wife says it smells like apples in the basement. I also spray at a lower pressure (15 - 20psi) which seems to help keep the overspary down. Spraying little parts on bamboo skewers produces no fumes/overspray. Spraying a body produces a little, but it tends to be very localized. If I stop, I can see the fumes slowly making their way back to the booth.Spray paint from rattle cans produces a little more overspray. It seems to collect more on the floor of the booth rather than on the outside. I'm guessing the molecules are not quite as atomized and slightly heavier. Before the booth, I would spray and there would be a cloud hanging in the basement as far away at 20 feet. Everything in the basement has a fine mist on it. I haven't seen that "cloud" since the new booth. Quote:
Up next is a homemade dehydrator to speed up drying and keep any other fumes from outgassing contained in the bin.
__________________
Recently completed projects: |
|||
|
|
|
|
07-09-2007, 01:14 PM
|
#8 | ||
|
Image Hosting Exceeded
Join Date: May 2003
Location: Flying in circles
Posts: 4,233
Thanks: 23
Thanked 95 Times in 86 Posts
|
Re: Homemade paint spray booth for $85 or less
Quote:
__________________
PHOTOBUCKET SUCKS |
||
|
|
|
|
|
POST REPLY TO THIS THREAD |
 |
|
|

