|
|
| Search | Car Forums | Gallery | Articles | Helper | Air Dried Beef Dog Food | IgorSushko.com | Corporate |
|
|||||||
| WIP - Motorsports Post topics for any "Work In Process" motorsports vehicles in this sub-forum. |
 |
 Show Printable Version | Show Printable Version |  Subscribe to this Thread
|
|
|
Thread Tools |
|
#1
 03-20-2010, 09:11 PM
|
||||
|
||||
|
1/24 Revell Corvette C6R
Hi,
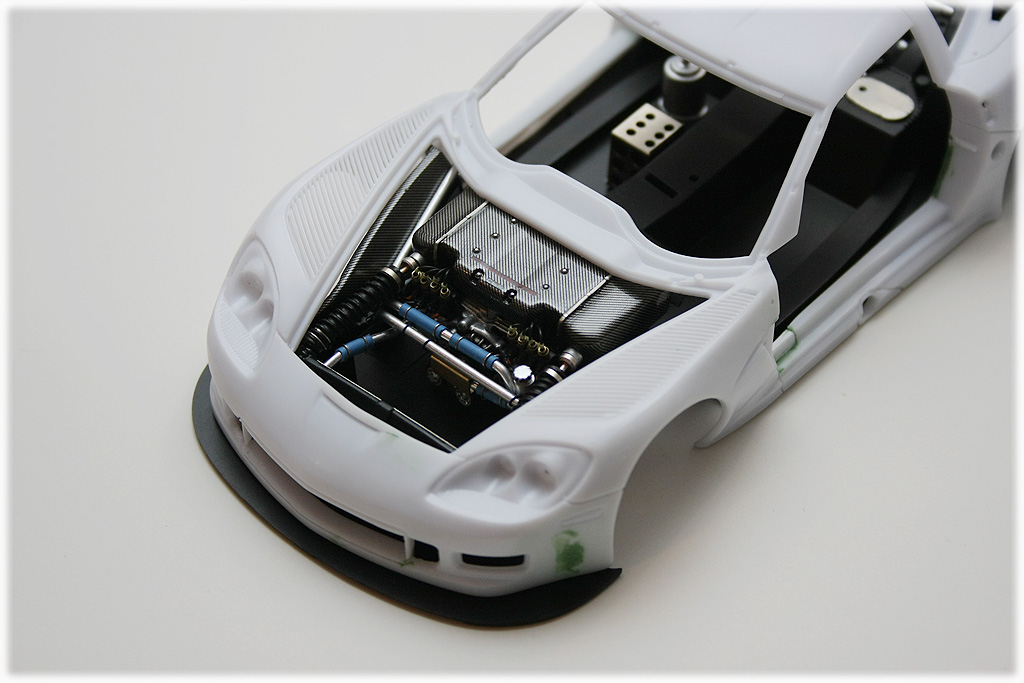
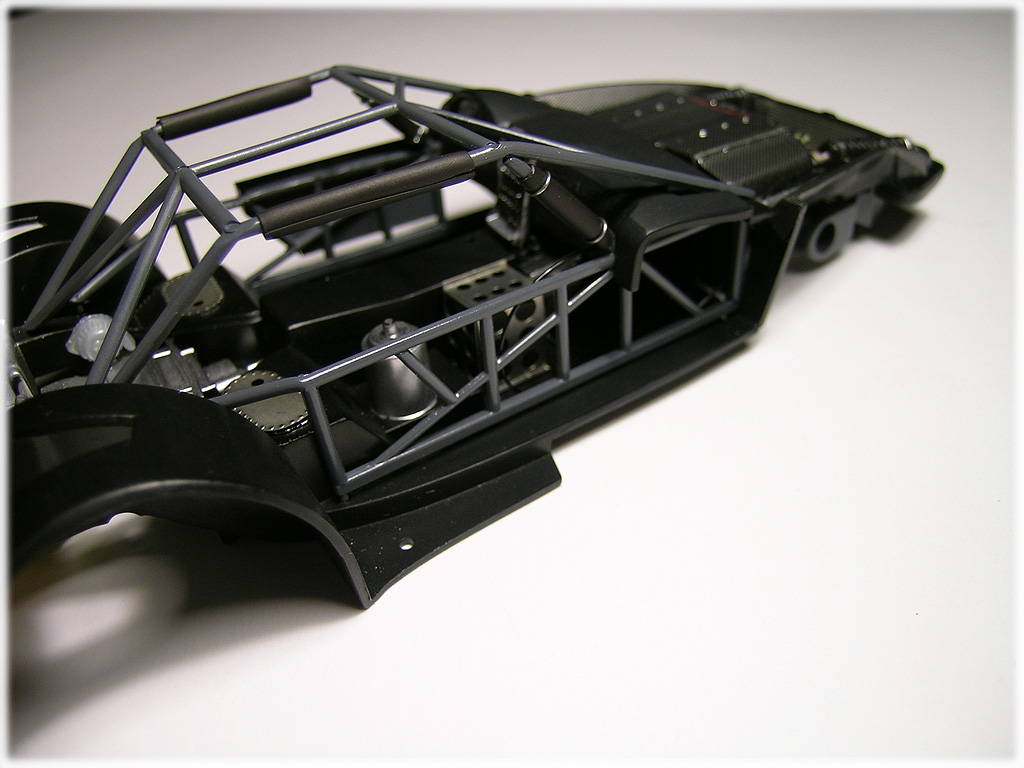
This is something I started working on since the beginning of the year. My goal is to add small details here and there, but mainly to use SMS's detail kit. I am not going to be overly concerned with the accuracy, but would like to do some simple work to make it acceptable. 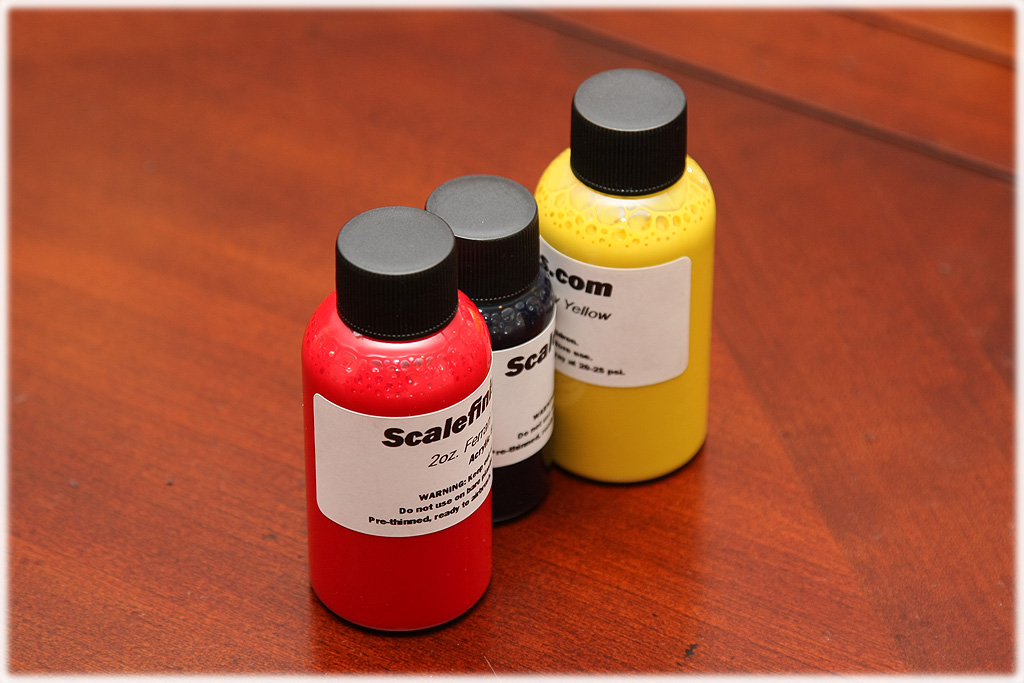 For the project, I also purchased Scale Finish paint for the first time to give it a try. Anyway, the wheels came from SMS are just gorgeous, it is shame that they don't sell them individually. I know SMS's detail kit is not cheap, but it is the only way to obtain the wheels.  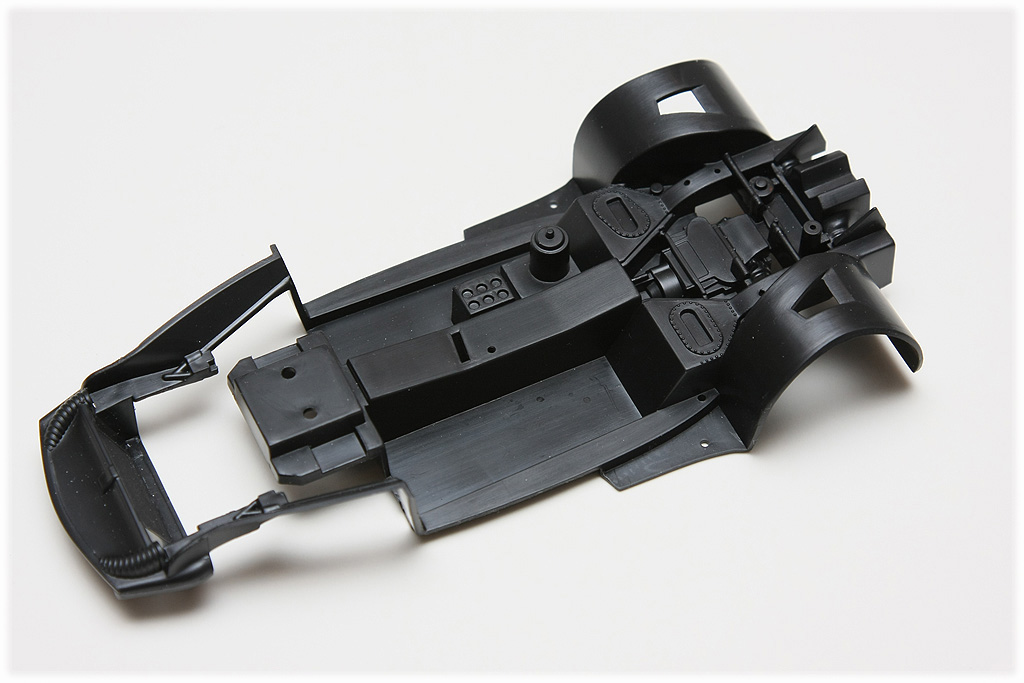 I started out with the chassis. I made no modifications and they seem to be a decent platform.  Added SMS's P/E parts. I also started the pluming/radiator piping work of the engine. 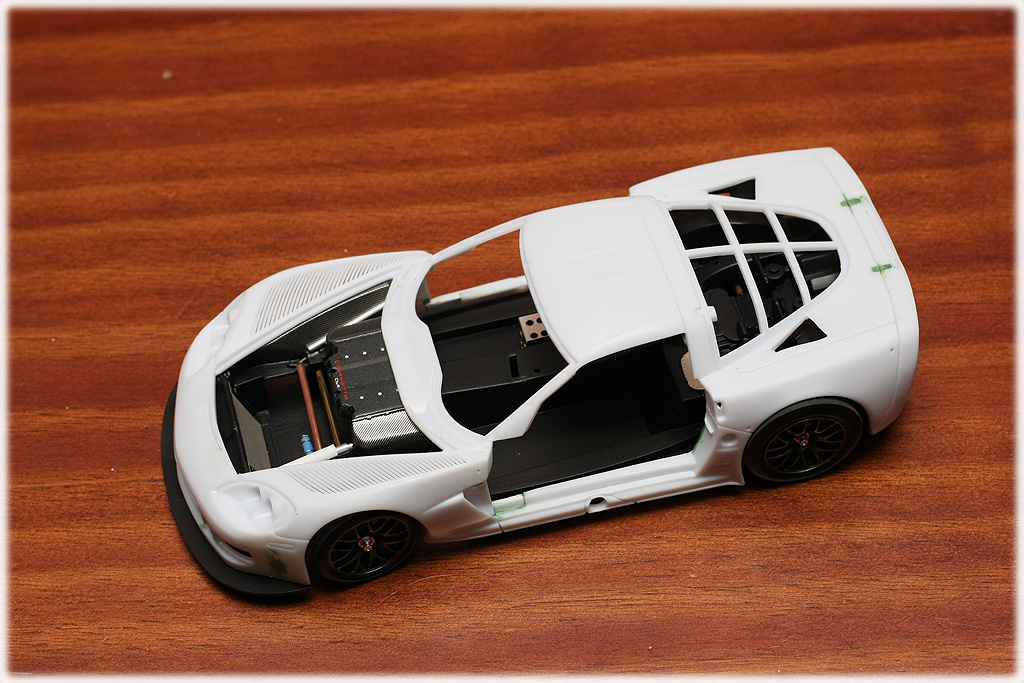 I cut out the doors and also made some adjustment on the body. The initial fit seems to be good and I was happy. 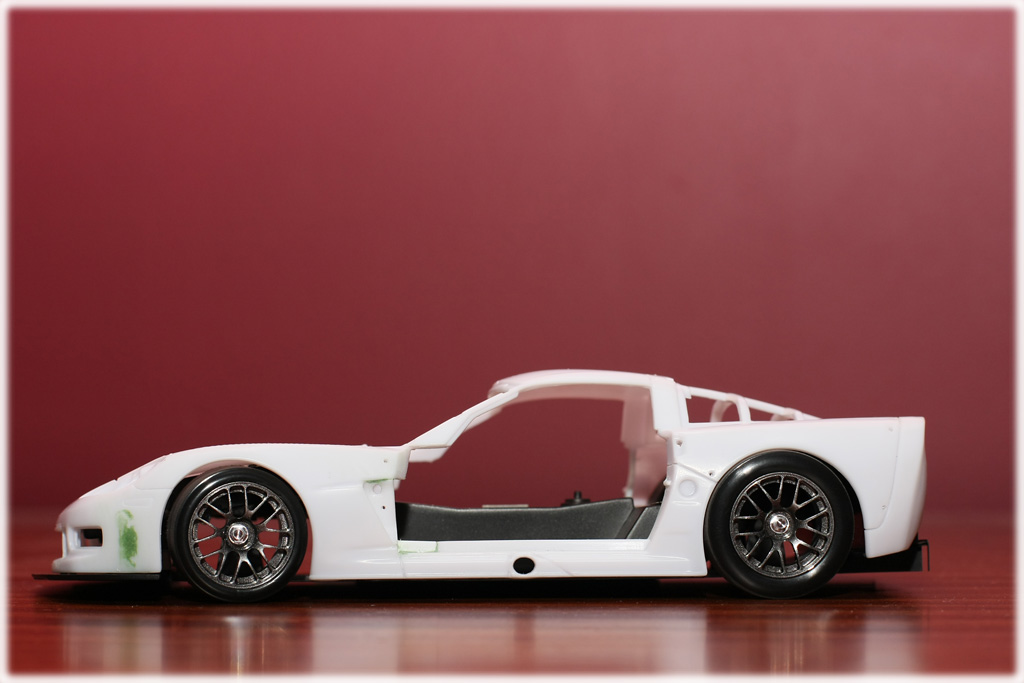 I have painted the wheels with Alclad Polish Aluminum and gave a dark smoke. Unfortunately, it came out way too dark. I wanted to have slight tint to give an aggressive look, but I might have to re-do the tone. 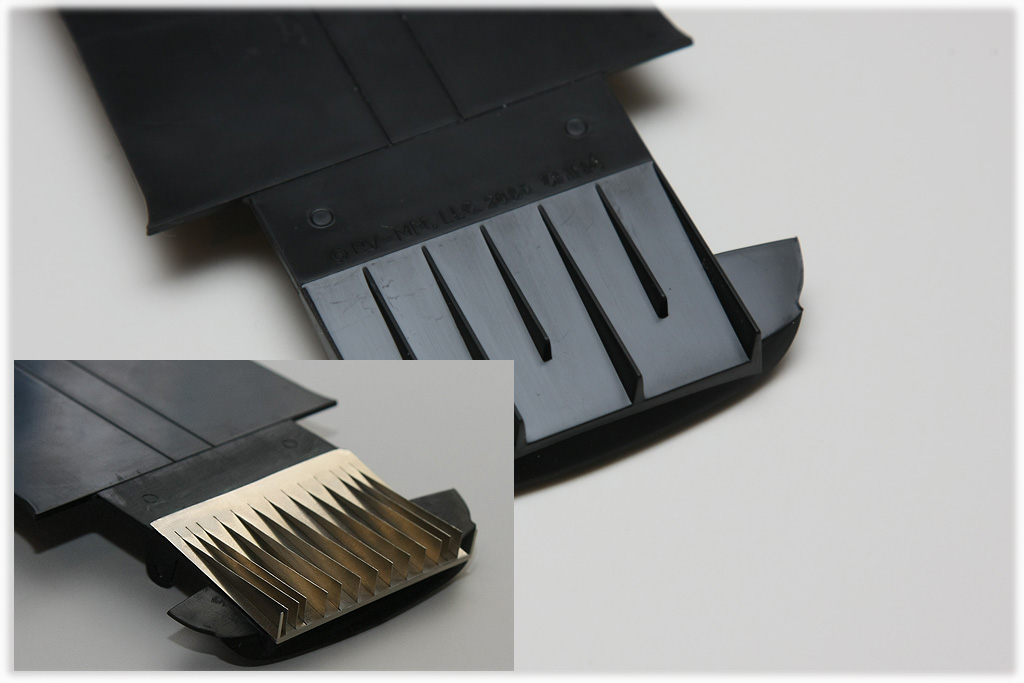 This is another cool feature of SMS kit; the diffuser adds so much realism. The instruction calls carbon fiber decals to cover the fins, but I wen with the easy route and treated with semi-gloss black. 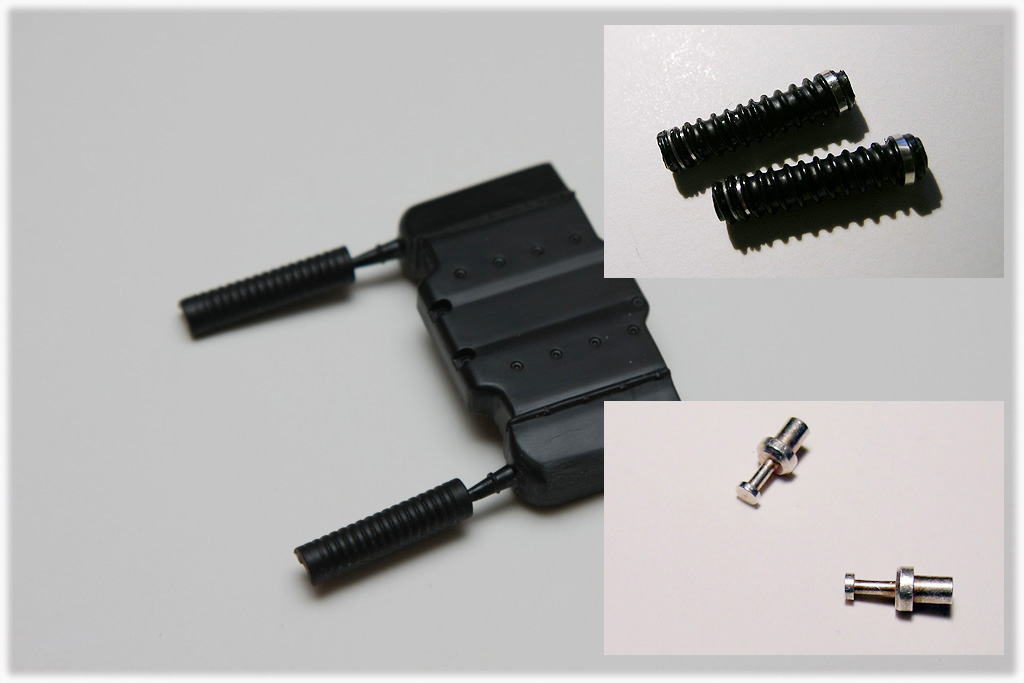 Starting the engine work- I didn't like the air intake hoses. I made my own with metal wires and gave several rubber coat. I also add tune metal parts for air inlets.
__________________
-- CifeNet 
|
|
#2
03-20-2010, 09:21 PM
|
||||
|
||||
|
Re: 1/24 Revell Corvette C6R
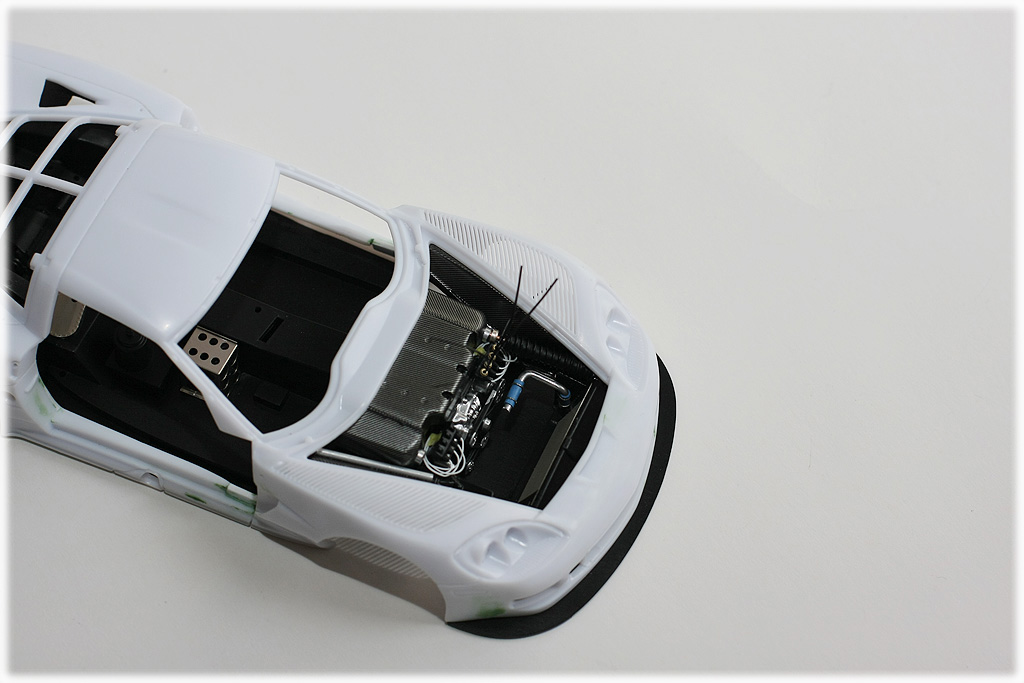 Continuing on the engine detail. Performed ignition wiring work and also gave carbon fiber treatments around the engine bay. 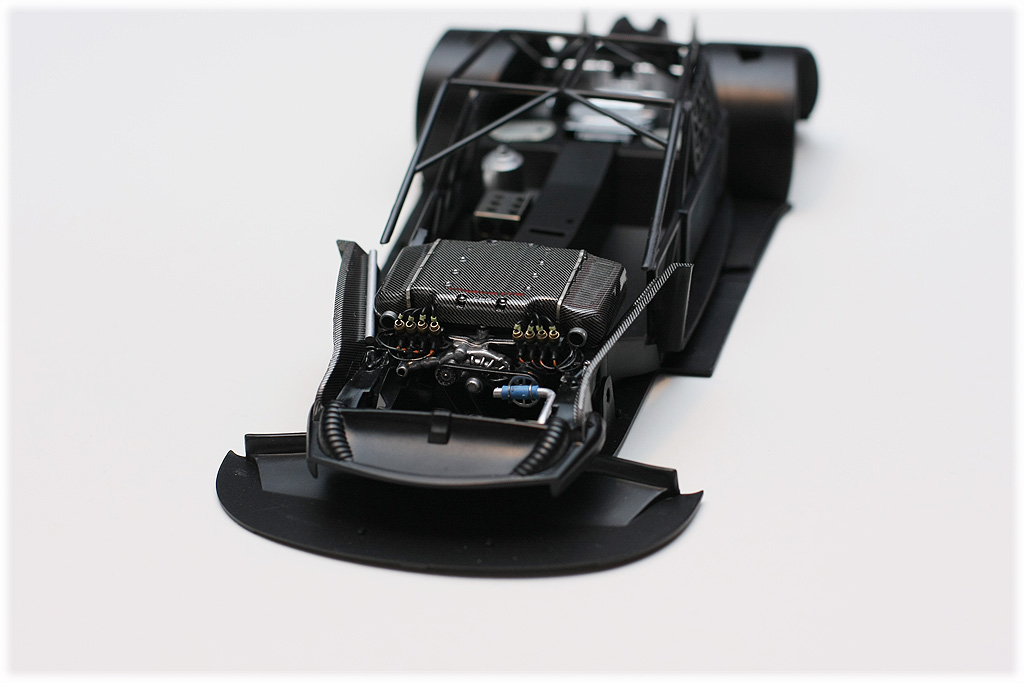 I did not use the carbon decals from the Revell kit for the engine cover, I ended up using SMS's regular 1/24 pattern decals. Then I transferred the "Corvette" and "C6r" lettering. 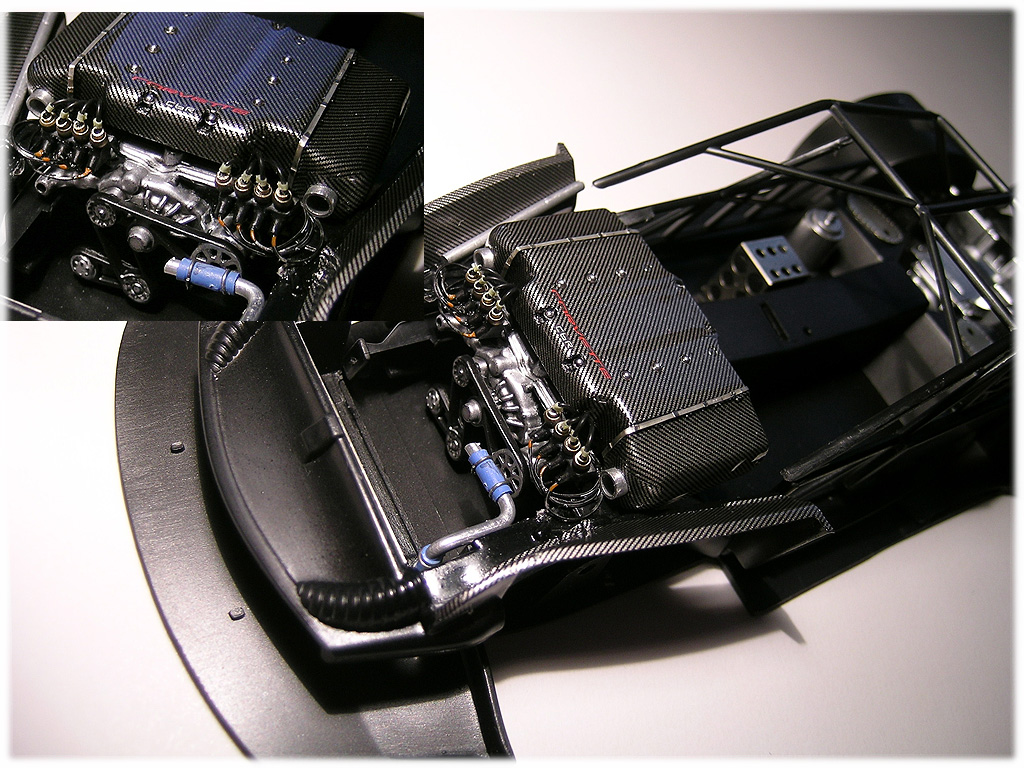 The ignition modules seem bit bigger, but I am happy that they do to fill up the engine (or lack of) details to start with.   I gave new coats for the wheels and they turn out to be better. I want the "polish" look and also want to have "dark" shine. Are they accurate to the real car? I am not sure and probably not... But I am building the way I would like to see!  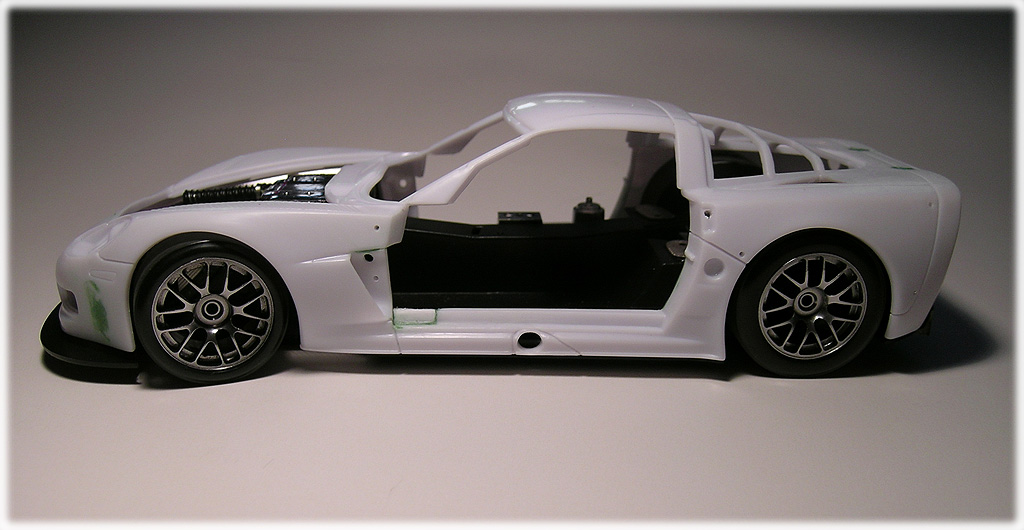 I checked the stance often as I made progress. The height seems to be okay and the track width is something that I need to increase...
__________________
-- CifeNet Last edited by CifeNet; 03-21-2010 at 01:09 AM.
|
|
#3
03-20-2010, 09:39 PM
|
||||
|
||||
|
Re: 1/24 Revell Corvette C6R
 Added radiator pipes. The heat shrink tube were used as connectors. Also added an oil(?) or steering fluid reservoir from my junk part bin. 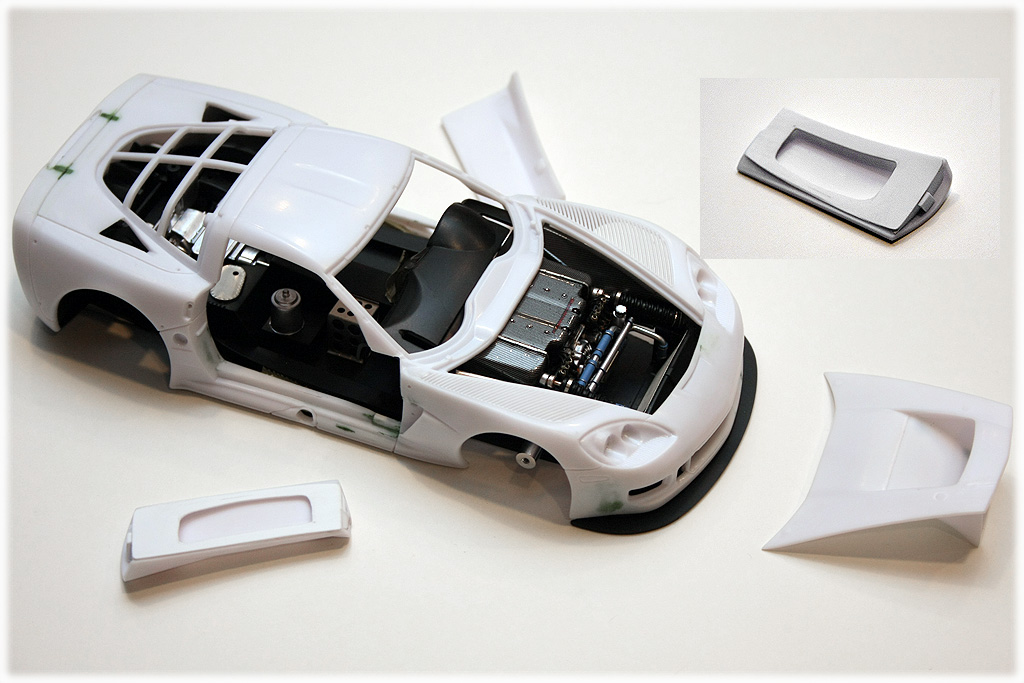 Made the inside door cover. The opening of the inside trim is actually smaller, but I preferred this way to hide the back of the door... The problem is, it actually took awhile to build one side, now I have to repeat the other side...  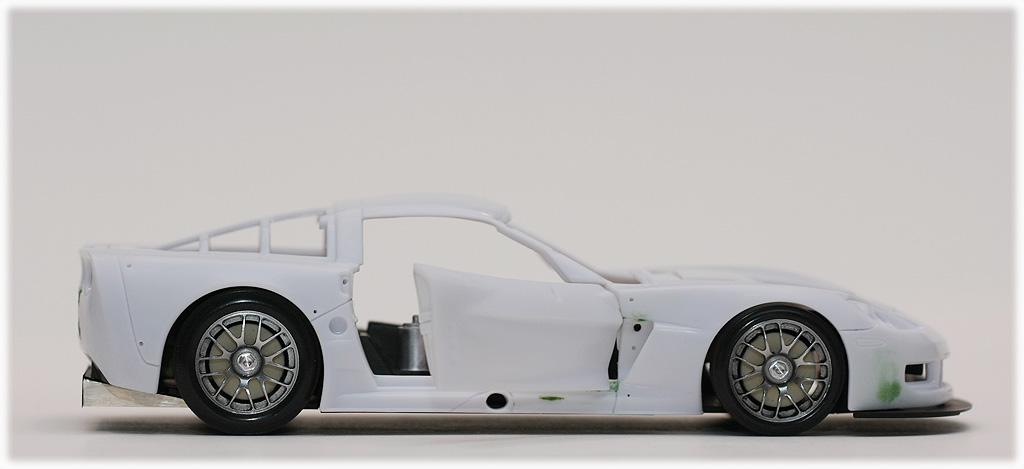 Checking the stance again. So far so good... 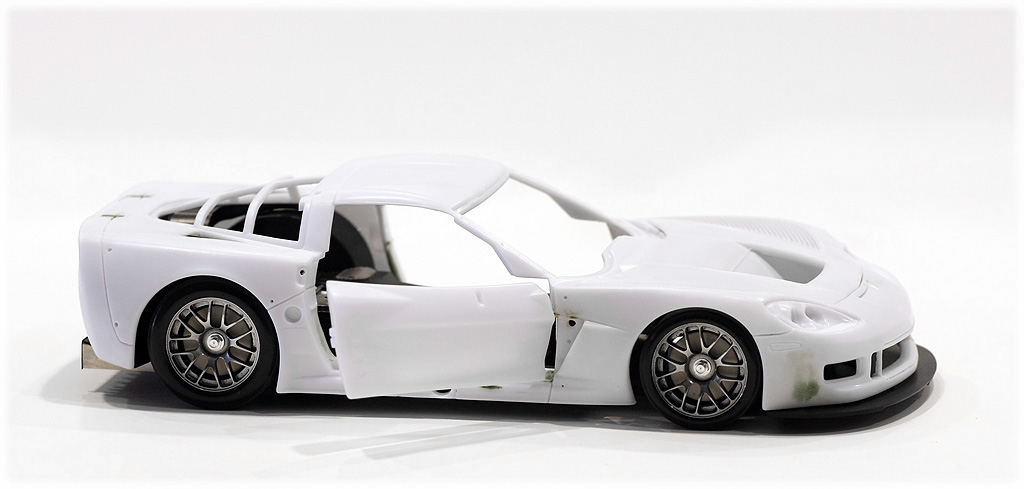 I am contemplating whether to fix the doors open, or make them to swing. Make them to open and close would be very cool, but I have experienced that models do eventually suffer from paint cheap/scuff around the door area from opening/closing and tend to receive damage more often. On the other hand, it is much easier to fix the door, but not as cool as a model with movable doors! I don't know which way I should approach just yet.
__________________
-- CifeNet
|
|
#4
03-21-2010, 12:31 AM
|
||||
|
||||
|
Re: 1/24 Revell Corvette C6R
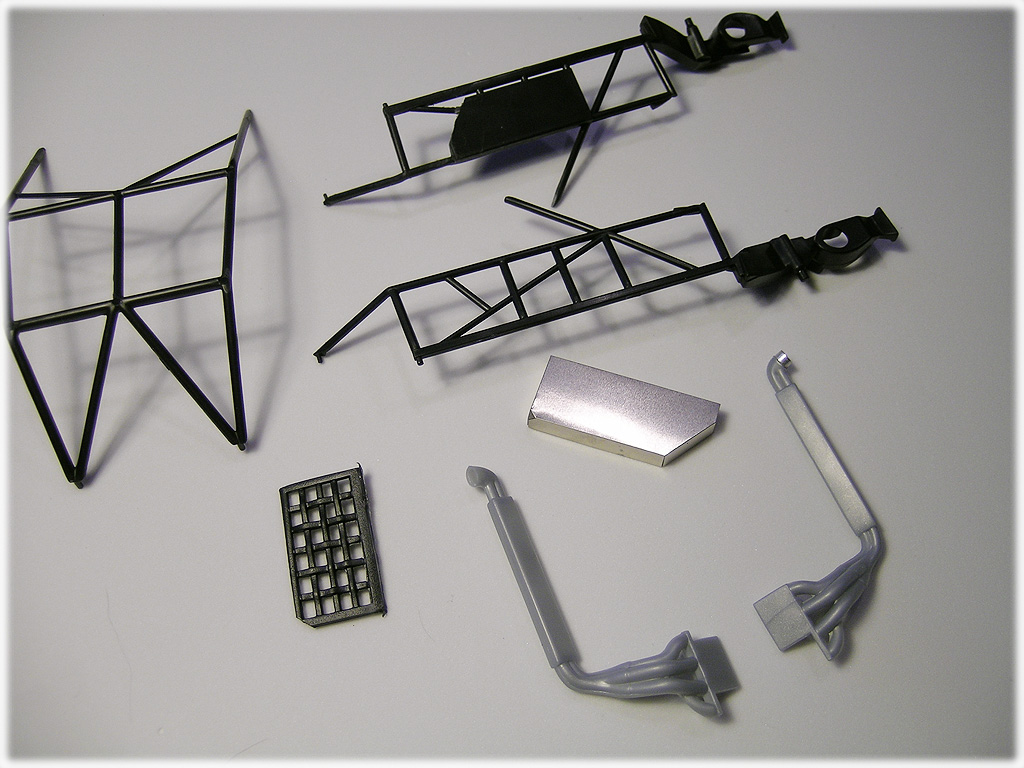 I started working on the roll cage and the parts supplied from the kit seem to be bit thinner/weaker. I thought about building my own role cage, but decided to stay the project manageable and use the parts from the kit. Also, I cut off the safety net and replace the tip of the exhaust pipe. 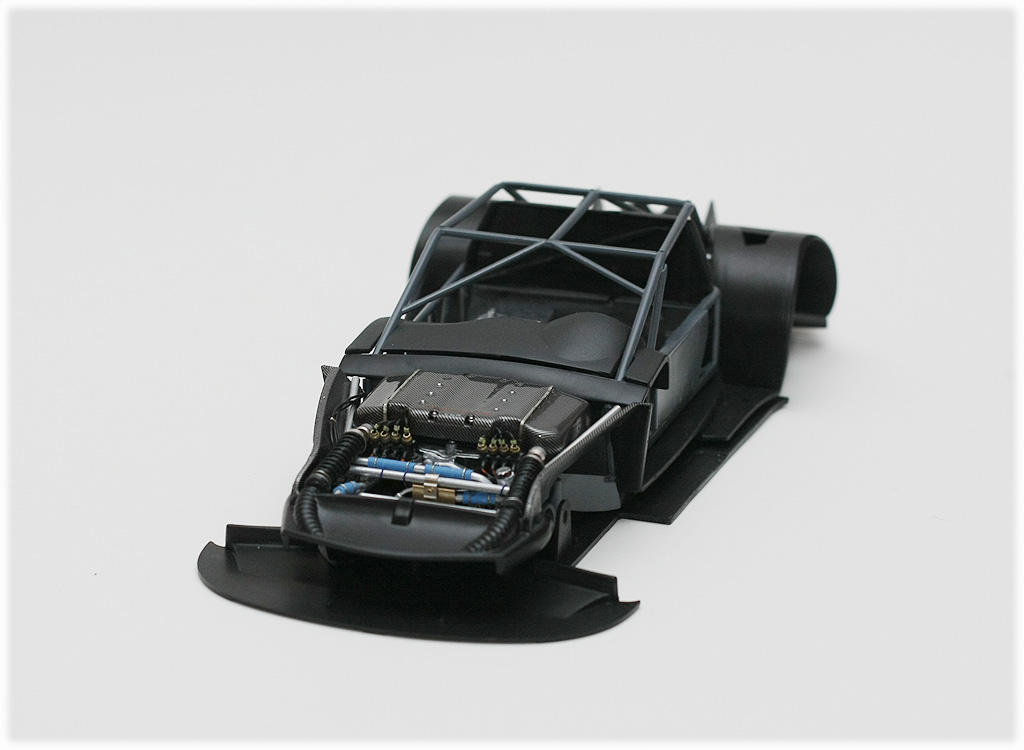  I mixed dark gray and black to paint the roll cages. Then I gave a coat of semi gloss clear to make them...well, semi glossy... 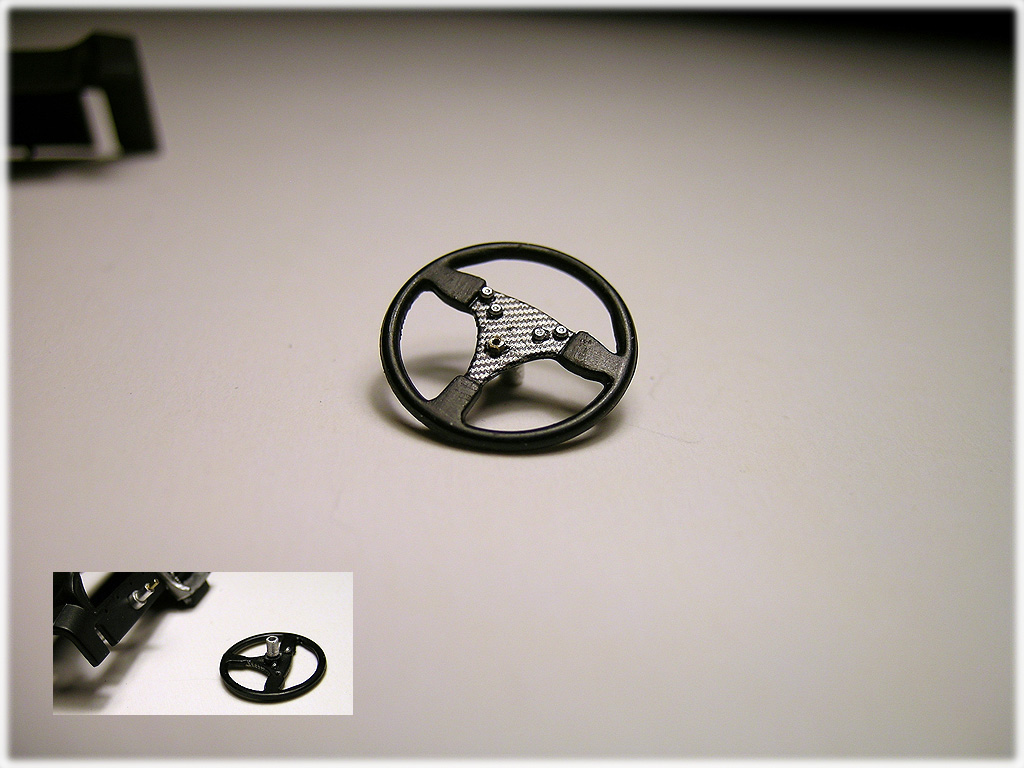 I slightly modified the steering wheel and gave simple detail bits. I think this is the level where I will stay with the project; I feel comfortable and do things quickly if I keep things at minimal.  I am toying with the idea of "how can I improve" with the roll cage... Maybe I will use different size of shrink tubes for padding materials. 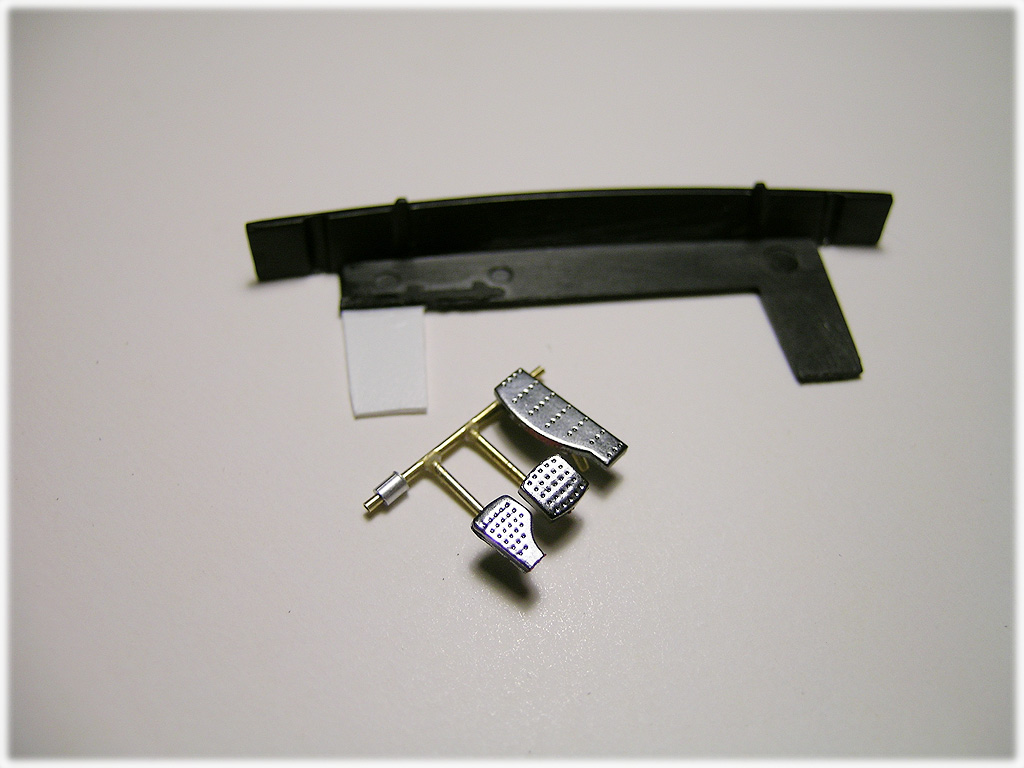 These look funny, but I took the spare parts from my junk bin to replace the stock pedals. I don't think "heel" and "toe" is possible with this setup and that my replacement parts maybe wrong, but I am not too concerned. Moving on to next steps! Go! Go! Go!  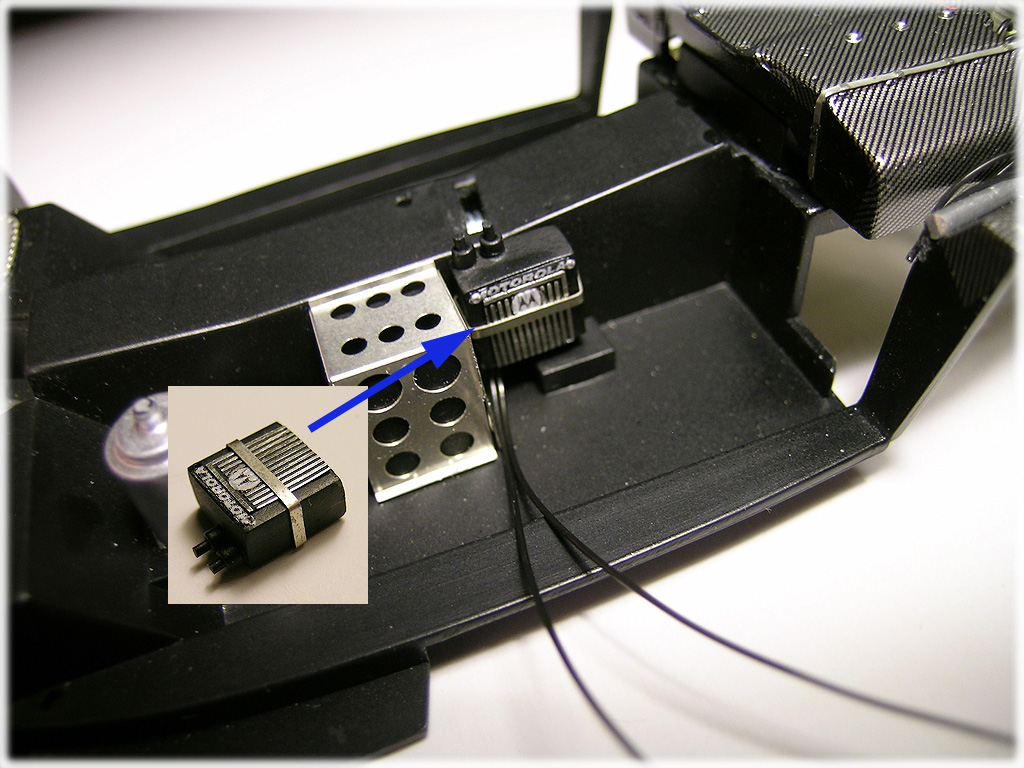 Radio unit was scratch built using various junk parts. The radio looks like it is from 1970's and can use more details, but I am moving on not to complicate things. My home made decals are almost falling apart too! 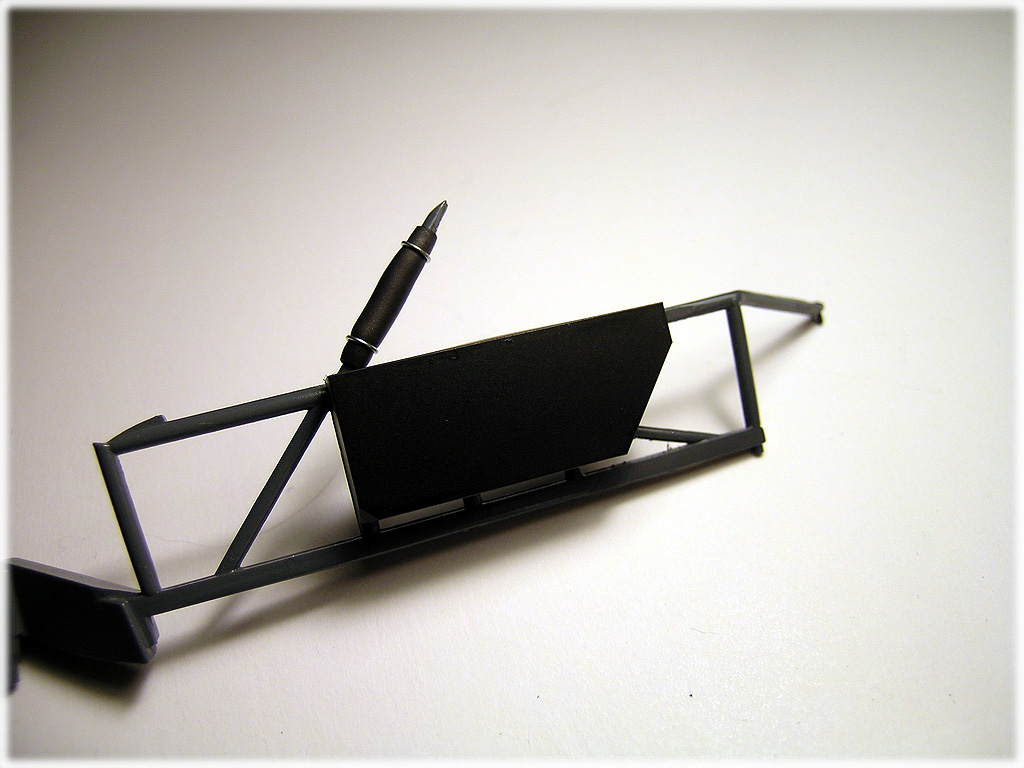 Shrink tube being used as roll cage padding.
__________________
-- CifeNet Last edited by CifeNet; 03-21-2010 at 02:07 AM.
|
|
#5
03-21-2010, 12:35 AM
|
||||
|
||||
|
Re: 1/24 Revell Corvette C6R
 Shrink tubes for the padding... 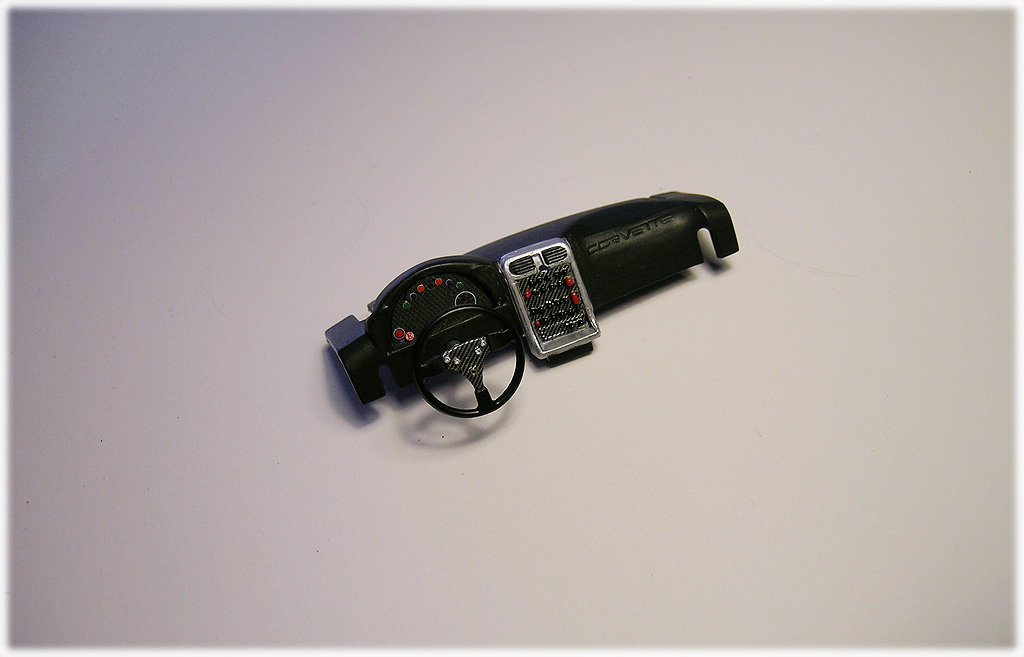 Interior. I simply brushed buttons and knobs. 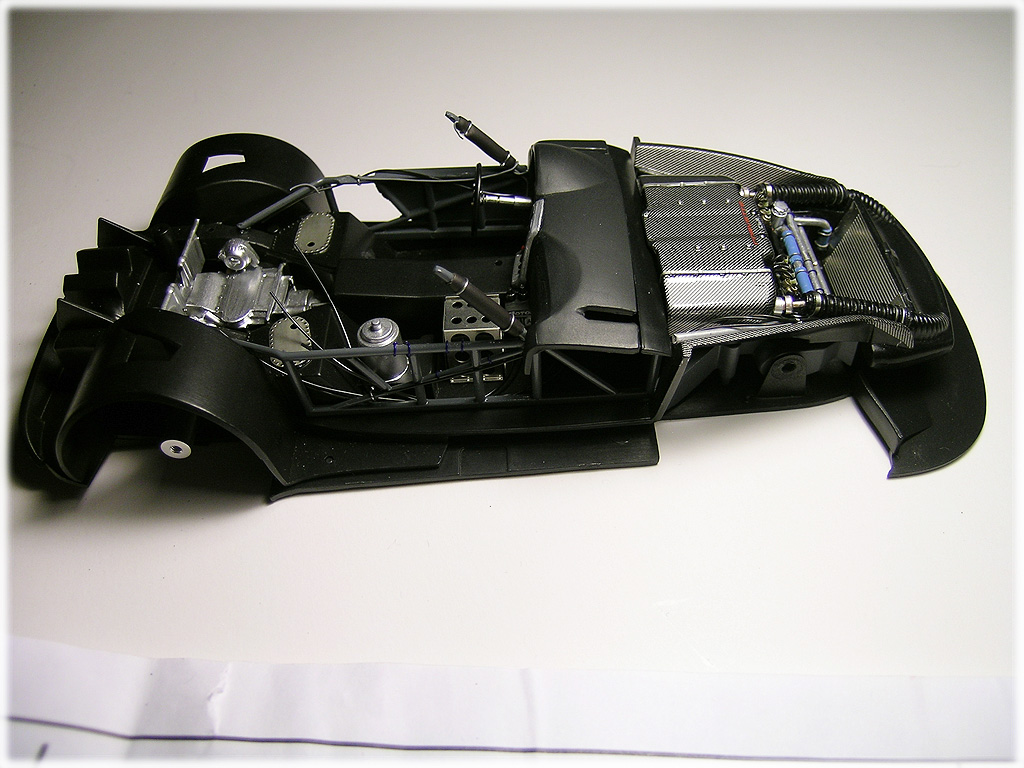 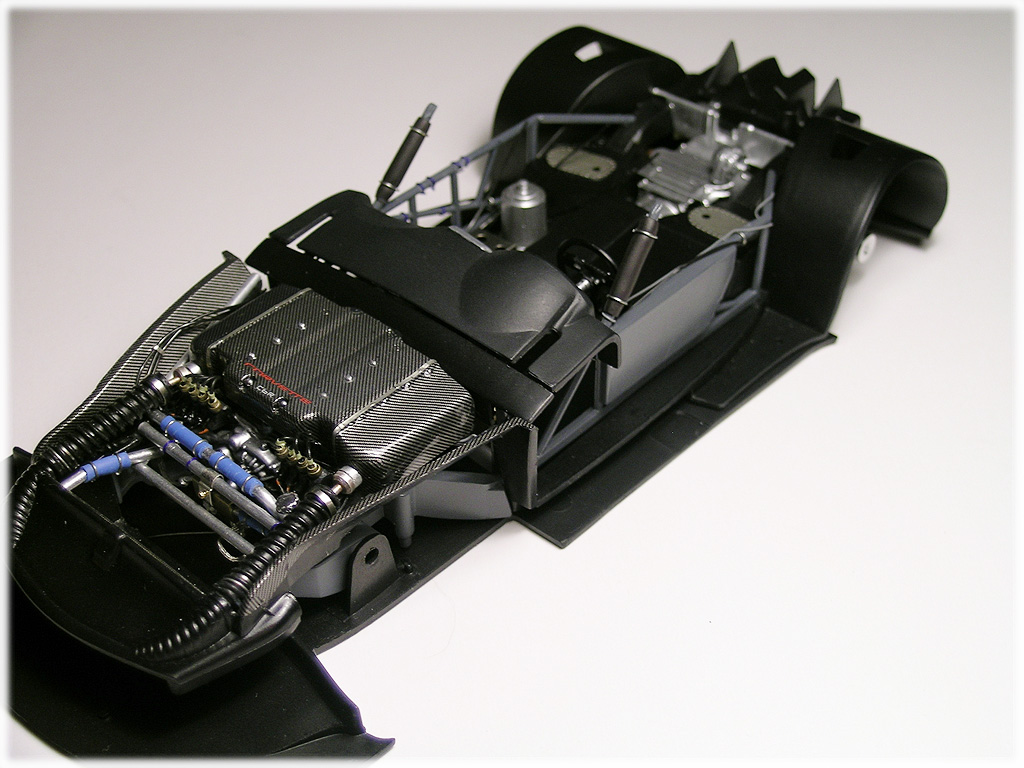 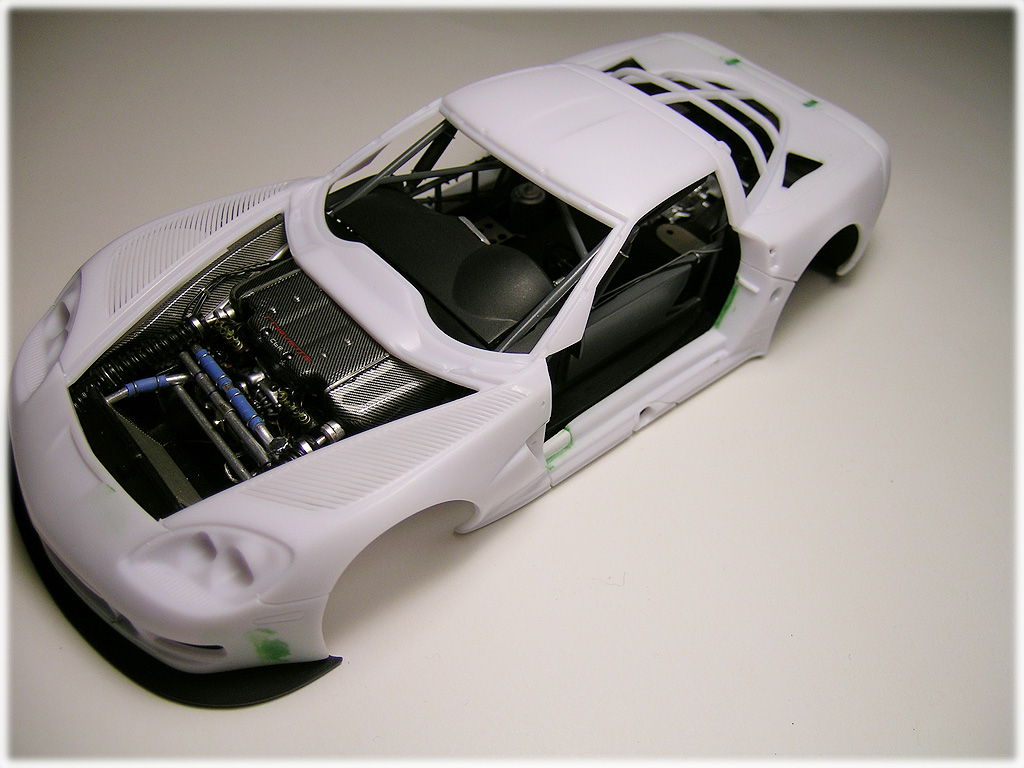 Testing fitting- no major problems to report so far. I think the kit is actually quite well engineered except for the fact that it lacks engine/interior details...
__________________
-- CifeNet
|
|
#7
03-21-2010, 01:43 AM
|
||||
|
||||
|
Re: 1/24 Revell Corvette C6R
 
__________________
   
|
|
#11
03-21-2010, 10:26 AM
|
||||
|
||||
|
Re: 1/24 Revell Corvette C6R
Indeed good to see you back building. Always enjoyed your builts/site through the years!
The car looks good already, nice add-ons! Nice to see someone adding the ignition modules/plugs aswell.
|
|
#13
03-21-2010, 01:50 PM
|
||||
|
||||
|
Re: 1/24 Revell Corvette C6R
Thank you gentlemen! Your warm feedback motivates!
I am hoping to finish this before late April! I am sure Tom knows why.  I used the Dremel tool to shave off the belt molding. The race seat shape is not correct, but I will use it, I think I can make it acceptable after putting the seat belts. 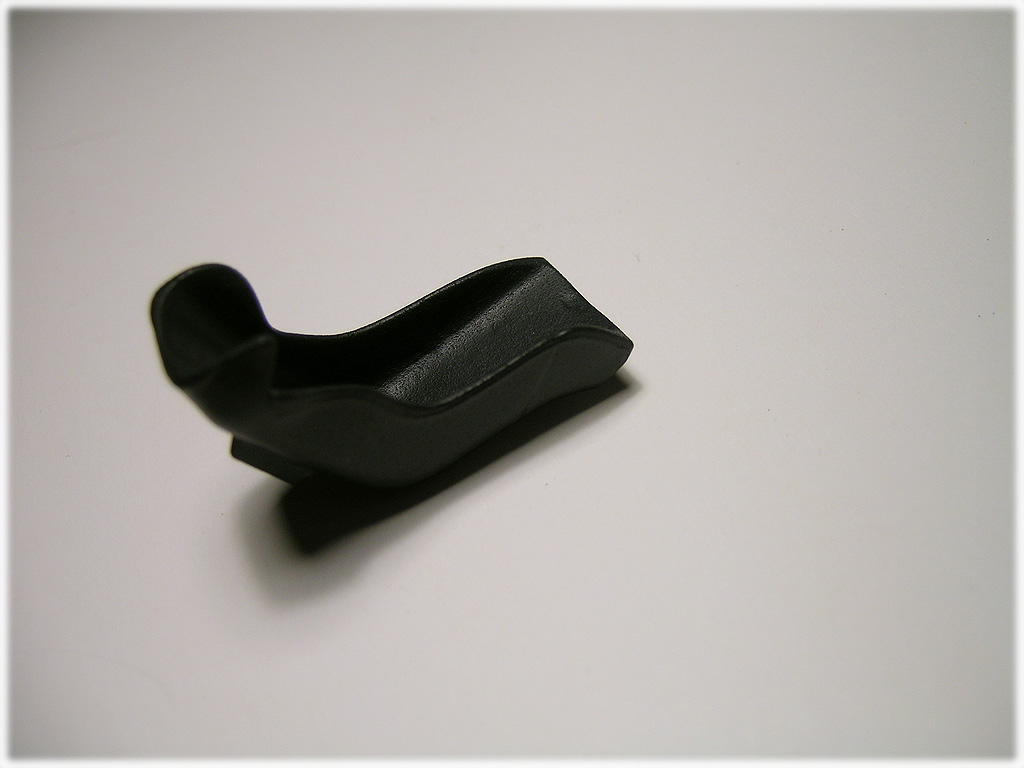 Added some rough texture and painted semi gloss black. 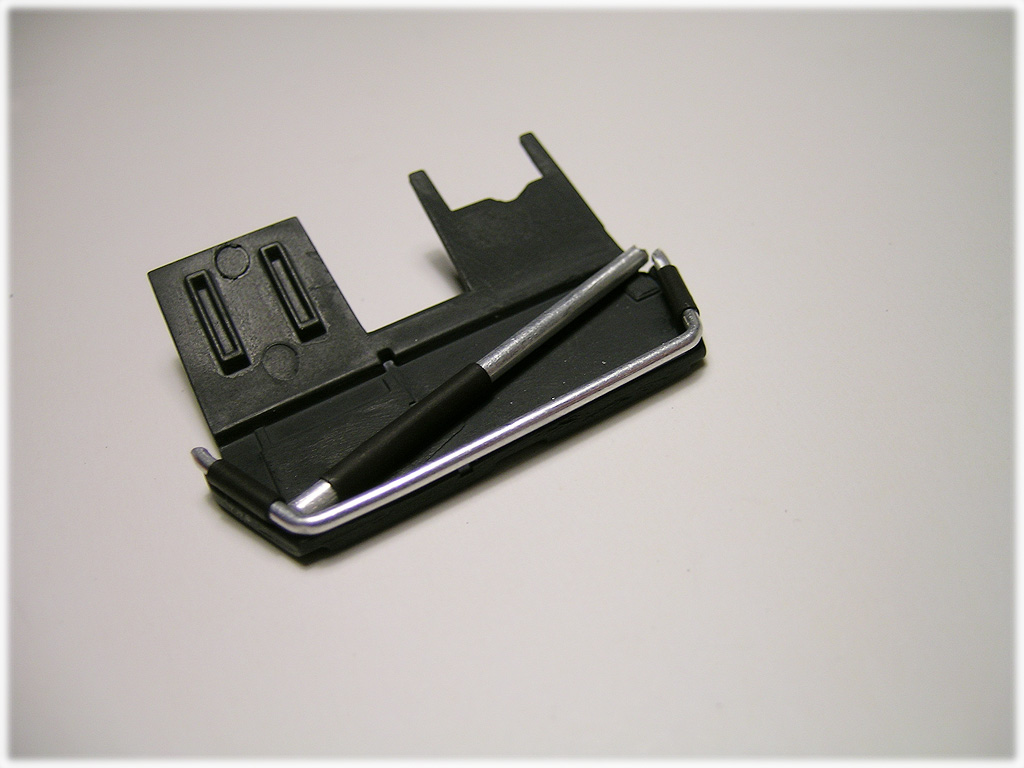 This is the only roll cage bars I made with my own, I used a thicker pipe for the support beam thinking it must be strong to support! 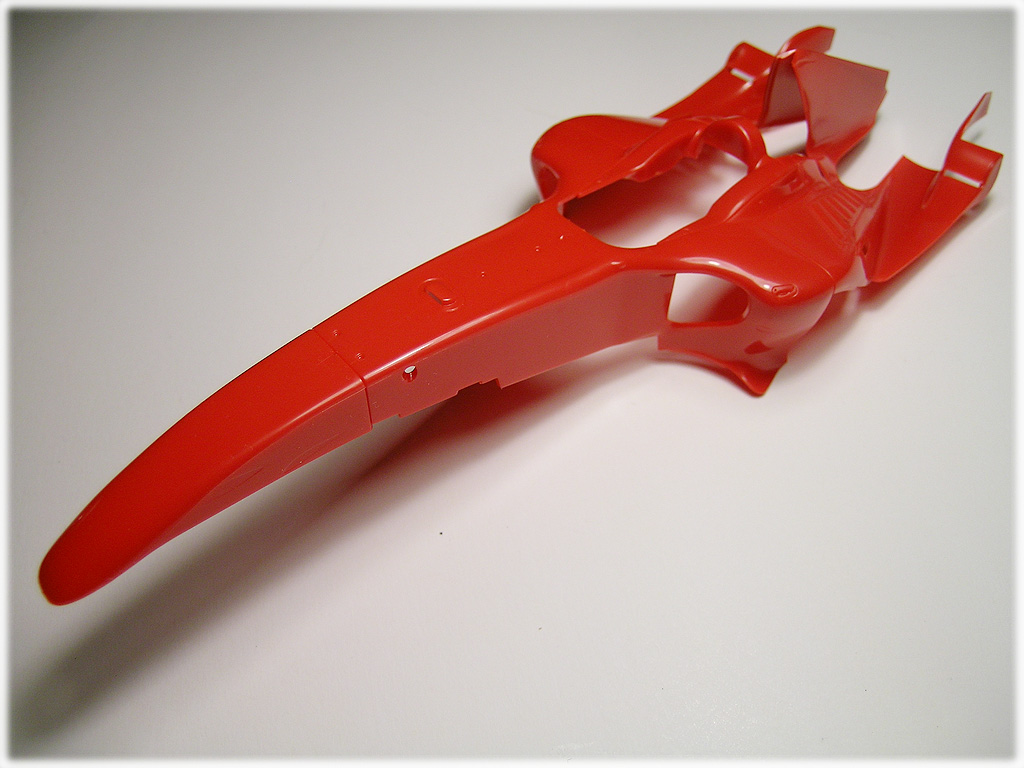 I actually started another kit while working on Corvette. This is Fujimi's 248F1. The monocoque/cowl molding is one piece! 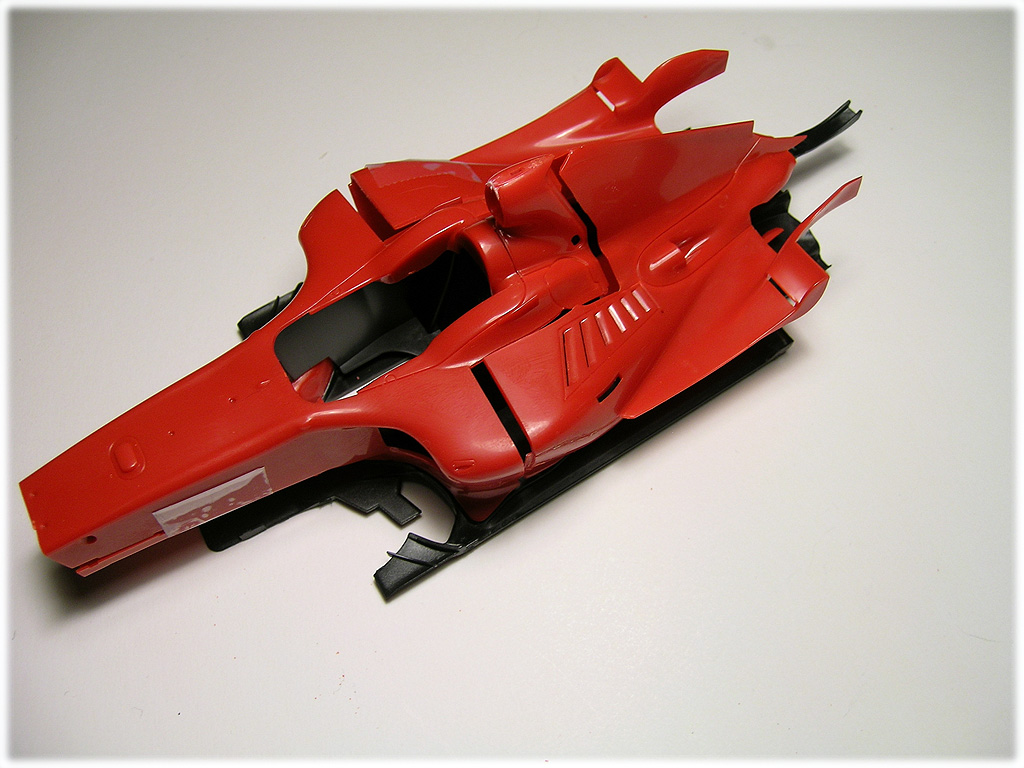 So I broke it off!  It has been awhile since I touched the F1 subject and I really really really want to make this one well. It has been awhile since I touched the F1 subject and I really really really want to make this one well.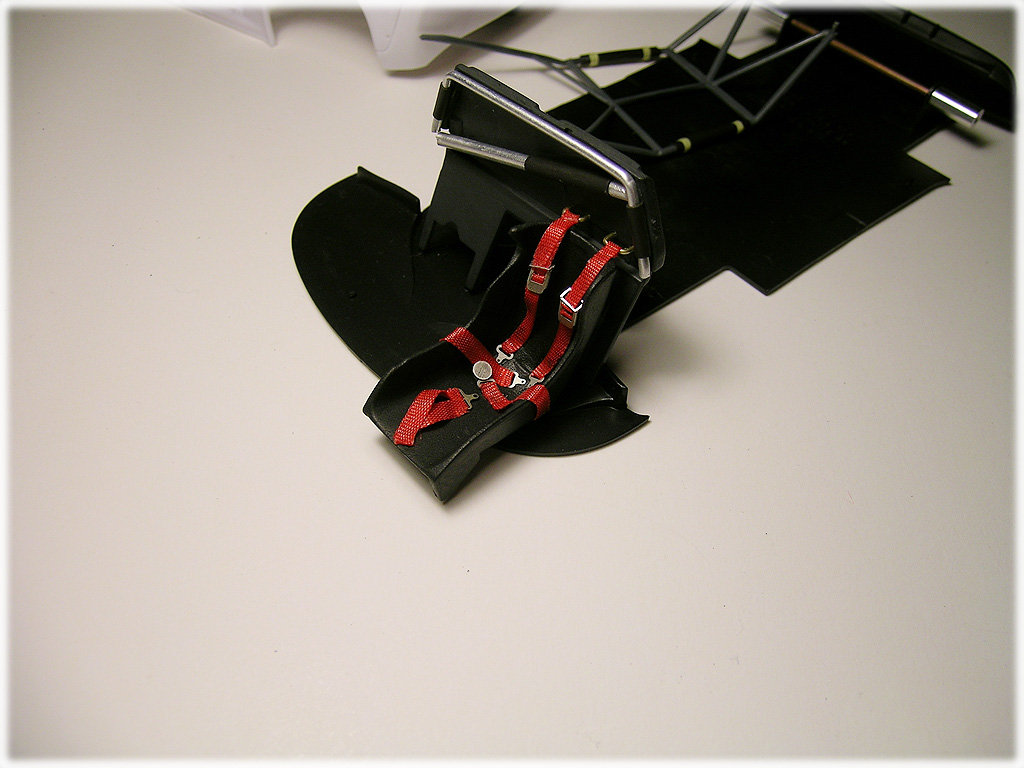 I quickly made 5 point harness and attached it to the seat. More to come...
__________________
-- CifeNet
|
|
#14
03-21-2010, 02:01 PM
|
||||
|
||||
|
Re: 1/24 Revell Corvette C6R
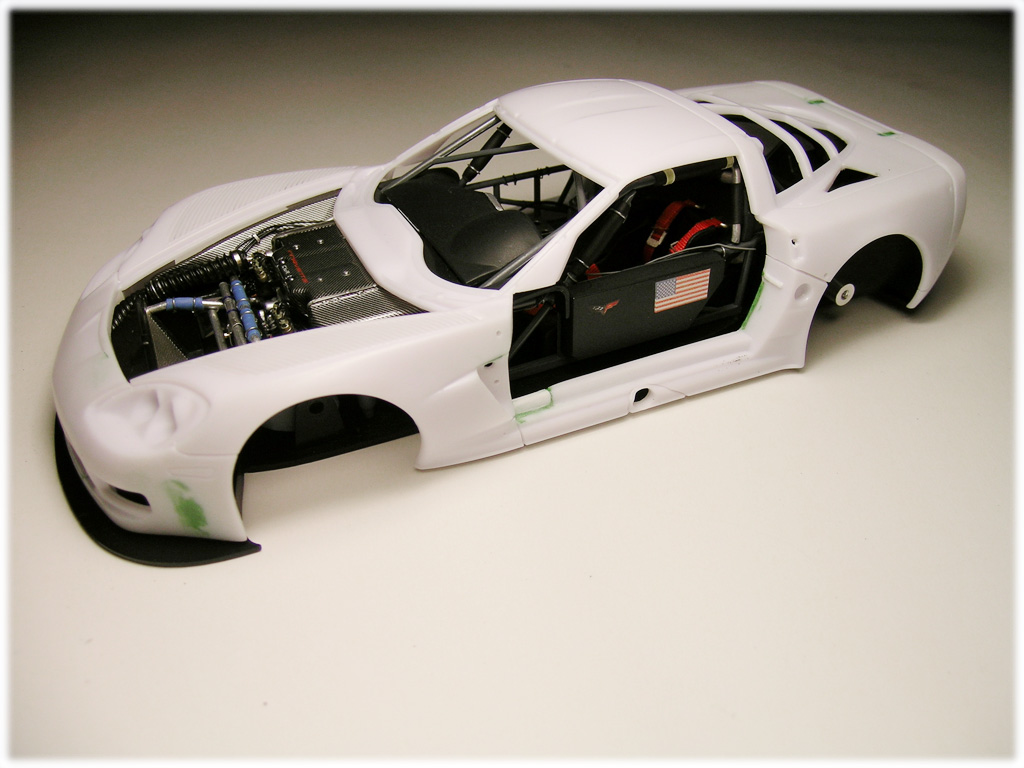 The seat is installed along with the back board. 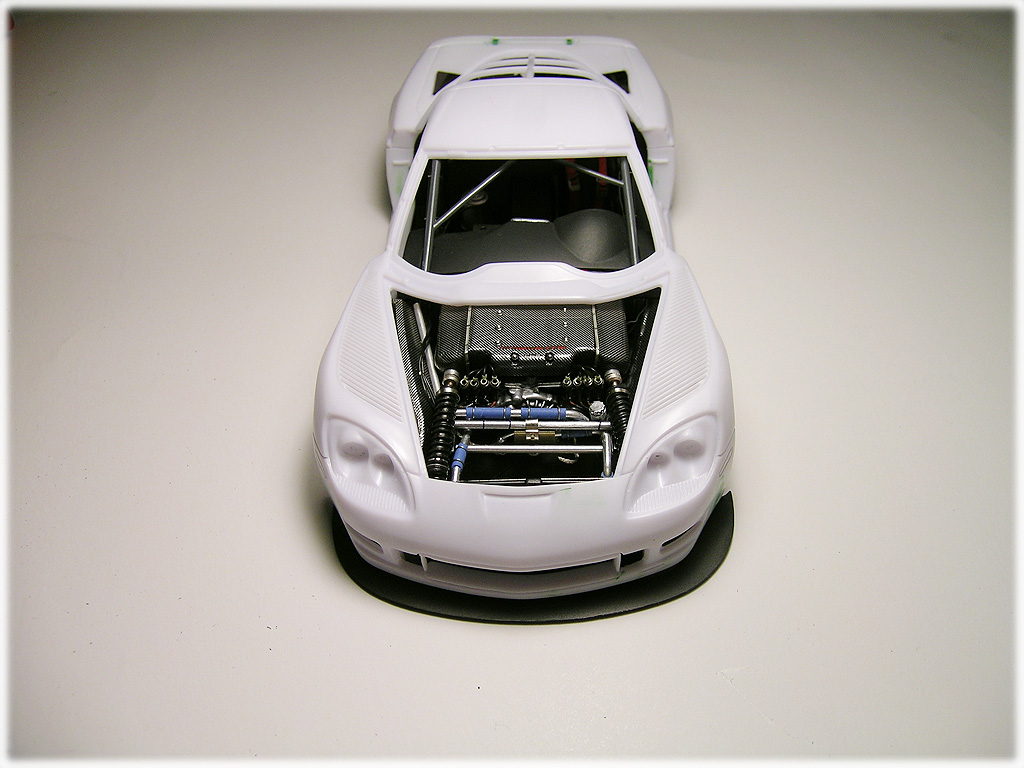 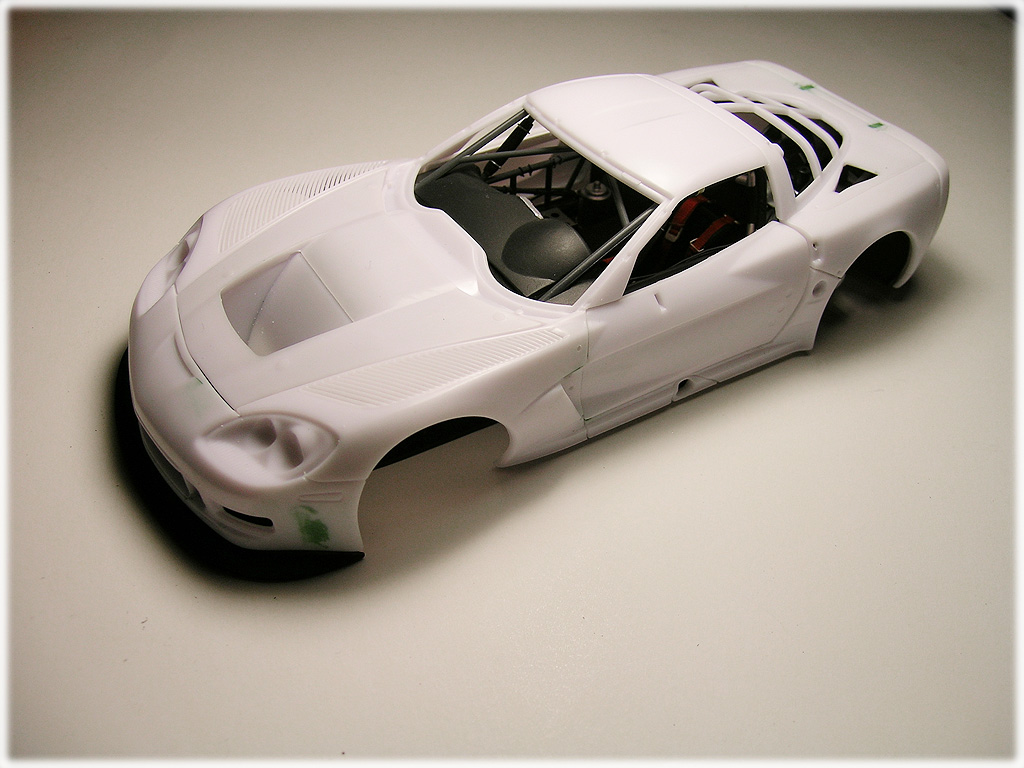 The overall fit seemed good to me and I was quite happy to see that the kit was giving no trouble. 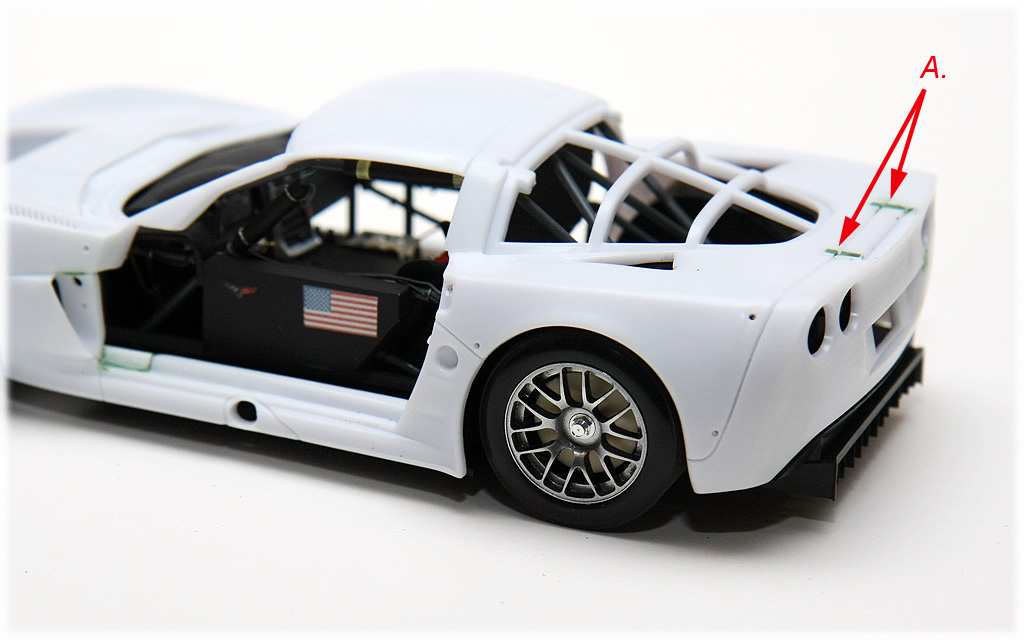 The rear wheel sits correct. I also filled the wing mounts (A) and gave wider mounts. 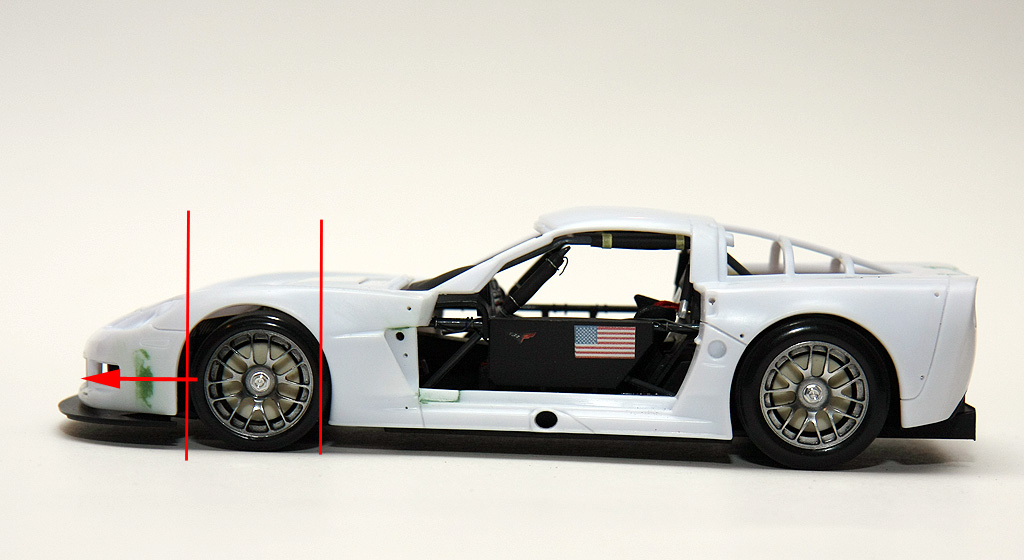 It was too early for me to conclude that everything fits. As soon as I mount the wheels/axles, the fitment problem started to emerge. The rear wheels sit narrower and the front left (driver side- I always get confused about front left/front right) sits too far back! I will try to fix the positions soon.
__________________
-- CifeNet
|
|
|
POST REPLY TO THIS THREAD |
 |
|
|


