|
|
| Search | Car Forums | Gallery | Articles | Helper | Air Dried Fresh Beef Dog Food | IgorSushko.com | Corporate |
|
|||||||
| WIP - Motorbikes Post topics for any "Works In Progress" motobikes projects in this sub-forum. |
 |
 Show Printable Version | Show Printable Version |  Subscribe to this Thread
|
|
|
Thread Tools |
|
#1
 05-06-2009, 02:19 PM
|
||||
|
||||
|
Honda NR
So it's time to build a bike again
 I found this nice kit in my pile and after searching on Google for some real pics of it, I made my decesision. It's going to be a factory stock build.  It's a very special bike, because of the racing technology from HRC. This bike has an engine that is based on the oval piston engine from 1979 which was used in the racing technology. Here's what's inside the kit:    I'll follow the instruction like Tamiya says, and also use the shown colors on the box art. Here are some pics of the real machine:  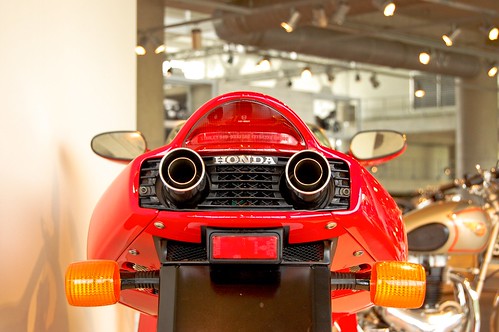  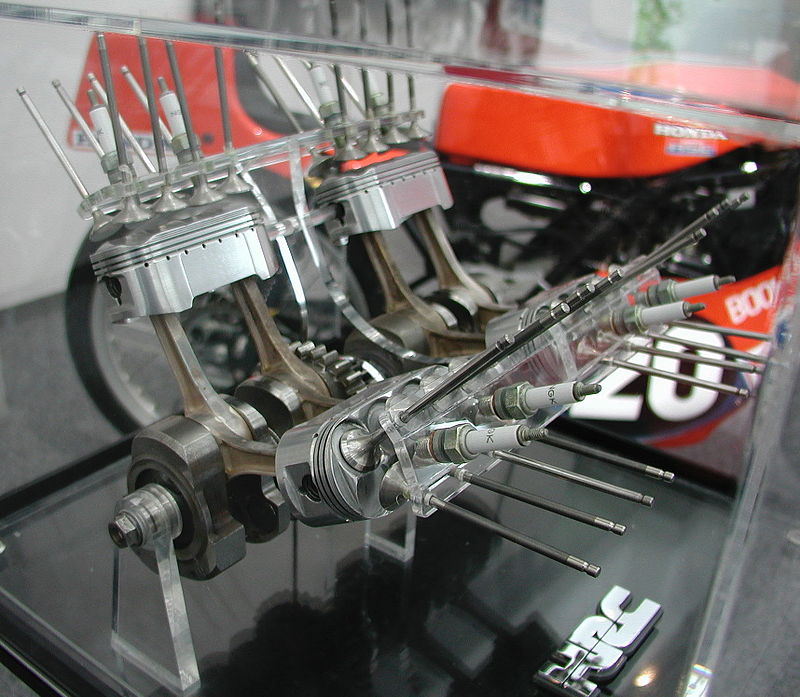 Kris.
__________________


|
|
#2
05-06-2009, 07:19 PM
|
||||
|
||||
|
Re: Honda NR
Great! thankyou for building factory, I wish to find this kit, and love to see your build.
...I would love to have the real NR over a Desmosedici anyday!
|
|
#3
05-07-2009, 11:13 AM
|
||||
|
||||
|
Re: Honda NR
Today I started on the bike.
First I painted the seat with my new spraycan from Tenco Proto. This paint is to create rough surfaces on dashboard, seats and also on engines.  I also started on the fearings. I primed them after sanding.     And also the wheels:  It's now drying from 3 layers of TS-8 Italian Red. Kris.
__________________
|
|
#4
05-07-2009, 11:24 AM
|
||||
|
||||
|
Re: Honda NR
Today I started on the bike.
First I painted the seat with my new spraycan from Tenco Proto. This paint is to create rough surfaces on dashboard, seats and also on engines. I also started on the fearings. I primed them after sanding. And also the wheels: It's now drying from 3 layers of TS-8 Italian Red. Kris.
__________________
|
|
#6
05-09-2009, 02:40 PM
|
||||
|
||||
|
Re: Honda NR
I started with the bodyparts 2 days ago. First I painted them in Italian Red, and the lower cowling was painted semi gloss black.
Than it was time to add Tamiya's carbon decals. It was a hell to add them, because the decals are a bit old and will break very easy. I used a lot of Microsol SOL and a hairdryer for them. All by all it's not bad I think. There are some spots that have some folds but this will be repaired once the clearcoat is on it. The wheels are also painted semigloss black, and the rearwheel has his decal in the center. I also sanded the tyres. Also added some BMF on the lowering cowling instead of painting it aluminium. Now it was time for a clearcoat. I used MR. Hobby Super Clear Gloss for the first time, and I liked it Now the carbon decals are clearcoated, I pressed with a soft cloth on the folts and pressed them away. It's now much better than the pictures above. I also painted the stand in semigloss black. I don't use the sidestand for the bike. I also started with the brakediscs. First I had to drill out all the holes.  I painted them in Tamiya Gold, and masked the centers with some masking tape. I cutted them out with my new OLFA circle cutter. Thanks for the tip Aggression10!  The outside was handpainted with MR. Hobby metalizer aluminium.  This paint gives you a metal look once you polish it with a cothon cloth.   I also pianted the frame in Silver Leaf, but that's for the next update Kris.
__________________
|
|
#8
05-10-2009, 05:42 AM
|
||||
|
||||
|
Re: Honda NR
Quote:
there is nothing polished yet. I clearcoated the body and 2 hours later I made these pics of it. Next week I'll polish it, so the orange peel will disapear. The decals which shows some folts, are also tight now. I pressed them away with a soft cloth, and added another layer of clear on it. Kris.
__________________
|
|
#9
05-17-2009, 10:09 AM
|
|||
|
|||
|
Re: Honda NR
Interesting project... I made it when I was 7 and I will look this thread very close.
In my opinion the red is a little bit too dark, but you are doing a great job on that kit. Keep the pictures coming! Roca. Oh I forgot to say! That paint for the seat is fabulous. I have to take one spray like these
|
|
#10
06-05-2009, 11:47 AM
|
||||
|
||||
|
Re: Honda NR
Finally I have the bodyparts polished and made some pics of it.
The carbondecals are very smooth now, and also very shiny so you won't see anything of faults anymore.        I also painted the rearlink TS-30 instead of semigloss black.  I painted the engine with a mix of black, grey metallic and silver. The upscripts are bmf'ed before painting, so I only had to remove the paint for a nice chrome upscript.   Kris.
__________________
|
|
#12
06-13-2009, 05:48 AM
|
||||
|
||||
|
Re: Honda NR
I have a big update for you guys.
First I added the wiring and tubing on the engine. Than I could place the engine into the framework. First I painted this frame with TS-30 Silver Leaf.     The discbrakes could be placed on the frontwheel also.   The rearlink was again painted and the chain and chainprotector also. So I only had to assemble it.   The exhausts were first painted Silver Leaf. Than I used Tamiya's wheateringset to make the heatstains on them. After that I clearcoated the exhausts.   The radiator was also painted Silver Leaf. After that I sprayed it with TS-70 Smoke for some dept. After this was dry I painted the sides of the radiator with flat aluminium.  The cockpit was also started. I had used a lot of MicroScale SOL to add the decals but it looks oke now.  The steeringsystem was also painted, and also the details on the handlebars.  The frontfork was painted Silver Leaf also. The upper part was painted Titanium Silver and the cilinder has some BMF on it. The brake calipers are painted metallic grey.  The rearlink could be placed on the frame now.       The underseat of the bike was also painted red. Than I masked it of to paint some Semigloss Black on it. After this was dry I was able to add the indicatorlights and numberplate etc. I also painted the honda logo by hand with a tiny brush.   The sidemirrors are painted and BMF was added  The upperbody part was also finished now. The seat was added, the fuelcap was painted and placed and also some mesh behind the intakes was placed.      The frontfearing was also finished. I added the ligths in them and also the mesh.  The cockpit was added on the frame. The same for the radiator.    The upperbodypart was added on the body for a dryfit.    Now with the frontfearing for a dryfit.  And a dryfit with the rear wheel.     This is how it stands right now.  Kris.
__________________
|
|
#15
06-16-2009, 08:54 AM
|
||||
|
||||
|
Re: Honda NR
So it was time to do some more work about this bike.
First I assembled the frontfork. The frontwheel is placed and also the mudguard.  The fearings are also placed. I used no glue but only the screws from the kit.    The upperfearing was also assembled with these screws.      The rearwheel was installed. Tamiya used a very nice nuts for placing the wheel.   The footsteps are also placed.   Glued the sidemirrors on the frontfearing.  And than it was ready...  It's now ready so I made a photoshoot and you can see it in the completed forum. Thanks for watching. Kris.
__________________
|
|
|
POST REPLY TO THIS THREAD |
 |
|
|


