|
|
| Search | Car Forums | Gallery | Articles | Helper | Air Dried Fresh Beef Dog Food | IgorSushko.com | Corporate |
|
|||||||
| WIP - Motorsports Post topics for any "Work In Process" motorsports vehicles in this sub-forum. |
 |
 Show Printable Version | Show Printable Version |  Subscribe to this Thread
|
|
|
Thread Tools |
|
#1
 02-19-2009, 10:20 AM
|
|||
|
|||
|
Tamiya 1/20 Ferrari 312 T3 - Progress
Just made a start on my Ferrari 312T3, first thing I wanted to do was to de-chrome the chrome parts..mmm
Anyway I tried on a spare spruce to check this would work, and bugger me it does, and very quick as well, no plastic melting or anything like that. Nice thing is the product I used was £1.25 cheap oven cleaner. This picture is before, nice and shiney!!! 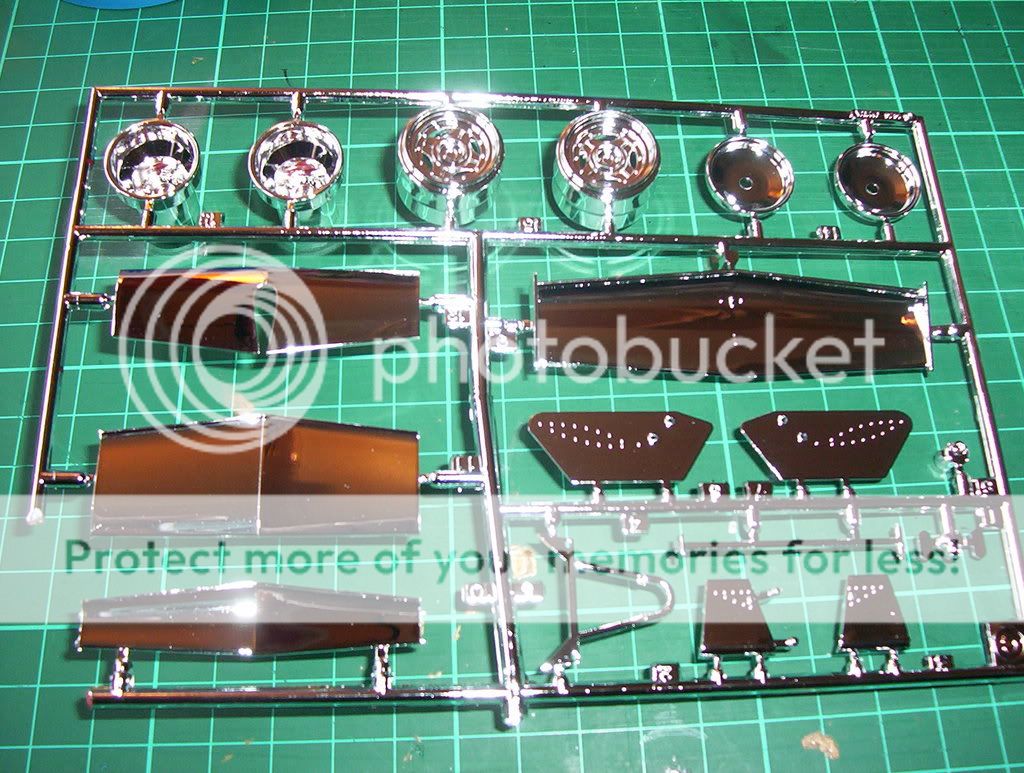 ...and this is the culprite, CHEAP oven cleaner.... 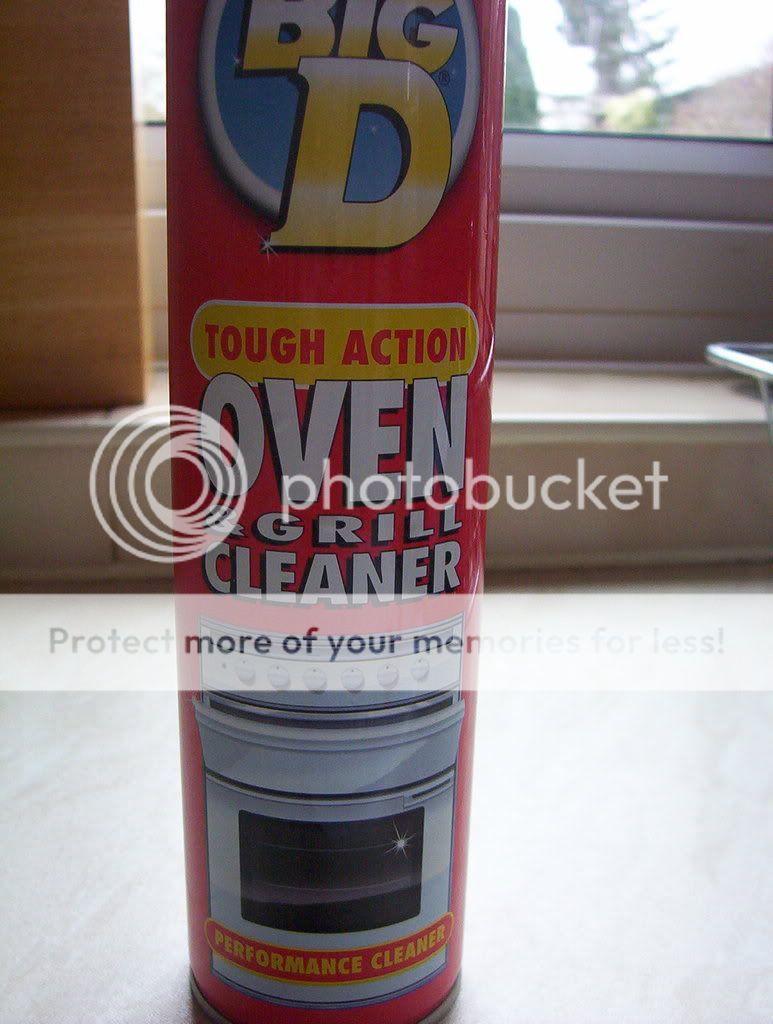 ...the pot I put parts in to soak for a few minutes... 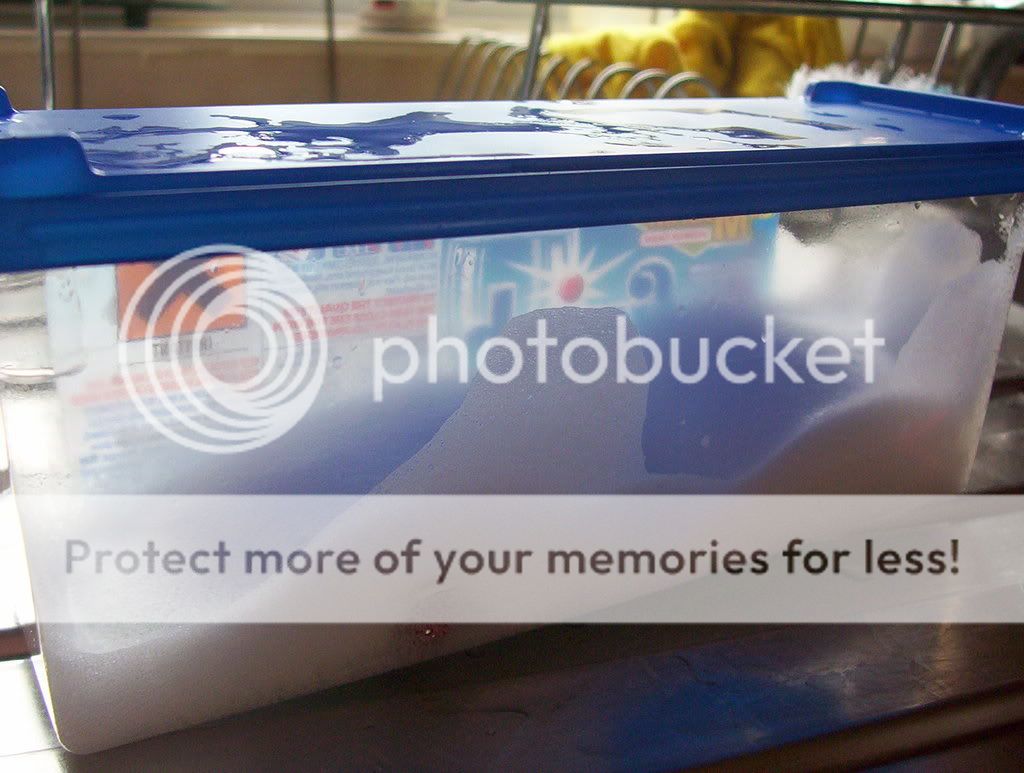 ..and this is the finaly result, pretty good I though, now some time to clean 'em 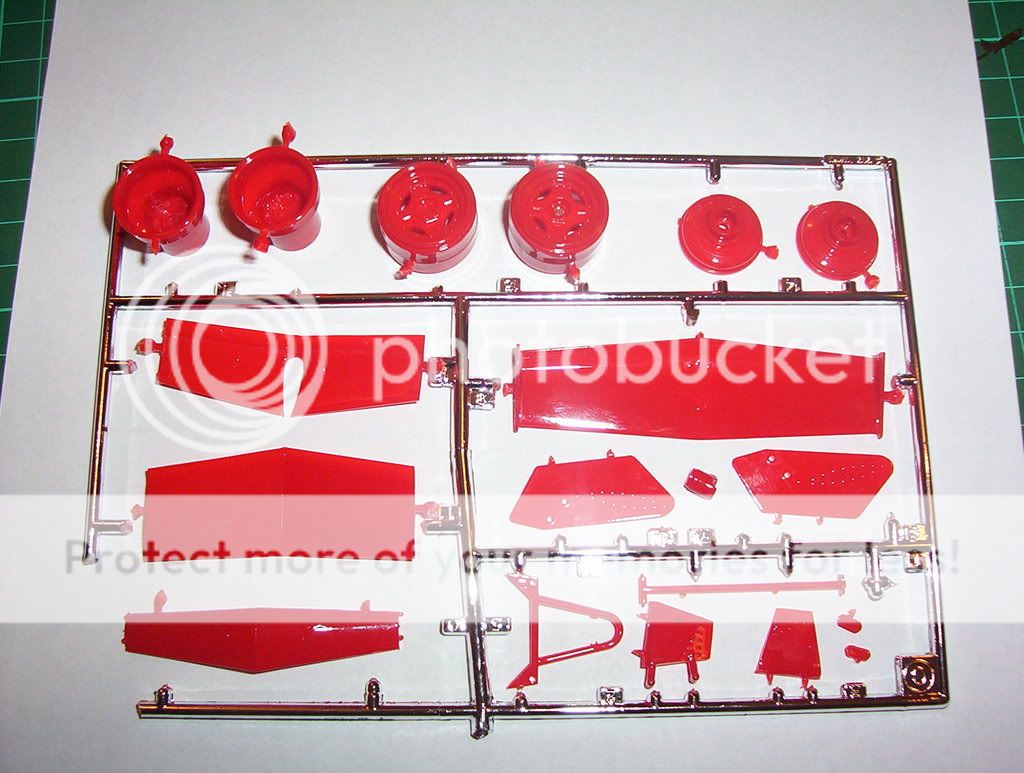 Cheers Colin Last edited by zeptrader; 02-19-2009 at 12:45 PM. 
|
|
#2
02-21-2009, 04:29 AM
|
||||
|
||||
|
Re: Tamiya 1/20 Ferrari 312 T3 - Progress
Hi Colin,
Great start; that chrome just had to go. Make sure ALL the chemicals have been washed off those parts before you get the primer on. Also, I found the de-chromed parts in this kit to be more brittle that the others, so take care not to break long thin roll bar support (C4). Now is the time to remove the front wing endplates (if you have PE replacements). Kind regards, Bill
__________________
On the workbench: Completed WIPs: Completed Models Gallery:
|
|
#3
02-21-2009, 06:29 AM
|
|||
|
|||
|
Re: Tamiya 1/20 Ferrari 312 T3 - Progress
Thanks Billypee
Ok, I want to asks some questions - 1.The front wing end plates on some picture on both the number 11 and 12 cars are red, any ideas? 2. The Clear cowl model from tamiya has Aluminum stickers/foil for the aluminum monocoque, has anyone done this version and what are the advantages/disadvantages of this method. 3. I dont think the decal sheet in the model I have are very good, the white in decals are turning yellow (common it seems in these older models), I am thinking of either buying the clear cowl model and use the cartograf decals, or buy indycals sheet but with the red pin strips, which means I would need to paint the white and red on the body, or the other option is to use what I have but again paint the are where the white decals will go which then would lessen the red coming through. suggestions? 4. as seen in this picture from indycals web site the front cowling is removed from the main body, has anyone done this and how awkward would this be.  I dont think I will be getting the PE parts, due to cost, so my idea would be to sand down the front wing end plates a little, for the rear wing end plates I thought to replicate this using some litho plate I have, shape and mark out any rivets ect. A question regarding colour of the rear and front wings, I assume they were aluminum? same material as the monocoque, although in some pictures the wings seemed a lot more brighter in colour, rather a silver than darker aluminuim? do I make sense? What tyres were used during this period? Any comments or suggestions are welcome. Cheers Colin
|
|
#4
02-21-2009, 07:51 AM
|
||||
|
||||
|
Re: Tamiya 1/20 Ferrari 312 T3 - Progress
Just looked on F1 Facts and the endplates were red on Jody's car in Brazil and Gilles' in Canada.
If you are not using PE, then make life easier for yourself and leave the endplates standard. If you decide to make your own, why not use a sheet of thin metal and use the kits pieces as templates (the parts are flat which makes this easier). Removing the nose section will be relatively straight forward. You will probably end up removing the sidepods from the chassis anyway to make painting easier. I struggled to reattach the sidepods properly because I hacked away at the parts and did not refill the material I had removed. Good luck, Bill
__________________
On the workbench: Completed WIPs: Completed Models Gallery: Last edited by billypee; 02-22-2009 at 07:47 AM.
|
|
#5
02-21-2009, 07:57 AM
|
|||
|
|||
|
Re: Tamiya 1/20 Ferrari 312 T3 - Progress
ah, I see so as I'm doing Reutermann's car then leave as it is, sorted, that got that one outta the way. As for the end plates I think the litho plates I have are perfect.
cheers for that info Billypee Colin
|
|
#6
02-25-2009, 04:06 PM
|
|||
|
|||
|
Re: Tamiya 1/20 Ferrari 312 T3 - Progress
here is the latest update....
I decided to make as near as possible a lifelike apperance of aluminium effect with rivets, I really didnt know how to go about the rivets until it hit me..doh! I'm a printer by trade, I use very thin aluminuium plates, they are very thin, very durable, and best of all if you turn them over , mark 'em off where you want rivets, turn 'em back over...sorted.. 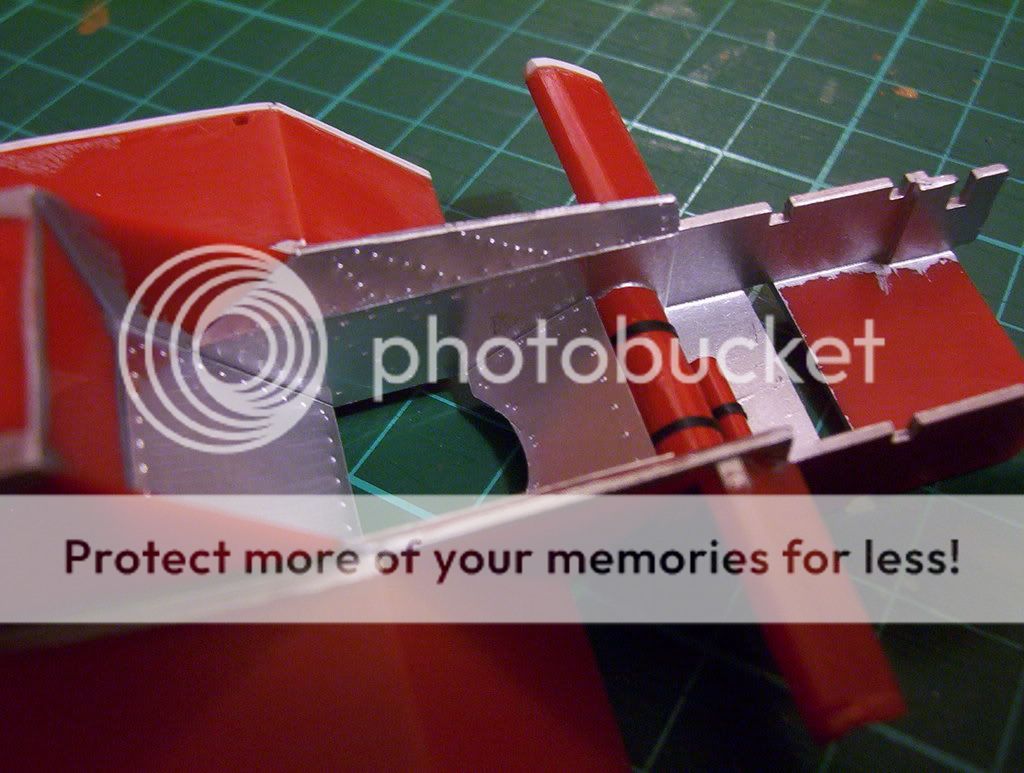 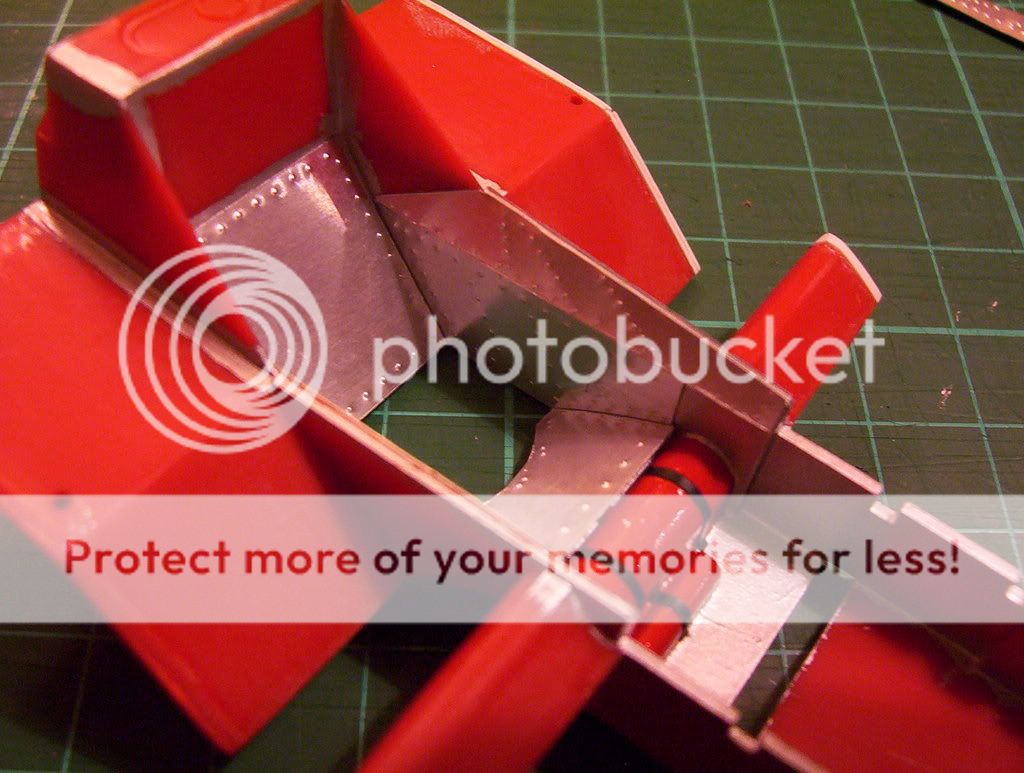 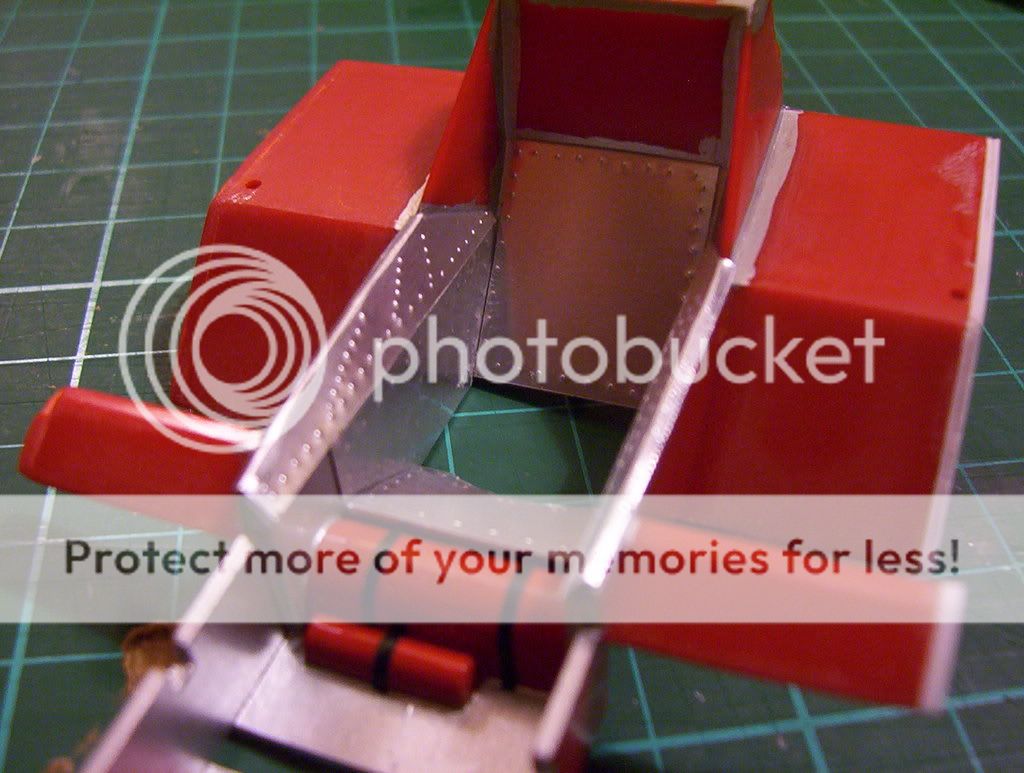 I think this is gonna work, I'll make it work. cheers, comments please  Colin
|
|
#8
03-01-2009, 10:21 AM
|
||||
|
||||
|
Re: Tamiya 1/20 Ferrari 312 T3 - Progress
Nice work Colin, the riveting technique looks spot on.
I see you have removed the outside edge of the sidepods and you appear to have avoided my mistake of not replacing the material that gets lost in that process. You might consider filling those locator holes for the top cowling as they aren't really necessary as the cowling will fit snugly enough without them? Just a thought. Bill
__________________
On the workbench: Completed WIPs: Completed Models Gallery:
|
|
#9
03-01-2009, 02:17 PM
|
|||
|
|||
|
Re: Tamiya 1/20 Ferrari 312 T3 - Progress
Thanks for your comments
I did struggle removing those side pods and found one side lost more than the others, just a case of a little measuring and all was sorted. This is the progress so far, this takes some time, but I think the result speaks for itself. 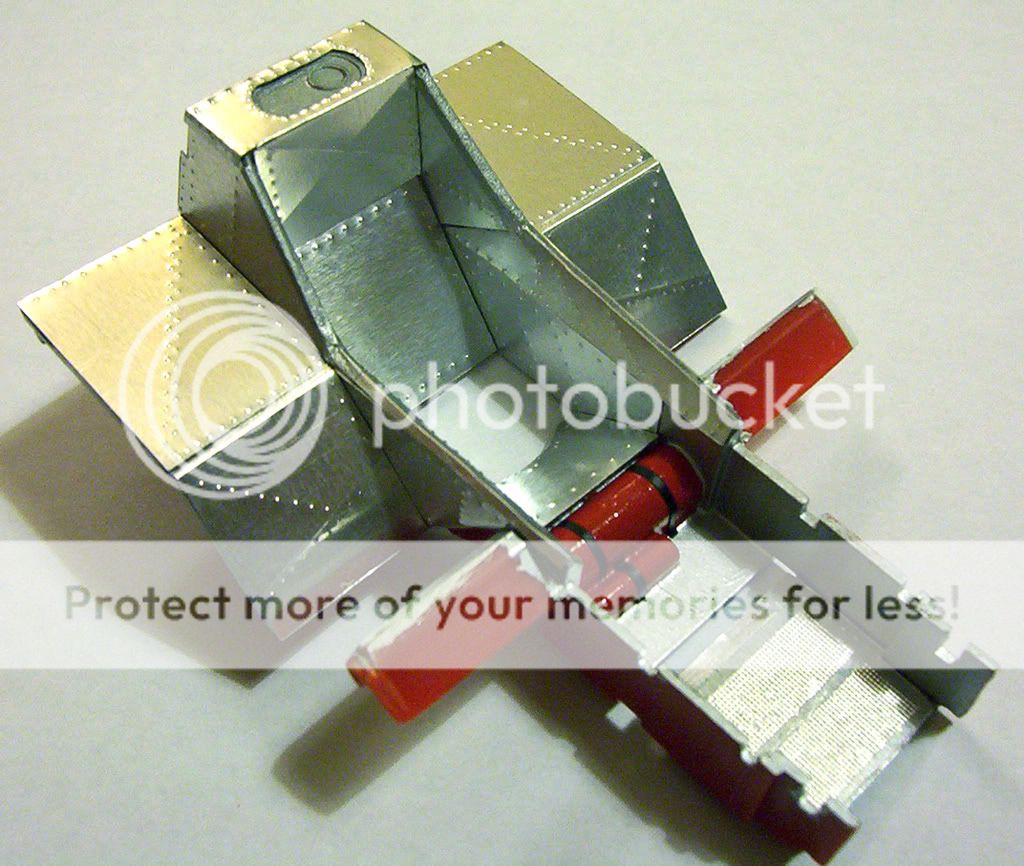 I cant speak much for the camera, but its all I got, the picture really shows up some imperfections, all the rivet locations are from some excellent ref pics sent to me by Joachim. Oh and the different texture where the foot pedals will be are from my cigs packet, the inside foil has just the right texture i was looking for. Cheers Colin
|
|
#10
03-02-2009, 11:09 AM
|
||||
|
||||
|
Re: Tamiya 1/20 Ferrari 312 T3 - Progress
I recently started on this kit so I'll be following this one closely. Nice use of the aluminium sheet, no better simulation than using the real thing!
Tom
|
|
#13
03-09-2009, 02:12 AM
|
|||
|
|||
|
Re: Tamiya 1/20 Ferrari 312 T3 - Progress
Could anyone give me some advice or suggestions reagrding making seat belts, I have just got hold of the Acu-Stion 1/20 set?
They have the material (ribbon like material), do I need to prepeare the P/E parts?  Cheers in advance Colin
|
|
|
POST REPLY TO THIS THREAD |
 |
|
|


