|
|
| Search | Car Forums | Gallery | Articles | Helper | Air Dried Fresh Beef Dog Food | IgorSushko.com | Corporate |
|
#1
 07-30-2008, 08:36 AM
|
||||
|
||||
|
Front Corner Light Repair - How To
I noticed the passenger side corner light was loose, rattley.
So i popped the black plastic top piece (exposed when you open hood, above the light). One large bolt holds the unit in place. I used a small ratchet to get it off (metric nut). Turned out that someone had previously repaired the plastic light casing. It has a plastic extruded bracket with a metal clip that the bolt screws into. This piece had snapped off (perhaps when someone dinged it in a parkinglot). SOmeone else had previously repaired it by hotglue-ing it back on, and then adding a small L-shaped sheetmetal strapping and pop-riveting that in place to help hold the broken piece back on. The glue had torn away, and all that was preventing the light from sailing into a ditch on the highway was the small 3/8" x 1" strapping, (and one pop rivet). But I liked the principle of the metal replacement. So I stripped out the old hotglue, drilled out the poprivet, and removed the strapping. The two pieces still fit together, (the piece that holds the metal retaining bolt clip, and the rest of the box). I cut out a larger piece of sheetmetal, about 1.5" by 2" and bent it in an L shape, and drilled one large hole for the bolt to pass through. The piece covers the bolt hole (and clip) then folds down the side of the lamp bracket (the light is all one piece). I drilled 3 holes on the side ( 1/8" for 3 more popriviets), spaced out so that the plastic was not weakened too much. Popriveted this plate in place. Now what happens is the metal clip is pressed against the metal plate, between the body and the lamp. The metal clip holds the plate, and the plate is pop riveted on the side of the light. Its mechanically solid and a lot stronger than both the repair, and probably the original design. I may make a plate for the other side, just to prevent a similar break there. 
|
|
#2
09-14-2008, 06:18 PM
|
||||
|
||||
|
Re: Front Corner Light Repair - How To
Update with pictures
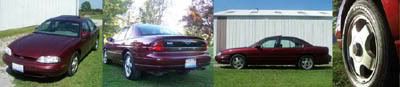
Over 40 people viewed this thread, so I thought I'd better update it with photos while I had the camera out and was replacing a turn-light. My lovely assistant is holding the corner piece, which (for all its size) only holds a single small signal light for warning oncoming drivers.  This piece is held on by a hook at one end and a bolt into its backside through the front frame at the other end. The part is susceptable to getting broken, because of location, and mine on the passenger side had been broken loose previously and was inadequately repaired (it rattled loosely).  Here is a closeup of the (unbroken) back-piece, which has a metal clip that slides over the plastic support and provides something for the bolt to screw into.  Here is a look at my repair-job on the passenger-side unit:  The plastic top-plate had broken off near the bolt. This plastic piece was kept, to hold the metal clip that the bolt actually screws into (it has a kind of simple thread that matches the bolt). But to secure the broken piece, I decided to cover it with a piece of galvanized sheetmetal I had lying around. This arrangement is virtually unbreakable, but required a bit of fiddling with tin snips, and a hammer and pliers to shape the piece.  Here you can see why I made two simple cuts and left the metal sticking out. The other parts are wrapped around the original plastic piece, and the natural slot created keeps the metal clip securely in its place. The left and right units provide a handy "before and after" shot:  This method of repairing the unit makes the best use of the broken parts, and the strongest repair, as well as the easiest. Even epoxy glue is not a reliable alternative in a situation like this. You don't want a piece like this bouncing down the road at 60 mph because the glue failed.  in hindsight, I could have made this even stronger by using an extended piece of sheetmetal, and placing the rivets further away from the original break. If the other one is ever knocked out in the parking lot, I will make a larger bracket this time.
|
|
#3
09-14-2008, 08:00 PM
|
||||
|
||||
|
Re: Front Corner Light Repair - How To
nice write-up. If someone doesn't want to go to that trouble, I have a set of those lights I'd like to get out of my room! PM me if interested
__________________
 This ain't your grandma's car!!
|
|
 |
POST REPLY TO THIS THREAD |
 |
|
|


