|
|
| Search | Car Forums | Gallery | Articles | Helper | Air Dried Fresh Beef Dog Food | IgorSushko.com | Corporate |
|
|||||||
| WIP - Motorsports Post topics for any "Work In Process" motorsports vehicles in this sub-forum. |
 |
 Show Printable Version | Show Printable Version |  Subscribe to this Thread
|
|
|
Thread Tools |
|
#1
 01-27-2008, 01:57 PM
|
|||
|
|||
|
"Gold Leaf" Lotus 72 Jochen Rindt 1970 Tameo WCT 1:43
Hi everybody
As I mentioned in my McLaren thread I didnt get back to it after finishing the little Porsche 911GT1. After that little trouble- and laboursome bugger I wanted to do a quick one in between. My choice fell to the Tameo WCT Lotus 72 in Gold Leaf colours. I had bought this kit some time ago from Macs Modeling ( great guy, great service ) and was itching to work on it. All the parts looked great and theres not a lot of reference for this early version of the 72 around, so I thought I might do it more or less box stock. Well .that plan didnt survive the first hour. Seems I just cant do box stock :-) I only have own reference pictures of later JPS liveried versions of the 72 so there will be no real car pictures in this WIP. I highly recommend Michael Olivers Lotus 72: Formula 1 icon though. Thats one of the best books on an F1 car! First up heres a few pictures of what you get in the kit: Everything thats inside, still in the bags: 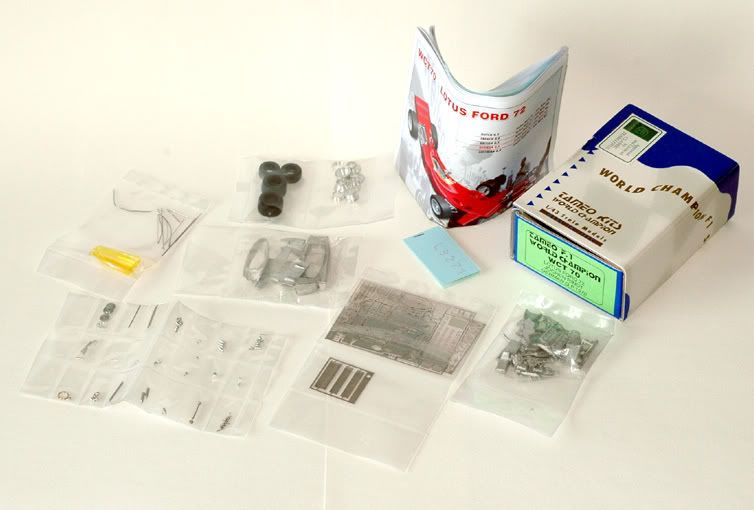 The white metal body parts: 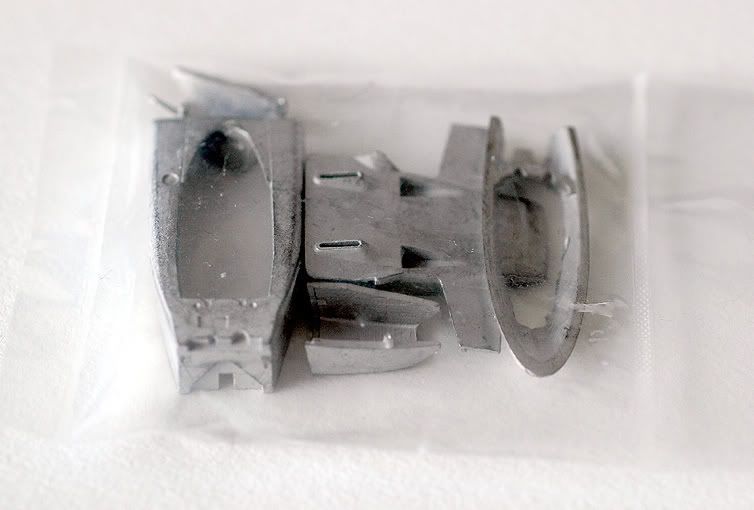 More white metal ( engine and stuff ) : 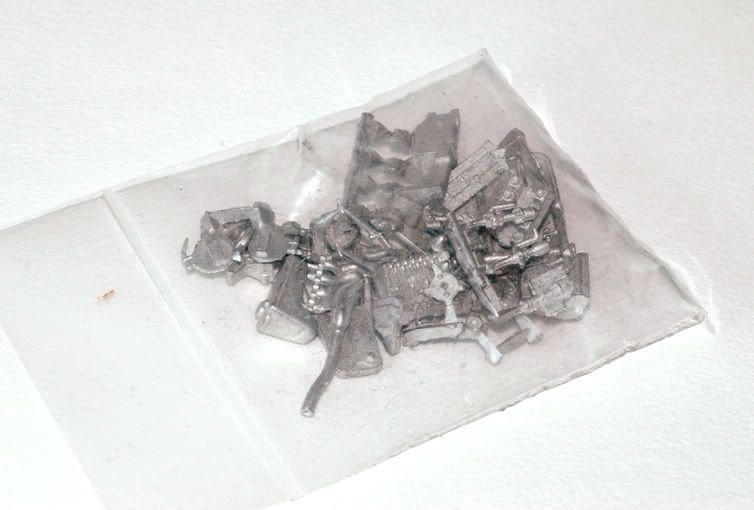 A good deal of photoetch in various thicknesses: 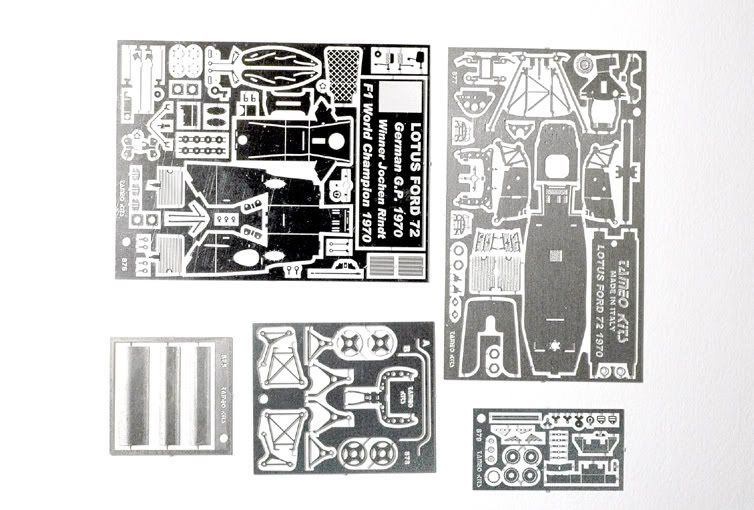 A variety of turned metal parts: 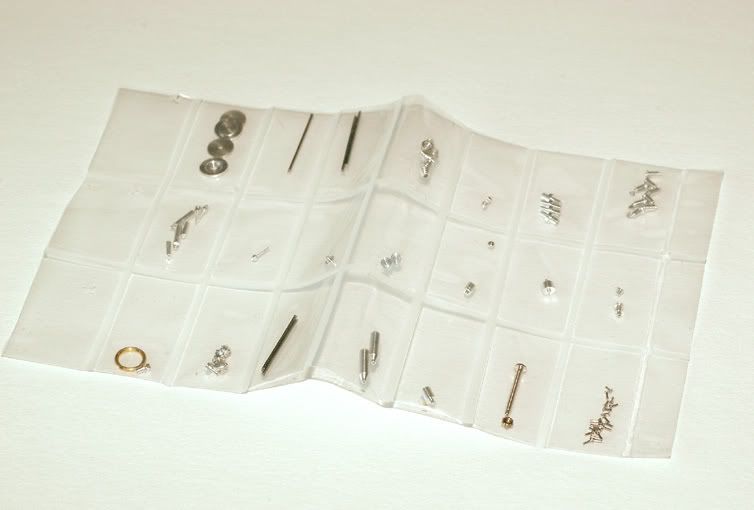 Turned aluminium rims and tyres: 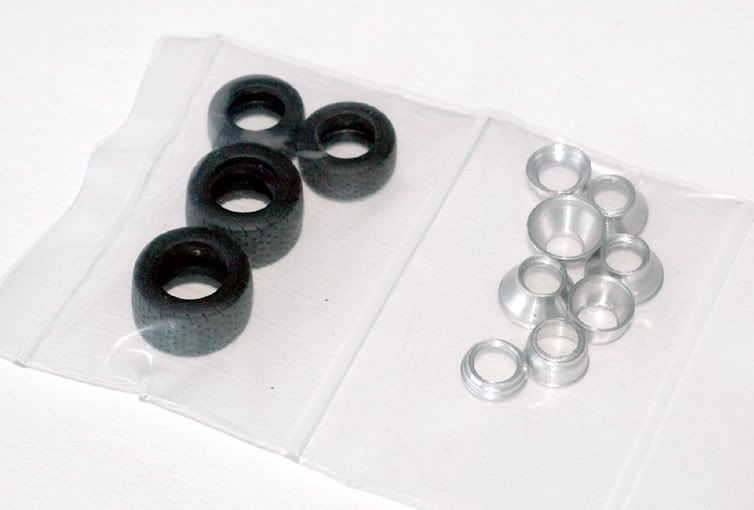 Two vacform windscreens and various wires: 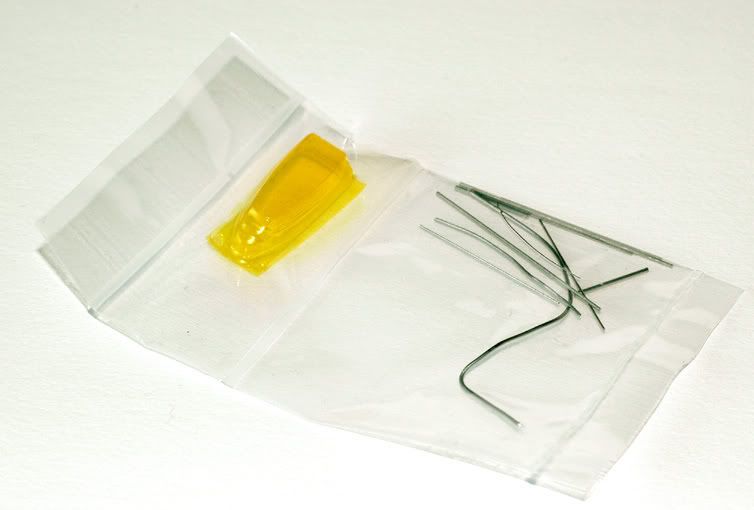 The typical Tameo kit instruction booklet including 4 pages of reference pics: 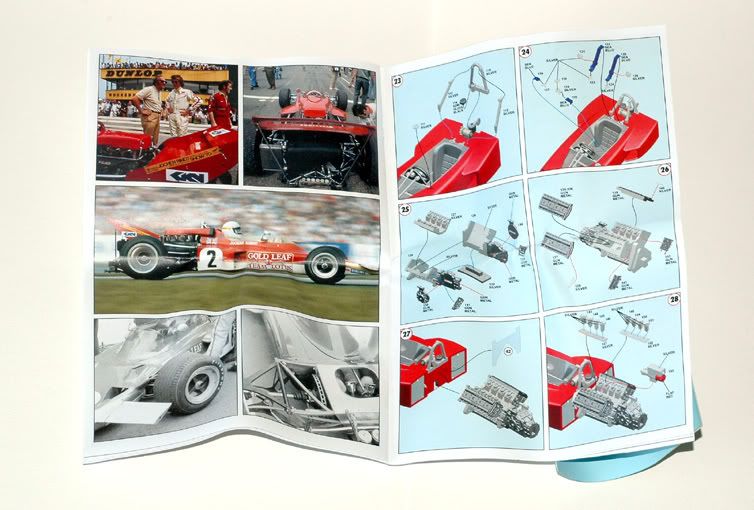 2 sheets of decals .in case you screw some up: 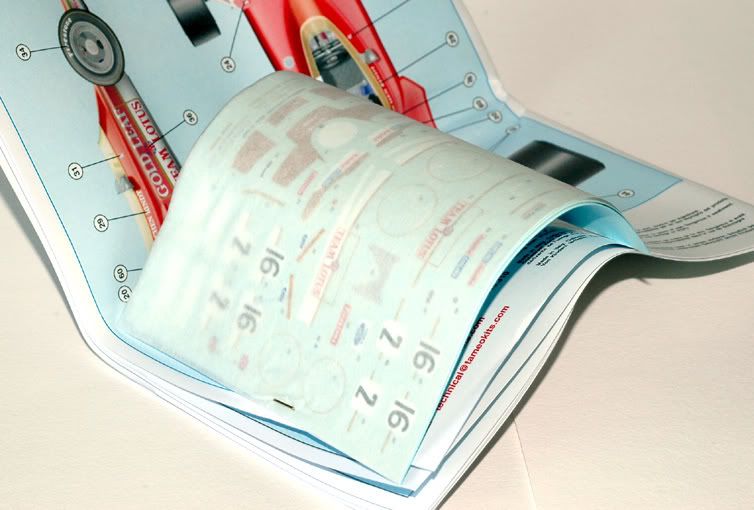 White metal parts unpacked. All very well cast: 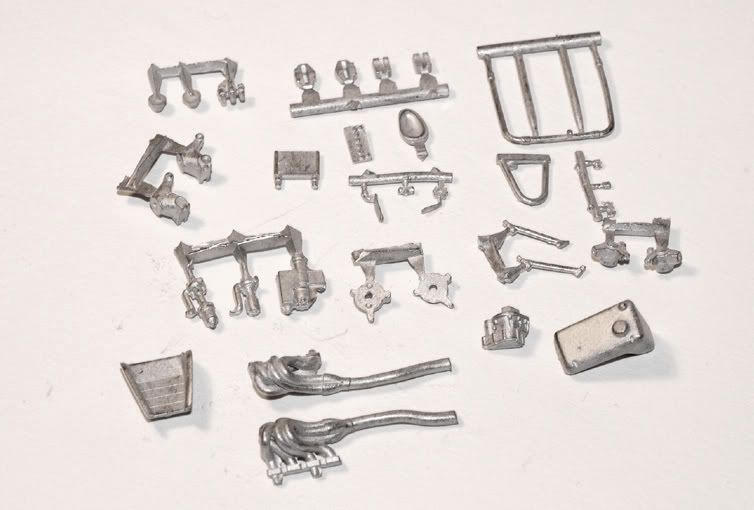 Engine and gearbox parts: 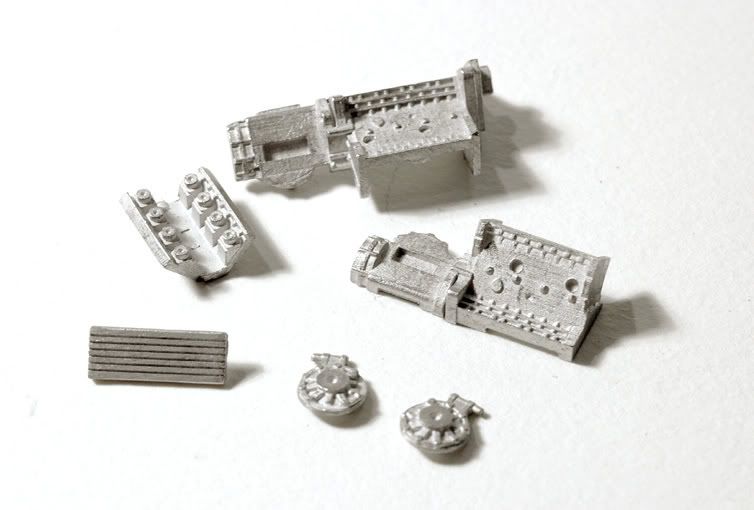 The engine parts dry fit together after a bit of cleanup and some reference for size: 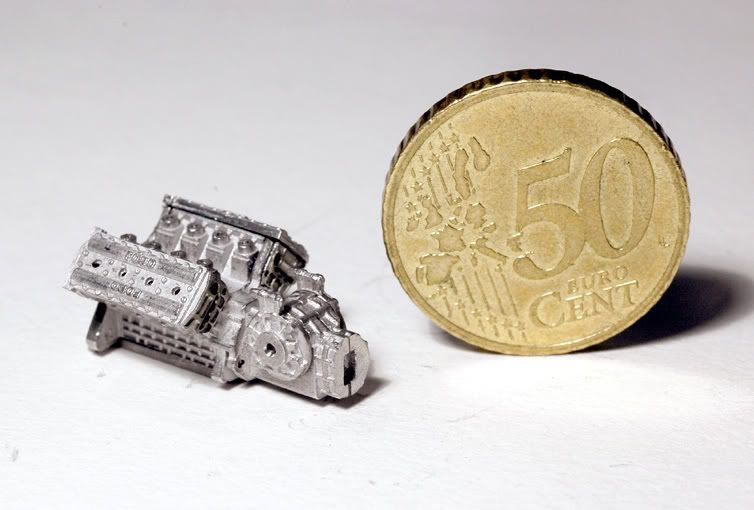 Overall the parts look very good ( Studio 27 could learn a lot from these white metal castings :-), the PE is very nice and clean too and the decals are very nice ( no need for aftermarket ones :-) and give you a choice of painting or decaling various areas. Nevertheless there are some things I dont like. The first and biggest problem are the tyres. They have an odd profile that makes them look a bit like off road hardware Im not yet sure how to deal with that: 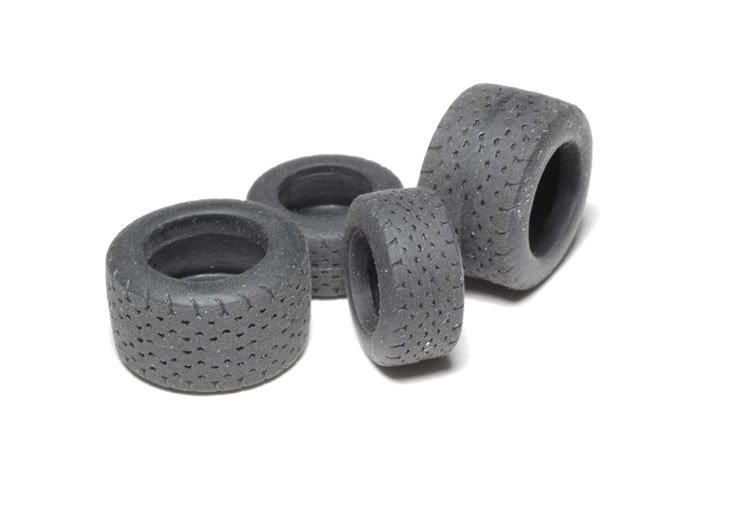 For the rear wing elements Tameo didnt make the typical white metal pieces but supplies pressed photoetch parts. They are crisp .but like that they have no wing profile with a volume. Thats a bit strange too, but can be cured without too much problems. 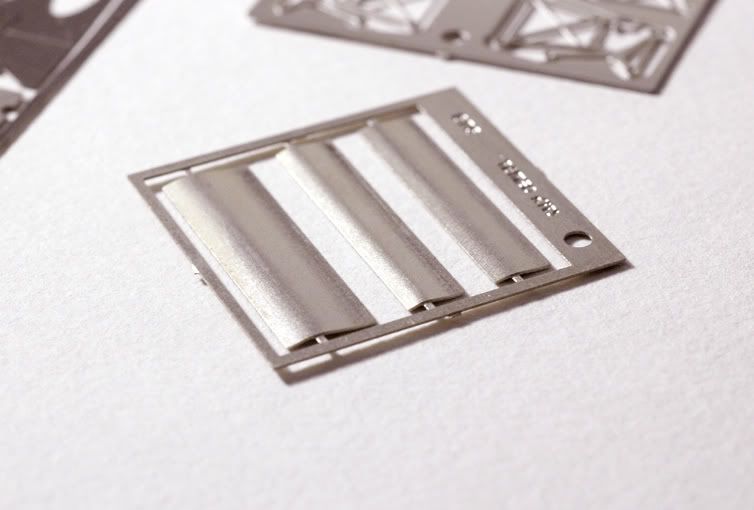 In case you screw up the vacform windscreen when cutting it to shape Tameo supplies two. Thats nice ..but in my case they both have identical imperfections as if there was dirt in the mould. That can be evened out but is annoying. Last are the instructions. They are nice as always but I have found wrong numbers for parts ( a possible problem with those tiny PE parts ) On the first page you get a picture with all the PE sprues and numbers for all the parts. Thats very good but they should do the same for the turned metal parts as well. It took me quite a while to figure out all of them ( and the white metal parts ). Its fun they put numbers for all of them in the instructions but no corresponding numbers anywhere near the parts themselves !? On to the build then. As I mentioned the box stock plan didnt last very long. That changed when I checked the white metal parts for the chassis and bodywork. They are nice but the material thickness was massive for a 43rd scale in some areas that are not more than a couple of fibre glass layers on the real car Thinning out the parts was no option because the metal parts would bend ( thats why Tameo doesnt make them any thinner in the first place ) but with resin parts that would be a different story! For that reason ( and because I hate black fingers from white metal dust ) I decided to make resin copies! I made them quick and dirty because I was going to modify them anyway. 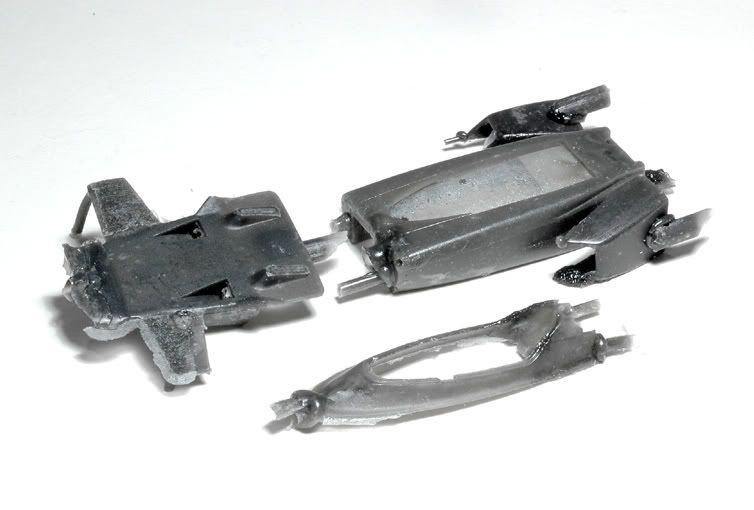 I got some air bubbles but they were taken care of quickly. Some body filler and sanding helped. Here they still look a bit messy: 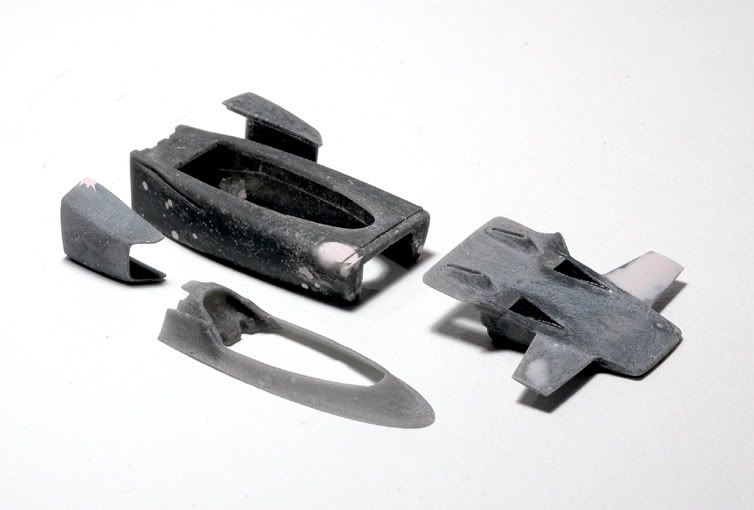 In the next picture some primer makes them look better already :-) In the back you see the original white metal pieces .no difference really !? 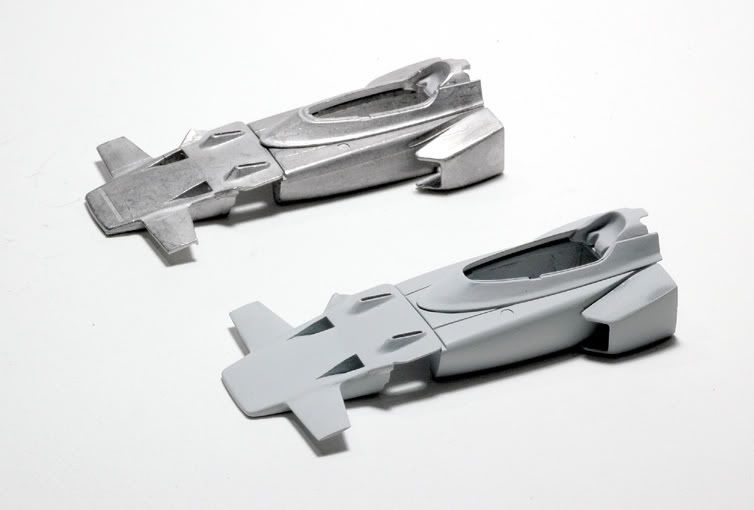 In the next pictures you can see that better. Especially on the nosecone and the cockpit surround the reduced material thickness will make a difference ( at least for me :-). In some areas Im down to 0,1mm. The resin is of course quite flexible like that but can still be handled. White metal would bend like theres no tomorrow. 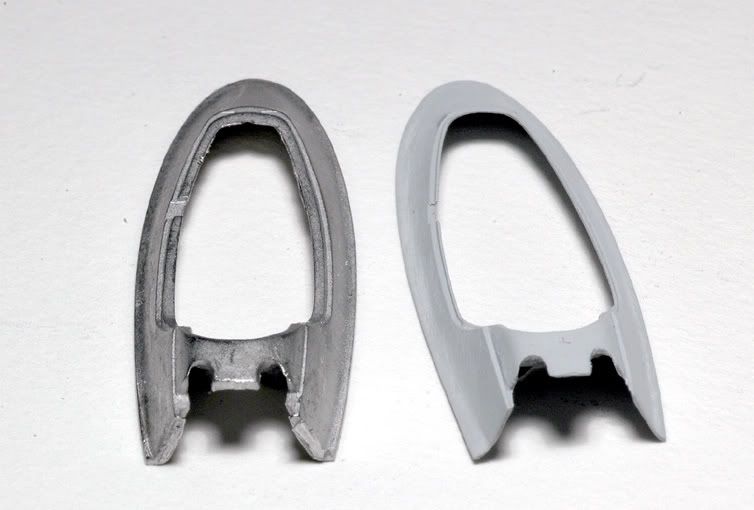 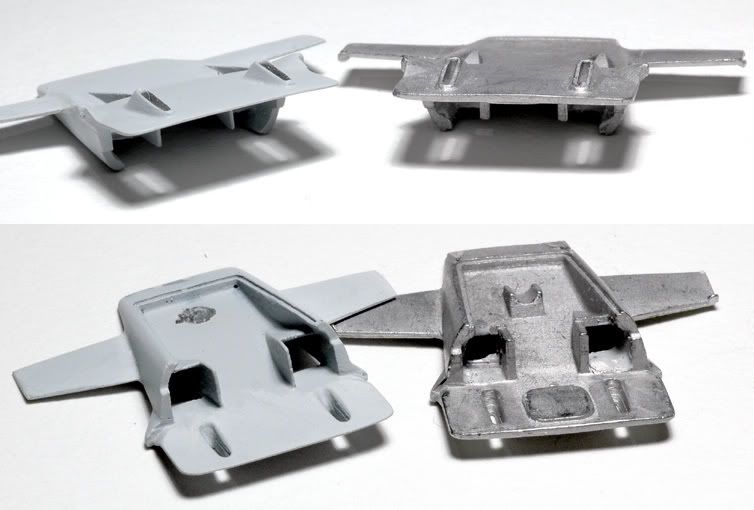 The nose cone and cockpit surround will still need some work but that will have to wait until after I have worked on other areas. More to come in an update! Jaykay 
|
|
#4
01-27-2008, 04:10 PM
|
||||
|
||||
|
Re: "Gold Leaf" Lotus 72 Jochen Rindt 1970 Tameo WCT 1:43
This is going to be good very cool work on making those body parts can't wait till the next update.
__________________
Regards, Dave
|
|
#5
01-28-2008, 01:17 AM
|
||||
|
||||
|
Re: "Gold Leaf" Lotus 72 Jochen Rindt 1970 Tameo WCT 1:43
Quote:
 I am very much looking forward to seeing this come together.
__________________
Guideline for happy modeling: Practice on scrap. Always try something new. Less is more. "I have a plan so cunning, you could put a tail on it and call it a weasel" - Edmund Blackadder
|
|
#6
01-28-2008, 01:55 AM
|
||||
|
||||
|
Re: "Gold Leaf" Lotus 72 Jochen Rindt 1970 Tameo WCT 1:43
Fabulous start to this model. Can't wait to see more.
__________________
On the workbench: Completed WIPs: Completed Models Gallery:
|
|
#7
01-28-2008, 08:55 AM
|
||||
|
||||
|
Re: "Gold Leaf" Lotus 72 Jochen Rindt 1970 Tameo WCT 1:43
I am ready to go
 , like you said thickness is one of the biggest problems with white metal models in 43. Nice subject also. , like you said thickness is one of the biggest problems with white metal models in 43. Nice subject also.
|
|
#10
01-28-2008, 06:47 PM
|
||||
|
||||
|
Re: "Gold Leaf" Lotus 72 Jochen Rindt 1970 Tameo WCT 1:43
Really nice start. I'm going to enjoy watching this one. Hope you don't mind me putting this link in for the Macs Modeling 1/12th version because I wished he'd get on and finish it!
http://www.macsmodeling.com/Lotus%2072C.htm 
|
|
#11
01-29-2008, 08:40 AM
|
||||
|
||||
|
Re: "Gold Leaf" Lotus 72 Jochen Rindt 1970 Tameo WCT 1:43
rEALLY NICE TOUCH ON CASTING IT IN RESIN GIVES A MORE REALISTIC FEEL WHEN IT IS THINNER.
|
|
#12
01-29-2008, 12:04 PM
|
||||
|
||||
|
Re: "Gold Leaf" Lotus 72 Jochen Rindt 1970 Tameo WCT 1:43
LOL Hopefully Luca Tameo wouldn't see those cloned messy parts or he'll have an heart attack and we'll loose all future releases
. BTW the managed result is just at "Jay' standard" so, super. I'm tuned.
__________________
 gio gio
|
|
#13
01-30-2008, 03:58 PM
|
|||
|
|||
|
Re: "Gold Leaf" Lotus 72 Jochen Rindt 1970 Tameo WCT 1:43
Thanks for your replies guys! Ill try to justify your expectations :-)
@builder77: Ill get to the paint in the next update. @360spider: I sure know:-) I bought this one to keep me from buying the Hiro! @Gionc: Tell Luca Tameo to make resin bodies for his kits .so I dont have to make messy copies lol! All right then. Here we go with some progress. While I was waiting for the resin parts to cure and later the paint to dry I started working on the photoetch parts. These are really fun to work with and particularly bring those aluminium chassis F1 cars to life. I started with the cockpit tub of course. Its like a big origami piece. You only have to cut the pieces from the sprue, sand all the edges a bit, fold and glue them together. 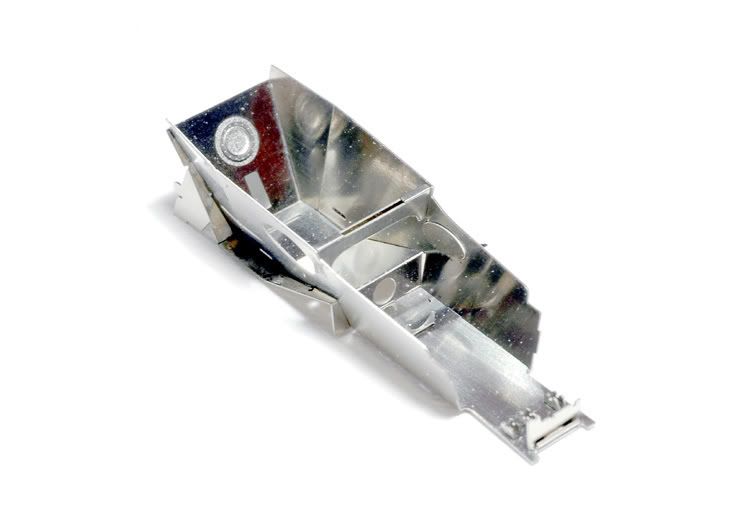 While I was folding and glueing away I was soon starting to wonder, why the hell I bother to build anything less than that or a Hiro. Unlike the BBR GT1 for example where I was always thinking.. what can I do to make this part look better I was constantly worrying what can I do to not mess this part up ? The result was that I bought another 3 WCTs on ebay before Christmas ( for a pretty good price :-) Now they sit in front of me all the time .tempting :-) Anyway, theres still room for improvement Next I installed the dent in the right side of the tub where the driver shifts. Its a white metal piece that I hand milled out some more to make the hole bigger. I tried to add rivets around it as per the original with tiny dots of silver paint but I didnt manage to place the dots properly so in the end I shelved that plan. I wonder why Tameo doesnt etch them in like on other pieces!? 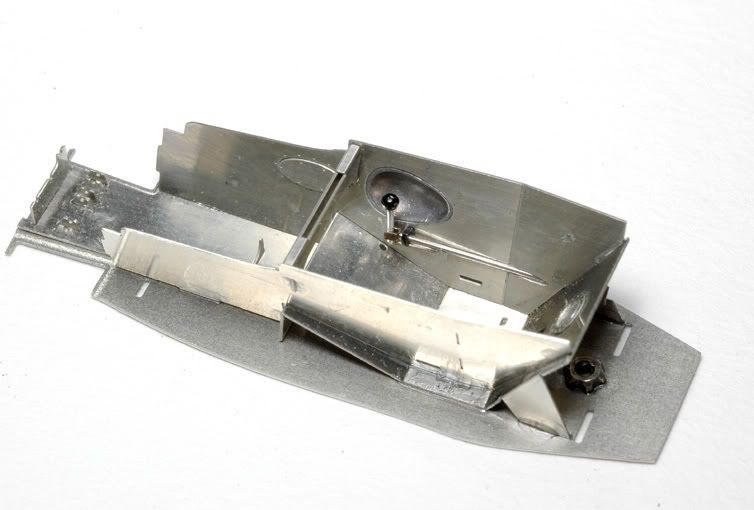 Then followed the gear stick itself. Its a nice turned aluminium piece but it was a bit biggish so I chucked it in my Proxxon mini drill and made the ball smaller with some fine sand paper. I painted the ball semi gloss black and then glued it in along with the gear linkage that I souped up a bit with extra pieces. Looks nice now but it took me countless tries until it looked like that and was properly fixed :-) Next was the seat. Here you see the PE pieces that represents the cushion the driver sits on .doesnt really look comfortable :-) 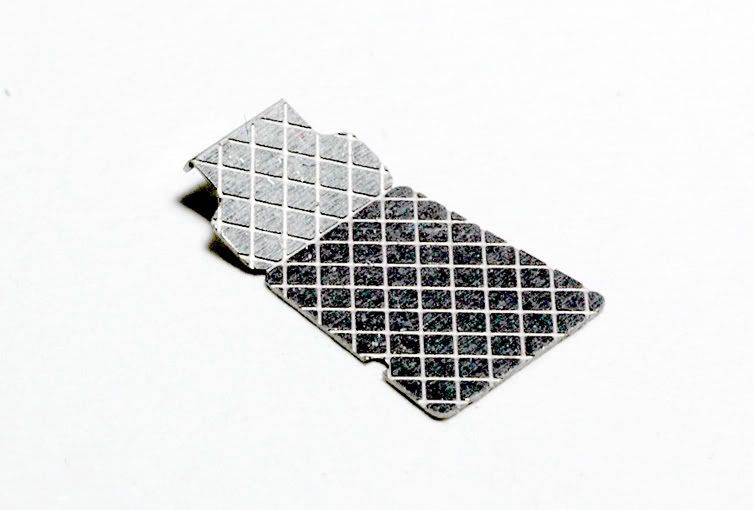 To change that I brush painted dots of 2K primer ( because its rather thick when unthinned ) on each of the squares, gave it a layer of primer from the airbrush after these dots had dried and finally airbrushed the part and also the white metal piece for the backrest with ZERO Jet Black. 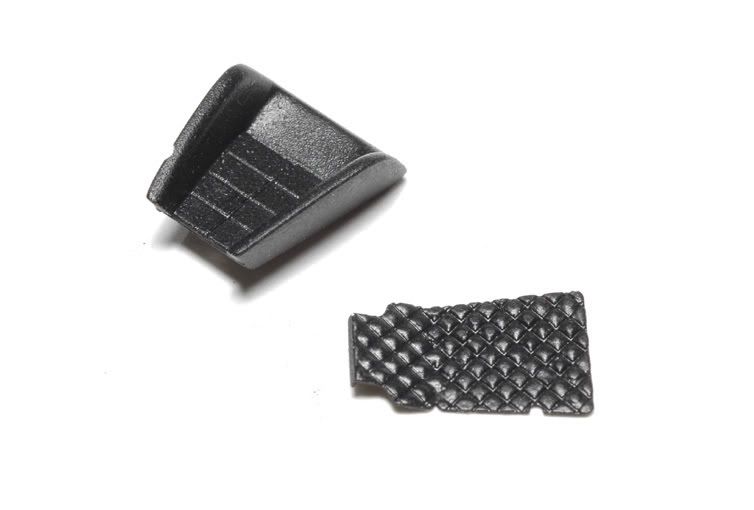 That looks more like a leather cushion Id say :-) In the next picture they are placed in the tub 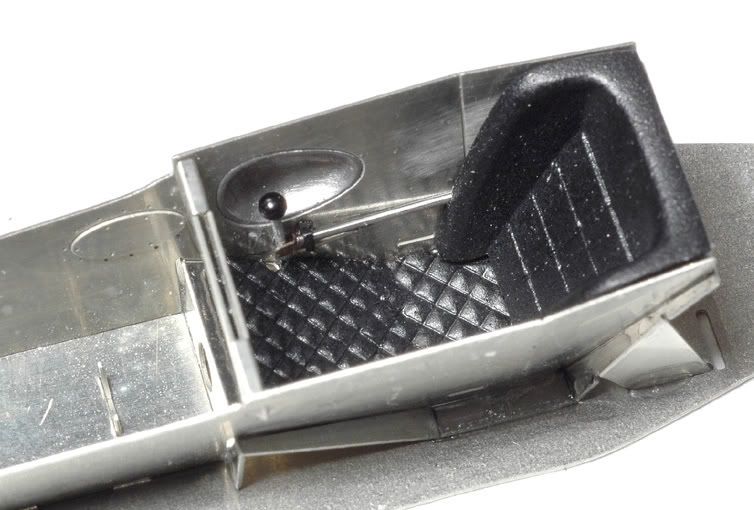 Thats it for now. In the next update Ill get to painting some parts. Jaykay
|
|
#15
01-30-2008, 07:56 PM
|
||||
|
||||
|
Re: "Gold Leaf" Lotus 72 Jochen Rindt 1970 Tameo WCT 1:43
Wow, great job in such a small scale. Great work on the seat cushion. One thing I realized was I have no idea what a 50 cent Euro looks like but I think I get the idea.
Mike
__________________
   
|
|
|
POST REPLY TO THIS THREAD |
 |
|
|


