

|
| Search | Car Forums | Gallery | Articles | Helper | Air Dried Dog Food | IgorSushko.com | Corporate |
|
| Latest | 0 Rplys |
|
|||||||
| WIP - Motorsports Post topics for any "Work In Process" motorsports vehicles in this sub-forum. |
 |
 Show Printable Version | Show Printable Version |  Email this Page | Email this Page |  Subscribe to this Thread
|
|
|
Thread Tools |
|
|
#1 | |
|
AF Enthusiast
Join Date: Apr 2004
Location: mexico
Posts: 601
Thanks: 9
Thanked 30 Times in 27 Posts
|
MFH Aston Martin DBR9 "late" WIP...
This was supposed to be a step by step WIP, but the wife found a way to rewrite a lot of the process photos
 But, hereīs what I can share so far... Some chassis/interior pics. -You can see I added a couple pins to give more strength to the union of this part and the chassis. 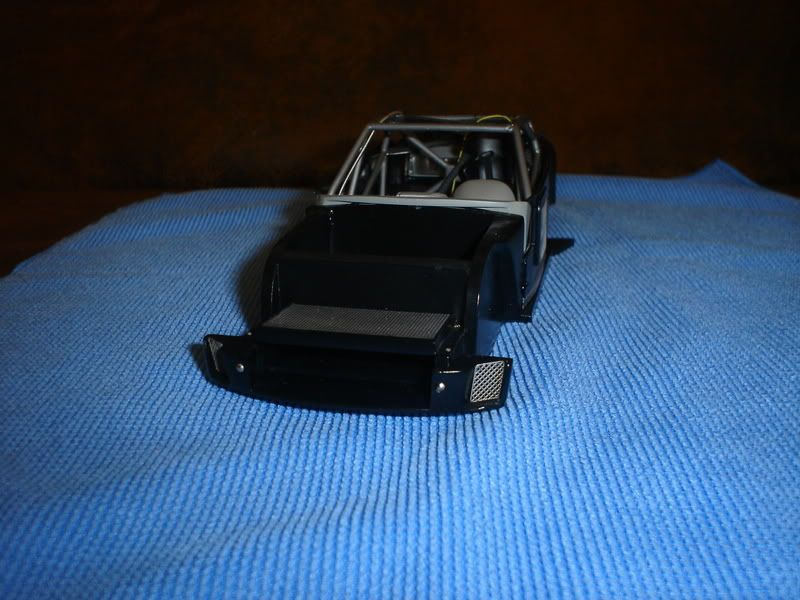 -It is a MUST to weld the roll cage pieces. The weight of the finished cage makes it impossible to glue the parts using cyano or epoxy (if you donīt want to end up with a mess of debonded pieces when you try to install the finished cage in the chassis) -TEST FIT!! The parts fit is very tight (specially the roll cage over the chassis), so be prepared to do some sanding and fitting. 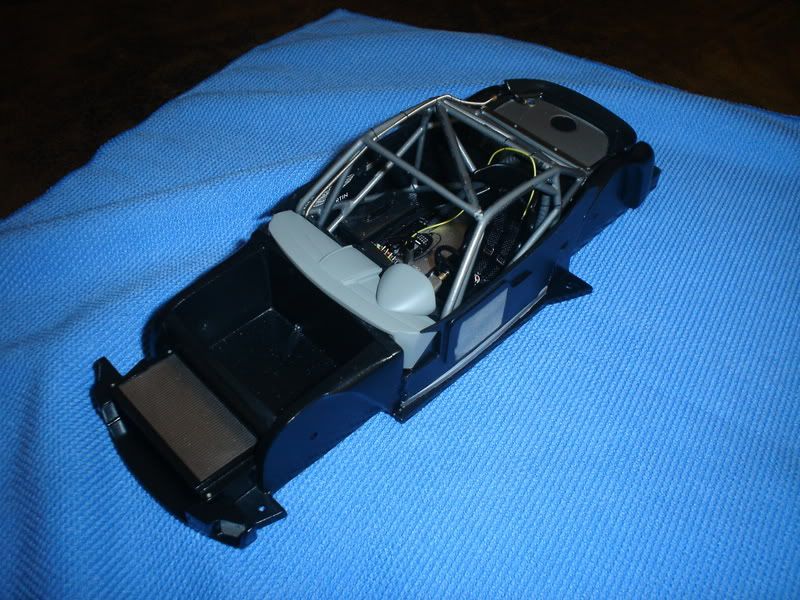 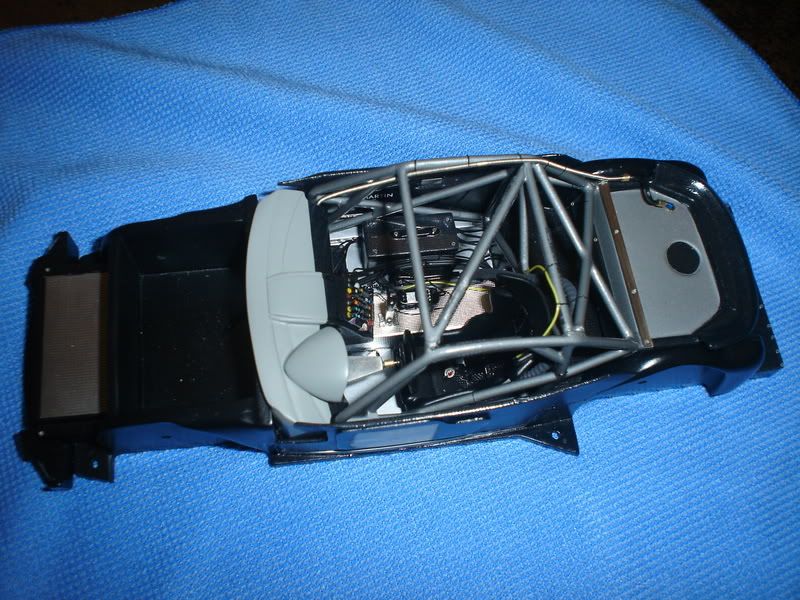 -The proposed seat position is wrong. It wonīt let the roll cage sit in the chassis. You will have to move it to the front, just to clear the roll cage. I used MFH Heat shield to cover the transmission tunnel. 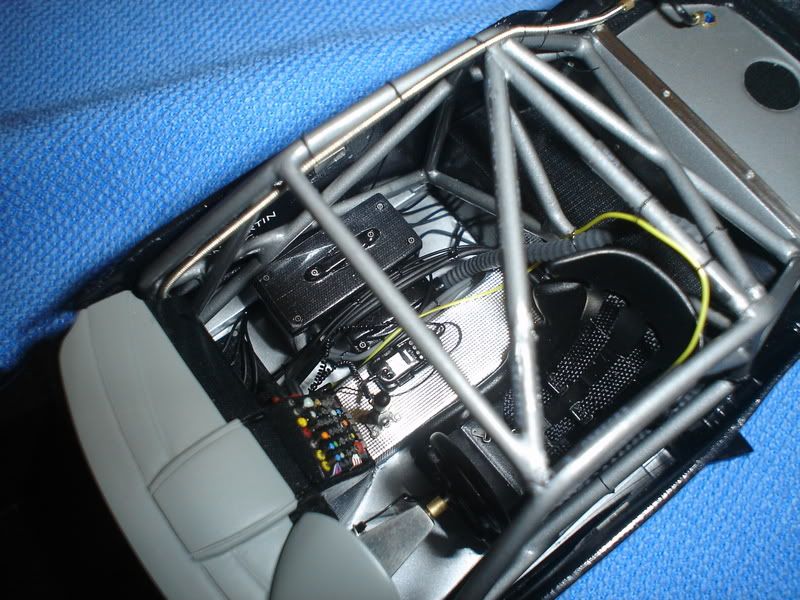 I used a lot of SMS carbon fiber (the 3d stuff), and tried to wire everything I could to make the cockpit look busy, like in the 1:1 car. 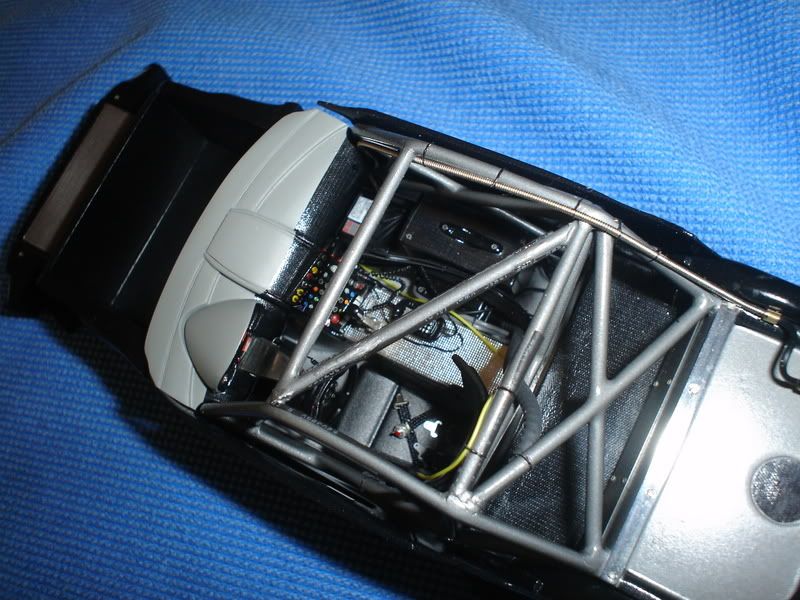 -Carefully plan all you connections, and do all your wiring holes before gluing the interior parts. 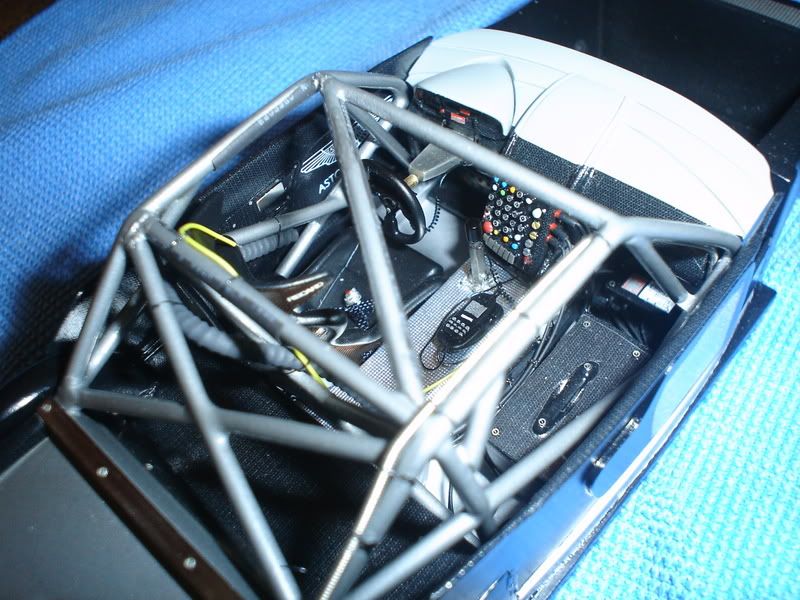 Now, the wheels...I added valve stems and applied the decals using the flat clear thechnique. 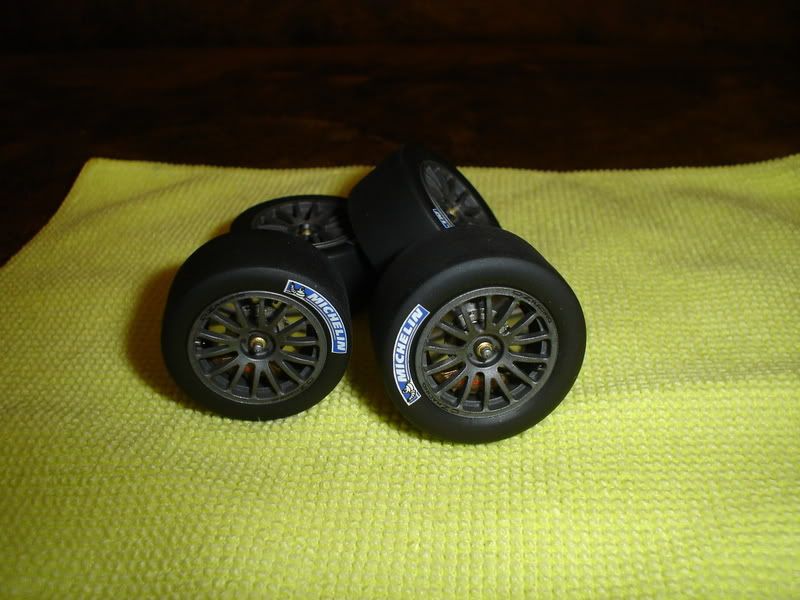 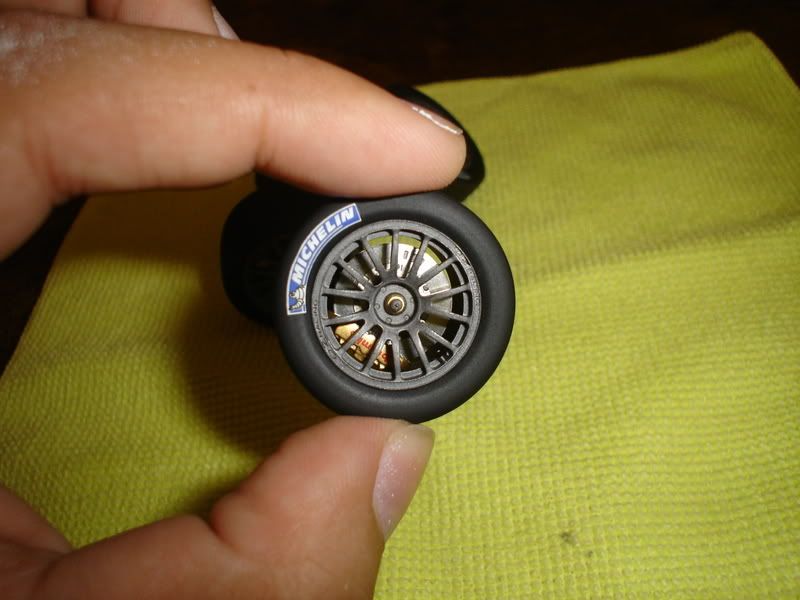 On to the body...I drilled the air jack holes (I was planning to put pins there, but kluts syringe needle idea is just great), and all the vents. Since the body is VERY thick, I opted to sand away the central fin in the vent located in the rear quarter panels and add it as a separate piece. That way, I can apply a dark wash first and then add the central fin. Iīll show you the result in the near future. - The body looks great in the box, but you will have to correct tiny bubbles and imperfections. It is a must to shoot a primer guide to locate those imperfections. - The fit of the door handles and front suspension access panels is very tight, so be sure you donīt loose those panel lines when shooting primer and paint. I had to rescribe those lines after each primer/paint application. 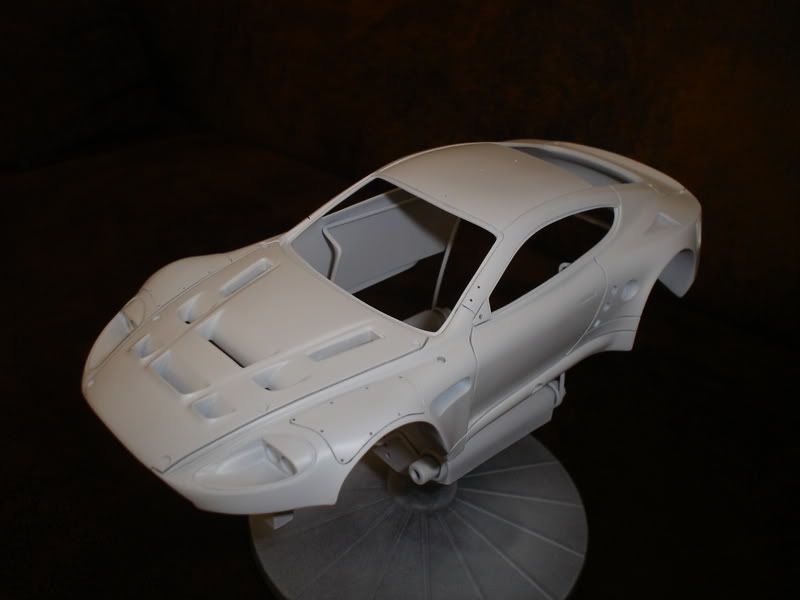 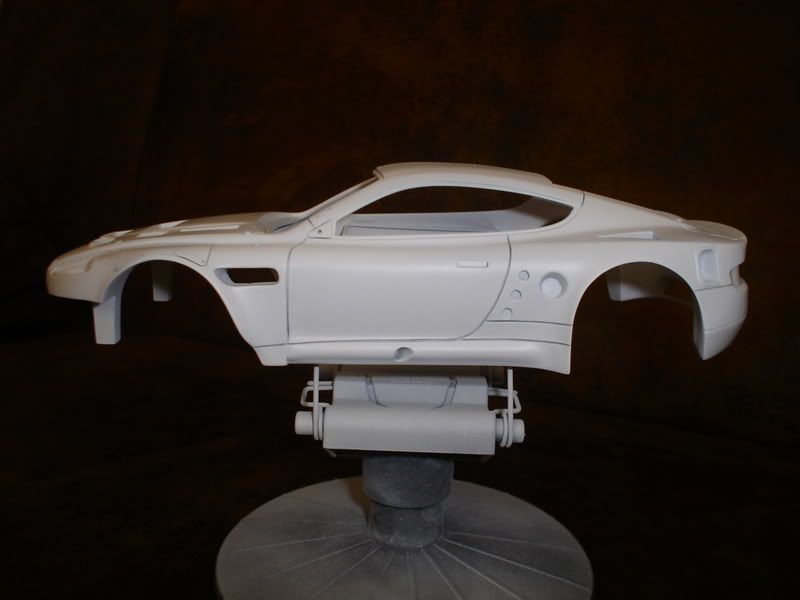 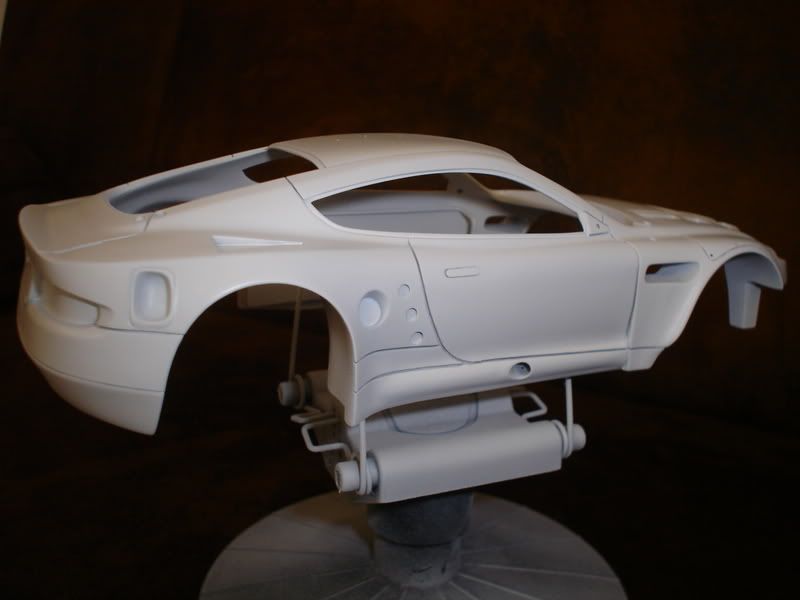 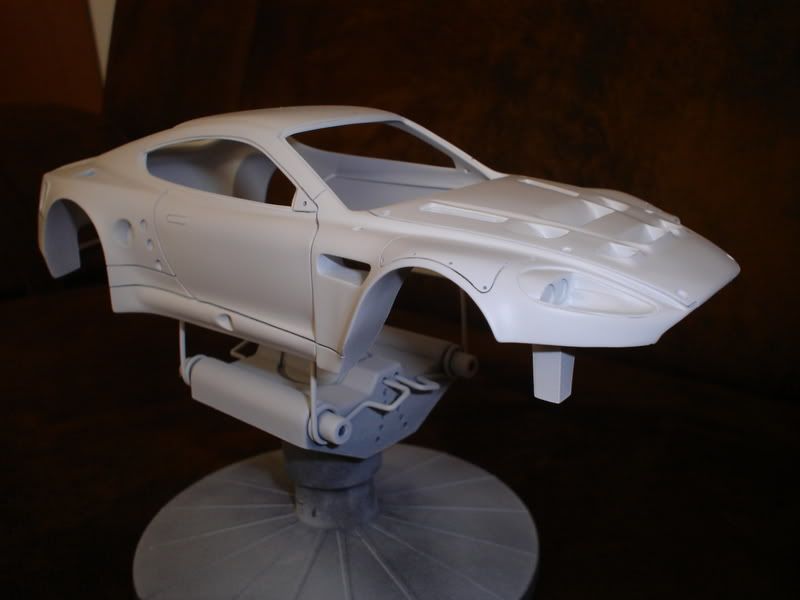 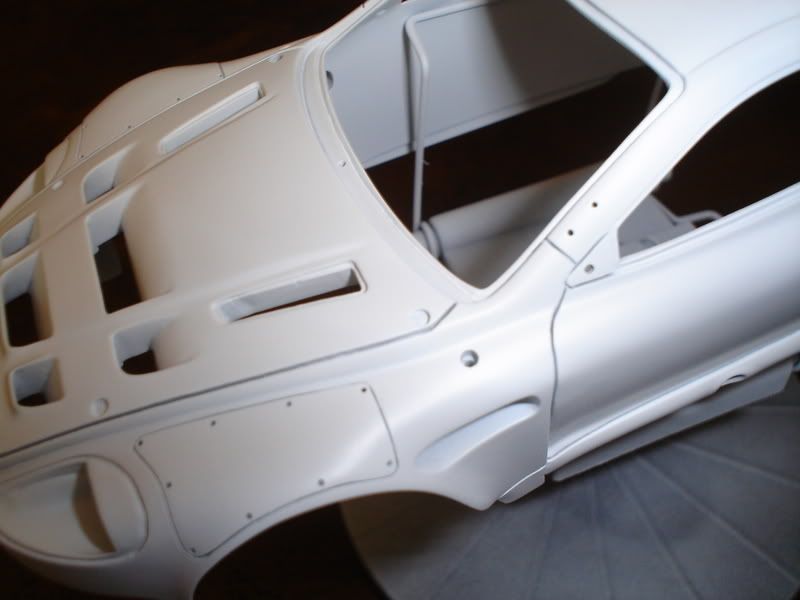 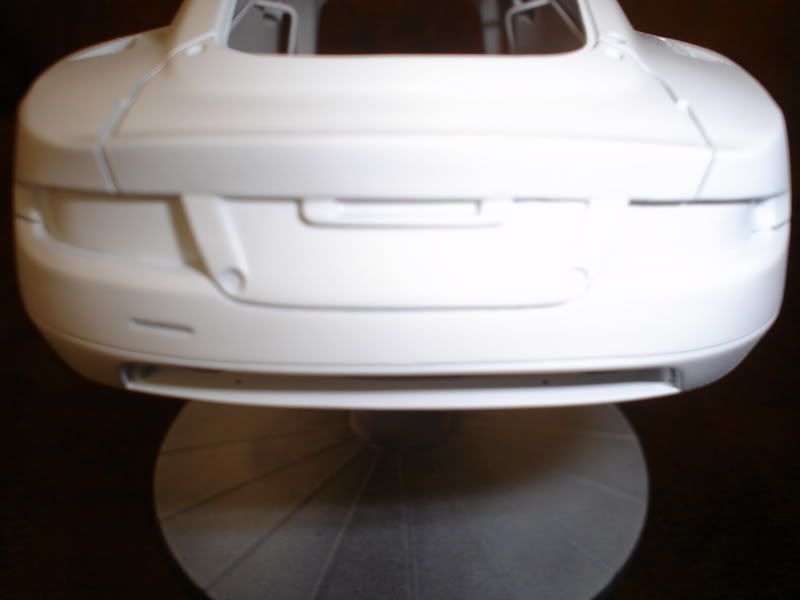 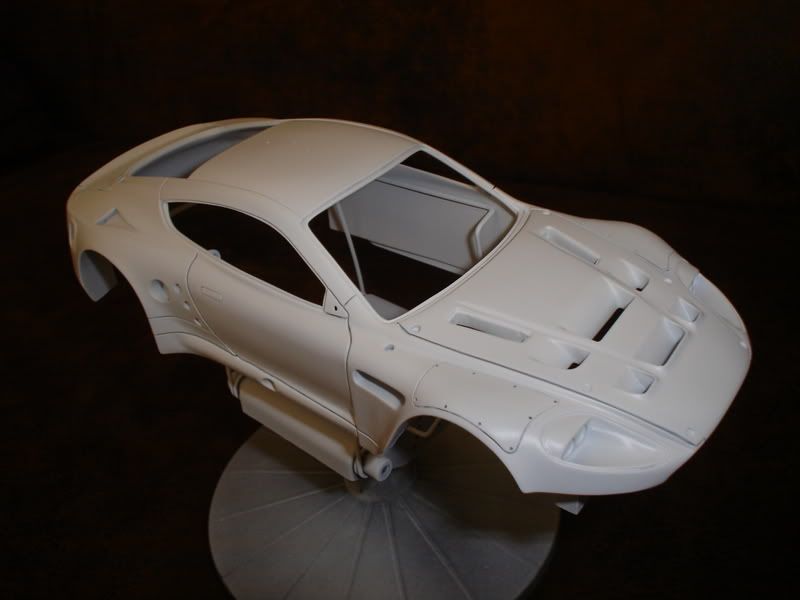 Well, thatīs it for the moment...The body is ready for the metallic green (ZERO paints), and while the paint cures, I will prepare all the body details (rear wing, tow hooks, etc) Hope this info helps!! Thanks for watching! |
|
|
|

|
|
|
#2 | |
|
AF Fanatic
|
Re: MFH Aston Martin DBR9 "late" WIP...
WTG Sam!!
I've been waiting to see what you've done to this kit for what seems like a year now  Give my regards to your wife Give my regards to your wife  What you have done with the interior is just super! I can't believe how well you have detail painted that control panel on the central console  How on earth did you do that?? How on earth did you do that??I am curious about your impressions on that gear lever position. Did you re-locate it? On mine, if I use the MFH locating hole, the gear lever is up flush against the control panel so I have re-located it slightly. What color did you use on the wheels? Looks good  Terrific work and I am looking forward to more - soon!! 
__________________
Guideline for happy modeling: Practice on scrap. Always try something new. Less is more. "I have a plan so cunning, you could put a tail on it and call it a weasel" - Edmund Blackadder |
|
|
|

|
|
|
#3 | |
|
AF Newbie
Join Date: Aug 2005
Location: West Midlands
Posts: 70
Thanks: 1
Thanked 3 Times in 3 Posts
|
Re: MFH Aston Martin DBR9 "late" WIP...
Klutz, the gear shift is up against the control panel and it is angled slightly towards the driver.
 |
|
|
|

|
|
|
#4 | |
|
AF Enthusiast
Thread starter
Join Date: Apr 2004
Location: mexico
Posts: 601
Thanks: 9
Thanked 30 Times in 27 Posts
|
Re: MFH Aston Martin DBR9 "late" WIP...
klutz, I sanded off all the original detail in the control panel, and added my own switches using acupuncture needles. I did the buttons with sewing needles (I painted them separately and glue them in predrilled holes)
The gear lever position is just like Happy Martian says...I used the hole provided by MFH...at first, I tought it was an error, but my references show the gear lever right next to the console and leaning towards the driver...I AM DOING THE #59 CAR...THE POSITION MIGHT BE DIFFERENT IN OTHER CARS...I saw that some FIA GT Astons use the gear lever centered in the transmission tunnel. |
|
|
|

|
|
|
#5 | |
|
AF Fanatic
|
Re: MFH Aston Martin DBR9 "late" WIP...
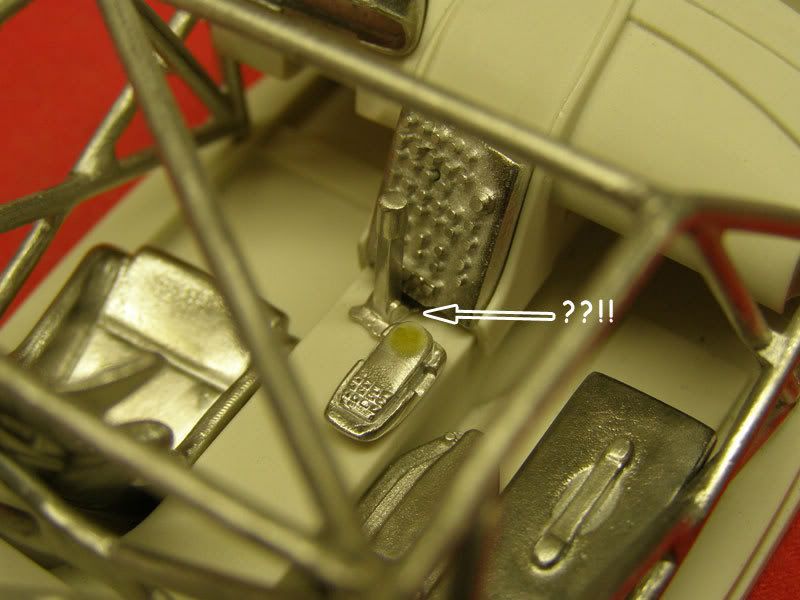
hmm this is what I was getting with my test fit :s
__________________
Guideline for happy modeling: Practice on scrap. Always try something new. Less is more. "I have a plan so cunning, you could put a tail on it and call it a weasel" - Edmund Blackadder |
|
|
|

|
|
|
#6 | |
|
AF Enthusiast
Thread starter
Join Date: Apr 2004
Location: mexico
Posts: 601
Thanks: 9
Thanked 30 Times in 27 Posts
|
Re: MFH Aston Martin DBR9 "late" WIP...
Well...I think you must relocate the locating hole my friend...
 |
|
|
|

|
|
|
#7 | ||
|
AF Newbie
Join Date: Aug 2005
Location: West Midlands
Posts: 70
Thanks: 1
Thanked 3 Times in 3 Posts
|
Re: MFH Aston Martin DBR9 "late" WIP...
Quote:
Sam, if you want some other detail pics, I have some taken at the Prodrive workshops. But for tasters..... 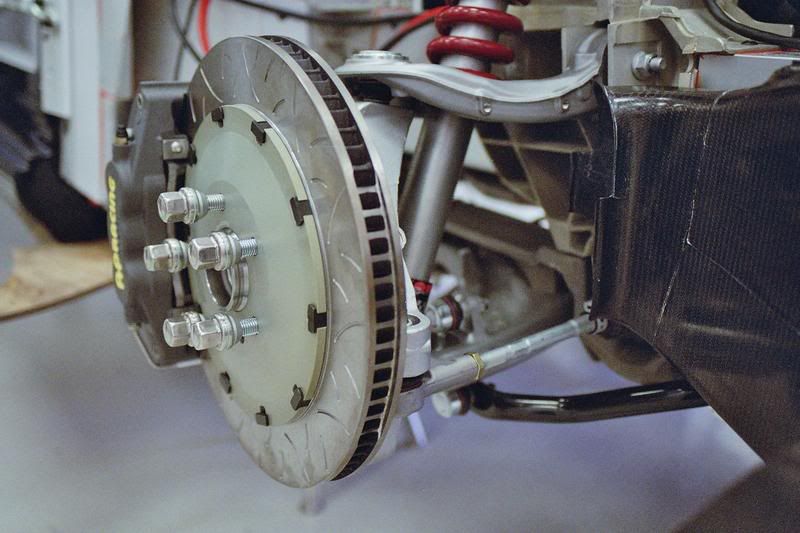 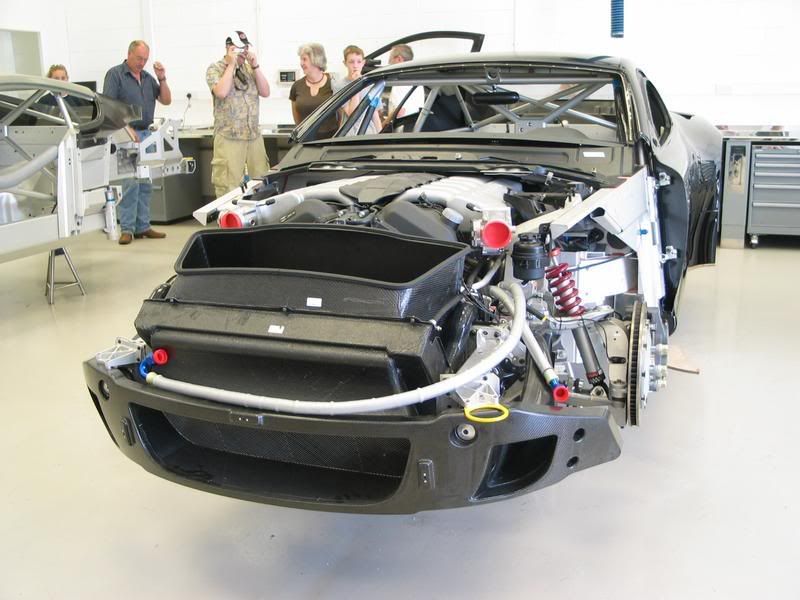 |
||
|
|

|
|
|
#8 | |
|
AF Enthusiast
Thread starter
Join Date: Apr 2004
Location: mexico
Posts: 601
Thanks: 9
Thanked 30 Times in 27 Posts
|
Re: MFH Aston Martin DBR9 "late" WIP...
 WOW!!!! Those are GREAT reference pics!! WOW!!!! Those are GREAT reference pics!!I am finishing my model, but those pics will be very useful to build my next Aston!! Please send me a private message and Iīll give you my email address!! |
|
|
|

|
|
|
#9 | |
|
AF Regular
 Join Date: Aug 2007
Location: Dexter, Missouri
Posts: 105
Thanks: 0
Thanked 0 Times in 0 Posts
|
Re: MFH Aston Martin DBR9 "late" WIP...
Very nice build! Interior work is fantastic! Wheels look excellant!
 Dan |
|
|
|

|
|
|
#10 | |
|
AF Newbie
Join Date: Aug 2004
Location: Madrid
Posts: 8
Thanks: 0
Thanked 0 Times in 0 Posts
|
Re: MFH Aston Martin DBR9 "late" WIP...
WOW!!!!!! The interior is excelent, a little work of art.
You inspired me. Sorry but Iīm speechless |
|
|
|

|
|
|
#11 | |
|
AF Enthusiast
Thread starter
Join Date: Apr 2004
Location: mexico
Posts: 601
Thanks: 9
Thanked 30 Times in 27 Posts
|
Re: MFH Aston Martin DBR9 "late" WIP...
An update...
I just shoot the body with ZERO PAINTS DBR9 paint...GREAT STUFF!! You canīt go wrong with this paint!  Even coverage, and dries in a few minutes. Iīll try the same brand of clear. 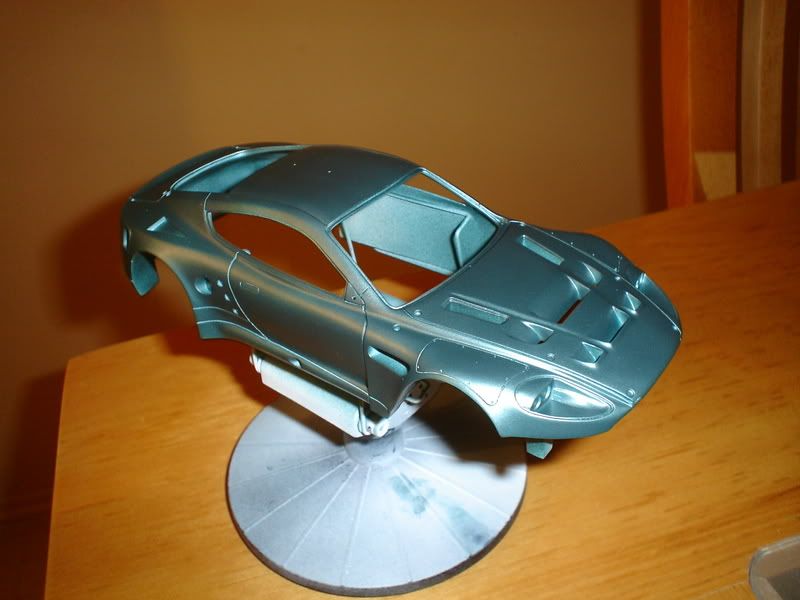 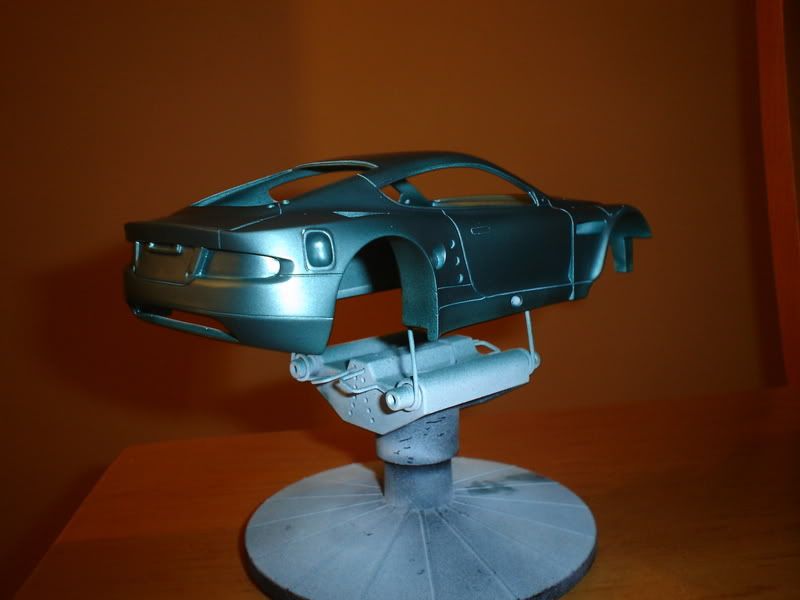 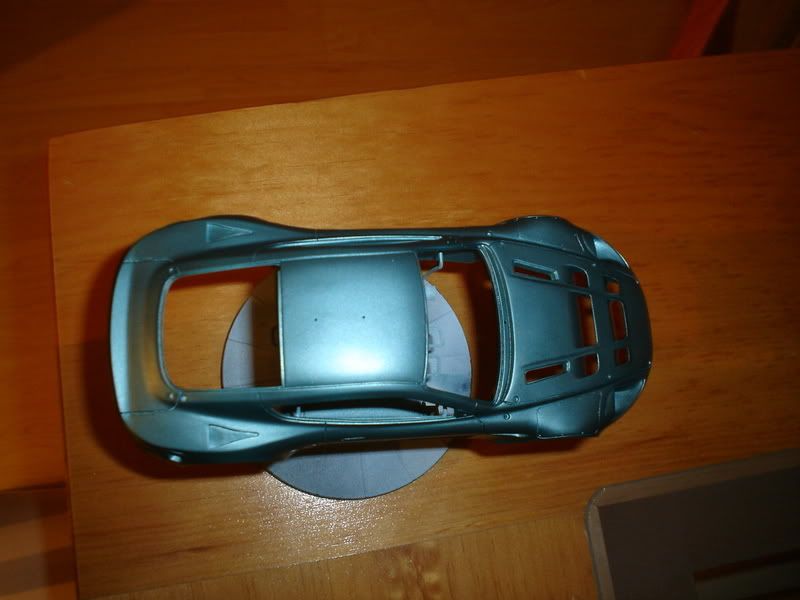 |
|
|
|

|
|
|
#12 | ||
|
AF Fanatic
|
Re: MFH Aston Martin DBR9 "late" WIP...
Looks great in color!
Quote:
I am curious how you get on the clear though. I haven't had much success with 2-part clears 
__________________
Guideline for happy modeling: Practice on scrap. Always try something new. Less is more. "I have a plan so cunning, you could put a tail on it and call it a weasel" - Edmund Blackadder |
||
|
|

|
|
|
#13 | |
|
AF Enthusiast
Thread starter
Join Date: Apr 2004
Location: mexico
Posts: 601
Thanks: 9
Thanked 30 Times in 27 Posts
|
Re: MFH Aston Martin DBR9 "late" WIP...
klutz, donīt make me nervous!
 After reading your post I was thinking about using the good old Tamiya clear can... After reading your post I was thinking about using the good old Tamiya clear can...Everyone says ZERO PAINT clear is the very best clear...I hope everything turns out OK...Of course I painted a piece of styrene with the green paint, and I will practice with that to get the "feeling" of the clear. |
|
|
|

|
|
|
#14 | |
|
AF Enthusiast
Join Date: Feb 2004
Location: Brisbane
Posts: 751
Thanks: 0
Thanked 9 Times in 9 Posts
|
Re: MFH Aston Martin DBR9 "late" WIP...
You've put a mountain of detail in the interior, looks fantastic!
|
|
|
|

|
|
|
#15 | |
|
AF Regular
Join Date: May 2006
Location: Richmond, Virginia
Posts: 474
Thanks: 6
Thanked 13 Times in 13 Posts
|
Re: MFH Aston Martin DBR9 "late" WIP...
sam the interior is just awesome, don't even put the body on!
|
|
|
|

|
|
 |
POST REPLY TO THIS THREAD |
 |
|
|