|
|
| Search | Car Forums | Gallery | Articles | Helper | Air Dried Fresh Beef Dog Food | IgorSushko.com | Corporate |
|
|||||||
| Car Modeling Share your passion for car modeling here! Includes sub-forum for "in progress" and "completed" vehicles. |
 |
 Show Printable Version | Show Printable Version |  Subscribe to this Thread
|
|
|
Thread Tools |
|
#1
 05-19-2007, 04:31 PM
|
||||
|
||||
|
HOW TO: Make Custom Tail Lights
CAUTION!!! Using a butane torch can be dangerous and shouldn't be used by inexperienced modelers.
You need: - metal tubing (aluminum, brass, ect... depends on what colour you want) - clear red or orange part tree (Revell usually has clear red & orange parts) - wire cutters - small butane torch - glass of cold water - Dremel w/ cutting discs or metal saw - some fine grit sand paper 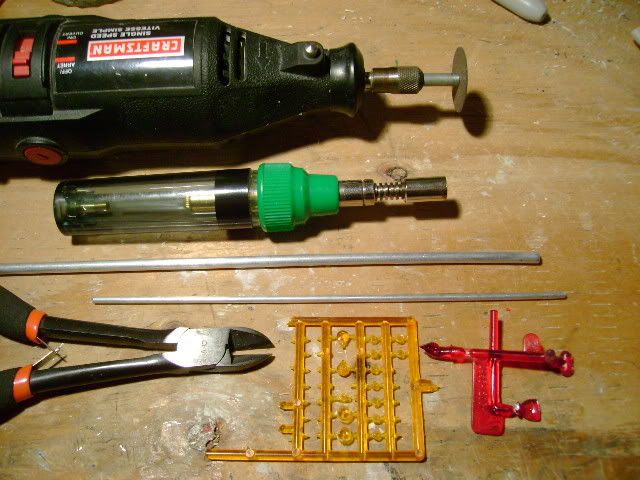 I used 1/8" aluminum tubing for the brake light and 1/16" aluminum for the turn signal 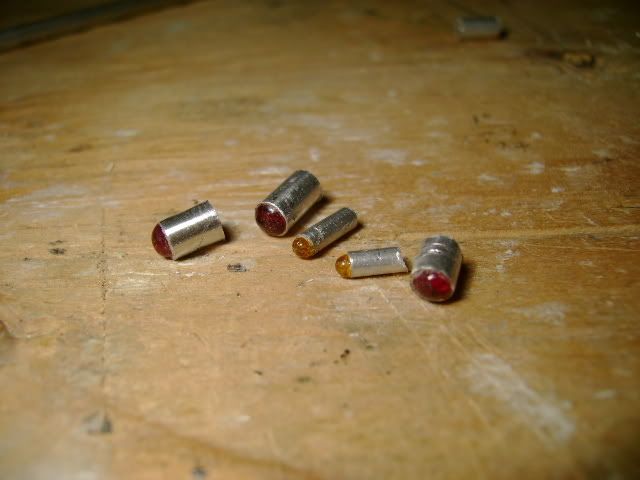 1. Take a long piece of metal tubing (atleast 7"-8"), the tubing will get hot so I use a long piece so that you can hold onto it without getting burnt. 2. Cut off a piece from the clear red parts tree and place in the end of the tubing. 3. Light the torch, set it at a low flame. 4. Hold the tubing so that the end with the plastic in it is facing at a downward angle. This is so that when the plastic heats up it will come out and make a "bubble" shape. 5. Quickly go across the tubing in a zig zag pattern starting about 1"-2" up the tubing and moving towards the end, make sure to rotate the tubing so that it heats up evenly. NOTE: Make sure not to let the flame touch the tubing as this will cause the tubing to melt (especially aluminum) or will cause the plastic to catch on fire. Doing it slowly will get you the best results. 6. If the plastic doesn't want to come out you can lightly blow into the other end of the tube PLEASE make sure that it isn't hot first!!!! 7. Once you have the desired shape place tubing into the glass of water to quickly cool the plastic. The plastic will shrink back into the tube if it cools slowly. 8. Let the tube cool, then use the Dremel or saw to cut the part off. NOTE: If you are using a Dremel with cutting discs, I suggest that you put a clamp on the part so that it doesn't fly off when you cut it. 9. I usually then sand the tubing to give it a polished look, plus it gets rid of any little scratchs. Also if your "bubbles" aren't all the same shape you can sand them with some fine grit and then use a polishing stick to get them nice and shiny again. 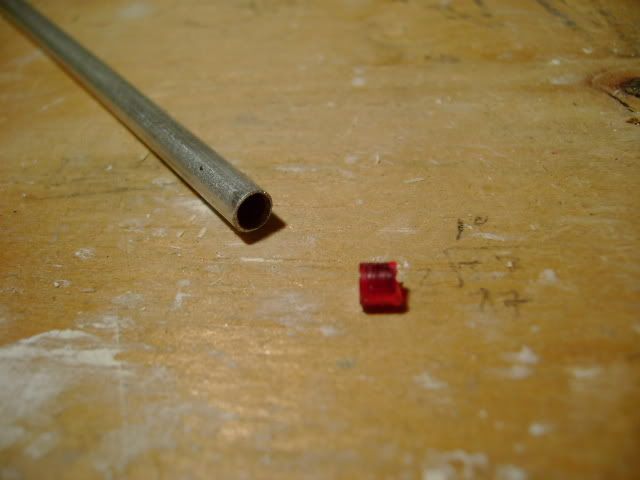     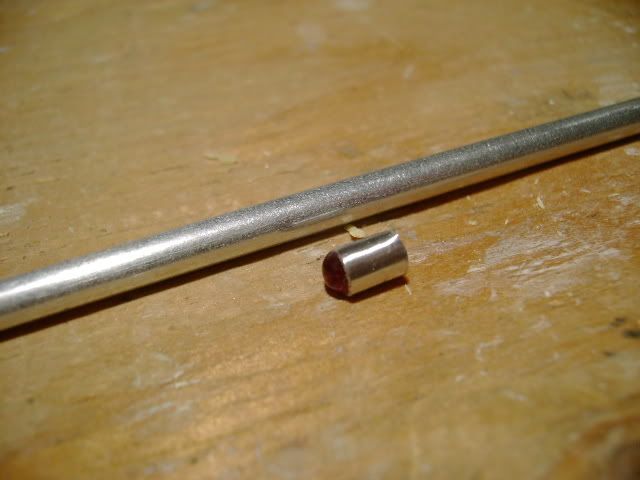 Here are some possible applications 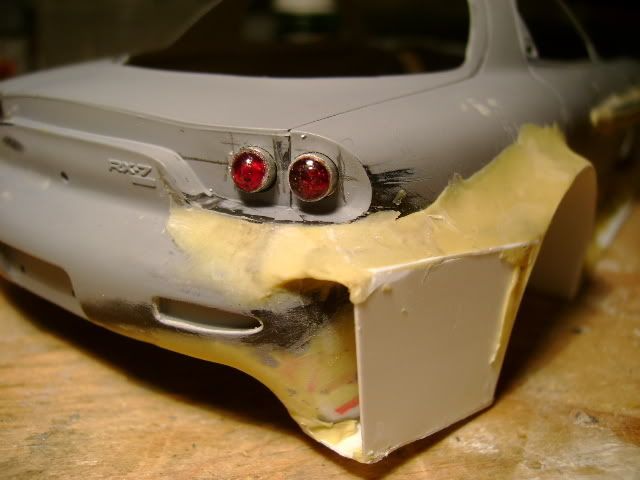 
__________________
 Current Model Projects: Peugeot 206, Toyota Supra, Honda NSX, Toyota Celica, Honda S2000, Toyota MR2, & many others. 
|
|
#2
05-19-2007, 04:47 PM
|
|||
|
|||
|
Re: HOW TO: Make Custom Tail Lights
very nice
|
|
#3
05-19-2007, 04:59 PM
|
|||
|
|||
|
Re: HOW TO: Make Custom Tail Lights
Good how-to. Thanks for posting.
|
|
#4
05-19-2007, 05:02 PM
|
|||
|
|||
|
Re: HOW TO: Make Custom Tail Lights
nice i like it

|
|
#6
05-21-2007, 11:00 PM
|
||||
|
||||
|
Re: HOW TO: Make Custom Tail Lights
Awesome, I thank you for the good value-added tip!
If we can even polish the end light better, it will look totally fantastic! Thanks again.
__________________
-- CifeNet
|
|
#7
05-21-2007, 11:31 PM
|
||||
|
||||
|
Re: HOW TO: Make Custom Tail Lights
I was kinda wondering how you were making those. Thanks for sharing!!
|
|
#8
05-22-2007, 01:39 AM
|
||||
|
||||
|
Re: HOW TO: Make Custom Tail Lights
Very nice tip
 Thanks for sharing it.
__________________
Guideline for happy modeling: Practice on scrap. Always try something new. Less is more. "I have a plan so cunning, you could put a tail on it and call it a weasel" - Edmund Blackadder
|
|
|
POST REPLY TO THIS THREAD |
 |
|
|