|
|
| Search | Car Forums | Gallery | Articles | Helper | Air Dried Fresh Beef Dog Food | IgorSushko.com | Corporate |
|
|||||||
| Car Modeling Share your passion for car modeling here! Includes sub-forum for "in progress" and "completed" vehicles. |
 |
 Show Printable Version | Show Printable Version |  Subscribe to this Thread
|
|
|
Thread Tools |
|
#1
 03-09-2006, 08:28 PM
|
||||
|
||||
|
I figured out this trick for getting the bubbles out of molds a while back I thought I'd share it with you guys. I use HS3, a rubber with a very long pot life, it takes about 24 hours to cure. I have not used any other rubber, but this will work best if the RTV you're using has a long pot life.
OK, you'll need *mold making supplies, *a base, and *a small compressor or anything that vibrates a significant amount for long periods. This is my mold making and resin casting space, it's just a second workbench with a large piece of glass resting on Legos at four corners. I use the glass as my base, you can scrape anything off of it with a razor blade (paint, CA glue, resin, anything. Make sure the glass is clean when you start. 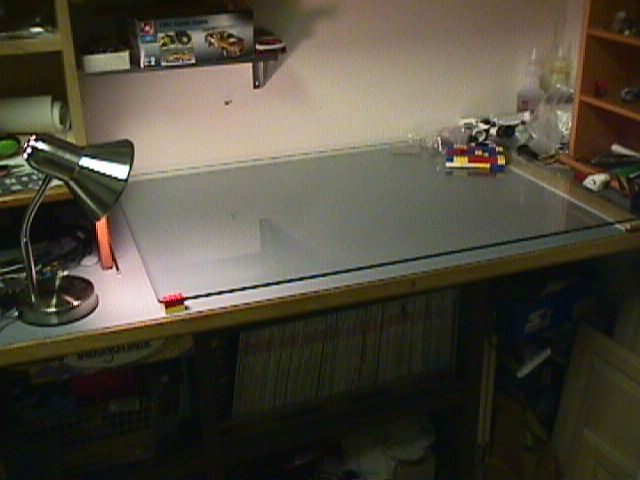 Gather the stuff you want to make molds out of and position them roughly where you want so that you can make a frame around it. I'm making a mold of small parts so my extra resin doesn't go to waste. I've got some BOVs, some resivoirs, EM boxes and such that I can use in many of my builds... 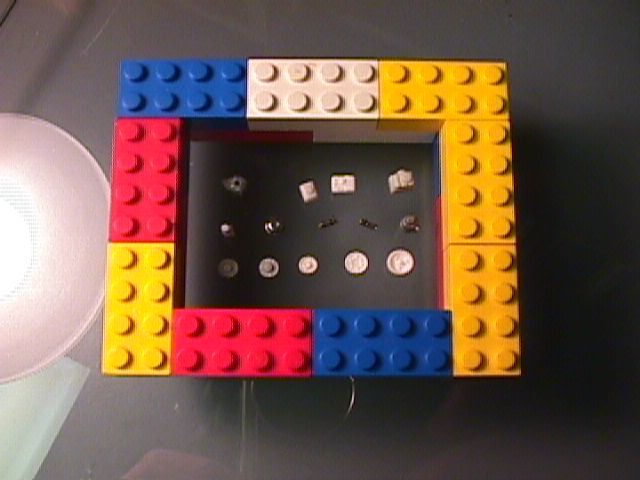 Super glue the pieces to the glass, keeping in mind where the frame will be. 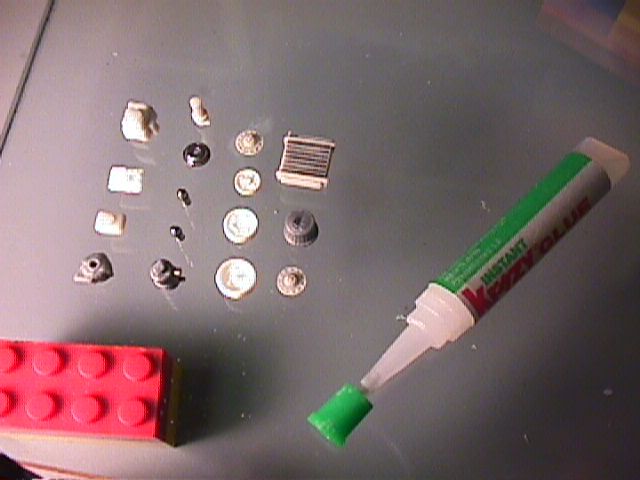 Now put the frame in place and seal it with clay or Silly Putty. 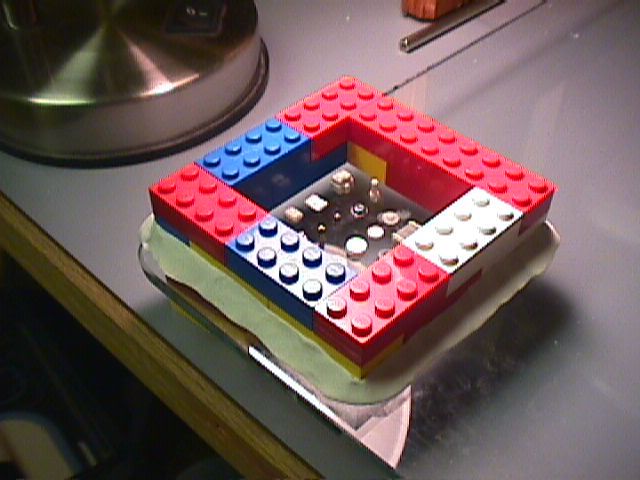 Mix up your rubber and turn on the compressor or whatever you're using, as long as it vibrates. Find the "sweet spot" where the vibrations are most violent, here, on the handle of the compressor. Tkae the cup of RTV and hold it against it for a while, I stick it there for 5 minutes at least, because I tend to fold air into the rubber when I mix the catalyst in. If you look at the air nozzle you'll see I've tied it in the open position to keep the compressor running. 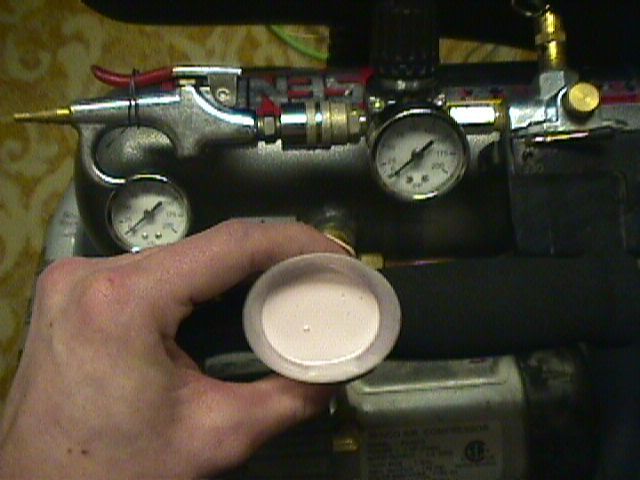 Now I turn the compressor off and slide the glass off the table about 6 inches. With the compressor on a stool (one of those pnuematic drafting chairs) I position it so the the mold box is resting on the "sweet spot." Make sure you use something to cusion the metal from the glass, the foam grip works fine in this instance. 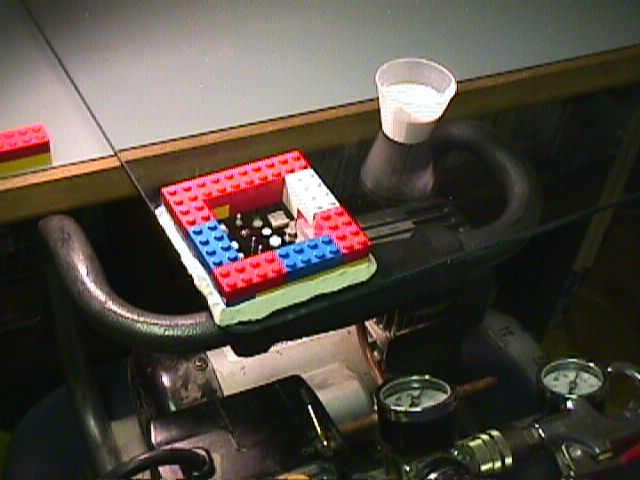 Pour your mold. I like to start from one corner, just drizzling it and letting the rubber flow. Less air will be trapped this way. When the box is about half full turn the compressor back on and continue to pour. Touch the mold box to see how much vibration is coming through it, I found that it wasn't working very well, even though it had earlier. So I repositioned the compressor frame, using a Kleenex to put a little cushion between metal and glass. Now I can really feel the vibrations coursing through the mold. 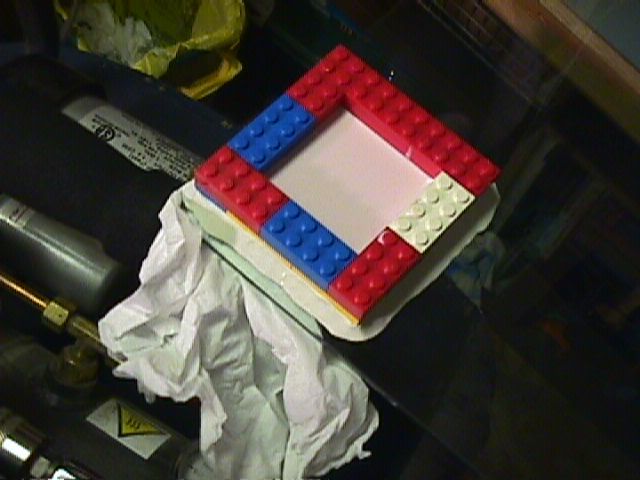 After 2 days (longer than necessary, but I was busy) I began to take the frame apart. Pulling the mold out I can see it wasn't sealed especially well, I'm think about getting new Legos (these ones have been used and abused). Close inspection reveals some small bubbles on the oil cooler (not surprising, the fin and tube designs hold bubbles. Also, this was the corner I poured from, so more air would have been trapped here) but everything else has no bubbles anywhere. The cooler was just a last minute piece I added anyway... 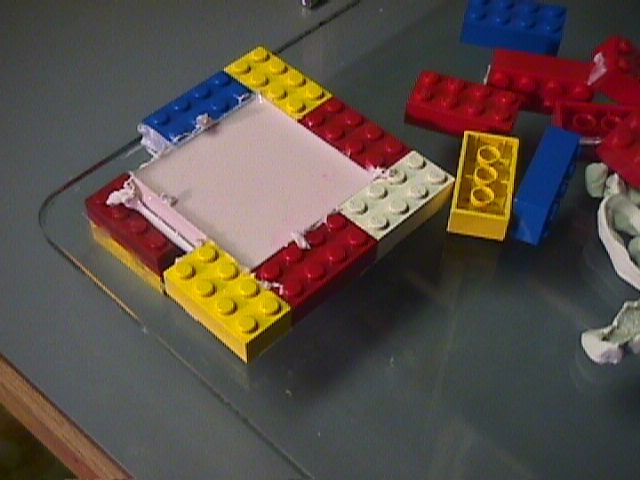 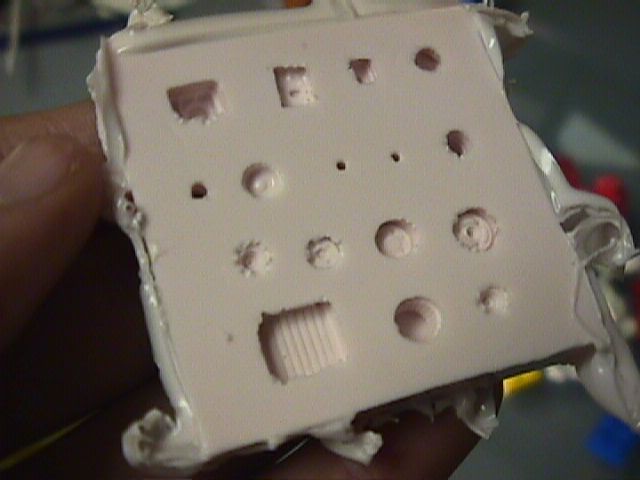  After a little trimming, the mold is ready for use! Also shown is a subwoofer mold I did that has no bubbles what so ever in it. It was the test piece for this method. 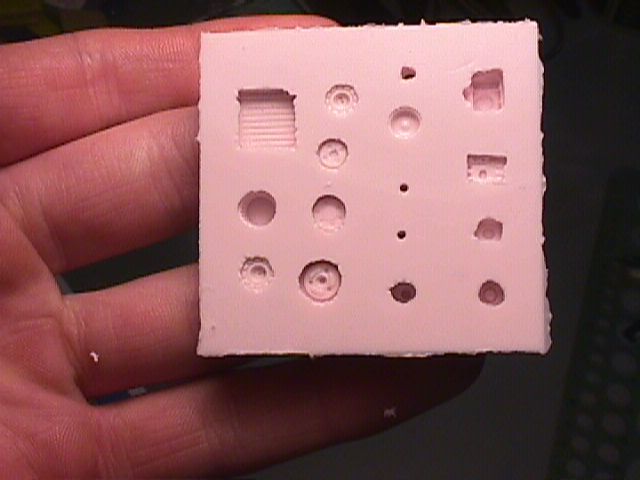 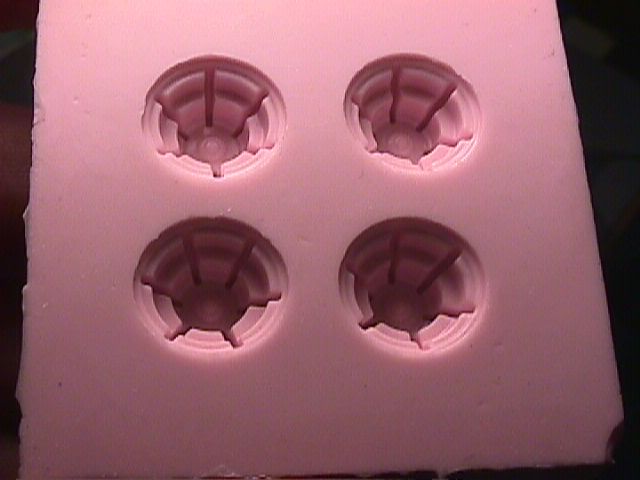 Just a tip, I wrap my molds in plastic wrap to keep them from getting dust and other gunk on them.  Note: There really isn't a set way to do this, I'm just showing what I do. The large piece of glass could be substituted for something smaller and just held against the compressor. And if you are using something other than a compressor, like a back massage thing, you'd probably hold the device up against the box or under it. Experiment a little and see what works for you. Happy casting!  I hope this is of use to some people. I hope this is of use to some people.
__________________
 Slow down, dear, you're scaring the dog... 1:1 ride: '84 BMW 318i, needs attention. Stickin' with it  1:25 450+ hp DSM build, Click here for thread 

|
|
#3
03-10-2006, 03:30 PM
|
||||
|
||||
|
Re: How To: Almost Eliminate Bubbles in Your Molds
there's a novel idea. i usually end up pushing a dixie cup down on the top of the stuff a couple of times. haven't seen bubbles for years. i guess i'm gonna have to try both of those now. thanks to both of you guys.
|
|
#5
03-10-2006, 03:51 PM
|
||||
|
||||
|
Re: How To: Almost Eliminate Bubbles in Your Molds
I once watched an episode of Rides on TLC where Chip Foose was casting decorative pieces in resin. He mixed up a bunch of RTV then put it in a vacuum chamber. The vacuum sucked ALL of the air out of the RTV, and the mold was flawless.
I'm sure someone here could fab up a vac-chamber using a shop-vac or something.... 
__________________
The name is Sam.. and I'm ready to rock ------------------------------/  TRIUMPH!
|
|
#6
03-10-2006, 05:42 PM
|
||||
|
||||
|
Re: How To: Almost Eliminate Bubbles in Your Molds
Glad you like it
I'm sure there are small, semi-affordable vacuum chambers out there somewhere, but I, uh, lack the funds  This works well for me, so I'm happy with it. The next step is a way (besides a pressure pot) to get the bubbles of the resin quickly (oh why didn't I get the long-life resin? Oh wait, I know-- it was $6 more than the quickset This works well for me, so I'm happy with it. The next step is a way (besides a pressure pot) to get the bubbles of the resin quickly (oh why didn't I get the long-life resin? Oh wait, I know-- it was $6 more than the quickset   ) )I think I might attatch something stiff (needle, pin, small glass rod) to one of those vibro back massage things and stick in the resin when it's in the mold. I'm off to expreiment! Providing I can find one of those things... 
__________________
Slow down, dear, you're scaring the dog... 1:1 ride: '84 BMW 318i, needs attention. Stickin' with it 1:25 450+ hp DSM build, Click here for thread
|
|
#7
03-11-2006, 12:10 AM
|
||||
|
||||
|
Re: How To: Almost Eliminate Bubbles in Your Molds
Wait a minute. You're casting molds of woofers and you don't see the sense in just sticking the mold on your woofer and blasting it with some rump-shakin' beats to vibrate and remove the air bubbles?...;-)>
__________________
Bill "Why yes, that IS my bare, carbon fiber Enzo in Scale Motorsport's "How to Carbon Fiber Decaling video!"
|
|
#8
03-11-2006, 07:05 AM
|
||||
|
||||
|
Re: How To: Almost Eliminate Bubbles in Your Molds
Ahem...I thought I gave you the idea on SAM?!
 http://www.scaleautomag.com/sca/comm...TOPIC_ID=24959 John S.
|
|
#9
03-11-2006, 02:27 PM
|
||||
|
||||
|
Re: How To: Almost Eliminate Bubbles in Your Molds
cinqster-- Rediculous as this sounds, I don't remember. The way I've been doing this came within that last month... but maybe, somehow, subconciously, your idea morphed into this. I honestly didn't even remember asking those questions and I'm glad you posted the link to it! Now that I see the thread it probably looks like I'm some sort of megalomaniacal credit-snatching idea thief, but that's not the case!
 Pardon...
__________________
Slow down, dear, you're scaring the dog... 1:1 ride: '84 BMW 318i, needs attention. Stickin' with it 1:25 450+ hp DSM build, Click here for thread
|
|
#10
03-11-2006, 06:52 PM
|
||||
|
||||
|
Re: How To: Almost Eliminate Bubbles in Your Molds
Quote:
 Nice graphic how-to BTW. I thought you guys didn't have Lego over there? John S.
|
|
#11
03-11-2006, 07:29 PM
|
||||
|
||||
|
Re: How To: Almost Eliminate Bubbles in Your Molds
Quote:
 Dunno what you mean by "over here" but Legos are big in the US!
__________________
Slow down, dear, you're scaring the dog... 1:1 ride: '84 BMW 318i, needs attention. Stickin' with it 1:25 450+ hp DSM build, Click here for thread
|
|
|
POST REPLY TO THIS THREAD |
 |
|
|


