|
|
| Search | Car Forums | Gallery | Articles | Helper | Air Dried Fresh Beef Dog Food | IgorSushko.com | Corporate |
|
|||||||
| WIP - Street Post topics for any "Works In Progress" street vehicles projects in this sub-forum. |
 |
 Show Printable Version | Show Printable Version |  Subscribe to this Thread
|
|
|
Thread Tools |
|
#1
 10-09-2011, 05:36 PM
|
|||
|
|||
|
Tamiya Lamborghini Countach LP500S
This is a simple kit that I bought in Miami when I was on a Disney vacation with my family. By the way, the store I bought it, a BMW Z3 and the Aston Martin DBS its a huge Tamiya and Revell warehouse with awesome prices. I will use this kit as a comeback from last April, when I was getting ready for the GSL. From that date, I hadn't touched a model. Actually, I haven't opened my GSL model's bag to see how they arrived..if they arrived
A dry fit to see how everything looks together. 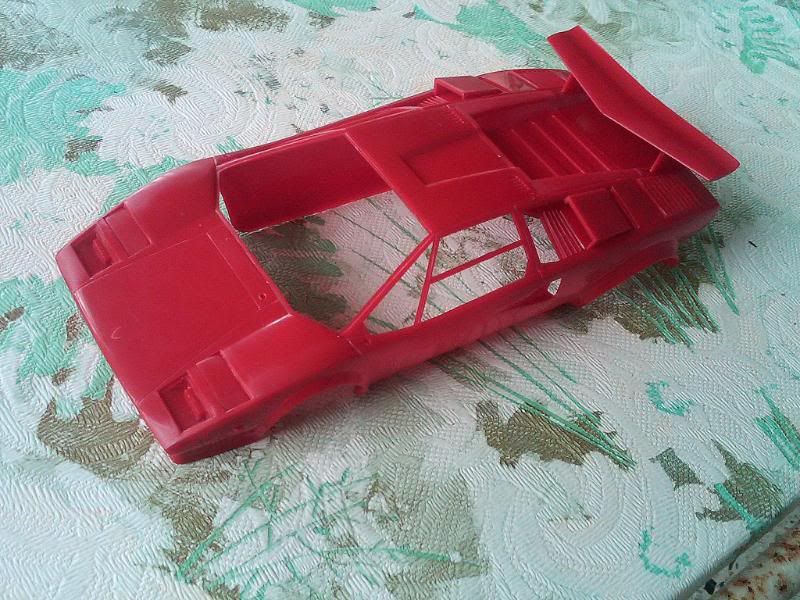 Some primer after I removed the mold lines over the body.  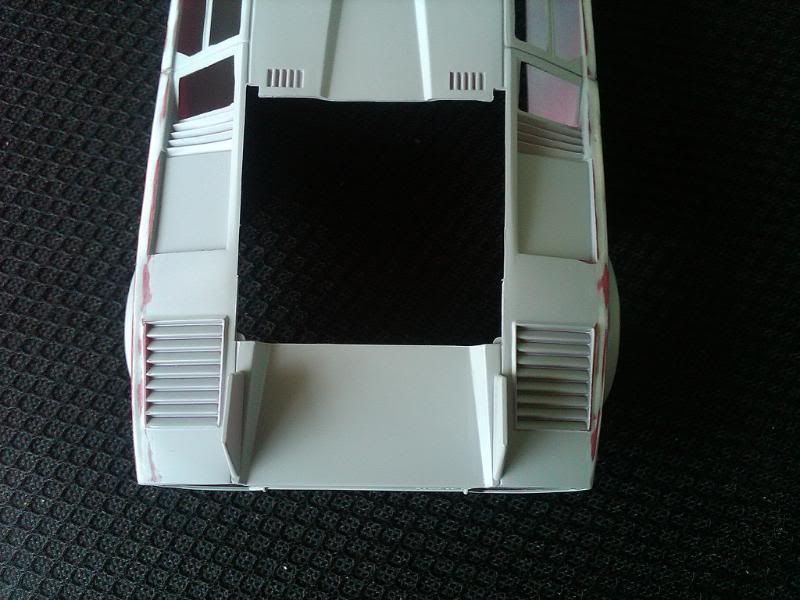 Here I did a Scalefinishes paint job for the first time ever and it was on this body. By the way, great paint! I also airbrushed some gloss black paint to the muffler tips and the wheels before an Alclad II coat. I was pretty impressed by how this paint performed since its enamel and there's a lot of detail on this exotic body. The deflection of the inside of the dehydrator can be seen on the hood:  The wheels tube wholes are too wide to me. I proceed to thin it and then gave them an oven cleaner bath, then some Alclad II Chrome.  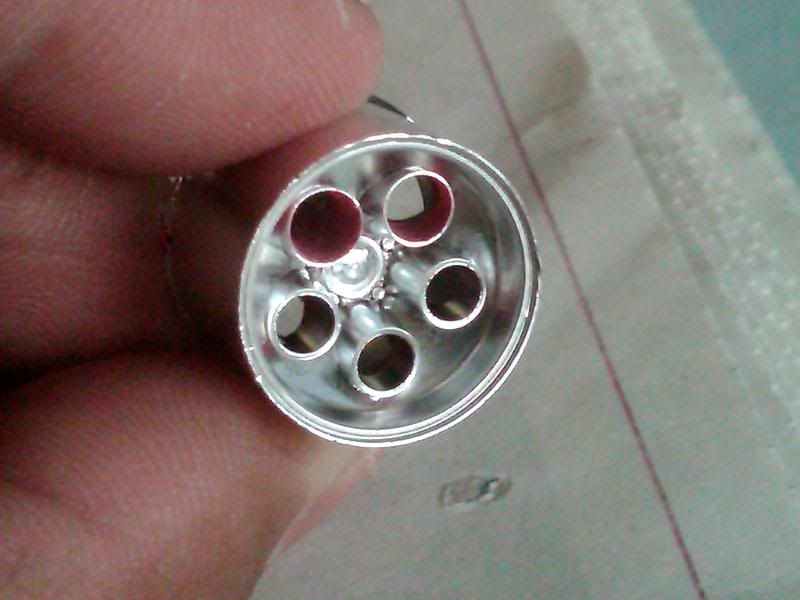 The muffler tips also are a little bit thicker, so, received the same treatment. 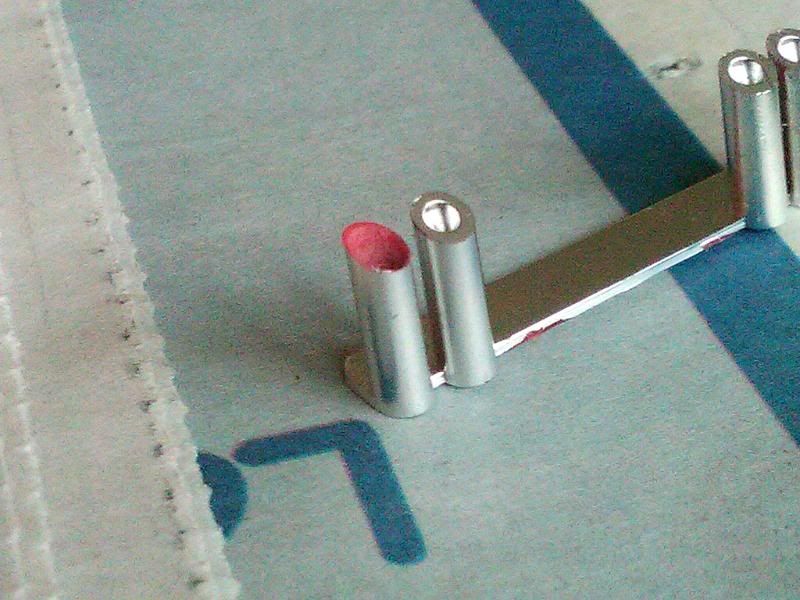 As will be a Box Stock model, the engine will receive no add-ons goodies, so I have to take out the brush to enhance it a little bit. Before: 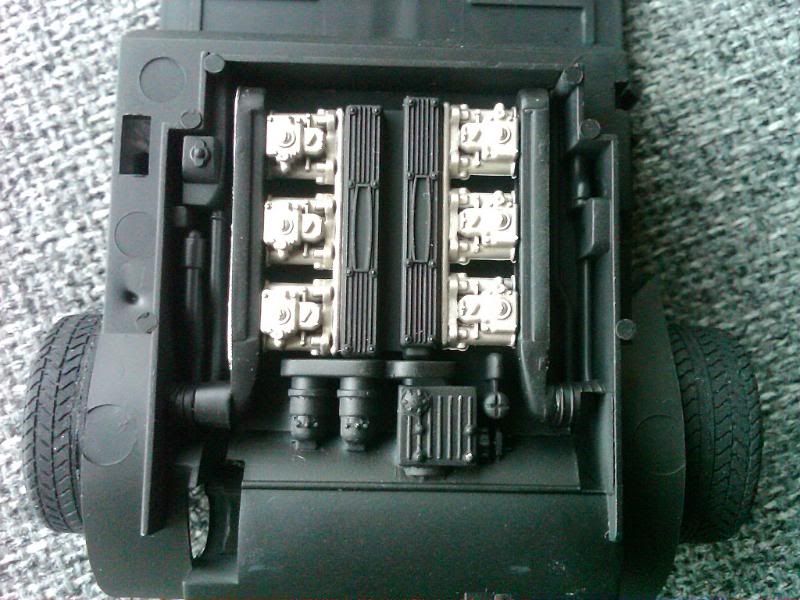 After: 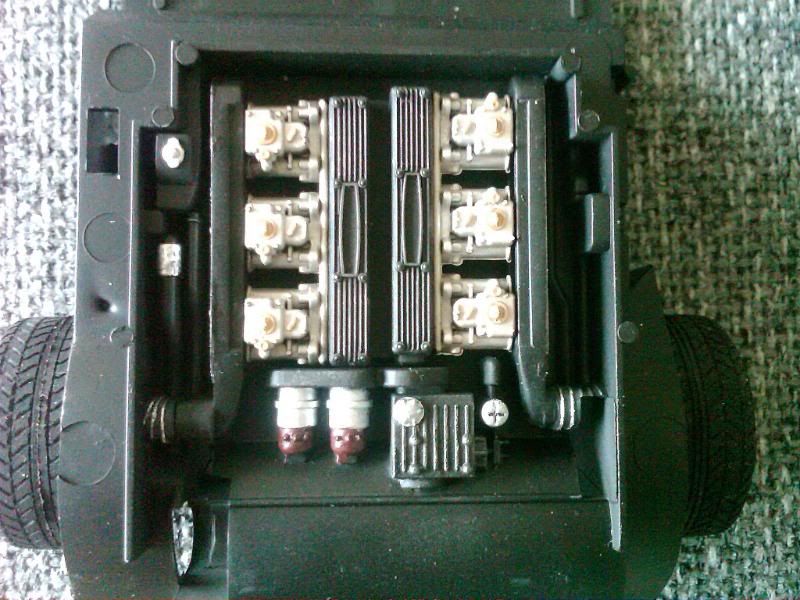 The dash is a two part assembly, but, an ugly line asked for some putty. 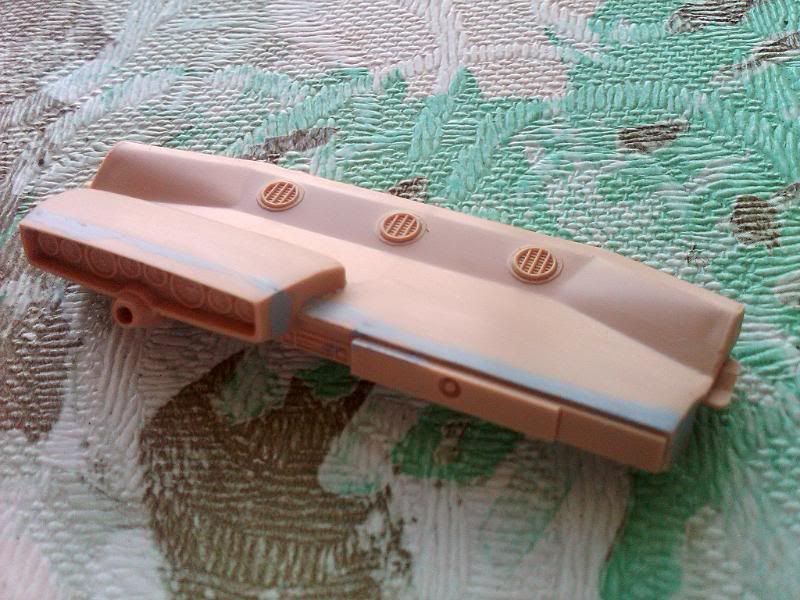 The interior tub also has some ugly pin holes. 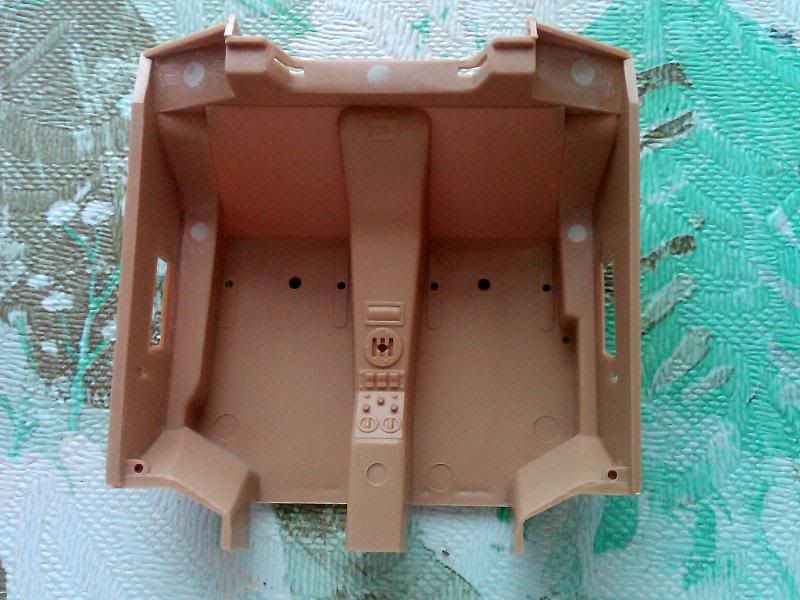 Finally for today, the bottom of the car receive also some brushed paints detailing(some difficult task) and to seal everything up some trick I learned at my IPMS local group stay...The Dry brush technique. 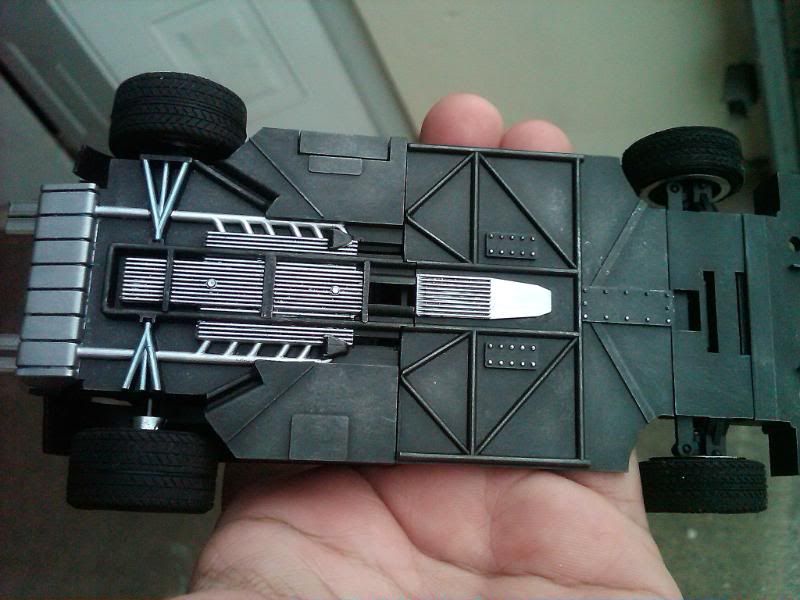 To be continued... Last edited by Porsnatic; 10-10-2011 at 09:31 PM. 
|
|
#3
10-10-2011, 05:13 AM
|
||||
|
||||
|
Re: Tamiya Lamborghini Coutach LP500S
i do love a countach build!
lookin good so far
__________________
   
|
|
#4
10-10-2011, 07:28 PM
|
|||
|
|||
|
Re: Tamiya Lamborghini Coutach LP500S
Great work so far!
|
|
#5
10-10-2011, 08:14 PM
|
||||
|
||||
|
Re: Tamiya Lamborghini Coutach LP500S
Nice! I also had this kit. Great kit to work with. Are you going to add the driver in? I decided not to do that.
__________________
 Lexus LF-A Roadster Concept with my bodykit design "Current Projects" Nismo Kure GT-R - 0% Sileighty/Onevia - 35%/25%, MCR R34 GT-R - 10%, R34 JGTC Xanavi - 30%, JGTC Raybrig NSX - 0%, 2009/2011 WRX STi - 50%/0%, D1GP Kazama S15 - 55%, Toyota Celica - 2%, Calsonic Z Super GT - 0%, Calsonic R32 GT-R Race car - 5%, C-West RX-7 - 40%, Nismo 350Z 5%, Blitz Chaser - 90%.... a lot of unfinished work.
|
|
#6
10-10-2011, 09:33 PM
|
|||
|
|||
|
Re: Tamiya Lamborghini Coutach LP500S
No, this one didn't came with the driver. This is the 2007 reissue. Look tomorrow for the update, since I already almost finish with the interior tub.
Quote:
Last edited by Porsnatic; 10-14-2011 at 12:00 AM.
|
|
#7
10-12-2011, 09:52 AM
|
|||
|
|||
|
Re: Tamiya Lamborghini Coutach LP500S
Update time...
Since the plastic has a sort of cream-leather plastic, in order to cover it with the flat white paint, I had to made a good mix to avoid the bleed through. I mixed Gunze Sangyo's Mr. White Surfacer 1000, Mr Color white, and Mr Color flat clear. After I shoot the color, I masked everything up, including the dash... 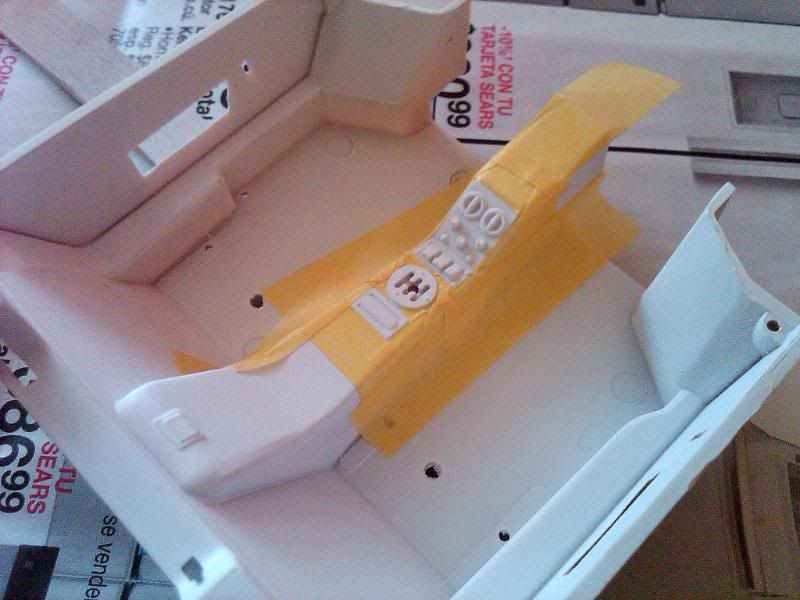 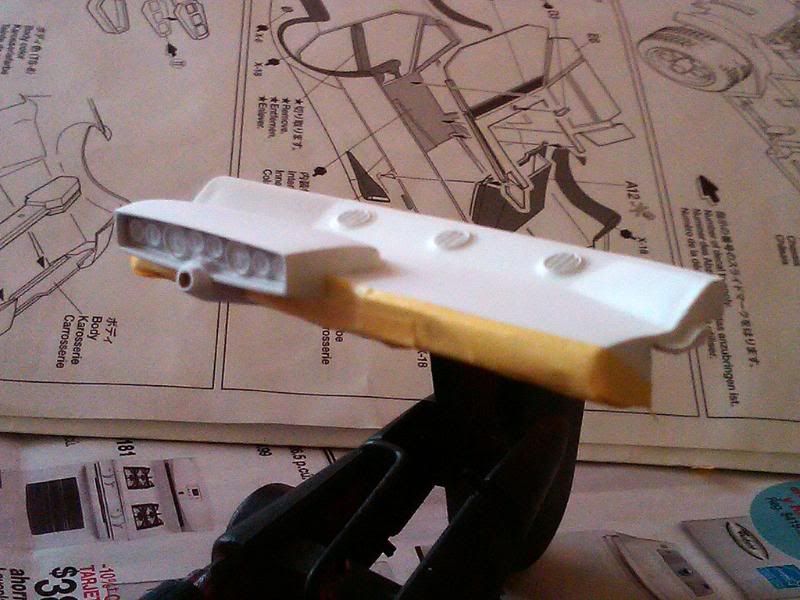 This is how it turned out at first sight with any retouch...Black details over white are alway deficult! 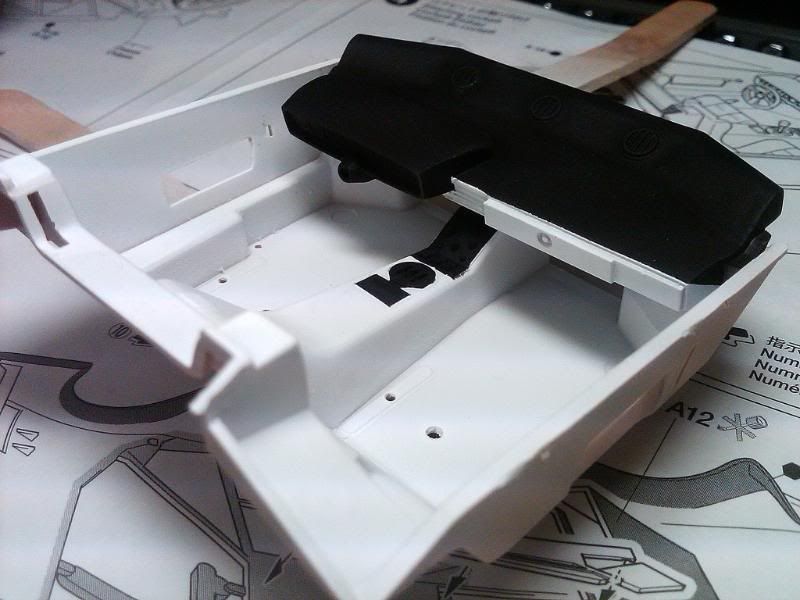 The dash is supposed to have a silver face, so, I decied to use a bright one. I selected Gaianotes Star bright silver,but, there's a problem with this one, although its very bright...Its to grainy... 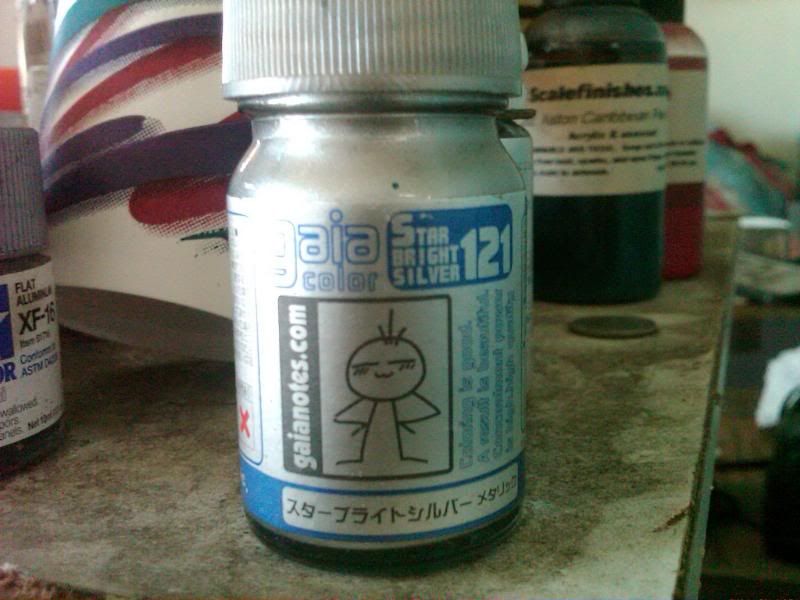 How I resolved it?, I used their T-09 Thinner for metallics. This is a thinner that when you use a liltle bit more thinner than paint ratio and leave it about 5 minutes,the thinner disolves the metallics particles and gives you a smoother surface, something like Alclad's chrome. Here can be seen the thinner working.. 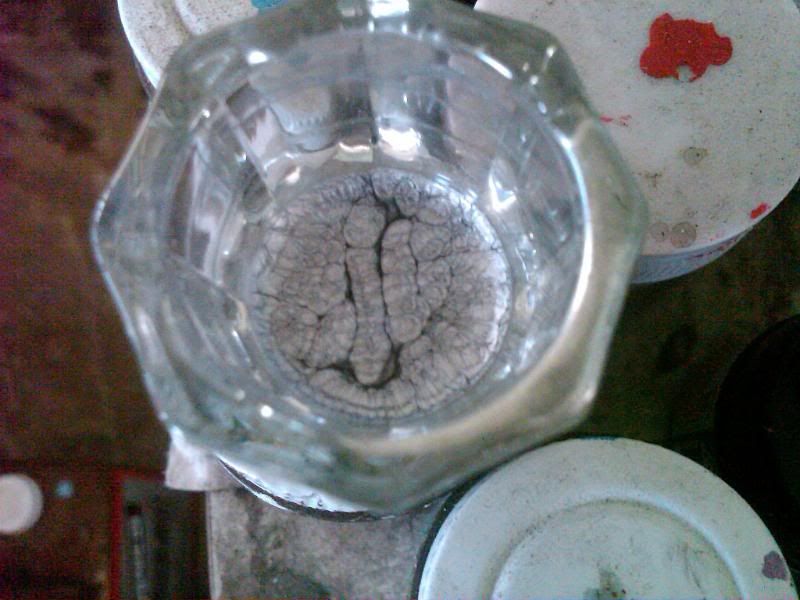 How the dash turned out... 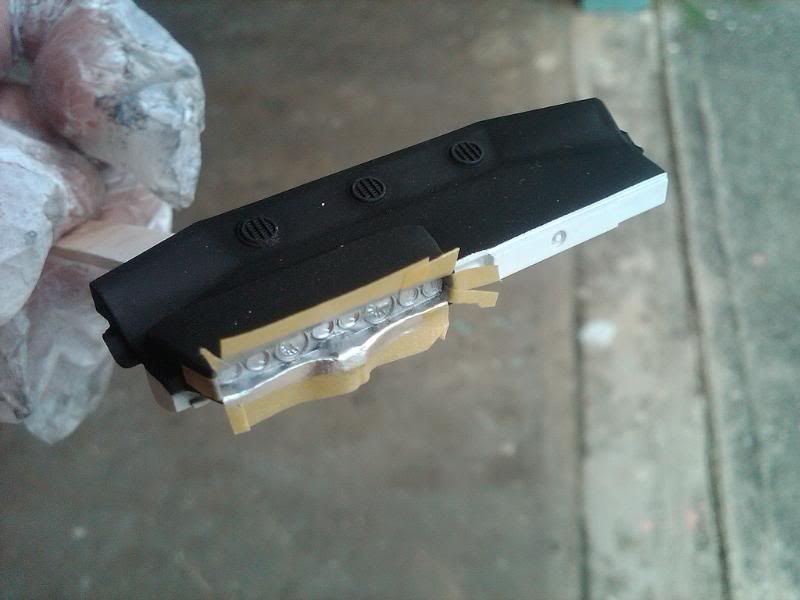 After all the silver paint section was finished, the thinner still continued disolving the paint...  This is the dash and the center console after some detailing... 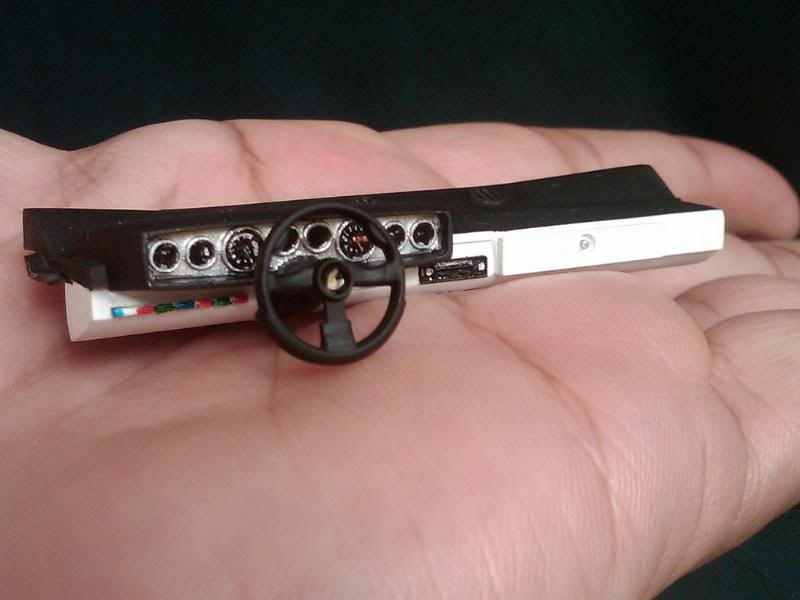 The rear wheel after the Alclad coat and how they looks on the model...  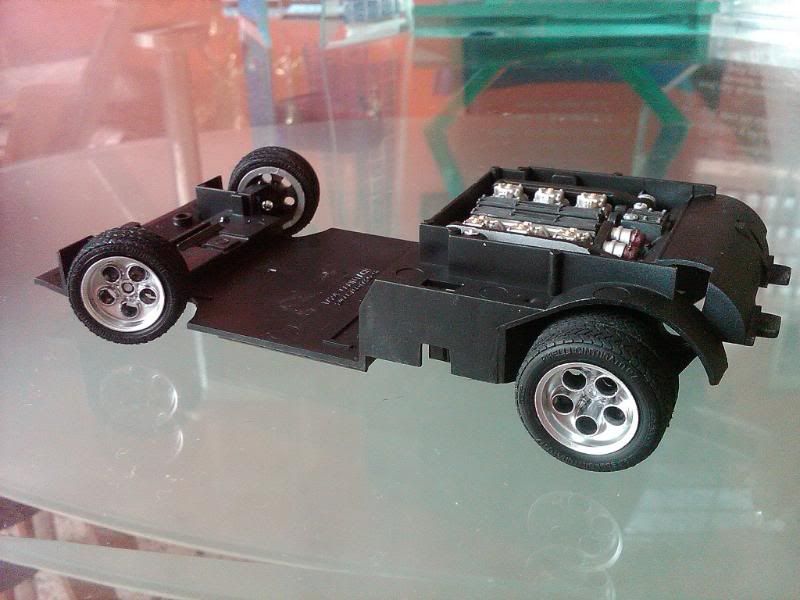 to be continued... Last edited by Porsnatic; 10-12-2011 at 02:52 PM.
|
|
#8
10-13-2011, 09:17 PM
|
||||
|
||||
|
Re: Tamiya Lamborghini Coutach LP500S
nice progress
nice dash detail i look forward to more
__________________
|
|
#9
10-14-2011, 12:01 AM
|
|||
|
|||
|
Re: Tamiya Lamborghini Coutach LP500S
Hey, you're completly right, it comes with a driver!...I haven't noticed that. But,...A driver for a well known street car!..Weird, isn't it?
Quote:
|
|
#10
10-14-2011, 08:57 AM
|
|||
|
|||
|
Re: Tamiya Lamborghini Coutach LP500S
Update time...
A quick overall view before I attached the dash: 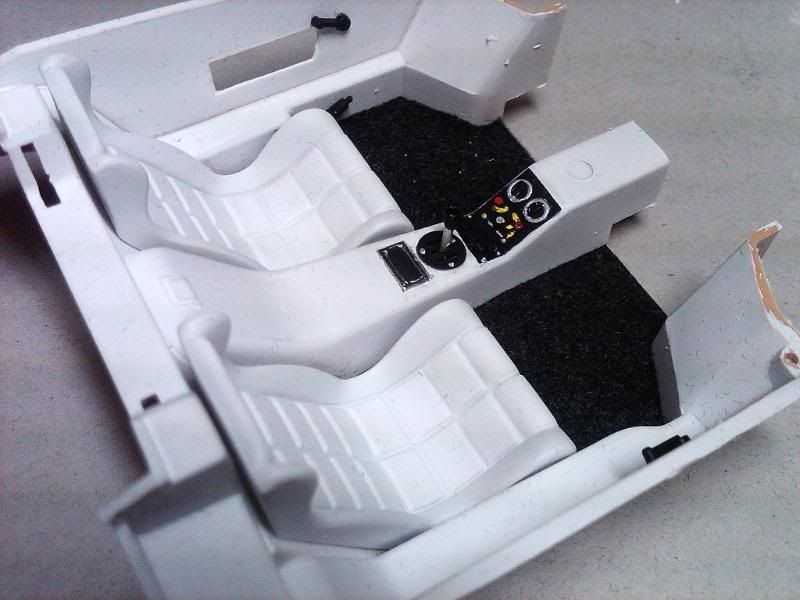 Dash in on plus seats: 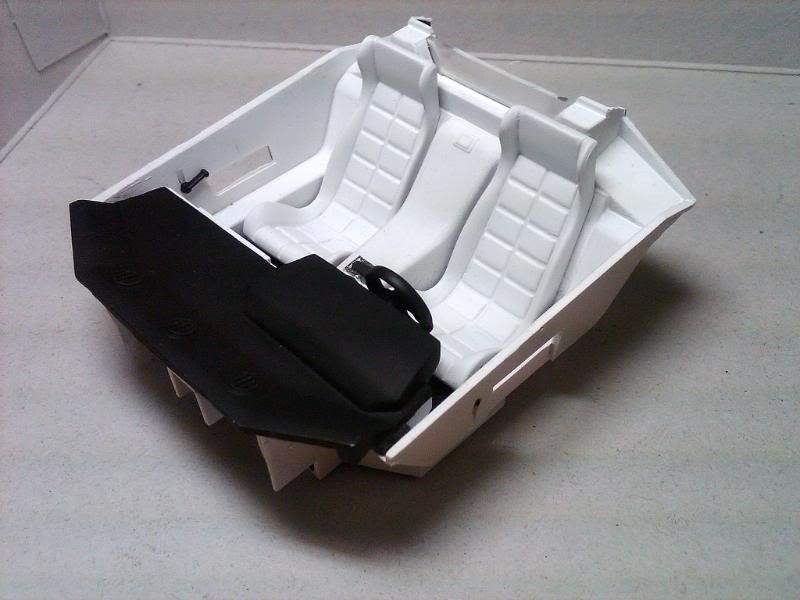  A better view to the dash:   The tub assembly already on the chassis: 
|
|
#12
01-23-2012, 05:39 PM
|
|||
|
|||
|
Re: Tamiya Lamborghini Coutach LP500S
After I finished with the chassis, bottom of the car, exhaust system, and the interior tub, I will move on to the last part…Body painting. I airbrushed 2-3 coats of the Scalefinishes Acrylic Enamel Gloss Black.
The paint session was perfect, just some minor dust on the hood area. 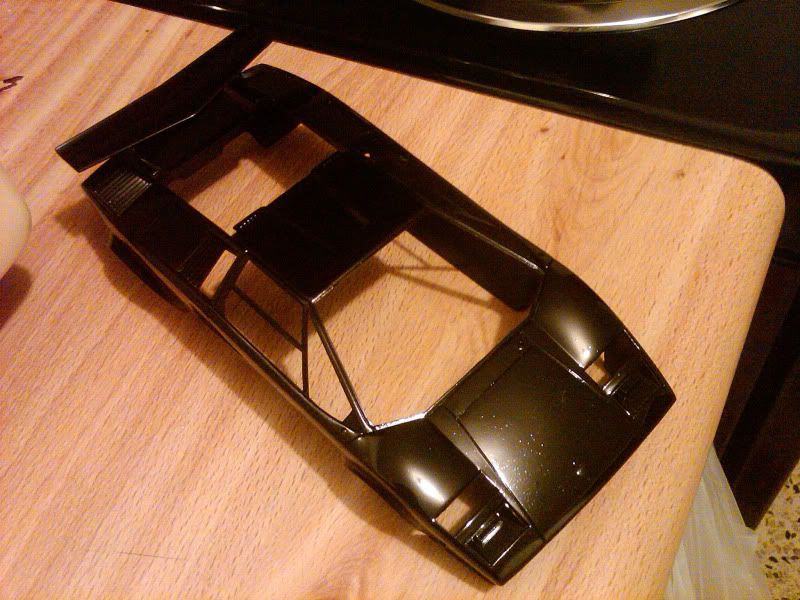 After some light sanding I have a surprise. To me, enamel its supposed to be thick, but, this great paint performed like lacquer and after a 48 hours drying period it was thin as lacquer and when I sanded the body I went through the paint to the primer in some spots. So, I had to give a couple of light airbrush coats. 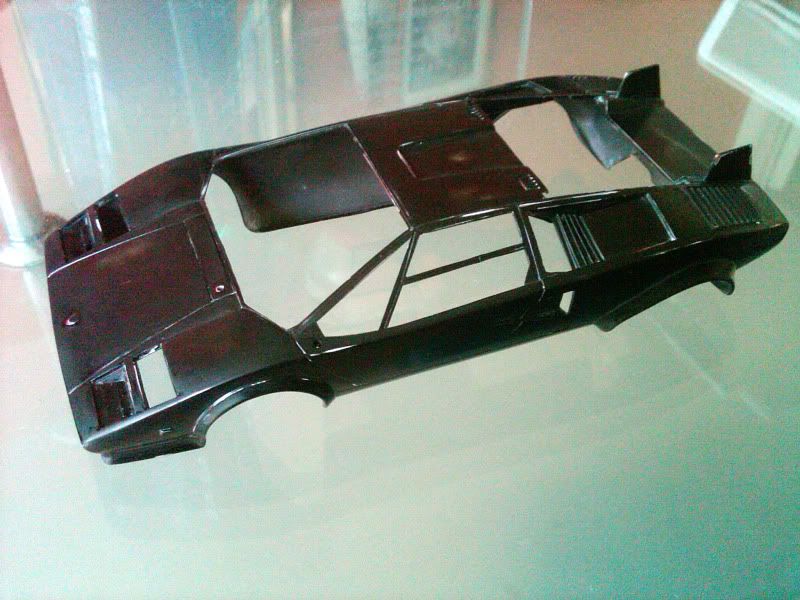 This time I got a perfect buffing and a great gloss on the paint..No clear needed! 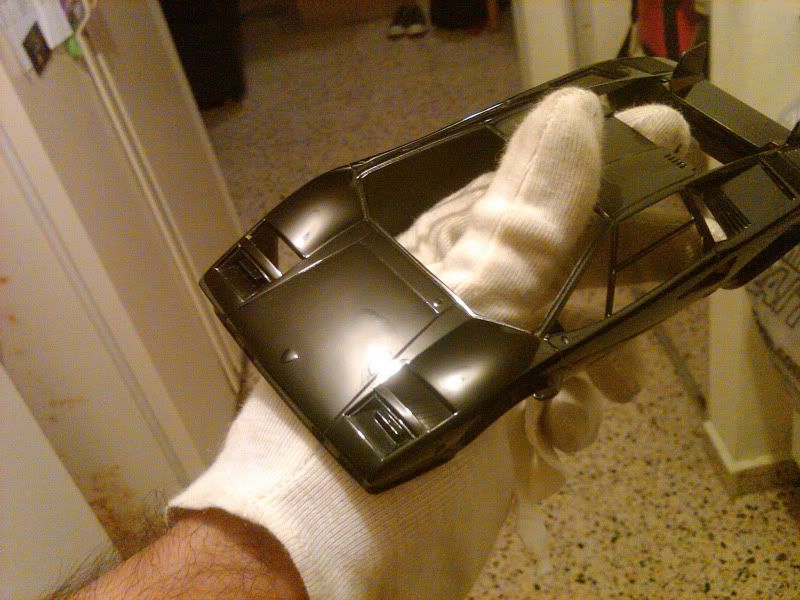 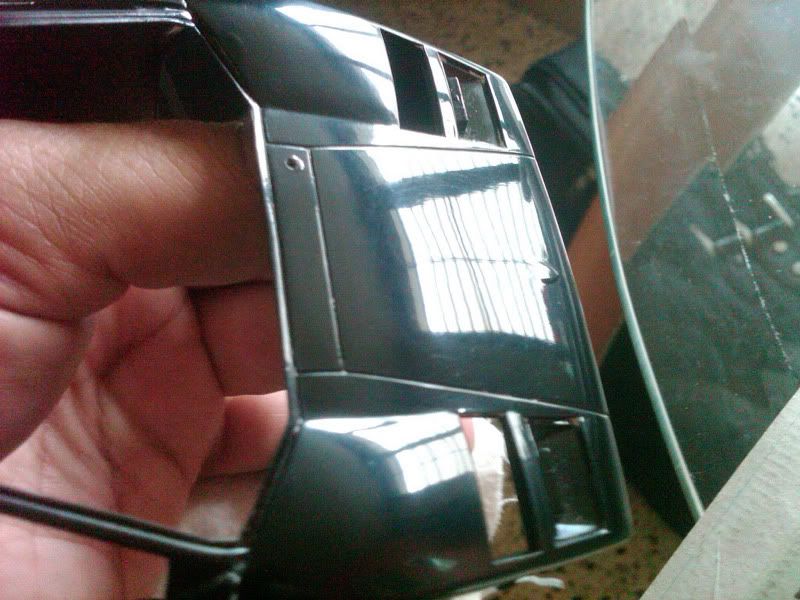 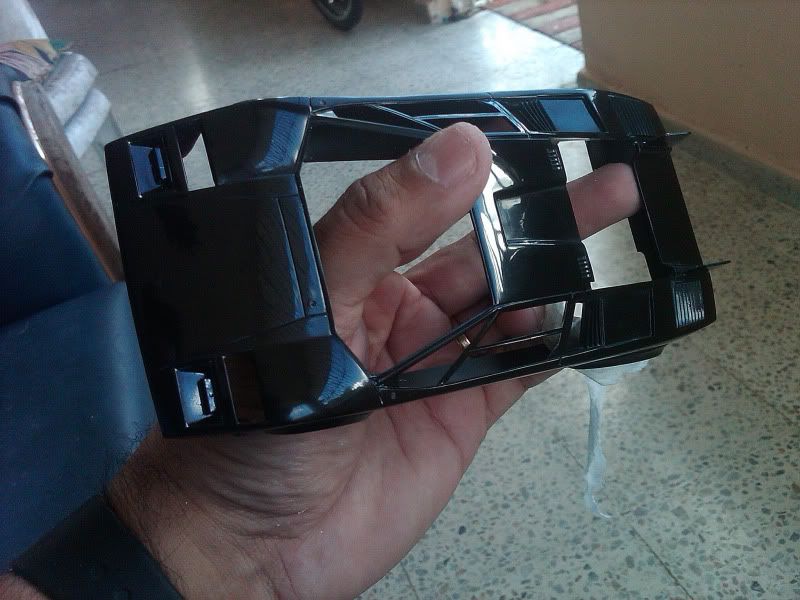 After I finished with the buffing of the body, then, I moved to paint detail it. I used of my favorites paints to color the semi gloss black areas, Gunze Sangyo semi gloss black. Here I started to mask the side scoops: 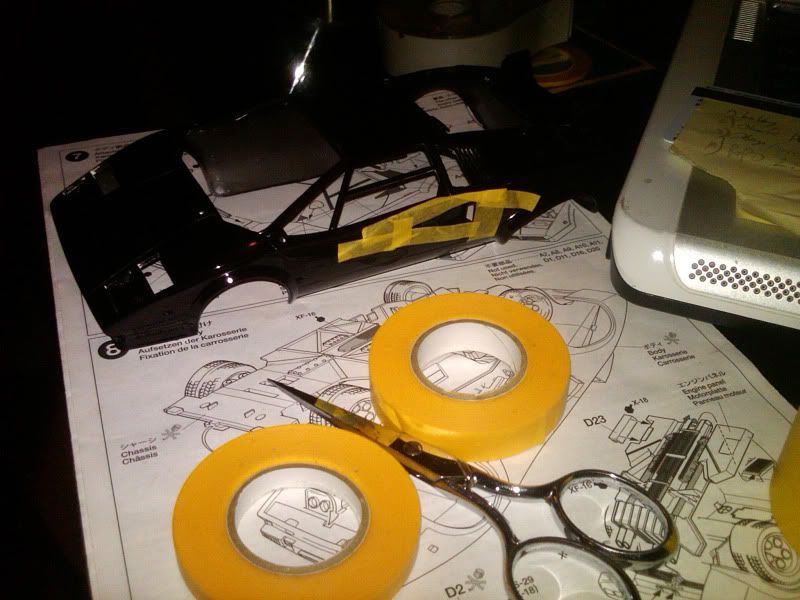 ...The windshield mouldings, scoops, wing supports, etc: 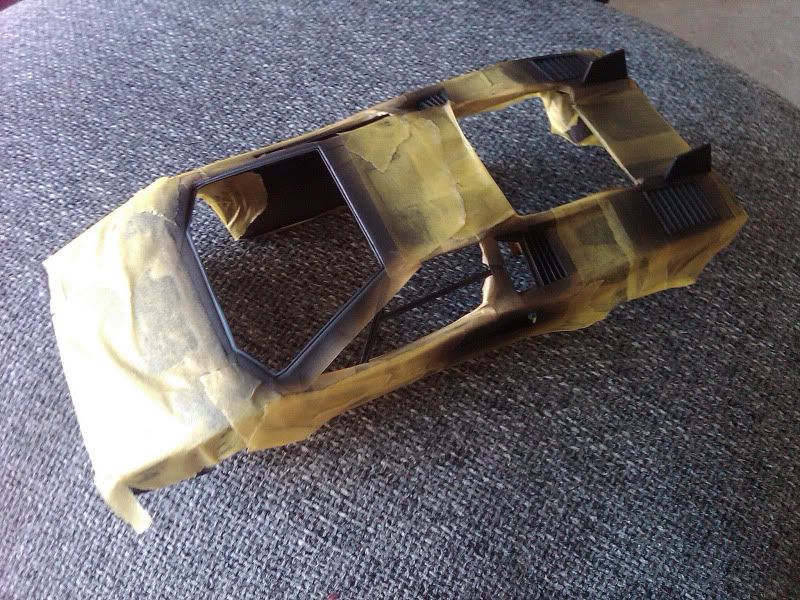 This was probably the most difficult section to detail, the front direction signals. I think it could be easier if it was molded as a separate part, a simple square to glued on or, perhaps it could be sanded but….this is a Box Stock, so, I won’t altered anything like this. I had to mask and use even aluminum foil for the body, due it was already polished and with some wax already. 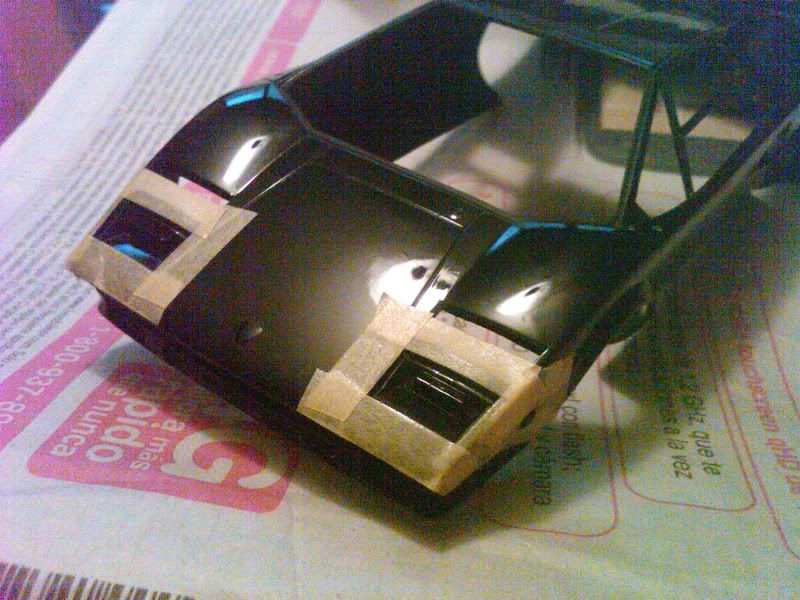 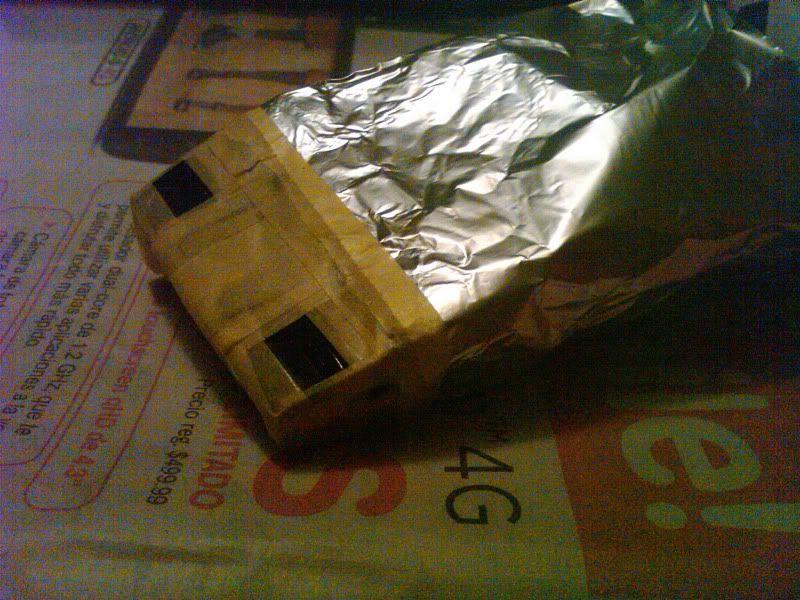  This is how it turned out…  Side scoops were painted and polished, masked, then, detailed with semi gloss black. 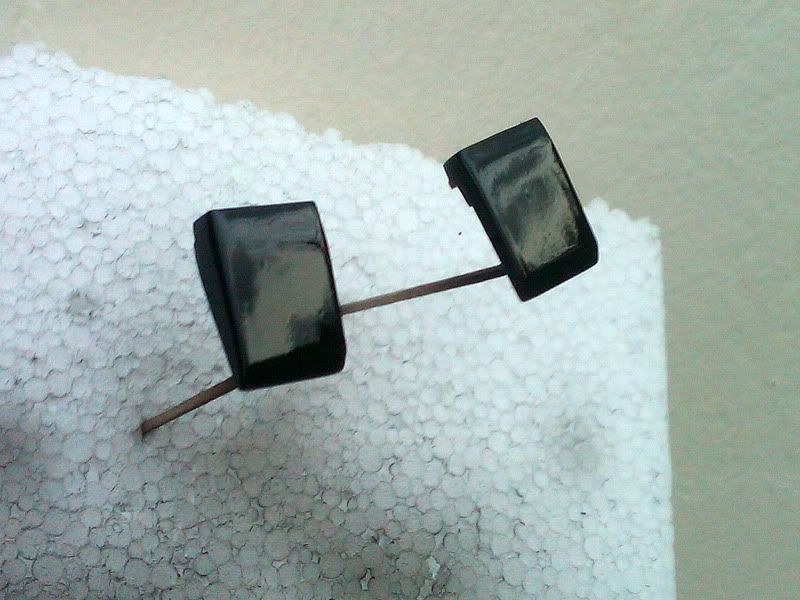 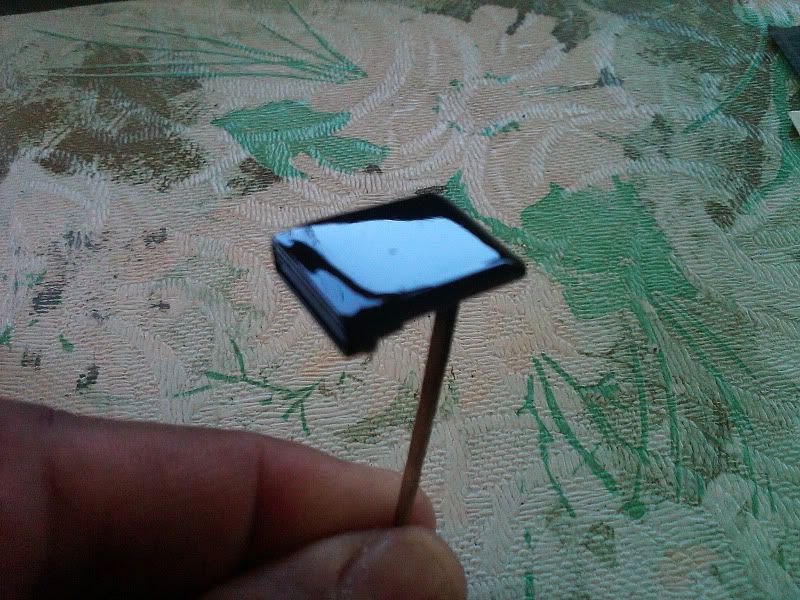  The scoops and the rear wing where glued to the body, so, this is a picture of how everything looks until now. Now, I just have to detail the engine cover. 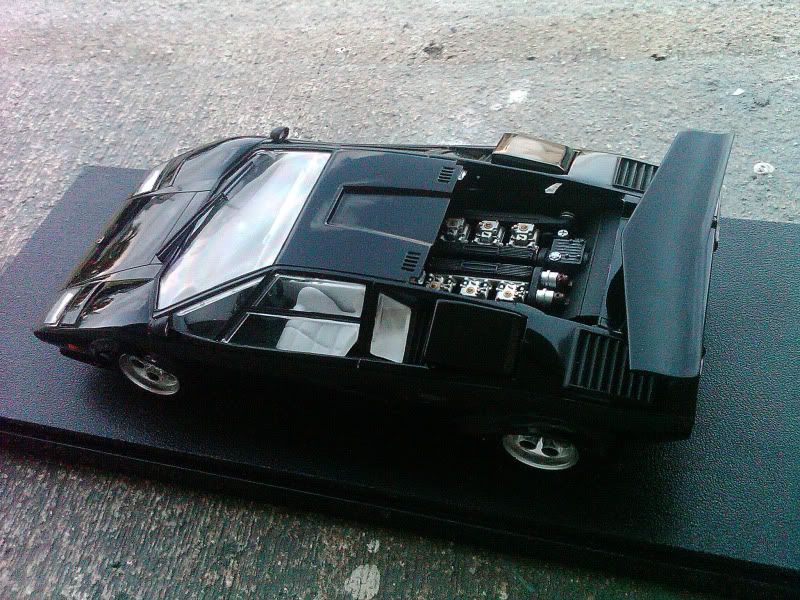 This was also a little bit tricky. Tamiya tape as always to the rescue…Instruction sheet call for some semi gloss black, but, since the paint turned out so glossy a contrast is hard to see. To resolve this, I mixed some semi gloss black with some flat clear and I got what I wanted: 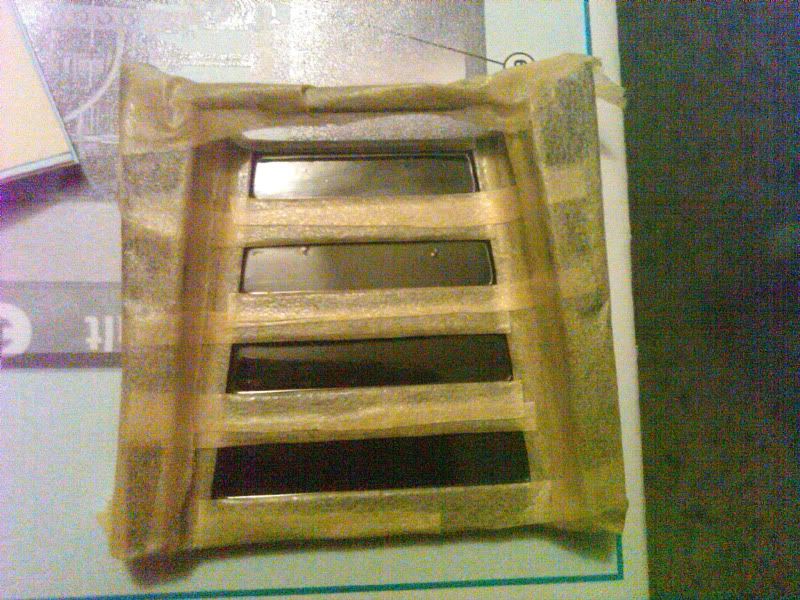 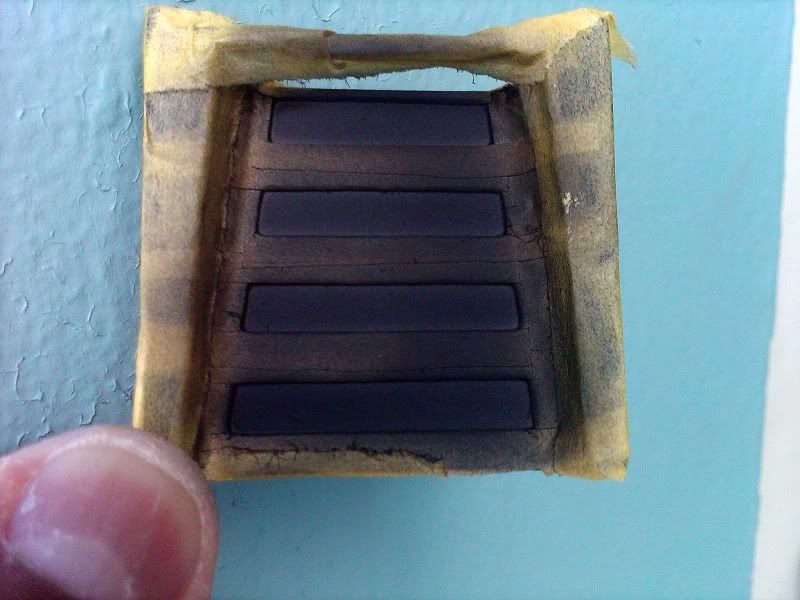 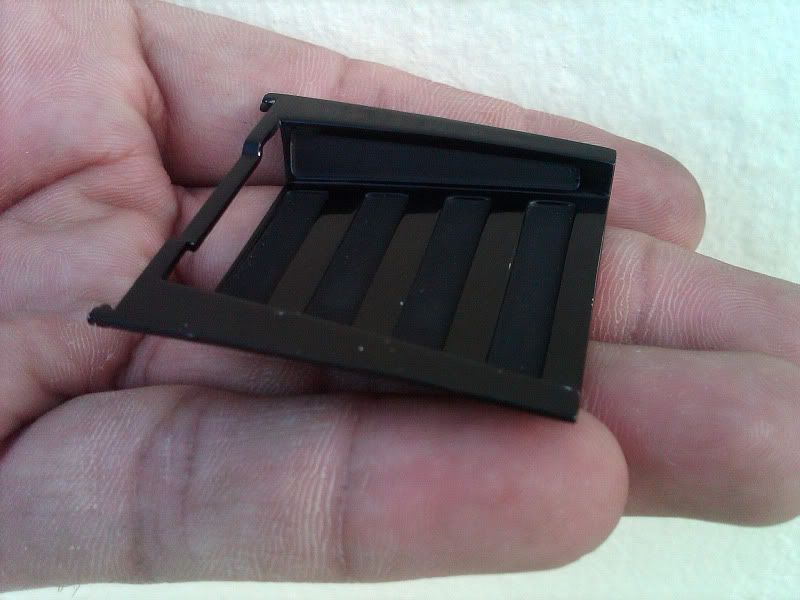 Here we can see how it turned out. A simple model with a great aggressive look… 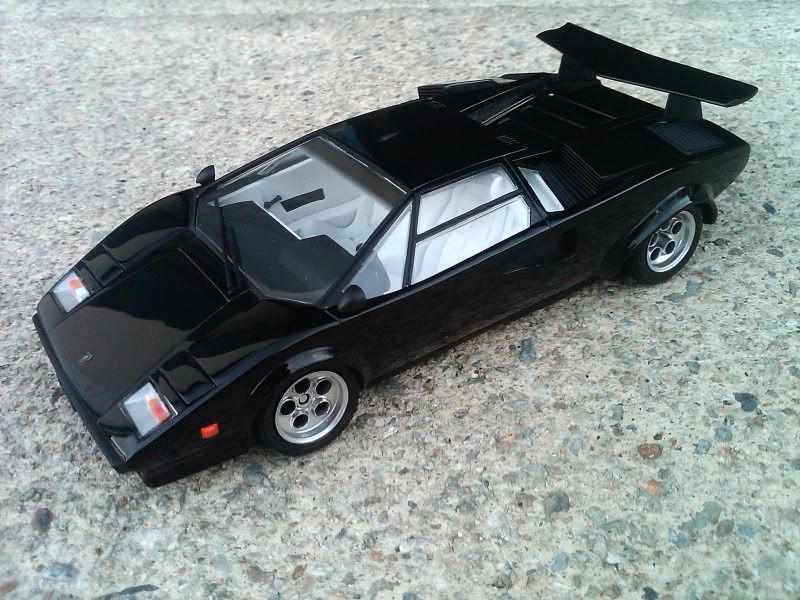 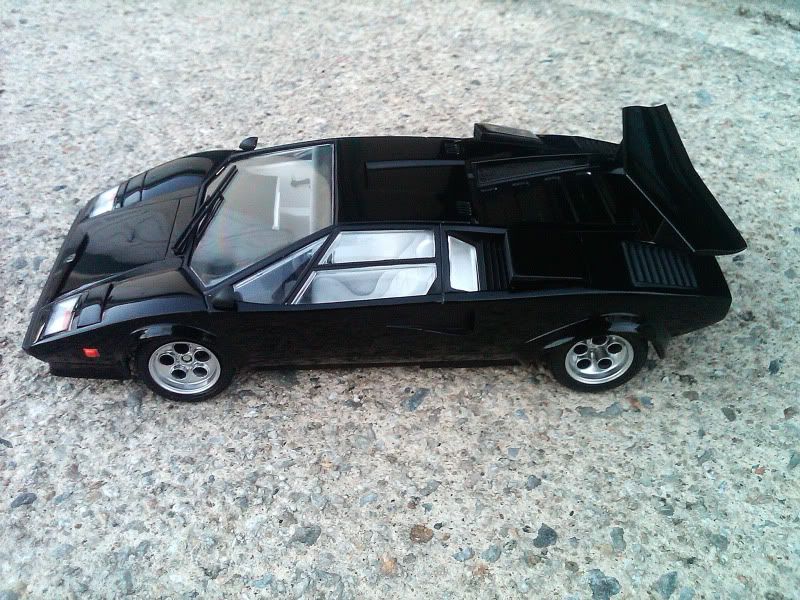 More pictures in the Completed Projects/Gallery
|
| ||||||||||||||||||||||||||||||||||||||
|
POST REPLY TO THIS THREAD |
 |
|
|


