|
|
| Search | Car Forums | Gallery | Articles | Helper | Air Dried Fresh Beef Dog Food | IgorSushko.com | Corporate |
|
|||||||
| Car Modeling Share your passion for car modeling here! Includes sub-forum for "in progress" and "completed" vehicles. |
 |
 Show Printable Version | Show Printable Version |  Subscribe to this Thread
|
|
|
Thread Tools |
|
#1
 05-12-2003, 02:07 PM
|
|||
|
|||
|
Could someone post a step by step way to apply CF decal on an irregular surface . With pics if possible... how to make the initial template?!?
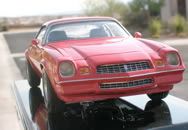
RallyRaider you seem pretty good at this buy the way you built your Peugeot 206... Show me how good your decal skills are!!! I was really impressed buy the mirors and tha gas tank. Thanks
__________________
SFTB 
|
|
#2
05-12-2003, 02:32 PM
|
||||
|
||||
|
id like to know too.
__________________
1991 Eclipse GS-T Exterior: stock Interior: Boost and A/F gauge, TV/DVD player, thats about it. Motor: supra side mount, hard pipes, greddy type s, greddy profec b b/c, nology hotwires, 3 in. turbo back exhaust. Wheels and tires: stock shitty fan rims  with stock tires (no grip what so ever) with stock tires (no grip what so ever)
|
|
#3
05-12-2003, 02:36 PM
|
||||
|
||||
|
with CF decals, there is no miracle solution.
All you might need is a lot of patience, a decal softener to bend nicely around curves and an earbud or something not-sharp to put them into place. You might want to use a hair drier if appling decals without decal setter (microset) and decal softener (microsol) or similar products. Should be actualy a post about this (or several) Olivier
|
|
#4
05-12-2003, 02:51 PM
|
||||
|
||||
|
To make a pattern simply use masking tape to cover the part then go around the edge with a pencil to make the outline. Then take the tape off and lay it on cardboard or plastic to make the pattern. Then trace the pattern on to decal and cut it out.
|
|
#5
05-12-2003, 03:14 PM
|
||||
|
||||
|
Decals should also be a little larger than what you cut out so they will fit properly on the model.
|
|
#6
05-12-2003, 03:35 PM
|
|||
|
|||
|
Quote:
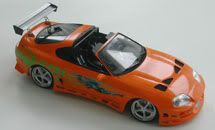
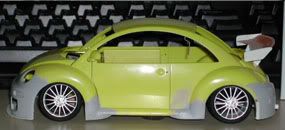
how the heck you guys get those decals in those places, like the intakes. do you have pics, and what to use???
__________________

|
|
#7
05-12-2003, 11:12 PM
|
||||
|
||||
|
I just make sure I cut the decal big enough, you don't want to make it too small otherwise you will have to use more than one decal and you will see the overlap
i also use a decal setting solution, it works wonders  
|
|
#9
05-13-2003, 08:49 AM
|
|||
|
|||
|
|
|
#10
05-13-2003, 09:32 AM
|
|||
|
|||
|
Quote:

|
|
#11
05-13-2003, 12:10 PM
|
||||
|
||||
|
Microsol is the only way to make it look real.

|
|
#12
05-13-2003, 12:20 PM
|
|||
|
|||
|
Quote:
__________________
|
|
#13
05-13-2003, 02:30 PM
|
||||
|
||||
|
Quote:
this is my first modeli will try to remove all molding lines and stuff on the body
|
|
#14
05-13-2003, 07:41 PM
|
|||
|
|||
|
so let me guess this right, so i dont mess it up
you disolve the microsol in the warm water, put the decal in, until is ready to move to the part, make sure there are no bubbles, taking them off with a qtip, and a small brush to keep the moisture, after all the bubbles are out, use a hair dryer to let it dry. so is that correct??? 
__________________
|
|
#15
05-13-2003, 07:52 PM
|
|||
|
|||
|
Quote:
 You do what? You place the decal in the warm water until it will slide off the backing, once you have the decal in place on the part, then you apply the microsol to soften the decal and help it conform to the surface. once microsol is applied, don't touch the decal until it is dry completely, even if it shows small bubbles don't touch. Once it is dry, pop the small bubbles with a sharp blade or pin and gently push the air out with a wet Q-Tip, then apply more microsol and leave it to allow the microsol to work. No matter how tempting, don't touch the decals when they are wet with microsol, you will only mess them up if you touch them. Ray
__________________
|
|
|
POST REPLY TO THIS THREAD |
 |
|
|