|
|
| Search | Car Forums | Gallery | Articles | Helper | Air Dried Fresh Beef Dog Food | IgorSushko.com | Corporate |
|
|||||||
 |
 Show Printable Version | Show Printable Version |  Subscribe to this Thread
|
|
|
Thread Tools |
|
#1
 04-18-2010, 08:47 PM
|
|||
|
|||
|
DIY Stabilizer Link replacement (w/pics)
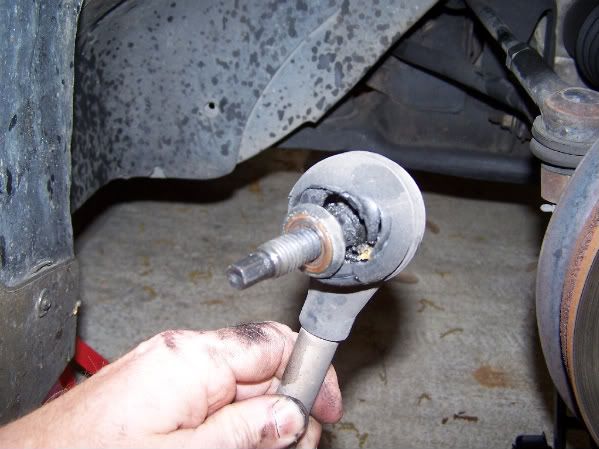
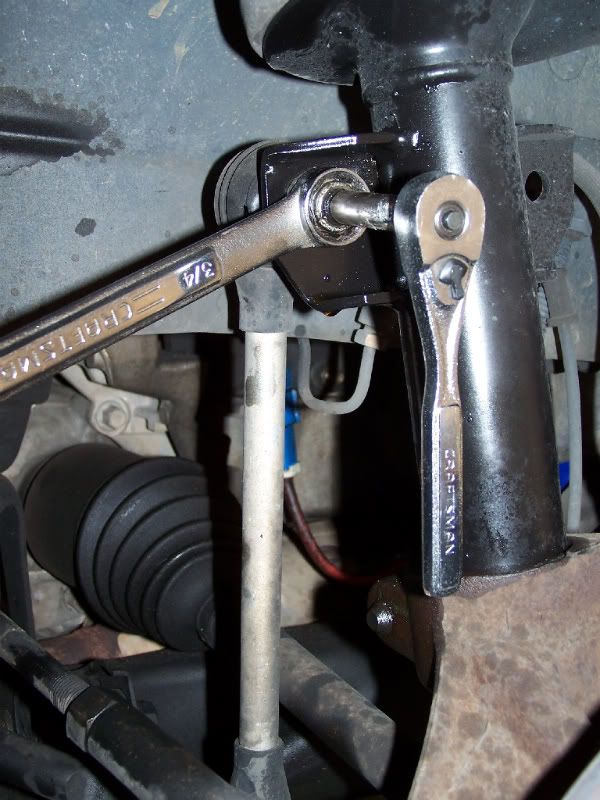
Quick DIY on the stabilizer link replacement I did today.
Really not that difficult to warrant a DIY, but the results so far are great. Previous symptoms were clunking when the van hit a bit bump, or driveway, any time it would rock. Grabbed hold of the old links and there was movement possible. I bought two Moog links from Carquest for about $70 with tax.  1. Loosened lug nuts on whell and jacked up one side of car. 2. Sprayed PB Blaster on both ends of old link.  3. With one wrench on the stud, I broke the nut off the link (top attachment and bottom attachment.  4. Attached grease fittings into side of new links (Moog brand had these) Removed old link, and installed new one had to use slightly different two wrench setup. 5. Reattached wheel, removed jack/ jack stands, etc. Here is the old busted one.  It was really that easy. I took about an hour, just cause I was taking pics, and taking my time. Very satisfied with results for the effort so far... 

|
|
#2
04-19-2010, 12:09 AM
|
||||
|
||||
|
Re: DIY Stabilizer Link replacement (w/pics)
It may not be a bad idea to resize your pictures. A max width of 800 pixels is usually pretty good. These would be great at a max width of 600 pixels.
__________________
|
|
#5
04-19-2010, 10:04 AM
|
|||
|
|||
|
Re: DIY Stabilizer Link replacement (w/pics)
Thanks for the DIY and the pictures.
It's been awhile since I've checked my links - but I've been using the grease-gun-with-needle-fitting method to keep them in decent shape. That said, I really like the replacements that have grease fittings. That's the way to go! Regarding image resizing: I just do it myself before posting, using free image tool IrfanView.
__________________
2000 Windstar LX 3.8 1995 Contour GL 2.5 1986 Mustang GT 5.0 --> Sold, but missed on sunny days
|
|
#6
04-19-2010, 10:10 PM
|
|||
|
|||
|
Re: DIY Stabilizer Link replacement (w/pics)
Grease fittings are best......but in the case of no grease fitting.....no way to add one.....then the grease needle is the way to go.
I got LOTS of miles out of the front end parts on my '96 windstar by using the grease needle to get some lube in there. Make sure to STOP adding grease when you see the rubber cover start to move even just a bit.
__________________
Moderator for Ford Windstar room only Links to my pictures, intended as an aid, not a replacement for, a good repair manual. 1996 3.8L Windstar http://www.flickr.com/photos/4157486...092975/detail/ 2003 Toyota Sienna pictures (not much there yet) http://www.flickr.com/photos/4157486...781661/detail/
|
|
|
POST REPLY TO THIS THREAD |
 |
|
|


