|
|
| Search | Car Forums | Gallery | Articles | Helper | Air Dried Beef Dog Food | IgorSushko.com | Corporate |
|
|||||||
| WIP - Motorsports Post topics for any "Work In Process" motorsports vehicles in this sub-forum. |
 |
 Show Printable Version | Show Printable Version |  Subscribe to this Thread
|
|
|
Thread Tools |
|
#46
 11-08-2006, 02:30 PM
|
||||
|
||||
|
Re: WIP: Tamiya 1/20 Jordan 191
Thanks for that link. I hadn't seen them before (except the ones posted as part of this thread). My reference pics investigative skills begin and end with Google images and Gurneyflap.
I am working on the CF on the monocoque at the moment. I am gonna get all the exterior surface of the body parts complete, clear them and then work on the interior once the exterior is protected by a few coats of clear. Cheers, BillyPee
__________________
On the workbench: Completed WIPs: Completed Models Gallery: 
|
|
#47
11-09-2006, 05:40 PM
|
||||
|
||||
|
Re: WIP: Tamiya 1/20 Jordan 191
Another tedious update on the decals... but will be useful for the other modellers out there who are/will be making this. The car that doesn't have the TicTac decal has a Cosberg decal on the bottom of the rear cowling whereas the car with the TicTac decal has an IGM Group logo decal in its place.
The Studio27 decal of the red capital E in a white circle with a red edge has an overly bold letter E when compared to the reference pictures (I also noticed that the Ireland decal on the side of the cockpit is too bold too. I have applied the Tamiya white lines on the rear cowling now (as I can only assume the Studio 27 decals omit these). The Tamiya ones are slightly thicker and whiter and are actually very good. They are perhaps a little too thick for scale, but they do a much better job of hiding any imperfections in your masking of the blue/green border. Given the opportunity over, I would use the Tamiya white lines (on sheet B) unless I was very happy with my masking/paint job. Hope that helps, BillyPee
__________________
On the workbench: Completed WIPs: Completed Models Gallery:
|
|
#48
11-10-2006, 06:05 PM
|
||||
|
||||
|
Re: WIP: Tamiya 1/20 Jordan 191
Fabulous work so far and great detective work figuring out the decals. Eddy Jordan was always on the hunt for a sposorship deal so the placement of logos often changed race by race, if not session by session!
|
|
#49
11-12-2006, 07:47 AM
|
||||
|
||||
|
Re: WIP: Tamiya 1/20 Jordan 191
Hi Folks,
Quick update and a few photos. Basically I have done some more decalling, CF work and a bit of wiring and plumbing: The first image shows the side elements of the rear undertray. On the real car, they are one part with the undertray. I considered attaching them to the undertry before painting but decided that would be silly. Once the decals have dried properly I will clear over these pieces and then apply Bare Metal Foil (BMF) to the insides as per the reference pictures. This is to protect the CF from the exhaust heat. 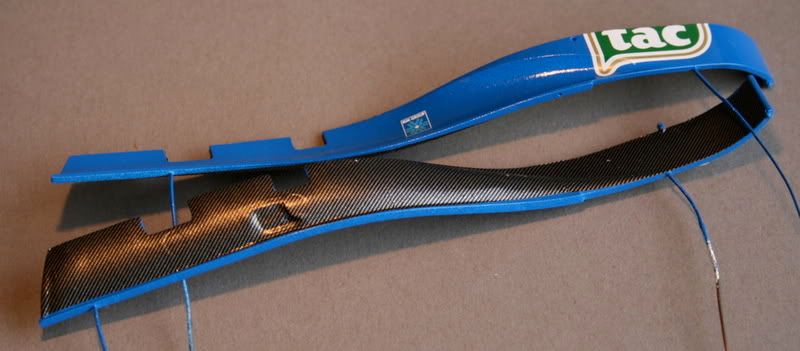 I have started working on the CF on the monocoque around the cockpit. The CF alignment is as per the ref pics and looks wrong if you ask me. Normally CF is applied at an angle, but all the reference pictures show the CF is perpendicular. The work isn't finished yet but should should get the idea. 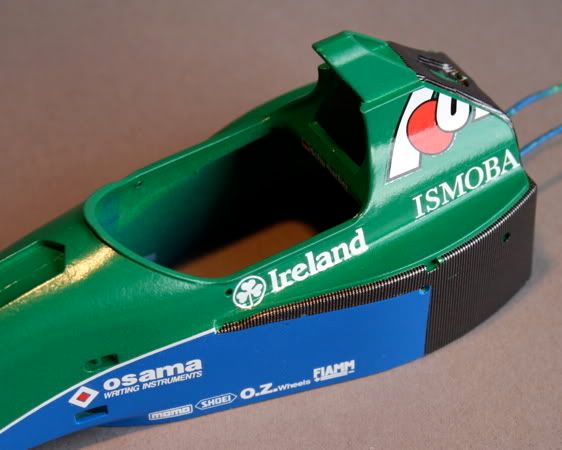 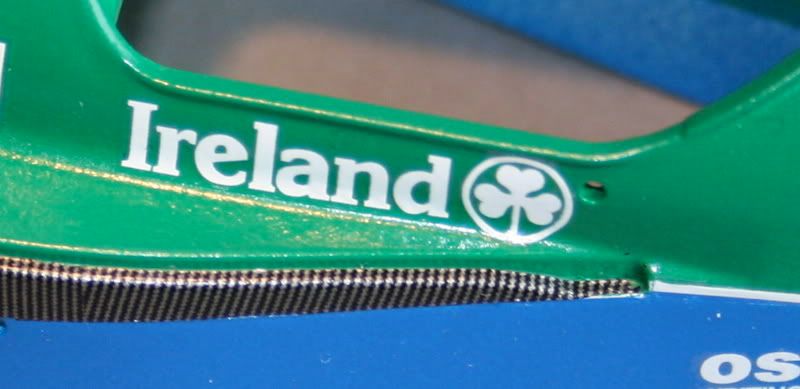 Here is the "Red E" in place on the rear cowling. If you look at the reference pictures, you will see what I mean about the E being out of scale (too bold) 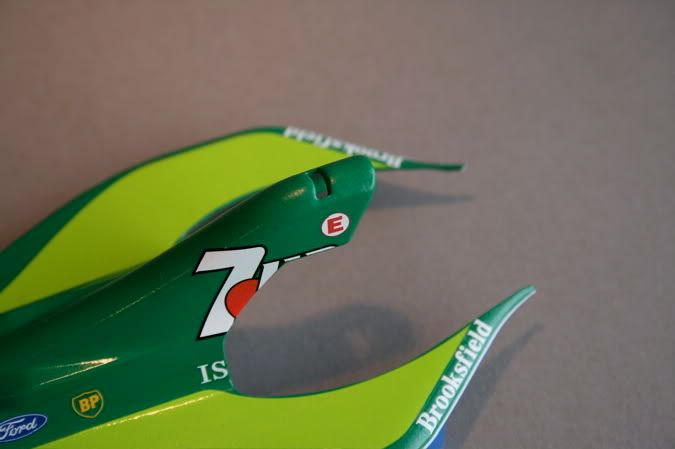 Also, here are the white lines I added from the Tamiya decal set. They are too wide for scale, and they are starting to crinkle and crumple, so I retract my early comment about being tempted to use them for the whole pinstriping job. 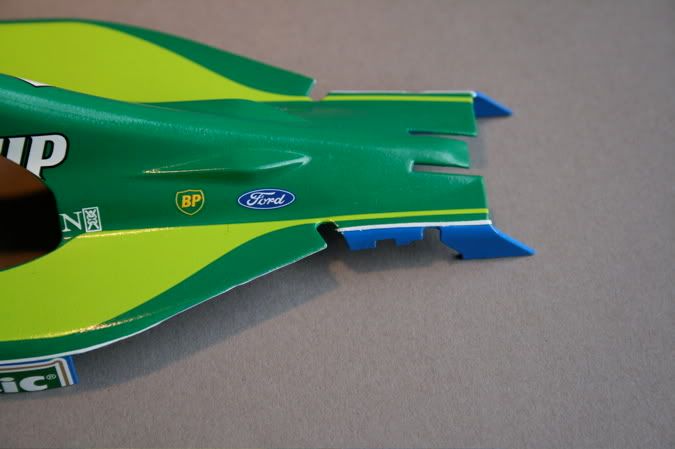 Finally, here are some shots of the engine. I have added wire and hose and temperature stickers. The hose looks too thick but it is very thick on the reference pictures. I would have liked to have been able to recreate the blue terminals on the hose but was at a loss how to. If you know of any aftermarket parts that replicate that, let me know for future reference... or if you have an idea how to scrath them, let me know. 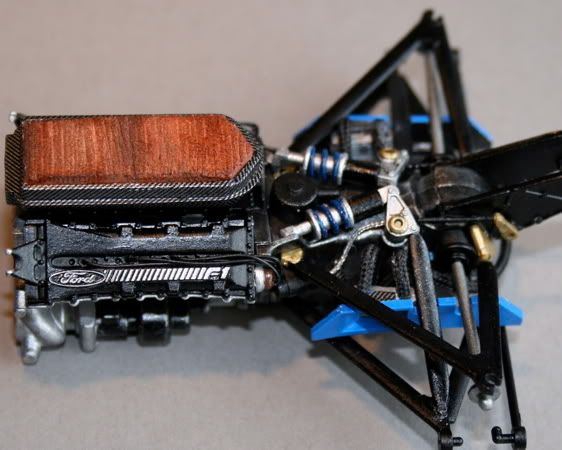 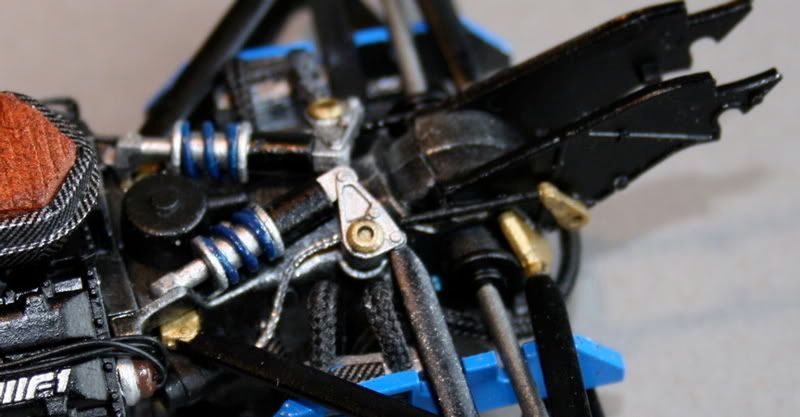 All the best, BillyPee
__________________
On the workbench: Completed WIPs: Completed Models Gallery:
|
|
#50
11-12-2006, 08:35 AM
|
||||
|
||||
|
Re: WIP: Tamiya 1/20 Jordan 191
Looks awesome BillyPee - you're doing a great job!
Can't wait to see this one completed.
__________________
 
|
|
#52
11-12-2006, 09:35 AM
|
||||
|
||||
|
Re: WIP: Tamiya 1/20 Jordan 191
Some nice detailing on the engine my friend.The air cleaner looks very convincing! Have you tried Hiroboy for the hose end connectors? He does some excellent plumbing supplies on his website along with braided hoses and connectors of various shapes and sizes.I got a bunch of stuff from him to use on my McLaren build.It's worth a look.Keep up the progress with the Jordan.I look forward to your next update.
__________________
Steve Noble
|
|
#53
11-12-2006, 10:21 AM
|
||||
|
||||
|
Re: WIP: Tamiya 1/20 Jordan 191
Thanks for the pointer to Hiroboy, Steve. I have just been on the website and the Detail Master A/N fittings are clearly what I am after. I just need to work out which model I am making next and all the size requirements. Thanks again for the info.
Thanks to Captain Mark and Gamerxz for your generous comments (as ever). BillyPee
__________________
On the workbench: Completed WIPs: Completed Models Gallery:
|
|
#55
11-12-2006, 01:38 PM
|
||||
|
||||
|
Re: WIP: Tamiya 1/20 Jordan 191
Quote:
 Made me smile. Made me smile.
__________________
On the workbench: Completed WIPs: Completed Models Gallery:
|
|
#57
11-12-2006, 05:33 PM
|
||||
|
||||
|
Re: WIP: Tamiya 1/20 Jordan 191
BillyPee,
excellent work mate, the car is looking excellent - bet you cant wait to get it finished! I have to say I think it was one of the best looking F1 cars ever - such a simple colour scheme and yet so striking. Look forward to seeing this one finished! Regarding your AN fittings its also worth checking out RBmotion stuff, he also sells top quality stuff and at a very reasonable price too. Sean ______________________________ http://www.scalereproductions.co.uk ______________________________
|
|
#58
11-13-2006, 03:26 AM
|
||||
|
||||
|
Re: WIP: Tamiya 1/20 Jordan 191
Great CF work! So clean and crisp. Something to learn from...
|
|
#59
11-13-2006, 04:59 AM
|
|||
|
|||
|
Re: WIP: Tamiya 1/20 Jordan 191
Very nice build. This makes me want to buy one even more!
I'll second the hint for the RBMotion A/N-fittings. They are absolutely nice but i guess Detail Master will be good as well. One little bit of constructive critisism... You should fill the injection molding sink/ejection marks on the parts with some body filler before applying paint and decals. ( The circles you can see under the CF decals on the side parts ). These here won't be too visible once on the model but anyway.......improves the look a lot:-) Keep it up!
|
|
#60
11-13-2006, 06:22 AM
|
||||
|
||||
|
Re: WIP: Tamiya 1/20 Jordan 191
Quote:
Yes, I couldn't agree more. And, thank you for pointing it out as it needs people to notice these things to give me motivation to fix them in future. I have filled in the sink marks before on selected parts but have mostly turned a blind eye to it becuase I just wanted to get on with the build. Then, whenever I get to applying the finishing touches, all always look back and say... "Wish I had spent more time on the prep-work." The rest of the parts on this model will be filled and prep-ed properly, and you can see evidence of this on the picture of the undertray (a couple of posts back), with the little Milliput circles. Thanks to everyone for the RB Motion and Hiroboy pointers. I have requested a catalog from RB Motion and Hiroboy is now in my favourites. I'm gonna put all that to use on my next project (probably the Lotus 107B although my next project changes as often as my socks  ) )BillyPee
__________________
On the workbench: Completed WIPs: Completed Models Gallery:
|
|
|
POST REPLY TO THIS THREAD |
 |
|
|


