|
|
| Search | Car Forums | Gallery | Articles | Helper | Air Dried Beef Dog Food | IgorSushko.com | Corporate |
|
|||||||
| WIP - Street Post topics for any "Works In Progress" street vehicles projects in this sub-forum. |
 |
 Show Printable Version | Show Printable Version |  Subscribe to this Thread
|
|
|
Thread Tools |
|
#32
 05-14-2012, 03:13 AM
|
|||
|
|||
|
Re: Aston Martin DB4-1/25 Revell Monogram...a detailed story!
After so much time with no updates, I have some more pictures...
I noticed that the glass for the doors is too thick in scale for the model, I tried to scale it down sanding it, but, I didn't get the size I want. I got a better result and size using K&S plastic clear acetate. 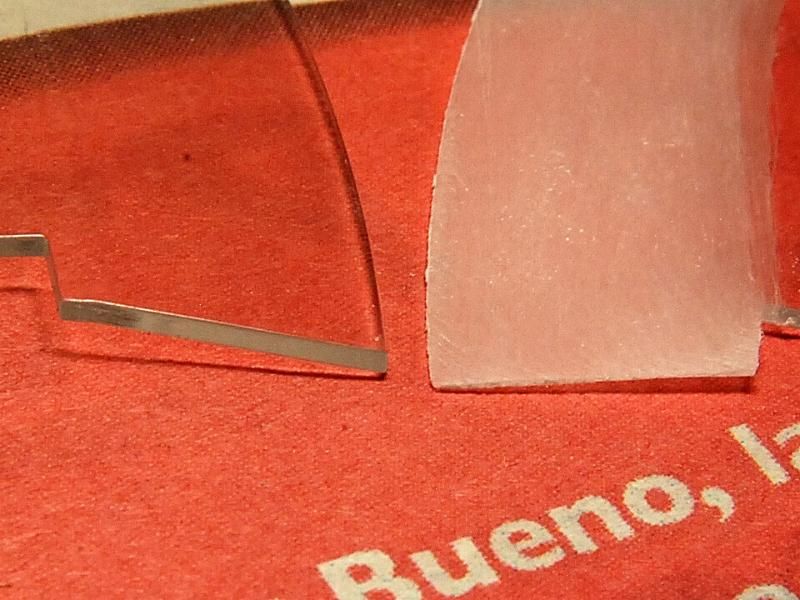 For the bumpers reflectors, I drill a hole and placed a plastic rod that I painted red. 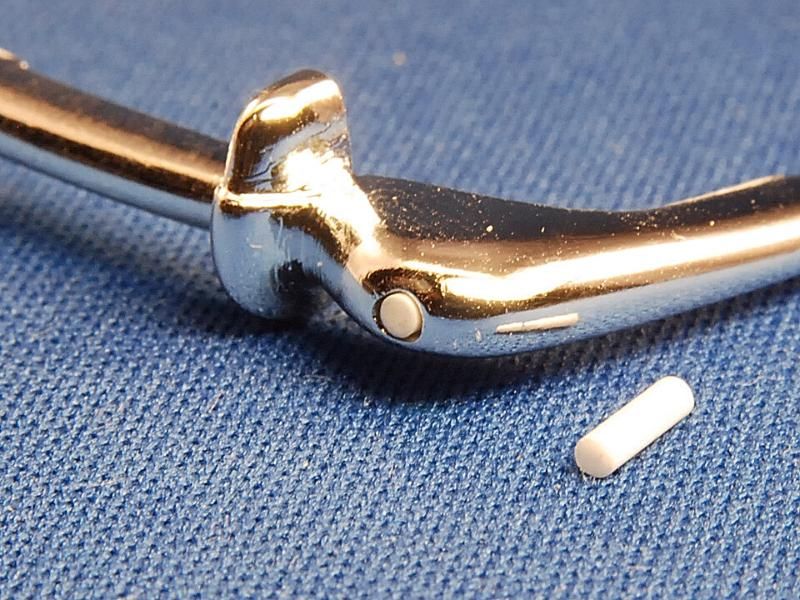 At the rear I noticed the lights cluster in unreal, the plastic part goes over the hole and the correct is supposed to go inside. Here you guys can see both versions: 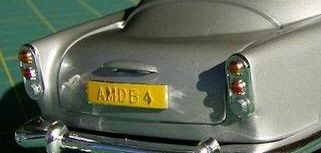  I reworked it using a piece of aluminum sheet, tubing, and Ka Jinkers links (a plastic pinhead used in handcraft) for the lights:  This is what I did; it's much better now and more real than the stock kit parts: 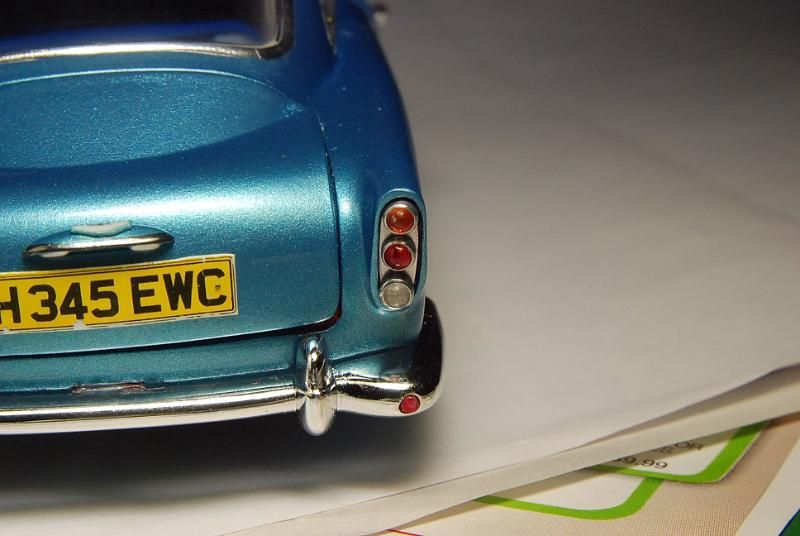  Here, you guys can see what I really wanted, the correct lights ensemble and the corrected bumpers:  Here I installed the front grill using the Detail Master's Front Grill Rectangle #2585 that has the same rectangle pattern, all the chromed details, glass, the tiny Model Factory Hiro "Superleggera" scripts, and the chrome foil. 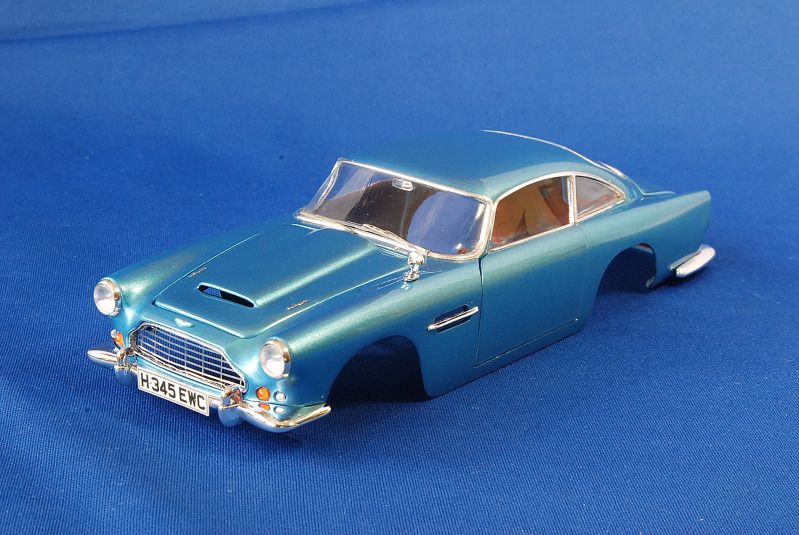 Same view, but, at the rear: 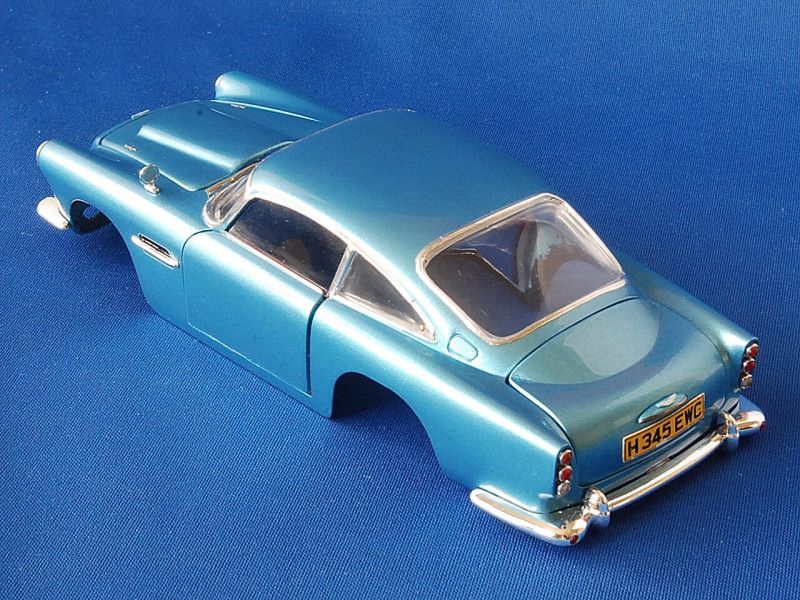 Everything opened, notice the correct scale thin of the doors' glass: 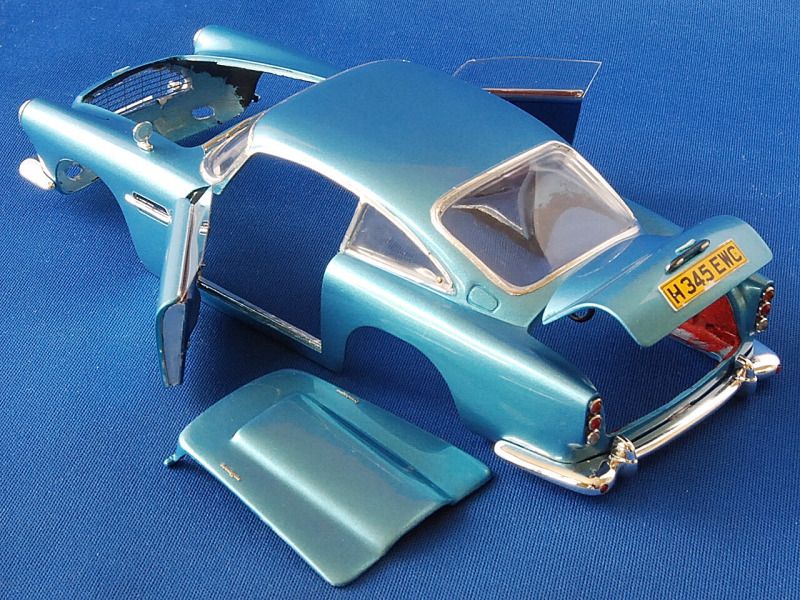 A detail that much modelers has questioned me: What set of Borranis I would use? Well, with the arriving of the Hasegawa's Ferrari 250 Testarosa and the different 250 GTO's, there's plenty of Borranis to chose, but...Does anyone has the correct features I was looking for?...15 inch and the all 4 narrows tires and wheel combo, who's is the one that makes the correct ones?...Reinassance!...The only thing is the high price. Since I live in Puerto Rico, I was charged from France to here a shipping quote of 100 dollars!...The real fine artwork of this borranis really worth it, and besides its the only set available in the 15 inch measurements, but, I considered it myself real expensive. Starting with the wheels, there's no doubt is a perfect job and they come already assembled: 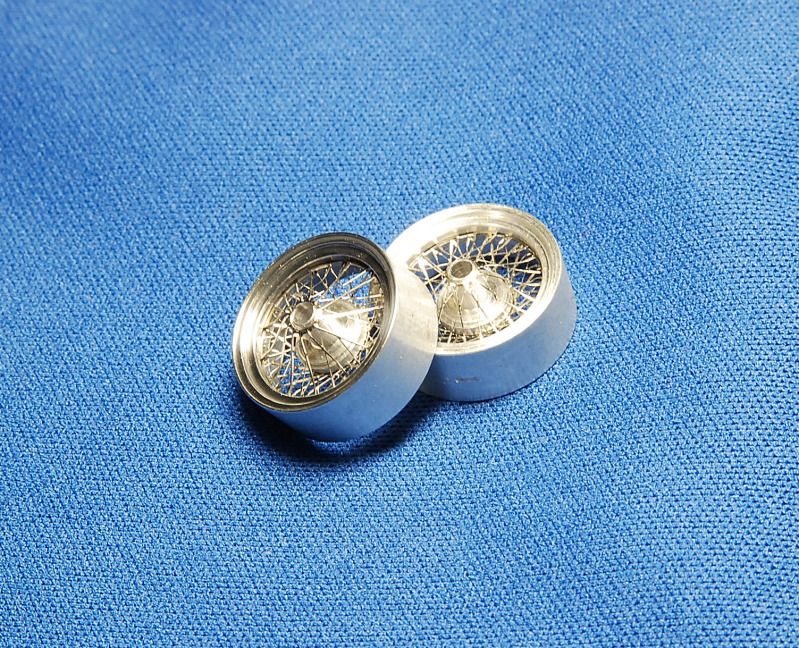 The only problem are the tires, they need some good time of sanding and trimming to get it right. I consider that for that real high price tag they should come real perfect:  To complete the perfect look of the tires/wheel combo, I used the Sakatsu Knock offs that are thicker than the Reinassance photo etch style part, but, for the center nut, I decided to use the Reinassance one. Sakatsu parts at the left, Reinassance parts at the right:  Here we can see at last, the model started to look like a real car and show us the beauty of an Aston Martin DB4:    For the engine, as I did until now with body, a lot of work has to be done to take this model to the real car standards. I consider the engine the feature and the most detailed part of this model car. Here you guys can see a picture of the stock engine of the model: 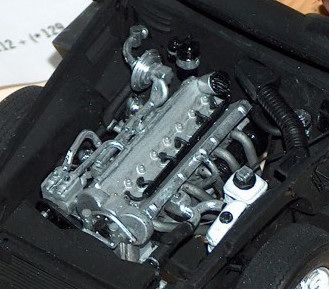 These are pictures of where I would like to take this engine:    Let's start... The engine block was sanded and reworked to accept some items: 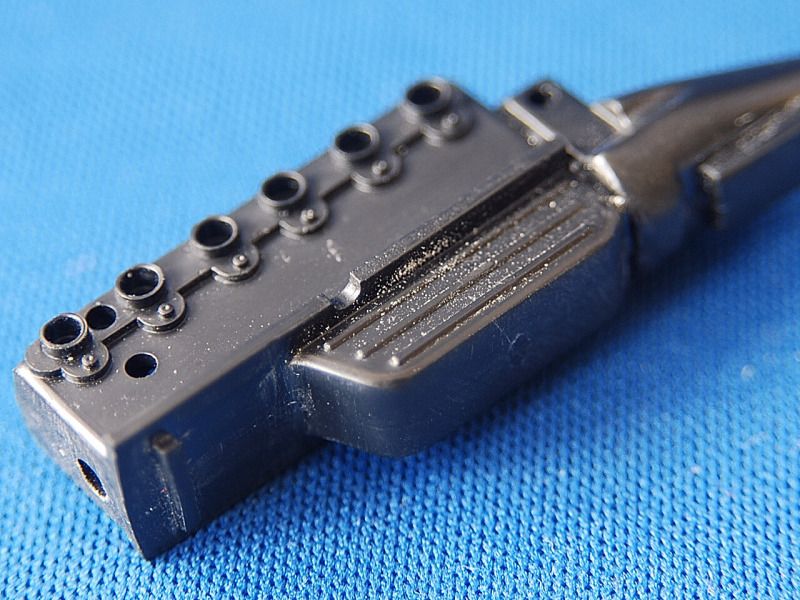 The cylinder head has to be reworked too. What I like is that, like the engine block, maybe it doesn't have the complete detail, but, it comes with al the guides to do the correct alterations: 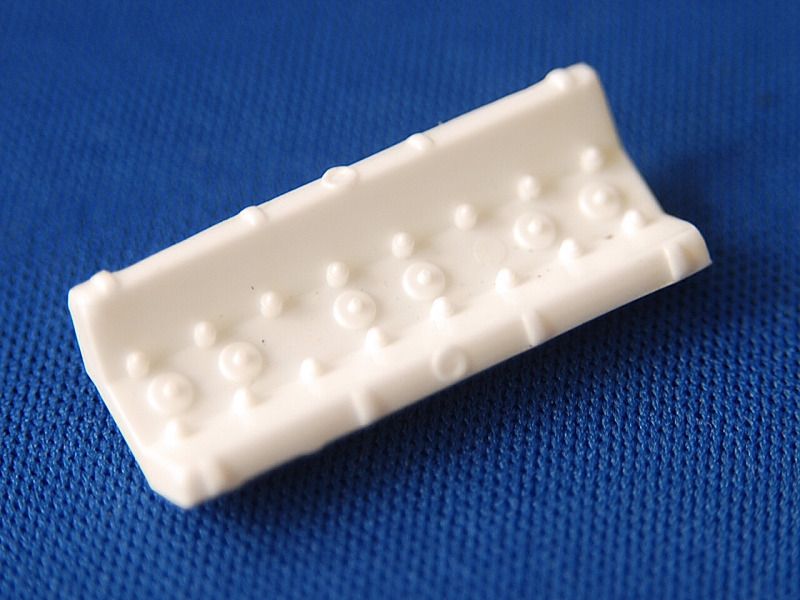 These pulleys where altered to double as the camshaft cover's Breather cap: 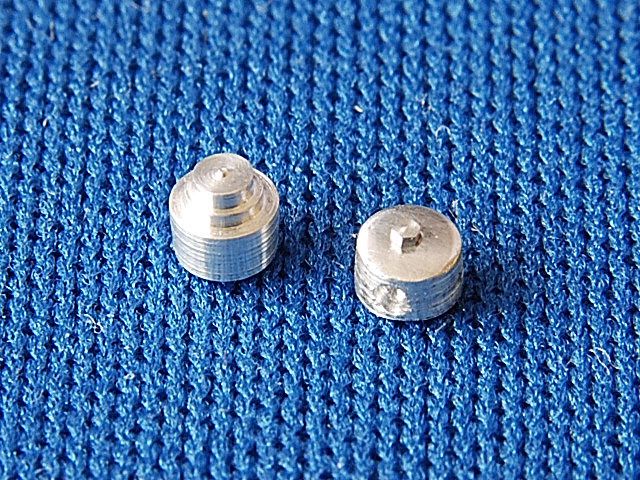 On the cylinder head, a length of aluminum tubing, photo etch hose clamps, Model Factory Hiro white metal spark plug boots and distributor, solder for the headers, R&B Motion acorn nuts, and a syringe needle(for the ignition lead tube) was used for the complete detail: 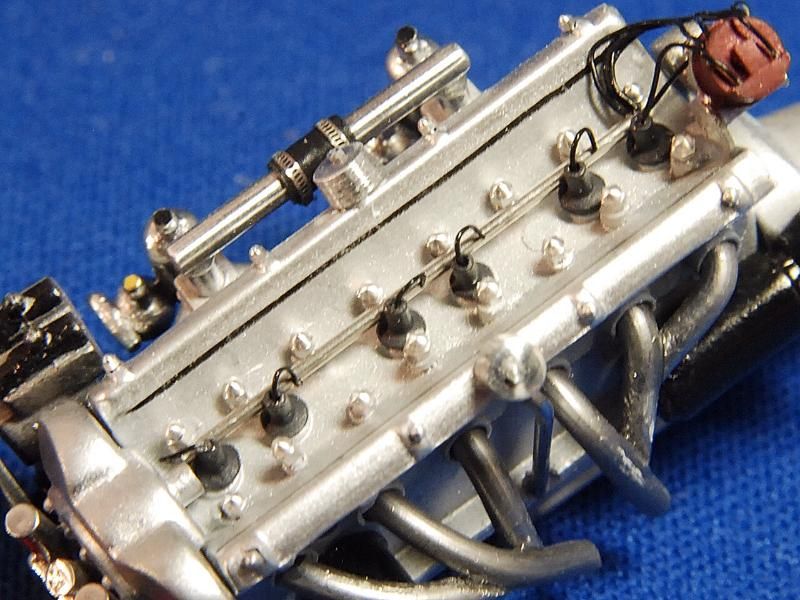 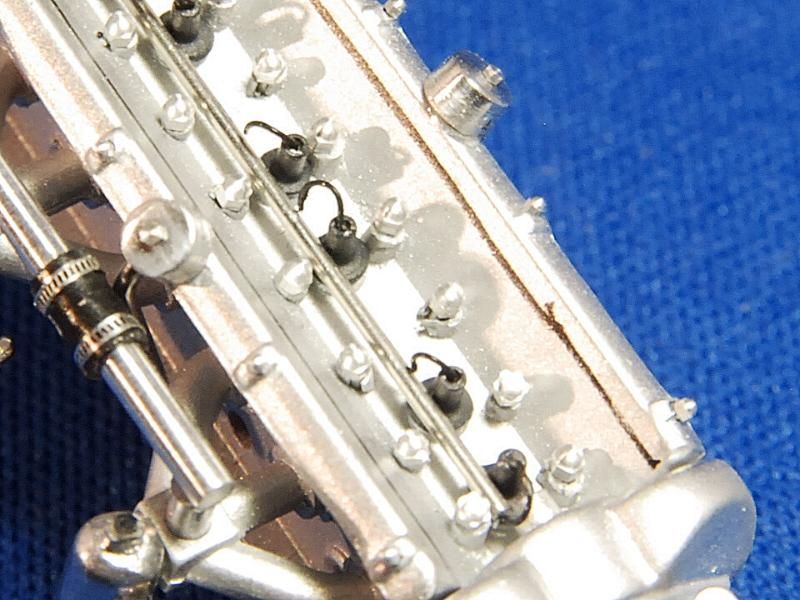 General view of the main engine: 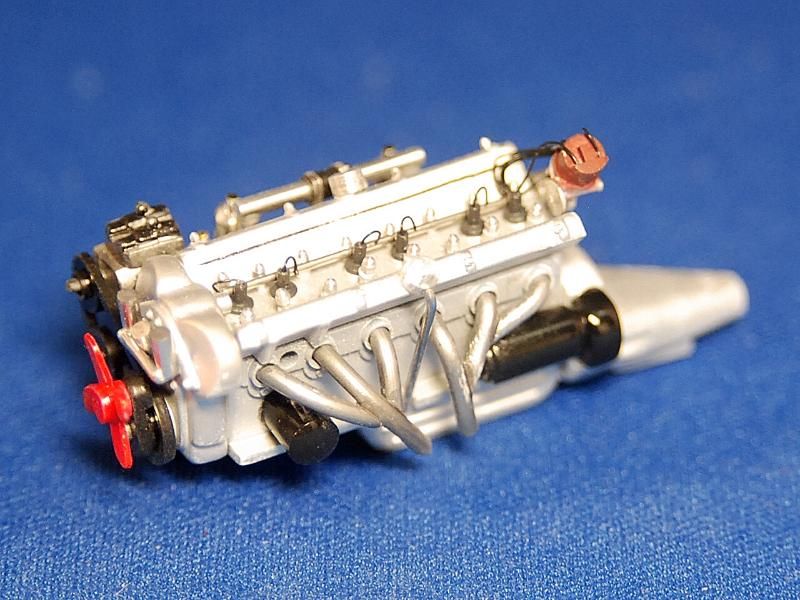 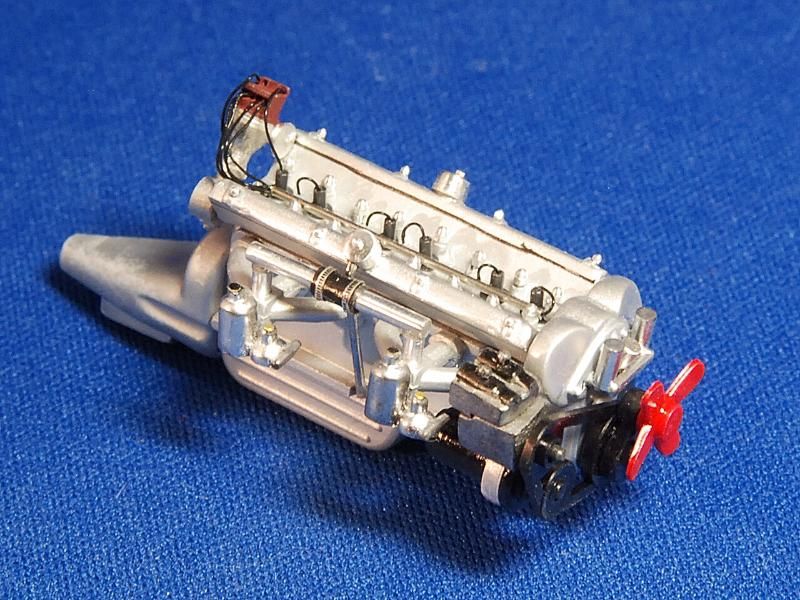 Some other parts have to be scratch built in order to complete the engine bay. I will start with the washer fluids bottle. As you guys can see here, the model's stock part is far away from the actual part: 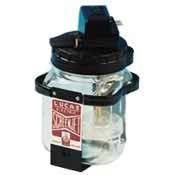 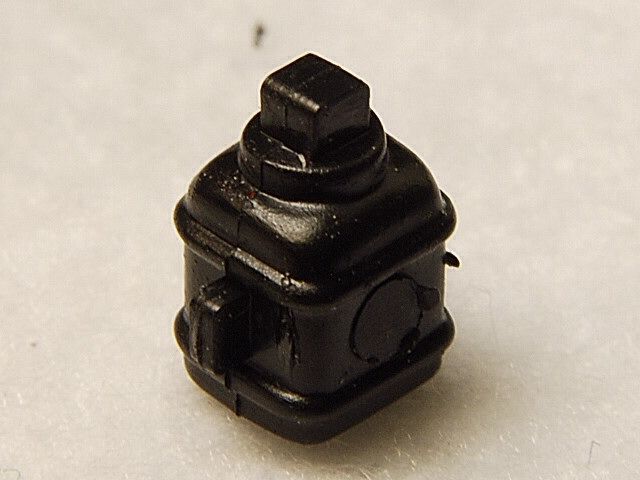 I will do the part using an acrylic glass rod: 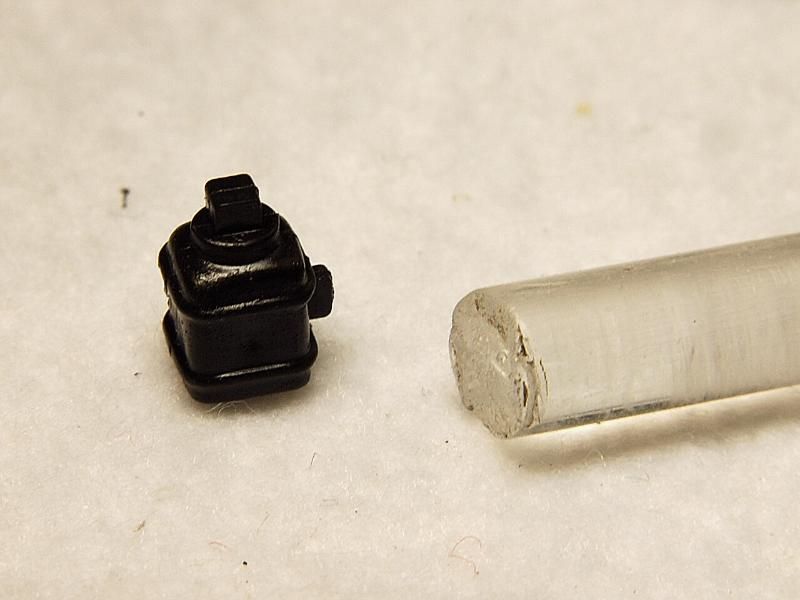 I sanded it using different sanding sticks, then a final buff using my Dremel: 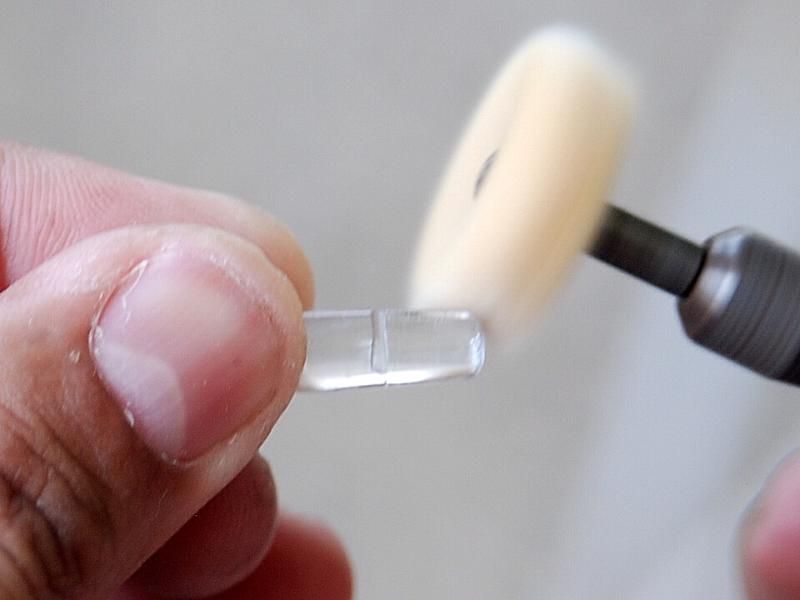 For the cap I used some plastic and then painted the part at the bottom with some Alclad II blue tint. Also used a fishing line for the connector line: 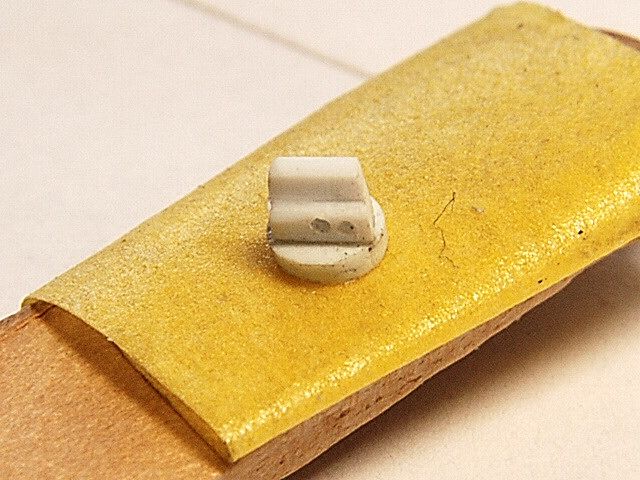 The completed part:  Same thing happens with the water tank, the model part is far away... 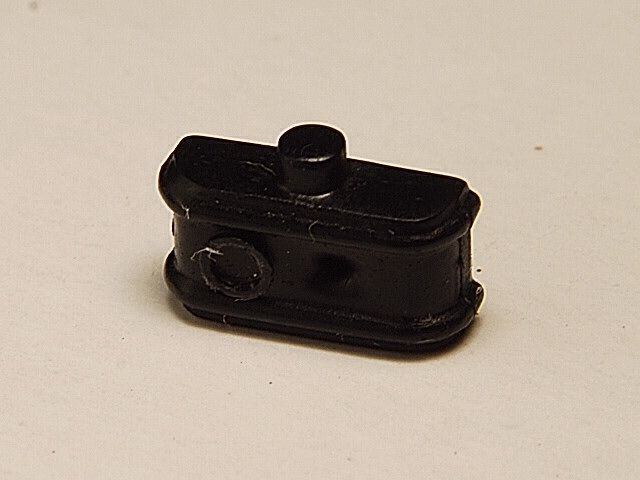 Real part:  Using some Milliput, wire (for the molding), and a turned radiator cap I transformed the part to the actual part standards: 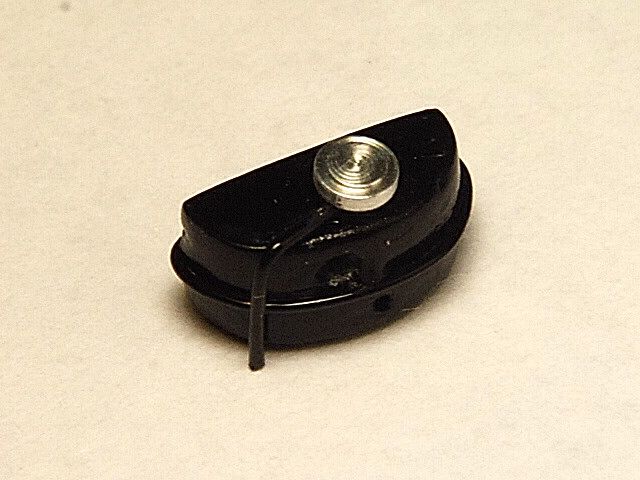 This is the scratch built voltage regulator: 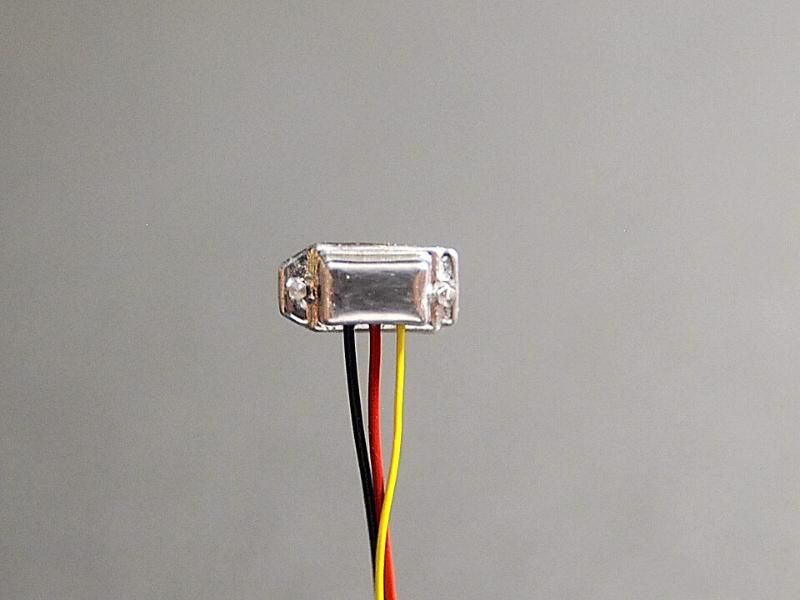 Real Fuses boxes and parts I did: 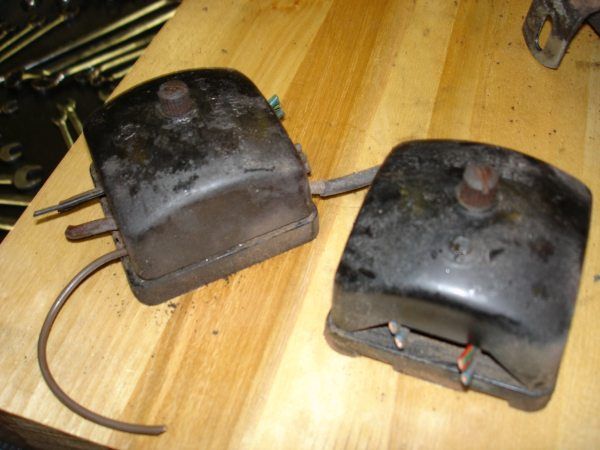 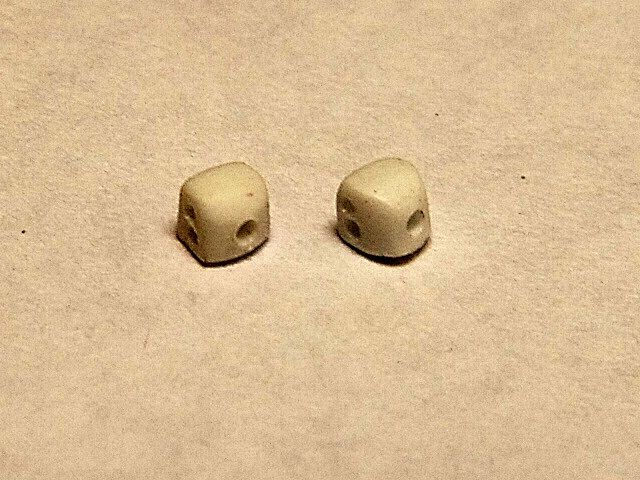 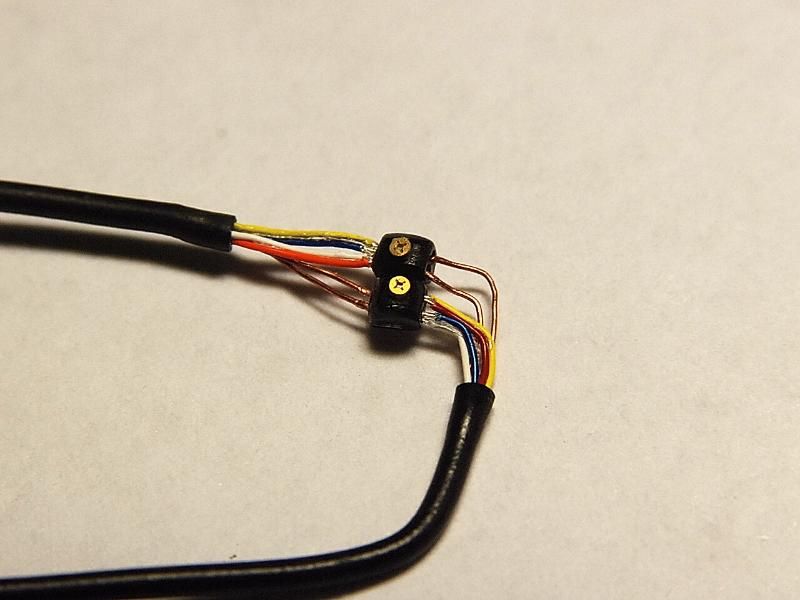 These coils served as the staring point for the brakes reservoir tanks: 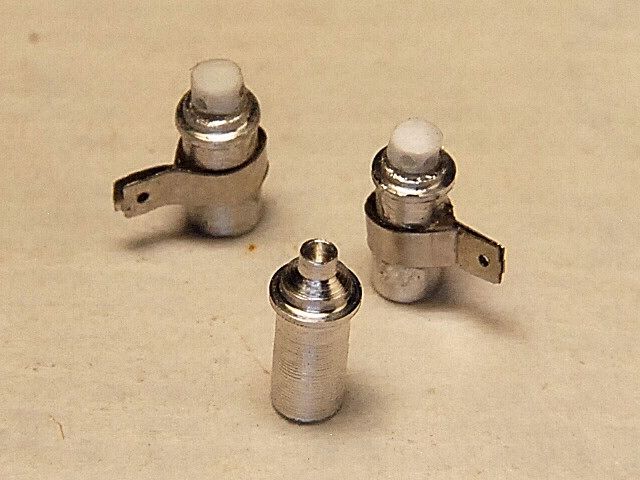 The model's servo unit was used as a base and detailed with plastic and bolts to do the new part. Here you can see the real and model parts:  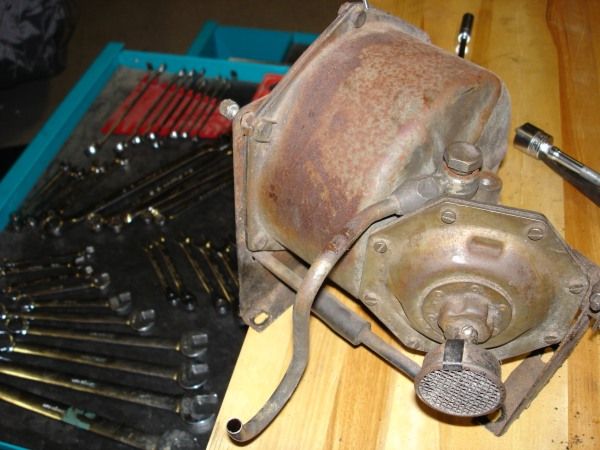  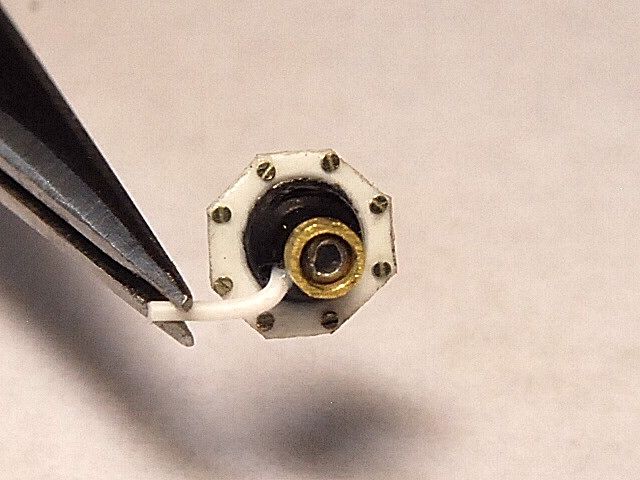 Real air cleaner and scratch built parts:  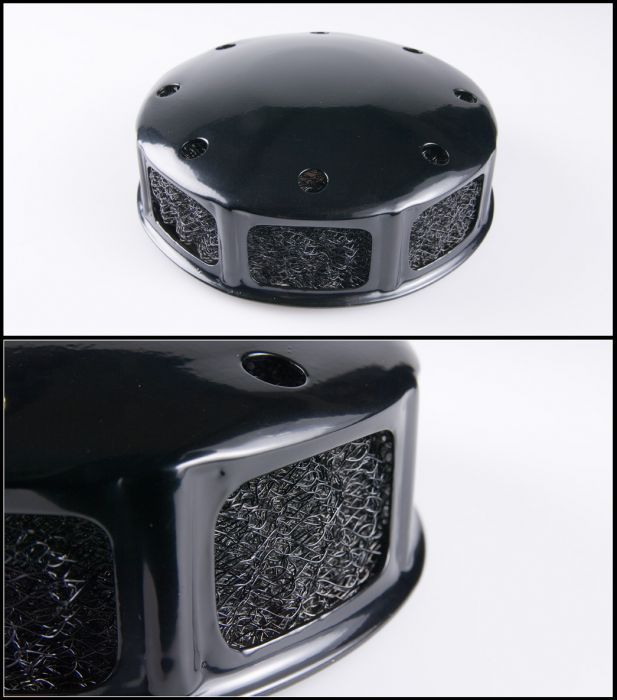 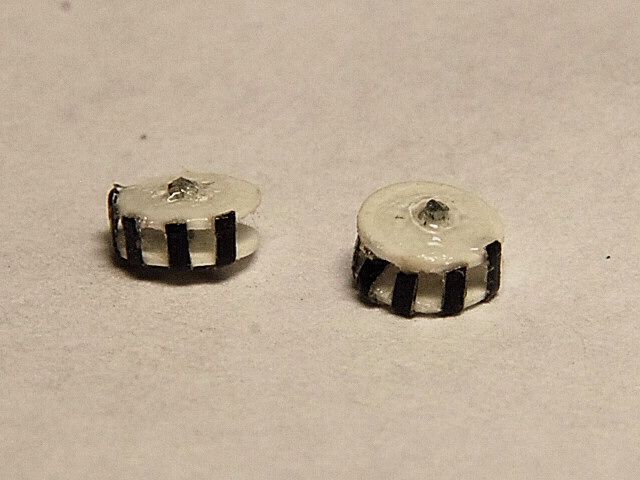 The engine bay until now. In the first picture, at the upper right corner you guys can noticed the scratch built brake master cylinder already connected:  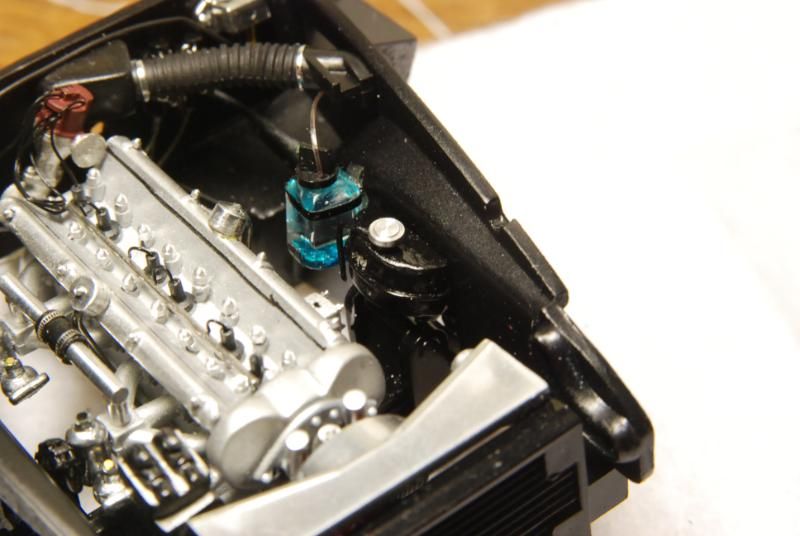 The exhaust system also had to be updated:  New parts: 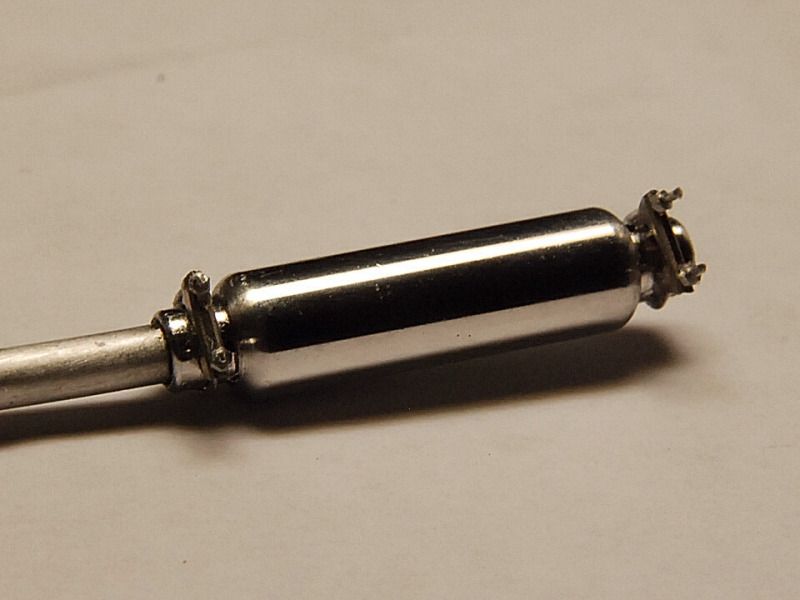  Great difference:  Plumbing for the brake system: 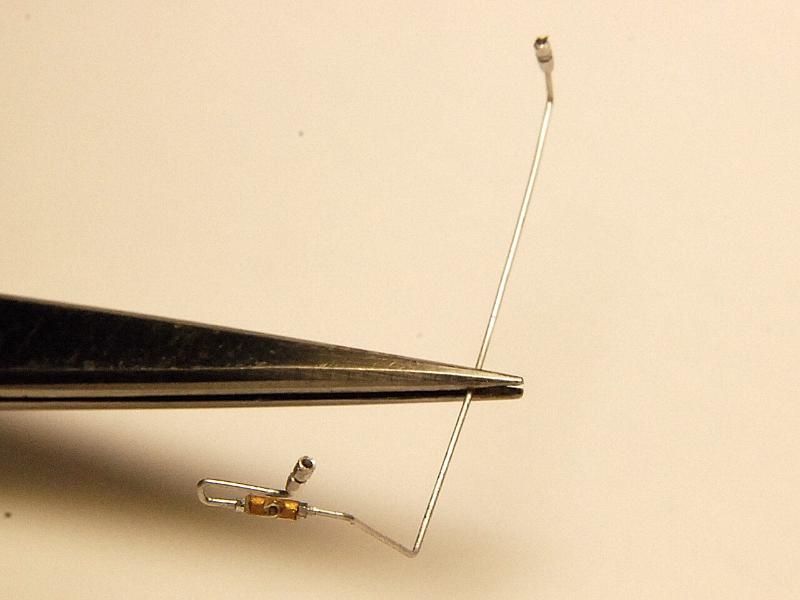 This is it for now... 
|
| The Following User Says Thank You to Porsnatic For This Useful Post: | ||
kitefighter (05-14-2012)
| ||
|
#33
05-14-2012, 07:00 AM
|
|||
|
|||
|
Re: Aston Martin DB4-1/25 Revell Monogram...a detailed story!
This is simply the most impressive build up of an Aston Martin model I've ever seen. Every single component is being worked on as a work of art all by itelf. Astonishing. I've attempted this kit twice (albeit as a youth) and found it impossibly hard. The work you are doing shows that with the right skills and time, the kit can yeild a fantastic model of the DB4. An inspirational build up. I will get this kit and components to try an emulate you one day.
|
|
#35
05-14-2012, 11:43 AM
|
||||
|
||||
|
Re: Aston Martin DB4-1/25 Revell Monogram...a detailed story!
 i am really really really speechless... your detailing work are really superb. i am really really really speechless... your detailing work are really superb.  i have so much to learn. i have so much to learn.
__________________
 Completed Lexus LFA http://www.automotiveforums.com/vbul....php?t=1122869 Completed Ferrari 458 Italia http://www.automotiveforums.com/vbul...php?t=1079425# Completed Nissan GTR http://www.automotiveforums.com/vbul....php?t=1054794 Completed WALD GTR http://www.automotiveforums.com/vbul...44#post7018544
|
|
#38
05-21-2012, 12:59 PM
|
||||
|
||||
|
Re: Aston Martin DB4-1/25 Revell Monogram...a detailed story!
Photobucket allows a limited amount of bandwidth for hosting pics- something like 10 gigabytes a month.
Every time someone looks at a pic in your post hosted by Photobucket (or someone else), a bit of bandwidth is used. The larger the pics are and the more pics you post, the more bandwidth is used. And of course the more people view your posts, the more bandwidth is used. So Photobucket adds the small amount of bandwidth used by each pic viewed by each person, and if/when it reaches 10Gb or so, they cut you off for a month- the bastards. To avoid this, Photobucket would be very happy if you gave them money- for which they would remove the limitation. So essentially they punish you for exactly the thing that we all want you to be doing.
__________________
PHOTOBUCKET SUCKS
|
| The Following User Says Thank You to MPWR For This Useful Post: | ||
kitefighter (05-30-2012)
| ||
|
#39
05-21-2012, 04:07 PM
|
|||
|
|||
|
Re: Aston Martin DB4-1/25 Revell Monogram...a detailed story!
Quote:
Just have to install PICASA, which have no limits (I guess) as photobuckets, is very easy to use , fast and so and so.... This WIP seems excellent, can't wait one month to see it 
|
|
#40
05-30-2012, 04:19 PM
|
|||
|
|||
|
Re: Aston Martin DB4-1/25 Revell Monogram...a detailed story!
I've just won the Monogram Aston Martin DB4 on ebay - completely new kit. This will be my third attempt to build this model (the first and second were childhood botch ups in the 70s).
But I really need those progress pictures back uploaded - it's your build that encouraged me to buy the kit again!
|
|
#41
05-31-2012, 02:09 PM
|
|||
|
|||
|
Re: Aston Martin DB4-1/25 Revell Monogram...a detailed story!
OK, I will waituntil tomorrow to see if they allow the pictures can be seen again, since I have a 1/43 Reanault RS01 F1 already in progress with lots of pictures waiting to be posted. That PICASA sounds like a great alternative, too.
|
|
#42
06-03-2012, 03:39 AM
|
|||
|
|||
|
Re: Aston Martin DB4-1/25 Revell Monogram...a detailed story!
We are back!!!
|
| The Following User Says Thank You to Porsnatic For This Useful Post: | ||
kitefighter (06-03-2012)
| ||
|
#44
06-03-2012, 06:41 PM
|
|||
|
|||
|
Re: Aston Martin DB4-1/25 Revell Monogram...a detailed story!
Quote:
|
|
#45
06-06-2012, 05:59 PM
|
|||
|
|||
|
Re: Aston Martin DB4-1/25 Revell Monogram...a detailed story!
the work's pretty amazing, to understate it.

__________________
olly olly oxen free
|
|
|
POST REPLY TO THIS THREAD |
 |
|
|


