|
|
| Search | Car Forums | Gallery | Articles | Helper | Air Dried Fresh Beef Dog Food | IgorSushko.com | Corporate |
|
|||||||
| WIP - Street Post topics for any "Works In Progress" street vehicles projects in this sub-forum. |
 |
 Show Printable Version | Show Printable Version |  Subscribe to this Thread
|
|
|
Thread Tools |
|
#31
|
||||
|
||||
|
Re: WIP: The Dino 36 hour Challenge :)
Quote:
     :evil lol: :evil lol: 
__________________
 gio gio
|
|
#32
|
||||
|
||||
|
Re: WIP: The Dino 36 hour Challenge :)
Quote:
 Seriously though, there were two reasons a) I do think that the glass parts in this kit are very thick which detracts from an otherwise beautiful kit; and b) EHS (Edmund Hillary Syndrome), I wanted to see if it could be done for future reference. It's worth knowing that in total I sent probably no more than 3-4 hours on replacing all the clear parts. The net result was worth it I think. Quote:
Much to my surprise too, the windscreen was actually by far the easiest part to replace. The glue I used is GS-Hypo cement made in NY, USA: Quote:
   
__________________
Guideline for happy modeling: Practice on scrap. Always try something new. Less is more. "I have a plan so cunning, you could put a tail on it and call it a weasel" - Edmund Blackadder |
|
#33
|
||||
|
||||
|
Re: WIP: The Dino 36 hour Challenge :)
MEGA UPDATE!!!
Just kidding  Hmm...brush painted heat staining... I think I didn't do justice to all that great advice you guys gave me but I'm still quite happy with my first attempt 
__________________
Guideline for happy modeling: Practice on scrap. Always try something new. Less is more. "I have a plan so cunning, you could put a tail on it and call it a weasel" - Edmund Blackadder |
|
#34
|
||||
|
||||
|
Re: WIP: The Dino 36 hour Challenge :)
Good job, klutz! You did a nice job on that molded-in engine. The weathering seems realistic!
*Mumbles rants about molded in chassis parts...
__________________
 
|
|
#35
|
||||
|
||||
|
Re: WIP: The Dino 36 hour Challenge :)
holy cats! that engine is amazing. wow, did you ever conquer the exhaust staining technique, i love it. i have always considered it too intimidating but i will have to learn it fast. how did you paint the engine? did you mask it off and spray it? please dont tell me you brush painted all that like you did the stains. thanks for the "MEGA" update.
__________________
  
|
|
#36
|
||||
|
||||
|
Re: WIP: The Dino 36 hour Challenge :)
Quote:
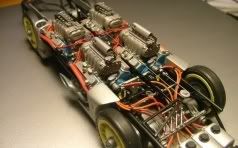
 Les, you wouldn't believe how lazy I was with this ! In fact I can hardly believe it  I cut corners BIGTIME I cut corners BIGTIMEAfter priming the whole underside, I sprayed it with Motip auto gloss black spray. Then I used Humbrol Maskol liquid mask on the areas I wanted to keep as black. This was applied veeery roughly with a paintbrush. Then I painted everything with Alclad2 Steel - gas tanks, drive mecahnism, exhast system etc etc (you can see in the picture). Immediately afterwards I swapped to Alclad2 Pale Burnt Gold which was applied (without masking off) to the exhast sytem parts and other parts just for some variety. The maskol was peeled off after 20 mins. That was my speed-build painting strategy (while I was still speeding, of course  ). Basically, I used the "depth" of the molded in detail to my advantage ). Basically, I used the "depth" of the molded in detail to my advantage
__________________
Guideline for happy modeling: Practice on scrap. Always try something new. Less is more. "I have a plan so cunning, you could put a tail on it and call it a weasel" - Edmund Blackadder |
|
#37
|
||||
|
||||
|
Re: WIP: The Dino 36 hour Challenge :)
Quote:
   Terrific work, Stevenski- So there's hope of seeing this one done soon, even as other projects are started?  The interior looks incredible- certainly doesn't look like a rush job! (One thing, though- put some wash in that shift gate!) Love the BMF work, and the finish is great. Never thought much of that color, but I'm beginning to think otherwise. Your glazing work looks like a magnificent improvement- especially the windshield, these can be really tough to do well. I like the rolled down side window, but I keep looking at it, thinking maybe it needs something....  I don't think a gap would be right- A gap will only be present if the window is slightly trapezoidal in shape. The rails on the Dino look rather parallel to me- but I can't be sure without a pic of the window rolled down a bit on the real car. I think perhaps the top edge of the glass doesn't quite match the curve of the top of the frame- rounded down just a touch at the front, and then gently sloping down towards the rear. Also, the top edge of the glass maybe a bit too invisible. The edges of auto glass tend to be ground to a rounded shape, so it's opaque and somewhat visible. I expect you can probably simulate that pretty well by rubbing the top edge round with the 'rough' side of a 3-way polishing stick. Then again, the Dino was made in the days before auto safety glass, wasn't it? I have no idea how the edge of plate glass would look. For all I know, the edge was capped with a chrome strip (BMF!). Got any pics? (If I'm nit picking too much, you will let me know.) Looking forward to seeing the body and chassis together on wheels!
__________________
PHOTOBUCKET SUCKS |
|
#38
|
||||
|
||||
|
Re: WIP: The Dino 36 hour Challenge :)
Quote:
 Although I will admit that for some reason it's not very visible in the photo. In reality it looks good (this time) Although I will admit that for some reason it's not very visible in the photo. In reality it looks good (this time)Quote:
Also I think you're right about the curve. I made it too softy on the template. Quote:
   EDIT: I'm glad someone got the TS13 joke!  I forgive you your nit picking I forgive you your nit picking 
__________________
Guideline for happy modeling: Practice on scrap. Always try something new. Less is more. "I have a plan so cunning, you could put a tail on it and call it a weasel" - Edmund Blackadder |
|
#39
|
||||
|
||||
|
Re: WIP: The Dino 36 hour Challenge :)
Really enjoyed this original thread, Klutz_100!!!!
Awesome buildin' style too!!!!. . .  Can't wait to see 'er done! 
__________________
Chuck
|
|
#40
|
||||
|
||||
|
Re: WIP: The Dino 36 hour Challenge :)
SUPER MEGA HYPER UPDATE (for quadzero)
I’m in a good mood today so forgive the long post about nothing ! It seems that in my dictionary, “OOB” is synonymous with “DIY”  Exhaust tips (or should that be ‘zhaust tips  ). ).I had already painted the kit parts with Alclad2 and was quite happy until I removed them from the sprue last night. It turned out that the cut off point is in a really visible place and retouching would look kind of crappy so….  They still need to be shortened to size and also I need to plug the ends with styrene rod for gluing to the exhaust pipes. A similar story with the gear lever. I figured I could make one with 1mm solder but I had no idea how to make the round gear knob. Then I had a “brain-ripple” – I can’t really call it a brainwave  My soldering sucks. Every time I’ve tried, I just end up with a kilogram of silver orbs scattered all over my work top  See where I’m going with this? See where I’m going with this?  I took a length of solder, held it vertically above the flame of my butane torch and slightly melted it. The melting solder collected in a nice ball shape at the end of the wire. After it cooled down, I simply polished it up, cut it to length and bent it to shape. Hocus Pocus! One dead easy, real metal, chrome looking gear lever.  For any of you worrying about the driver’s testosterone reservoirs, I have fixed the dash and steering wheel positions  I also managed to carried away with heat staining and put too much everywhere.  Also experimented with red clear over Alclad2 Steel on the brake calipers. Put wash on the grooved disc faces.  I waxed the body again. I’ve noticed in many of my photos that the color is always different and you can’t really see the shine that I am so proud of  This gratuitous photo is purely for me. This gratuitous photo is purely for me. Almost ready for assembly  And here are some teasers for (I hope) last post tomorrow    Any praise for my wonderful gear stick will be most welcome !!  (as will any ideas suggestions for better solutions - seriously). (as will any ideas suggestions for better solutions - seriously).Thanks for looking 
__________________
Guideline for happy modeling: Practice on scrap. Always try something new. Less is more. "I have a plan so cunning, you could put a tail on it and call it a weasel" - Edmund Blackadder |
|
#41
|
||||
|
||||
|
Re: WIP: The Dino 36 hour Challenge :)
wow is this ever turning into a work of art. the way you beguile yourself i had a hard time believing this model was yours. its really coming along super. the tail-lights are so realistic and yes we can see that great shine. wow, again. super tres chic job here! keep up the great updates and commentary.
"driver’s testosterone reservoirs", now thats funny!
__________________
  
|
|
#42
|
||||
|
||||
|
Re: WIP: The Dino 36 hour Challenge :)
A brilliant build and one of the most entertaining threads I've seen. Thanks.
P.S. How's the back? |
|
#43
|
||||
|
||||
|
Re: WIP: The Dino 36 hour Challenge :)
Fabulous work!
__________________
There is a lesson in every kit. |
|
#44
|
||||
|
||||
|
Re: WIP: The Dino 36 hour Challenge :)
Quote:
 Fantastic work. Fantastic work.
__________________
 gio gio
|
|
#45
|
||||
|
||||
|
Re: WIP: The Dino 36 hour Challenge :)
Ingrid is done
 Thanks guys for keeping me company on this one  Here are a couple of pics. The full completed thread can be found here  
__________________
Guideline for happy modeling: Practice on scrap. Always try something new. Less is more. "I have a plan so cunning, you could put a tail on it and call it a weasel" - Edmund Blackadder |
|
 |
POST REPLY TO THIS THREAD |
 |
|
|