|
|
| Search | Car Forums | Gallery | Articles | Helper | Air Dried Beef Dog Food | IgorSushko.com | Corporate |
|
|||||||
| WIP - Street Post topics for any "Works In Progress" street vehicles projects in this sub-forum. |
 |
 Show Printable Version | Show Printable Version |  Subscribe to this Thread
|
|
|
Thread Tools |
|
#31
 02-03-2013, 10:19 AM
|
||||
|
||||
|
Re: Scuderia 16M, feat Autodecepticon & khngmy
Wow, Bro K.H Ng, you are really quick... i still not yet put my attention on the 430 coupe yet... i will only start 430 after i done with the 16M body. now is my turn for some update.
rear grill part, this suppose a scuderia parts, so some area need to be touch up in order to match with 16M rear. as for the grill, if i just drill it and replace with PE, it will be very thick and looks odd. so i need to thin the parts down.  this is the real car.  removed the plastic grill, and thin it at the back.  thats more like it.  try to test fit the scuderia interior tub into a 430 spider body. problem here. stock 430 spider tub sit well and seal the gap, but not the scuderia tub. when put on the chassis, spider tub abit higher then scuderia tub.    my solution is trim some plastic out from the wheel arc in order to move the tub higher.   thats the result. but still need to work it till flush.  this section need attention aswell, but not now. hahaha   rear bumper glued, test fit with the rear grill. Need attention aswell.  thats all for now. all comment are welcome. Thanks.
__________________
 Completed Lexus LFA http://www.automotiveforums.com/vbul....php?t=1122869 Completed Ferrari 458 Italia http://www.automotiveforums.com/vbul...php?t=1079425# Completed Nissan GTR http://www.automotiveforums.com/vbul....php?t=1054794 Completed WALD GTR http://www.automotiveforums.com/vbul...44#post7018544 
|
|
#34
02-16-2013, 11:40 AM
|
|||
|
|||
|
Re: Scuderia 16M, feat Autodecepticon & khngmy
Hi folks! It’s been a while since the last update, was working on the front hood of the Scuderia 16M. It’s pretty hard to get a decent panel line, so after rounds and rounds of putty and sanding, I oversanded the surface of the right hood.
The exposed area was oversanded, to correct it I used Tamiya’s polyester putty. 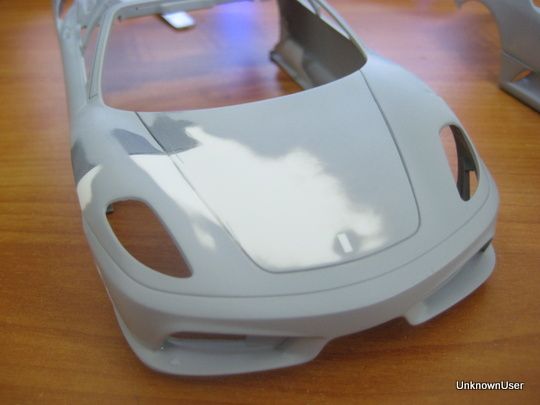 The polyester putty is actually a two-part putty, after mixing it according to the ratio recommended by Tamiya, I applied the putty on the area to be corrected. 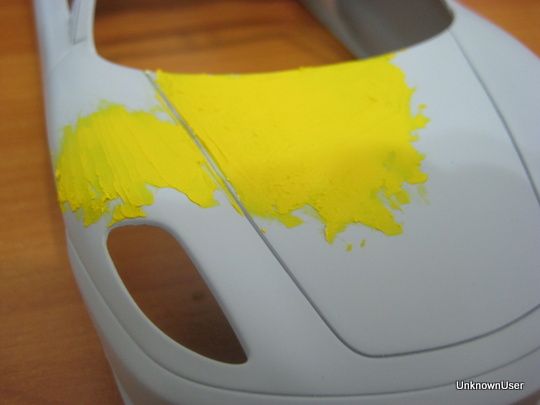 This is how it looks like after first round of sanding. 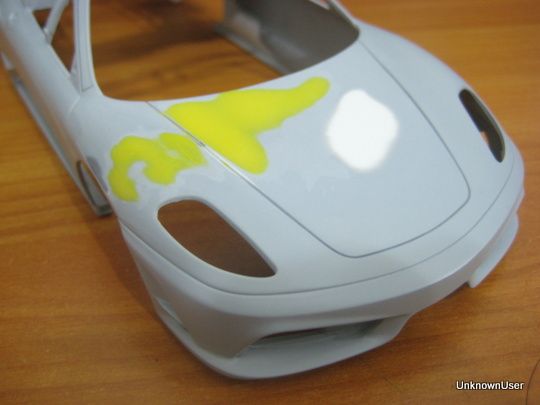 Primed and checked for errors, wasn’t happy with how it turns out, so here goes another round of sanding. 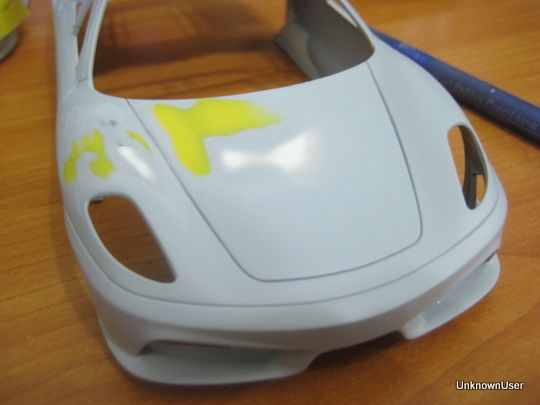 Primed again, looks so much better now… 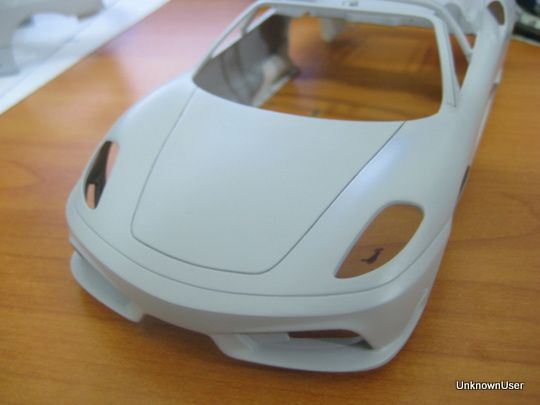 There is a huge gap between the bumper and the rear body, I’m thinking of filling the gap and re-scribe the panel lines…any ideas guys?  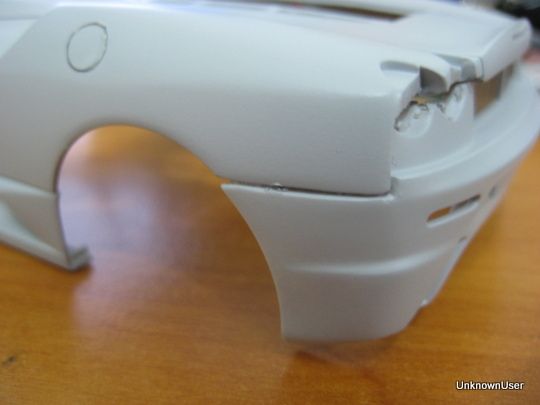 More progress on the F430 coupe too, cut and removed the plastic light housing of the original bumper, planning to replace with a clear sheet of plastic. 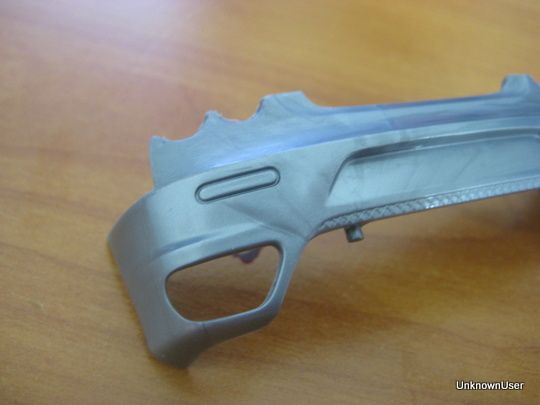 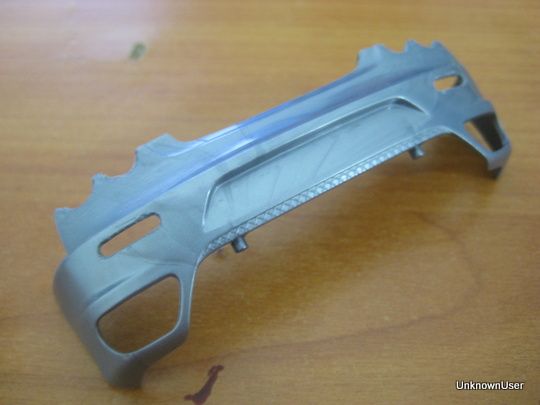 Now let’s have a look on the primed Scuderia 16M body and the F430 coupe body. Can anyone notice that these bodies have undergone a major surgery before?  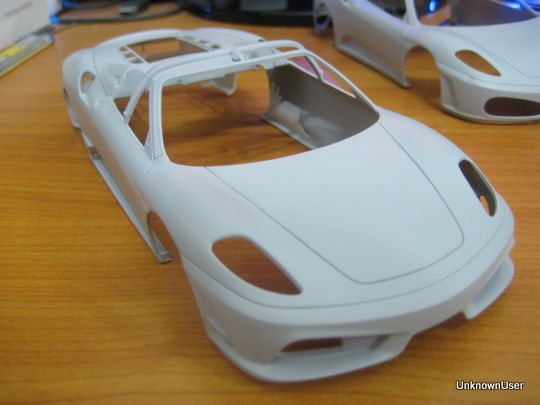 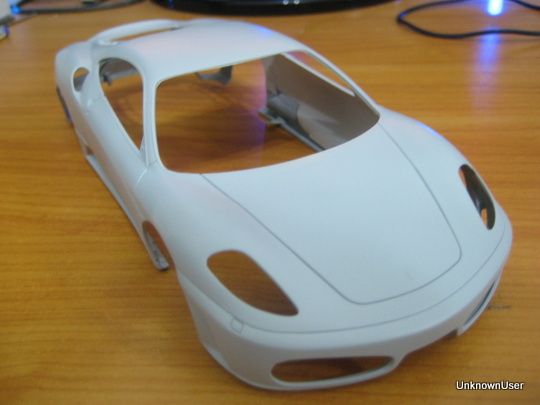 That’s all for now guys, thanks for reading the post. Comments are welcome! 
|
|
#35
02-16-2013, 12:25 PM
|
|||
|
|||
|
Re: Scuderia 16M, feat Autodecepticon & khngmy
Awesome stuff!!!!! Great to see the progress on these and so inspirational!!!!!
Keep it up!!!!!!!!!!! Andy
|
|
#36
03-07-2013, 01:15 AM
|
||||
|
||||
|
Re: Scuderia 16M, feat Autodecepticon & khngmy
Hello, is been awhile i didnt update my progress. here are some progress.
proceed to 430 coupe before i lose interest on it. attached the head and side skirt.   rear light housing filled, not much i can do to 16M body.   Filled with polyester putty, sand and primed.   while wait for the primer completely cure, i proceed to rear bumper. rear mesh removed, thin down the plastic, to be replace with PE.   flaws fixed with white putty, primed again.    Huge gap on the rear bumper area.   Add plaplate to the bumper.  the result after some sanding.  Thats all for now. all comment are welcome. thanks.
__________________
Completed Lexus LFA http://www.automotiveforums.com/vbul....php?t=1122869 Completed Ferrari 458 Italia http://www.automotiveforums.com/vbul...php?t=1079425# Completed Nissan GTR http://www.automotiveforums.com/vbul....php?t=1054794 Completed WALD GTR http://www.automotiveforums.com/vbul...44#post7018544
|
|
#37
03-08-2013, 04:30 PM
|
||||
|
||||
|
Re: Scuderia 16M, feat Autodecepticon & khngmy
Nice progress. Love to watch this...
|
|
#38
03-12-2013, 10:02 AM
|
|||
|
|||
|
Re: Scuderia 16M, feat Autodecepticon & khngmy
Been hibernating for quite some time and its time to continue to build my F430. Quite a lot of works done on the F430 in the last few weeks, Ill be focusing on the F430 for the moment before moving to Scuderia 16M.
As I drilled holes in the rear light socket when I removed the rear bumper, I have to fill the holes using putty. First, I cut a piece of pla-plate into semi-circle shape and glue to the back of the bumper, it will act as the backbone when I fill with putty later. 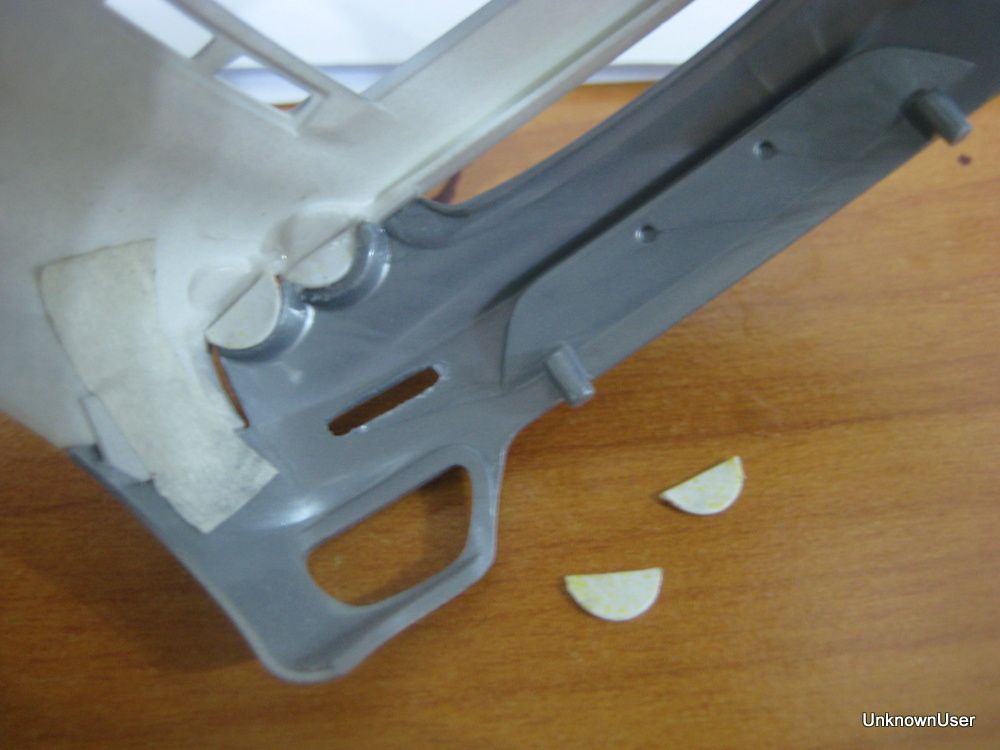 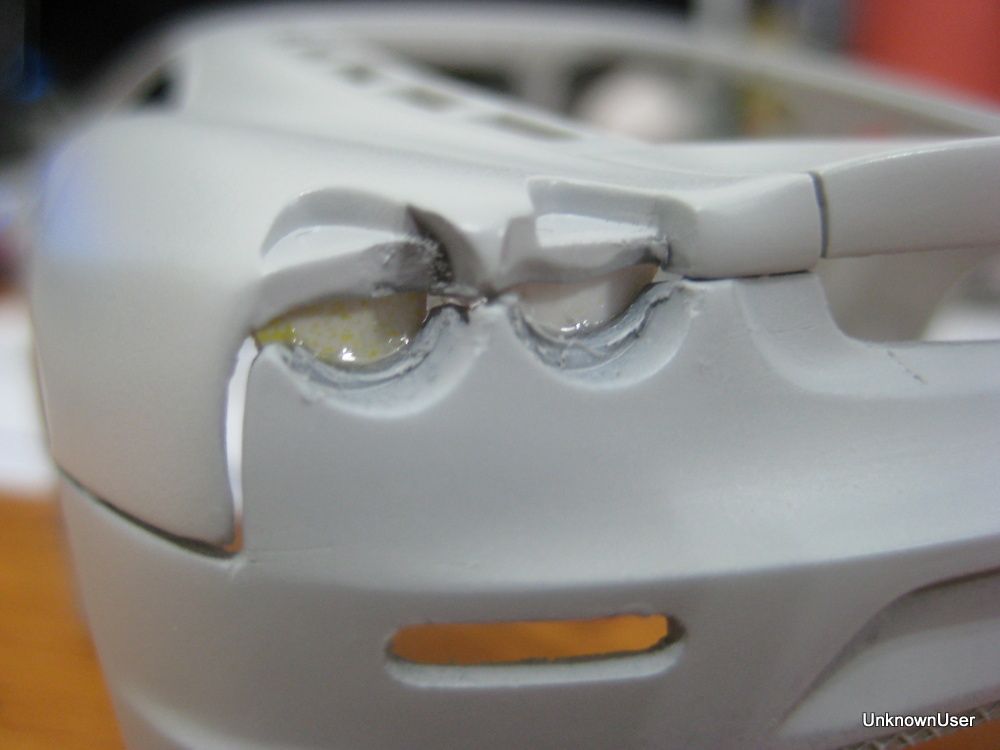 This is the putty that I used, the industrial type putty that I bought from local hardware shop. Its a 2-part putty. To use it, I cut them in equal proportion and mixed both putties together by adding some water to ease the mixing.  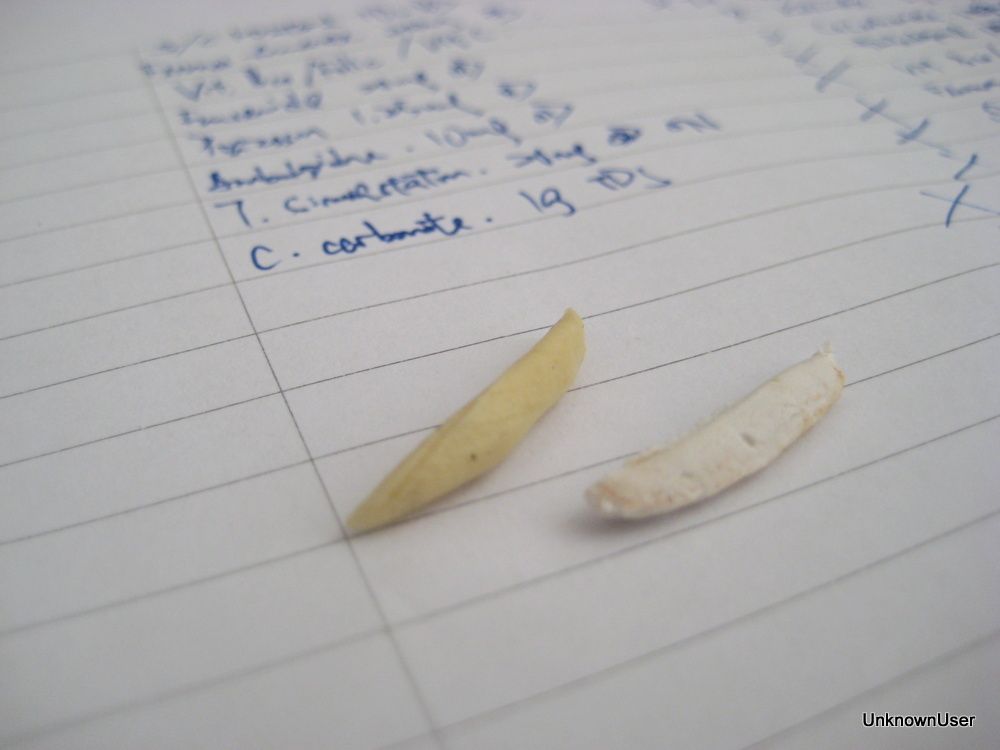  This is the result after filling the light socket with putty. 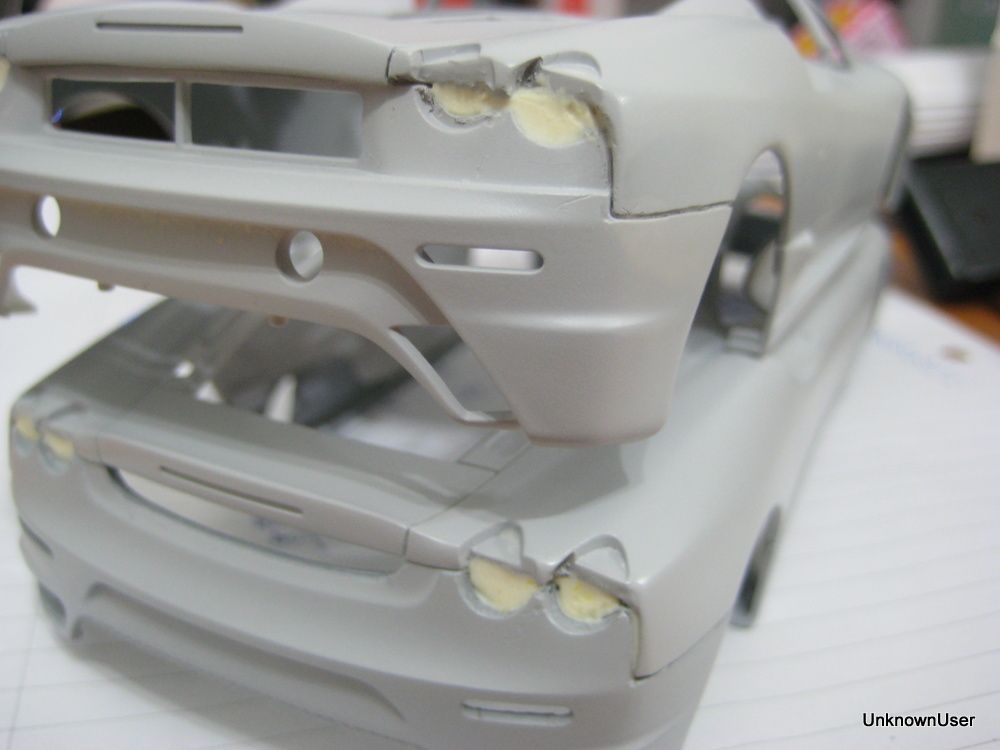 Also, using the same putty, I strengthen the connection point of the body and the front end.  Carbon-ceramic disc brake was replicated using gun metal with flat clear coat. The discs were sanded to create the wear-and-tear effects. 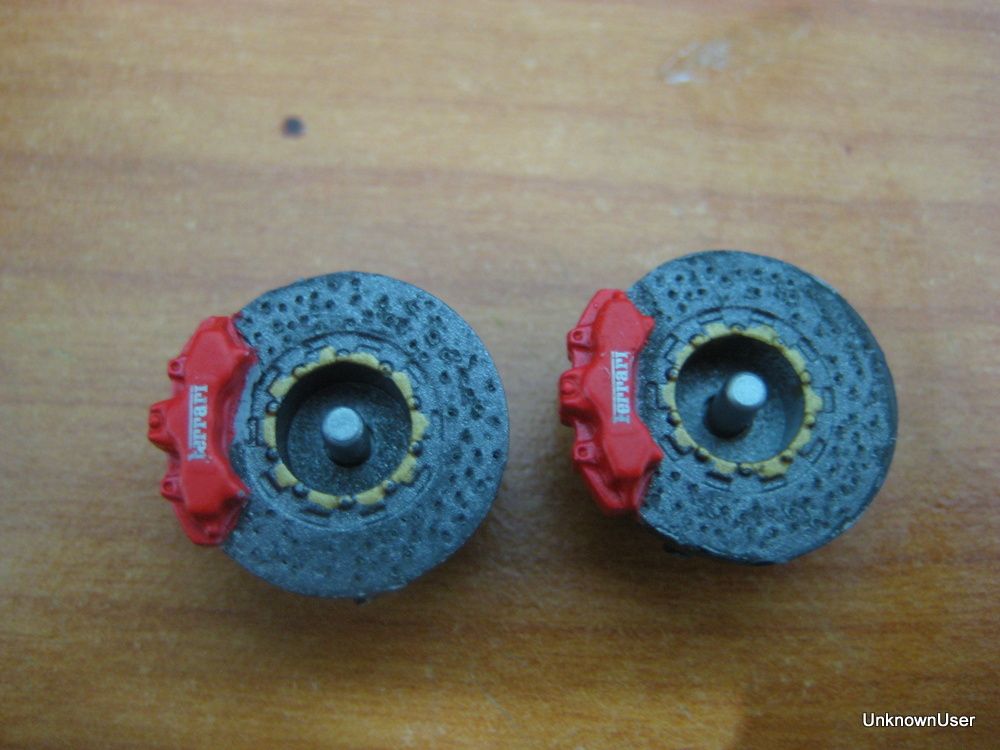 I noticed the original steering wheel needed some attention, so I filled it and painted it in semi-gloss black.  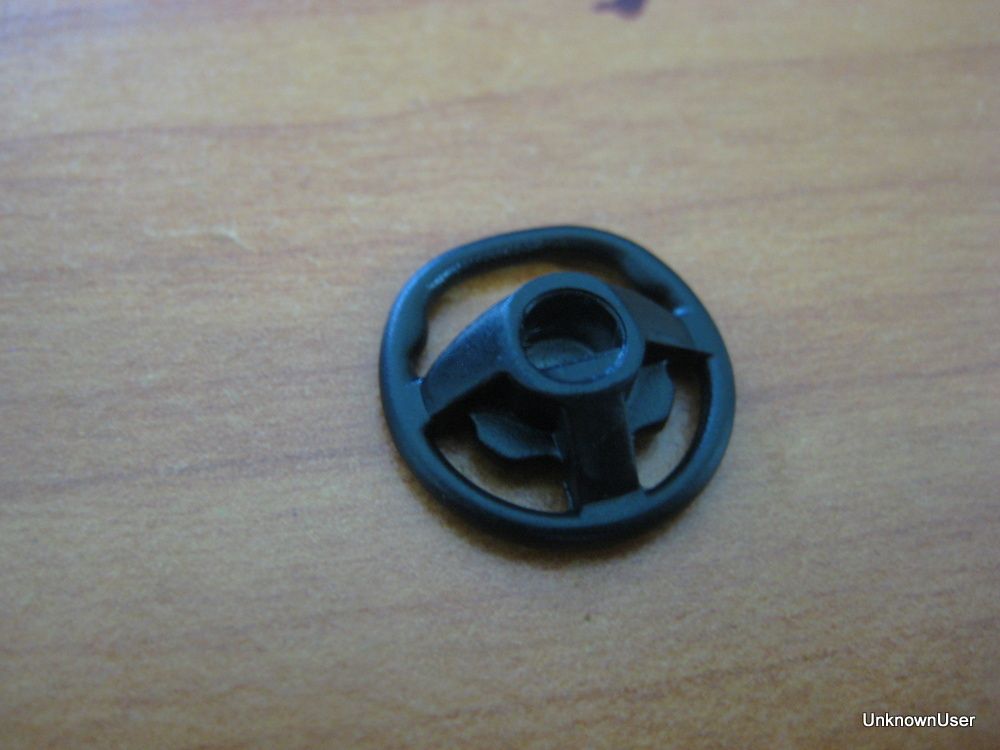 Engine bay and the engine cover were painted. The red engine cover will be painted with flat clear soon. Ill be adding HobbyDesigns Ferrari metal transfer and will do some wiring soon. 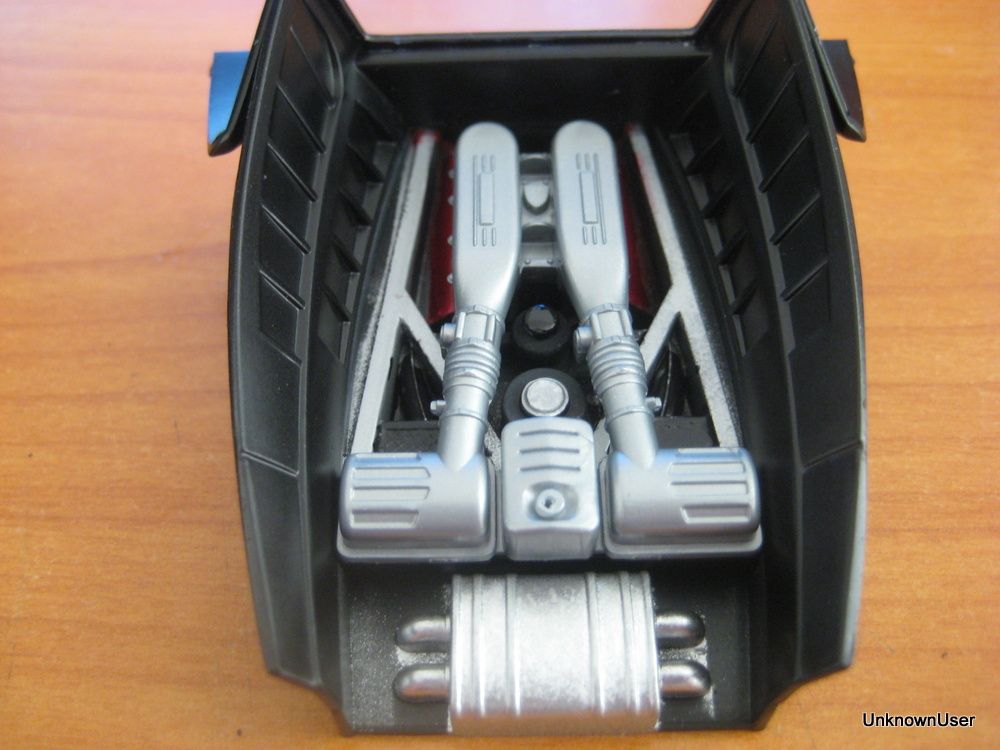 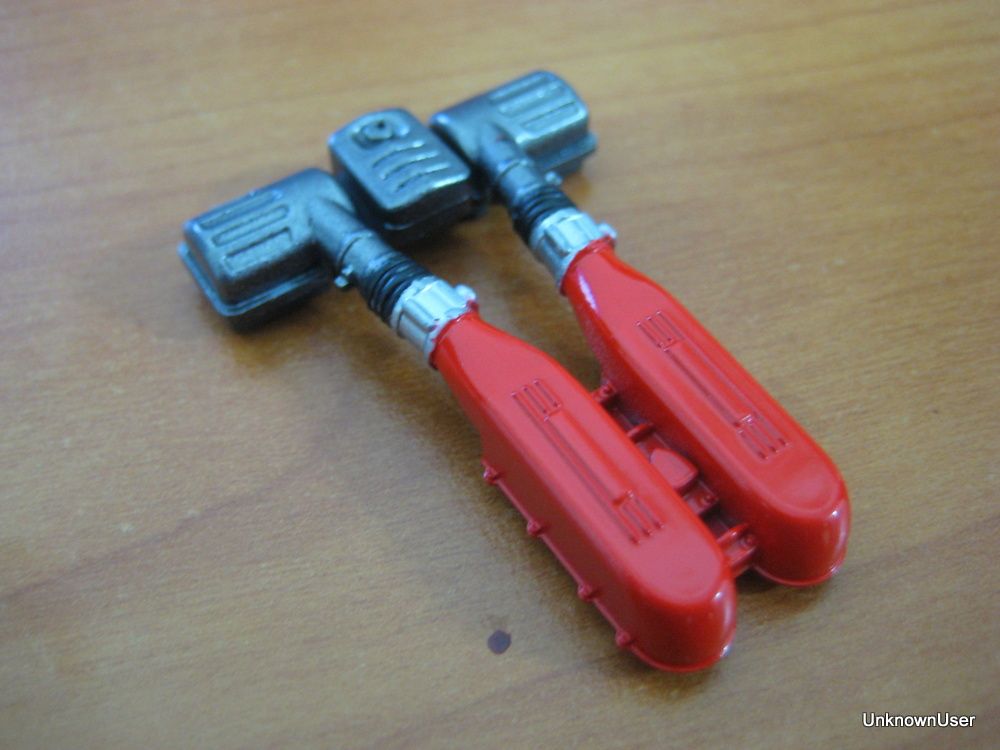 The chassis is almost ready. Interior is the next part that I will put more efforts in detailing it. Still need some touch up on the body before I can proceed to painting main body color.  Thats all for now, thanks for reading.
|
|
#39
03-12-2013, 10:14 AM
|
||||
|
||||
|
Re: Scuderia 16M, feat Autodecepticon & khngmy
very good work!! i like both ferraris so much!!
|
|
#40
03-12-2013, 11:03 AM
|
||||
|
||||
|
Re: Scuderia 16M, feat Autodecepticon & khngmy
Nice dude.. too fast too furious bro... cant catch up...

__________________
Completed Lexus LFA http://www.automotiveforums.com/vbul....php?t=1122869 Completed Ferrari 458 Italia http://www.automotiveforums.com/vbul...php?t=1079425# Completed Nissan GTR http://www.automotiveforums.com/vbul....php?t=1054794 Completed WALD GTR http://www.automotiveforums.com/vbul...44#post7018544
|
|
#41
03-12-2013, 07:21 PM
|
||||
|
||||
|
Re: Scuderia 16M, feat Autodecepticon & khngmy
So What Colours are you guys considering doing?
__________________
 It's Not wheather you Win or Lose, its how you look while you play the Game
|
|
#42
03-12-2013, 11:00 PM
|
||||
|
||||
|
Re: Scuderia 16M, feat Autodecepticon & khngmy
Quote:
__________________
Completed Lexus LFA http://www.automotiveforums.com/vbul....php?t=1122869 Completed Ferrari 458 Italia http://www.automotiveforums.com/vbul...php?t=1079425# Completed Nissan GTR http://www.automotiveforums.com/vbul....php?t=1054794 Completed WALD GTR http://www.automotiveforums.com/vbul...44#post7018544
|
|
#43
03-14-2013, 10:30 PM
|
|||
|
|||
|
Re: Scuderia 16M, feat Autodecepticon & khngmy
Quote:
|
|
#44
03-14-2013, 11:01 PM
|
|||
|
|||
|
Re: Scuderia 16M, feat Autodecepticon & khngmy
Quote:
Very ballsy. I think it would fit the agressiveness of the mentality of this thread. How would you do it? I am afraid a red Tamiya clear red acrylic would pool and be inconsistent been there and done that). I vote red chrome!!!!!!! Andy
|
|
#45
03-19-2013, 03:24 AM
|
||||
|
||||
|
Re: Scuderia 16M, feat Autodecepticon & khngmy
Hello, here are some updates. put the coupe aside and do some improvement on the 16M interior.
Door of the 16M. this part is not on the real car.  sand it down, separate the door jamb.  door jamb attached to the tub.  now, need to focus on the back area.  didn't have it on the tub of the scuderia kit.  by using epoxy putty, shape this thing up. do this bigger so i can slowly sand it to perfection.   slightly shape it and center console removed for easier carbon decal application.   wheel arch slightly trim out, so i dont risk stretch the 16M body too much to fit the chassis.   test fit after further trimming the add-on.  thats more like it.  thats all for now. thanks for viewing. all comments are welcome.
__________________
Completed Lexus LFA http://www.automotiveforums.com/vbul....php?t=1122869 Completed Ferrari 458 Italia http://www.automotiveforums.com/vbul...php?t=1079425# Completed Nissan GTR http://www.automotiveforums.com/vbul....php?t=1054794 Completed WALD GTR http://www.automotiveforums.com/vbul...44#post7018544
|
|
|
POST REPLY TO THIS THREAD |
 |
|
|


