

|
| Search | Car Forums | Gallery | Articles | Helper | Air Dried Fresh Beef Dog Food | IgorSushko.com | Corporate |
|
|||||||
| WIP - Motorsports Post topics for any "Work In Process" motorsports vehicles in this sub-forum. |
 |
 Show Printable Version | Show Printable Version |  Subscribe to this Thread
|
|
|
Thread Tools |
|
#16
 01-30-2008, 08:31 PM
|
||||
|
||||
|
Re: "Gold Leaf" Lotus 72 Jochen Rindt 1970 Tameo WCT 1:43
That is the coolest seat cushion thanks for shearing your tips. I don't know when I will be building something with a seat like that but it is sure nice to know for the future.
__________________
Regards, Dave 
|
|
#17
01-31-2008, 01:45 AM
|
||||
|
||||
|
Re: "Gold Leaf" Lotus 72 Jochen Rindt 1970 Tameo WCT 1:43
Nice update JayKay. The seat looks like a big improvement. Maybe some glitter would have worked for the bolts on the recessed part for the driver's hand to be able to change gears?
__________________
On the workbench: Completed WIPs: Completed Models Gallery:
|
|
#18
01-31-2008, 11:38 AM
|
||||
|
||||
|
Re: "Gold Leaf" Lotus 72 Jochen Rindt 1970 Tameo WCT 1:43
Fantastic car.
Fantastic work. And fantastic tips. Please more pics soon.
__________________
"Racing, competing, is in my blood. It's part of me. It's part of my life" Ayrton Senna
|
|
#20
02-04-2008, 06:46 AM
|
|||
|
|||
|
Re: "Gold Leaf" Lotus 72 Jochen Rindt 1970 Tameo WCT 1:43
How do you guys do it? You make me sick
 opcorn: opcorn:
|
|
#21
02-04-2008, 04:09 PM
|
|||
|
|||
|
Re: "Gold Leaf" Lotus 72 Jochen Rindt 1970 Tameo WCT 1:43
Hi everybody
In the last update i promised to get to some painting…well here we go :-) As I mentioned before I started preparing some of the photoetch detail parts while waiting for the body bits to be ready. Normally I try to paint as late as possible while building and test fitting detail bits to not mess the paint job up. I soon realized though with this kit that wasn’t gonna work. Pretty much everything is connected to the main tub and test fitting without glueing didn’t really work so I decided to paint the tub and sidepods and add bits from there. I went with ZERO paints and after the primer was sanded I added a layer of pure white. No problems there. Tameo gives you the decals to just paint the car red and add white and gold with decals but I decided against that. Next was the ZERO red. The kit instructions call for RAL 3020 which I got. When comparing that colour with my reference pictures in books, the instruction reference pictures and digital pictures I wasn’t convinced though. It was a bit too yellow ( or orange if you will ) for my taste. Instead I ended up using Ferrari Rosso Scuderia ( also from ZERO ) that was a better match to the red in the decals as well. This is what that looked like: 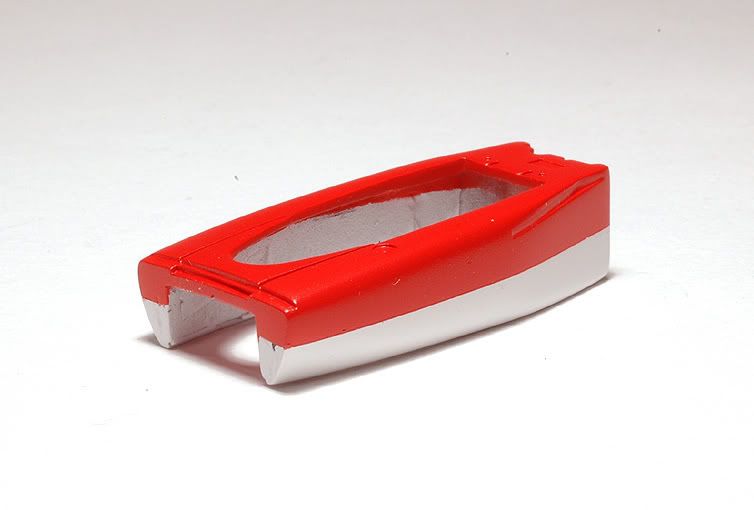 Directly on the base coat paint I put the decals that were no problem to work with. I only had one problem with the numbers on the sidepods. You could still see the dividing line between red and white under them. Putting on a second decal layer mostly cured that. 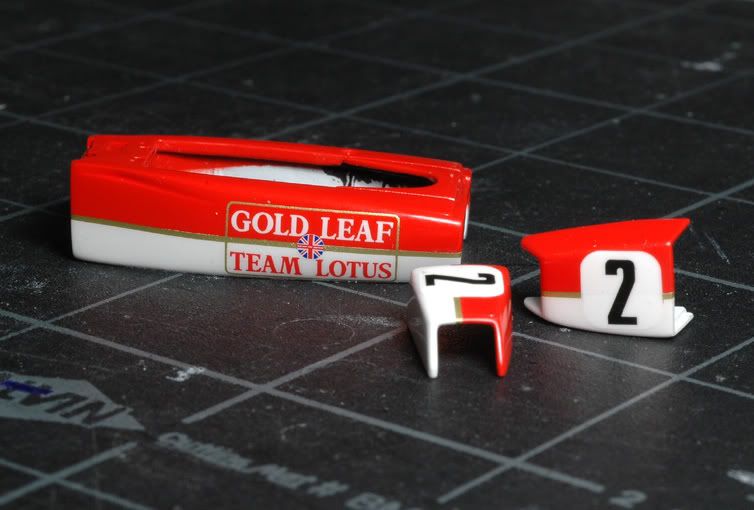 On top of the decals I put a serious layer of urethane clear. That was then sanded and polished with micromesh pads up to 12000 followed by acrylic glass polish that made the surfaces mirror like. Then I glued the sidepods to the tub. 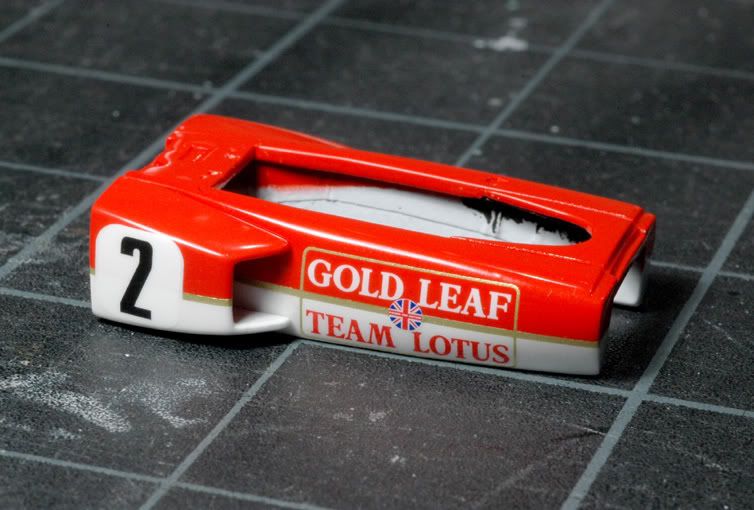 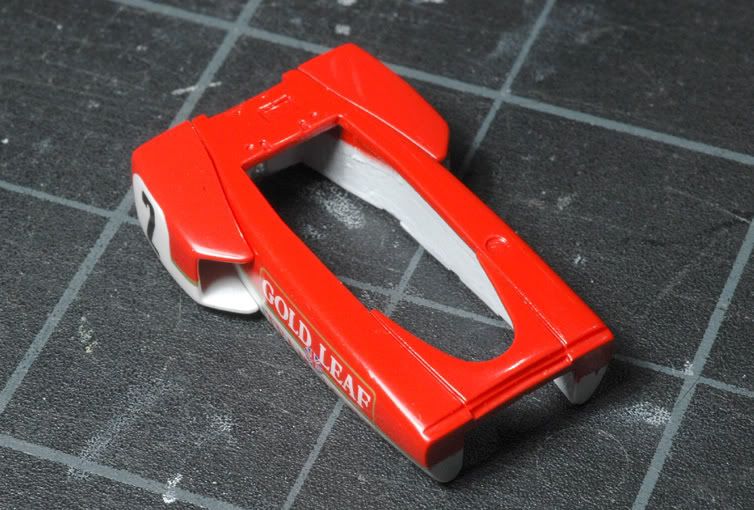 I was very proud of myself and this was the most trouble free paint job I had done in ages … …. but sadly the story doesn’t end there :-( I got to that point right before Christmas and then because of holidays and other duties the model sat around for weeks. I had realized while polishing there were two spots where the clear wasn’t fully hardened ( that layer was seriously thick…). No problem then. I carried on doing some silly details to add later and let it cure a bit more. In between I checked the body every now and then, but there were little pimples showing up in two or three places. I sanded and polished them again. No problem….enough clear to sand and polish. What puzzled me though was that these seemed to be under all the paint ( not just in the clear ) and I got worried. I didn’t wanna glue all those lovely little etched and turned parts to this body that seemed to head into puberty and an increasing case of acne… I suspected that maybe the resin underneath wasn’t fully cured ( although I think it had time enough ) and caused this trouble. To make a long story short, I peeled the paint off the tub last night and I’ll redo it. I can tell you that hurt! Paint jobs and me still seem to not get along with each other very well… I saved the side pods but the tub currently looks like this again: 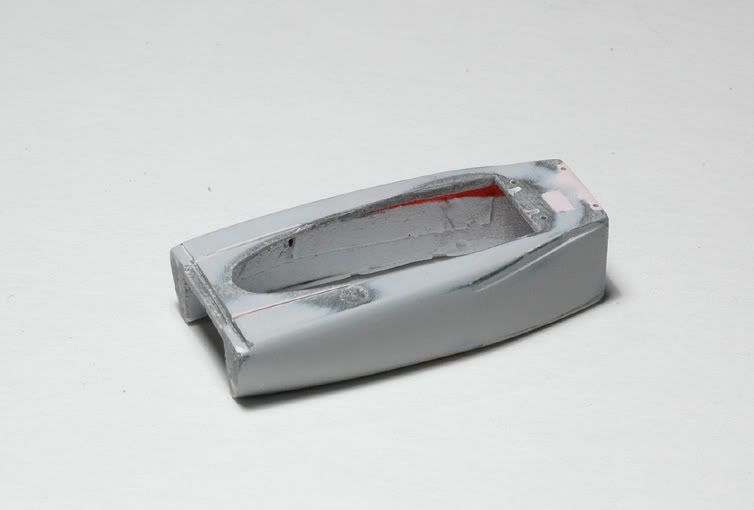 There’s at least one good thing about it. I can fix an inaccuracy I found out about while making some details. You can see where i filled those holes behind the driver with body filler....i’ll get to that later. The extra set of decals will then also come in handy! Tonight the body will get a new layer of primer. Before I carry on with the paint I will put all the resin parts into the oven for a bit to anneal them…just to be sure. I think I’ll do that always with my home made resin parts from now on! See you for the next update!
|
|
#23
02-10-2008, 01:21 PM
|
|||
|
|||
|
Re: "Gold Leaf" Lotus 72 Jochen Rindt 1970 Tameo WCT 1:43
Hi
I’m still repainting the chassis tub. It’s currently red and white again but I’m taking my time with each step and let the paint layers thoroughly dry. I hope that’s gonna pay off in the end! Well anyway, while doing that and waiting I carried on doing some details and I wanna show you the first few in this update! I’m staying at the front end where the pedals box sits underneath the nosecone. Attached to this metal box that builds up from photoetch pieces in the kit are the inboard front brakes and suspension elements. In the first picture this is the front and top wall ( not yet folded ) with the hole through which the pedals are visible. This looks a bit naked… 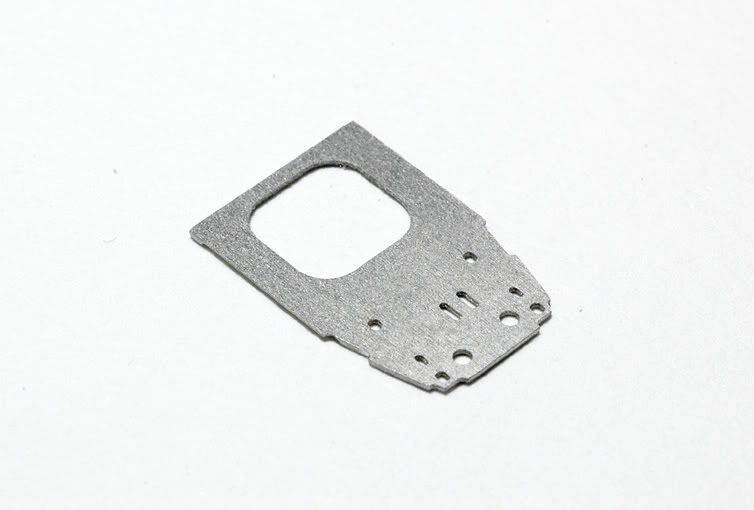 I wonder why Tameo again didn’t etch some rivets in… I decided to change that. Drilling holes and putting in raised rivet heads was no option at this size so I milled some in. The mill made it a lot easier to get a consistent spacing. It can be done by hand though. Kamimura San proves that :-) 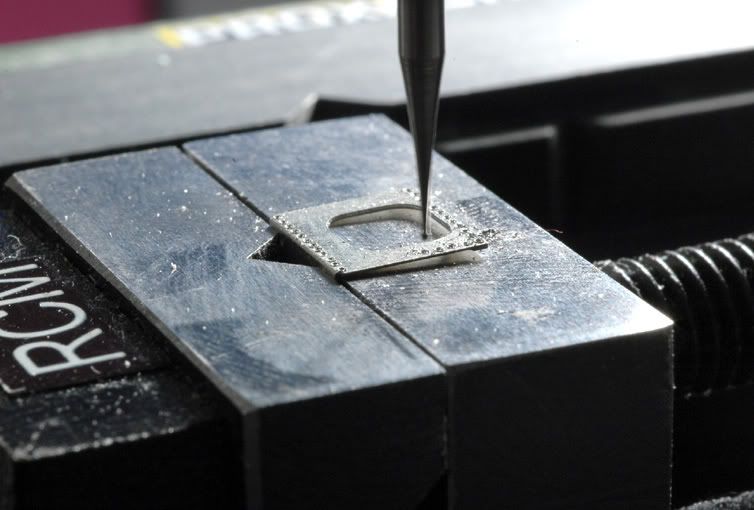 On top of that I added a flange around the hole. On the real car that’s the sheet aluminium folded up a bit for added stiffness. On the photoetch part that wasn’t possible so i added a strip of 0,1mm nickel silver sheet. 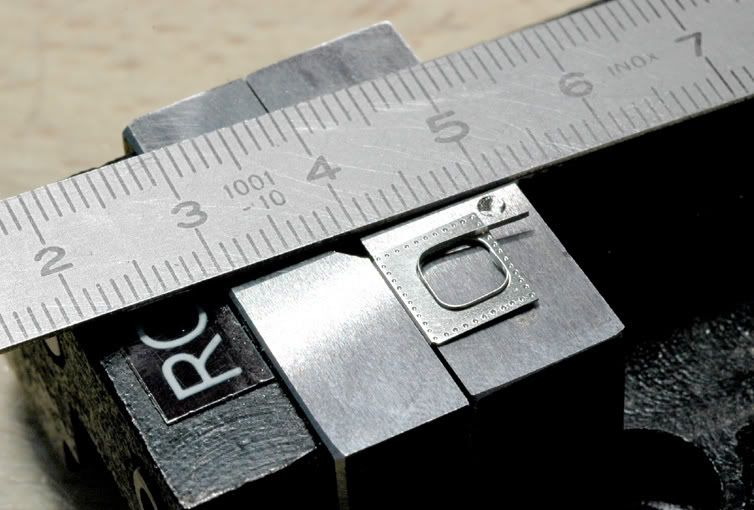 I glued it with superglue. Soldering would have been better but too messy as well. It’s not sitting perfect when seen from the top but it took me long enough and I decided to leave it like that. Could be much worse too :-) 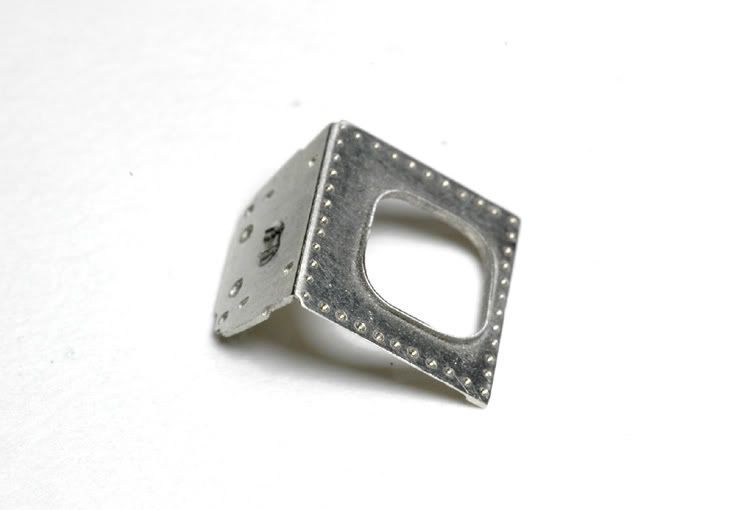 Next is one of the front suspension subframes with turned aluminium damper and upper A-arm. 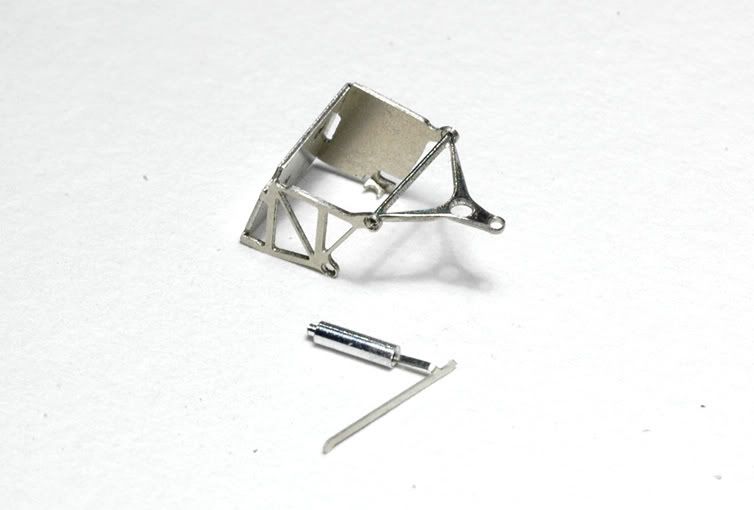 I wasn’t too happy about how the damper is connected to this diagonal strut, so I rebuilt the strut with a bit more ( correct ) shape to it and milled a proper top element for both sides’ dampers ( the kit provides those for the rear dampers though ) including bump rubbers. I then had to shorten the lower damper elements a bit and after also beefing up the A-arm pickup points on the subframe I painted the frames with a mix of light blue and gray and the dampers with transparent blue followed by a mix of matt clear and matt dark blue to tone it down a bit. 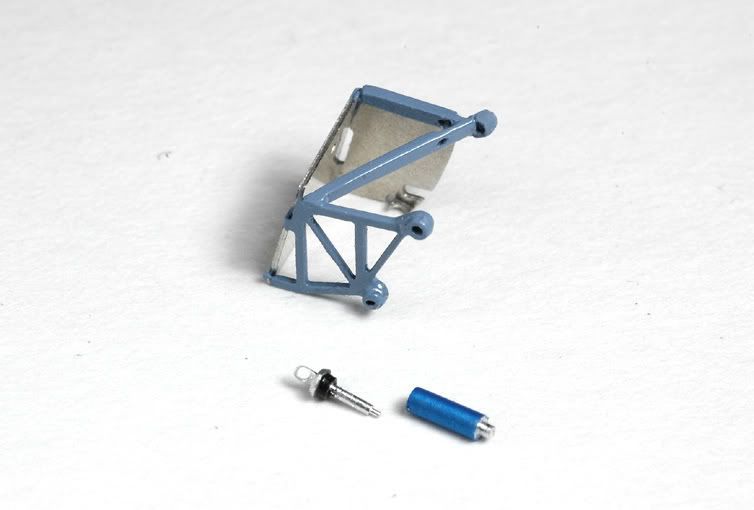 The paint looks a bit thick up close but maybe the next shot puts this in a bit of perspective :-) 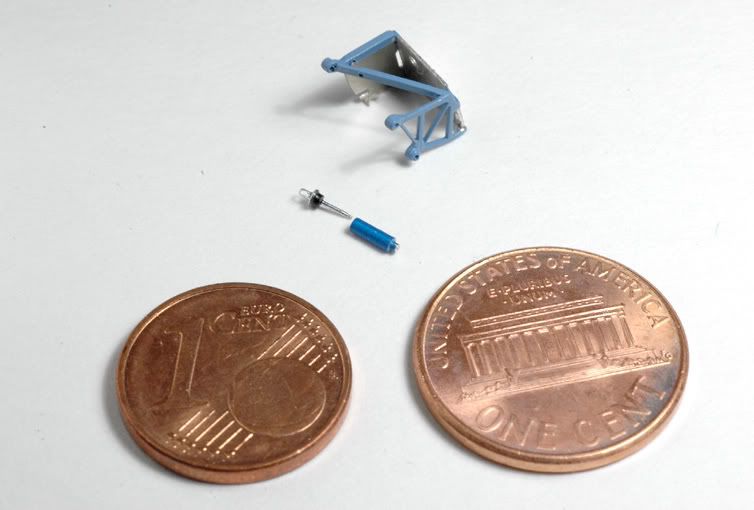 Inside these frames will go the front brakes as well. The turned parts that came in the kit looked a bit messy again: 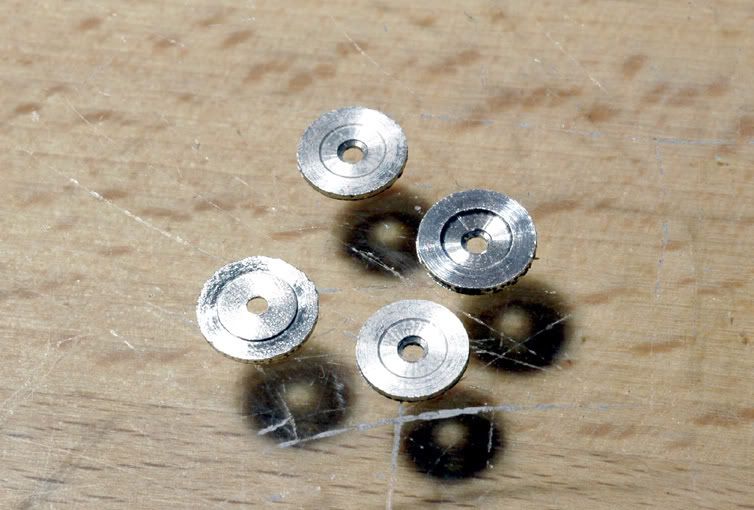 I chucked them in my Proxxon again and sanded them smooth with fine sand paper. In the next picture you see one along with more pieces that go on each side that are already sanded and painted with different types of Alclad and ZERO Jet Black. 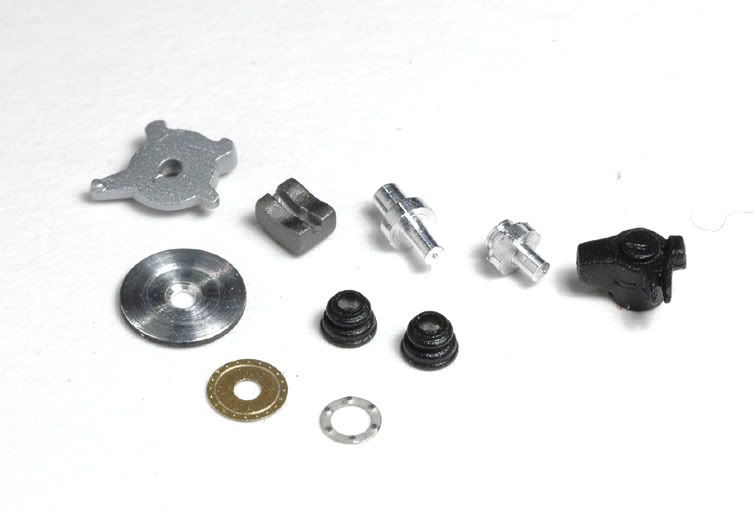 Once the tub is ready I can assemble these and build the front end up…I hope :-) That’s it for now. Thanks for looking!
|
|
#25
02-10-2008, 04:14 PM
|
||||
|
||||
|
Re: "Gold Leaf" Lotus 72 Jochen Rindt 1970 Tameo WCT 1:43
I am not really sure why I even try to scratch build anything
 Just awesome work your doing in this scale. Just awesome work your doing in this scale.
__________________
Regards, Dave Last edited by davesans; 02-11-2008 at 06:24 AM.
|
|
#27
02-13-2008, 12:16 PM
|
|||
|
|||
|
Re: "Gold Leaf" Lotus 72 Jochen Rindt 1970 Tameo WCT 1:43
Bummer about the paint acting all crazy Jay!
If you didn't post comparative pics with pennies it's really easy to forget the actual size of this thing. How the hell do you do it?!?!?! Impressive, most impressive! Great to see you work on other projects other than the Mp4/4, gives you time to step back, clear your mind, look at the overall picture and, when the time is right and your pasion for it is back, I'm sure you'll go back to it to complete what is simply the best model I have ever seen. 
|
|
#29
02-23-2008, 08:01 AM
|
|||
|
|||
|
Re: "Gold Leaf" Lotus 72 Jochen Rindt 1970 Tameo WCT 1:43
O.k.
Here we go with some more progress. The chassis tub is finally painted again. It took a bit longer than expected, also due to some possibly catastrophic mishaps again, but here it is: 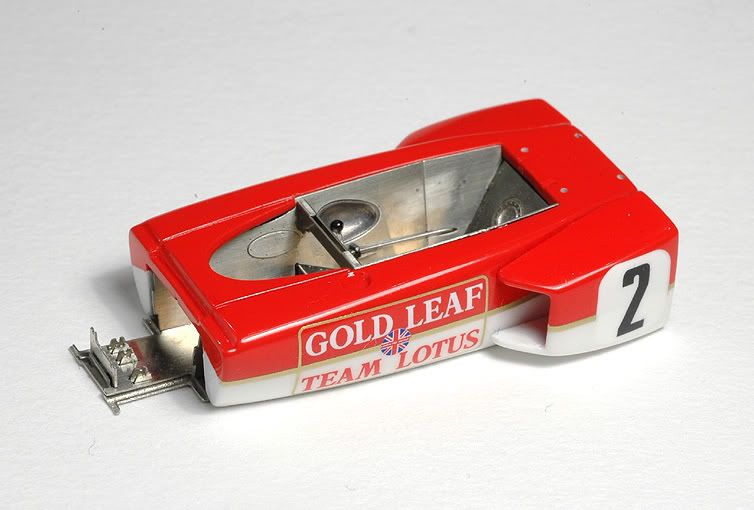 Painting went nicely and I had no problem with sanding and polishing. Then I wanted to glue the PE cockpit tub. This slides in from underneath and is a pretty tight fit around the upper edge…..which became a problem. With the first paintjob it was sitting very tight with no problem if handled carefully. Now after the second paintjob it was too tight and of course the sharp edges of the sidewalls chipped of the paint at the cockpit surrounding edges in two places. I nearly fainted when that happened! I just couldn’t believe it …:-) To make a long story short, I managed to fix that ( also due to the ZERO paint being quite good for such spot repair ) and then to get a smooth finish I decided to give the body yet another layer of clearcoat ( after widening the cockpit surround that is! ). That delayed everything some more but finally I could get the cockpit in place safely and attach the sidepods again. Next up were the pedals. The etched kit pieces come like this: 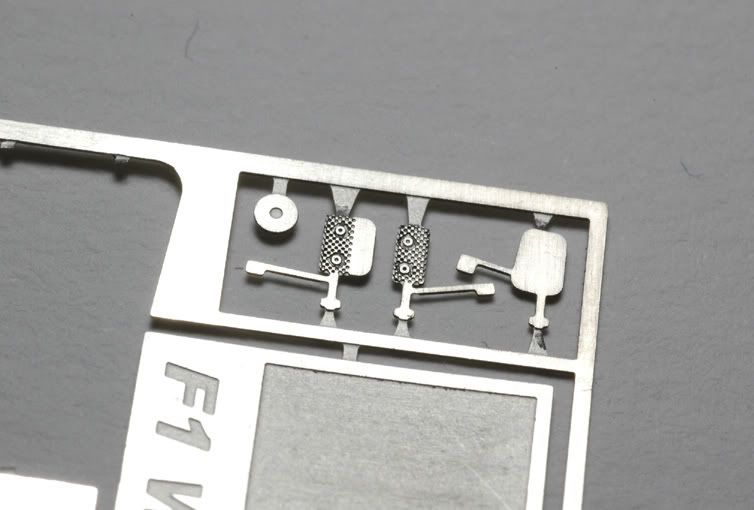 They have a nice texture but I didn’t like them being so “flat”, so I souped them up with some scratch pieces from PE sprues and 0,3mm nickel silver rod. 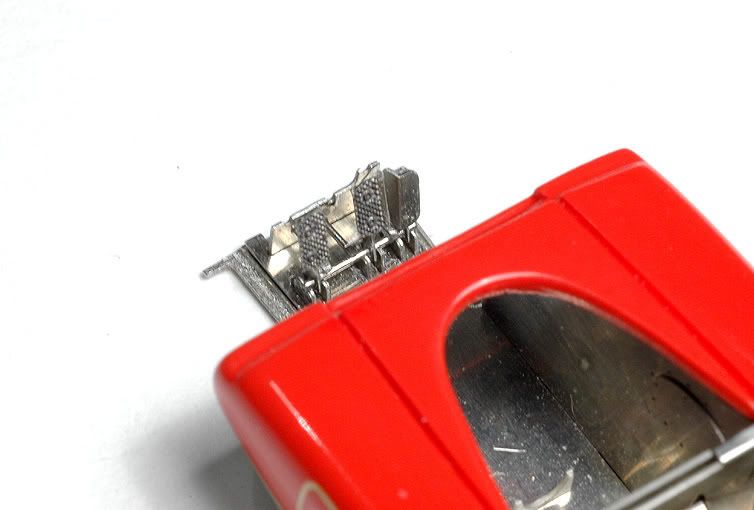 Then I could finally install the pieces for the footbox around the pedals I showed you in the previous update. 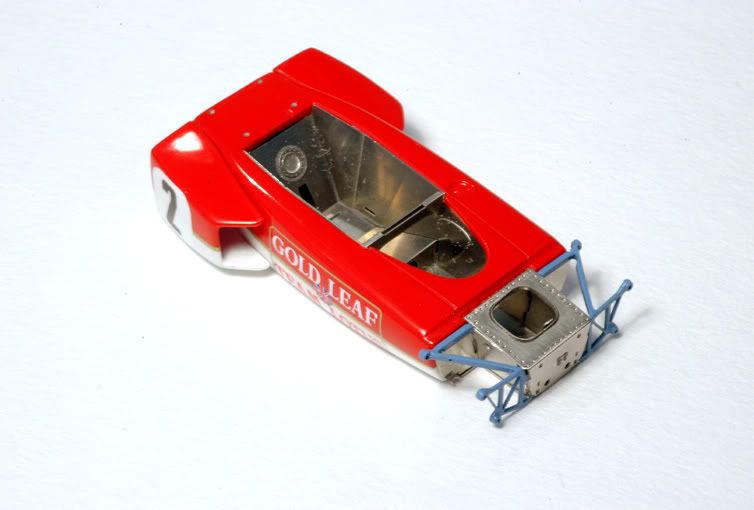 …and here’s how you see the pedals through the top hole: 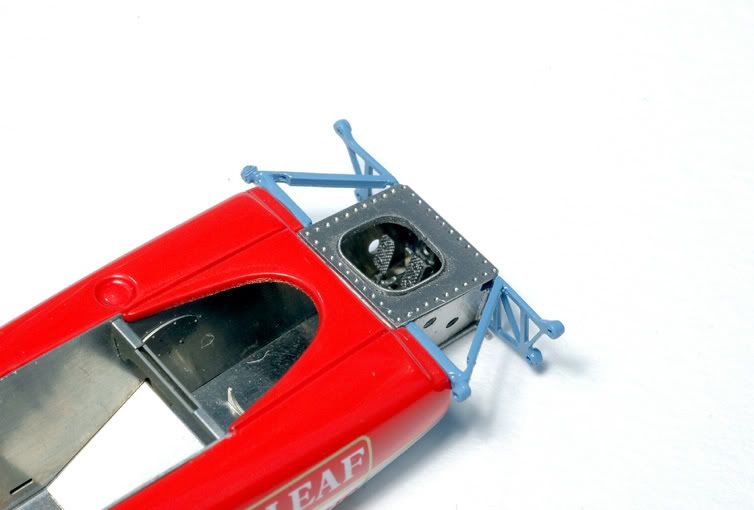 Now I will get to install some more little goodies I already prepared. More of that in the next update. Thanks for watching!
|
|
#30
02-23-2008, 09:05 AM
|
||||
|
||||
|
Re: "Gold Leaf" Lotus 72 Jochen Rindt 1970 Tameo WCT 1:43
Excellent and very interesting

__________________
Guideline for happy modeling: Practice on scrap. Always try something new. Less is more. "I have a plan so cunning, you could put a tail on it and call it a weasel" - Edmund Blackadder
|
|
|
POST REPLY TO THIS THREAD |
 |
|
|









