|
|
|

|
|
| Search | Car Forums | Gallery | Articles | Helper | Quality Dog Food | IgorSushko.com | Corporate |
|
| Latest | 0 Rplys |
|
|||||||
| WIP - Motorsports Post topics for any "Work In Process" motorsports vehicles in this sub-forum. |
 |
 Show Printable Version | Show Printable Version |  Email this Page | Email this Page |  Subscribe to this Thread
|
|
|
Thread Tools |
 10-28-2005, 03:59 AM
|
#16 | |
|
AF Enthusiast
 
Join Date: Jul 2003
Location: Aveiro
Posts: 1,032
Thanks: 0
Thanked 0 Times in 0 Posts

|
Re: F1 - Leyton House CG901B (1/20) - Progress Pics
__________________
Pedro Click the picture to check my progress thread: 
|
|

|

|
|
10-28-2005, 06:19 PM
|
#17 | |
|
AF Enthusiast
Thread starter

Join Date: Feb 2004
Location: Brisbane
Posts: 751
Thanks: 0
Thanked 9 Times in 9 Posts
|
Hi all,
pettercardoso: excellent reference pics, there's a couple there I've not come across before, and every little bit helps with this particular project! mickbench: Hi-tech decals function basically the same as regular decals, only when they've properly set and dried you can peel a very thin protective film from them. This leaves only the also very thin coloured decal left behind, and helps to give it a much more painted on look. I've found that Micro-Set/Sol works fine with this type of decal and causes no problems. I didn't actually realise these decals I'd bought were the hi-tech variety until I accidentally found that I'd pulled the film off one and my heart about stopped...! It's not the best pic (it was damn hard to take a good shot!), but you can sorta see below where I've partially peeled the film from the No. 15 decal... 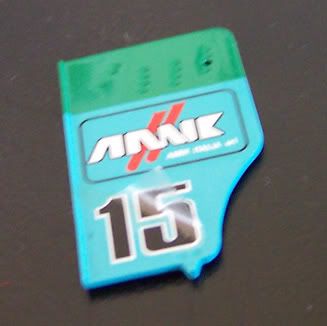 Update time! Well a small update anyway... It was time for me to break out the CF decals for the first time, and I'm getting some reasonable success from it! Here's the process I took: First I had to make a template from Tamiya masking tape. You can see below I've put the tape on the area I want to have the CF decal put on. The tape must be cut to shape, so I simply used a pencil to trace the outline I needed, which wasn't hard as I just followed the plastic piece around as required. It's hard to see the pencil line in the pic, but you get the idea. 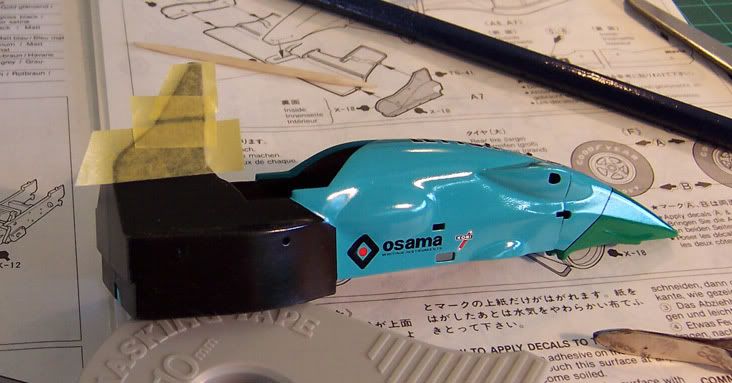 I then carefully peeled the tape from the model and placed on my cutting mat. Again, hard to see the pencil, so I just went over it again to make a definite line, then used my modeling knife to trim off the excess. 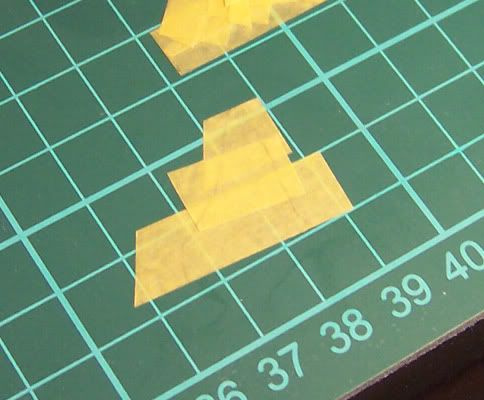 Once I had the exact template I was after (this process is very similar to the BMF process shown on the previous page), I stuck the tape directly to the CF decal sheet, and used my knife to cut the decal to the exact shape I was after. Forgot to get a piccy of this step, but it's not hard to figure out. Then it was just a matter of peeling the tape from the cut out decal, soak the decal, and place it on the model. A bit of MicroSol and we're all done! 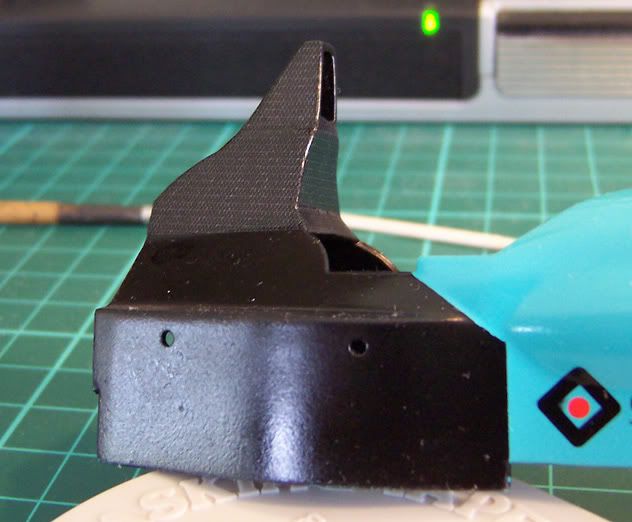 It's only partially complete so far as you can see, and looks a bit dodgy all peice-meal like this, but I think it's going to come up great when it's complete and some other parts are attached, etc. I'm hoping to get this kit finished by about the end of November, so hopefully the updates will keep coming thick and fast! Cheers all, M
__________________
 
|
|
|
|
|
|
10-28-2005, 07:37 PM
|
#18 | |
|
AF Enthusiast
 
Join Date: Jul 2003
Location: I live in a giant bucket, Kansas
Posts: 688
Thanks: 0
Thanked 0 Times in 0 Posts

|
Nice! Good technique on those cf decals. I'm sure they will be stunning when complete.
More please! 
__________________
The name is Sam.. and I'm ready to rock ------------------------------/  TRIUMPH! |
|
|
|
|
|
10-29-2005, 07:59 AM
|
#19 | |
|
AF Regular
 
Join Date: Nov 2003
Location: Dohna
Posts: 128
Thanks: 0
Thanked 0 Times in 0 Posts
|
Re: F1 - Leyton House CG901B (1/20) - Progress Pics
Your technique is right, but one thing is to mention: Make sure you've prepared a very glossy surface to stick the CF decals on, best is some gloss black or even just a clear gloss coat. I've had several heart stopping accidents where the decal came off while rubbing out the protective clear coar over it or even while placing another decal on it. CF decals (like ANY decals) need a very good and glossy surface preparation before.
__________________
Best Regards, Steffen 
|
|
|
|
|
|
10-31-2005, 01:17 AM
|
#20 | |
|
AF Enthusiast
Thread starter
Join Date: Feb 2004
Location: Brisbane
Posts: 751
Thanks: 0
Thanked 9 Times in 9 Posts
|
One thing I've been meaning to mention... the green used on this kit is Revell Color (enamel) number 61 - Emerald Green. It's a very close match, and looks great against the Coral Blue.
This pic shows the nice contrast... 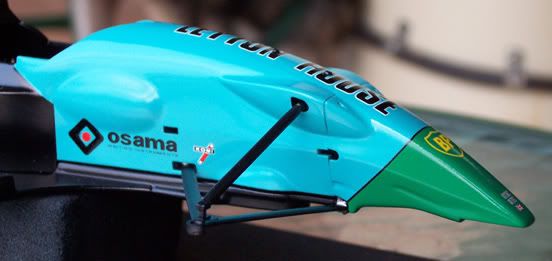 Cheers.
__________________
|
|
|
|
|
|
10-31-2005, 03:20 AM
|
#21 | |
|
AF Regular

Join Date: Jun 2004
Location: Hong Kong SAR
Posts: 377
Thanks: 0
Thanked 0 Times in 0 Posts
|
Re: F1 - Leyton House CG901B (1/20) - Progress Pics
Mark
The colour scheme looks great! Keep it up! Mikusen |
|
|
|
|
|
11-03-2005, 07:30 AM
|
#22 | |
|
AF Enthusiast
Thread starter
Join Date: Feb 2004
Location: Brisbane
Posts: 751
Thanks: 0
Thanked 9 Times in 9 Posts
|
I've just finished laying the last decals on the rear wing (they're still wet as I type!), and it looked so good with the carbon fiber I thought I'd share it with you all!
I've gone a bit CF crazy now that I've found it's not an impossible mission to lay CF decals down on challenging surfaces and get good results. I'm about 90% happy with the results I've had so far... if that makes sense. Anyway, here's a teaser of the progress on the kit so far... (The CF is a little hard to make out on the inside of the wing end plate - it was the best I could do with the lighting available. I'll get some more daylight shots soon enough.)  And my Scale Motor Sport PE and fabric harnesses arrived... yummy stuff! 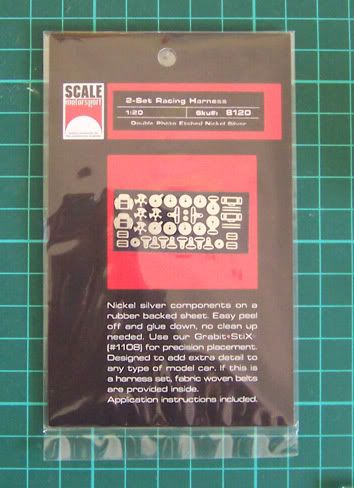 Cheers all!
__________________
|
|
|
|
|
|
11-03-2005, 08:33 AM
|
#23 | |
|
AF Regular
Join Date: Jun 2004
Location: Hong Kong SAR
Posts: 377
Thanks: 0
Thanked 0 Times in 0 Posts
|
Re: F1 - Leyton House CG901B (1/20) - Progress Pics
Hi Mark
The wing is looks nice! I can't wait to see more pics about it! Mikusen |
|
|
|
|
|
11-03-2005, 07:16 PM
|
#24 | |
|
AF Fanatic

Join Date: Jan 2005
Location: Anywhere but here
Posts: 1,676
Thanks: 0
Thanked 0 Times in 0 Posts
|
This is looking very nice and clean. I see you place your completed parts on kitchen paper, I do that as well. Helps prevents chips and getting dirt on the bottom etc.. Well I think it does anyhow.
And how do you keep your cutting mat so clea?. Ive had mine for 9 months, and now I need a new one. Its a right mess. These SMS belts look very nice as well.. Might have to spend more money and get me some of those.. |
|
|
|
|
|
11-04-2005, 07:48 PM
|
#25 | |
|
AF Enthusiast
Thread starter
Join Date: Feb 2004
Location: Brisbane
Posts: 751
Thanks: 0
Thanked 9 Times in 9 Posts
|
Thanks guys!
mickbench: Not sure how I keep it so clean. I don't find that I need to do a lot of painting on it I suppose, and I always paint on paper towels, etc, so nothing really gets spilled on the cutting mat. Time for another update. I've got a lot of parts in a half completed state, so a lot of what you see here is just fitted together without any glue as yet. I'm pretty happy with my first attempt with carbon fiber decals, but you'll have to excuse the odd small blemish. I'm at about the point where most things are nearly complete and all that's left is to detail the engine (after the decal disaster I'm not completing the engine cowling, at least until 2006/7-ish). I think though, that I've perhaps gone too far with the engine building, and if I start drilling holes and trying to add some things I'll destroy my current work and be unable to fix it. We'll see though, there's still some scope for detail work, given my meager(sp) abilities in this area. Enjoy the pics! 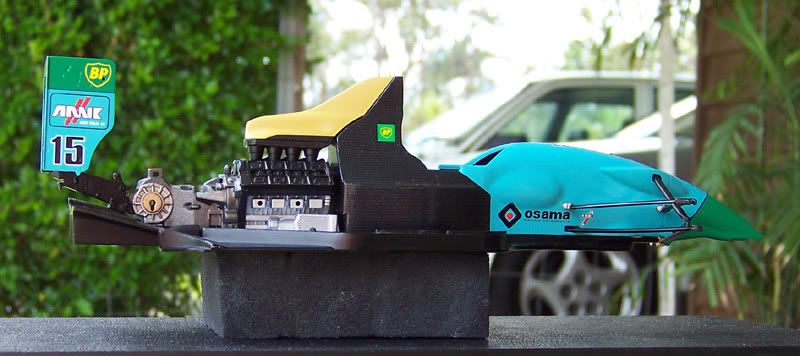 The rear wing is just sitting there, so it's a little scewed forward. Will be fixed when it's permanently attached. I also put a slight wash through the silver section of where the drive shaft will go into the gearbox. My brushing skills are generally rather crappy, so the wash helped hide my sometimes questionable work... hehe. I aimed to keep the wash to a very small amount, so as to give the effect of shadow more so than dirt/grime, and it came out reasonably well.  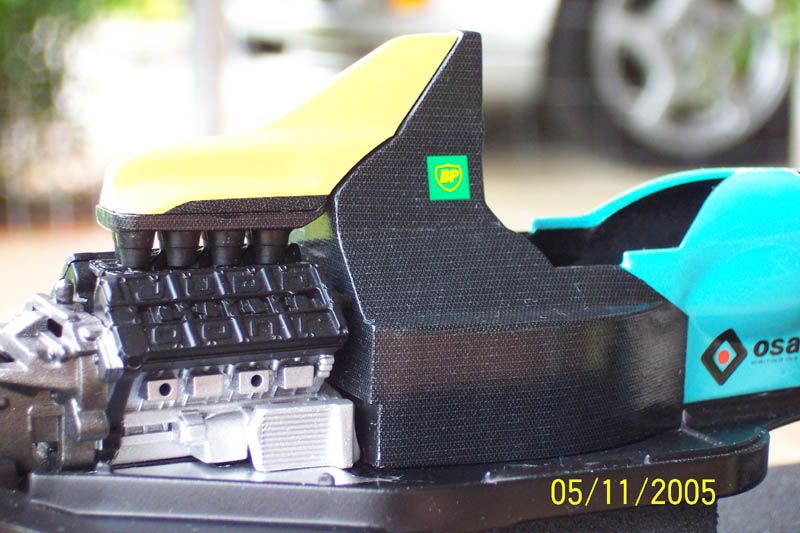 I've used the latest SMS Hi-Definition Composit Fiber Decals, and while they're of exceptional quality, I find them a bit bland to be honest. I think next time I'll use their older version which appears to have a bit more of a contrast between the white and black of the fiber weave. 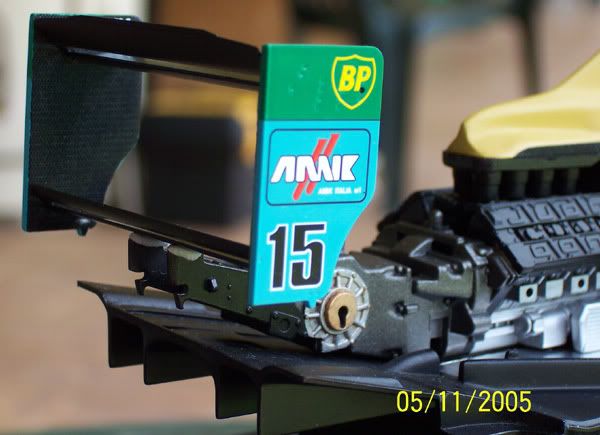 For those of you yet to try CF decaling, my further suggestions are to have a number of knife blades handy as you'll go through them quite quickly when cutting the decals out and making templates. And you must be as precise as possible when cutting the templates and decals out - they are somewhat forgiving, but the more accurate you are, the easier your job will be by far. 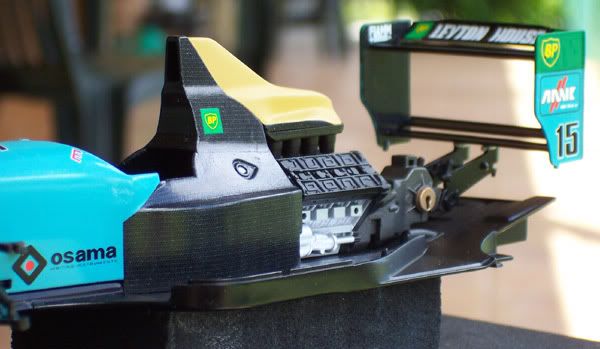 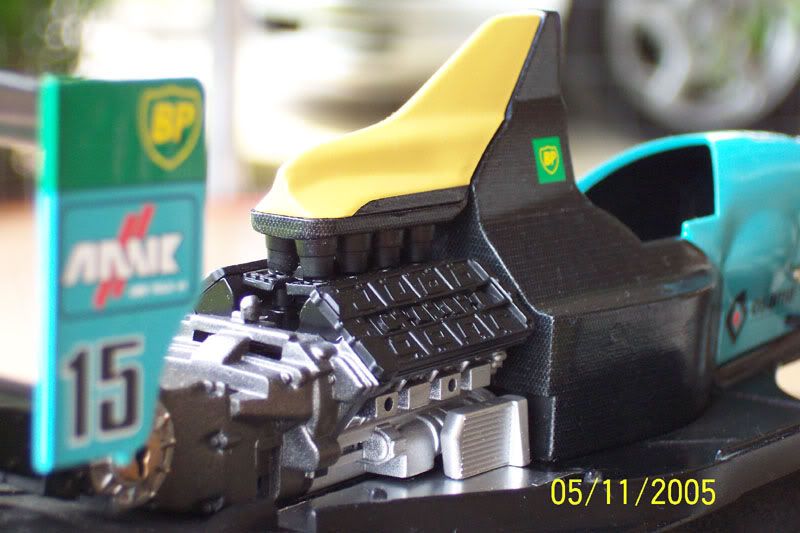  All comments and feedback welcome of course. Cheers, M
__________________
|
|
|
|
|
|
11-05-2005, 08:27 AM
|
#26 | |
|
AF Enthusiast
Join Date: Jul 2003
Location: Aveiro
Posts: 1,032
Thanks: 0
Thanked 0 Times in 0 Posts
|
Re: F1 - Leyton House CG901B (1/20) - Progress Pics
Hey Mark! I'm really impressed with the paintjob. You said you cleared it with enamel? It looks superb!
I have to agree with you on the new SMS carbon decals, they look too bland and boring. Maybe on some parts they may be more acurate look-wise, but overall it's not that great :S Keep us posted! Cheers, Pedro.
__________________
Pedro Click the picture to check my progress thread:
|
|
|
|
|
|
11-05-2005, 10:15 AM
|
#27 | |
|
AF Fanatic
Join Date: Jan 2005
Location: Anywhere but here
Posts: 1,676
Thanks: 0
Thanked 0 Times in 0 Posts
|
Mark,
I noticed your 300ZX in the background.. Anyhow - CF decals look fine to me. Nice work so far, paintwork looks perfect.. Keep us posted on the progress.. |
|
|
|
|
|
11-05-2005, 04:40 PM
|
#28 | |
|
AF Enthusiast
Thread starter
Join Date: Feb 2004
Location: Brisbane
Posts: 751
Thanks: 0
Thanked 9 Times in 9 Posts
|
Oh I meant to mention also that I mixed a few extra things into the yellow airbox. It calls for mostly for mostly deck-tan with a hint of orange. This is ok, but from the pictures I saw I decided to add a splash of yellow and also some flat base, and it's come out much better.
pettercardoso: that's right, cleared with enamel. I'm not sure I'd recommend it though. After nearly a month it still leaves finger prints and I won't be polishing it. I think the key to my reasonably good shine is to have polished the blue (lacquer) underneath to a very high shine first. You'll notice I've NOT done the same to the enamel green on the nose and in none of the shots is it as shiney and reflective as the blue. The clear top coat was applied with moderate to good quality/results - which is what leads me to believe that my preparation of the blue played a big role in the finished product. mickbench: I didn't think anyone would notice my Z from those shots! Well done - you're my new best friend for the week! hehe I should have the SMS seatbelts and cockpit finished in a day or two and will post a pic of that. I must admit that while the seatbelts look MUCH better than the kit mouldings on the seat, they do take some getting used to and are only marginally forgiving. And they are the single most fiddly things I've EVER come across in my life!!! Unfortunately I don't have much in the way of detail pics of the cockpit, so it will have to stay essentially bare. Till next time folks...
__________________
|
|
|
|
|
|
11-05-2005, 06:20 PM
|
#29 | |
|
AF Fanatic
Join Date: Jan 2005
Location: Anywhere but here
Posts: 1,676
Thanks: 0
Thanked 0 Times in 0 Posts
|
Enamel clear will dry - in about three months.. It's a very slow curing paint, and takes a long time to go hard.
Acrylic clear is better as this hardens off in around 14 days. After two days its good enough to work with and apply decals etc.. Problem with both of these is that when polished you have to be real careful, as they will never be as hard as laquer. And I remember your 300ZX from when I built my 300ZX as you provided some ref pictures of the engine.. |
|
|
|
|
|
11-10-2005, 06:51 AM
|
#30 | |
|
AF Enthusiast
Thread starter
Join Date: Feb 2004
Location: Brisbane
Posts: 751
Thanks: 0
Thanked 9 Times in 9 Posts
|
Just finished the seatbelts/cockpit, and the front suspension, so snapped off some shots for show and tell.
I didn't have any real photos of the cockpit of this machine, so it's stayed relatively bare during the build. 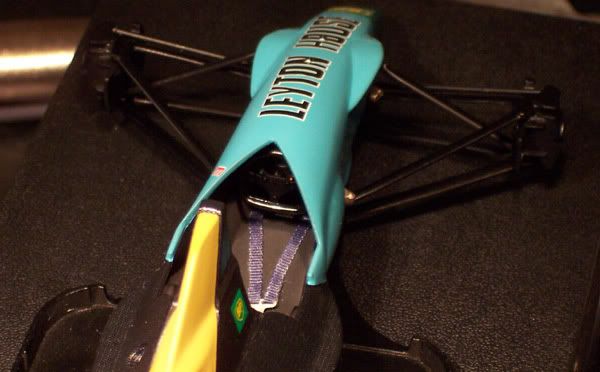 I flat refuse to use the kit seats with the molded seatbelts, so as mentioned above ordered some fabric seatbelts from SMS. I found them to be excessively fiddly, and prone to having slivers of fabric come away and give a somewhat hairy/cobweb like appearance. Try as I might to cut them all off, they still came back. I've heard of people using a lighter to burn them into submission, but I'll stay clear of this for now. Other than those two issues I think they're quite good quality. Although having said that I think I'll try a different brand next time, just to compare, and find the brand that works best for me specifically. Oh, and there's nearly 20 PE pieces in the seatbelt assembly you see below by the way. You'd never think it to look at it. 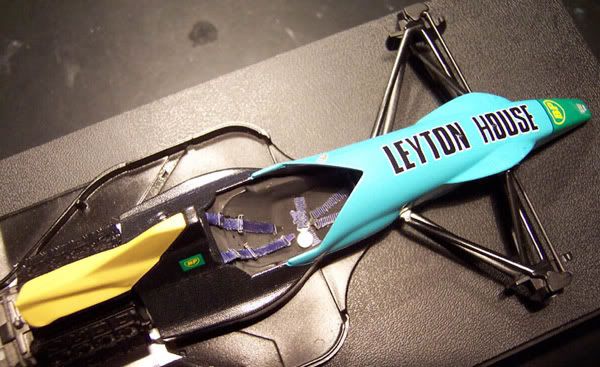 These aftermarket harnesses certainly do take some getting used to, and you really have to find the 'knack' for it. Comes with practise I suppose. 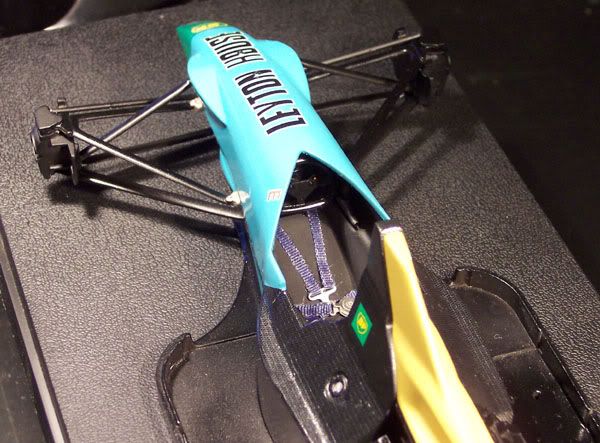 Front suspension - my method of gluing the nose first up, and putting suspension in last did work. Although it was a bit of a nightmare getting it all in, and I had to do some touchup painting where I lost a little paint from some of the suspension arms. Just a tip in case you try to copy my method... put the steering arm in before you glue the previously cut suspension piece! Anyway, somehow I came out of it relatively well, and the front end of the Leyton House is coming together nicely.  A few odds and ends arrived from HLJ today. Some new tiny drill bits for helping me with the plumbing on the engine, and also some Sakatsu "computer connectors" to help bring some extra life to the engine bay, etc. Here's hoping my fledgling skills will justify the expense of these! 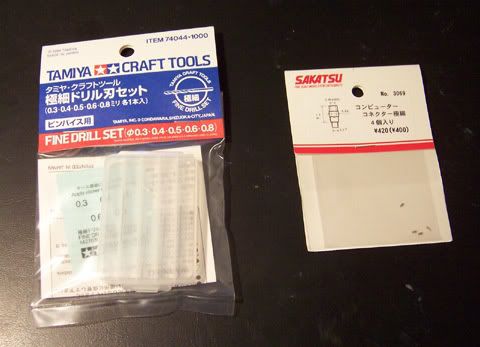 I'm now slowly working my way from the front of the car to the back, completing everything as I go. Or pretty close to it. Hope to get another update in under a week. Cheers all!
__________________
|
|
|
|
|
|
|
POST REPLY TO THIS THREAD |
 |
|
|

