|
|
| Search | Car Forums | Gallery | Articles | Helper | Air Dried Beef Dog Food | IgorSushko.com | Corporate |
|
|||||||
| WIP - Street Post topics for any "Works In Progress" street vehicles projects in this sub-forum. |
 |
 Show Printable Version | Show Printable Version |  Subscribe to this Thread
|
|
|
Thread Tools |
|
#31
 02-04-2003, 02:35 AM
|
||||
|
||||
|
Quote:
I wait to assemble the suspension on all of my models for dead last!! The entire model assembled as it will remain is the only way to ensure the tires locate properly and that the car sits level. Here is how I do it on this model - 1) Finish interior, drivetrain, and permanently assemble with chassis and body leaving suspension off. *TIP* - Thin the blacked-out area in the pic heavily until it slides into the rear of the body without spreading the bottoms of the rear fenders - your rear valence will fit perfectly!  2) Using a round file, sand the saddle for the rear axle to about 1/8" thickness, eliminates unsightly extensions. Also, lose the locating pins on the rear axle.  Notice the difference between stock and the modified part.  3) Trim the front of the leaf spring where the black-out part is. This will give you room to locate the axle more forward when assembling. 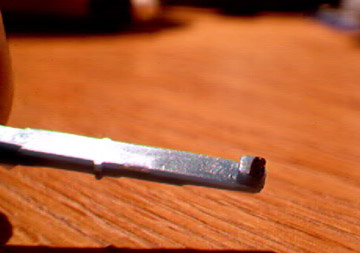 4) Attach the springs to the axle with epoxy - make sure the axle is centered by using the chassis as a jig but don't glue the springs on yet! 5) Press-fit (dont glue) the wheels to the rear axle, and with the car sitting level at ride height (use a piece of glass or mirror and something to prop-up the rear at the height you want) attach the springs while watching tire location within the wheel wells. Use 5 minute epoxy! 6) Remove the wheels and hog-out the mounting holes. This allows you one last chance to set the wheels perfectly to the body, using the epoxy again and still lightly propped-up, and have the tires 90 degrees to the ground (mirror again).  Color, finish, and STANCE are everything to a model and this method gets the stance perfect everytime!! 
|
|
#32
02-04-2003, 03:09 PM
|
|||
|
|||
|
Thank you murco, much appreciated, I got all the paint buffed off and made an inch long scratch underaneath the drivers door handle with my fingernail
 . I tried to buff it out but it is not working so it will just have to be a battle scar . I tried to buff it out but it is not working so it will just have to be a battle scar Quote:
|
|
#33
02-08-2003, 11:35 AM
|
|||
|
|||
|
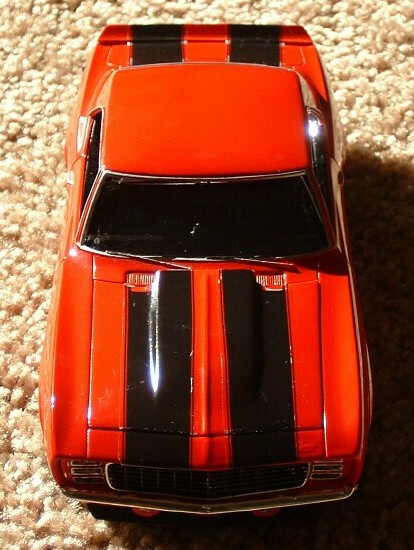
Ok heres a quick update with some photos I will explain what has been going on in the next post.
The quality of the pictures here are crap, as I am still learning to use my new digital camera and the lighting today is terrible, its raining here. I also had about 4 cups of coffee and am very shaky, not a good time to model. Anyway here is after I have put the grille in. I decided to go with the RS style, I just like the hideaway headlamps. edit-the pictures were horrible so I have deleted the old and inserted new ones Next picture is under the hood where I am still working on detailing it. I still have not decided where I am going with this model. I have pretty much decided this is a practice car and the next one I build will be built w/o the mistakes done on this one. I have recieved very much help from murco, and also help from trial and error. I will start on the interior today or tomarrow. Have a good weekend everyone. Maybe I can get some more pics up Sunday.   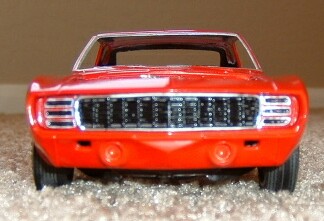 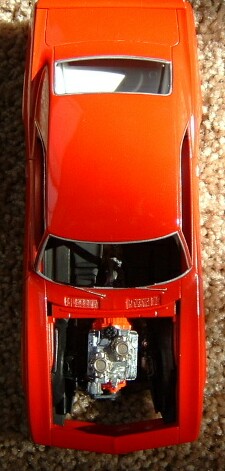
Last edited by Shortbus; 02-08-2003 at 01:27 PM.
|
|
#34
02-08-2003, 12:05 PM
|
||||
|
||||
|
Looking awesome!! Love the color and the RS front end! Most builders don't use it as it can be intimidating to detail properly, but you've done it right!!
|
|
#35
02-08-2003, 12:05 PM
|
||||
|
||||
|
You shouldn't paint the trim for a car like that. For a 50s 60s car you should use Bare metal foil. It's like a sheet of crome sticky foil. You cut the right amount of size stick it to you car and cut the excess.
__________________
I want to build models again :' (
|
|
#36
02-08-2003, 01:03 PM
|
|||
|
|||
|
Quote:
|
|
#38
02-08-2003, 01:49 PM
|
|||
|
|||
|
Whats going on
Ok here is what is happening. Chrome sucks I hate it. It is completely unforgiveing and unless you have your own chrome plating tool than you have to live with your mistakes.
The front grille got some of the body paint on the headlamp doors, so i used a wooden square end toothpick to scrape the paint off, i did not think it would remove the damn chrome as well as the paint. Wrong, please note I did not want to buff this area because I did not think I would be able to get the buffing compound out of the grille slats. I know realise I should have used a magnifying glass and smaill brush to paint this area, thus avoiding the possiblity of overspray. I was hurrying. The chrome trim around the windows. I have buffed the paint off of these areas more times than I care to say. I have gotten better at painting them but am still not happy with the outcome. I am leaving the paint on - no more buffing Next one I will use the sheet metal. I went to get some the other day but the hobby store was out. The engine. The engine when dryfitted sets crooked, not a little but a lot. I guess I will have to sand the motor mounts until I can get a better fit. I really don't have to many plans for dressing the engine. I am a total amatuer and just doing this for fun. I will try to put some spark plug wires and heater hoses on but that is going to be about it for this one. Rear suspenison I have studied the photos from murco and taken his advice. I filed the rear springs down and all I need to do is glue them on. After dry fitting I was very pleased with the way it looked. The way the kit has it setup is very dissapointing. Interior ???????? I want the deluxe door panels for this one but with the way this project is turning out I am going to put the non delux in and leave it at that. Next project I found a 69 ss 396 convertible camaro with deluxe interior at the store today and decided to build that one next, I hope to incorporate all the great advice received and the hard lessons learned while building this one on it. The next post I make here will be the finished model. I may even read the instruction manual for my new camera and take some decent photos.  Hope I did not miss anything, thanks to everyone for following this project and the kind words, advice ect. ect. John
|
|
#39
02-09-2003, 10:50 PM
|
|||
|
|||
|
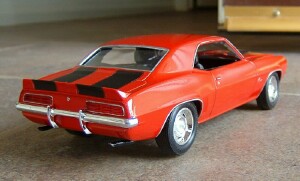
Shelving this one.
I am way to aggravated with this one to continue working on it. I have shelved it and am going to start on the 69 ss convertible. I hope I can apply what I have learned here to it. I will take some more time to finish it.
Here are the picks of the slapped together unfinished RS. I still have not finished buffing the painted moldings which I said I was not going to do but have started to anyway. There are some emblems to attatch. The exhause is a total POS on this model, as well as the entire suspension. I did have fun with this model though, and I guess it did not turn out all that bad. Sorry the lighting once again is terrible. 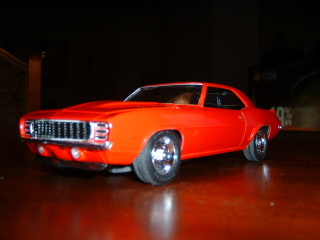 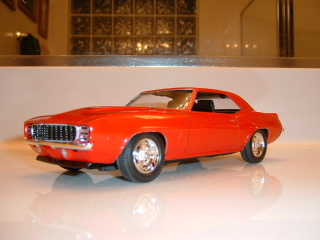   
|
|
#40
02-09-2003, 11:01 PM
|
||||
|
||||
|
I'd roll in that.

__________________
Alan 
|
|
#41
02-10-2003, 12:13 AM
|
|||
|
|||
|
Looking good! I got one waiting to be built! I was planning on making a replica of my fathers car, but it has a SS hood, I got the 396 motor though, maybe I can convince FOTW to have the hood done!
__________________
AF MODELING FAQ  ~ 1987 Toyota Corolla GTS Coupe Sprinter ~ "Oh what a feeling.- Toyota
|
|
#43
02-10-2003, 01:37 AM
|
||||
|
||||
|
Looks dynamite!! You nailed the stance perfectly!! Never seen the engine sitting crooked before (never built a small block!)
 , and the color looks great!! , and the color looks great!!We'll build the new Camaros together, and rule the board! LOL Here is a sneak preview of mine...  My thread will start soon!!
|
|
#45
02-16-2003, 07:01 PM
|
||||
|
||||
|
nice one.. I think Stripe would not fit this kit... anywa Awersome work
__________________
 CarsModeling.com. My Scale Model Cars blog.
|
|
|
POST REPLY TO THIS THREAD |
 |
|
|