|
|
| Search | Car Forums | Gallery | Articles | Helper | Air Dried Fresh Beef Dog Food | IgorSushko.com | Corporate |
|
|||||||
| WIP - Street Post topics for any "Works In Progress" street vehicles projects in this sub-forum. |
 |
 Show Printable Version | Show Printable Version |  Subscribe to this Thread
|
|
|
Thread Tools |
|
#16
 07-18-2015, 07:47 PM
|
|||
|
|||
|
Re: The new Rocket Bunny S14
ZoomZoom - He could just put a hemi in it, apparently Miura-san wants to do that with his 1:1, though he put out the first car with an SR20. That way your friend could just make it with what he knows...
I wanted to get this done before a 1:1 got built, but I already missed that. Damn. So, now I'm trying to get it done before the transkits come out... as far as I know I'm still good. Next time you see a post, this will be done, so it's getting there. Mine is more and more inspired-by than replica because A. I didn't know the 1:1 would be so close to the rendering, B. There are some things I would change and C. I'm not that good at body work. Anyway, here's progress: I started working on the grill. 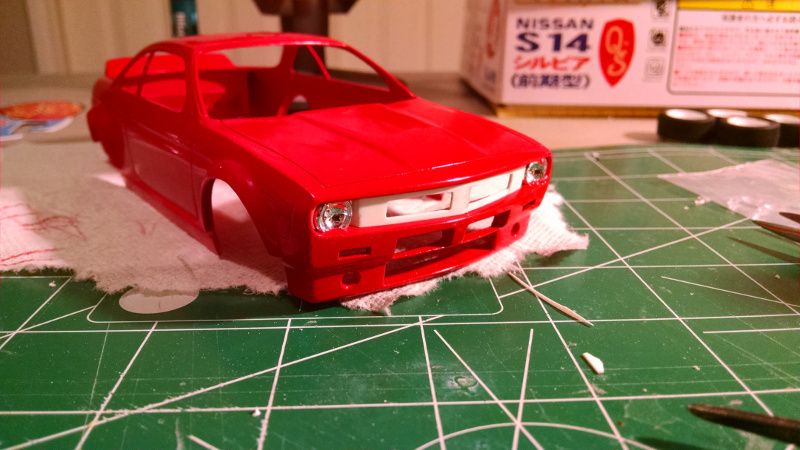 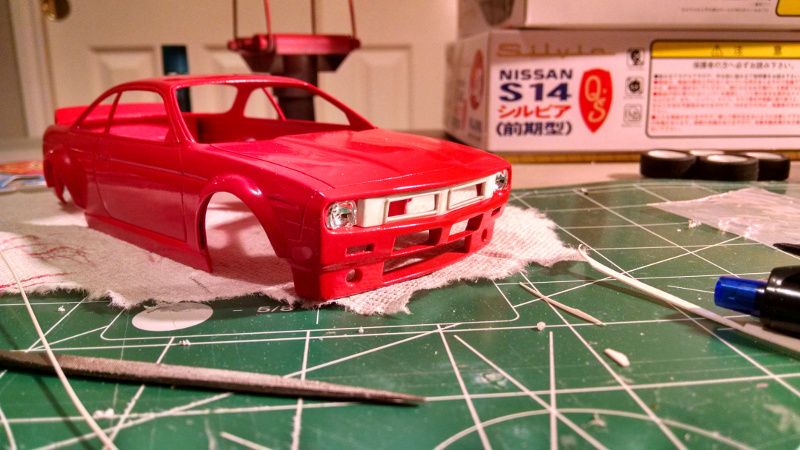 Oh, that sucks. Start over... 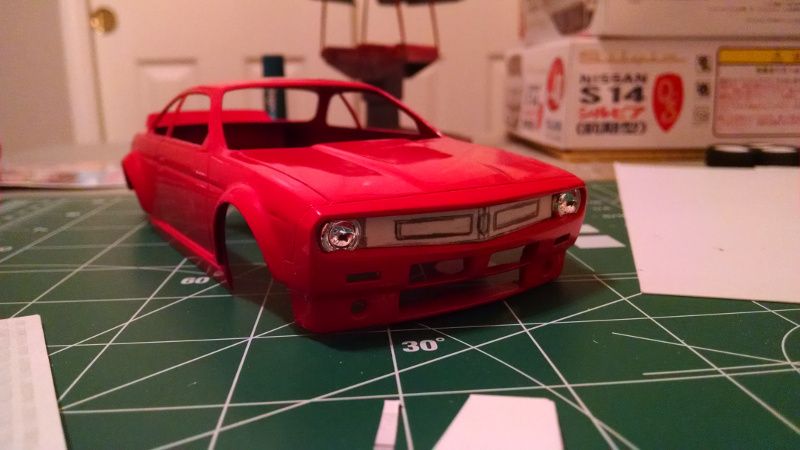 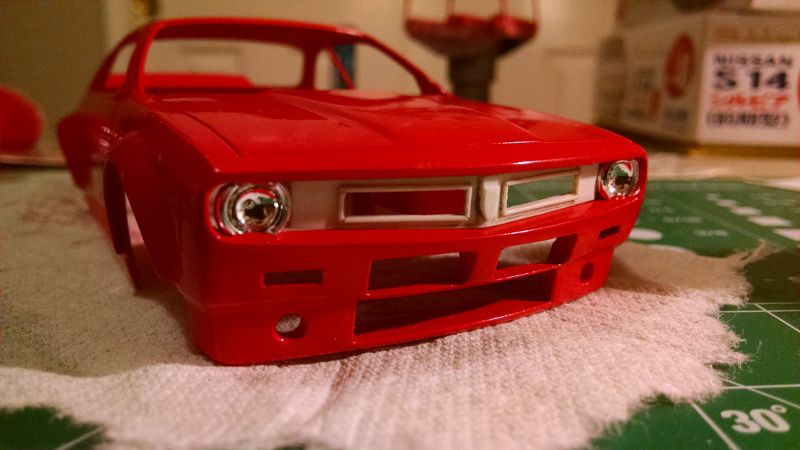 Better. I made it from some sheet styrene cut to size and shape, bent in the middle to give it dimension, a little more strip and rod behind it to give it structure, and some styrene rod for the trim around the cutouts. I used some Tamiya putty to fillet the relief. What's that in the middle? Well I really wanted to use the S badge from the Silvia kit, I wanted to keep it Japanese even with all the American muscle influence. 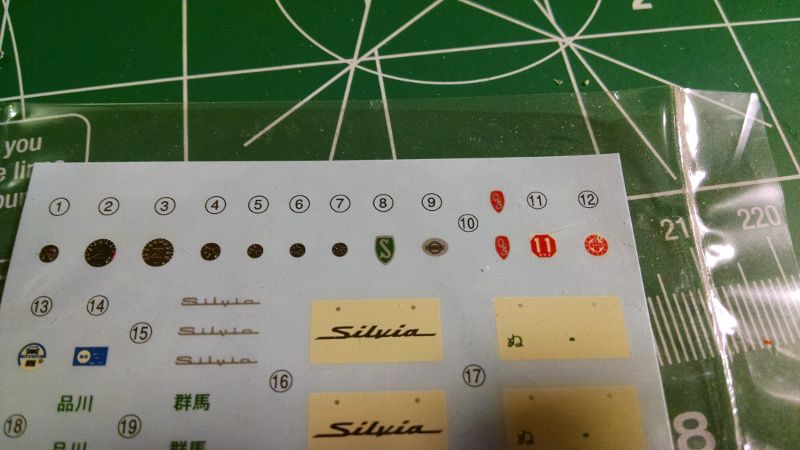 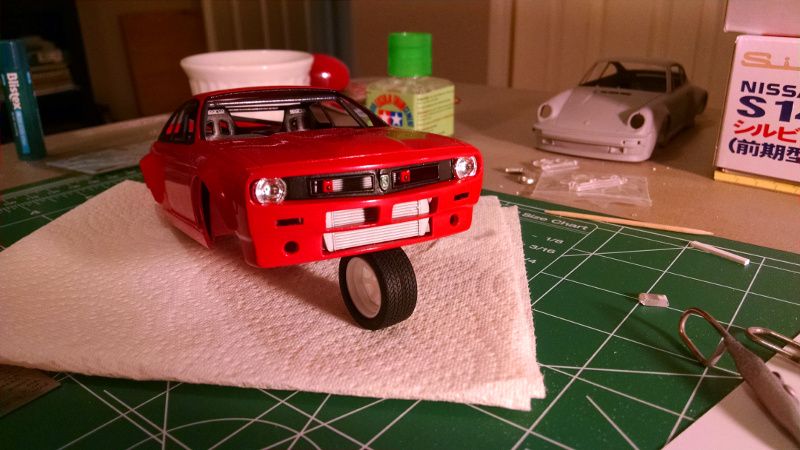 Like that. I went and masked off the window trims, sprayed them, and broke the A-pillar taking the tape off. Damnit! I was being extra careful, too, since I had broken the A-pillar twice already. I will just use a little paint on a brush to fix it when the rest of the car is done. 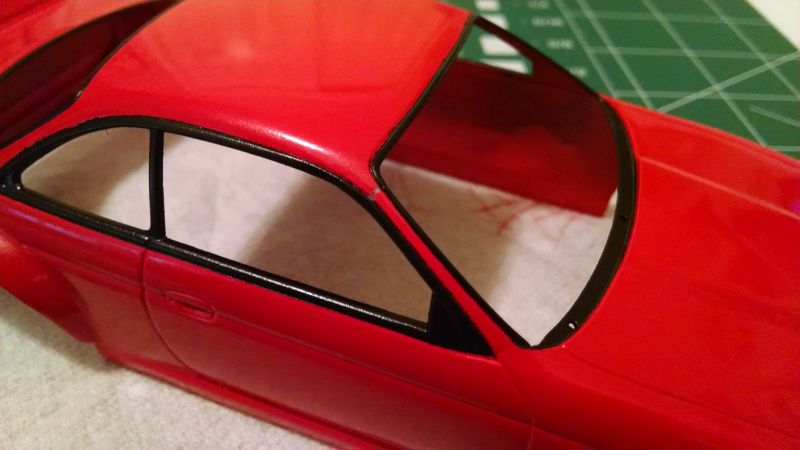 I glued the body to the chassis... it was a tight fit, the roll cage interfered with the glass a little, and I had to cut a LOT of glass away to make it almost fit. I like the way it turned out, though, because the roll cage tucks in a little instead of sitting inside glass and looking a little undersized.  And I glued the wheels and suspension on. These pictures were pre-suspension, but it looks like this right now (minus the wonky left rear wheel). You can see the intercooler, the radiator, and the radiator support which I just made from some styrene strip that I drilled holes in and sanded all the sharp corners from. I realized that it's a little to far back behind the grill, but... not changing it now. 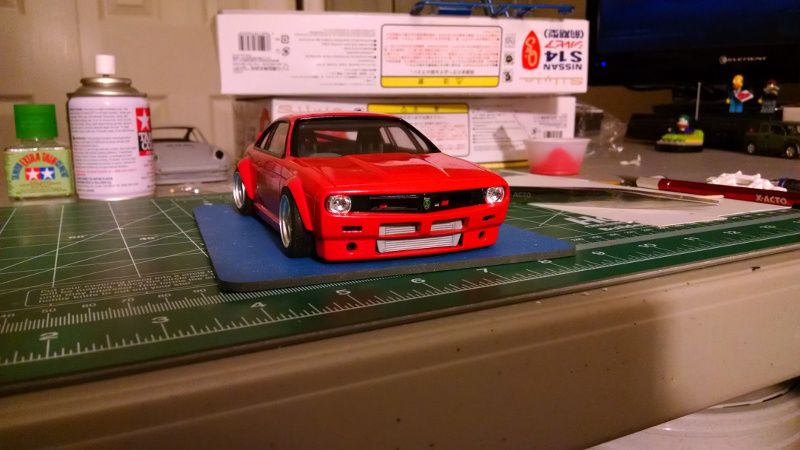  I still have a lot of details to do. Headlights, PE Nissan logo, mirror, wipers, and I have to build the diffuser which I am not too excited about, and the exhaust which I am going to run through the diffuser for style points. Thanks for looking! Comments, criticisms welcome!!
__________________
It ain't cool 'till your wife hates it. Imagine a world without Alabama Recent builds: Rocket Bunny FR-S and stock BRZ Toyota bB Bro-style Civic K20 powered SiR converted EK WIP I build slowly and poorly. 

|
|
#18
08-08-2015, 04:59 PM
|
|||
|
|||
|
Re: The new Rocket Bunny S14
Looks PHENOMENAL!! I'm actually quite fond of the 1:1 build (All my friends hate it. :P)
But I had a quick question, how do you cut your styrene and the holes in the front bumper? You say you're not good at body work but it looks fantastic. I need to get into scratchbuilding but a razor blade and a scribe tool can only go so far... Thanks for any tips!!
__________________

|
|
#19
08-11-2015, 04:58 PM
|
|||
|
|||
|
Re: The new Rocket Bunny S14
I use a variety of tools to cut styrene, and sometimes I try to avoid cutting at all. The lower opening of the front valance, for example, was never filled in. I built the two sides and then just put a piece of styrene across the bottom.
Thin styrene is easy to cut with a hobby knife, and an old trick I learned long ago is the scribe-scribe-snap technique. You just make a couple passes with the blade, or if it's thick, a couple more with the reverse edge of the blade, until the cut is deep enough that you can just snap the plastic apart. This will leave a jagged edge on thick plastic, so I always cut oversize and file down. I also use my sprue nippers sometimes for thick plastic, especially strip and rod, and I also use them to make quick work of an oddly shaped cut that is concave - I will draw out my shape, nip out pie pieces with the nippers, then sand to final shape. I also have a great tool called The Chopper from North West Short Line. They do model train stuff, but it's this handy little board with a razor blade on a hinged handle. 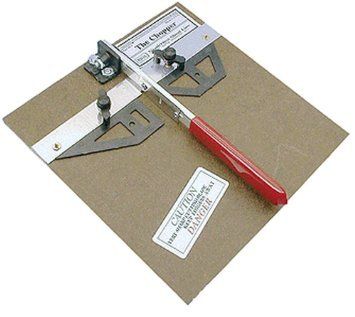 You can clamp some triangles down onto it, against the baseline straight edge, and cut miter cuts or (most importantly, to me) many pieces the exact same size - I used it to good effect for the vertical ribbing below the taillight. But you asked specifically about the front valence. I actually used a Dremel to cut the slots, the two main ones in the center and the two smaller ones to the sides. At least, to rough them out. Again, I drew out what I wanted to cut, and then cut a little less with the Dremel since I don't have as much control. The tool I use to get started is the High Speed Cutter, and it works like a champ. 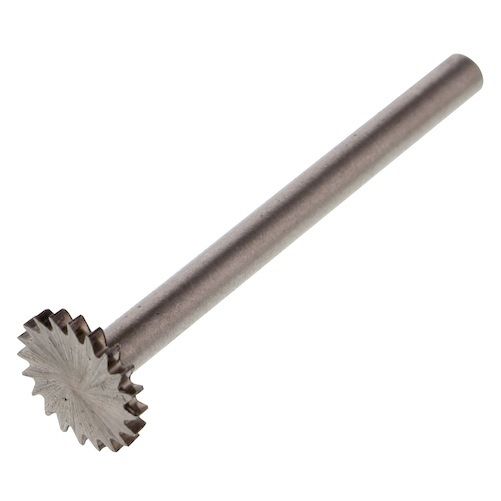 I'll get the hole started, and then use small files to get the final shape. You will rarely (never) find a negative space on any of my models that you can't fit one of my files into! I find that the files are sturdy enough and come in square shapes that allow me to make nice, neat little square cuts easily. I lightly drag my hobby blade across the edge, perpendicular to the edge (like a plane over wood) to remove any sanding burrs. I hope this helps!
__________________
It ain't cool 'till your wife hates it. Imagine a world without Alabama Recent builds: Rocket Bunny FR-S and stock BRZ Toyota bB Bro-style Civic K20 powered SiR converted EK WIP I build slowly and poorly.
|
|
#20
08-29-2015, 03:11 PM
|
|||
|
|||
|
Re: The new Rocket Bunny S14
That helped a lot! I have that exact bit in my dremel kit too. lol
I use the scribe/snap method. but I feel this creates a larger gap than what I imagine (as the scribe gets thicker, so does the gap). I've seen photoetched saws but from I remember, they're pretty expensive for what they are. Also curious what file set you have?
__________________
|
|
#21
09-01-2015, 07:03 PM
|
|||
|
|||
|
Re: The new Rocket Bunny S14
I have never gotten a set of PE saws, but always want to. I don't know why I have managed not to get any yet.... I have a basic K&S needle file set. Nothing magical.
__________________
It ain't cool 'till your wife hates it. Imagine a world without Alabama Recent builds: Rocket Bunny FR-S and stock BRZ Toyota bB Bro-style Civic K20 powered SiR converted EK WIP I build slowly and poorly.
|
|
#22
09-04-2015, 01:20 AM
|
|||
|
|||
|
Re: The new Rocket Bunny S14
Once you have tried photo etch saws it is very hard to go back. They are just so handy.
Hasagawa makes a set that is literally paper thin. Very handy for scribing work.
|
|
#23
09-04-2015, 02:04 AM
|
|||
|
|||
|
excellent color!!
__________________
[Signature removed by moderator]
|
|
#24
07-23-2016, 12:16 AM
|
||||
|
||||
|
Re: The new Rocket Bunny S14
Man its so good to see your still at it. That custom graphed parts was stunning!!!
__________________
Oops I didn't see you down there sorry for running you over!  http://s162.photobucket.com/albums/t248/White_r34/
|
|
|
POST REPLY TO THIS THREAD |
 |
|
|


