|
|
| Search | Car Forums | Gallery | Articles | Helper | Air Dried Beef Dog Food | IgorSushko.com | Corporate |
|
|||||||
| WIP - Motorsports Post topics for any "Work In Process" motorsports vehicles in this sub-forum. |
 |
 Show Printable Version | Show Printable Version |  Subscribe to this Thread
|
|
|
Thread Tools |
|
#16
 01-04-2010, 12:19 AM
|
|||
|
|||
|
Re: AM Corvette Grand Sport Chassis #004 1965 Sebring
I got a little bit of an update on the GS. In between family time, friends time, party time and recovery time, I was able to spend a little while at the bench. I didn't like the way the rear vents looked as they made the body look like it was 2" thick. So, I started working on it by hollowing out and trimming the area around the inside of the body. Then I sanded the back so that it was all flush to the openings, then cleaned em up a bit and here I am. I put an un-altered body next to it so you can see the difference.
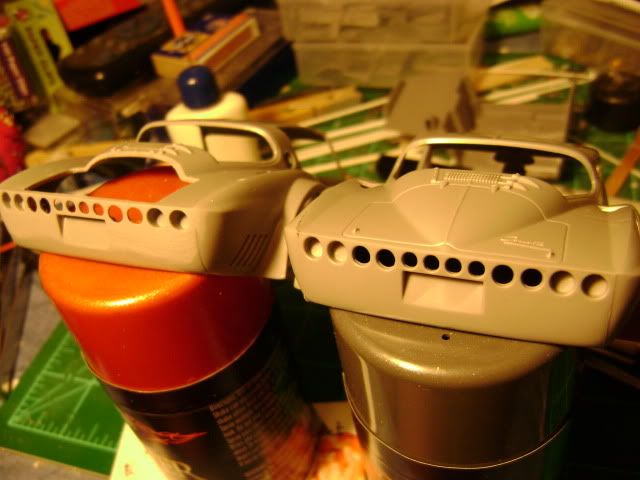 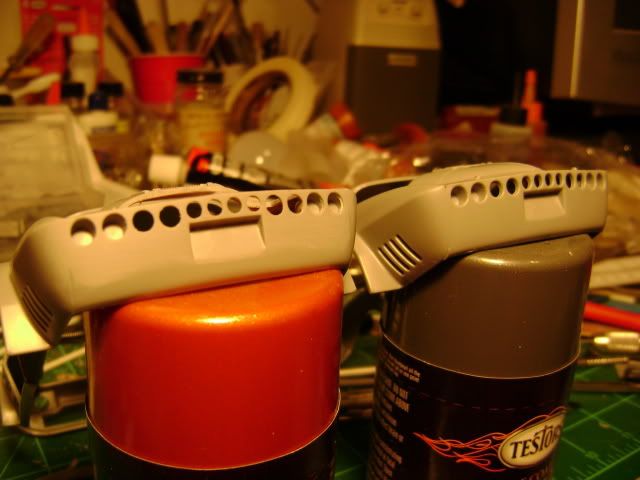 I took the kit provided fuel cap and started trying to clean it up by sticking it on a dremel stone and using chisels, files and a hobby knife to make it look more like the real car's. I ended up with a modified cap that may be usefull on another build, but not this one. So, I grabbed a parts box roll bar, cut a chunk off, chucked it in a drill and went to work. A short time later along with some super glue, a mini pin and a little piece of wire and I ended up with this... 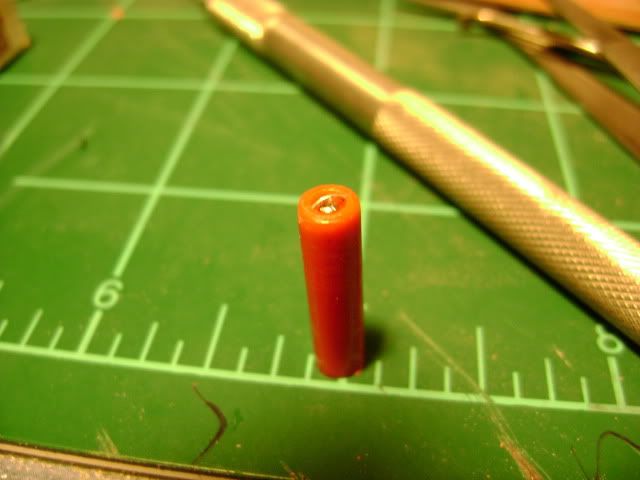 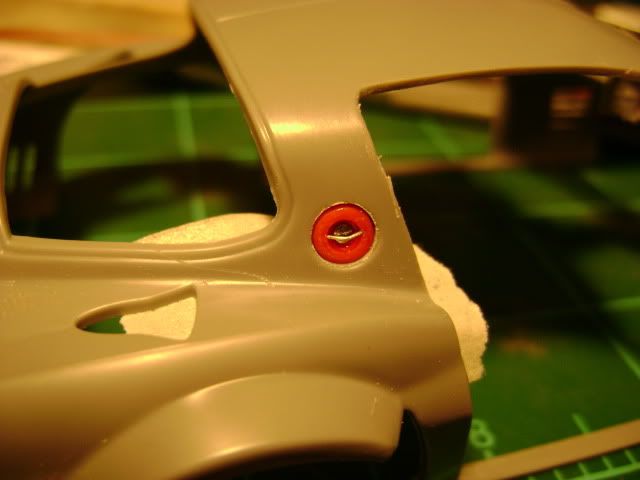 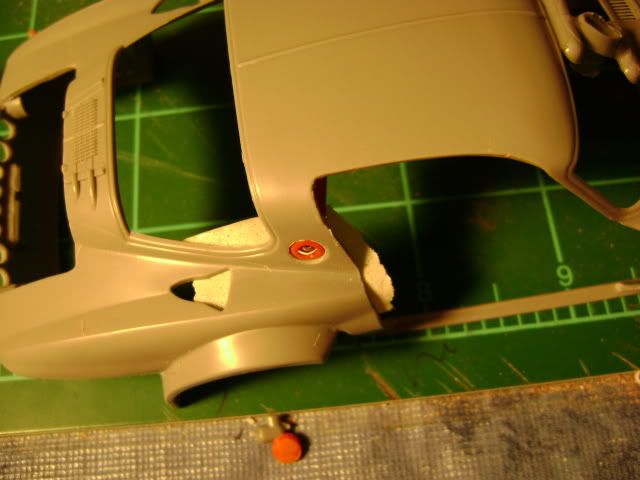 I thought it came out okay considering how small it is. Should look right once it's painted. Then, I turned my attention to the rear fender vents. This body is supposed to be one layer of fiberglass thick so the kit body needed some work here too. I ground out and sanded the inside and then trimmed up the outside. Then hit is with a sanding stick to true everything up. Here's the results. Unaltered: 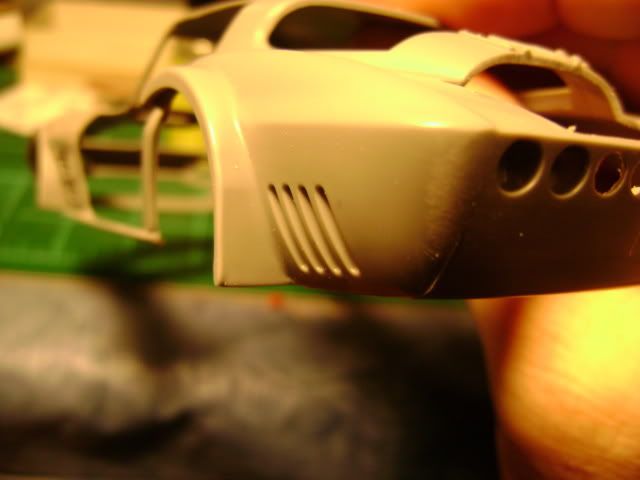 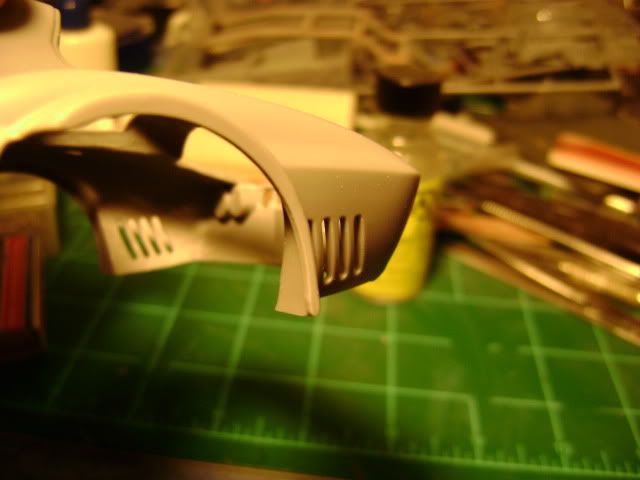 Altered:  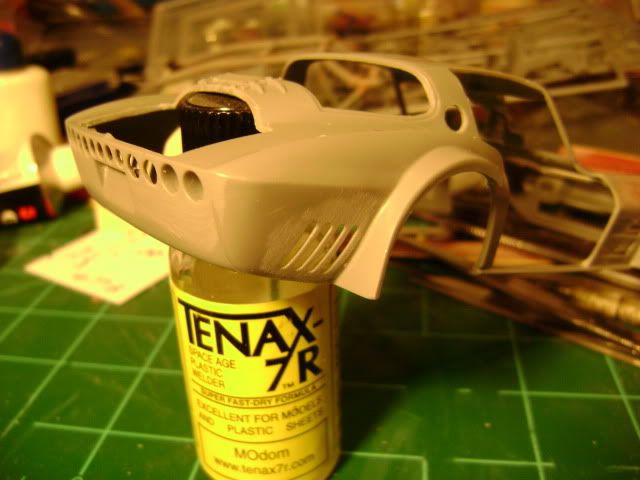 Along with this, I have been working on the interior and a few other parts. I have been sanding the carpet from the floor and removing molded in details that are not present on my chosen subject. I have also been truing up and correcting the chassis in prep to adding the photo-etched details. I will update again soon. Enjoy and as always, comments and critique welcome! 
|
|
#17
01-04-2010, 10:20 AM
|
||||
|
||||
|
Re: AM Corvette Grand Sport Chassis #004 1965 Sebring
Nice! That body is really starting to lighten up nicely. You mentioned "grinding". Are you using a dremel stone? ball mill? How are you controlling it to avoid the dreaded "Oops"?
__________________

|
|
#18
01-04-2010, 11:32 AM
|
|||
|
|||
|
Re: AM Corvette Grand Sport Chassis #004 1965 Sebring
Quote:
|
|
#19
02-09-2010, 10:19 PM
|
|||
|
|||
|
Re: AM Corvette Grand Sport Chassis #004 1965 Sebring
Okay, time for an update.
I have been working on and off on this thing trying out new stuff and fixing things that don't look right. Seems I will have modified each part I pull off the sprues. I took a look at the rear end half-shafts and driveshaft u-joints. Real ones have an inset that has a clip in to hold on the u-joint caps. I didn't like the little bumps on the models parts so I took out an appropriate sized drill bit and went to work. Once the holes were drilled, it left a conical bottom so I sanded the backside of the drill flat and used it like a punch. I filled the cavity with putty and then used the back of the drill bit to make a flat area just below the surface. The plan was to take some really thin wire and make the little clips but it seems much better as an Idea. Kind of hard to create a 1mm clip, even with the smallest tweezers. My other idea options would be decal or photo-etched but we will see what works out.  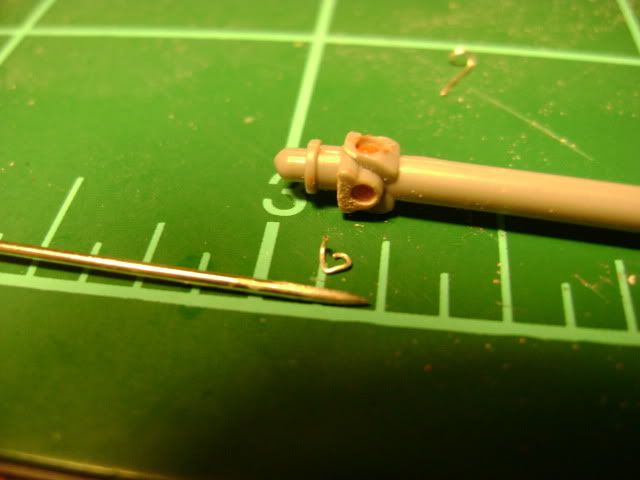 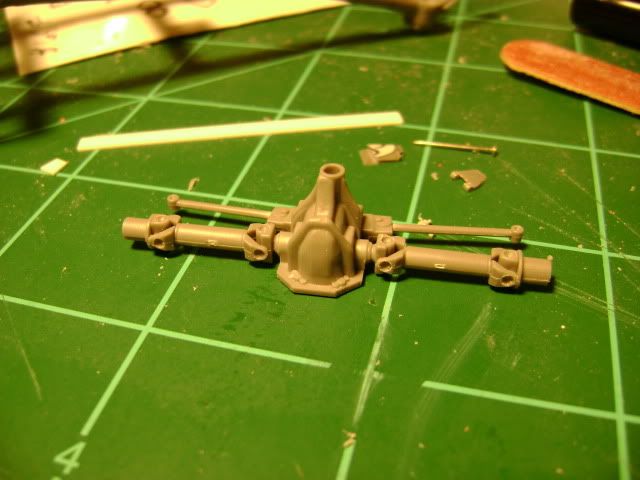 Here is my replacement spare, thanks to Harold at Historic Miniatures. Great stuff this is... 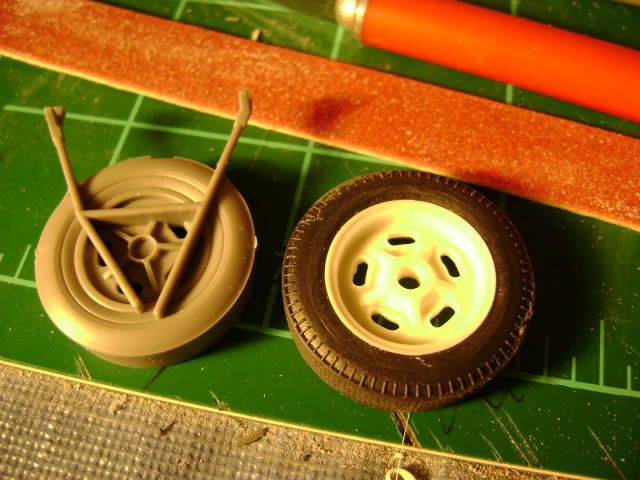 After seeing the progress on another Grand Sport, I was inspired to make some modifications to my wheels and mounts. I grabbed some resin knock-offs and the kit wheels and went to the local hobby stores. I found some fine threaded 3mm screws that appeared the correct size and got the matching drill and tap. The results are thus... 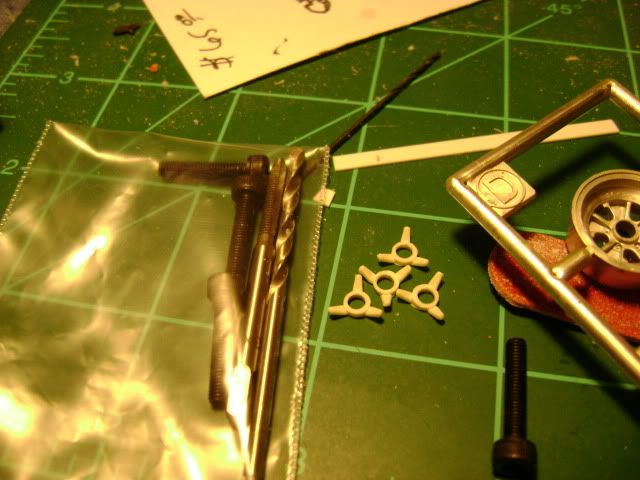 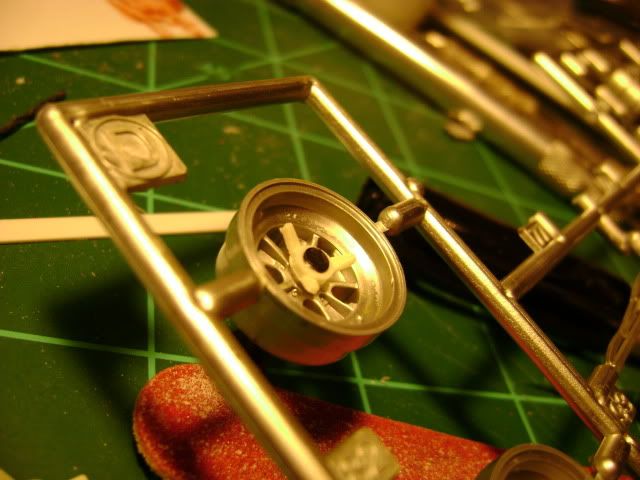 I'm waiting on some photo-etched brake disks, solid for the rear, vented for the front and will modify the model to have removable wheels. There will be so much detail that I think it would be a crime to hide some of it with the wheels and tires. I noticed that one of the un-restored cars had no inspection plate over the bellhousing so the flywheel was exposed. I have a flywheel from one of the Blueprinter parts pack motors I was planning to use but then realized I had a more visually stimulating idea. I pulled out some of the watch gears I purchased in a lot and found one that was the right size. Then, cut a plastic backing for it. With a bit more detailing, I'm sure it will be perfect. The five spoke vs six design won't matter much as you won't see all that much of it behind the oil pan. Just enough to make it look good. 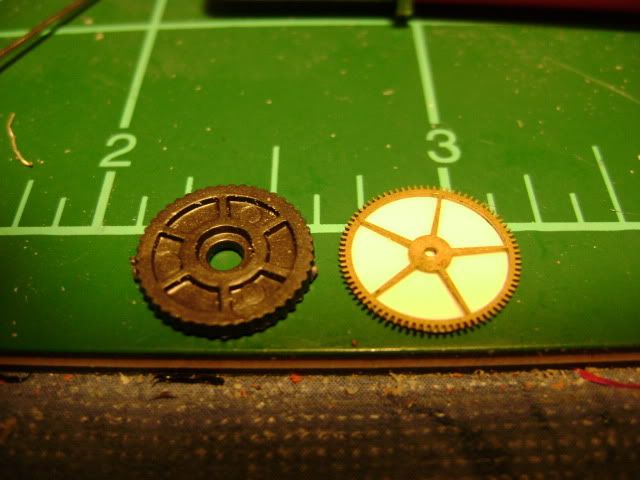 I also started work on the interior tub. The 004 raced with no carpet in the '64 Sebring so some sanding and shaping were in order. It's not done yet but you can see where it's going. 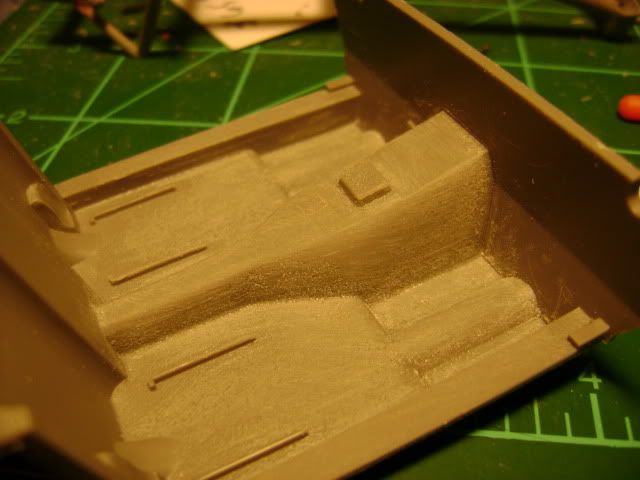 I got some needle files and attacked the spindles in the hopes of giving them a little more accurate shape. Will also put on ball joints, nuts and washers to make them more presentable. 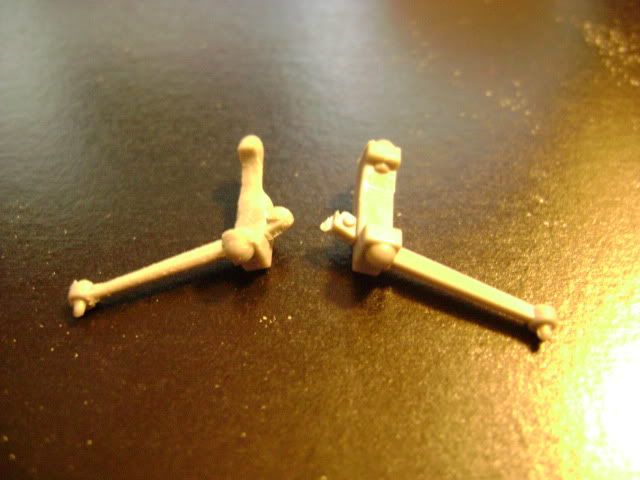 In these pictures you can see the modified frame, the photo-etched body supports, engine mounts, clutch bracket as well as the lower control arm strentheners and front frame bracket/skid. This chassis has so far eaten up the most time on this project but I want it to look awesome. A lot of time was spent trying to ensure everything lines up so the clutch pivot arm will sit right, the shifter and linkages will be in the correct place and so forth. I will cut off the kit trans mount now that I have the motor mounts installed and create a more realistic looking one. 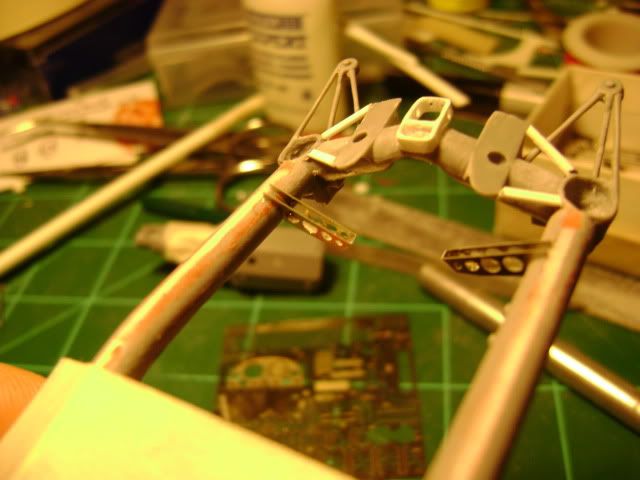 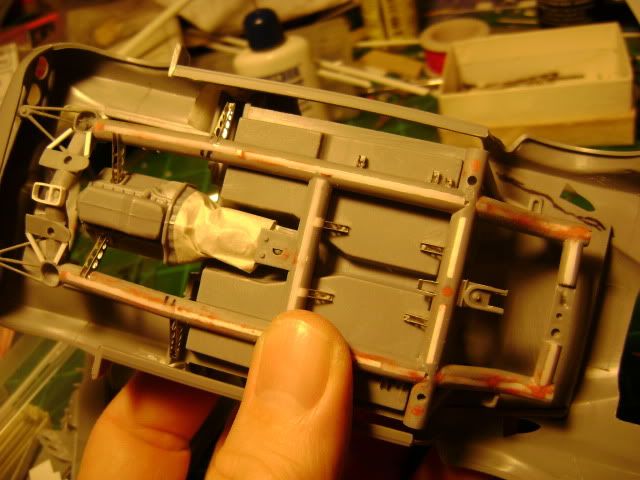 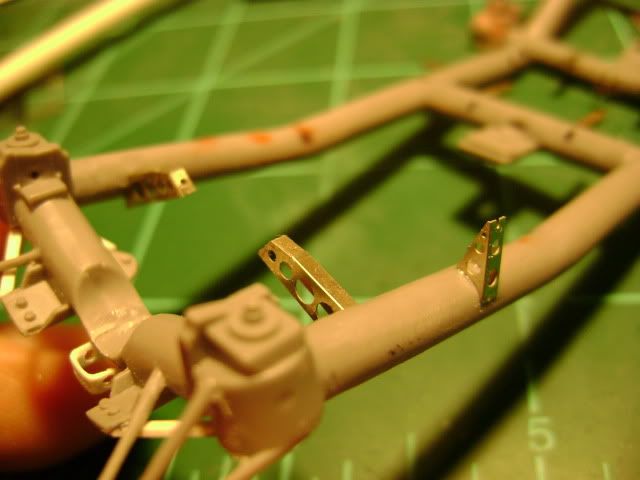 One other thing I was working on was the instrament cluster. The kit supplies us with a clear unit that is about twice as thick as it should be and the guages are little marks on the lense covers. The detail set provided one is photoetched and lacks the 3-D-ness of the real unit. The option I chose was to use the kits clear panel and modify it for the gauge decals on the VRM sheet. That way, if you wanted to, you could read the odometer! 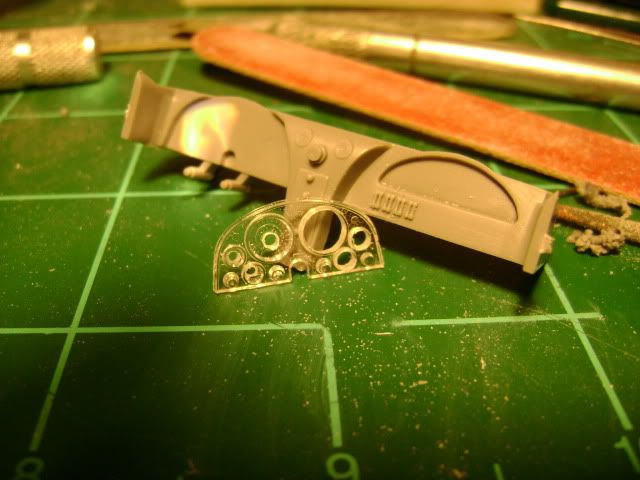 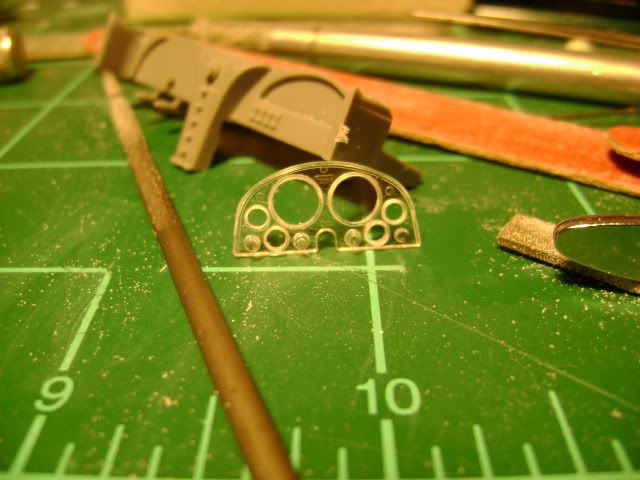  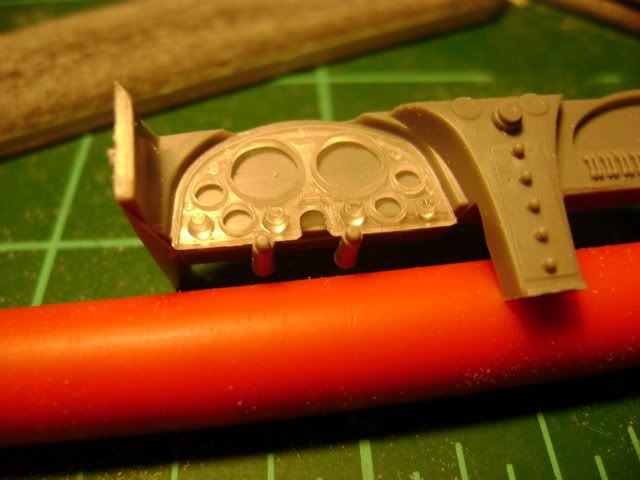 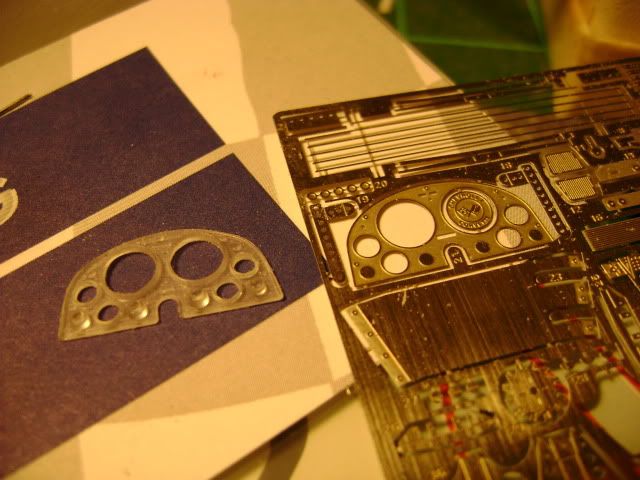 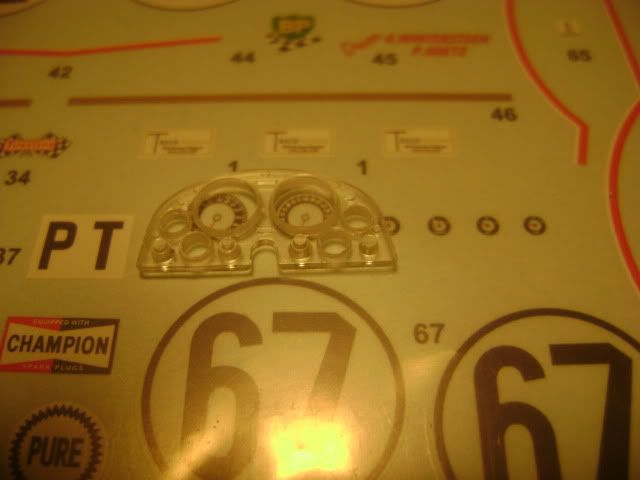 One last thing I did was remove the molded in air boxes for the rear brake cooling ducts. This way, I can make more realistic and HOLLOW looking ducts so when the rear tires are off, they look amazing... 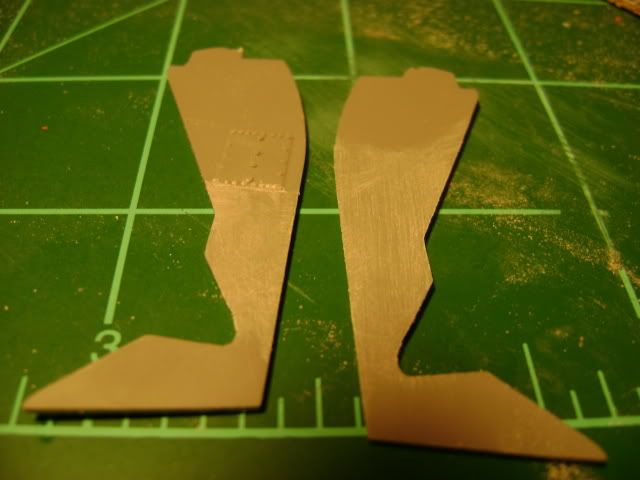 Other projects in progress are the vent box under the cowl vents complete with wiper control arms, cutting the dash 'wings' off (actually part of the door panels), working on the gas filler interior cover, figuring out how to build the grill, modify the front turn signal area and creating the missing lower portion of the firewall so the front outside body mounts actually connect to something... Hope you enjoyed this little taste of what I have been doing. As always, comments are welcomed and encouraged.
|
|
#20
02-10-2010, 10:33 PM
|
||||
|
||||
|
Re: AM Corvette Grand Sport Chassis #004 1965 Sebring
Nice update! Once painted and washed in those u-joints will look awesome and I like your flywheel idea. Whats your opinion of the photoetch quality so far (MCG)?
__________________
|
|
#21
02-10-2010, 11:37 PM
|
|||
|
|||
|
Re: AM Corvette Grand Sport Chassis #004 1965 Sebring
Quote:
You do know, the San Antonio show is next weekend? You gonna make it?
|
|
#22
02-11-2010, 09:41 AM
|
||||
|
||||
|
Re: AM Corvette Grand Sport Chassis #004 1965 Sebring
Good to hear your MCG fret is working out. I was wondering because I measured some parts on my '63 street fret and found some fit errors.
I'll be at Fiesta 29 next week with my MFH Testa Rossa. (I'm also bringing your DeTomaso parts.)
__________________
|
|
#23
02-11-2010, 02:52 PM
|
|||
|
|||
|
Re: AM Corvette Grand Sport Chassis #004 1965 Sebring
I started this same car 5 years ago and also like the MCG parts. Its nickel so it bends and cuts easy. Only thing I really hate about the Accurate Miniature GS are the wheels, wich don't look right(thats why I never finished the model). The center design is to small. I don't think anyone has made a corrected set.
Tom Tanner/Scale Designs/Ferrari Expo 2010 model/photo contest-Chicago April 24th 2010
|
|
#24
02-16-2010, 12:20 PM
|
|||
|
|||
|
Re: AM Corvette Grand Sport Chassis #004 1965 Sebring
Quote:
|
|
#25
05-09-2010, 02:00 PM
|
|||
|
|||
|
Re: AM Corvette Grand Sport Chassis #004 1965 Sebring
Those kidney bean halibrands look cool! Where can I get a set like that?
|
|
#27
05-10-2010, 09:16 AM
|
|||
|
|||
|
Re: AM Corvette Grand Sport Chassis #004 1965 Sebring
Quote:
Strada has a lot of the HRM stuff for the Grand Sport There's hoods, wheels, headers, control arms, photoetched, decals and more. Worth a check-out! Thanks again for the kind words. I haven't done much lately due to loosing my hobby room but now have a dedicated workspace set up and should be back into the flying plastic soon.
|
|
|
POST REPLY TO THIS THREAD |
 |
|
|


