|
|
| Search | Car Forums | Gallery | Articles | Helper | Air Dried Beef Dog Food | IgorSushko.com | Corporate |
|
|||||||
| WIP - Street Post topics for any "Works In Progress" street vehicles projects in this sub-forum. |
 |
 Show Printable Version | Show Printable Version |  Subscribe to this Thread
|
|
|
Thread Tools |
|
#46
 11-26-2006, 11:44 AM
|
||||
|
||||
|
Re: Topless Trio: 360 Spyder
Muy bien, jefe!!
__________________
Guideline for happy modeling: Practice on scrap. Always try something new. Less is more. "I have a plan so cunning, you could put a tail on it and call it a weasel" - Edmund Blackadder Last edited by klutz_100; 11-27-2006 at 05:25 AM. 
|
|
#47
11-27-2006, 04:06 AM
|
|||
|
|||
|
Re: Topless Trio: 360 Spyder
Fantastic progress. I love seeing all the machined parts you make. It really is a shame that you aren't going to see much of it when completed. However, like you said it is good practice for future projects.
Just remember, you can't go starting an Enzo until you finish the F40.
|
|
#50
11-27-2006, 09:47 AM
|
||||
|
||||
|
Re: Topless Trio: 360 Spyder
Those coil over shocks resulted great!!, it is really a shame that they will be fairly visible, but well, they were worth the trouble to make them.
I would love to have a lathe, but more than that, to have the skills to work like that in a lathe, I know it is not as easy as it seems. Good job!! Keep the good working!! Cheers!
__________________
Happy modeling! Ramon Garcia Puebla, Mexico
|
|
#53
05-14-2007, 12:54 PM
|
||||
|
||||
|
Re: Topless Trio: 360 Spyder
Top down weather has finally returned here, and it has finally inspired some more work on the 360. I've been continuing work in the chassis, including engine installation.
I've had some trouble deciding just how much detail to put into this build. The kit is terrific, and is a great base for superdetailing. My two accomplices have been doing their very best with their builds at raising the detailing arms race to dizzying new heights. However, the more I do on the 360, the more I've concluded that the majority of what I would choose to add to this build simply could not be seen once it's completed. The set of machined brakes are easily visible through the open five spoke wheels- but the machined dampers all but disappear when they're installed.  So, after much contemplation, meditation, and inebriation, I have (reluctantly) concluded that there's not alot of point in adding a bunch of machined stuff like oil filter, fuel injector rails, ejection seats and Stinger missile launchers that just can't be seen when the body's on.  But I will certainly make the best of what will be visible. But I will certainly make the best of what will be visible.  One of the little things that bothered me about this kit was the "Don't Touch" warning emblem on the resonator. To represent this, Tamiya included a decal to apply in that spot instread of engraving it. This may have been fine at the time, but when the Enzo kit was released soon thereafter, the emblem was engraved, as it should be. It's a small thing to be sure, but it is definately also visible- and I decided that the decal just wasn't going to do it. So I engraved it myself.  I used a handsewing needle held in a pinvise as a scriber and a PE circle template to get the position and shape right, and then carefully did the hand detail by hand. The kit chrome was of course removed (there will be no kit chrome left on this build!), and it allowed me to remove the wicked mold line around the resonator. Here it is with the chrome resored with Alclad.  The exhaust train of course then got the usual heat stain treatment. Nothing but Tamiya acrylics!   It's a real shame it won't be visible when the body is on- it really is a very pretty engine.  The rear brakes get the same treatment as the front brakes- with the addition of the handbrake caliper. Again, it was cut off of the kit part, cleaned up, detailed, and copied in resin.  And of course painted red. Black is the more standard option for the 360's calipers, but red was a popular option. I thought red would help bring attention to the rotors, and match the red plenums visible through the engine lid window.  Now for some detailing of the engine parts that will be visible-  I machined a new set of filler caps. Tamiya includes decent chromed parts, but to my eye they still look too much like chromed kit parts.  The filler caps will be very visible through the engine lid window, and I think a bit more detail on them makes a nice touch. I added some tiny PE ponies from Crazy Modeler's self adhesive emblem set, but they're almost too small to be seen.   The air cleaner boxes is just the straight kit part, detailed with paint and BMF. It's a beautifully molded part, and really doesn't need anything else. And here's what it looks like all together.  Thanks for watchin, more soon- I promise! 
__________________
PHOTOBUCKET SUCKS
|
|
#55
05-14-2007, 01:59 PM
|
||||
|
||||
|
Re: Topless Trio: 360 Spyder
Looks great!
I love your DIY etching on the muffler 
__________________
Guideline for happy modeling: Practice on scrap. Always try something new. Less is more. "I have a plan so cunning, you could put a tail on it and call it a weasel" - Edmund Blackadder
|
|
#57
05-14-2007, 06:36 PM
|
||||
|
||||
|
Re: Topless Trio: 360 Spyder
Quote:
 Yeah, that's exactly what I thought of it, too! That symbol has always looked that way to me. Perhaps it's the Italian symbol for "Do Not Make Rude Gestures".  (Eh, Gio?) (Eh, Gio?)Thanks guys!
__________________
PHOTOBUCKET SUCKS
|
|
#58
05-14-2007, 08:23 PM
|
||||
|
||||
|
Re: Topless Trio: 360 Spyder
Excellent update. Glad to see you moving on with the build and spending your skills on the visible stuff. I love the machined filler caps, I would love to be able to do this with my lathe but I thinks it's best left with the mill.
Mike
__________________
   
|
|
#59
05-15-2007, 03:53 AM
|
||||
|
||||
|
Re: Topless Trio: 360 Spyder
Nice update. Your engine bay looks very clean - that is exactly it. All clean, great paint jobs. How are your buddies doing?? Any new stuff from them?
__________________
Recently finished Projects:
Porsche 911 Carrera RS 3.0 Current Projects: Ferrari 250 GTO LM 1962 (chassis #3387)  
|
|
#60
05-17-2007, 10:31 AM
|
||||
|
||||
|
Re: Topless Trio: 360 Spyder
Time for the body- see, I said it would be soon.
Here's the 360 body primed up with some other unfinished traffic on my bench. (Yeah, none of the others have been finished since then either.  ) ) I painted the body with CobraColors Ferrari Verde Zeltweg Metallic- a very dark metallic green. It's an unusual color on a Ferrari, but the 360 Spyder was made in greater numbers than any other Ferrari in history (only to be surpassed by the 430). So what better car to put an unusual color on? Besides, even in 1:1 I think that bright primaries like Rosso Corsa and Giallo Modena make the 360 look too much like a cheap plastic toy. Here is the paint before clearcoat. I think it gives the body a wonderfull stately elegance. 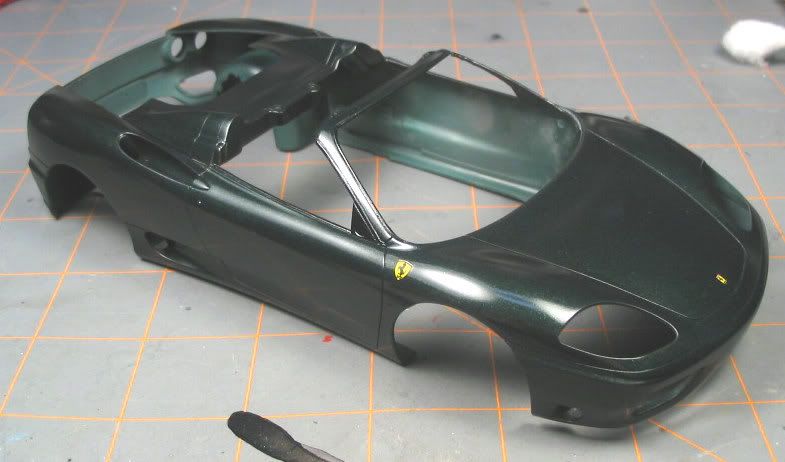 But it's bloody difficult to take good pics of! It's definately a color that looks best in bright sunlight. The decals were applied to the paint, to be covered with the clearcoat. Tamiya supplies nylon mesh for intake grilles. It would do fine, but I found some K&S photoetch diamond pattern screen that I really like the look of. It's the same screen that will be used as the rear grille mesh on the F40, as the pattern matches perfectly. 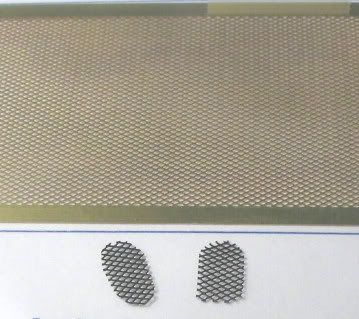 This is what it looks like installed. 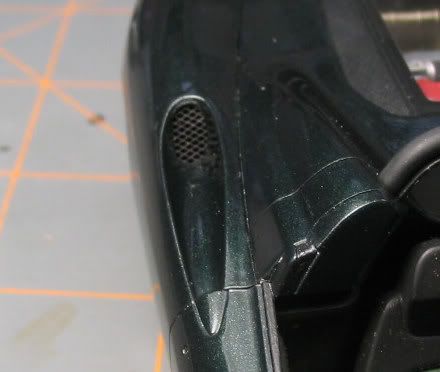 And here is the body clearcoated and polished. 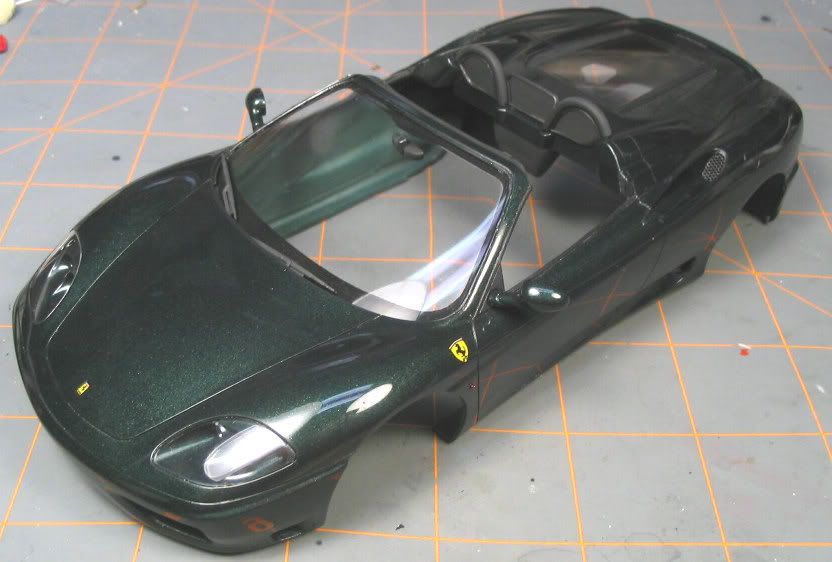 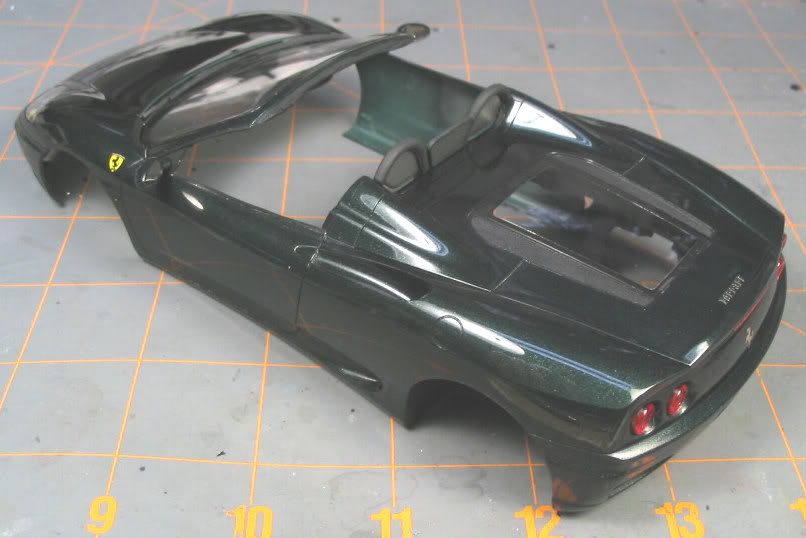 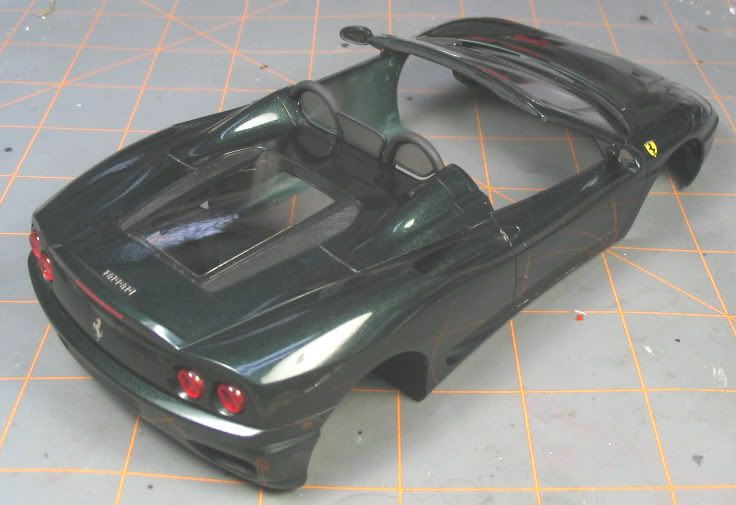 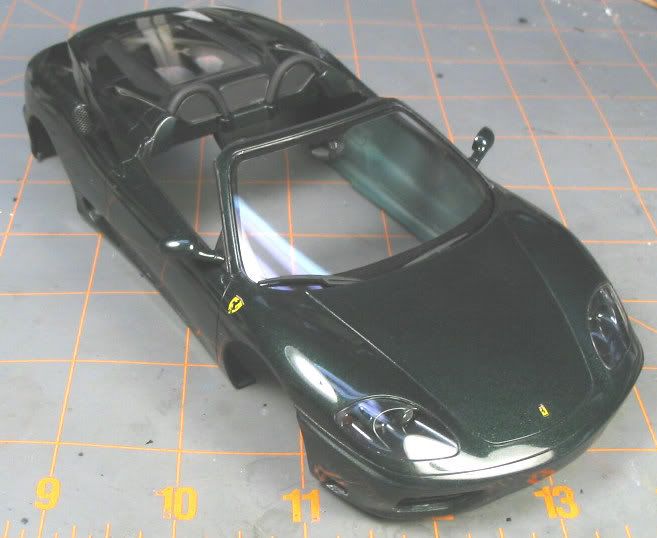 Again it's unusual, but I really like the color on this body. (I think though if I had to pick a color for my own 360, I might have to go with Blu TDF.) The clearcoat is Cobracolors laquer, polished with Tamiya course and McGuire's ScratchX, waxed with Zymol Carbon (I love the smell of carnuba in the morning). The brakelight strip on the engine lid was done with red 3M reflective tape from my local auto parts shop. I think it looks alot better than a decal strip. The Ferrari logos are from the Crazy Modeler set. They look at least as good as the Tamiya ones, but I find that they stick better- especially to waxed surfaces. Other than that, it's box stock. Getting close now....
__________________
PHOTOBUCKET SUCKS
|
|
|
POST REPLY TO THIS THREAD |
 |
|
|


 gio
gio


