|
|
| Search | Car Forums | Gallery | Articles | Helper | Air Dried Fresh Beef Dog Food | IgorSushko.com | Corporate |
|
|||||||
| Car Modeling Share your passion for car modeling here! Includes sub-forum for "in progress" and "completed" vehicles. |
 |
 Show Printable Version | Show Printable Version |  Subscribe to this Thread
|
|
|
Thread Tools |
|
#1
 05-13-2005, 08:06 PM
|
||||
|
||||
|
Tutorial: Making Vents
This tutorial can be very difficult if you do not take it slow. If you rush through it, and are not precise, the final out come will require more fixing and sanding to get it to look right. Saying that lets begin
 Here is a list of supplies you are going to need: 1. Masking tape (Tamiya was used in this tutorial) 2. A Sharpie, preferably a extra fine point 3. An Xacto Knife 4. A ruler 5. Krazy Glue Step 1: Decide where you want the vent to be, and how long you want the lines to be. After deciding that get out some tape and cut pieces to that length and apply to the car. Note: It is easier to apply the tape that will be slanted first. Step 2: After laying it out in tape, take your sharpie and carefully draw along the lines, being sure you dont pass the end of the tape. If this does happen make a mental note or sand off the extra bit of ink so you are not tempted to go past it. Step 3: Remove the tape revealing the shape of the vent in marker. Take a scribing tool (if available) and scribe the lines you just drew to make sure the knife will not slip out of the groove. Alternately using a knife and carefully scribing the line. After scribing a "channel" use a knife to cut partially through the plastic. Do not cut all the way through, only cut far enough in so you can see the plastic change to a brighter shade on the reverse side. 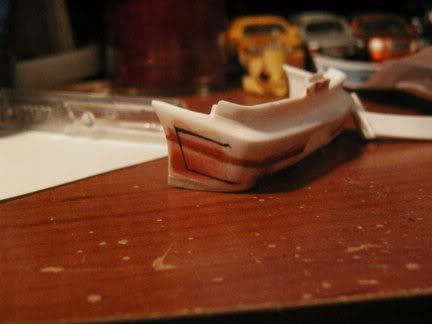 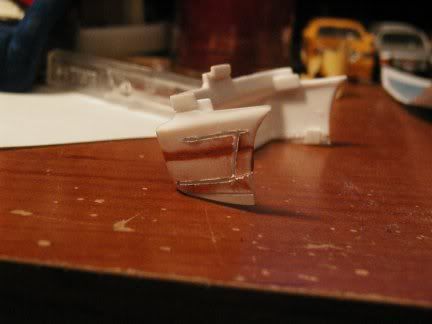 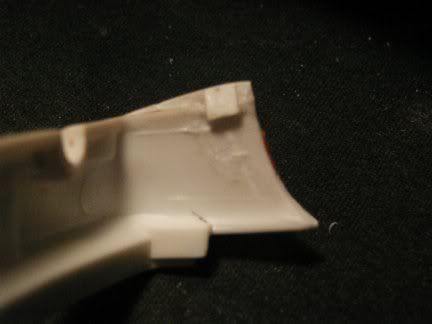 Step 4: From the reverse side, cut along the line that is bulging out (the brighter shade of the plastic color) until it cuts all the way through. Be careful on the final cut not to break the piece off, as it will now bend in and out. Step 5: Bend in the plastic now to the angle you want the vent to sit at, and glue into place. Note: You might have to hold it in place, or use a spacer such as styrene (if available) 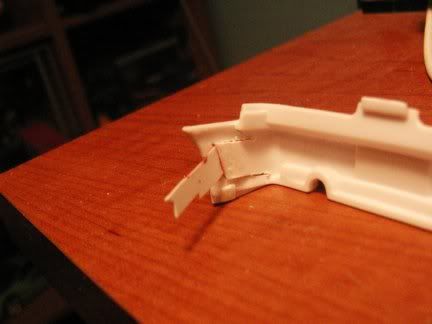 You have now successfully completed a custom vent, though it does not have a hole, a hole can be added using a fine dremel bit and some precision.  Here is the hood i made for my civic project using this same method. 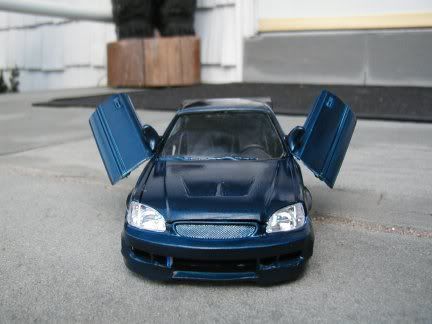 Hope this helps some people, and motivates them to make their very own custom creations 
__________________


|
|
#3
05-14-2005, 01:31 AM
|
||||
|
||||
|
Re: Tutorial: Making Vents
Nice
 Will try that out some day. Will try that out some day.
__________________

|
|
#4
05-14-2005, 04:06 AM
|
||||
|
||||
|
Re: Tutorial: Making Vents
Very good! I never knew it could be done so easily.
Thanks for the tutorial! 
|
|
#6
05-14-2005, 02:10 PM
|
||||
|
||||
|
Re: Tutorial: Making Vents
Sick Tutorial. Should come in handy.
__________________
~Josh~ OldUser:IImportSupra Do You Have a Car that Goez Sideways? 
|
|
|
POST REPLY TO THIS THREAD |
 |
|
|


