|
|
| Search | Car Forums | Gallery | Articles | Helper | Air Dried Beef Dog Food | IgorSushko.com | Corporate |
|
|||||||
| Register | FAQ | Social Groups |
| Car Modeling Share your passion for car modeling here! Includes sub-forum for "in progress" and "completed" vehicles. |
 |
 Show Printable Version | Show Printable Version |  Subscribe to this Thread
|
|
|
Thread Tools |
|
#1
 07-26-2010, 09:35 AM
|
||||
|
||||
|
Tutorial: How to fix models in display box
Hello AF modelers community,
Being in hollydays for 2 weeks, I'll try to share a tip I've been willing for a long time to put here, which some of you may have noticed in my (rare and unfinished  ) builds. ) builds.It came from a main problem when willing to enter modelling show, where having to safely bring them and once there protect them from (stupid and/or unrespectfull) people, or when simply wanting to store them free of dust or move them safely. Since the first problems encountered in modelling show - Fed up of aerials or mirrors reglueing and so.  - or even at home when moving models, I bought dozens of display box, each model having to get its own box. - or even at home when moving models, I bought dozens of display box, each model having to get its own box. That was the first point. Second one was "How to fix the model without ruining it, making fixation strong enough to move the models without dammaging the plastic or in the same time to hold in place some heavier metal models...?" Answer came fast: screwing models to their box !  Only remaining thing then was how exactly screw them as I wanted fixation system to be the most invisible as possible. So here is my tip. What you need is: - of course a display box  - bolts - nuts - glue (a strong efficient one  ) )- something to drill holes in plastic (a drill is the best, but a blade can use too) - and of course, too, something to screw bolt in nut. (- a pen) and here we go: 1) Firstly, I place the chassis on the base of the box, taped in the center. 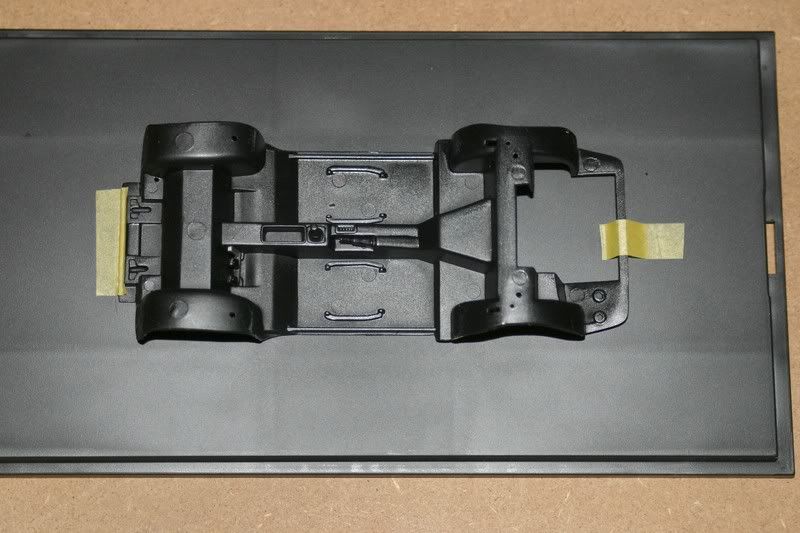 Nuts will be hidden under the seats, that's perfect as they are in the middle of the model, one on each side, what should give stability to the model. Please notice that on some models (mostly resin ones) you have to choose to put them elsewhere, under seat place isn't free... Then, I choose one in the front and the other in the rear of the model. 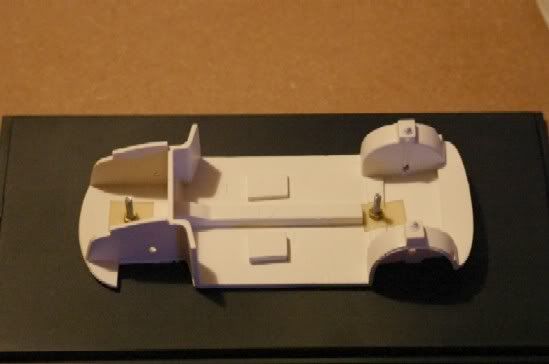 2) I choose how exactly where to put the nuts... 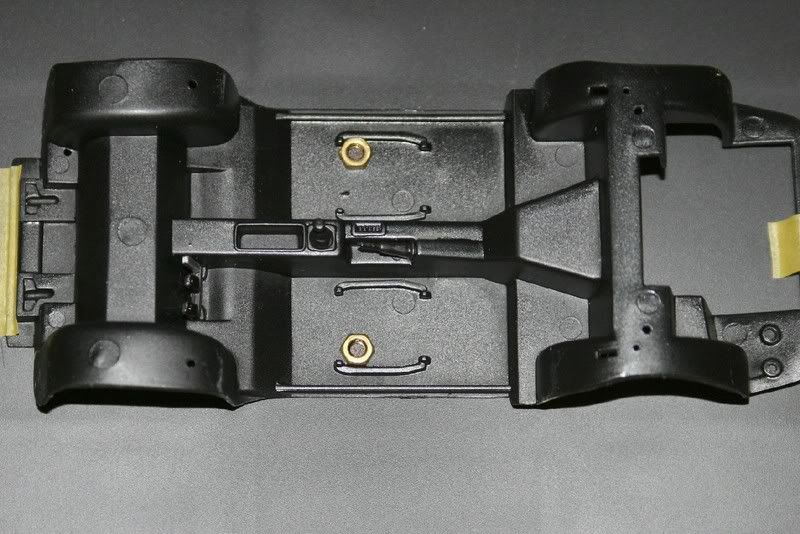 3) ... taking car to verify nut (and bolt through it) won't disturb seats assembling 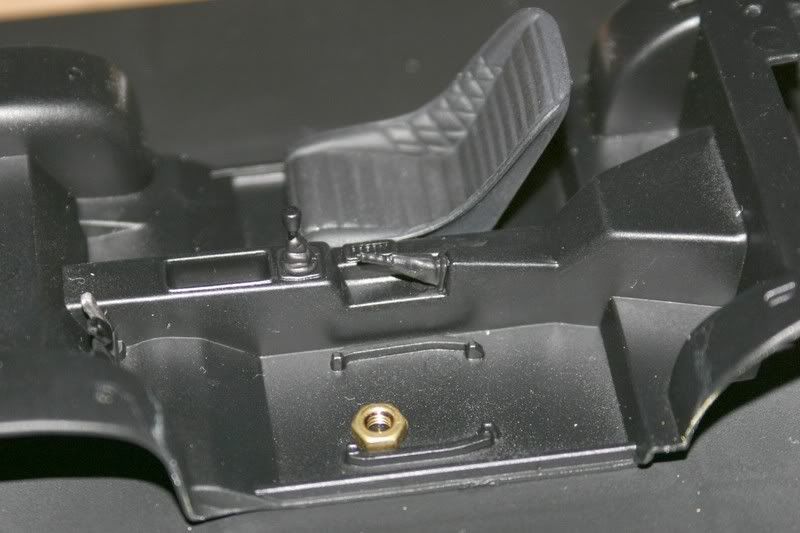 4) I use a pen (or sometimes a blade) to mark the place where to drill through the nut. 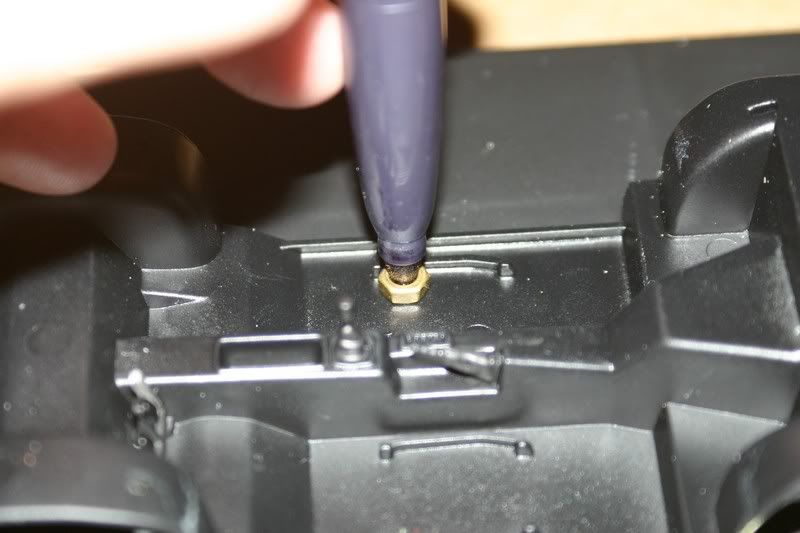 5) nuts locations are now visible...  6) ... and now need to be drilled, with drill or blade 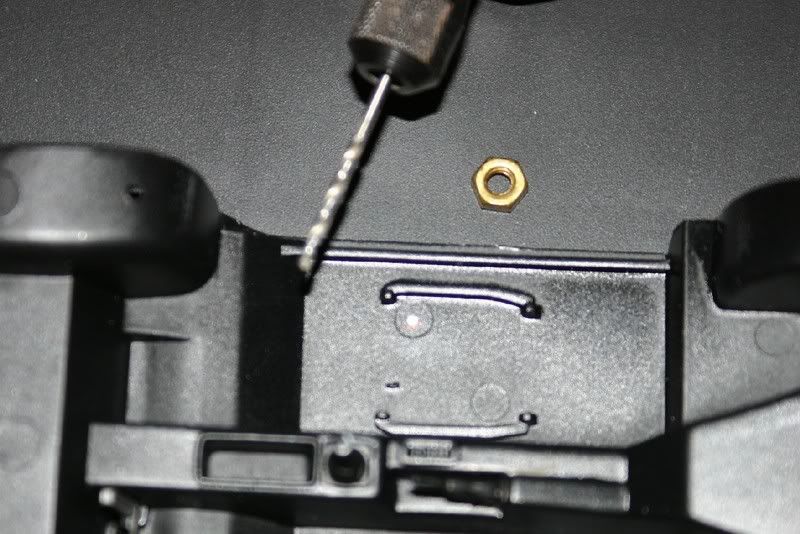 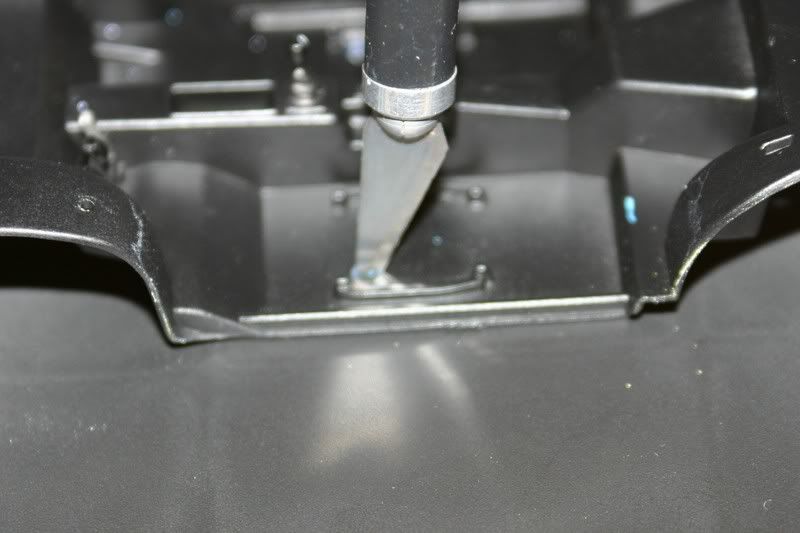 7) Of course display base is also drilled through in the same time 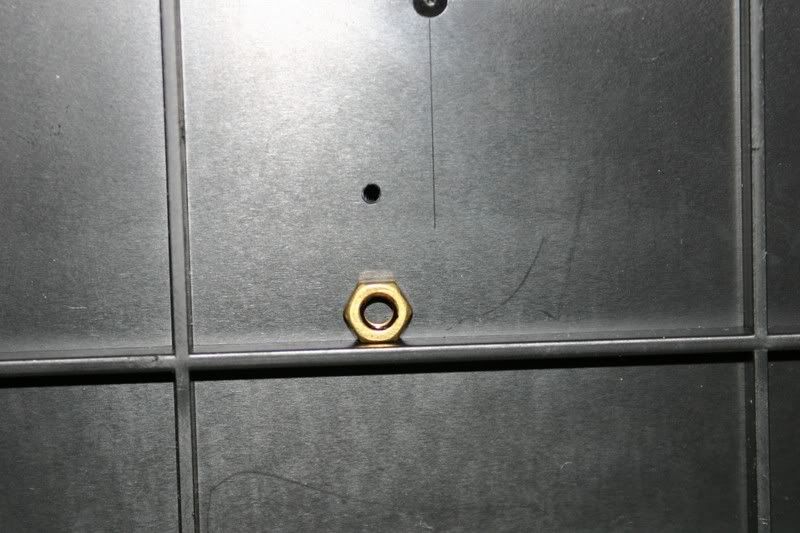 8) Verifying bolt and nut are working well together 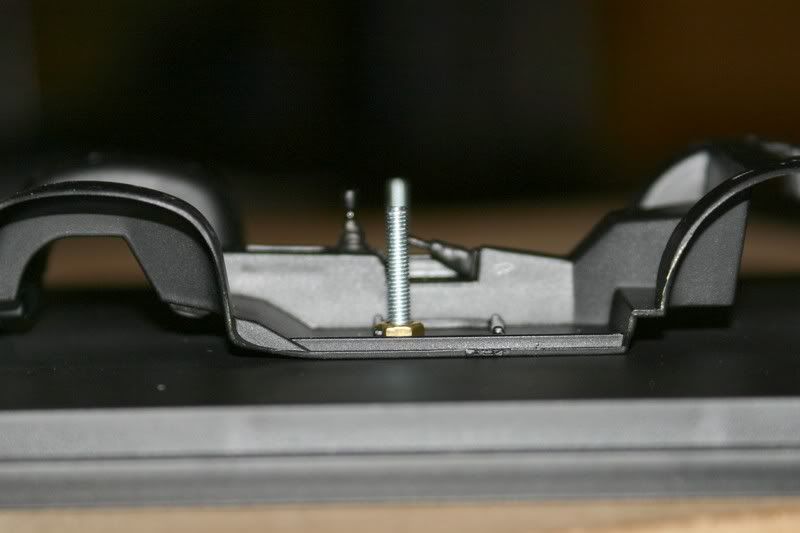 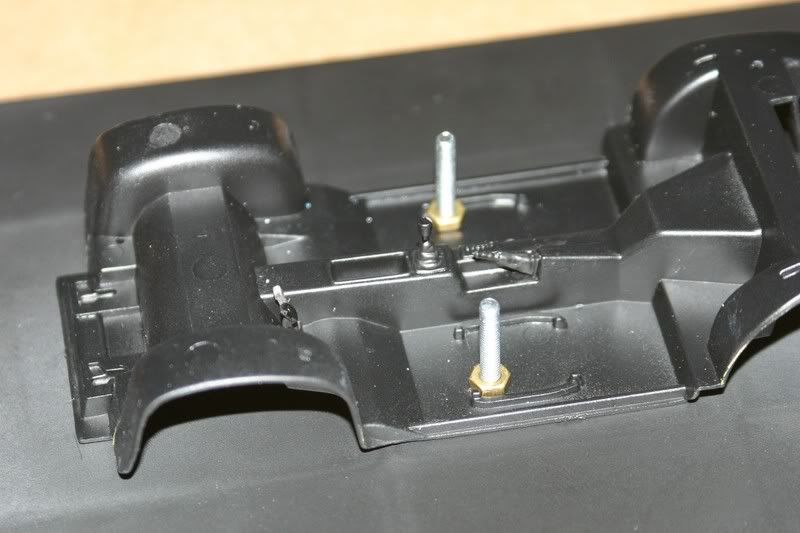 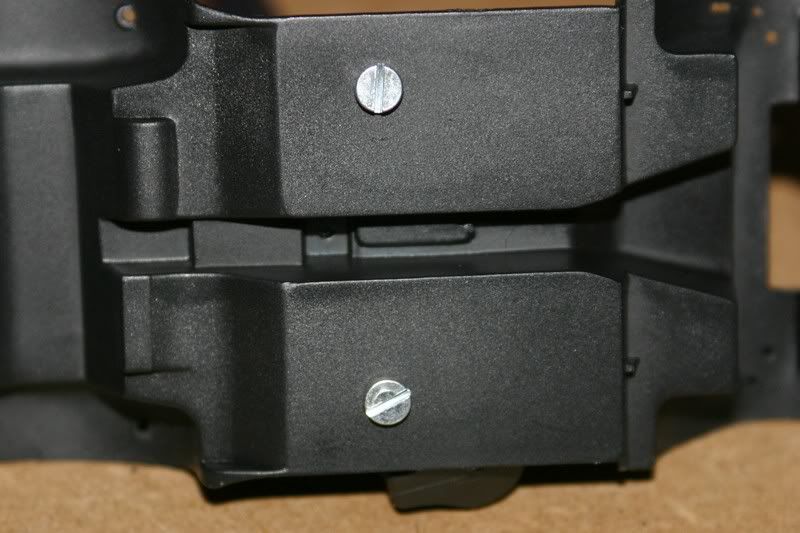 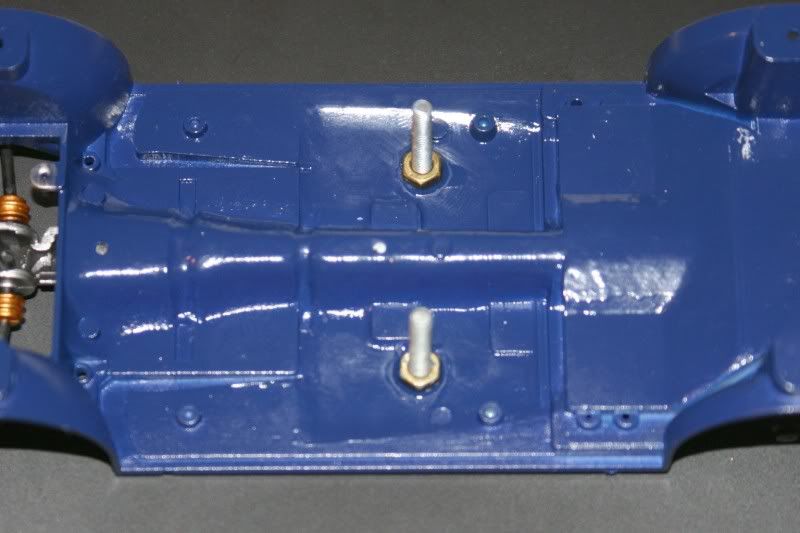 9) Next step is glueing the nut; aiming to glue it straigh in place but having to save hole from glue, I screw a nut on a bolt extremity, then put glue on nut edges, and finally use the bolt as the "nut applyer" putting it in the hole and pressing. Then I screw it half way through the model and put another nut by the other sens. 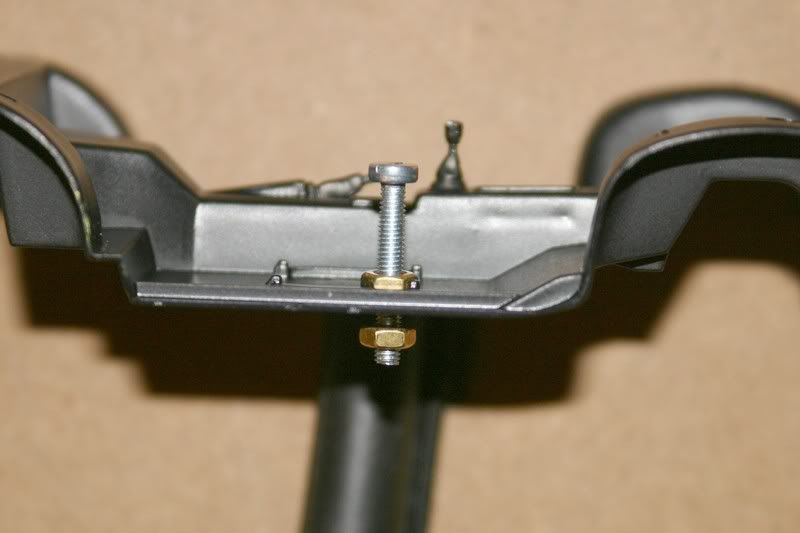 10) I screw it to press the inside nut in place as long as glue has to dry, taking care to verify before pressing hardly that the two nuts aren't glueing together with the plastic or to the bolt. 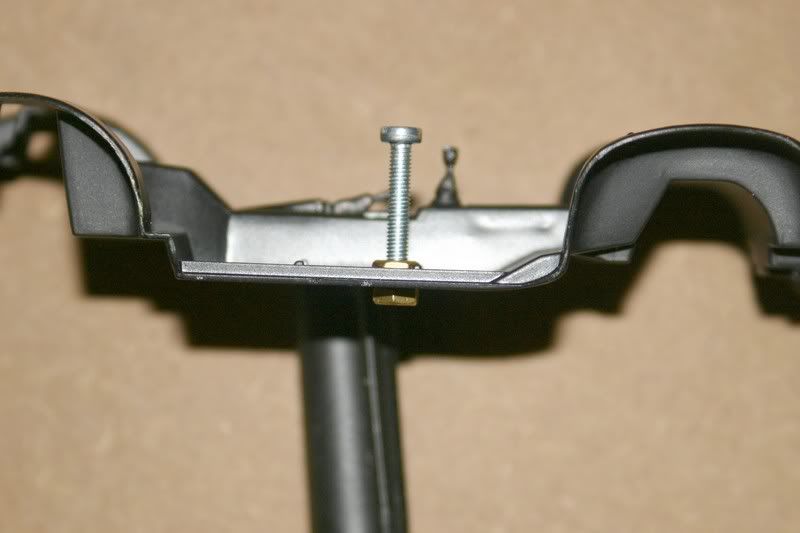 11) when "under nut" and bolt retired, I make sure everything is strongly attached, if necessary I consolidate some more glue all around the nut and press it with a grip. 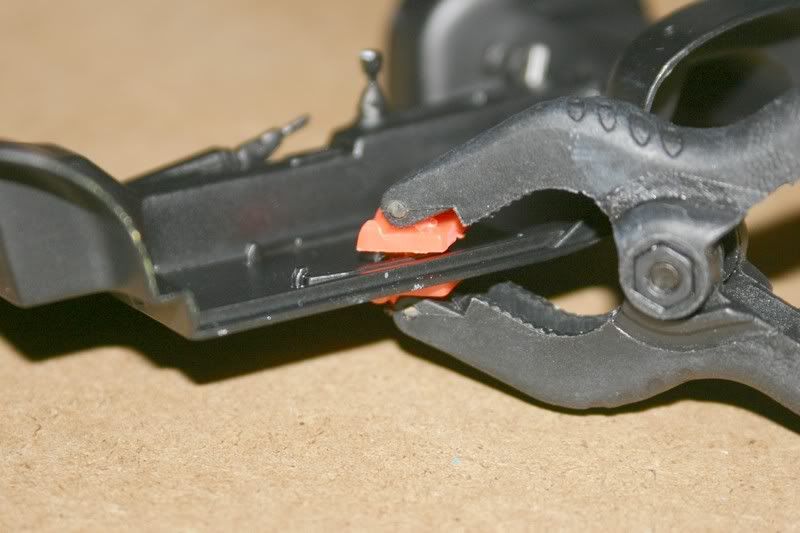 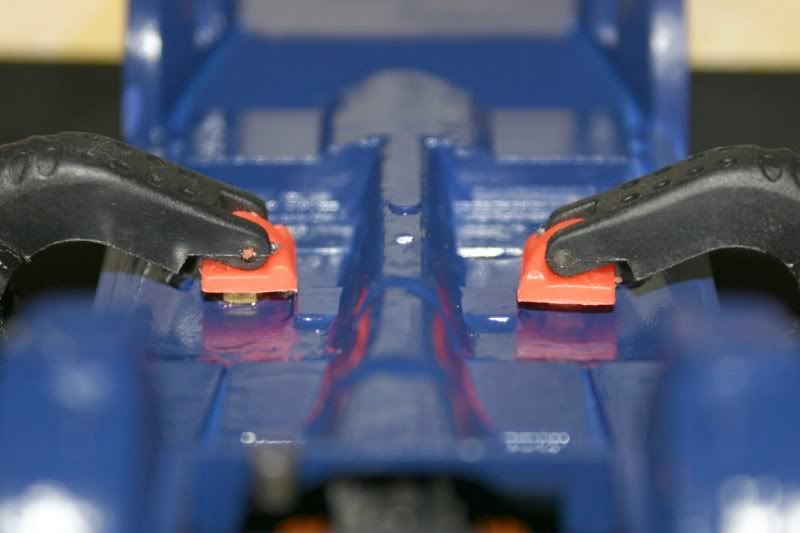 12) Now nuts are glued in place, I only still have to choose bolt lenght and verify if eveything fits well 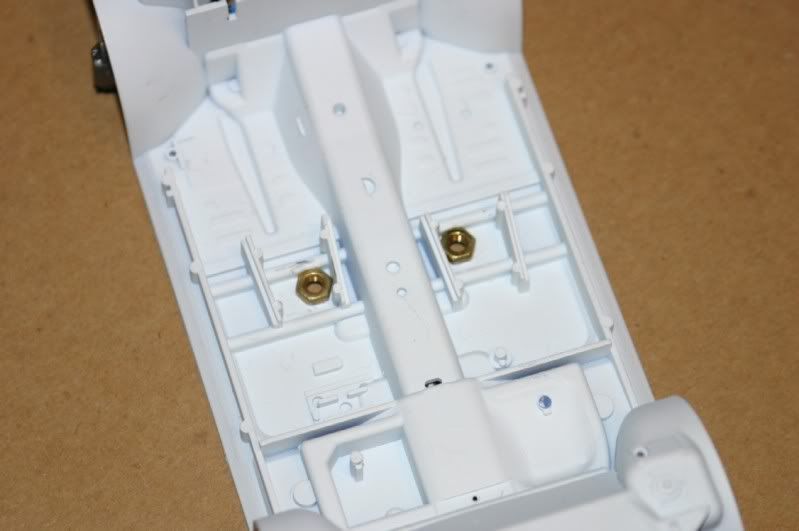 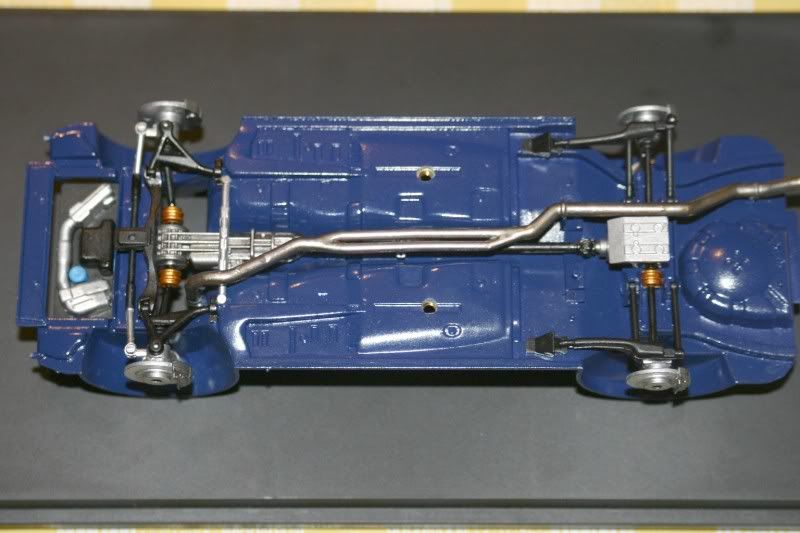  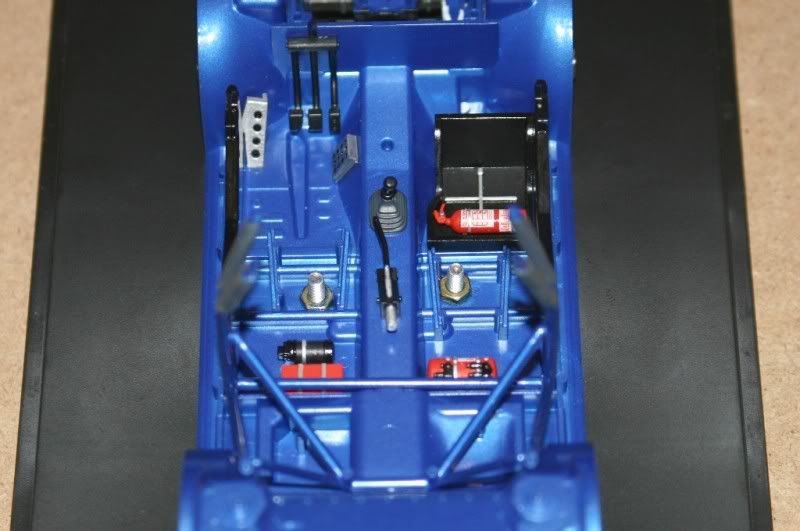 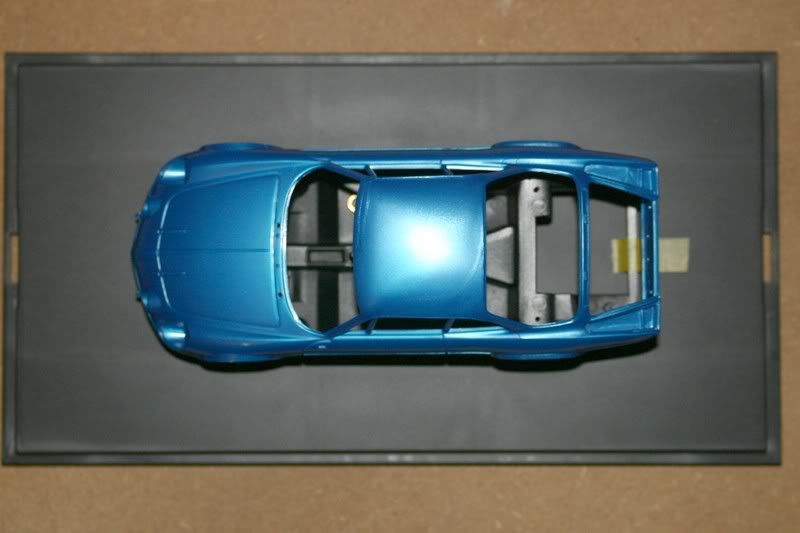 Once finished, models can be displayed, stored or moved, free from dust and protected from eventual people bad touch. 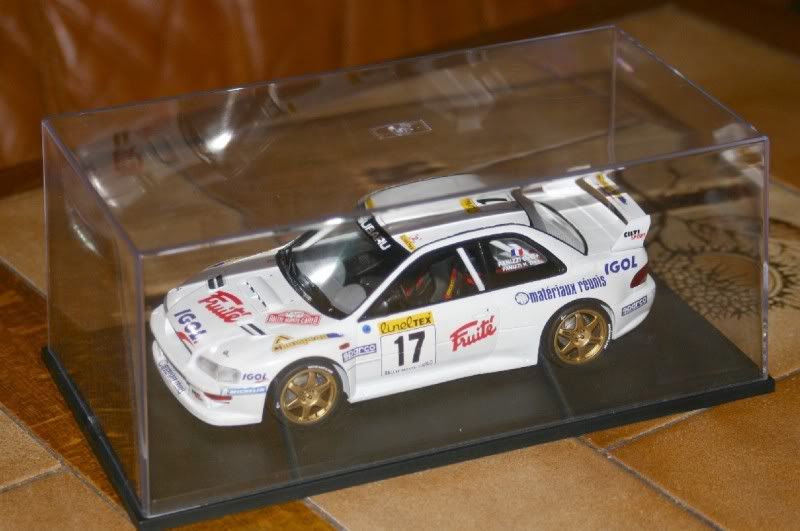 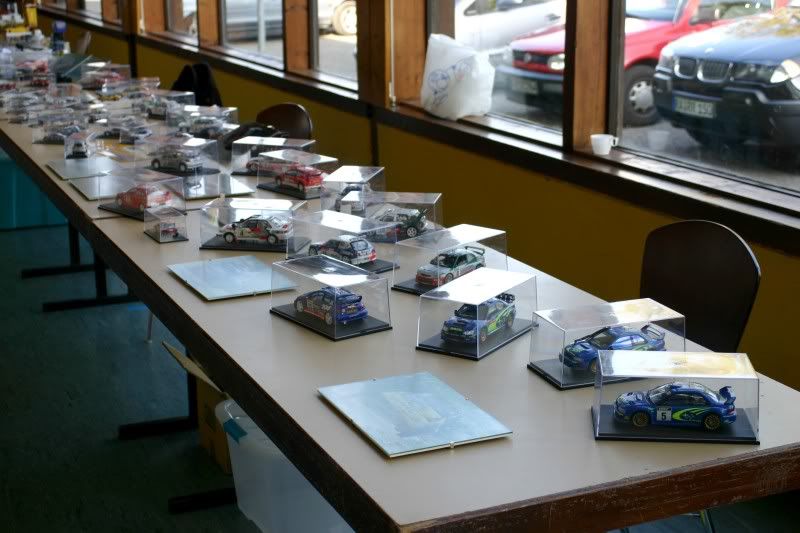 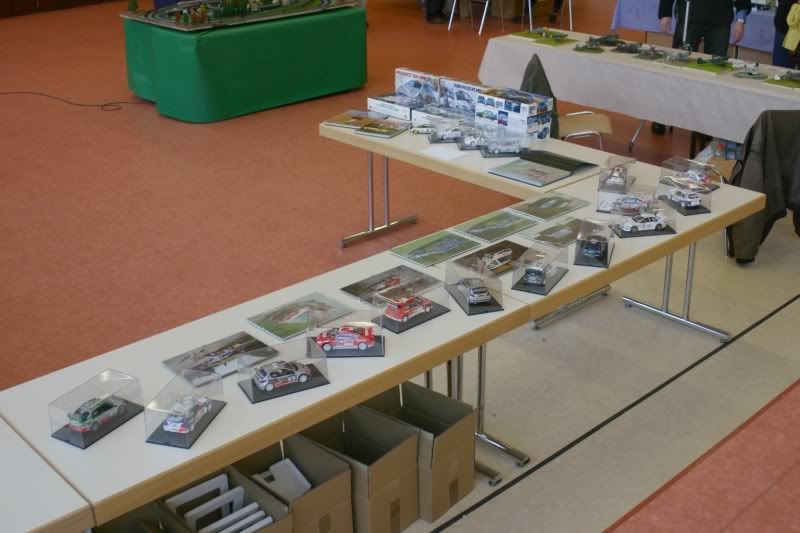 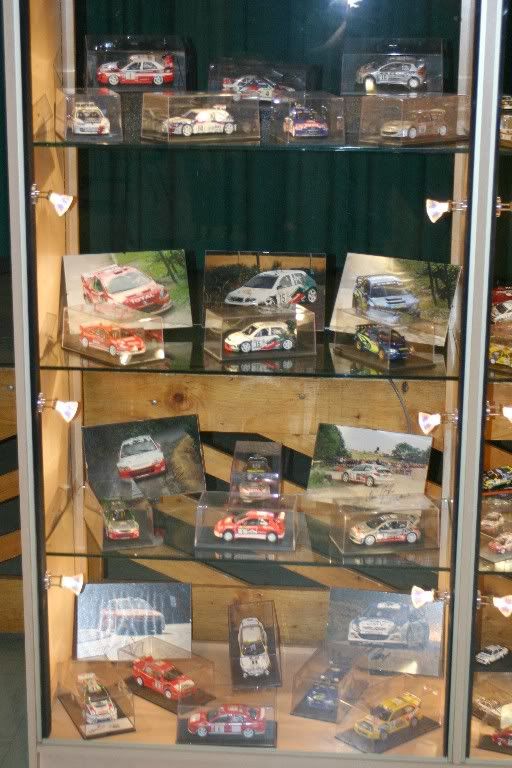 That's all ! Surely not a hard tip, maybe needing to be tried once or two but it it's how I now fix every models, and still haven't had any bad surprise when moving/storing/showing them. Comments and suggestions welcome  (especially if something in my English isn't understandable )
__________________
Phil 

|
|
#3
07-26-2010, 07:56 PM
|
||||
|
||||
|
Re: Tutorial: How to fix models in display box
Great tip. I've been doing that (not quite, but similar) with 1/43 models.
__________________
The client is not always right. - Enzo Ferrari ItalianHorses.net    
|
|
#4
07-27-2010, 12:53 AM
|
||||
|
||||
|
Re: Tutorial: How to fix models in display box
very nice. I am not sure if I could damage chassis with holes when theres detail on it but its great for moving. u can maybe blue-tac the wheels to base?
BTW can I ask where do you buy display boxes? I found tamiyas with mirror on hobby search for very good prize but postage to Slovakia is higher than boxes
|
|
#5
07-27-2010, 04:22 AM
|
|||
|
|||
|
Re: Tutorial: How to fix models in display box
Quote:
BTW: I the method described above sure is very neat and tidy - but I am quite happy with the easier version of just drilling a hole in the base, placing the model on the base, drilling a hole in the models' chassis and srew it on. Works just as fine, never had problems with it. Just my 
|
|
#6
07-27-2010, 04:25 AM
|
||||
|
||||
|
Re: Tutorial: How to fix models in display box
HI rallymaster
I do the same thing, little bit different, but your version is also very good       Mike
|
|
#7
07-27-2010, 07:53 AM
|
||||
|
||||
|
Re: Tutorial: How to fix models in display box
Hi Guys,
thanks for the kind comments Quote:
Quote:
Quote:
But that's right, on some lighter model, a simple bolt through the model can work well. Quote:
Hi Mike, you also use the simplest and fastest way, but it seems you scew the model after you entirely build it ? I suppose you firstly marked the place where to drill before finishing the build ? Putting the nut let me see and decide precisely where to screw the model and not risking an accident after finishing it (I know myself so good ) and I finaly consider it's part of my builds on each model, as I display all models in a box now.I have some models, build in my early times of modeling, which haven't nut inside, and I always couldn't dare to drill them now... Afraid of braking everything   thanks for the comments and for sharing your own tip and experience.
__________________
Phil
|
|
#8
07-27-2010, 03:27 PM
|
||||
|
||||
|
Re: Tutorial: How to fix models in display box
thanx for the links to boxes. scale production is closer to me as I dont speak german, but I am not sure how to order there as I dont see where to check paypal method.there is only written ask for paypal. am I dumb?
|
|
#9
07-27-2010, 03:57 PM
|
||||
|
||||
|
Re: Tutorial: How to fix models in display box
PM Mikezibit I'm sure he will be able to answer, this is his website !
__________________
Phil
|
|
#10
07-27-2010, 08:06 PM
|
|||
|
|||
|
Re: Tutorial: How to fix models in display box
Why couldn't you just put some small self tapping screws through the tires? when you take your car to a show, take the screws out from the bottom of the base, and you should have a fairly blemish free tire.
__________________
There is a very fine line between "hobby" and "mental illness." 
|
|
#11
07-28-2010, 03:44 PM
|
|||
|
|||
|
Re: Tutorial: How to fix models in display box
A trick I use is tie the model to the display base. I would drill two small holes in the base just inside one front and one rear tire (two holes for each tire), loop a piece of fishing line around the suspension, then tie the line. You can remove teh car anytime you want without issue.
|
|
#12
08-02-2010, 01:30 PM
|
|||
|
|||
|
Re: Tutorial: How to fix models in display box
I was thinking of sth else...
Using molly screws (like the ones used for fixing drywalls) but in hook version. Like this one...  It's made of 2 pices... we need only the one that is inside (the hook), as it has standard thread (f.e. M4) We use it to mount the wheels of out model to the display case like that: 
__________________
[Hasegawa] Mitsubishi Lancer Evo VI - 100% completed [Fujimi] Honda Integra Type R - 85% completed (suspended) [Aoshima] Suzuki Cappuccino - 100% completed (gallery will be posted soon)
|
|
#13
08-02-2010, 02:06 PM
|
||||
|
||||
|
Re: Tutorial: How to fix models in display box
Quote:
You have to be quite confident, though, that the wheels/suspension are attached firmly enough to handle the loads (some of mine definitely aren't) and it's not easy to make this work with some types of wheels, especially in older kits. But those are just some considerations, the idea itself is brilliant.
__________________
 Would love to resume my duties as AF's own official thread bastardizer!!!   1:29:53.435 || 207.316 || 310.596
|
|
|
POST REPLY TO THIS THREAD |
 |
| Thread Tools | |
|
|


