|
AF Enthusiast
Thread starter
Join Date: Aug 2006
Location: Portland, Oregon
Posts: 633
Thanks: 2
Thanked 7 Times in 1 Post
|
Re: 1969 Firebird 'mild' custom--bringing new life to an absolutely lousy kit
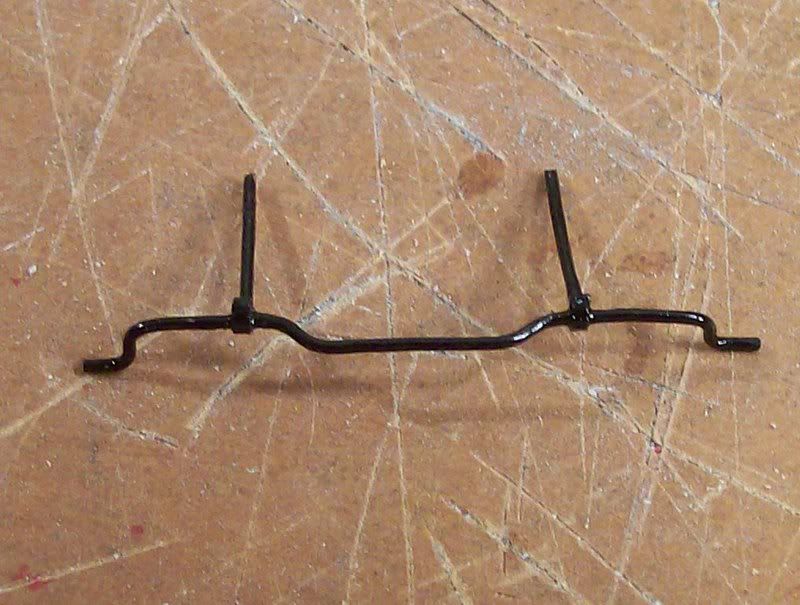
Well, its been a long time coming, but Ive finally got some substantial work done. Unfortunately, much of this work was a sort of regression, as I got some new reference photos that showed flaws in my work. I guess its like the saying, Taking a step backward to take two forward. The most significant revision was in the chassis. For whatever reason, my Chilton diagram was severely inaccurate, showing the tie rod being in front of the crossmember, which is typical. However, it seems that early F-body cars had a rear-mounted tie rod, which meant that my steering knuckles were improperly placed. However, this was actually good news, because Id been struggling trying to make a tie rod fit properly, and I had accidentally mounted my scratchbuilt front brakes with the calipers straight back, instead of at an angle. Here are the remounted spindles/brakes.
 Continuing with the steering system, here is the steering gear box/shaft. This was borrowed and modified from AMTs 1970 Monte Carlo (a very good AMT kit compared to this one, and which I have two of. Its my GM parts donor), which had a typical front-tie rod configuration. Obviously it still needs paint.
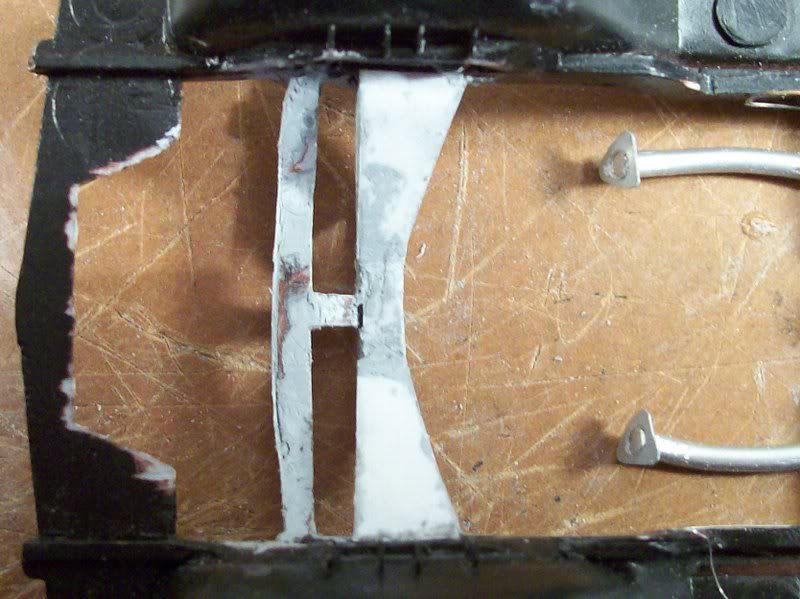
 The same reference picture that revealed the steering system configuration also showed me how the front crossmember was supposed to look. I had the right basic shape, but my part (recall that I did a lot of styrene and putty work in that area) was pretty wimpy. The inadequate size of the rear portion of the crossmember in particular interfered with the proper mounting of the lower A-arms, so this change was good. Here is the new assembly, after styrene/putty/filing but before paint.

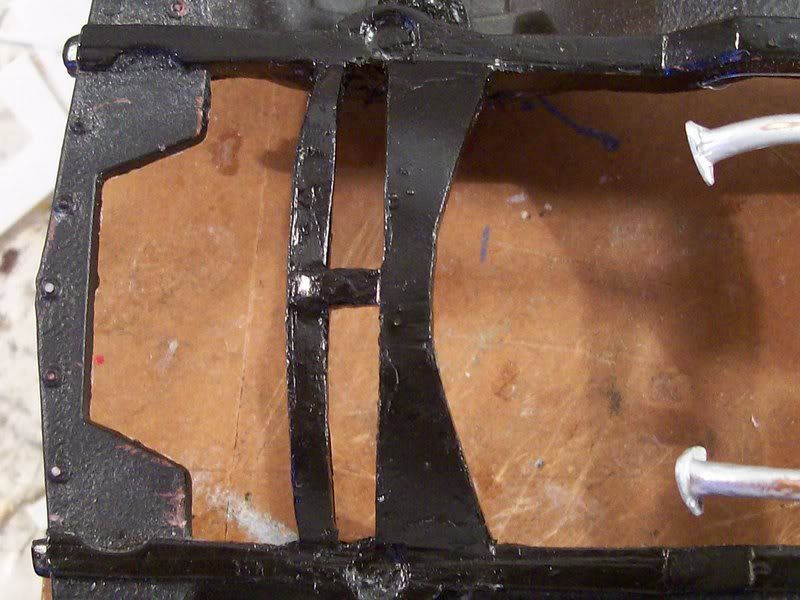
 And with paint: It looks a little rough, but the whole chassis will get a wash and dirt spray, so no big deal.
 I got the rear axle hung. You cant see it, but the brake flex hose is in place. You may also notice my e-brake cables; once I repaint them (Testors steel enamel wears off very fast with handling due to its super-slow-drying nature) I will photograph the whole parking brake system. The rear axle still needs the shackles, which on the real car attach the trailing ends of the leaf springs. I have found some shocks (from a Mustang) and still need to paint and mount them.
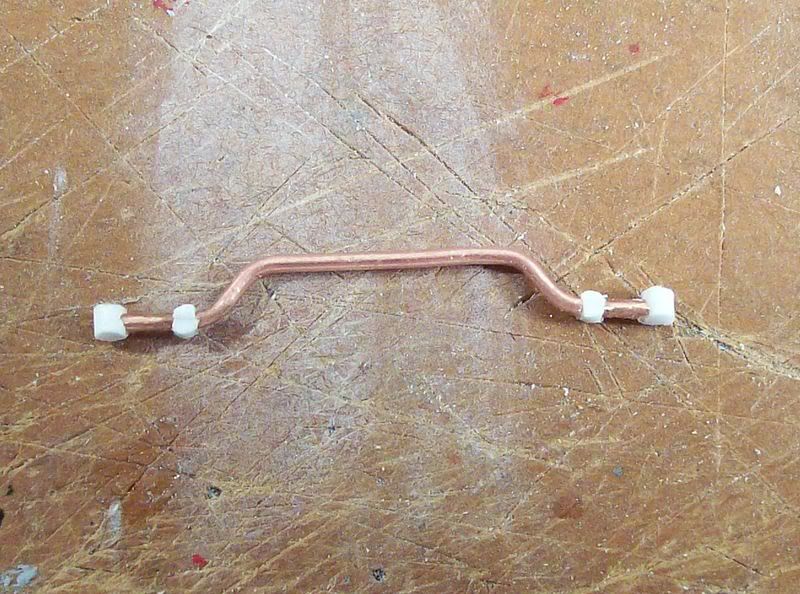
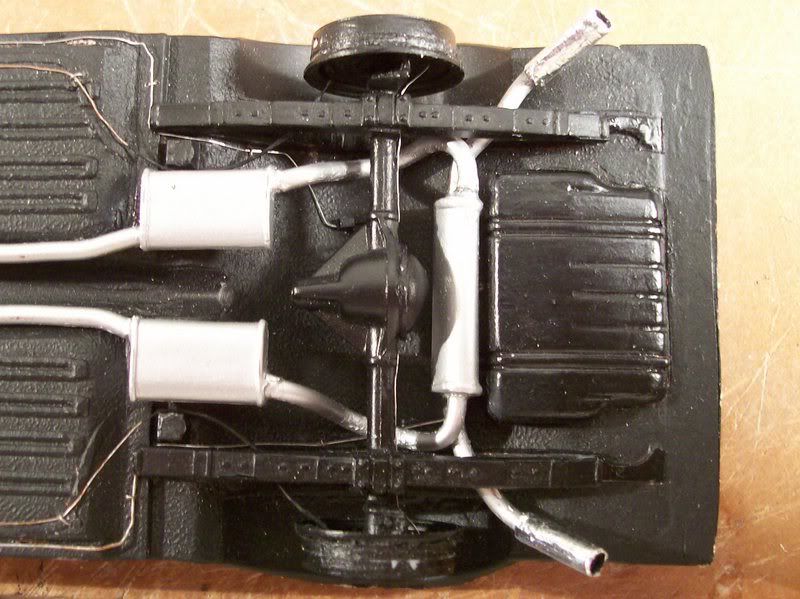 Here is my scratchbuilt rear anti-roll bar. .62mm copper wire and styrene. Ill show it mounted once I install the shackles and shocks.
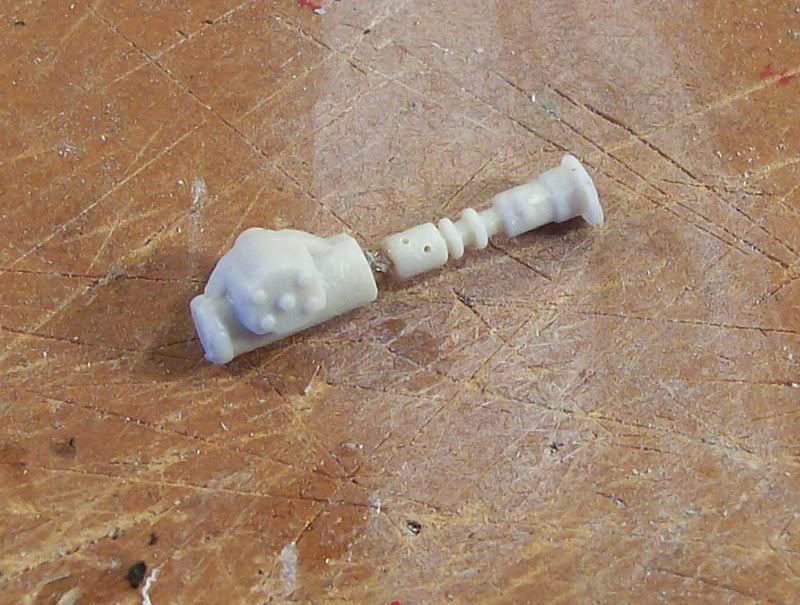
 Here is the center link for the tie rod. I still need to make the two ends, the pitman arm and the idler arm. Its not a particularly fun piece to build but Ill have to get around to it soon. 1mm copper wire and styrene.
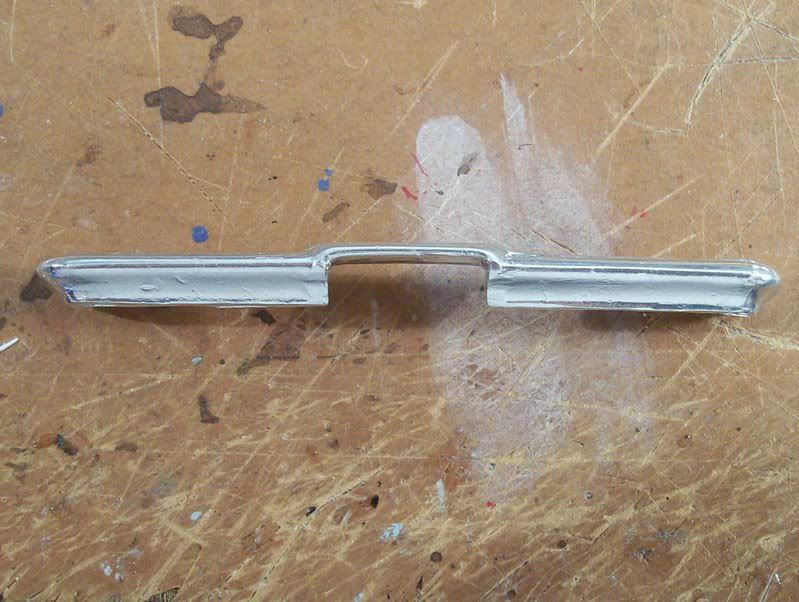
 On to the body. The body has been repainted and clear-coated with Tamiya acrylics (which Im very pleased with now that I now how to use them) and is awaiting polishing. The paint went on so smoothly that I wont need Micromesh cloths, just polishing compound. The kits taillight panel looks like this. It fits (Im not sure whether the big gouge is a kit defect or something I did accidentally when I got this kit years ago) and has nice texture, but is lacking the backup lamps.
 I added them.
 After modifying the rear bumper some time ago, I covered it with Bare-Metal Ultra-Brite Chrome foil in a rather poor fashion. It was wrinkled and Ive since learned that the Ultra-Brite Chrome is not as good as the original. Having acquired some of the original, I peeled off my old work and reapplied it in a much smoother manner. Since then, Ive noticed that the bumper seems too wide, so I may have to redo it again, but Im still awaiting more info on that subject.
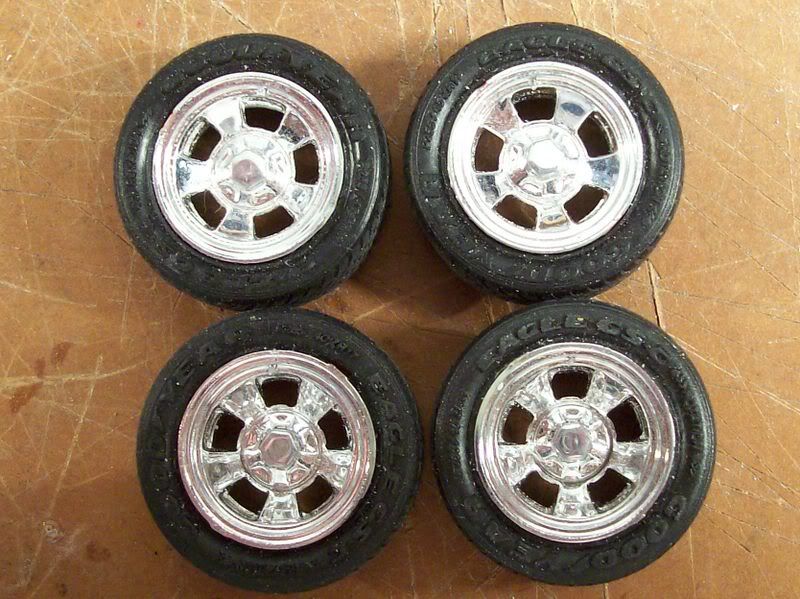
 Here are the wheels and tires I picked for this car. I didnt really care for the stock Firebird wheels, and these ones suit it well. Theyre from AMTs 1968 El Camino. (Contrary to appearances, I do not love AMT kits. I keep getting them as gifts) I added valve stems, but since I painted them silver chrome, theyre hard to see. Theyre at the top of the wheels as I have them set up here.
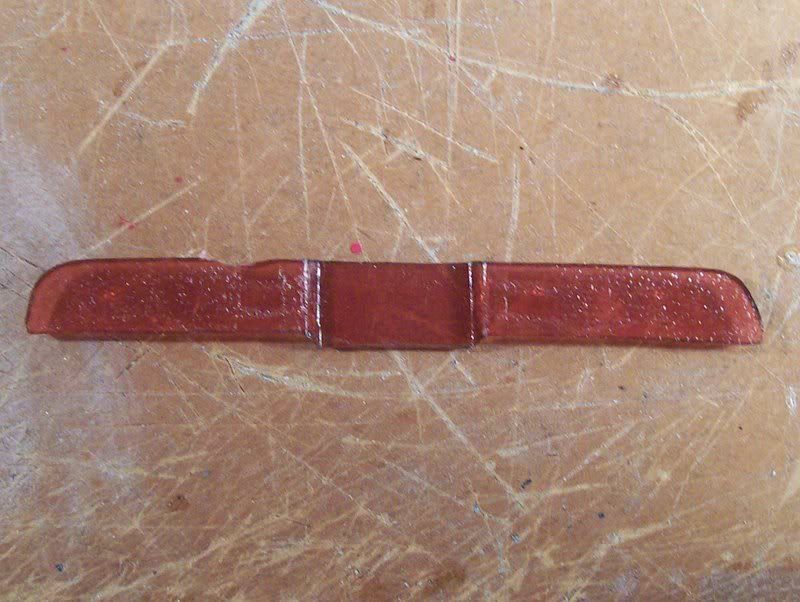
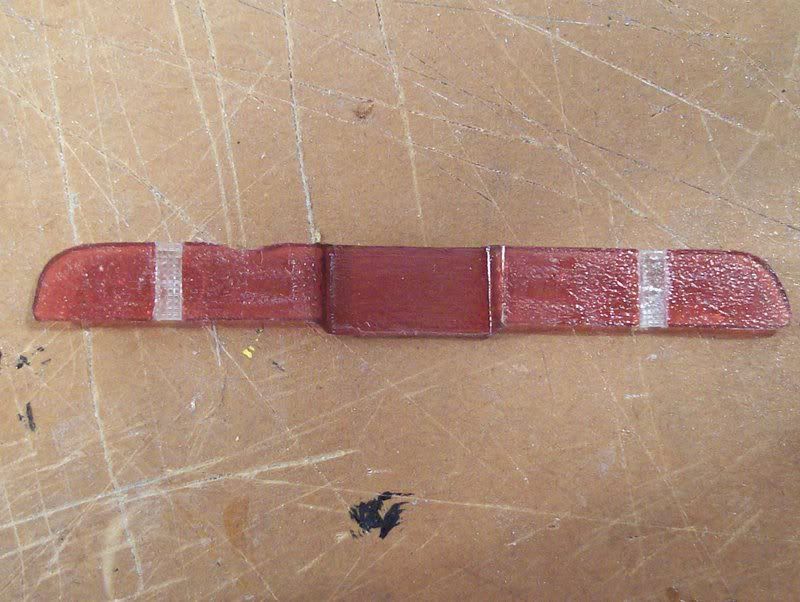
 Here are some of the engine bay panels I scratched. The orange ones are fillers between the fenders and wheel wells; the black one is the front nose panel to which the latch panel bolts. I may end up redoing these once the body is permanently installed.
 I decided to add power steering since I have power disc brakes. This pump is borrowed from the 70 Monte Carlo, with a styrene bracket piece and a pulley from the spares box.
 Here are my handbuilt pulleys, P/S pump, and alternator installed to the engine.
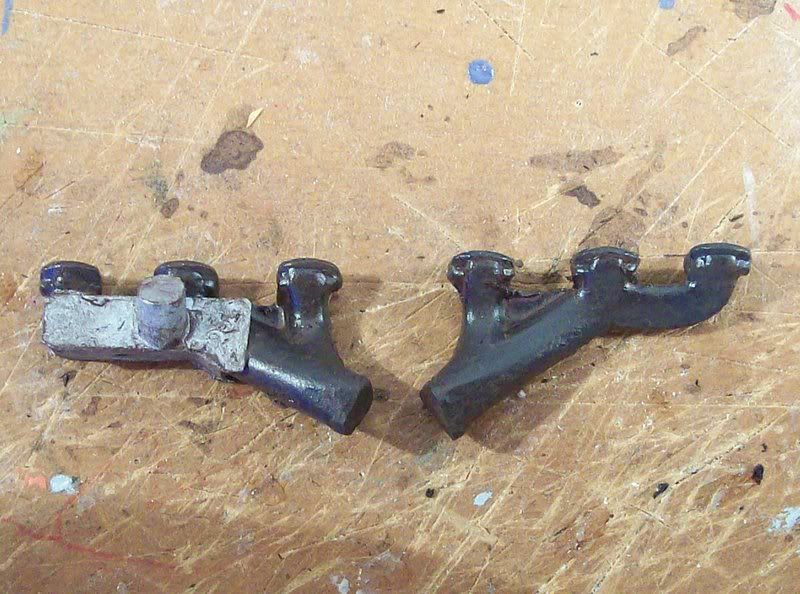
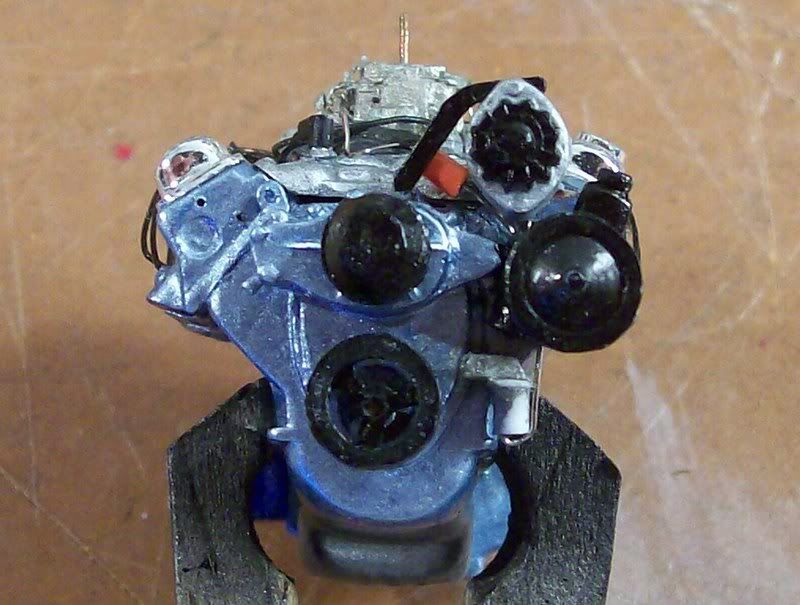 I painted and added a rust wash to my exhaust manifolds.
 Here are the manifolds and belts installed. The belts, made from masking tape, arent perfectly straight due to the sketchy installation on the accessories. However, once assembled, this will be hardly noticeable. I dont like flaws, but its hard to work with entirely scratchbuilt parts; with a scratched timing cover, water pump, and alternator bracket, I had trouble making everything fit properly.
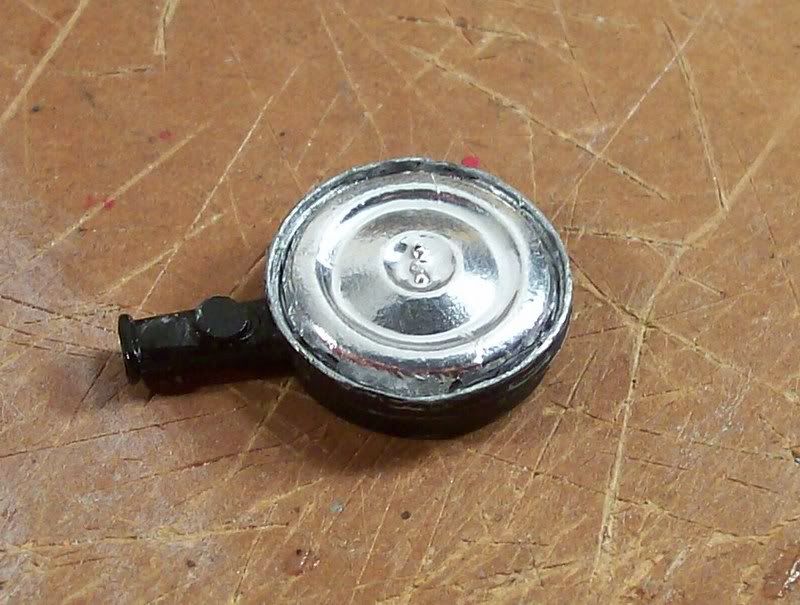
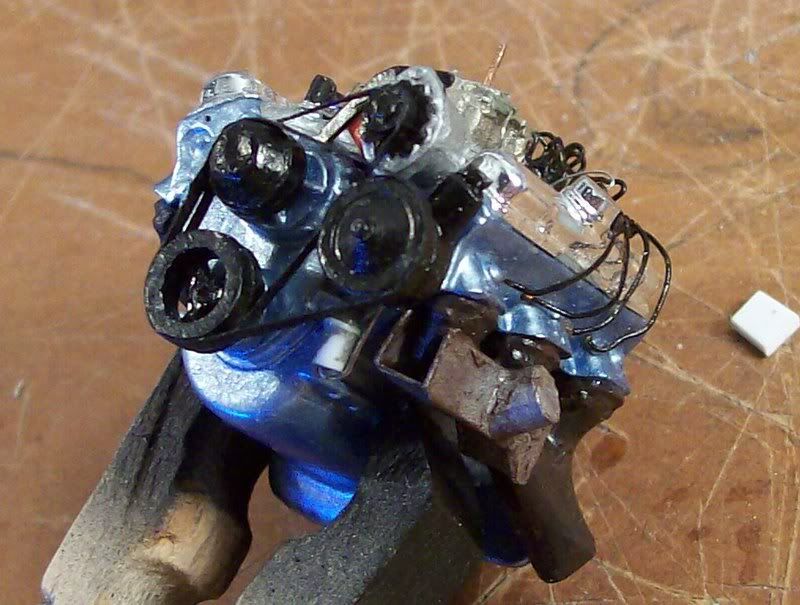 After painting my air cleaner, I learned that the 400 engines were given a chrome air cleaner cover. So I used BMF to cover it.
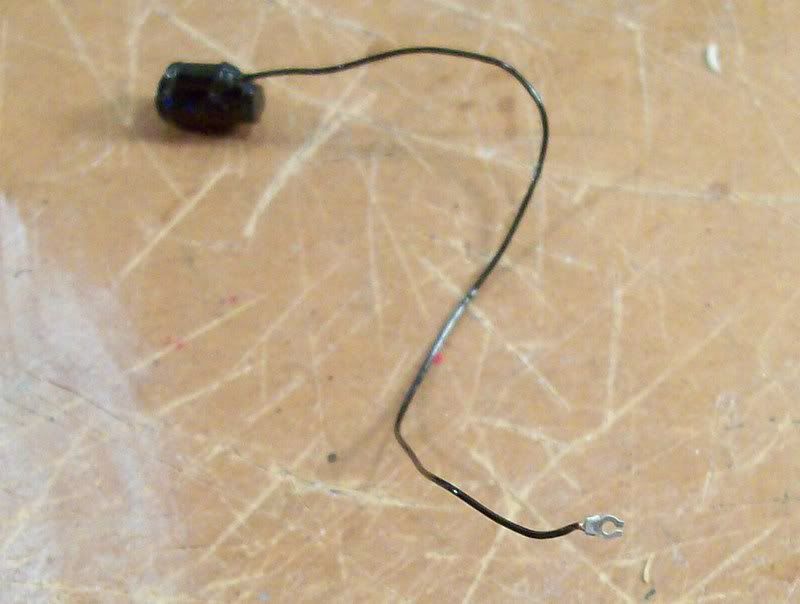
 I made the positive battery cable and attached it to the starter. I got the camera to focus on the most significant partthe photoetched clamp. This was a nice little touch.
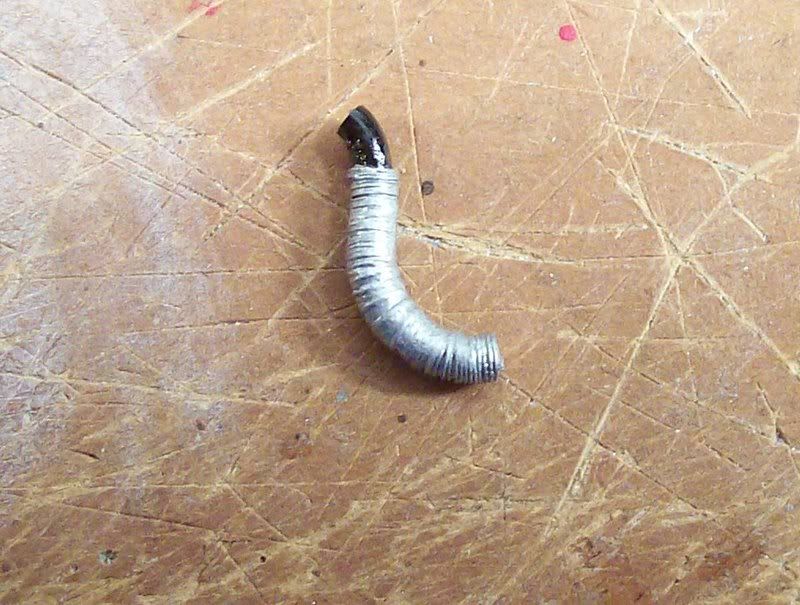
 And, finally, the heat riser tube that connects the heat stove on the exhaust manifold with the thermactor valve on the air cleaner snorkel. I bent 2mm copper wire to shape, then wrapped the lower part with .13mm wire and coated it with superglue, then painted.
 Thats all for now; however, I will soon have the engine finished, body polished, and suspension further underway, so expect some progress soon. I need to finish this within 3 weeks before I leave for college! No more modeling until Christmas break.
Thanks for looking; as always, comments, criticism, or advice is welcome.
Alex
Thats all for now; however, I will soon have the engine finished, body polished, and suspension further underway, so expect some progress soon. I need to finish this within 3 weeks before I leave for college! No more modeling until Christmas break.
Thanks for looking; as always, comments, criticism, or advice is welcome.
Alex
|