|
|
| Search | Car Forums | Gallery | Articles | Helper | Air Dried Fresh Beef Dog Food | IgorSushko.com | Corporate |
|
|||||||
| WIP - Street Post topics for any "Works In Progress" street vehicles projects in this sub-forum. |
 |
 Show Printable Version | Show Printable Version |  Subscribe to this Thread
|
|
|
Thread Tools |
|
#1
 11-29-2007, 09:07 PM
|
||||
|
||||
|
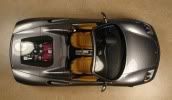
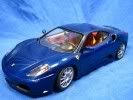
Ferrari 360 Modena, fully open
My last build was pretty much glue and paint, so in the spirit of learning, this one will be a little bit more ambitious with some mods, scratch building and PE work. No lathe yet
 So here is my attempt at the Tamiya Ferrari 360 Modena + Crazy Modeler PE with some detailing and open doors and trunk (is trunk the right name given it's at the front of the car?). This is the kit that got me into this insanity in the first place. For that story, as told in intro to my previous build, see here. So here is my attempt at the Tamiya Ferrari 360 Modena + Crazy Modeler PE with some detailing and open doors and trunk (is trunk the right name given it's at the front of the car?). This is the kit that got me into this insanity in the first place. For that story, as told in intro to my previous build, see here. You will recognise some familiar ideas from other builds on AF. Much kudos to those guys (MPWR, gionc, 360spider, etc), and to everyone here for the superb artistry and entertainment you give to all of us. This is my first WIP, so please let me know if it's boring, too detailed, not enough detail, needs more jokes, etc  Oh, and um, I've already made a lot of progress on this build, so I will be playing catch up for a little while... Oh, and um, I've already made a lot of progress on this build, so I will be playing catch up for a little while...This was going to be a simple build, but in examining this brilliant Tamiya kit carefully I realised that the doors can be cut out and reassambled outside the body with some scratch built frames for both the doors and the body shell. Here I am checking the feasibility of cutting out the doors. I was mainly concerned with how I would put the window in and how it would all fit back into the chassis, hinging details, etc. 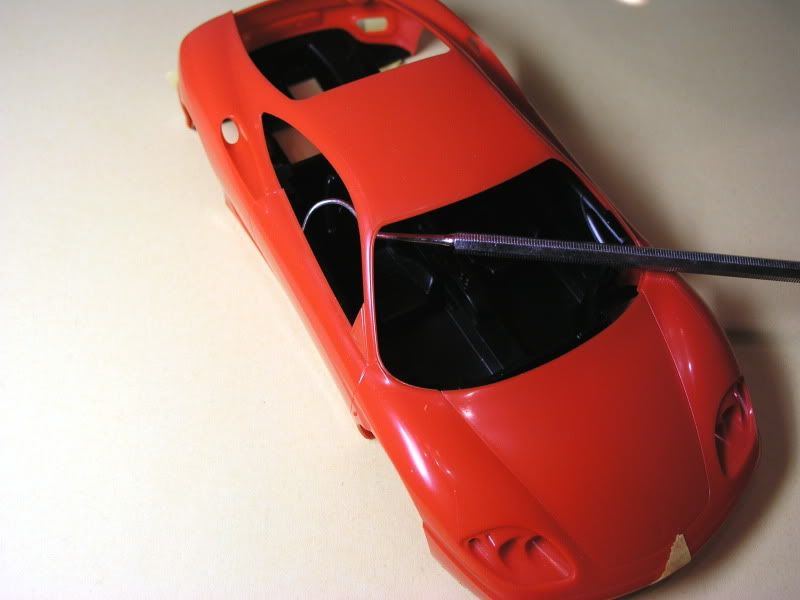 Here's a close up showing how the interior and exterior panels match up. There is a nice place in there where the window can be attached. 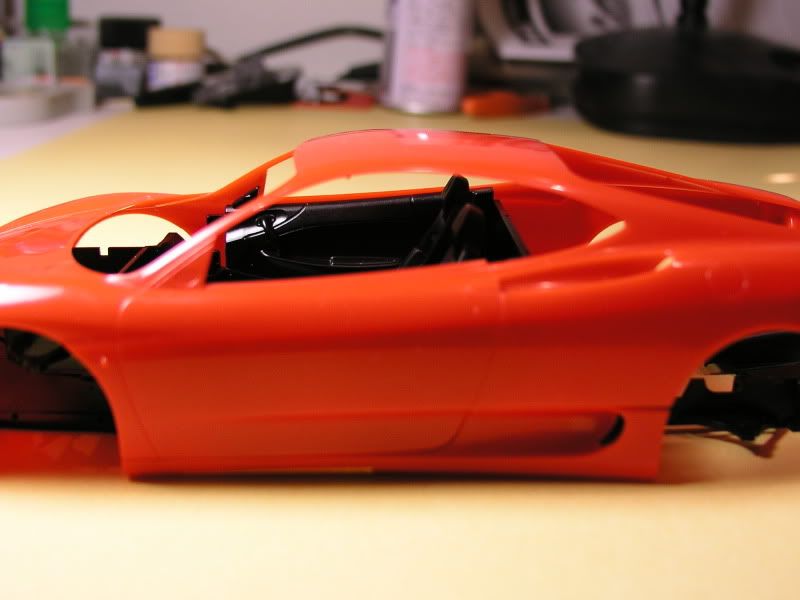 This one shows the area at the front of the interior panel - it will need to be reconstructed/filled in to complete the door. 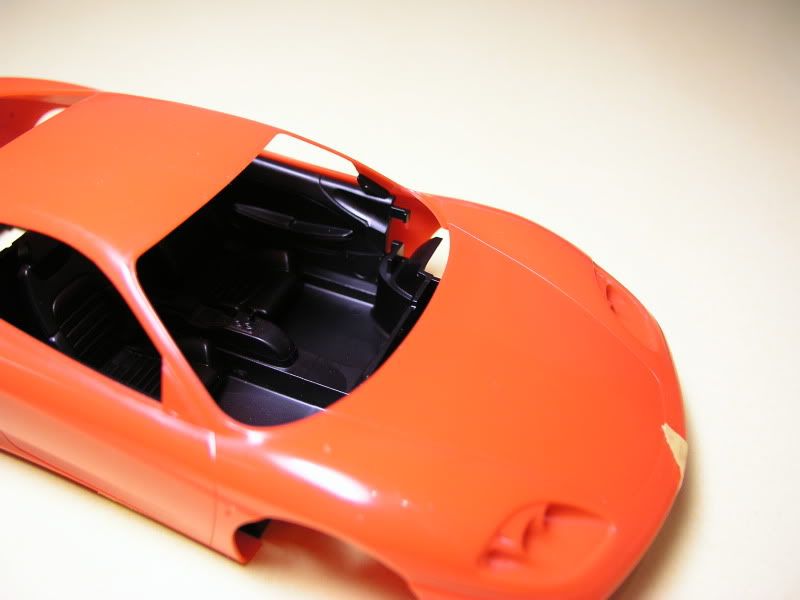 The interior door panel, beautifully detailed. It's pretty easy to cut this out of the tub. 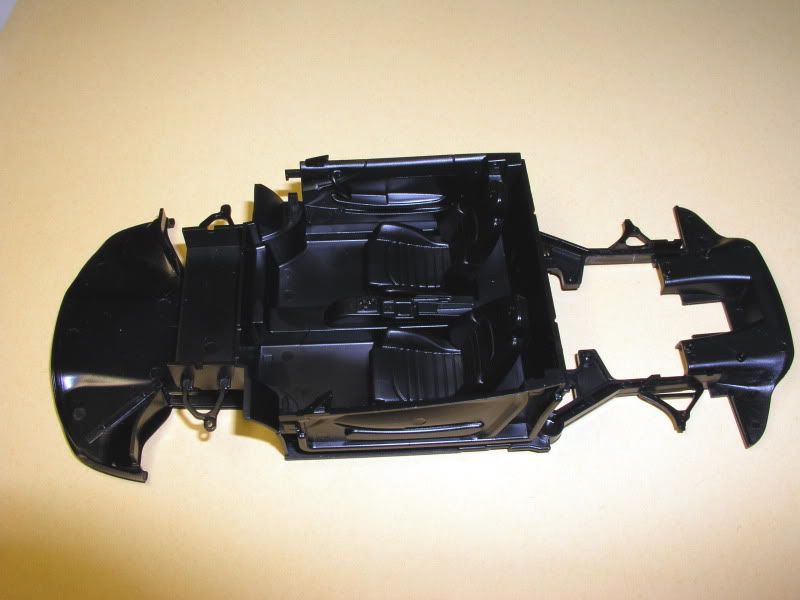 So I've decided to go ahead. But I need something to hold the body together when I cut the doors out. Turns out there is a very neat solution to this problem  Firstly, as Gio pointed out, the lower rear intakes look like total crap on this kit - this absolutely must be fixed. I started by removing the rear wheel wells, which will actually make lots of things easier and more sensible imho (painting, scratch work, final assembly, etc). 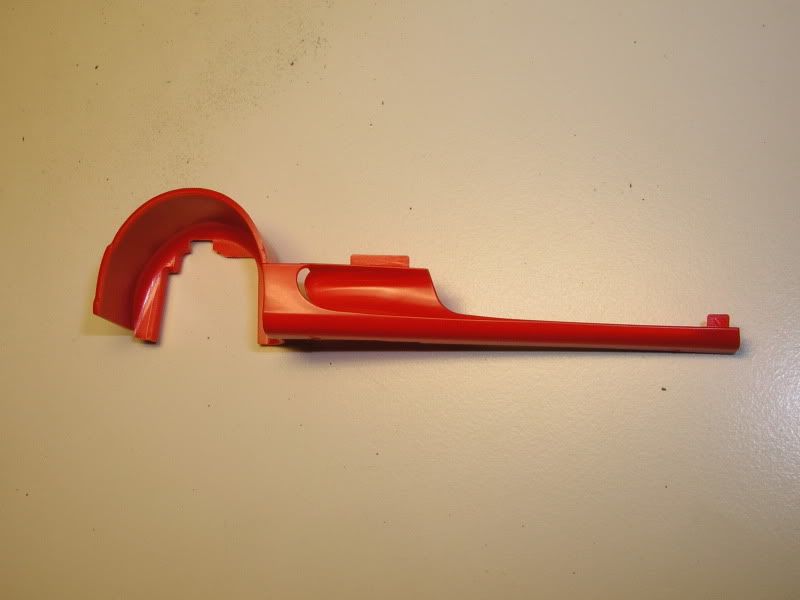 Wheel wells gone. Look at those lousy intake ducts...   Fixed... 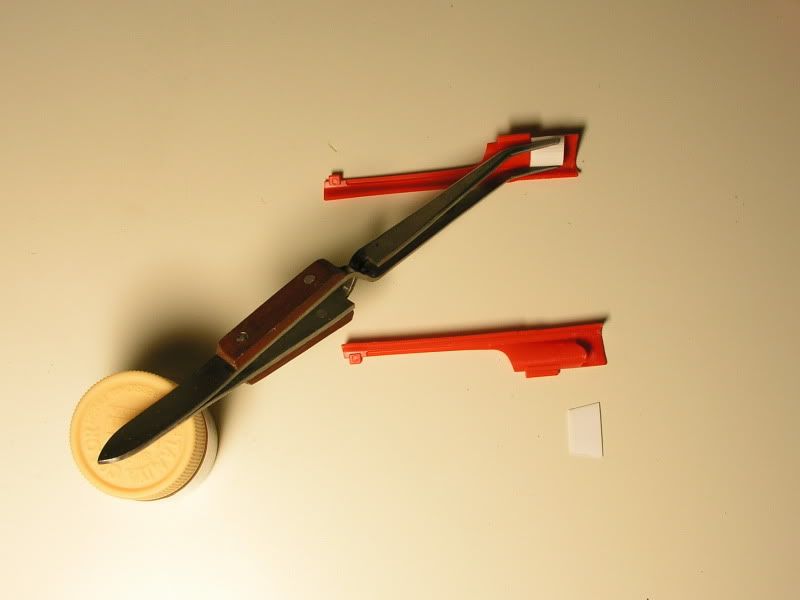 I also added a solid door sill to the skirts. This should look good on the final model (famous last words  ) )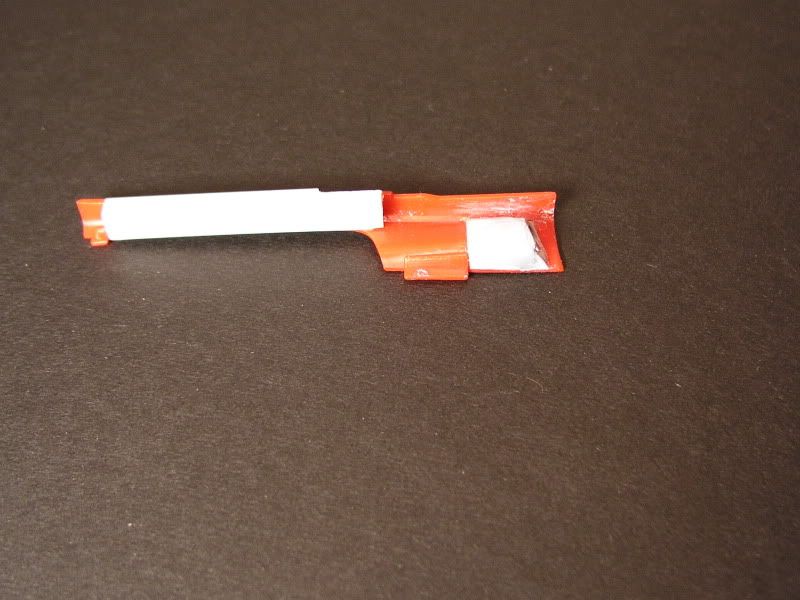 That side skirt is now extremely strong. I glued it onto the body permanently, along with an internal frame (details later). This gives the body enormous strength, allowing the doors to be cut out safely. The kit normally adds the side skirts after painting, but I prefer it this way anyway... Cutting out the second door - the point of no return has been well and truly reached. The doorless body does not flex at all. Just as well, or those flimsy A-pillars would be snapping every second day until completion  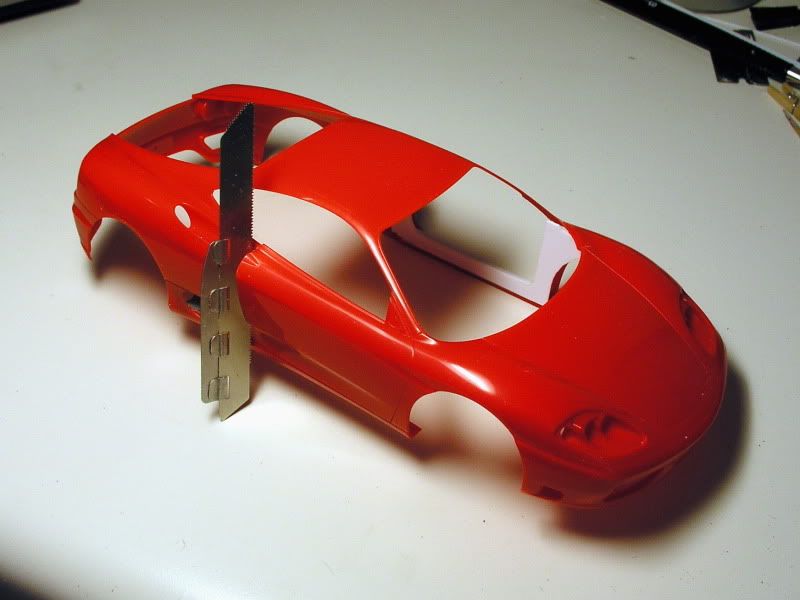 The Hasegawa PE saw set includes some great small blades, but as shown above, the cut out for the door falls in a single plane (yes, it really does - this is significant...), so the larger saw is perfect for the job. 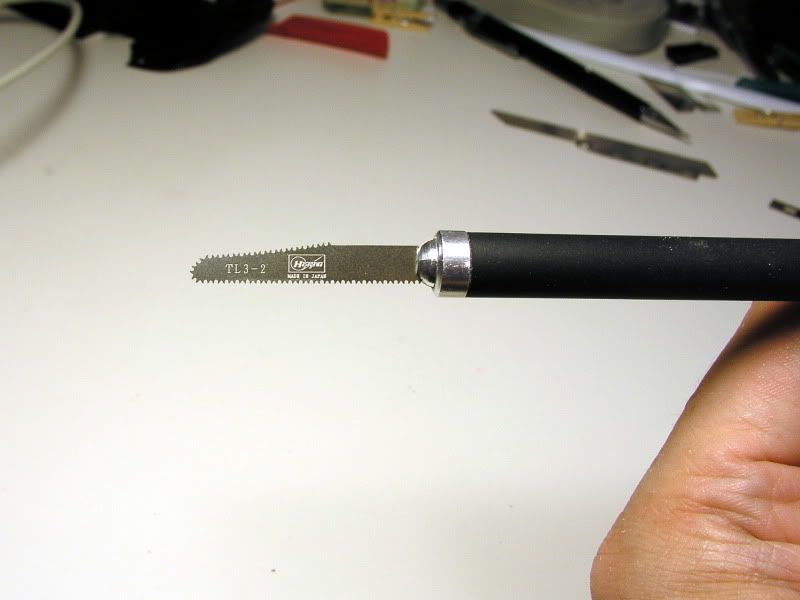 And of course we'll have to cut the window in half like this: 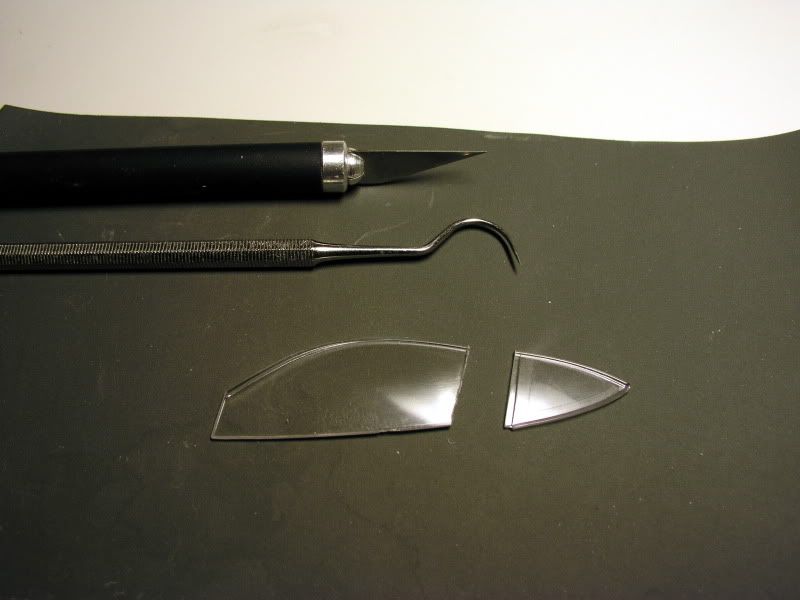 Looking good. 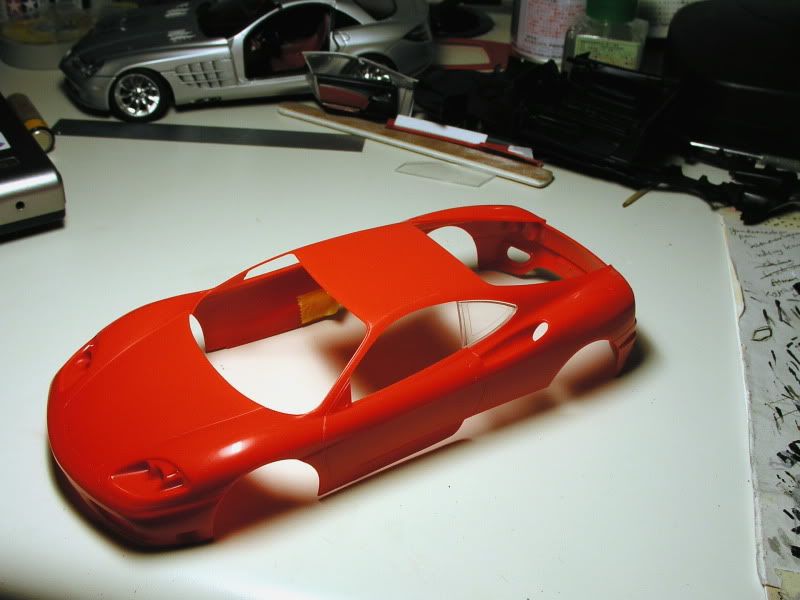 To be continued...

|
|
#3
11-30-2007, 03:36 AM
|
||||
|
||||
|
Re: Ferrari 360 Modena, fully open
brilliant work of a master!
fine execution & methodic approach! for sure i'll be 'leeching' onto you on this one... i'm a 100% ferrari freak!!! keep posting! marc SGP
__________________
I can feel the adredalin, the same adredalin of what it's like... to be a classic ferrari coachbuilder.
|
|
#4
11-30-2007, 08:53 AM
|
|||
|
|||
|
Re: Ferrari 360 Modena, fully open
I don't like Ferrari much, but seems you are doing a great job! MORE!
__________________
There is a very fine line between "hobby" and "mental illness." 
|
|
#5
11-30-2007, 10:20 AM
|
||||
|
||||
|
Re: Ferrari 360 Modena, fully open
Aren't you going to run into fitment problems with the "sills"?! Those are not part of the interior I think. I could be wrong, but place the undertray back and see where they line up. Just doesn't seem necessary. Great idea though and I will follow intently. As a complete Ferrari fan anything "prancing" on the boards is for me.
|
|
#7
12-02-2007, 06:25 PM
|
|||
|
|||
|
Re: Ferrari 360 Modena, fully open
You don't see many 360s on here often. So nice when someone does any Ferrari. Keep this build going buddy.

|
|
#8
12-02-2007, 09:52 PM
|
||||
|
||||
|
Re: Ferrari 360 Modena, fully open
Thanks for showing interest and all the encouragement guys.
EnzoEnvy1, thanks for the great question. The sills serve a few purposes. They provide much needed strength; the internal frames are glued to them; and most importantly, they form the visible sill at the base of door well, just like you would see in a real 360. Hopefully these pics will make it a bit clearer. The sills sit above the lower chassis, there is no interference there. Here's the doorless tub. It's a simple crate-like shape which the body shell will just slide onto. 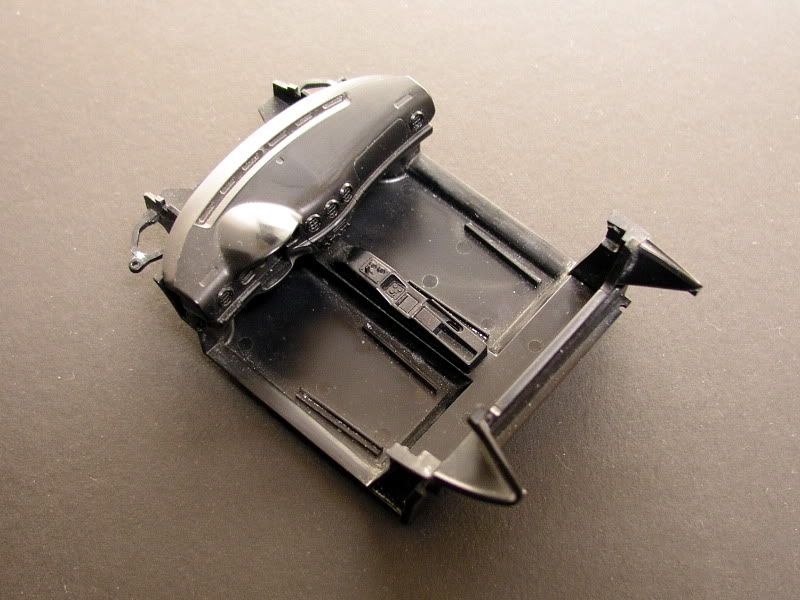 Here is one door frame complete - you can see the sills here. The rest of the door framing is glued to the sills and the body shell. 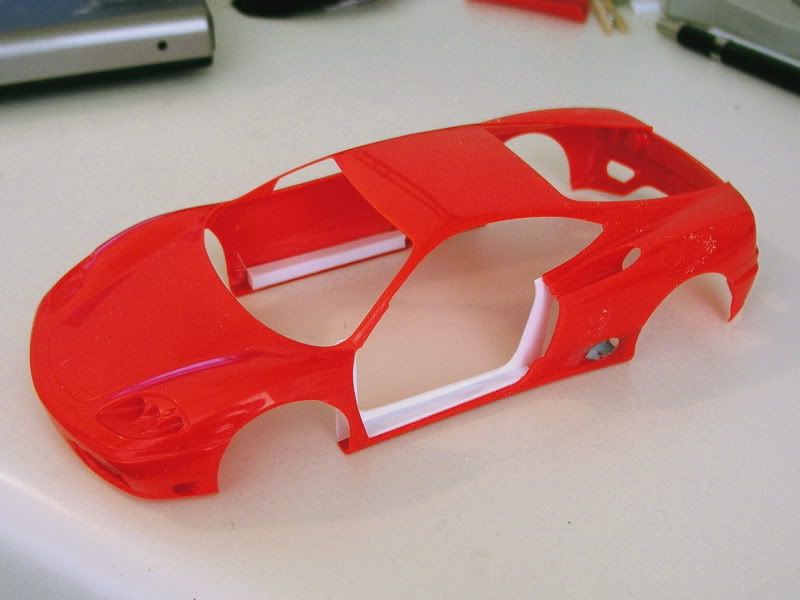 Notice that the A pillar has a vestige of the roof gutter on it. I'll address that below... Here's the real thing. I'll build up the shape of the sill as seen here.  Now, the doors. They need framing similar to the door well frame in the body shell. Starting with some simple blocks to glue the frame onto... 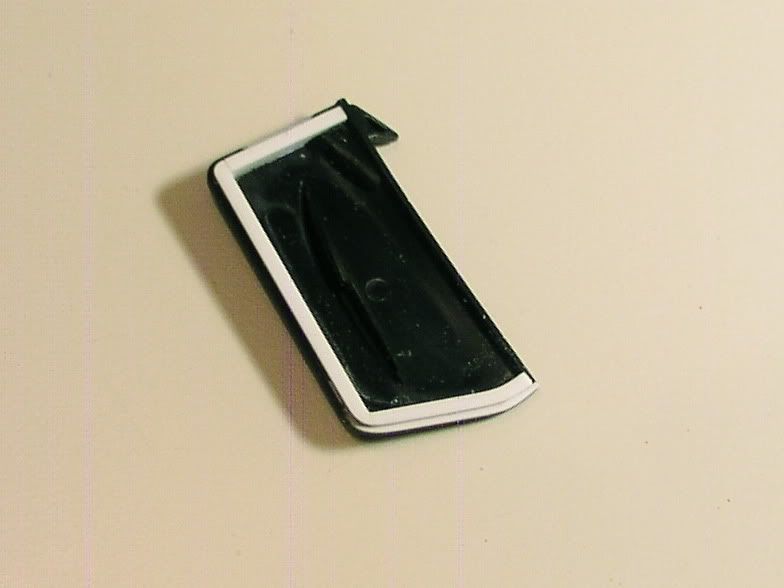 Then the door frame itself, from one piece (this piece has a really odd shape when laid flat because it twists as it turns the corners). 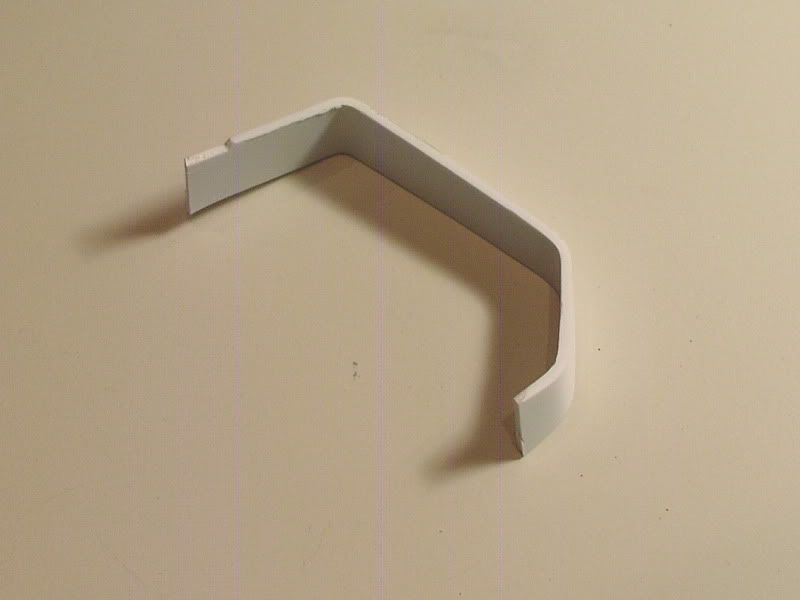 (the weird purple streaks and graininess in some of these pics is due to my camera screwing up) This frame is glued to the internal door panel and then fitted into the body so as to get its outer shape correct... 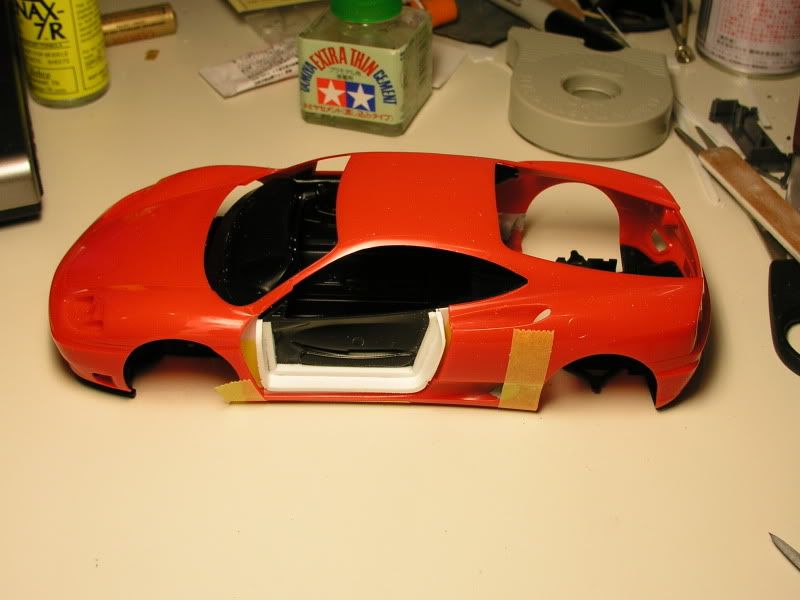 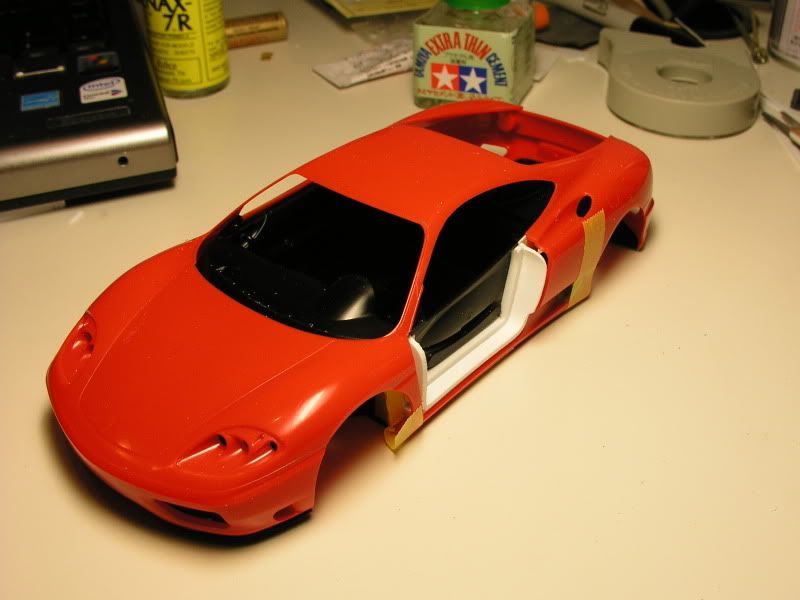  Now that the frame has the right shape, I can attach the outside of the door.  And of course, the trunk lid is begging to be cut out. You can see that I've added in the roof gutter here. It stops where it will meet the rear window. 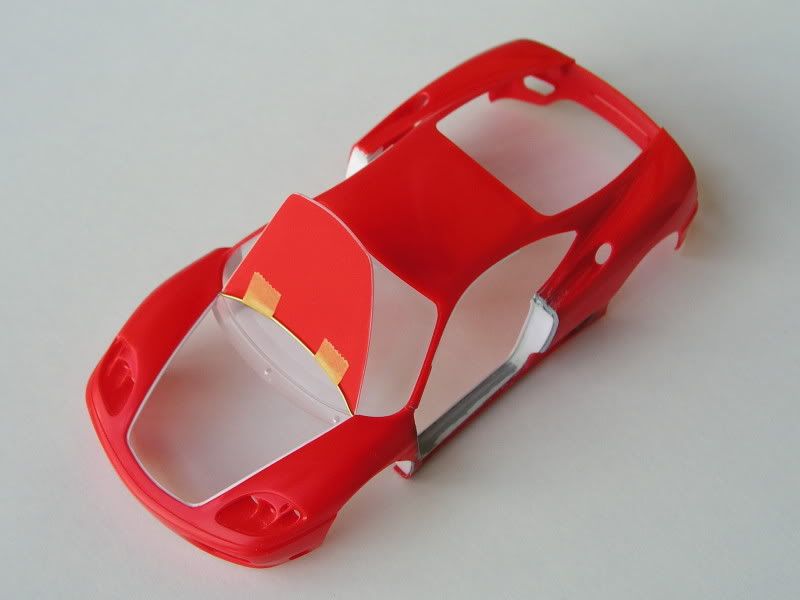 I got a nice bonus here - the windshield is now a simple clip in fit. It's resting on the door frame. The fit is perfect and the final thing will not require any glue (amazing!!)  The brass rod hinge is temporary, it can't stay like that because it would foul the wipers. The brass rod hinge is temporary, it can't stay like that because it would foul the wipers.From below - notice where the sills sit, how they will be above the chassis. Also, note how the windshield sits on the frames.  Checking the fit of the doors:  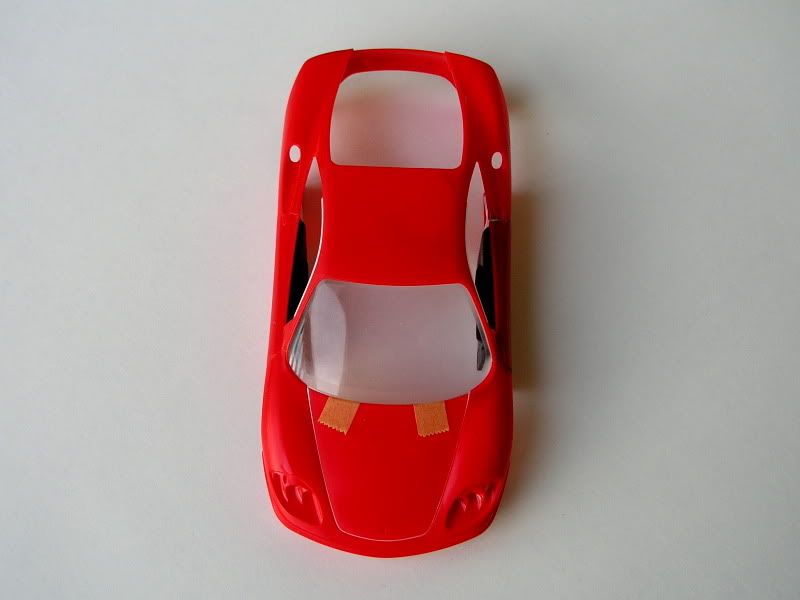 They fit great! I swear Tamiya designed this kit for this mod. Now for some priming. Yeh 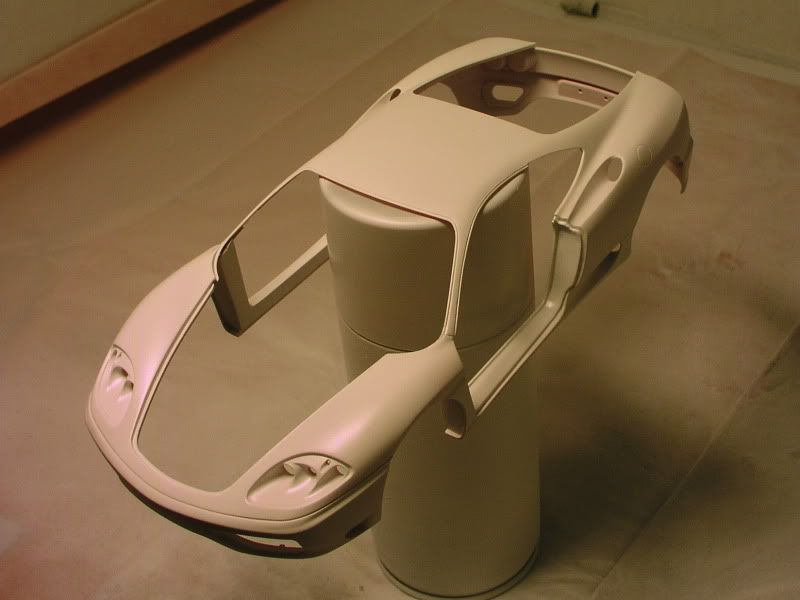 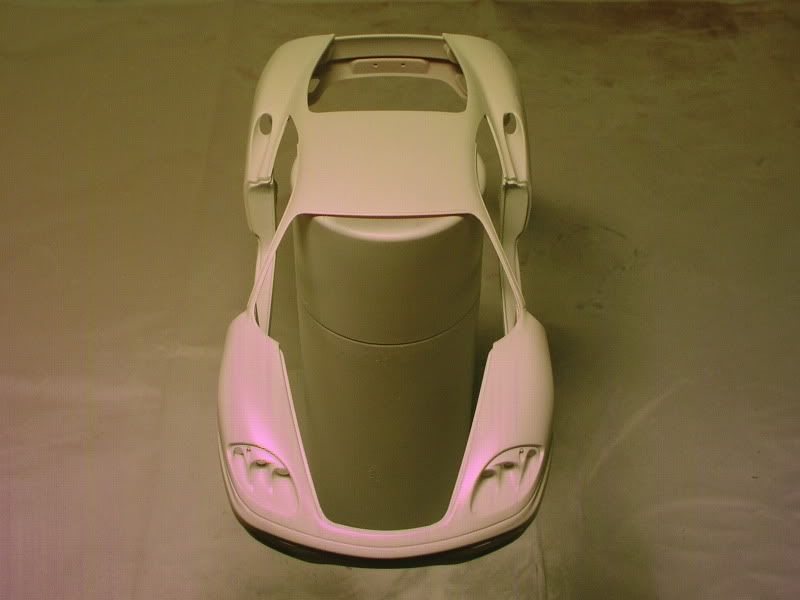  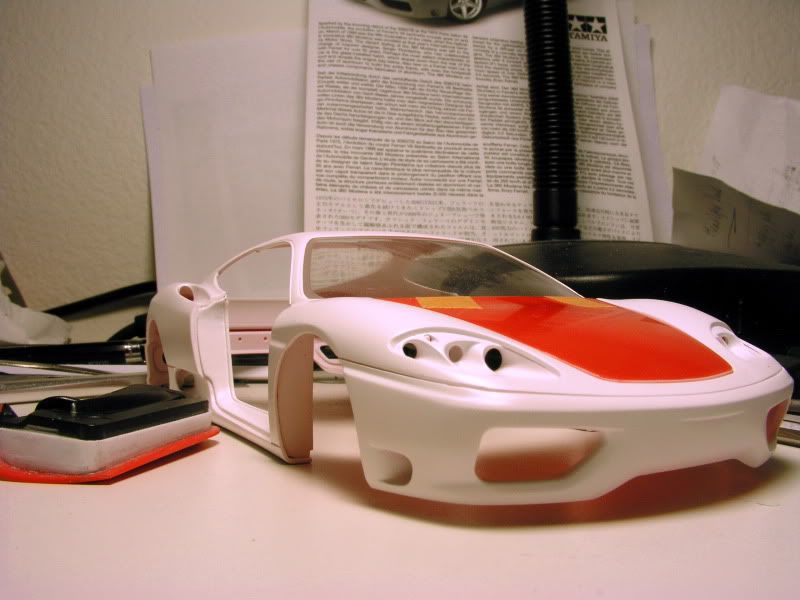 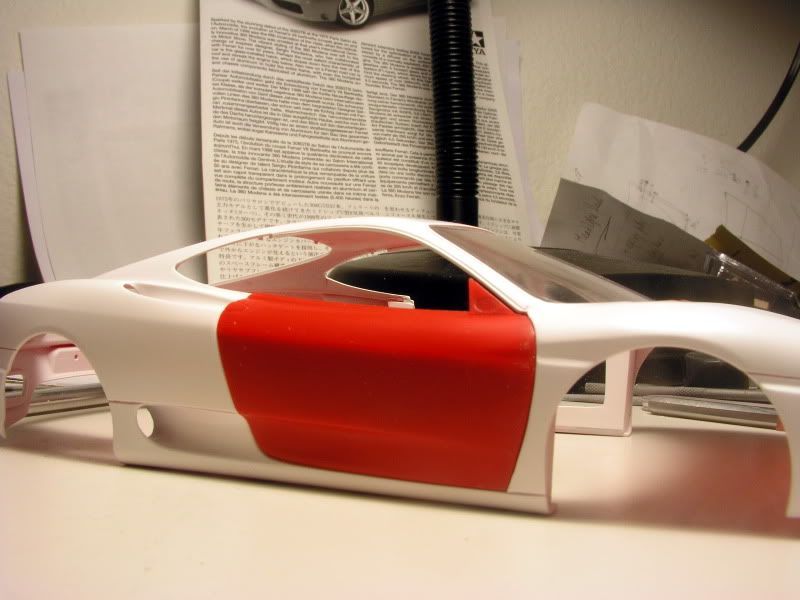 And some details of the door hinges. This was very tricky to get right  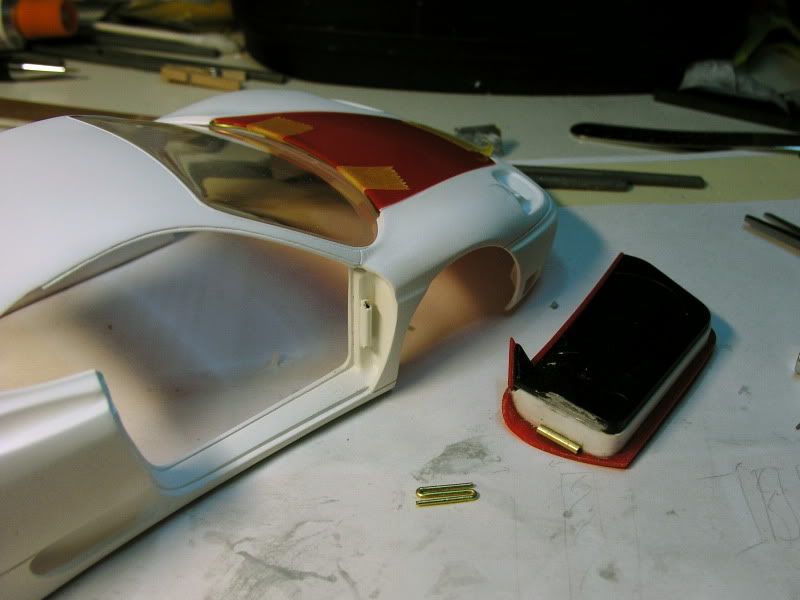  The hinge post you can see on the body side is modeled from the real car. However, I could not have a simple inline hinge set-up because the door would not open cleanly. I would have to shave the door and fender down to .2mm for that to work, and still there would be issues with the thickness of the hinge tubes, etc. Instead I created an articulated hinge. The tubes are separated and linked by the s-shaped wire. This allows the door to swing back slightly as it opens giving the required clearance at the fender. The little notch at the top of the body tube controls how much the hinge articulates. The result is that the doors open and close smoothly and the open and closed positions are "perfect". I'll show some better shots of the doors in the open position later. That's it for this update. I forgot to take some important pics here, but hopefully it's clear what's going on  Till next time  opcorn: opcorn:
|
|
#9
12-02-2007, 10:01 PM
|
||||
|
||||
|
Re: Ferrari 360 Modena, fully open
Excellent Work!!! As much as I love this kit OOB, it was still screaming for more detail, and you sir are doing a fine job at getting that detail done! looking forward to seeing more.
__________________
Adam Carvalho 
|
|
#10
12-02-2007, 10:30 PM
|
||||
|
||||
|
Re: Ferrari 360 Modena, fully open
My previous question is now officially stricken from the record.
Damn this is good stuff. I want to open my CS's doors and hood now. You make it look so easy but I am betting there is a lot of time there. Looks great. Besides the Enzo, I think this is Tamiyas most well built and executed models period. Great work!!!
|
|
#12
12-02-2007, 11:46 PM
|
|||
|
|||
|
Re: Ferrari 360 Modena, fully open
Woah! Interesting take on those door hinges. Probably looks great articulated, much better than the hinges I'm used to seeing. I'm looking forward to seeing how it turns out. This is going to be awesome.
__________________
It ain't cool 'till your wife hates it. Imagine a world without Alabama Recent builds: Rocket Bunny FR-S and stock BRZ Toyota bB Bro-style Civic K20 powered SiR converted EK WIP I build slowly and poorly. 
|
|
|
POST REPLY TO THIS THREAD |
 |
|
|


 gio
gio
