|
|
| Search | Car Forums | Gallery | Articles | Helper | Air Dried Beef Dog Food | IgorSushko.com | Corporate |
|
|||||||
| WIP - Street Post topics for any "Works In Progress" street vehicles projects in this sub-forum. |
 |
 Show Printable Version | Show Printable Version |  Subscribe to this Thread
|
|
|
Thread Tools |
|
#1
 05-06-2012, 12:18 PM
|
|||
|
|||
|
1/24 Fujimi Porsche 911 S 1972
My next build on this forum will be the roadgoing Porsche 911 S from 1972. I very much like these old Porsche 911s. This one is very special, because it was build only one year. It's the oilcap on the right backside of the car. It was often mistaken to put fuel in. So....they dropped it the next year. I'm going to use the great Fujimi enthousiast series to model the car. Here's a picture of the box.
 It's content.  This is the color I'm going to use. Viper green it's nice and retro.  In the end my goal is this.  So, lets get started.  First I always dryfit and get a feel for the model in hand.   I want the rear backside windows to be open. I gently carved it out.    At first I wanted to use the carved out windowframes. But they are very fragile. I decided to use aluminium. Before I carved out the second windowframe I made a template of it.  This was placed on a aluminiumsheet and cut it out. I used a thin saw.  It all fits nice.  For the famous oilcap/door I used this template to get the right shape and carved it in the model.  That's it for now. Eric 
|
|
#3
05-06-2012, 01:41 PM
|
|||
|
|||
|
Re: 1/24 Fujimi Porsche 911 S 1972
Nice craftsmanship! Never saw aluminium applied this way.
|
|
#4
05-06-2012, 05:11 PM
|
|||
|
|||
|
Re: 1/24 Fujimi Porsche 911 S 1972
Great WIP! Actually perfect for my taste.
 Keep on with good work, I'll be following progress for sure! Keep on with good work, I'll be following progress for sure!I am also working on the same Fujimi's model. It's far from finished, but you can check it out here: CLICK CLICK By the way, if you need any specific reference pictures, just contact me. I've got plenty of them and will be glad to share them.  Best regards Matic Last edited by matic176; 05-16-2012 at 11:54 AM.
|
|
#6
05-07-2012, 03:29 PM
|
|||
|
|||
|
Re: 1/24 Fujimi Porsche 911 S 1972
Great subject Eric! I have the Fujimi Enthusiast 911R in my stash and am considering moving on to that after the 917 is finished, so I'll be watching this one closely as you progress. Great work so far!
ianc
|
|
#7
05-09-2012, 01:44 PM
|
||||
|
||||
|
Re: 1/24 Fujimi Porsche 911 S 1972
That green is a nice color on this car. The window surrounds are a neat idea. I wonder if they will turn out symmetrical between left and right. Keep posting.
__________________

|
|
#8
07-22-2012, 03:06 AM
|
|||
|
|||
|
Re: 1/24 Fujimi Porsche 911 S 1972
After a while of not building I recently started again with the Porsche 911.
After a closer look I decided against the alu windowsurrounds. The frontwindowsurround was (for me) impossible to replicate. Maybe if I take more time, but then again I realise I don't have the right tools (plyers) and so on and I don't want to be building as long as the 917 on this one. So.....I donated the technique to the scrapbox. There are a few future projects where I'm going to use these parts. No harm done. A fresh one and now don't mess it up again  . . Didn't like the gutter-line on the roof. It's out of scale.  So, I shaved it of...  ...and is replaced with plasticstrip from Evergreen.  Fitted the new gutter and closed the hole for the right side mirror. I heated some white plastic from the sprue and pushed it into the hole. After hardening I glued it back into the hole and left drying for 24 hours. Then sanded smooth.  Some fitproblems for the headlights.  Glued plasticstrip behind it and filled the frontend with 2k Tamiya Putty.  Also the enginelid wasn't to my liking. Again I used 2k Tamiya Putty.  After drying sanded smooth.  The fitment of the headlights is spot-on now.  Enginelid sanded smooth and with better fitment to the body.  Rearbumper needed some attention to. I had to glue two little strips on each side.  Now it's okay!  I wanted the coolingfan to be open. I started sanding until I was almost through. Hold the part during sanding frequently against the light. Then it possible to see hom much further you have to sand. When you're almost through stop sanding and use a new Exactoblade to cut through.  This is more to my liking.  The body is almost ready to spraypaint the first layer of primer to check my work on the body. Eric
|
|
#9
07-22-2012, 07:07 AM
|
||||
|
||||
|
Re: 1/24 Fujimi Porsche 911 S 1972
Hi, I'm really impressed by your well detailed works!
I hope these pictures help your jobs. These are of 1984-5(?) 911SC, but could be just references for 1972's 911S. I took these photos because I am also the one who has 911S kit like you and hoping to make it someday!! And 1985 911 as well... in this creme yellow. When I make it, I'll do the same jobs on body (but the aluminum frame... maybe not, 'cause it is difficult for me), I'll sand out the lower part of front bumper 'cause I feel the section of Fujimi's is a bit too big and fat... 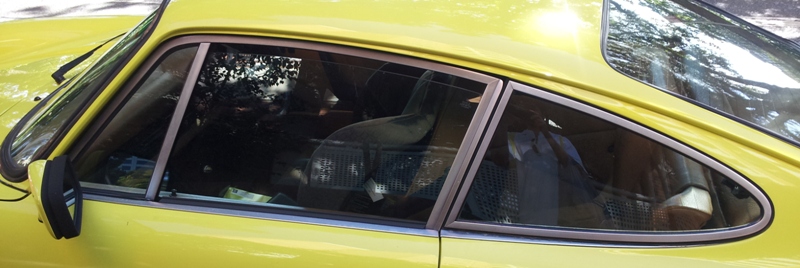 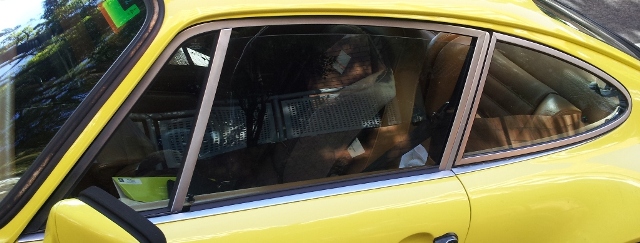 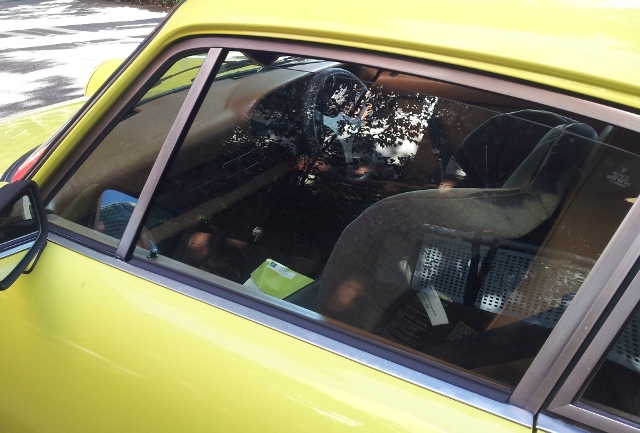 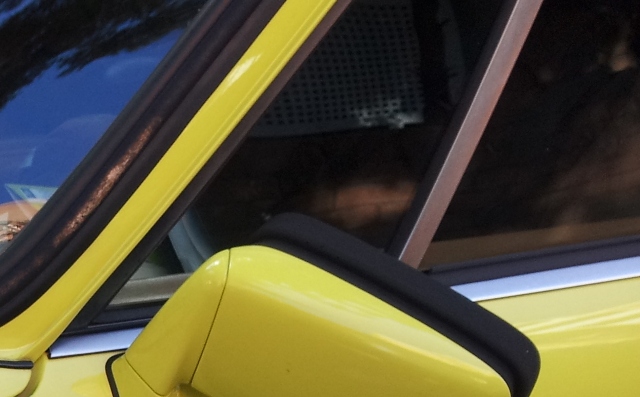 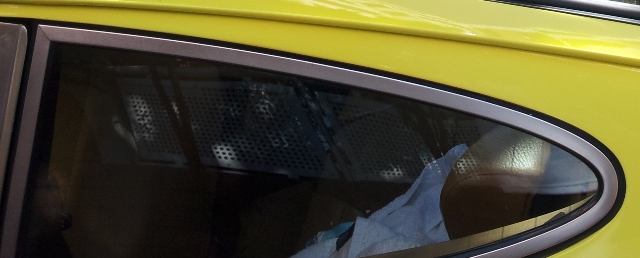 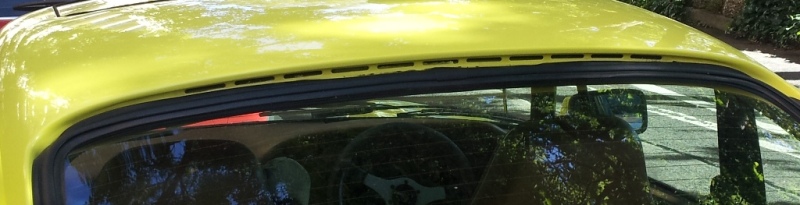 Last one is from another site. 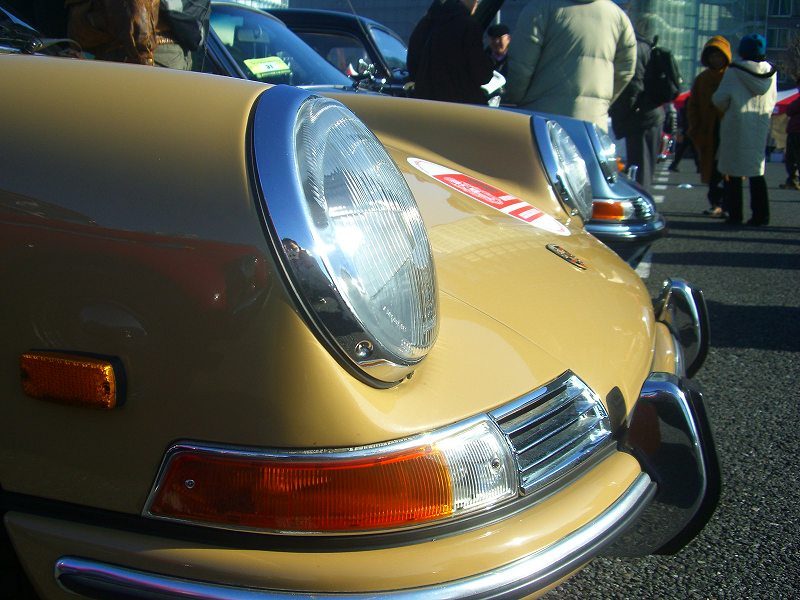 Regards,
__________________
Umihito We can learn from mistakes. 
Last edited by Umihito; 07-22-2012 at 08:02 AM.
|
|
#10
07-23-2012, 11:28 AM
|
|||
|
|||
|
Re: 1/24 Fujimi Porsche 911 S 1972
Great to see some more work going on this one Eric; I wondered if you fell in a hole!
Looking good; this one should keep you busy for a while. These Enthusiast kits have a LOT of parts; don't be tempted to paint the crankshaft and pistons... Looking forward to the next one! ianc
|
|
#11
07-24-2012, 04:16 PM
|
|||
|
|||
|
Re: 1/24 Fujimi Porsche 911 S 1972
the attention to the details is amazing. i'm sure even jeremy clarkson who "loves" the 911 would appreciate the effort
__________________
olly olly oxen free
|
|
#12
11-03-2012, 05:33 PM
|
|||
|
|||
|
Re: 1/24 Fujimi Porsche 911 S 1972
No I didn't fall into hole, but had to find some time to upload the pictures. So here's a little update on the 911.
I finished the body in primer and did some last minute polishing out some scratches. After that I sprayed layer of primer just a little wetter and let it cure for a couple of days.  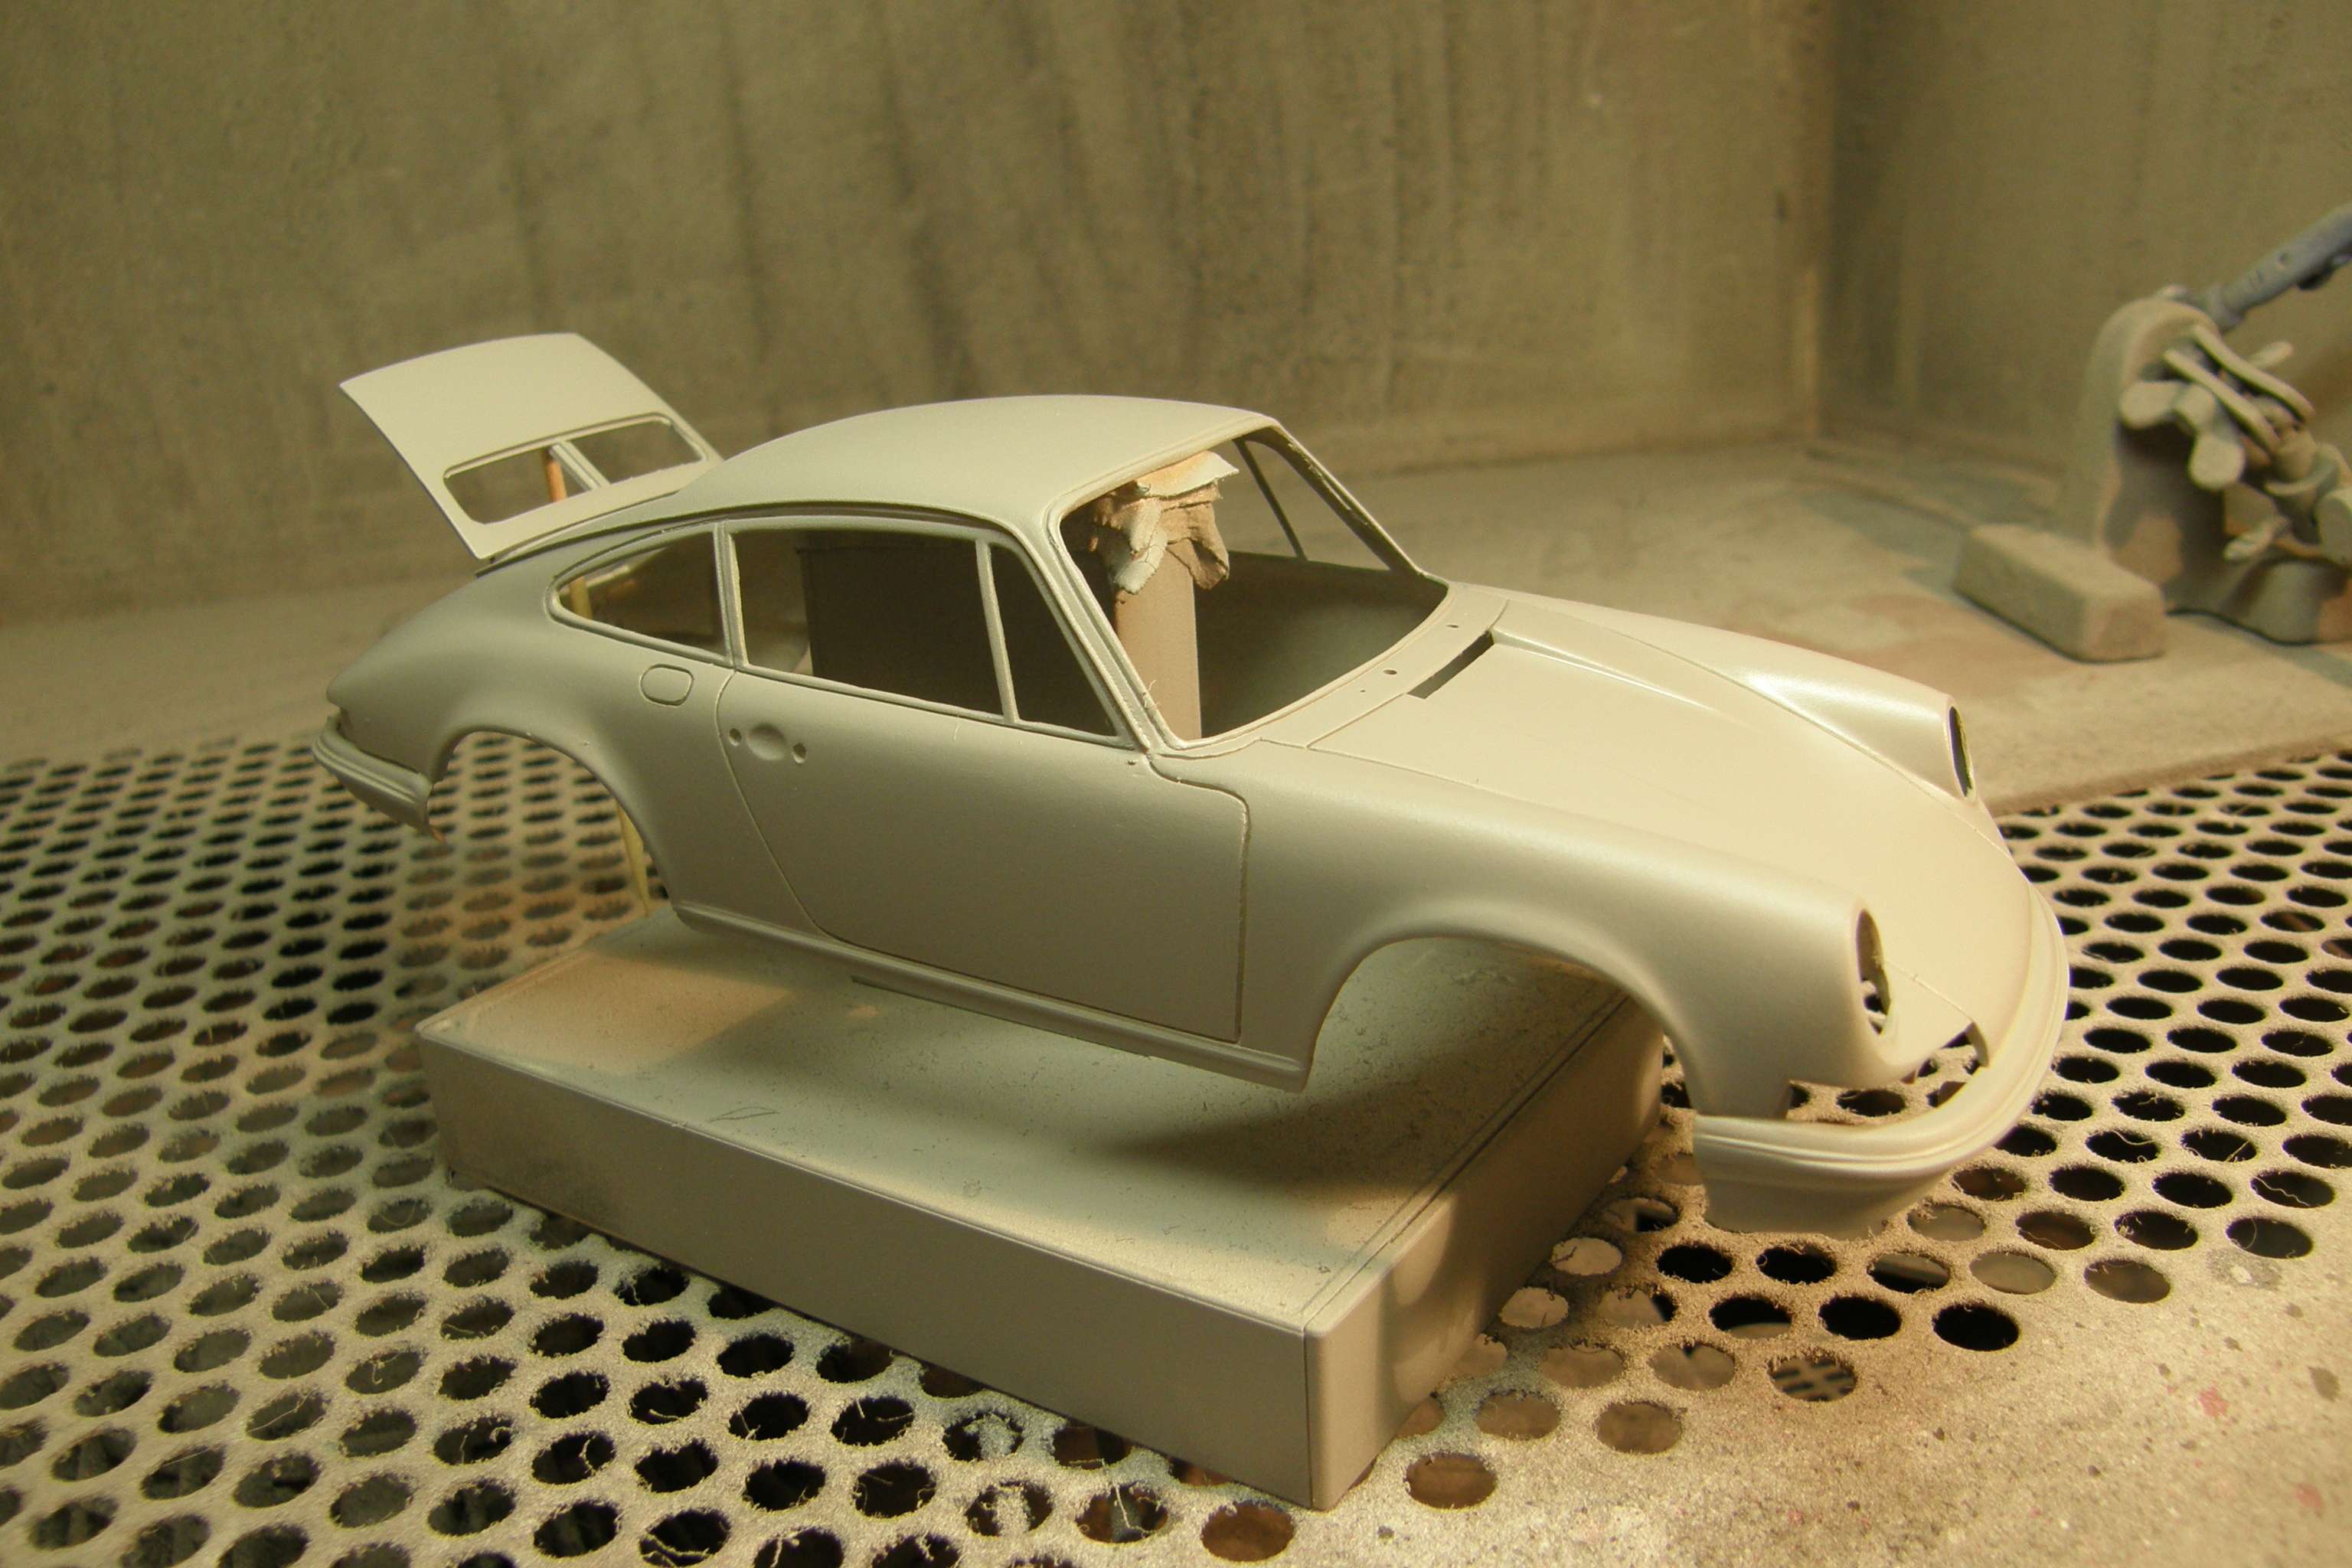 Then I sprayed the Viper Green. I mixed the paint with some harder so I can polish the paint rather then the clearcoat. 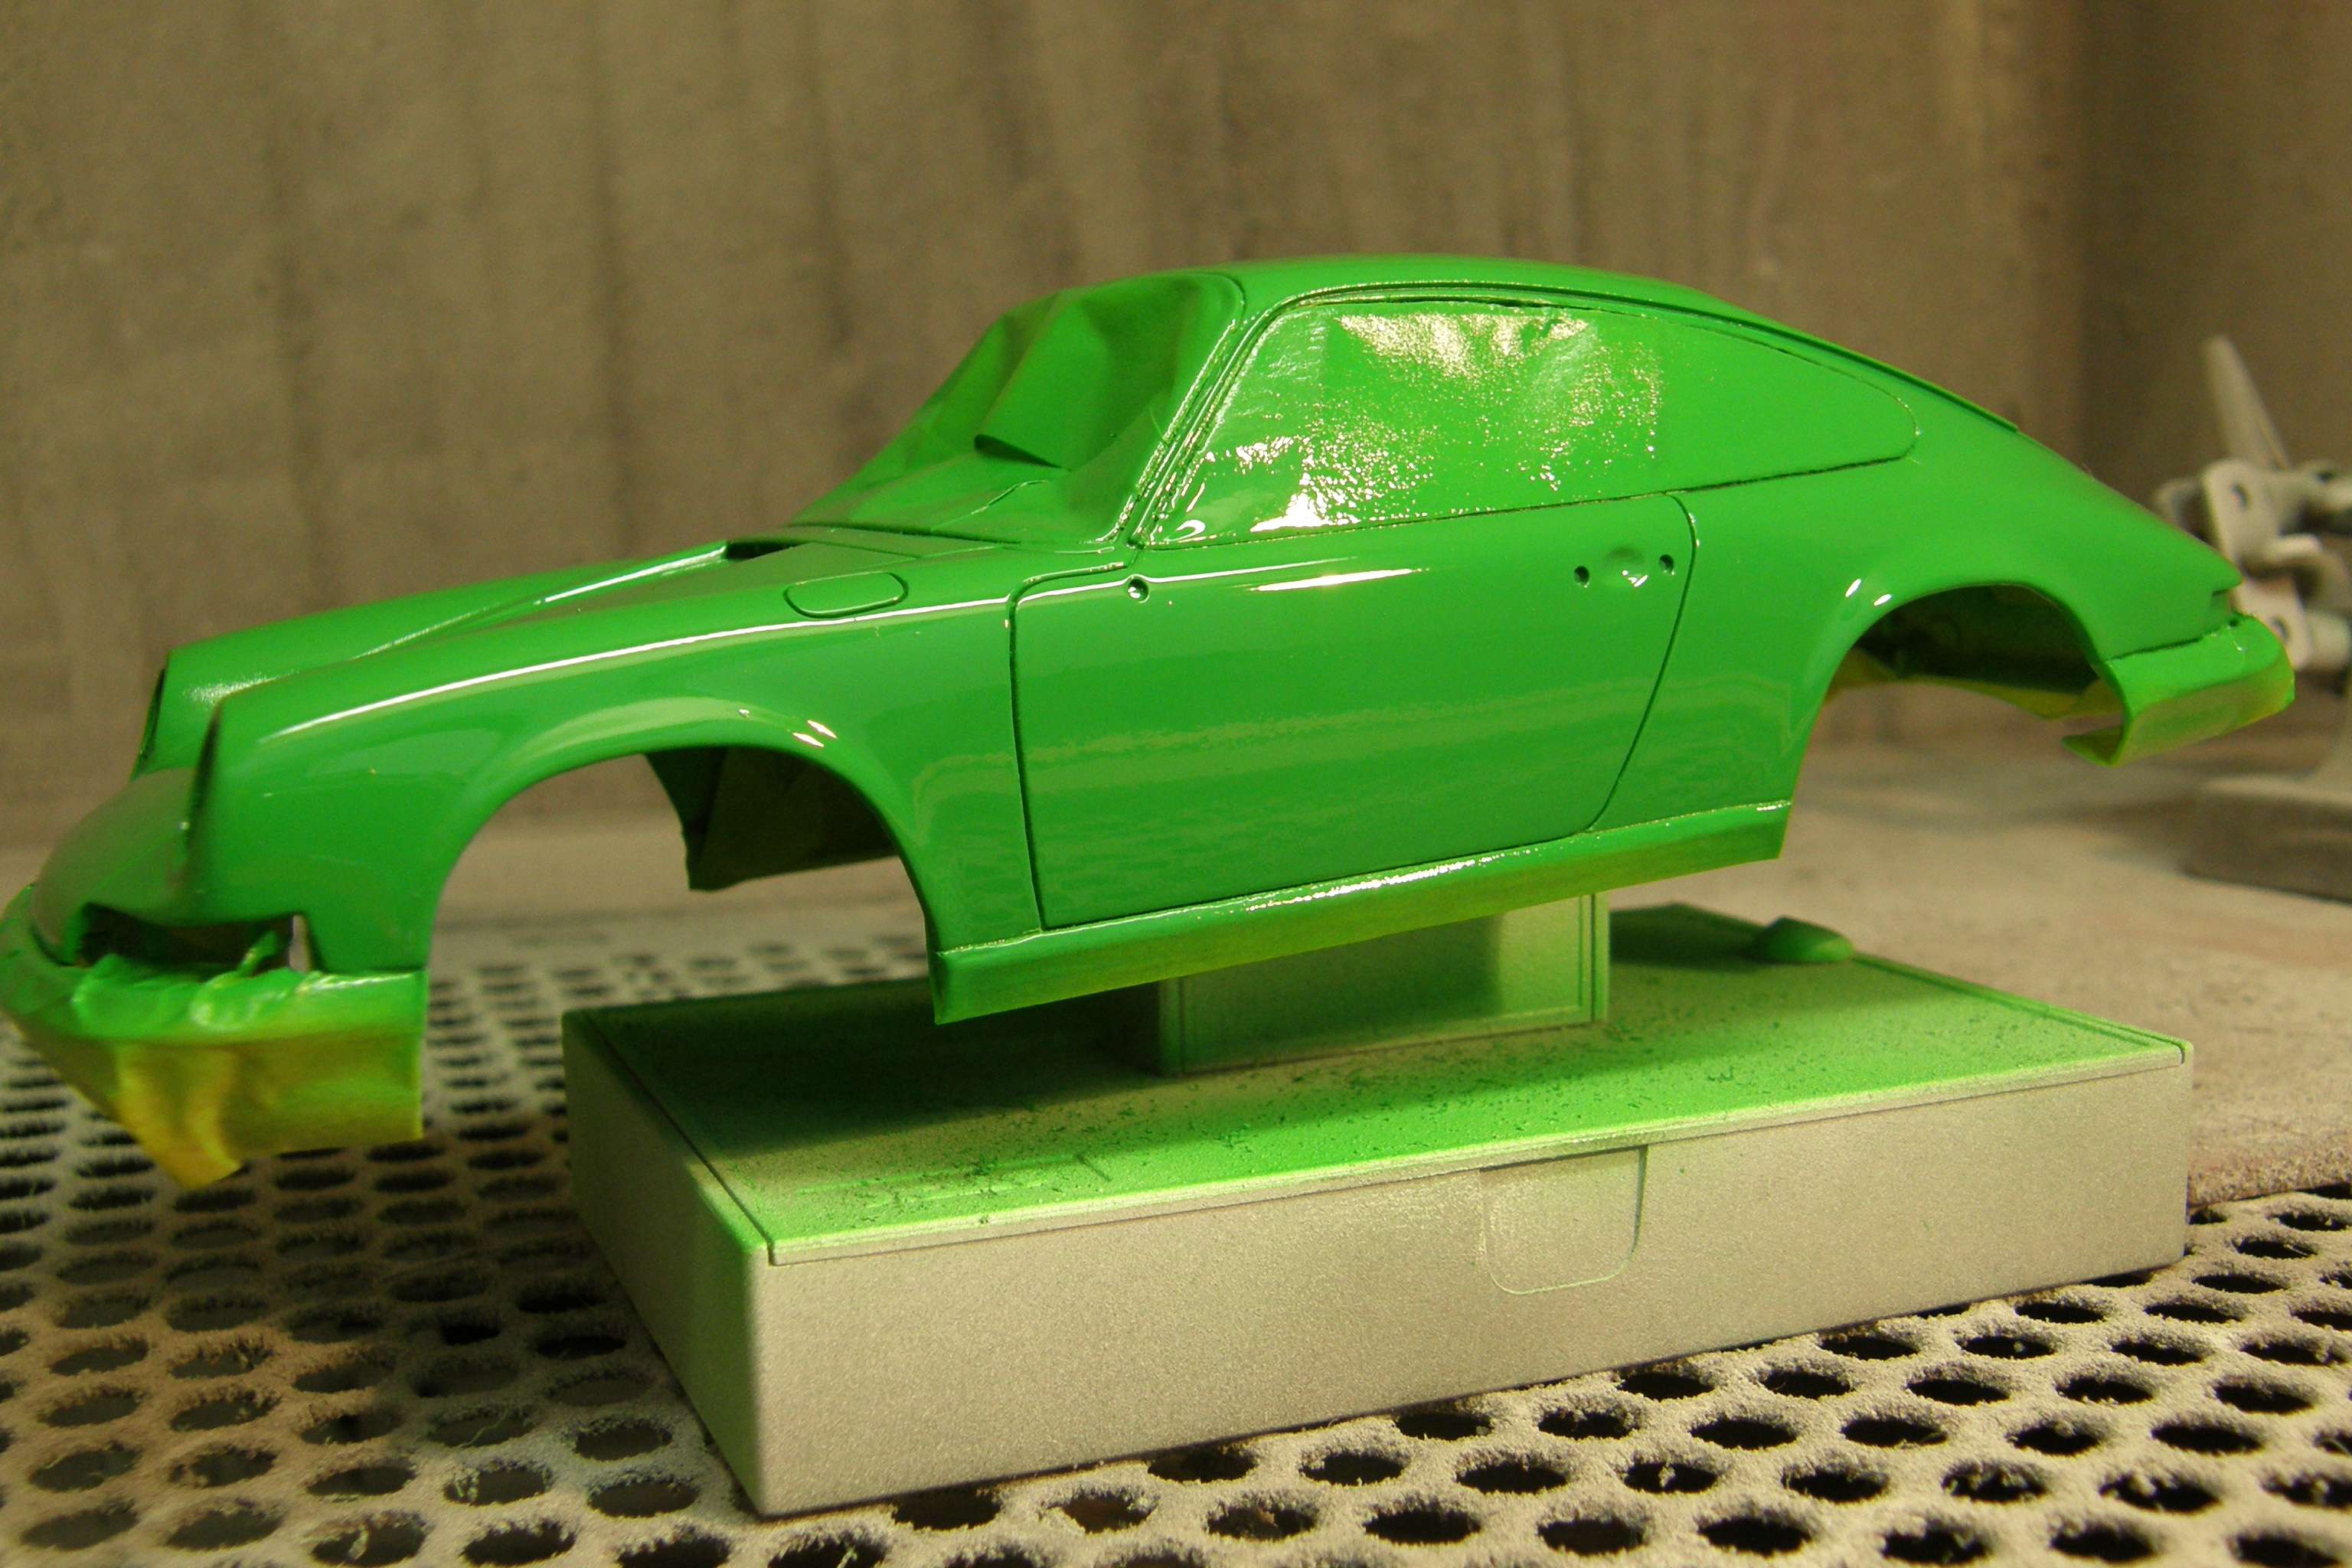 I worked on the engineparts to. Here they're all ready to recieve different shades of Alclad II. Will post pictures of the engine this weekend.  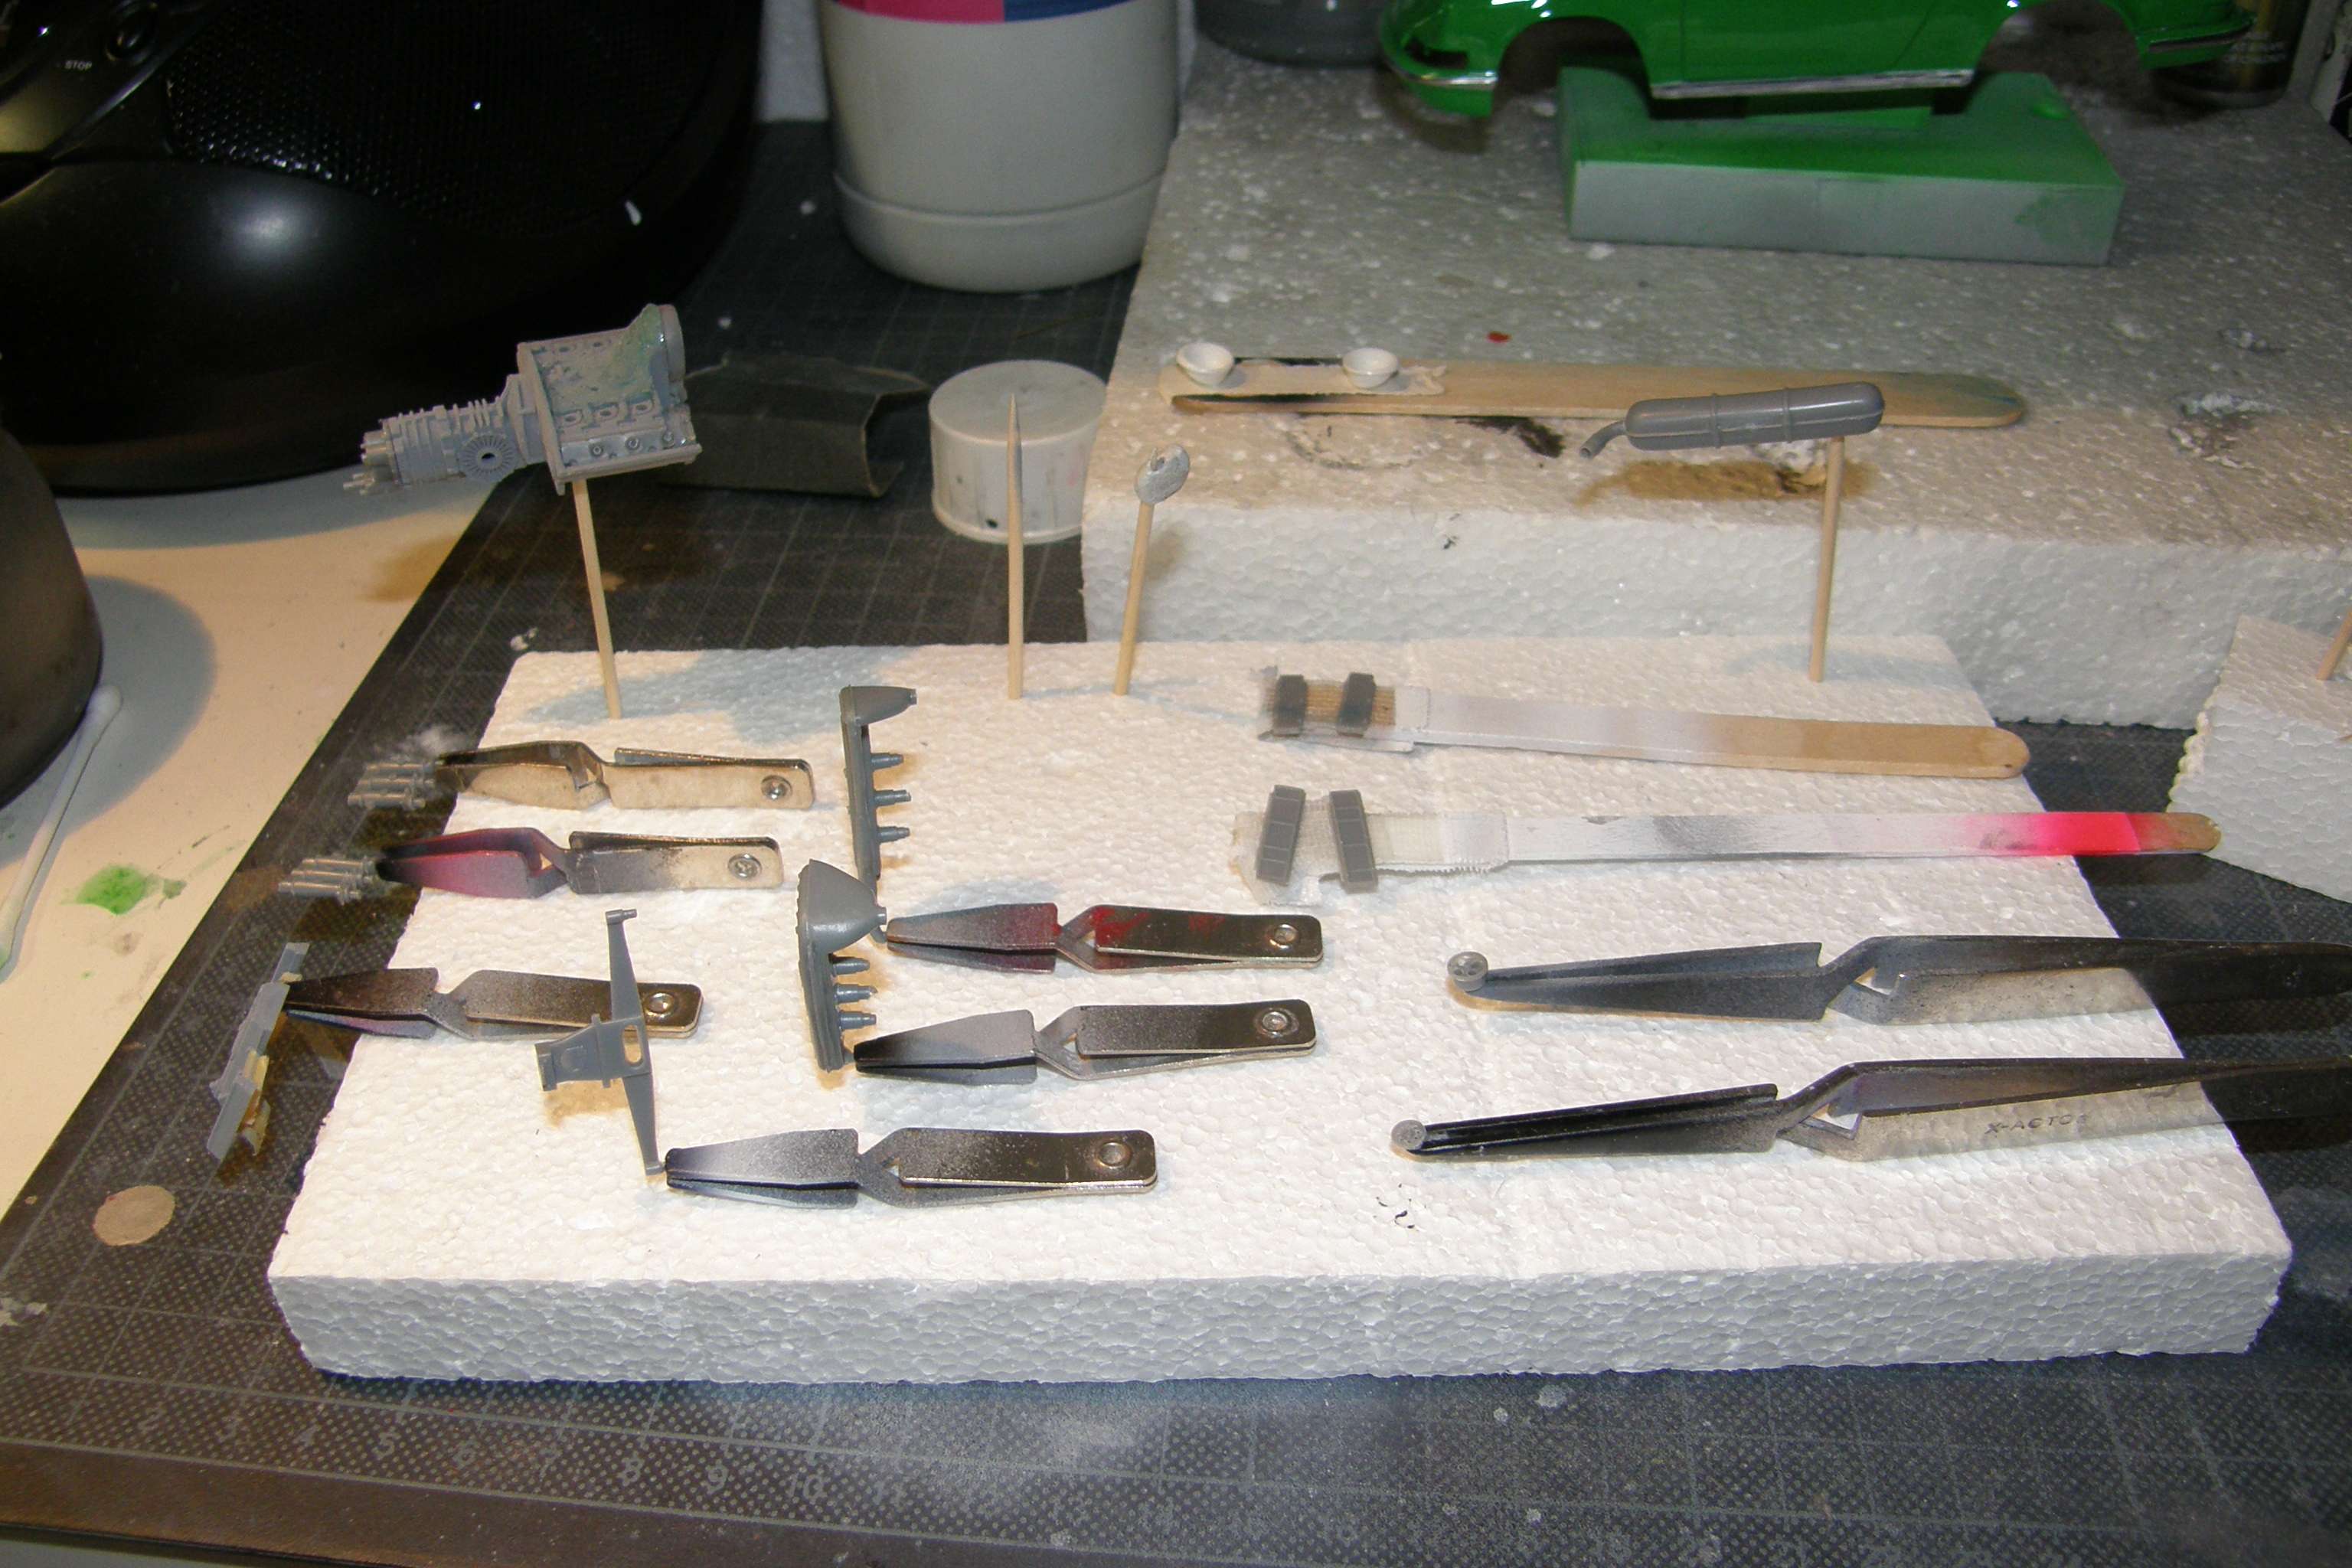 I altered the seats with putty and plastic strip. During the IPMS/ESM meeting last weekend I found what I was looking for. The correct decal with the "houndstooth" pattern. I made a prototype seat with the decal on it. I used plasticstrip on the seat that was a little bit to thick. Right now I'm bussy with the two new seats.  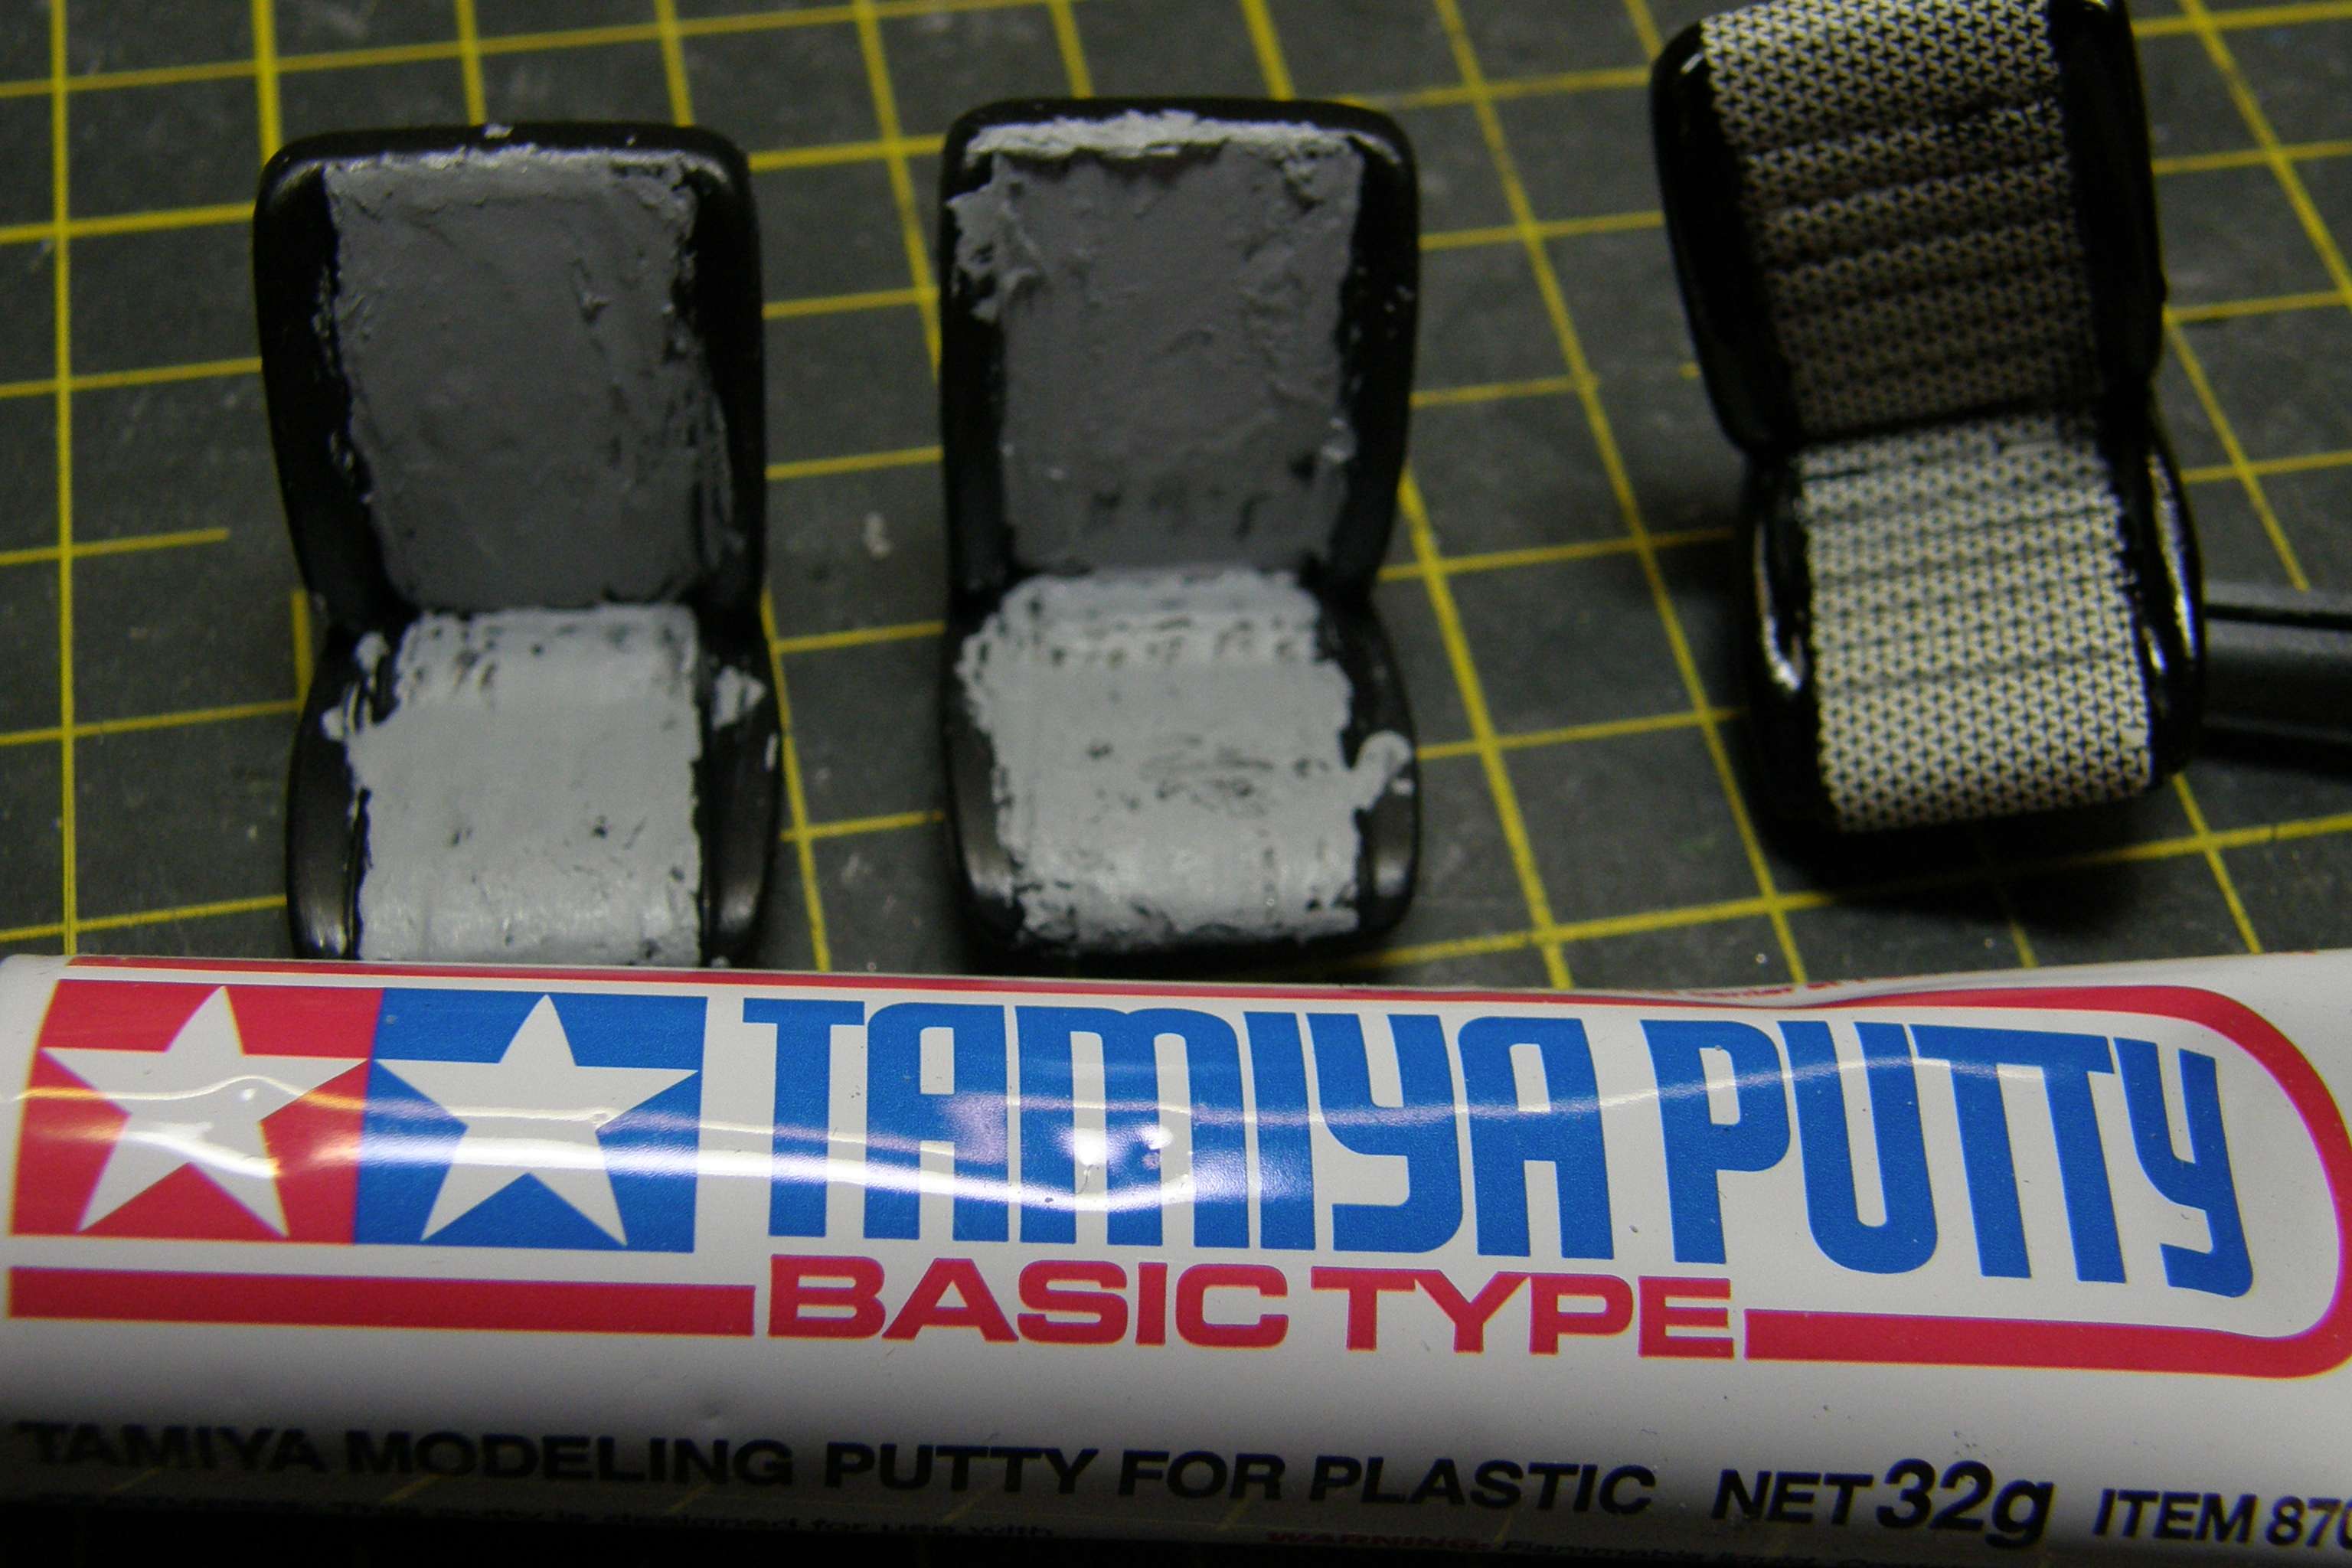 Eric
|
|
#15
11-05-2012, 04:11 PM
|
|||
|
|||
|
Re: 1/24 Fujimi Porsche 911 S 1972
As promissed the pictures of the engine. I still have to enhance the engine with various cables, like electrical, fuel and oil. More of that later.
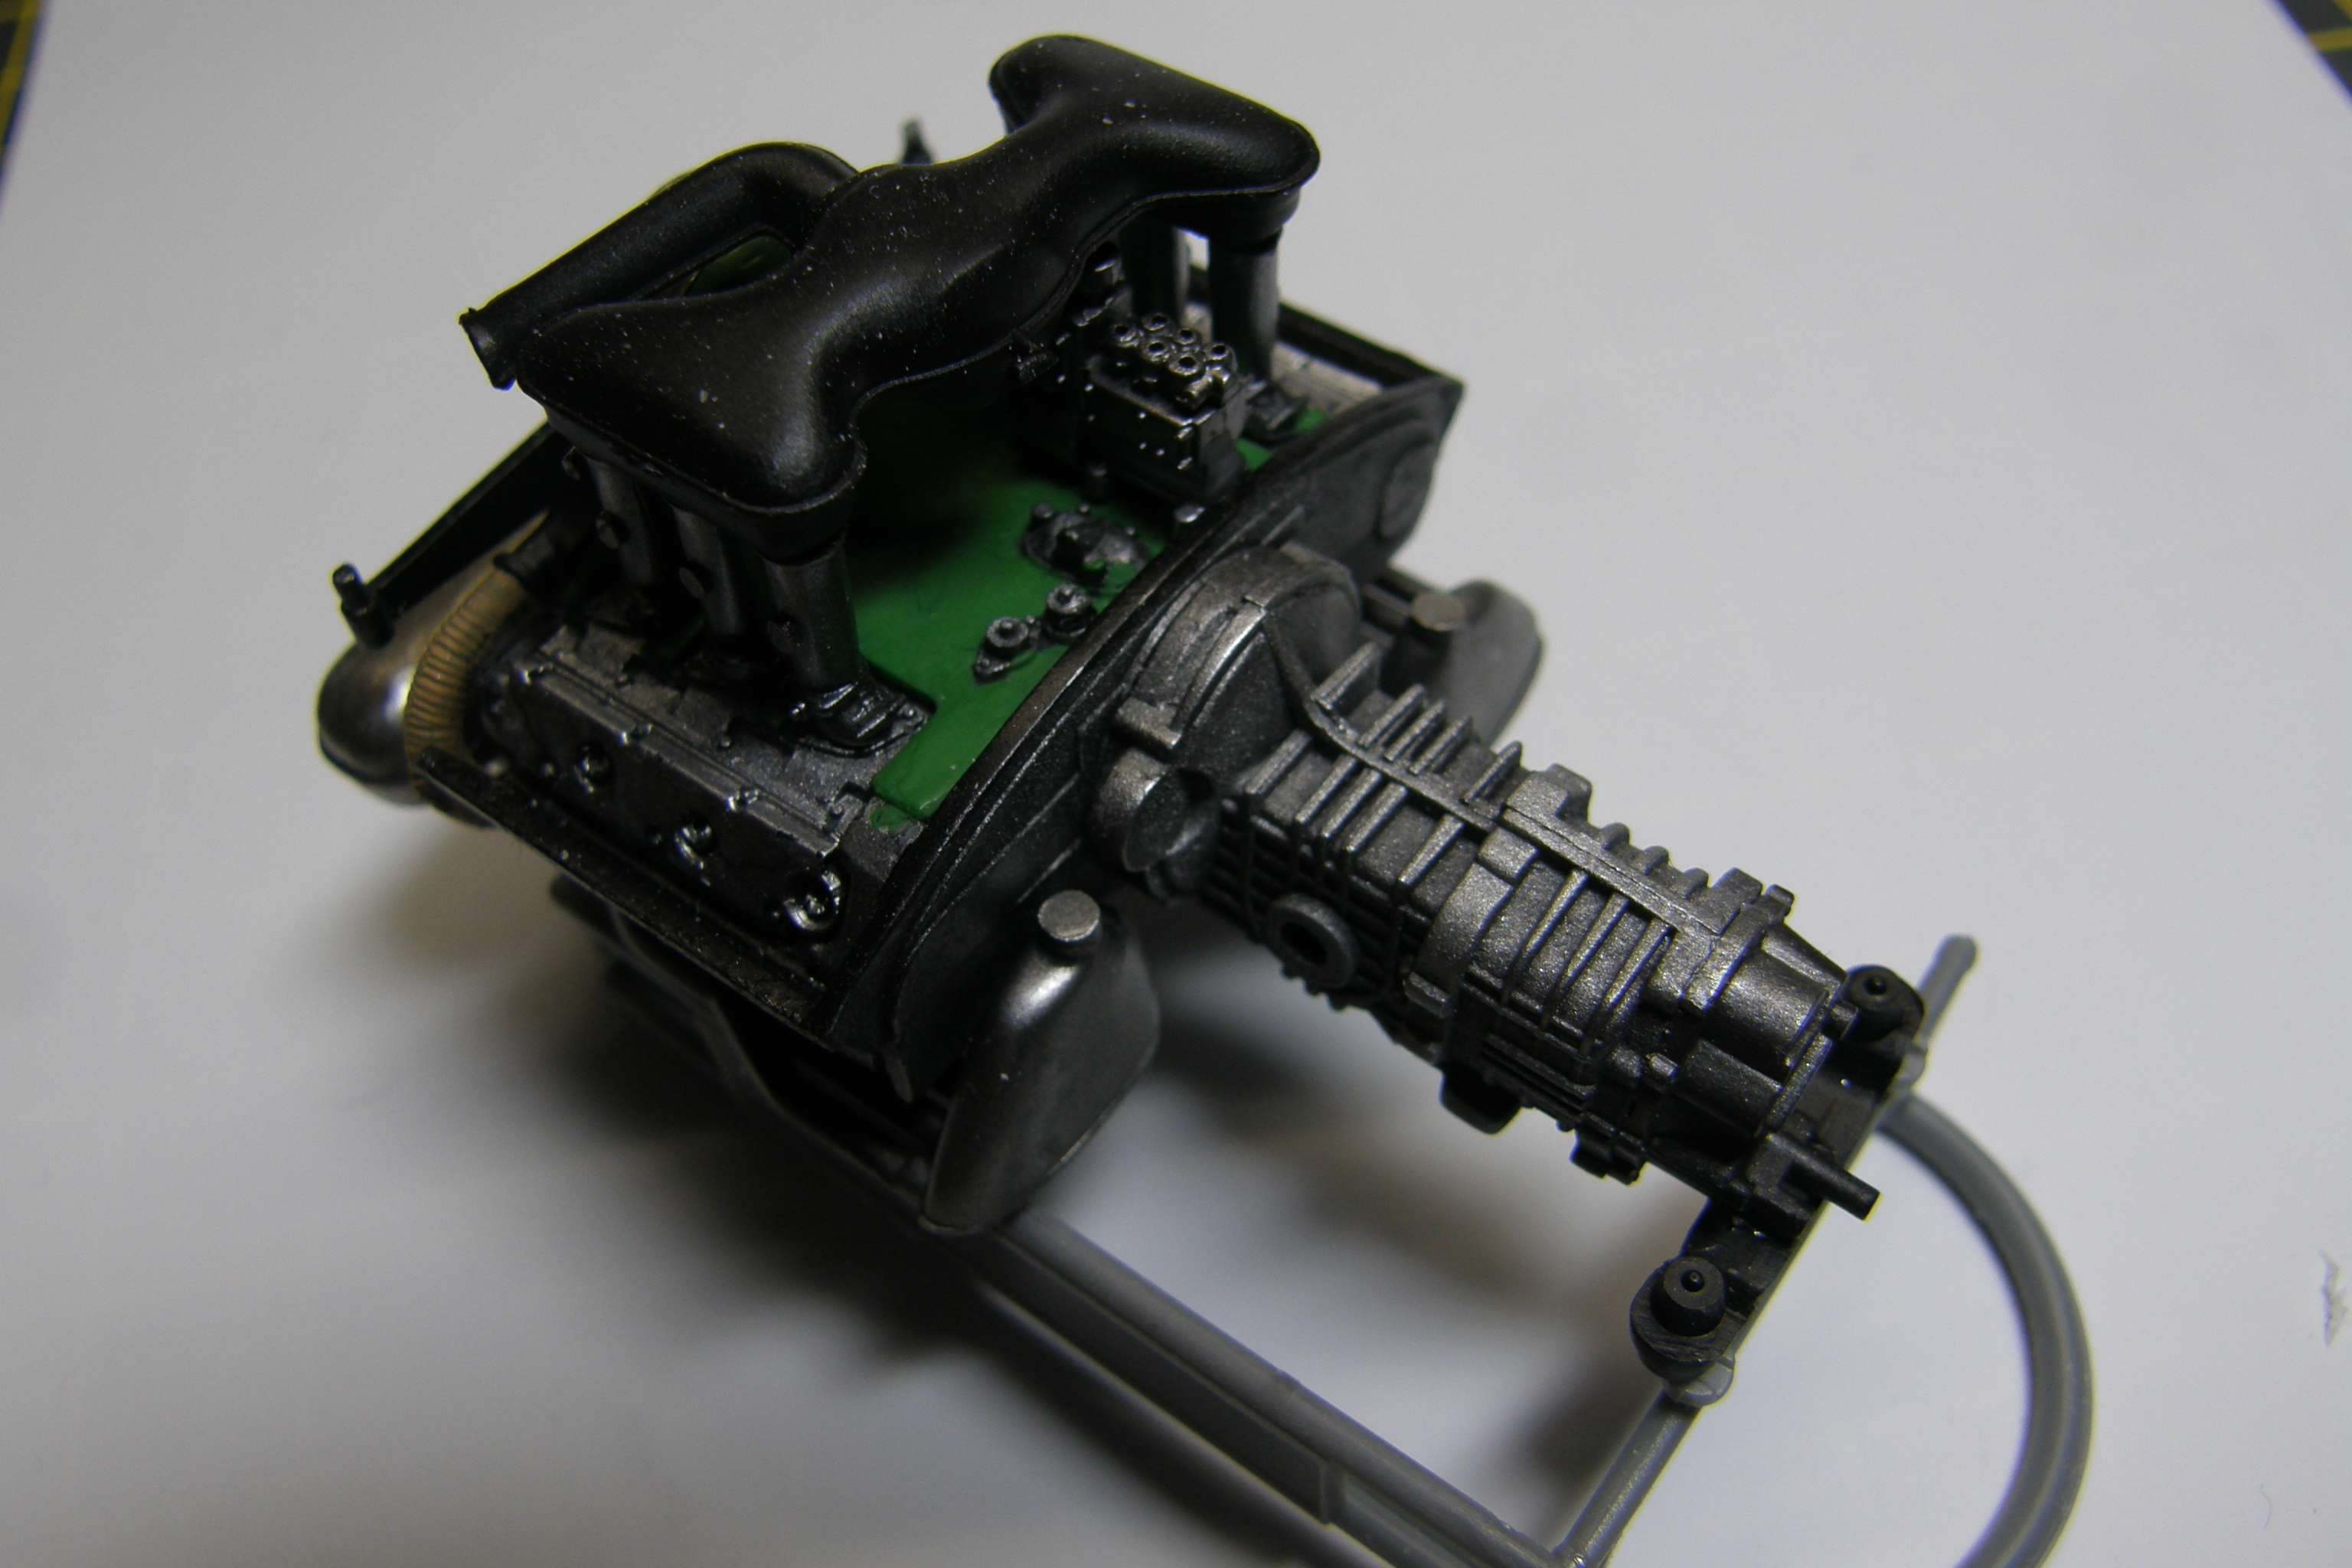 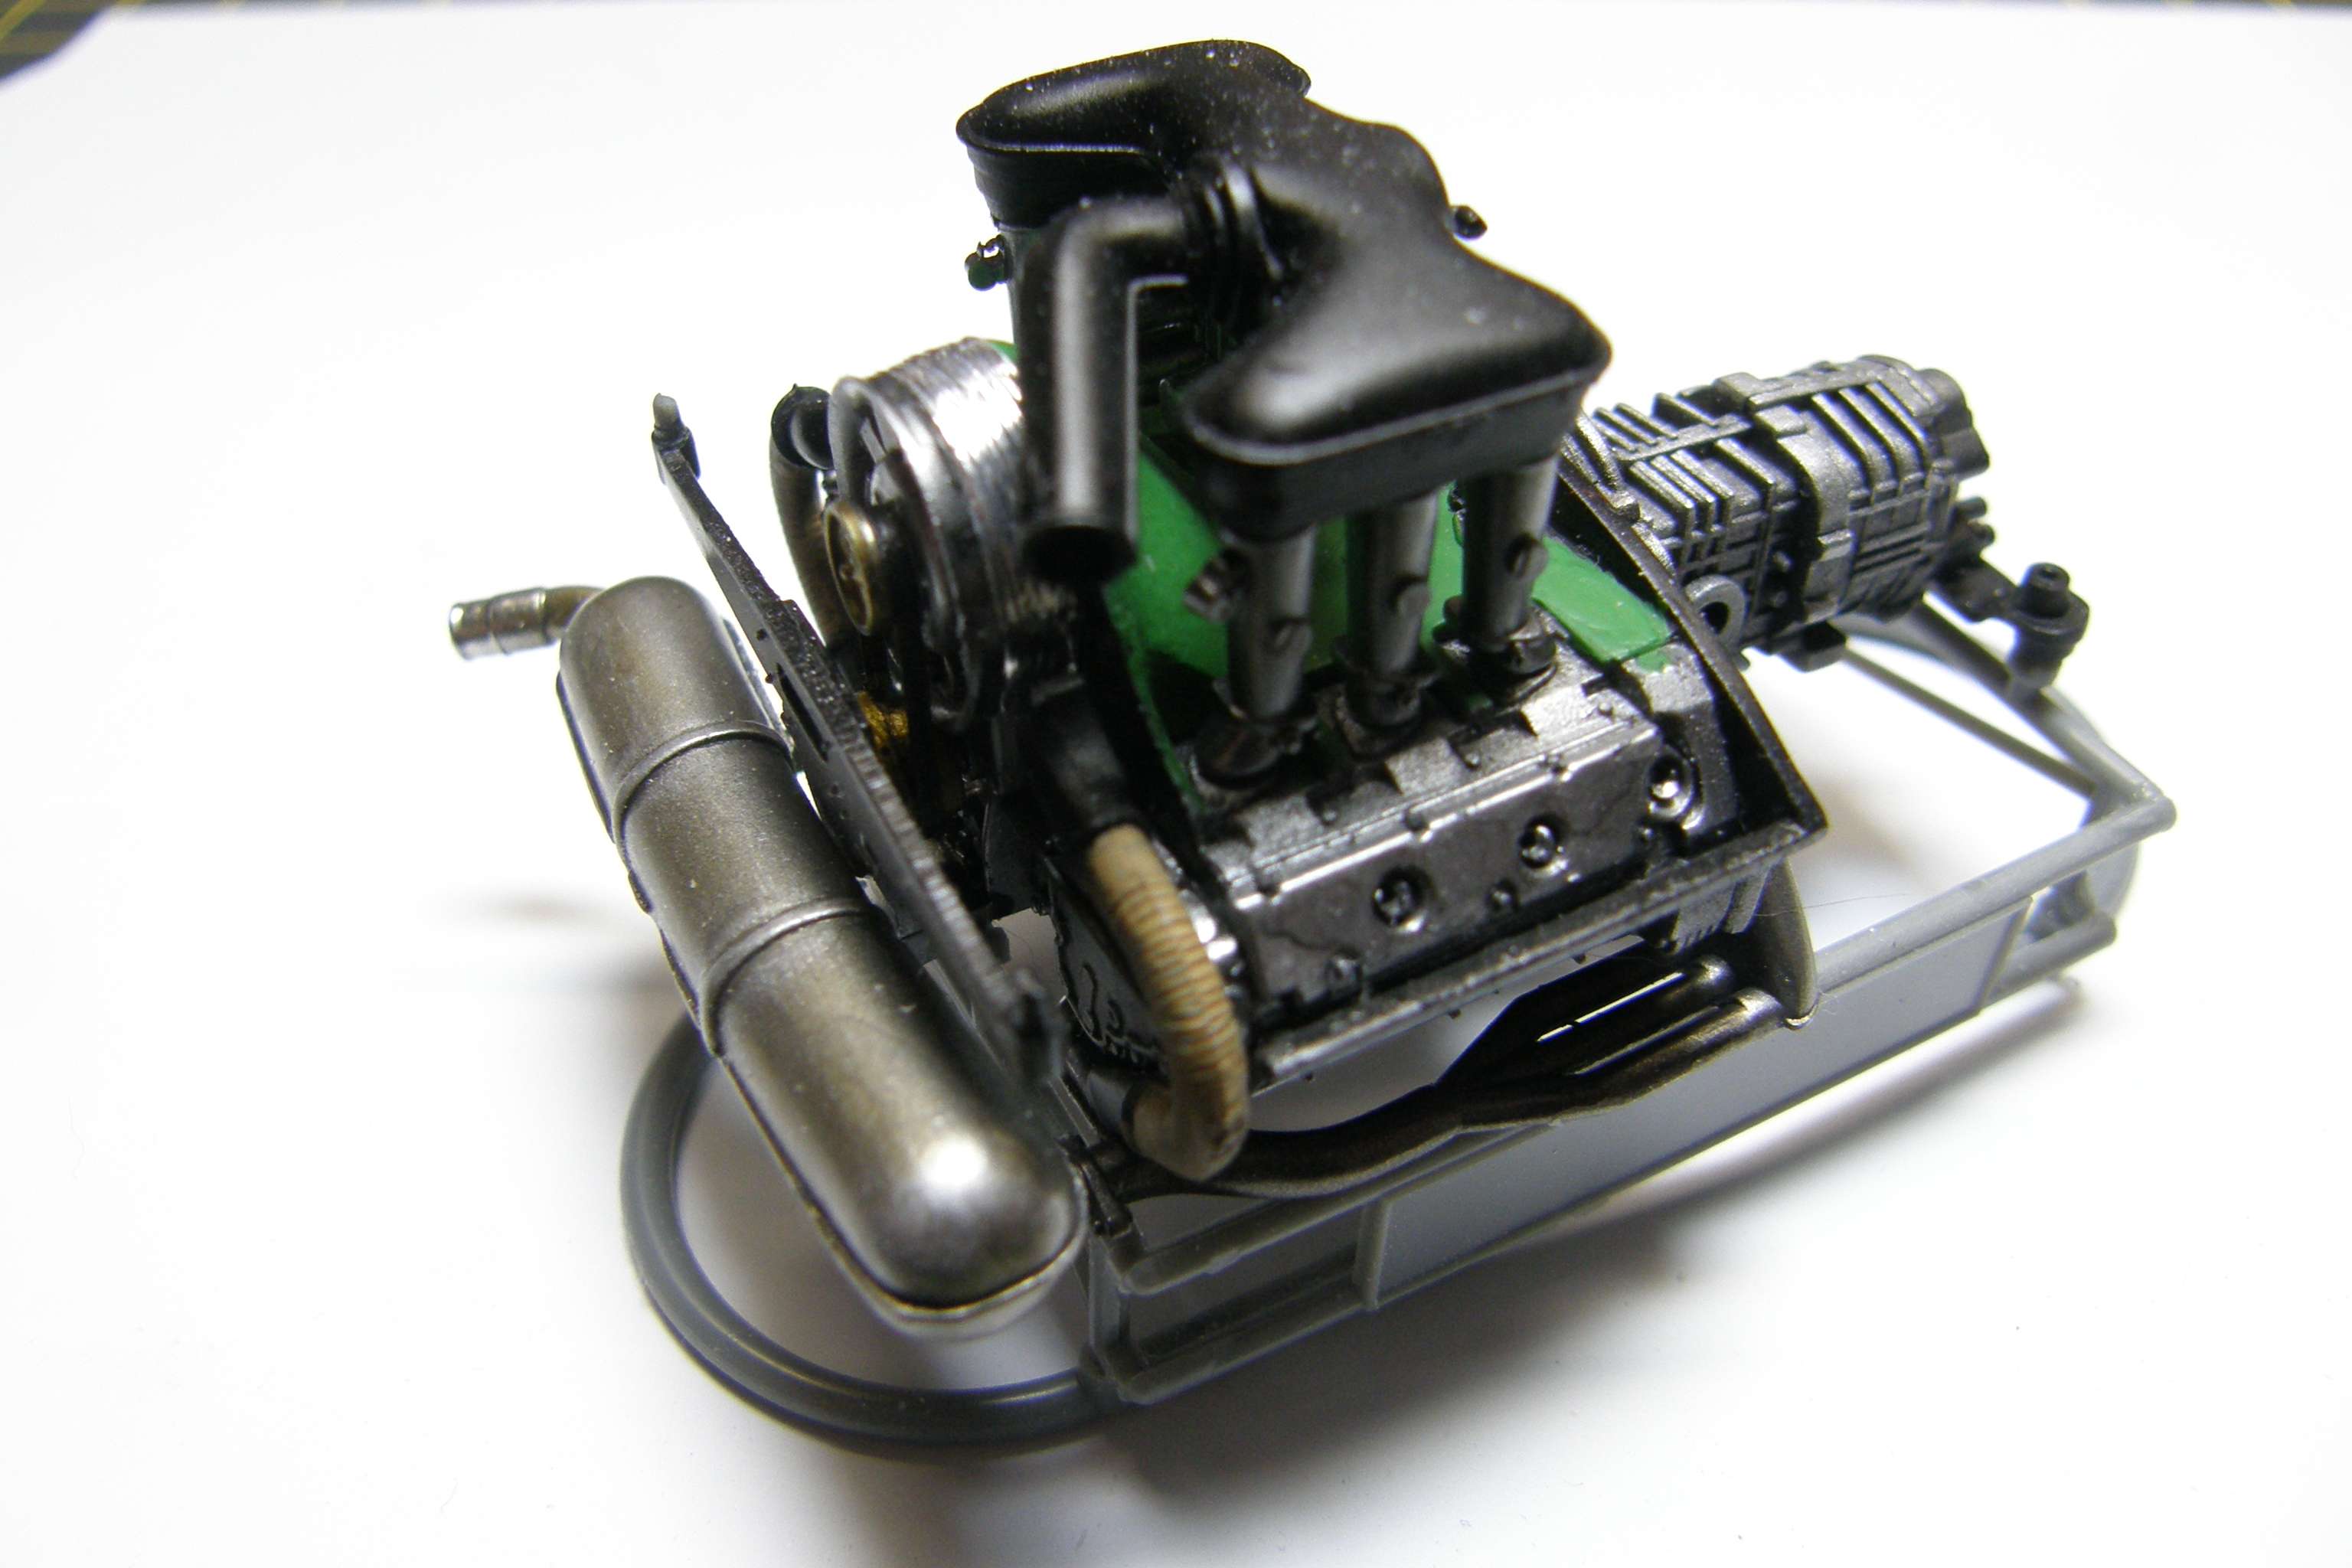 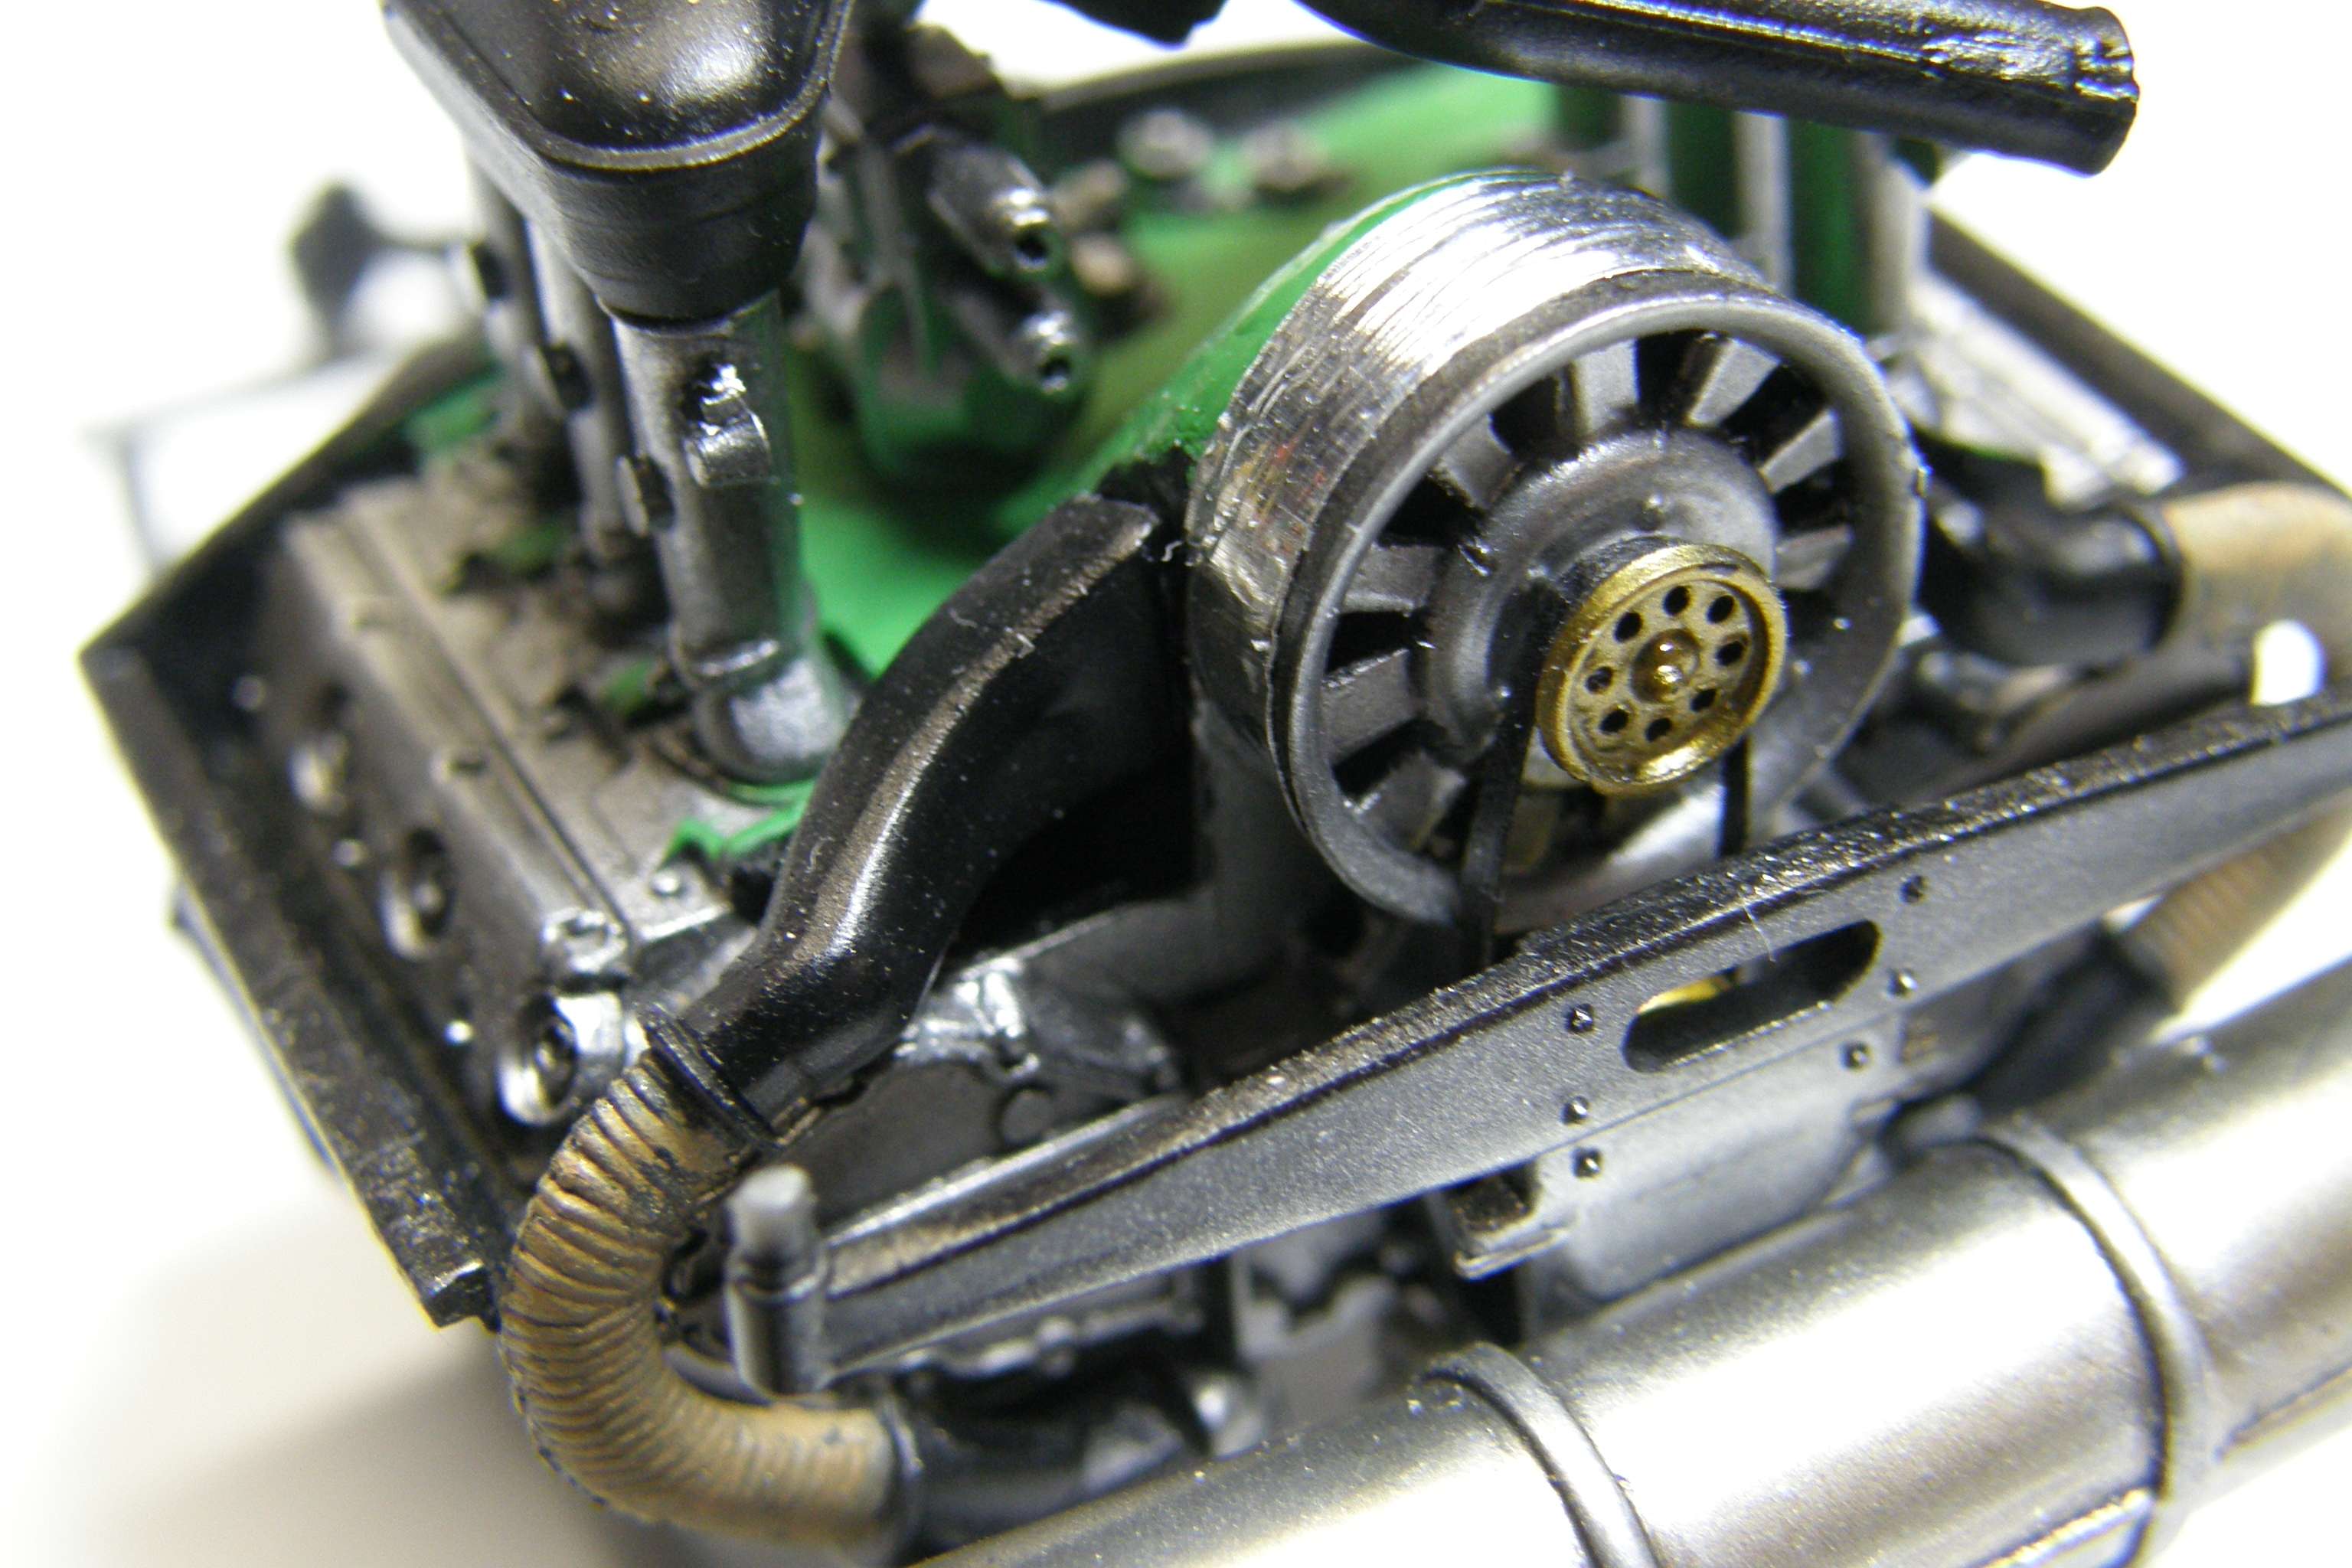  Eric
|
| ||||||||||||||||||||||||||||
|
POST REPLY TO THIS THREAD |
 |
|
|


