|
|
|

|
|
| Search | Car Forums | Gallery | Articles | Helper | AF 350Z | IgorSushko.com | Corporate |
|
| Latest | 0 Rplys |
|
|||||||
| WIP - Motorsports Post topics for any "Work In Process" motorsports vehicles in this sub-forum. |
 |
 Show Printable Version | Show Printable Version |  Email this Page | Email this Page |  Subscribe to this Thread
|
|
|
Thread Tools |
 05-21-2009, 06:11 PM
|
#1 | |
|
AF Enthusiast
Join Date: Aug 2005
Location: where "sky grey" is a colour
Posts: 822
Thanks: 3
Thanked 32 Times in 29 Posts
|
Jordan 191
Hi everybody!
This is the start for another WIP. Theres still some left to finish but after a Tameo McLaren MP 4/15 I built recently Iwas somewhat fed up with 1:43 and white metal in particular so I decided to again have a go at some plastic for a change. As the title says it this ones about the Jordan 191, and who would have guessed .its gonna be the Spa-Version :-) I dont have to tell you anything about the kit contents or parts fit I think. To turn it into Schumachers first F1-ride theres more to do than just add the correct decals though. Most notably the front wing flaps have to be smaller, the rear wing gets some gurneyflaps and other bits, in the rear wing support theres an extra cooler ( for gearbox oil I think ), the rear brakes get additional periscope style air ducts and theres an extra round liquid tank ( for whatever ) at the front of the left cylinder bank. For reference im of course using the Perfect File, plus the F1Modeling Schumacher Special and some additional pictures i found online and one important one for the front damper from Gurneyflap :-) My plan is to do all these modifications and add a pile of details and corrections along the way. Well see how long it takes until I rather get back to 1:43rd :-) For a change I started not by cutting up the kit pieces into even smaller bits but by actually putting some together with a bit of "racers tape" ( something thats impossible with a Tameo ) 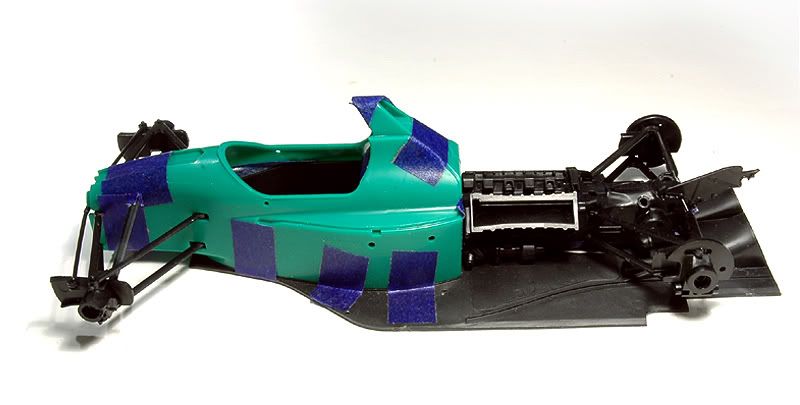 On my ongoing projects i learned the hard way that it can be quite tricky to assemble the suspension and set the model up right, once the Tamiya-path has been left and the suspension bits cut up. So I decided for this project to build a jig. 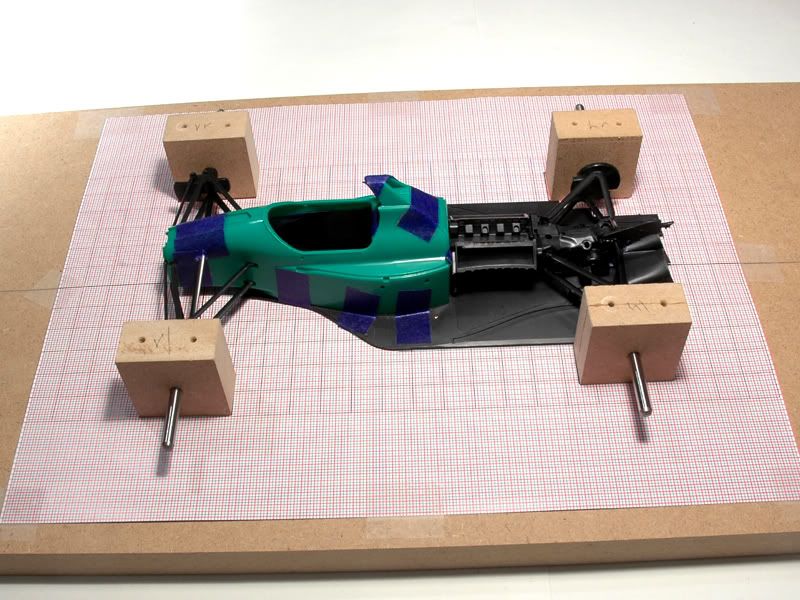 Its made from MDF and metal pins and will hopefully help me during assembly to get the uprights to sit where they belong :-) The actual build process started with the cockpit. I glued the monocoque halves and test fit the cockpit tub and seat. 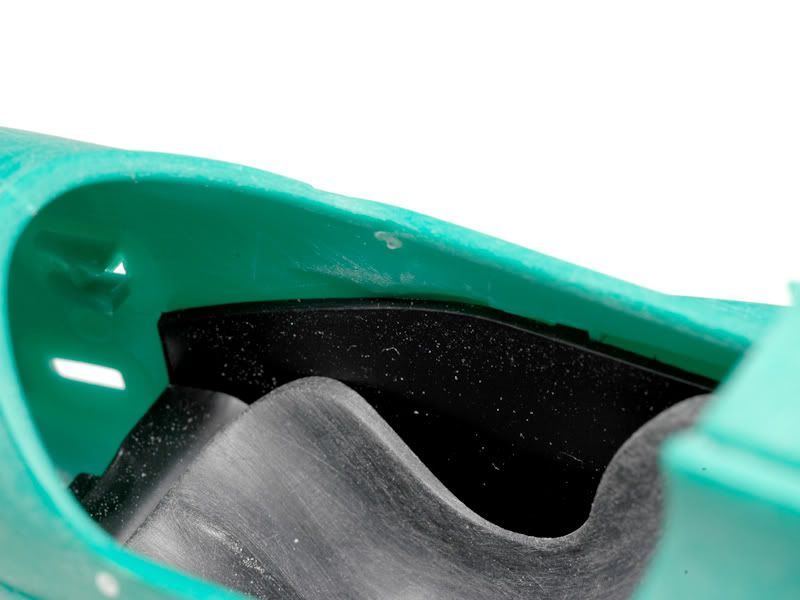 The seat ( already stripped of the moulded in belts ) turned out to be seriously asymmetric There needs to be some space for the gear shift linkage on the right side but Tamiya was really overly generous with it :-) On top of that the rather thick cockpit side walls were too low, so I replaced them with new ones made from 0.3mm styrene sheet 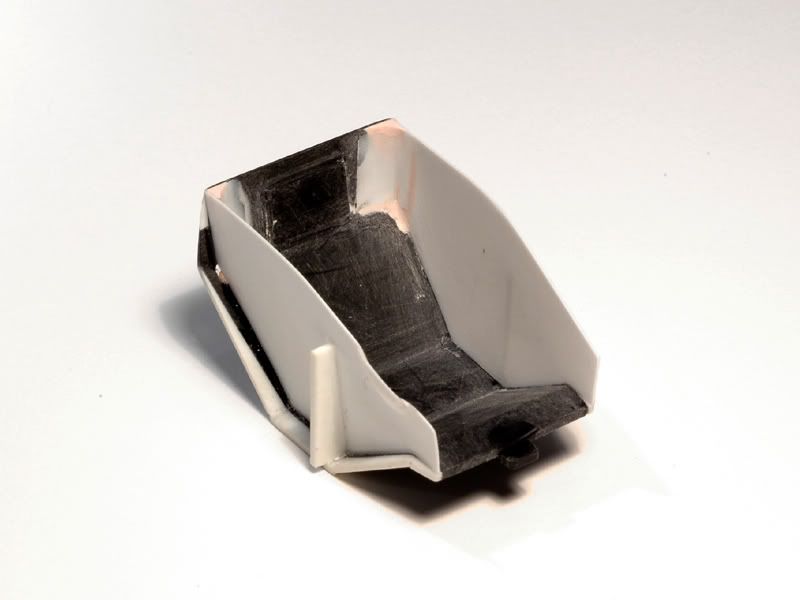 The seat was then also modified according to the reference pictures. 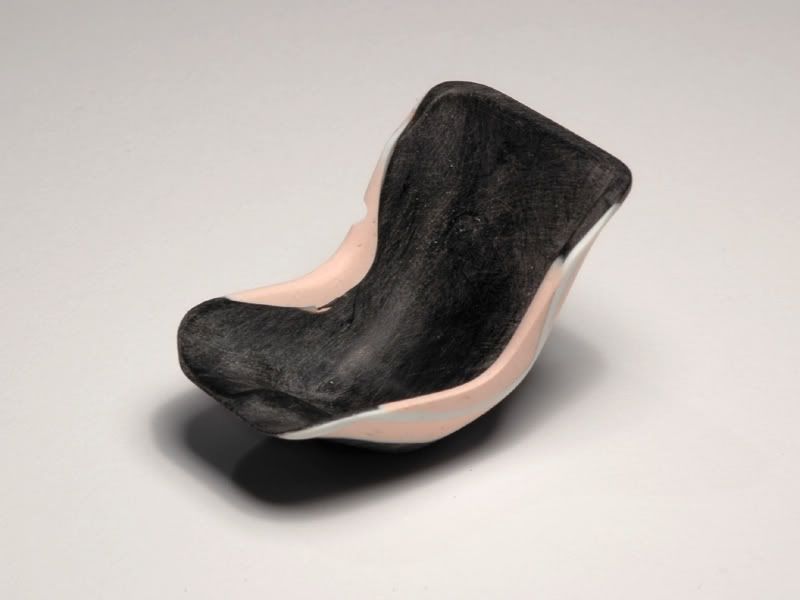 Now it fits the cockpit nicely: 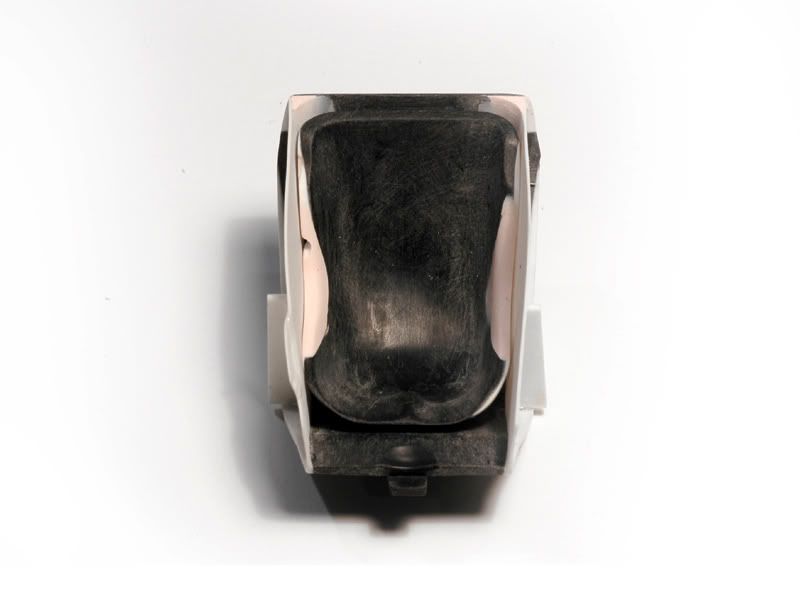 I also started work on the monocoque. I cut off the roll bar ( this will return as an extra piece ), opened the holes for front damper and the fuel filler at the rear and closed some of the smaller holes for locator pins that I wont need. I also reshaped the area around the head rest a bit with putty. All surfaces were sanded to get them straight, especially around the edges. 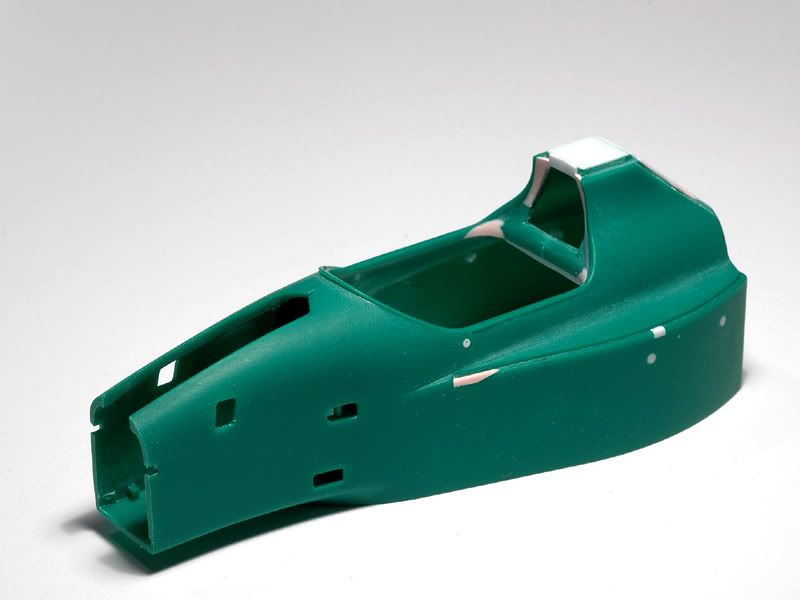 In the next picture the modified cockpit sits in the monocoque. I had to thin the sidewalls below the cockpit edges to make room for the higher cockpit walls and I added an indentation for the gear shifter ( or rather the drivers shifting hand ). 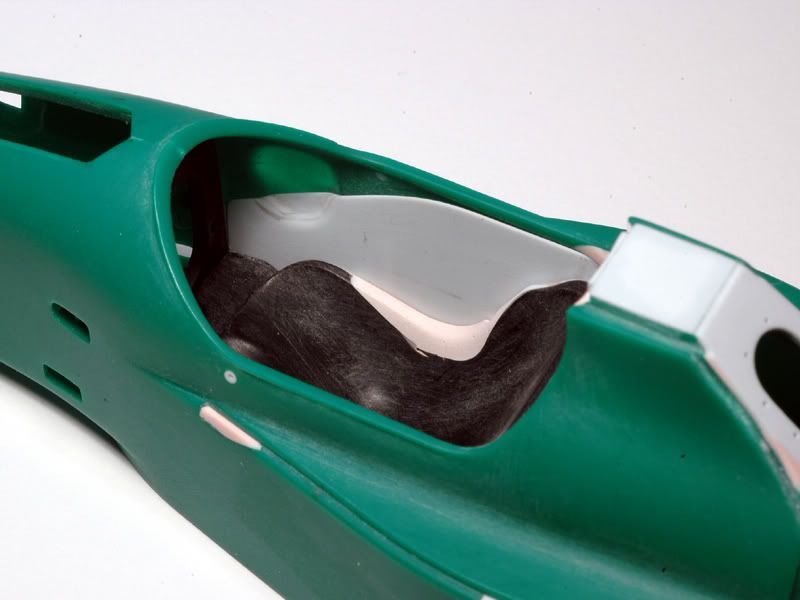 Thats it for the start. Theres more to follow soon. I have to say that modifying and scratch building parts like this is what I like most about modeling. Much more than finishing paintjobs and such . Lets see how long that lasts :-) |
|

|

|
|
05-21-2009, 06:28 PM
|
#2 | |
|
AF Enthusiast
Join Date: Jun 2007
Location: Vienna
Posts: 2,399
Thanks: 57
Thanked 27 Times in 26 Posts
|
Re: Jordan 191
Wonderful start!
 I like all the changes you are making. I'll follow your work closely as my main modeling project is building all the F1 cars M. Schumacher raced with. |
|
|
|
|
|
05-21-2009, 06:42 PM
|
#3 | |
|
AF Regular
Join Date: Jan 2006
Location: Denver, Colorado
Posts: 176
Thanks: 0
Thanked 3 Times in 3 Posts
|
Re: Jordan 191
Great stuff! I'm working on this one too so I'll be following your build closely.
|
|
|
|
|
|
05-22-2009, 01:26 AM
|
#4 | |
|
AF Fanatic

Join Date: Dec 2004
Location: Up the creek with no paddle
Posts: 5,888
Thanks: 7
Thanked 16 Times in 15 Posts
|
Re: Jordan 191
Your subjects, eye for detail and building skills are seriously badass!
 
__________________
Guideline for happy modeling: Practice on scrap. Always try something new. Less is more. "I have a plan so cunning, you could put a tail on it and call it a weasel" - Edmund Blackadder |
|
|
|
|
|
05-22-2009, 01:35 AM
|
#5 | |
|
AF Enthusiast

Join Date: Feb 2007
Location: San Francisco, California
Posts: 950
Thanks: 1
Thanked 0 Times in 0 Posts
|
Re: Jordan 191
Excellent!!! This is the type of modeling I love too. The jig is a great idea.
__________________
Mark R |
|
|
|
|
|
05-23-2009, 01:39 PM
|
#6 | |
|
AF Enthusiast
 
Join Date: Feb 2006
Location: Manchester
Posts: 759
Thanks: 0
Thanked 2 Times in 2 Posts

|
Re: Jordan 191
Great start on this JayKay. I'm sure this will turn into the definitive Jordan 191 WIP. Can't wait to see the progress.
__________________
On the workbench: Completed WIPs: Completed Models Gallery: |
|
|
|
|
|
05-25-2009, 02:59 PM
|
#7 | |
|
AF Enthusiast
Thread starter
Join Date: Aug 2005
Location: where "sky grey" is a colour
Posts: 822
Thanks: 3
Thanked 32 Times in 29 Posts
|
Re: Jordan 191
Hey guys, heres some more progress already.
The undertray was cleaned up. I filled the pin marks and sanded all surfaces. In the process the diffuser was thinned and I sharpened the edges at the rear left and right of the diffuser. 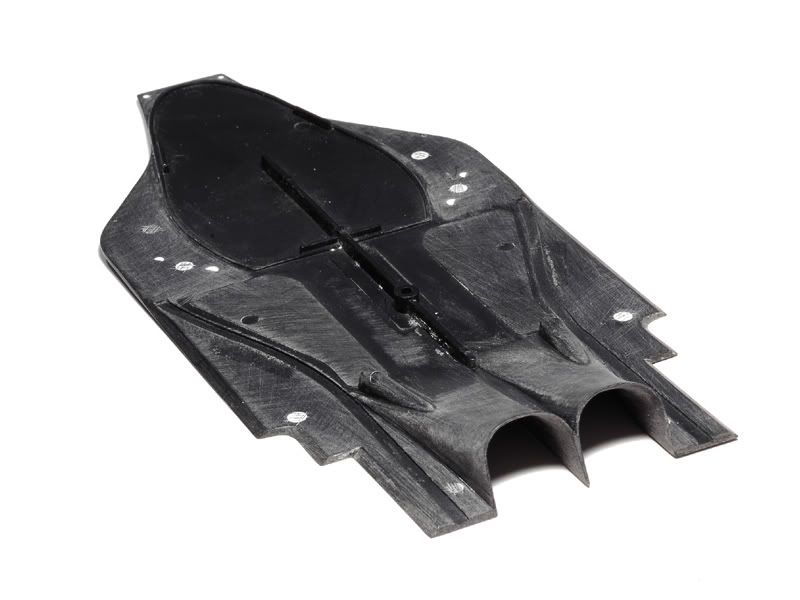 Then I scratchbuilt new sidepod structures from 0.3mm styrene as the Tamiya ones were inevitably thick and the moulded in electronic boxes couldnt stay anyway. 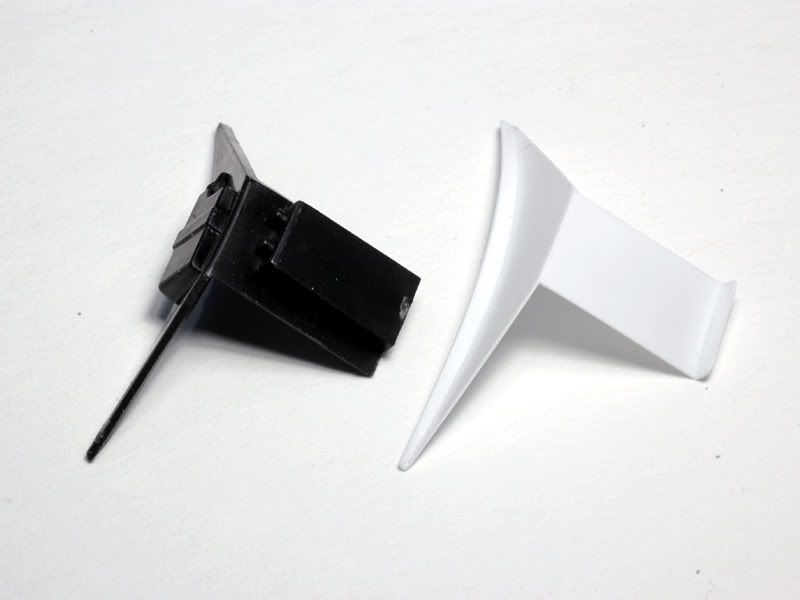 Here you see them placed on the monocoque sides. 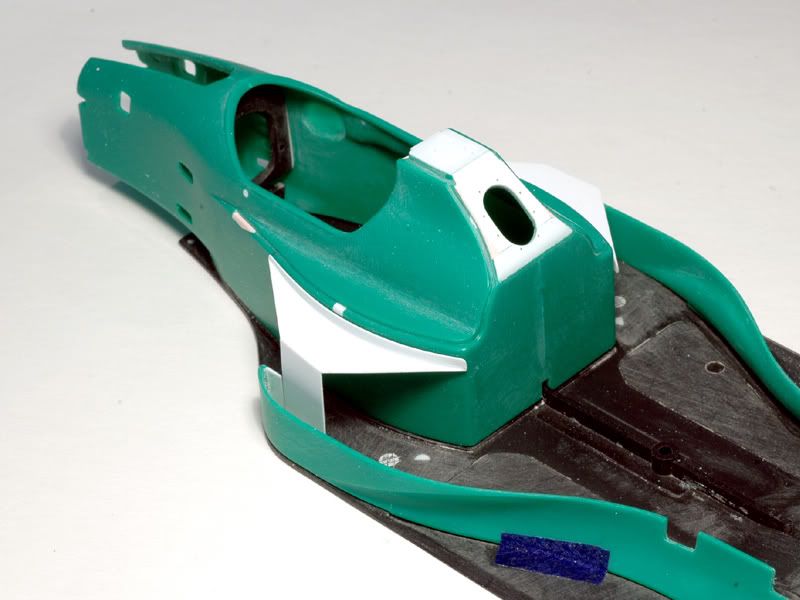 Also visible are the lower bodywork elements. I sanded them on the outside and then thinned them to about 0,7mm material thickness from the inside where its visible. Next I went for the nose area again. The kit comes with a separate lid for the front damper but nothing underneath. Scratchbuilding something there is tricky because pictures of the area are as rare as henns teeth. From what I have got, I figured out a layout and milled a block of renshape accordingly. 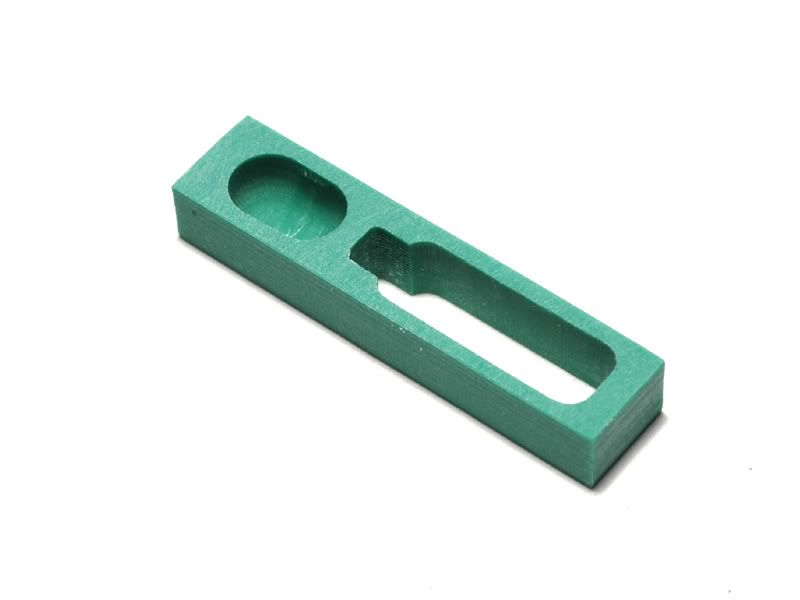 In the next picture you can see it after some more work. In front is the lid that I sanded thin from the inside to about 0,5mm. To match the upper surface of the milled part perfectly to the lid I put some tape on its underside, put some polyester putty on the renshape piece and then carefully pressed the lid on the wet putty. After a bit of curing I removed the lid ( no problem because of the tape ) and then cut and sanded off the excess putty. 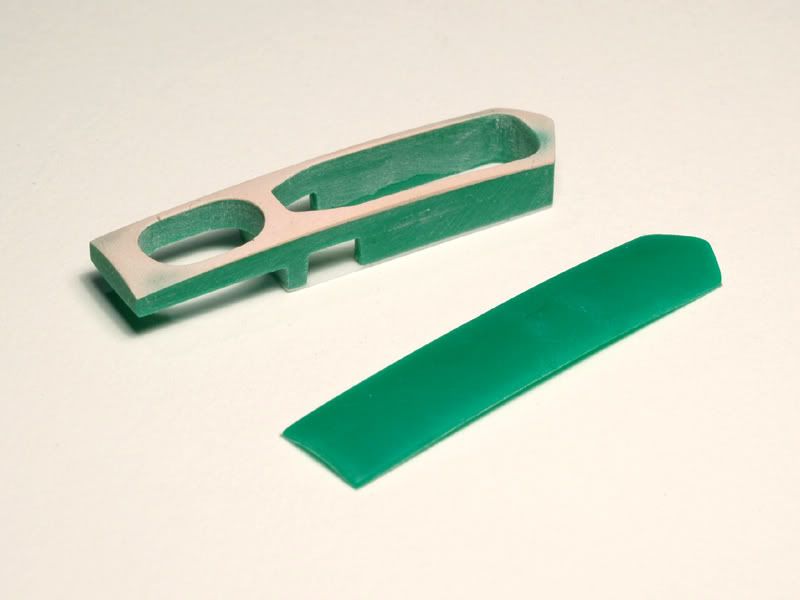 It will need more work but as you can see it fits quite nicely already. 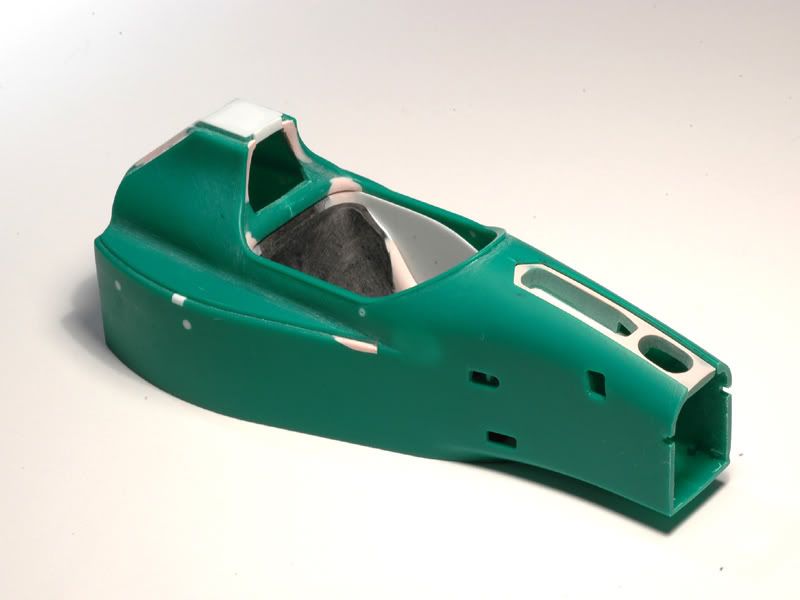 Thats it for now. The next update will take some longer as Im heading towards the trickier bits. Also Im jumping around between pieces and I will wait for areas to sufficiently progress so this WIP doesnt get too confusing :-) Thanks for following! |
|
|
|
|
|
05-25-2009, 03:04 PM
|
#8 | |
|
AF Regular

Join Date: Mar 2008
Location: Brantford
Posts: 307
Thanks: 2
Thanked 8 Times in 8 Posts

|
Re: Jordan 191
Very interesting but I like it.
|
|
|
|
|
|
05-25-2009, 04:24 PM
|
#9 | |
|
AF Regular
Join Date: Nov 2008
Location: mother earth
Posts: 175
Thanks: 0
Thanked 0 Times in 0 Posts

|
Re: Jordan 191
WTF!!! im definitely gonna follow your build!! very clean!!!
__________________
sylvia |
|
|
|
|
|
05-25-2009, 11:05 PM
|
#10 | ||
|
AF Fanatic
Join Date: Dec 2004
Location: Up the creek with no paddle
Posts: 5,888
Thanks: 7
Thanked 16 Times in 15 Posts
|
Re: Jordan 191
Quote:
__________________
Guideline for happy modeling: Practice on scrap. Always try something new. Less is more. "I have a plan so cunning, you could put a tail on it and call it a weasel" - Edmund Blackadder |
||
|
|
|
|
05-26-2009, 02:36 AM
|
#11 | |
|
AF Enthusiast

Join Date: Dec 2004
Location: Germany
Posts: 3,431
Thanks: 28
Thanked 79 Times in 73 Posts
|
Re: Jordan 191
Great, an interesting theme and model, always nice to follow your WIPs
__________________
Micha       
|
|
|
|
|
|
06-02-2009, 07:01 AM
|
#12 | |
|
AF Newbie
Join Date: Jan 2009
Location: Pitt Meadows
Posts: 38
Thanks: 0
Thanked 0 Times in 0 Posts
|
Re: Jordan 191
Excellent work on one of the most beautiful F1 cars ever. Looking forward to your next update!
TIM
__________________
 My hardhat has racing stripes. https://www.facebook.com/pages/Cameo...s/365886440252 |
|
|
|
|
|
06-02-2009, 09:44 AM
|
#13 | ||
|
AF Enthusiast

Join Date: Feb 2003
Location: F1...
Posts: 1,410
Thanks: 3
Thanked 3 Times in 3 Posts
|
Re: Jordan 191
Quote:
lovely work so far, as I said in one of the other threads  ! ! Last edited by Decs0105; 06-03-2009 at 05:44 AM. |
||
|
|
|
|
06-02-2009, 02:13 PM
|
#14 | |
|
'wannabe race driver'

Join Date: Aug 2008
Location: BAYERN
Posts: 258
Thanks: 81
Thanked 25 Times in 19 Posts
|
Re: Jordan 191
YES indeed, we are very used to ......thanx god!
This is a kind of modeling i like a lot!! The search and demand for the ultimate scale reproduction. Keep it up, very promising! Yours Jochen |
|
|
|
|
|
06-02-2009, 05:33 PM
|
#15 | |
|
AF Enthusiast
Join Date: May 2007
Location: Chicago, Illinois
Posts: 1,000
Thanks: 5
Thanked 29 Times in 26 Posts
|
Re: Jordan 191
Very nice work. You really are working the Tamiya kit over!
Tom Tanner/Scale Designs/Ferrari Expo-Strictly 43rd Revival April 2010-Chicago |
|
|
|
|
|
|
POST REPLY TO THIS THREAD |
 |
|
|


