|
|
|

|
|
| Search | Car Forums | Gallery | Articles | Helper | AF 350Z | IgorSushko.com | Corporate |
|
| Latest | 0 Rplys |
|
|||||||
| WIP - Motorsports Post topics for any "Work In Process" motorsports vehicles in this sub-forum. |
 |
 Show Printable Version | Show Printable Version |  Email this Page | Email this Page |  Subscribe to this Thread
|
|
|
Thread Tools |
 12-21-2007, 04:58 PM
|
#1 | |
|
AF Regular
Join Date: Dec 2007
Location: Cologne
Posts: 230
Thanks: 3
Thanked 6 Times in 6 Posts
|
Tamiya Toyota GT-one 1/24 //full detail//
hello,
this is my first progress threat here...chances are high that you have seen that w.i.p in ohter forums so please don't be angry that I post it here also...think this is a good place here to post it :-) what I'm going to show you is the work of the last 13 months  on and off, of course. and I'm alos doing the Tameo 1/43 312 T4 at the same time... on and off, of course. and I'm alos doing the Tameo 1/43 312 T4 at the same time...When doing the GT one I wanted to concentrate on the engine and cockpit and cover EVERYTHING with CF decal ..whish is a pain in the bum ... so here's the wip...comments are welcome daniel -germany- |
|

|

|
|
12-21-2007, 04:59 PM
|
#2 | |
|
AF Regular
Thread starter
Join Date: Dec 2007
Location: Cologne
Posts: 230
Thanks: 3
Thanked 6 Times in 6 Posts
|
Re: Tamiya Toyota GT-one 1/24 //full detail//
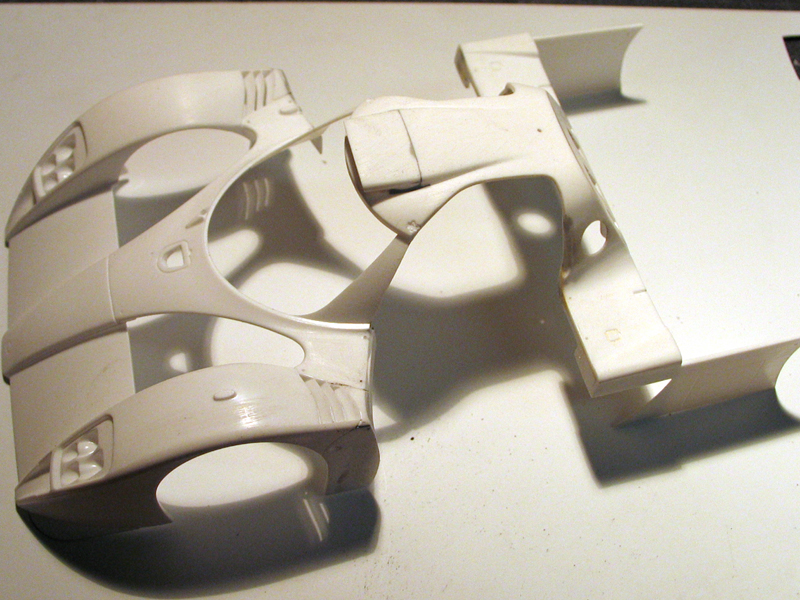 a little bit glueing sanding puttying has been done I already cut out both doors and added a little "thicknee" to the body. You can see I added a little plasticcard on the right and left part of the door. A big problem to deal with is to have the body, undertray and monocoque fit together without to much gaps that appear when cutting out doors and show what's (not) underneath. 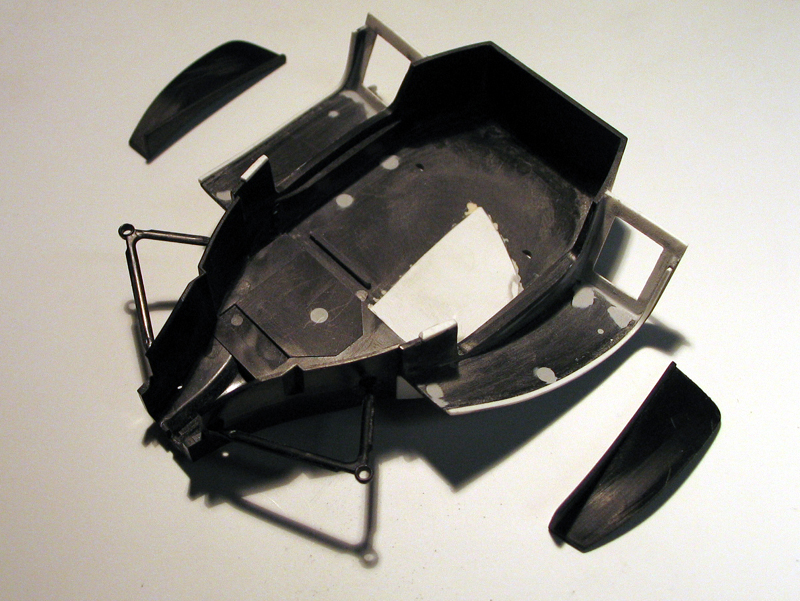 hier haben wir die fahrerzelle. coolers have been cutaway. these will be scratched from plastic and mesh...hope that was a good idea !?! the two loose parts are cout out from the monocoque and will be glued to the door...where they belong to ! I added small plasticard stripes to rebuild the part where I cut out the doors. I will also add thicker parts over it like on the real car...you will see that later molded in detail on the floor has been cut out. those will be scratched a big advantage is that it's much easier to CF and paint those parts. now we need to make CF templates fot the whole monocoque :-( I never did any CF before.  die beiden türen belkommen noch die abgeschnittenen teile aus der fahrerzelle angeklebt, die entstehenden hohlräume werden mit plastik zugemacht. a little bit has been done to the doors so far I added small plasticards to add a little thickness and make it look more interesting, more real. the lower and upper part of the doors are connected with plasticcard. problem was wehen you bend that material it will straighten out ijn a while....so here comes a tip bent two parts and glue them together then they keep their form ;-) the whole inside of the doors need CF as well 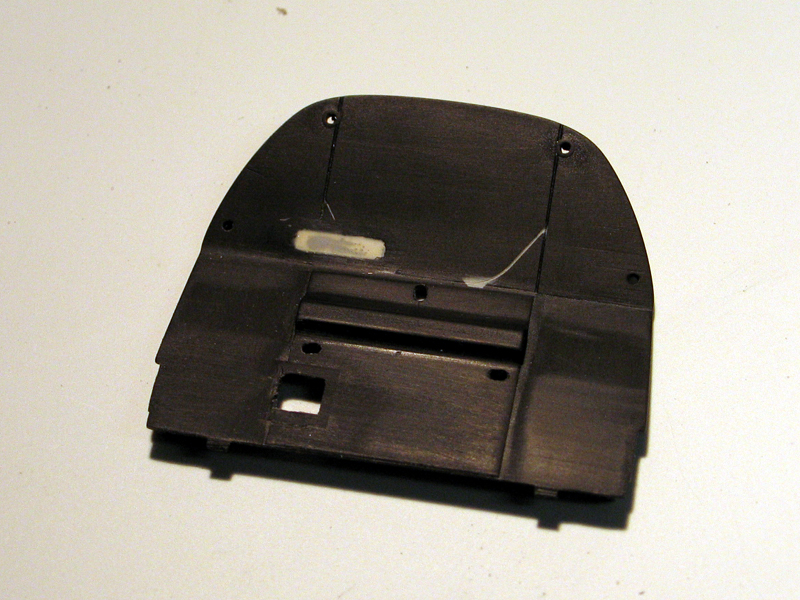 the firewall was sanded flat and molded detail was removed to be scrtched later. 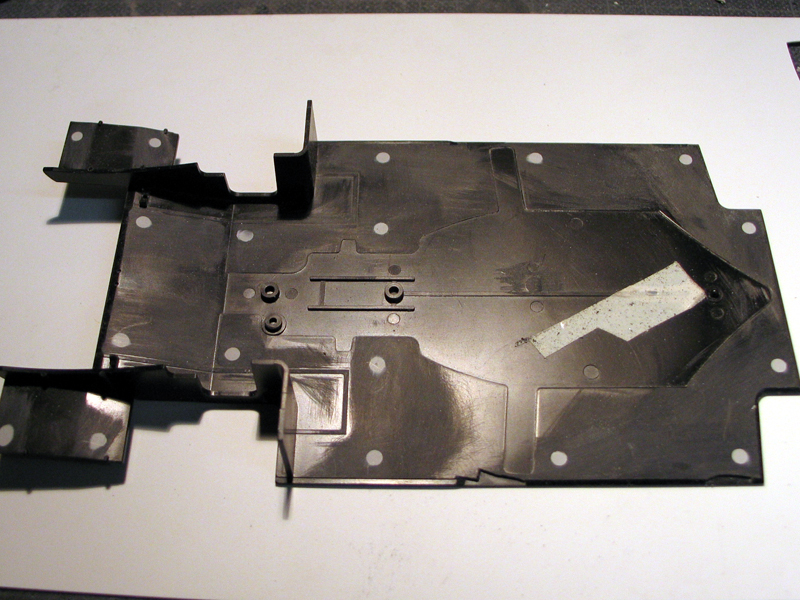 one thing many people seem to forget...sand away EVERY sinkmark :-) especially when it will be covered with CF. or everything will show through. der hintere bereich wo die hitzefolie ist wird mit metallfolie und einem PE rahmen detailliert, ansonsten alles CF. some bits and pieces  all the molded in cables have been removed including chrom plating 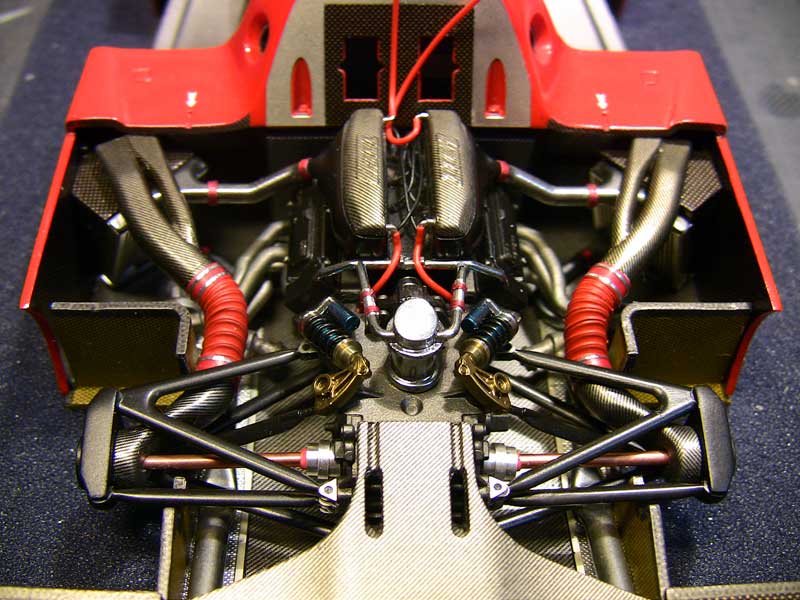 another miracle...why did the mold the small disk i cut out into the transmission ?!? It was to be painted silver like the other part on the left. so I cut it out and will glue those two parts together, sand the seam paint it and reatach it. 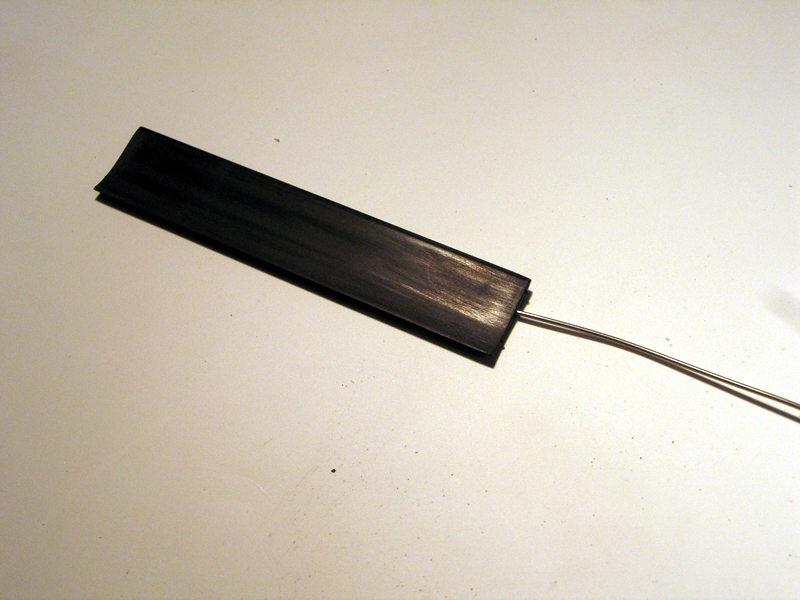 a small tip on how to get a handle on a part where no handle is :-) drill hole add wire..big deal..sorry for that tip more to come daniel -germany- |
|
|
|
|
|
12-21-2007, 04:59 PM
|
#3 | |
|
AF Regular
Thread starter
Join Date: Dec 2007
Location: Cologne
Posts: 230
Thanks: 3
Thanked 6 Times in 6 Posts
|
now let's make some templates
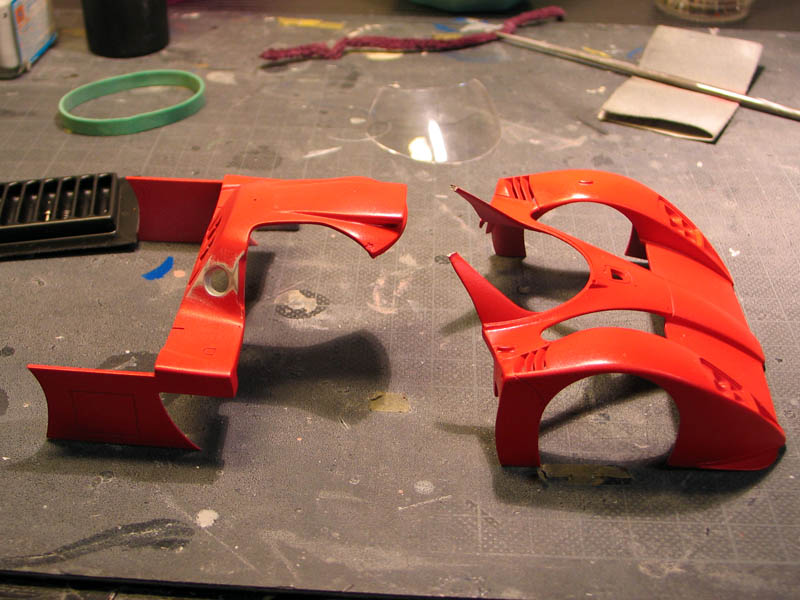
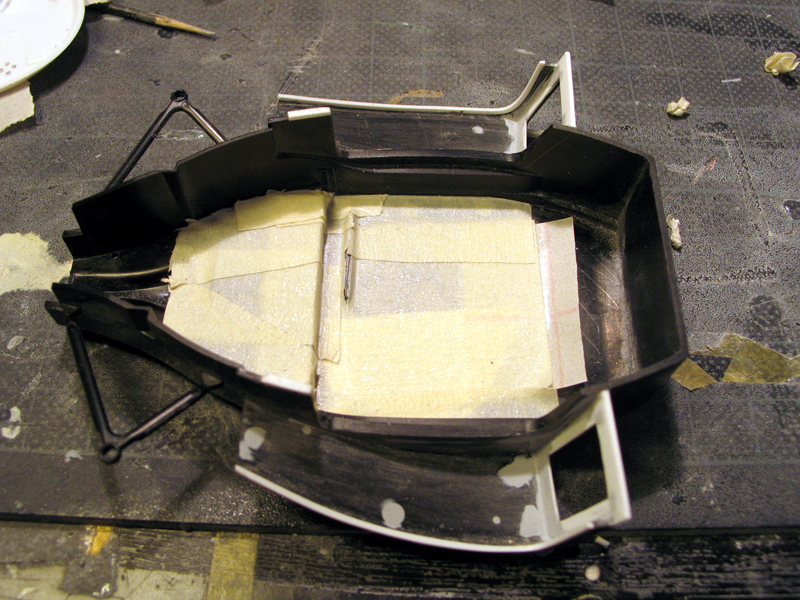 -the place for the CF is covered with tape -pushed in the corver with toothpick -and cout out with a sharp knife along the corner. next I glue the tape on some paper, make photocopies and test the templates. 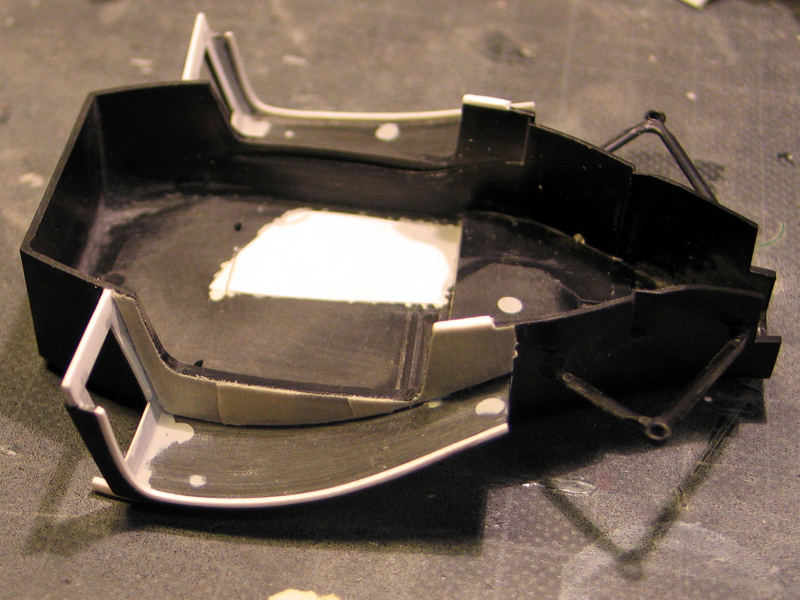 a finished mask still sticking on the part 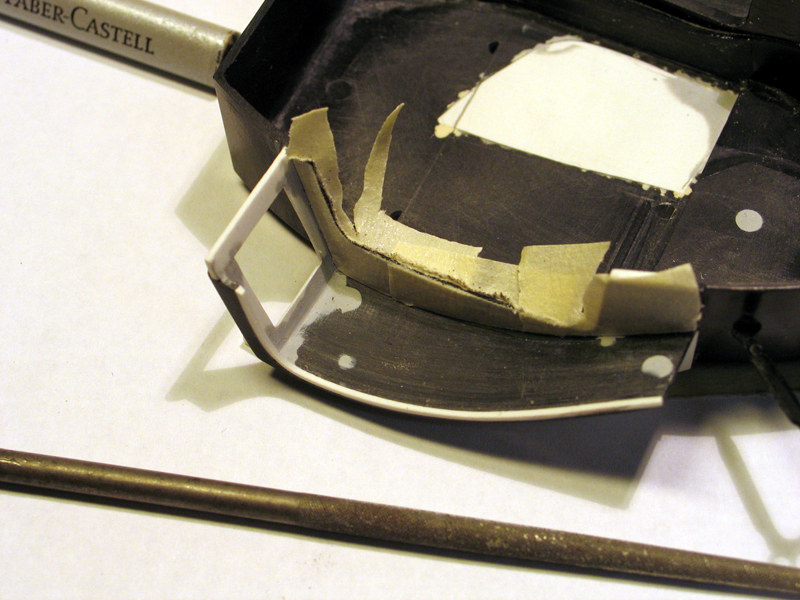 attention !!! another great tip ;-) more to come daniel -germany- the whole CF story is really a pain in the XXX. but here are some parts I covered. 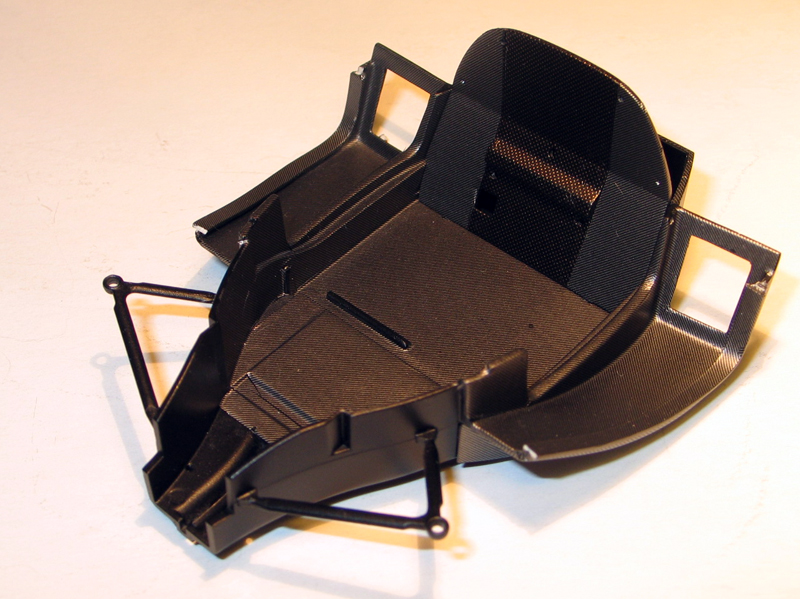 the monocoque..lot's of work to get everything right that part alone has 22 custam made CF parts. 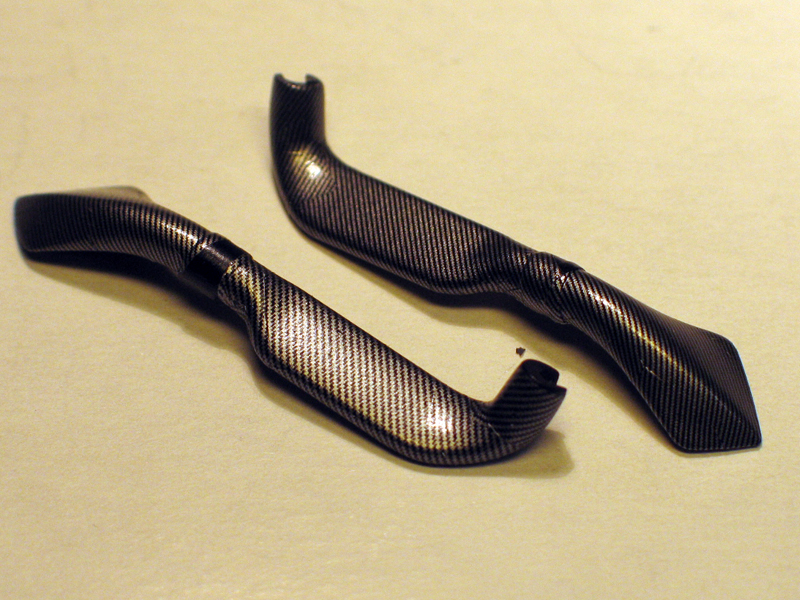 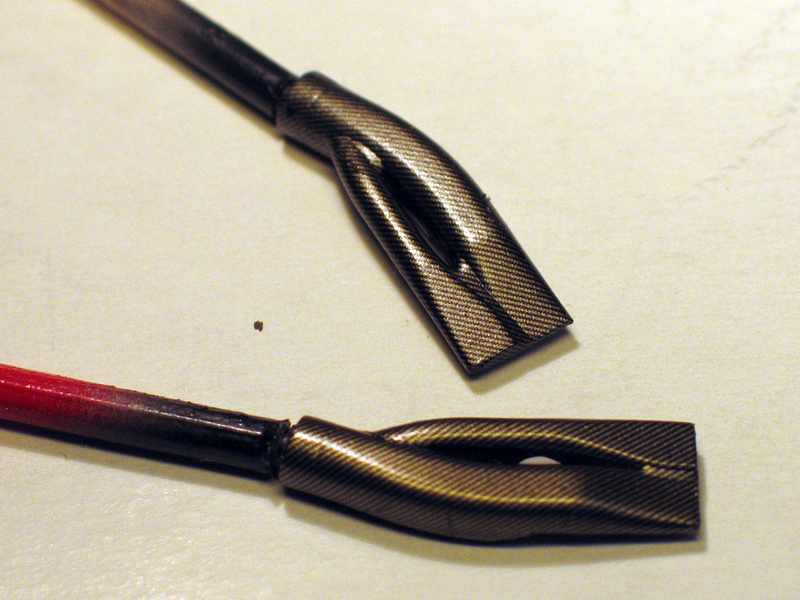 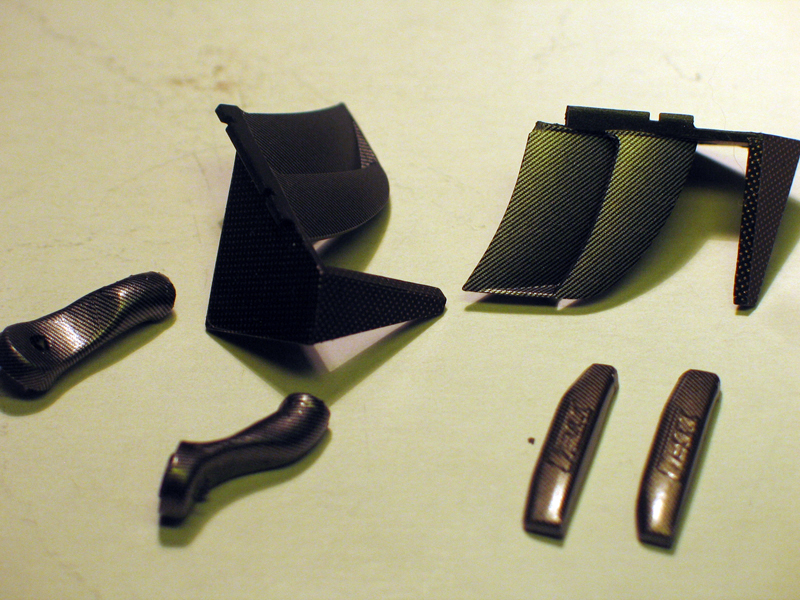  a batch of CF parts...lots of work, some parts required many different pices otherwise it wasn't passible to lay them flat especially around corners. all parts have bee varnished, glass, semi, matt sometimes I added a drop of clear yello/orange to add some variation. 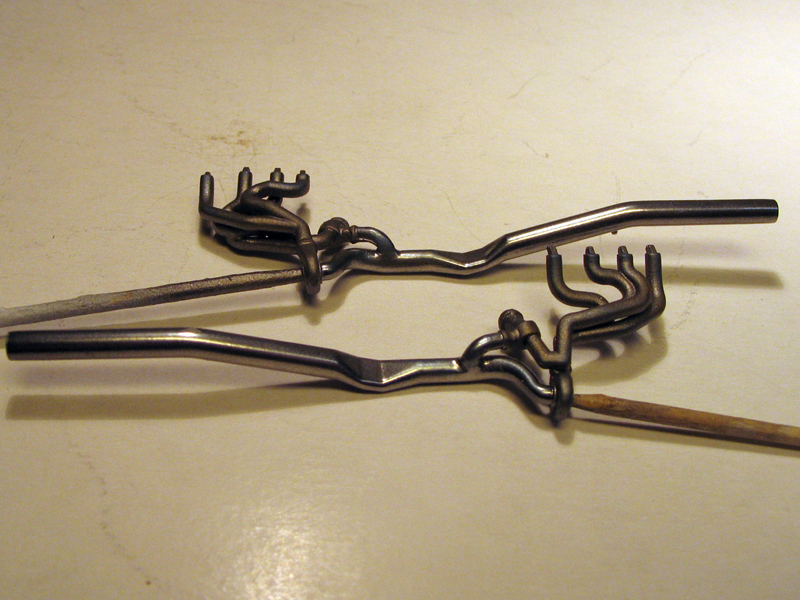 no big deal here, some aclad, some weathering with that tamiya weathering set, whish is great by the way...I will add a little more weathering later 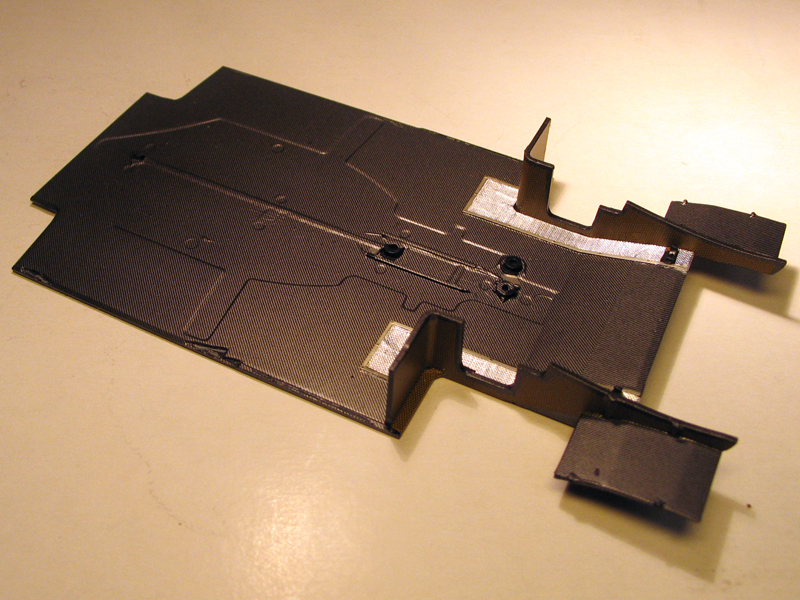 well I wasted a little CF on the ground plane where the monocoque is..but what the hell :-) I also added aluminium tape whish was rubbed over fine mesh to get some textuirng, also two PE frames have bee glued to the floor 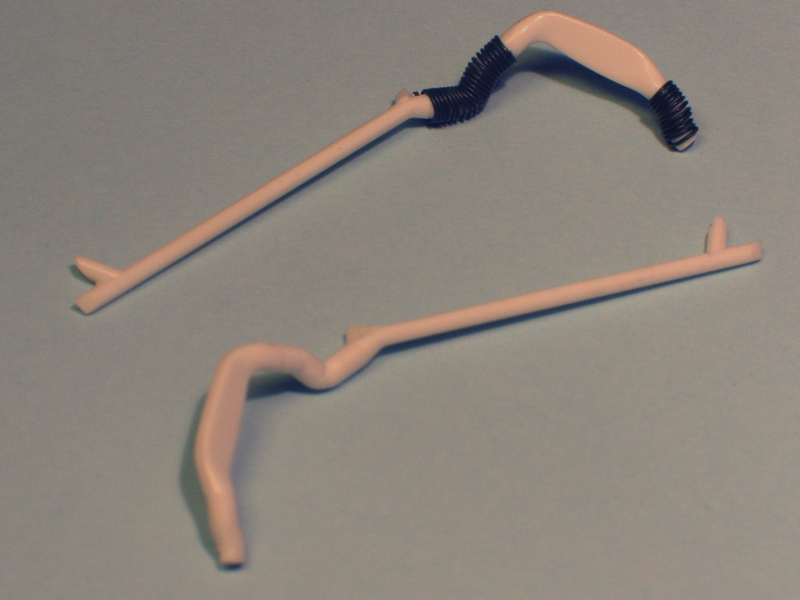 I added some small wire to add a little detail to those "flexible tubes" 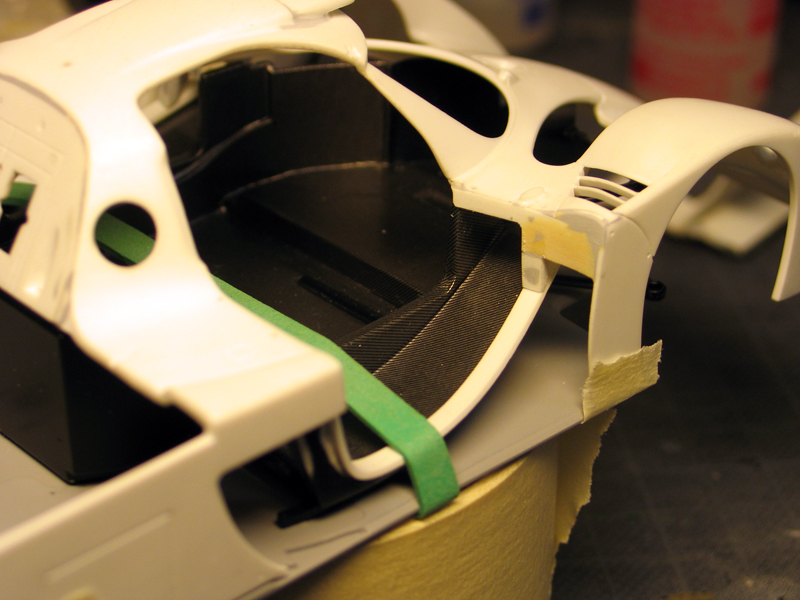 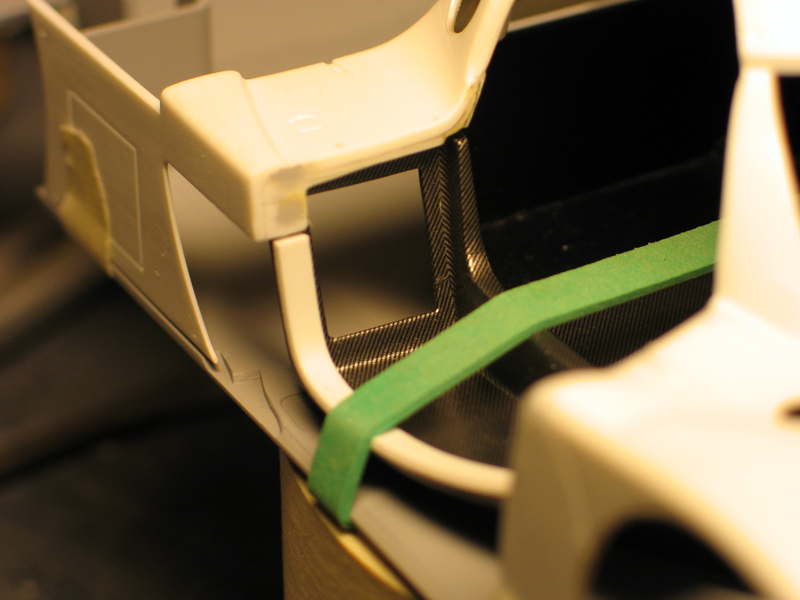 again the hardest part on the built so far...getting the parts fir together and closing those gaps that appeared when I cut out the doors to show it open. tja und das wars auch schon :-) little conclusion -99% of the decals are custom made, for some reason I was not to happy with the templates but maybe that is because I did so much modifications to the kit -a hairdryer is essential when working with CF and complex curves. I really heated the decals and when soft I pressed the down really hard, with a cottonbud or wet finger ...don't worry when you try this you will ruin some decals for sure :-) -well I tried many different decals, SMS, crazy modeler, studio 27, carpena etc ...and one thing is for sure in the future ony SMS CF decals ! ! ! even more to come daniel -germany- well well on to the dashboard 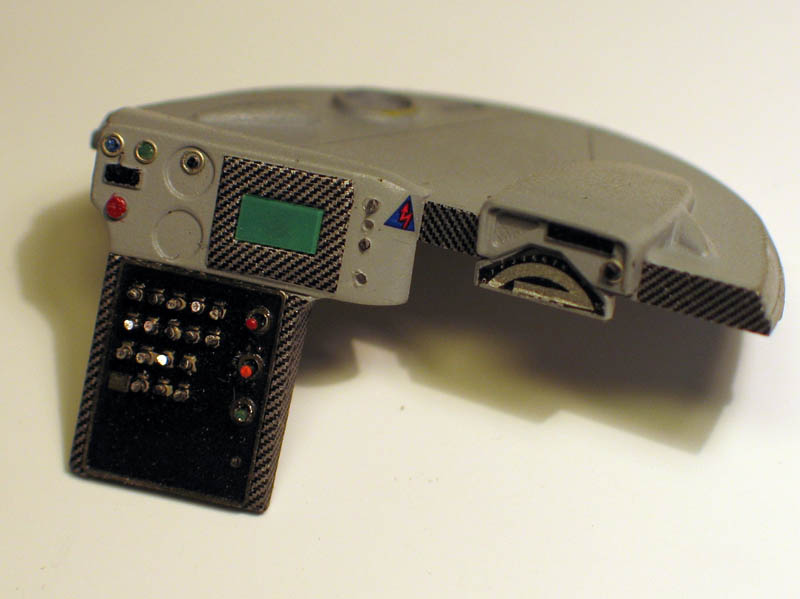 to make it short, what I did here totally suXXs -decals are out of scale -all buttons will be removed and added seperately, painting just looks bad -the green screen will be removed including frame and build as a seperate piece -the part with all those buttons is just not clean, will be repainted and better swithes will be added what I've learned here..don't rush thigs or you have to do it twice ! ------------------- but the seat turnd out pretty neat...and was hard to do believe me. it did the wholw operation twice because the first wasn't perfect and some decals cracked. the hard part was to get the edge between the CF and the seatmaterial whish runs along the top line and not on the side like all those rally seats we know..these are easy to paint and mask..so this is how I did the Toyota seat -painted everything gloss black -applied "custam made" CF decals with lot's af Microset/sol -lot's of clear varnishe added ! to protect the decals and to have it shine -then everything was masked 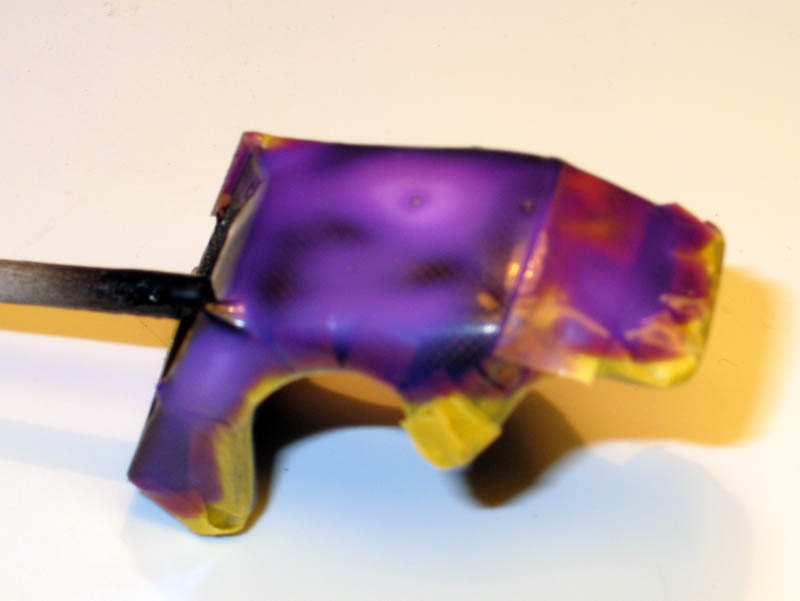 -taymia tape is the tape to use ! -now for the tricky part I had to move a supersharp knife along the top edge to cut the tape and reveal the part that has to be painted -paint the whole thing with slow drying paint -now steal some flour from your wife and dip the whole seat in it 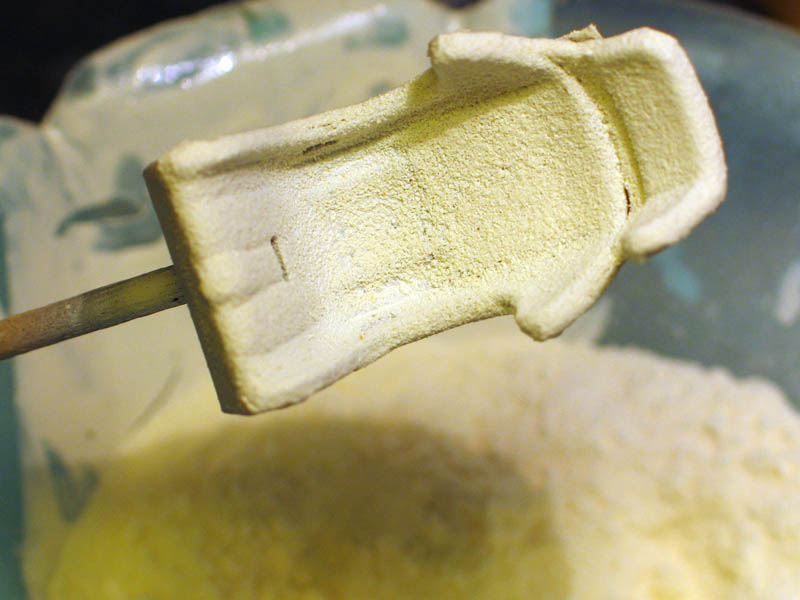 -paint the whole thing blue -caaaaaarefully remove the maks and don't pela of the CF decals and clear..like I did on the first try. and you have a nice seat :-)  -later I will add seatbedl hardware, decals and some "communication cables" ----------------------- unfortunately I didn't take pictures of the building process of the door but here is the result 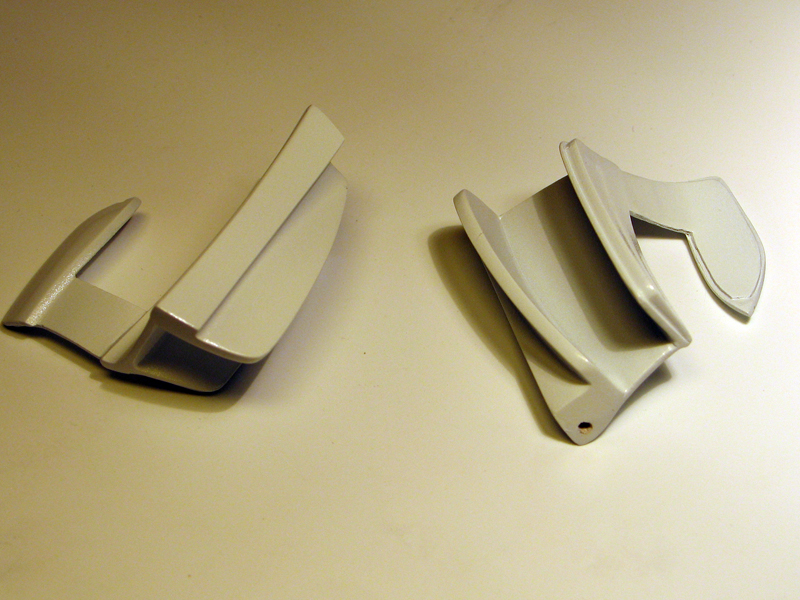 I added masses of filler to get the final result. I should make resin copies and make a fortune...not really ;-) daniel -germany |
|
|
|
|
|
12-21-2007, 05:01 PM
|
#4 | |
|
AF Regular
Thread starter
Join Date: Dec 2007
Location: Cologne
Posts: 230
Thanks: 3
Thanked 6 Times in 6 Posts
|
weee to make the kit a little more challenging I broke some parts in two :-(
 well I cut that part twice and now I leave it till the final assembly in two parts ! then I test fittet the turned fuell fillers just two learn I forgot to install the kitparts where they belong to...so I glued them in, sanded it smooth and have to paint the whole thing again ! sometimes it helps to work with the brain turned on... then I lost the two small covers that sit below the front lamps 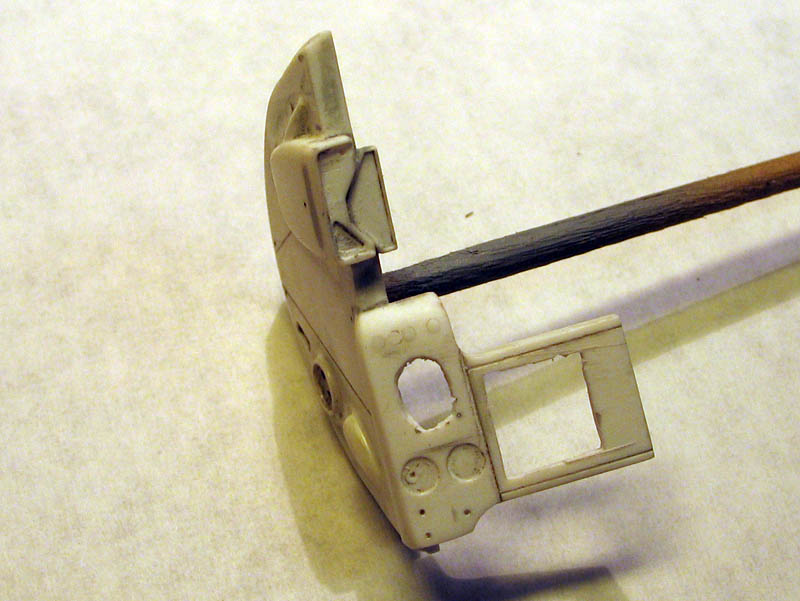 the dashboard ready to be remade 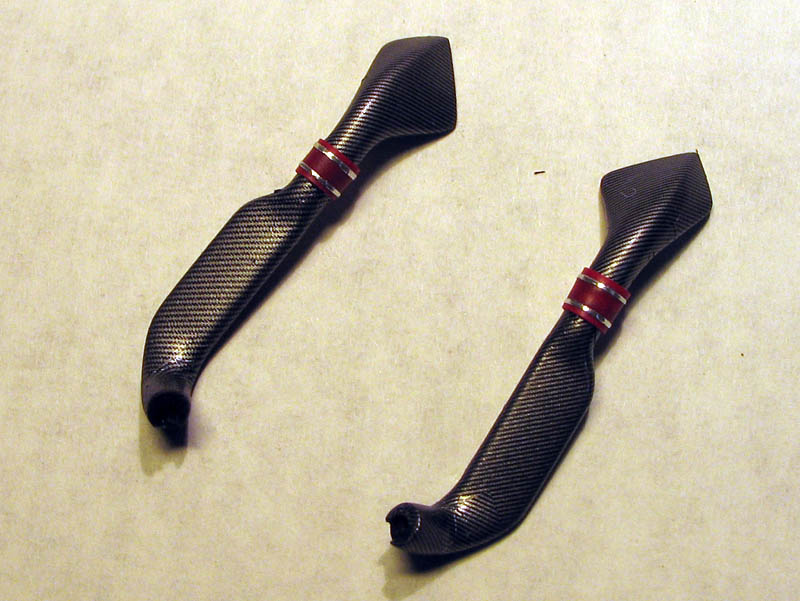 some detailing ...I added red and silver tape, looks cooler than painting and no need to wait for the paint to dry 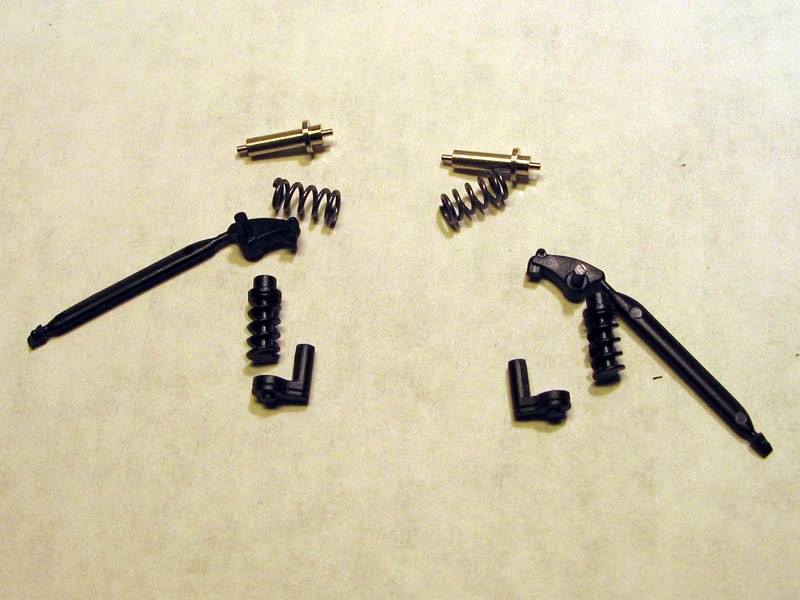 next comes the rear suspension..the metal parts are from the SMS kit, very simple but ok for me. that's it so far..nearly a work of slooooow work daniel -germany- 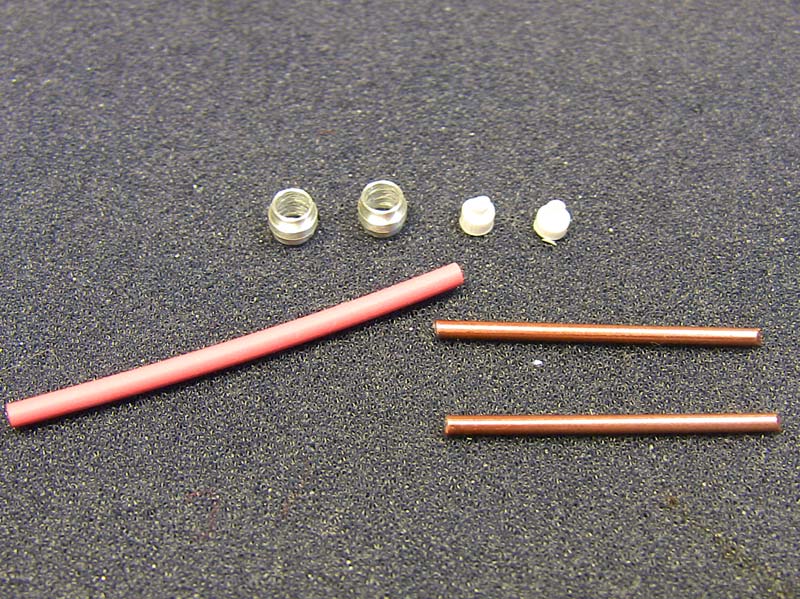 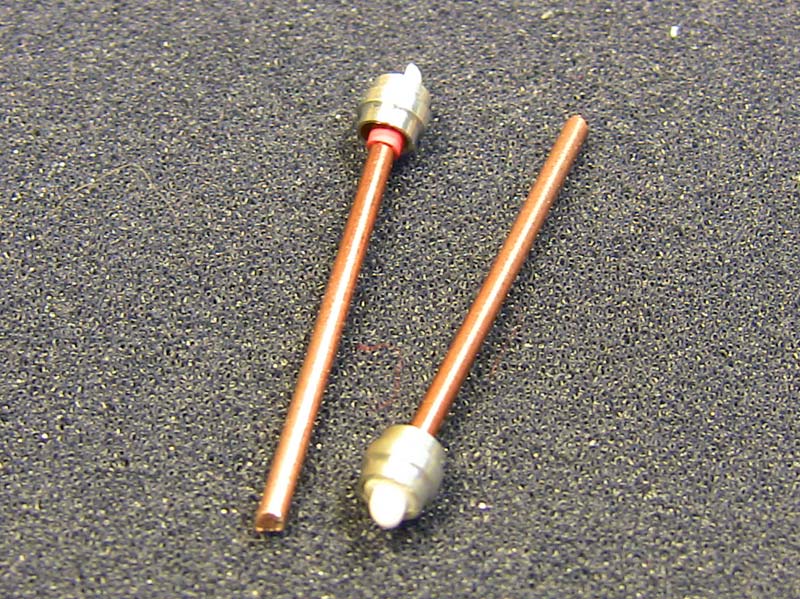 The drivetrains, made from turned Aluminum, stell rod painted clear red, some red shrinktube and the pins from the kit parts. 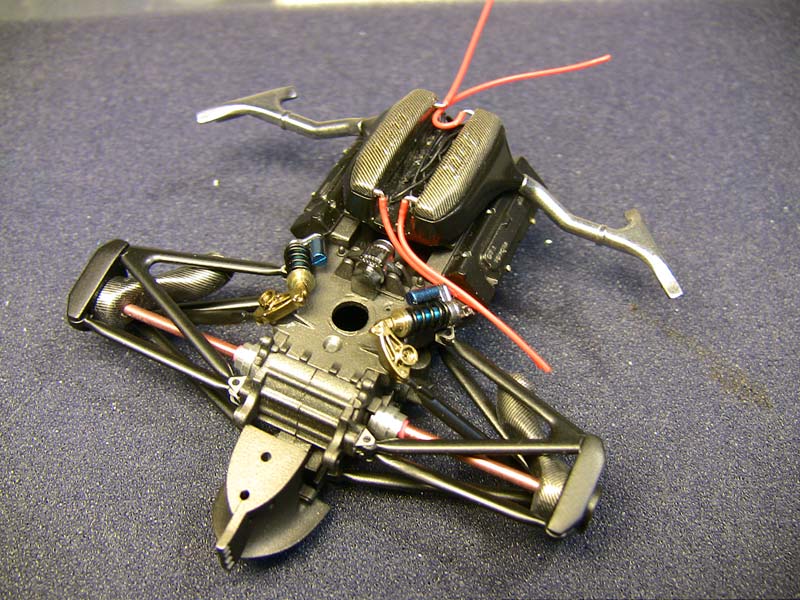 Here you can see the parts fitted to the engine. Some cable are allready added, the cable connectors are made from bent wire ans steeltubing...the engine will receive A LOT of detail in the future. 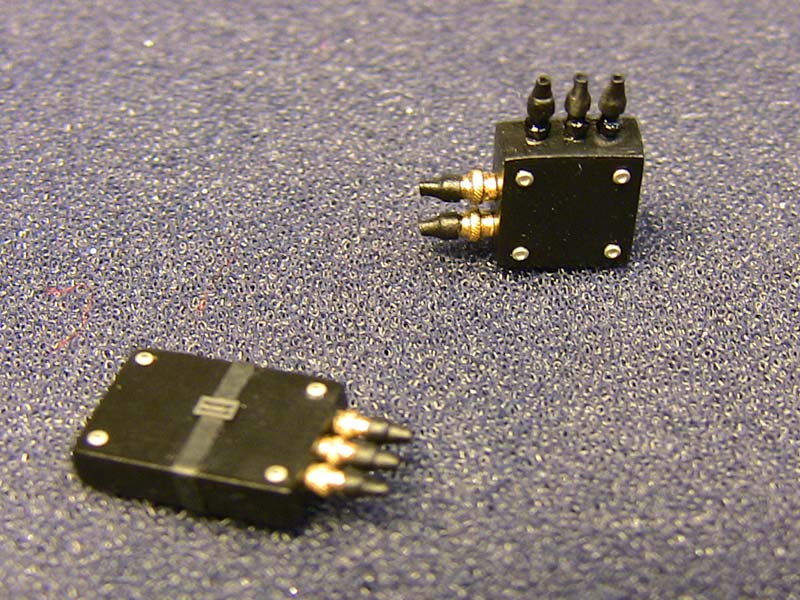  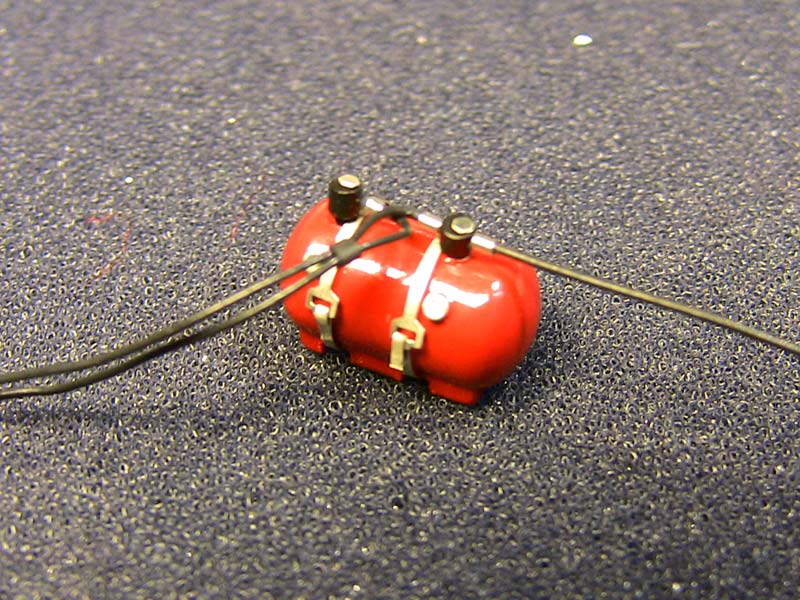 The electric boxes are cut from styrene and are detailed with PE nuts and TopStudio connectors. The fire extinguisher is also detailed a lot and I nearly got a heartattack while doing it :-) making those small steel wireconnectors was terrible. They are stainles steel and I had to cut them with my Dremel... Handling such small parts was nearly impossbile and many half finished pieces rest in piece somewehe on my basement floor. 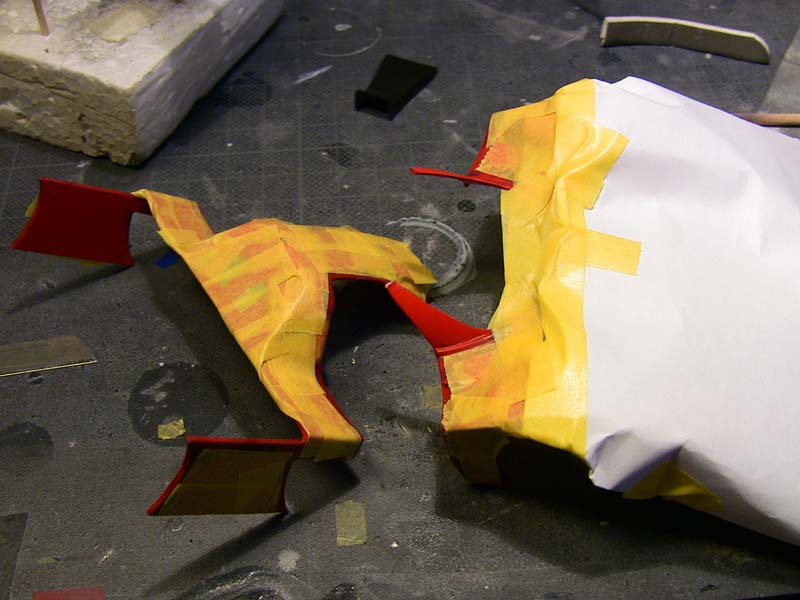 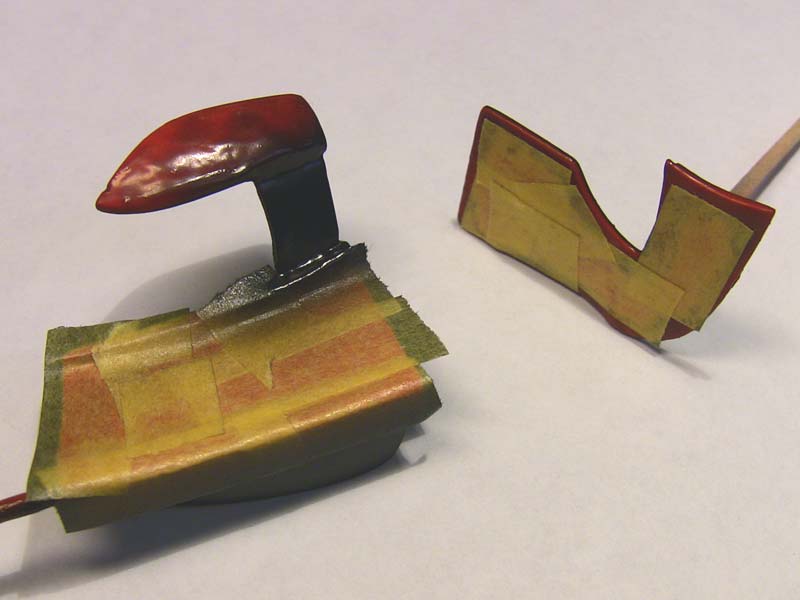 A decission had to be made. CF right on to the red or paintign it black first..I went for the black and a lot of masking was necessary. 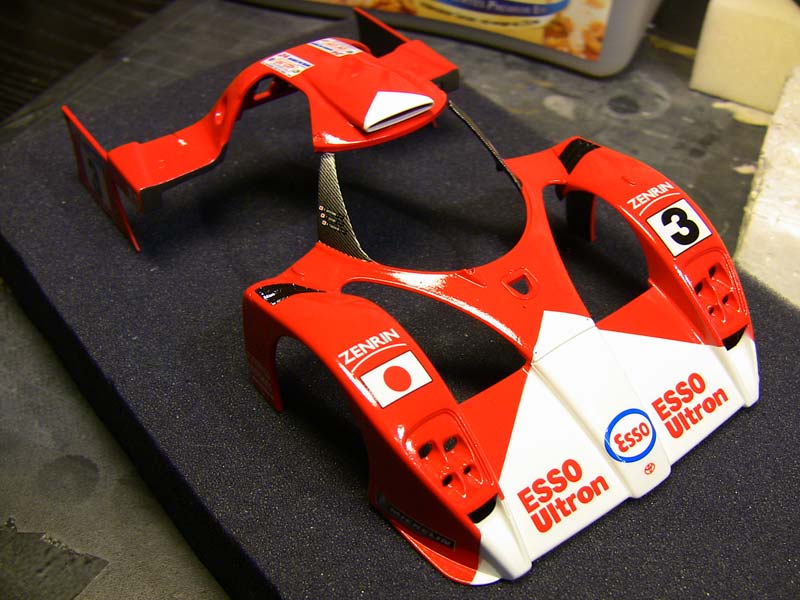 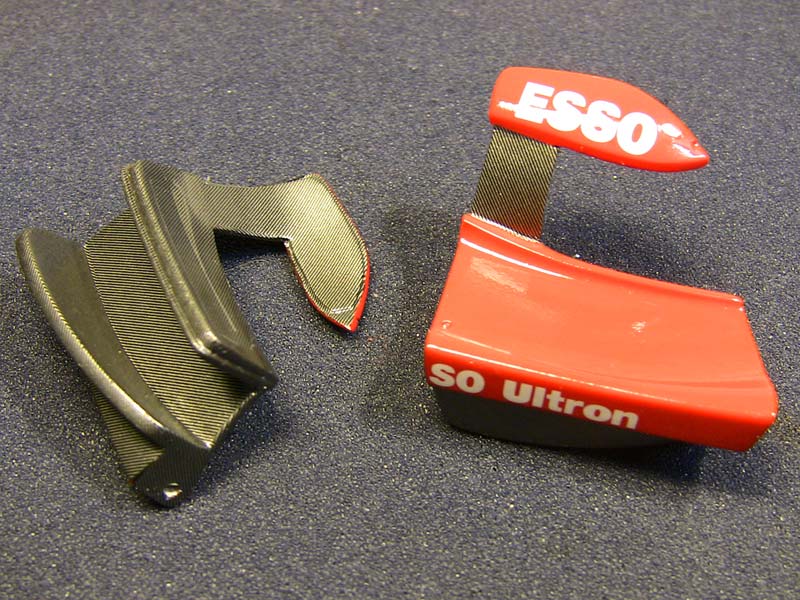 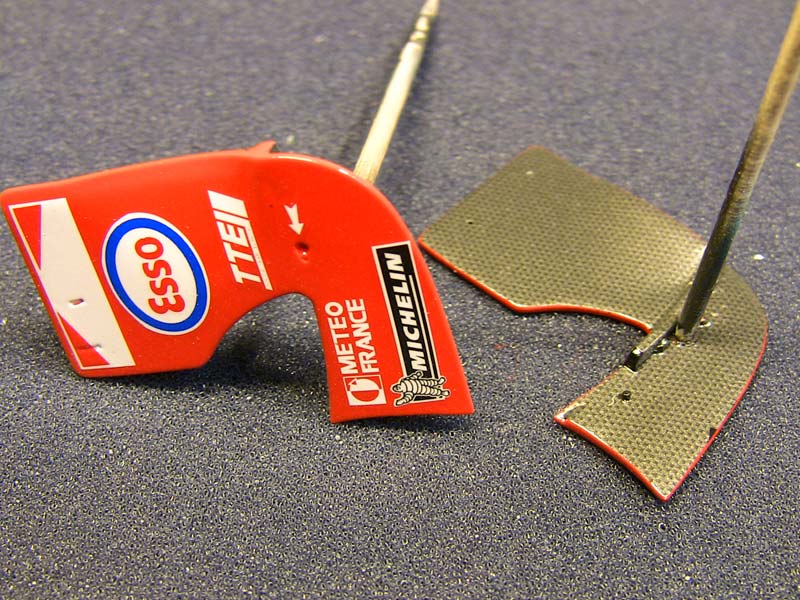 That's the final result, paint decals and CF decals Jetzt wird alles matt geschmiergelt und poliert, dann abgeklebt und die CF decals mit seidenmatt überlackiert. The white nose, roof and numberplates are painted also. red is TS49, clear is zeropaint 1K clear. Now everything will be sanded matt and polished to a high gloss finish. The CF parts will be maksed and sprayed semigloss clear. daniel -germany- P.S. I hope noone has a problem with posting a non F1 model here. hello, I'm still alive and building, although things are getting complicated and frustrating but here's a little progress 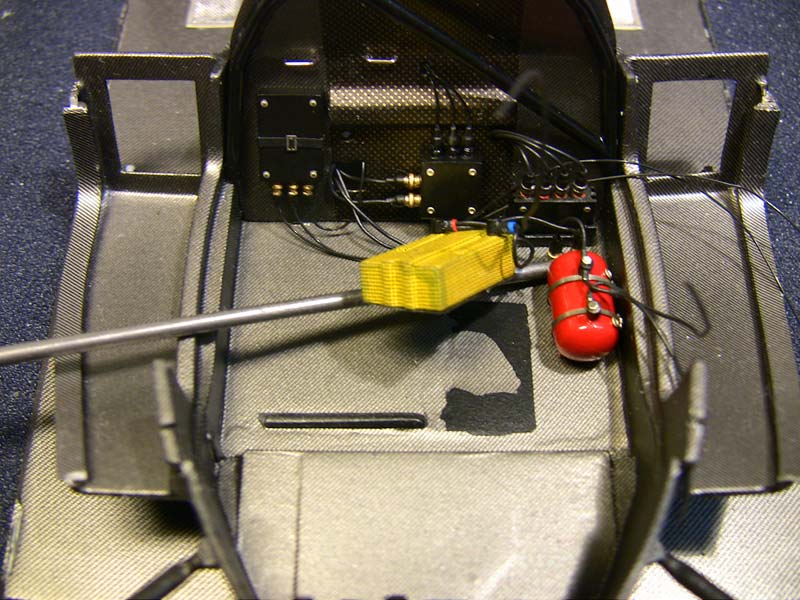 the yellow box had to be removed again because the dash didn't fit anymore...you can see the result :-( I added a new piece of cf and hope it's not to visible in the end. here some pics of the cockpit, it's pretty much finished 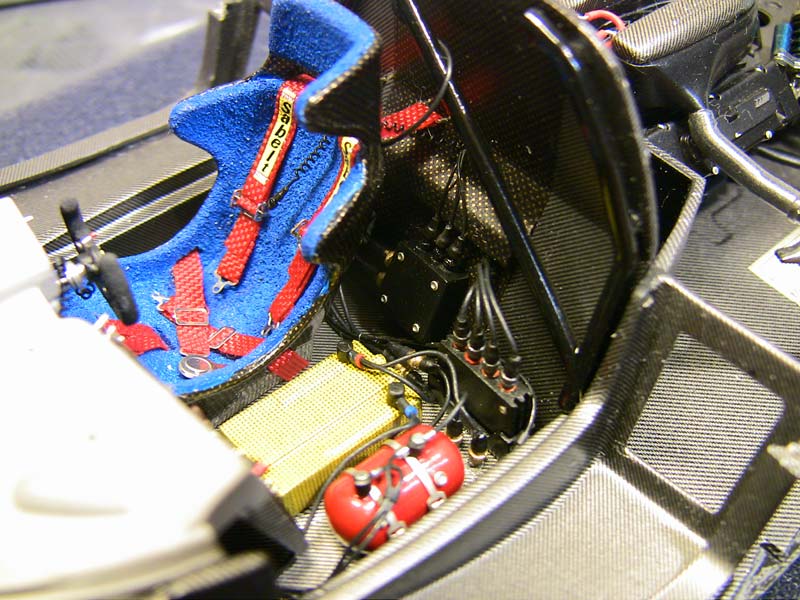 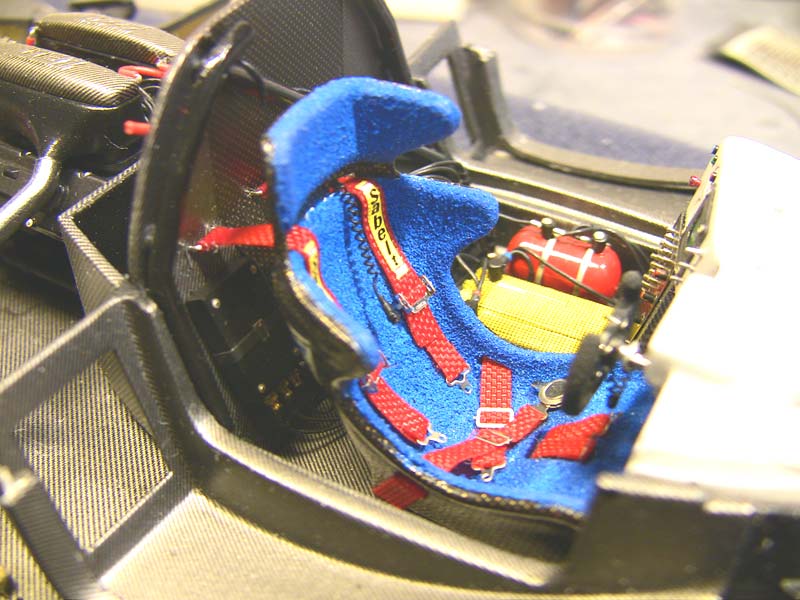 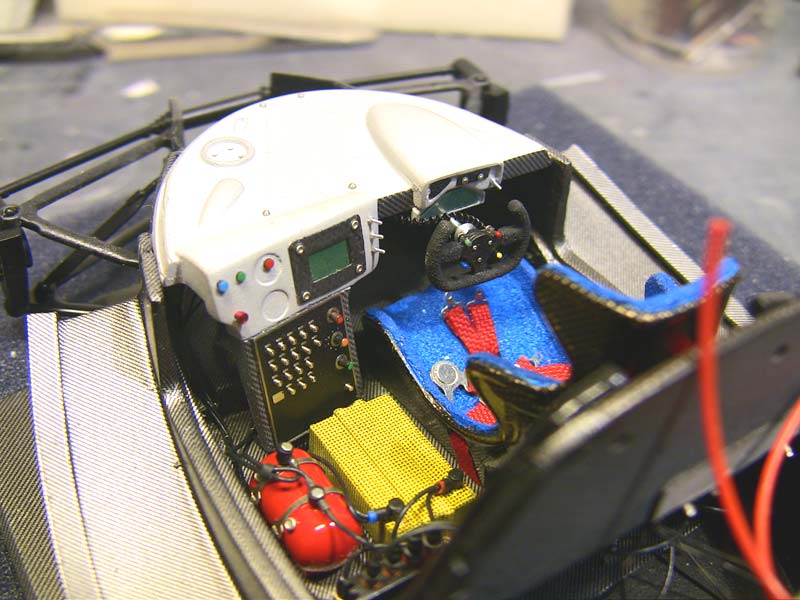 another step in the painted, right side is the airbrushed result the left is micromeshed with 2400 grit to eliminate the edge between decal and paint, will lay another coat of clear over all parts, sand back with 3200 grit or more and do the final polishing...if the edge is still visisble, it's sanding back again and a nother coat of clear :-) 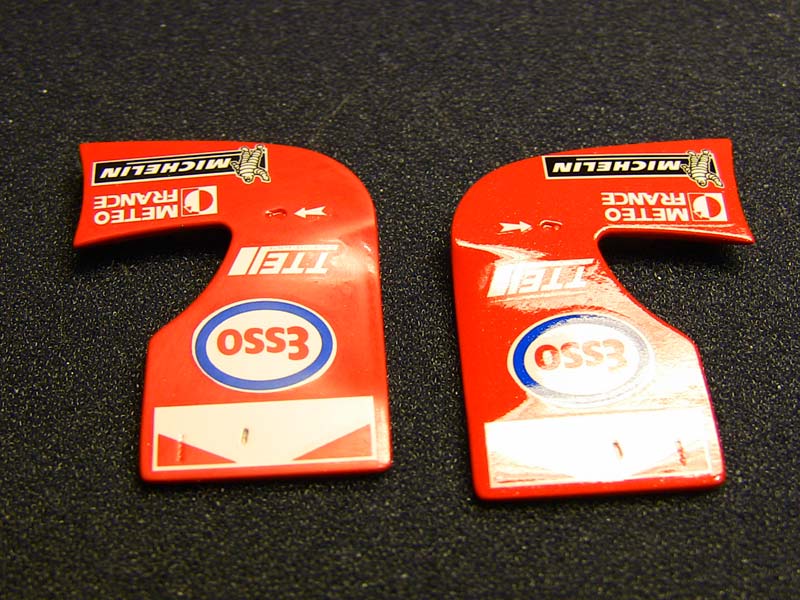 daniel -germany- Last edited by freakray; 12-21-2007 at 05:10 PM. Reason: Multiple posts |
|
|
|
|
|
12-21-2007, 05:31 PM
|
#5 | |
|
AF Enthusiast
 
Join Date: Mar 2005
Location: Barnsley
Posts: 3,199
Thanks: 8
Thanked 111 Times in 107 Posts
|
Re: Tamiya Toyota GT-one 1/24 //full detail//
Daniel,this is an incredible build so far.I really admire the level of detail you are putting into this and the effort you are expending to get it perfect.The wiring and seat etc in the cockpit is fantastic and your explanation of how you make the templates and do the carbon fibre decals is superb.Thanks for posting all this.I am looking forward to seeing more.
__________________
Steve Noble |
|
|
|
|
|
12-21-2007, 07:01 PM
|
#6 | |
|
AF Regular

Join Date: Jan 2007
Location: Denver, Colorado
Posts: 381
Thanks: 1
Thanked 3 Times in 3 Posts
|
Re: Tamiya Toyota GT-one 1/24 //full detail//
Earlier there was a discussion of what a master modeler was. (I forget exactly where) You, sir, are a master modeller.
__________________
|
|
|
|
|
|
12-21-2007, 07:59 PM
|
#7 | |
|
AF Enthusiast

Join Date: Mar 2003
Location: Zephyrhills, Florida
Posts: 981
Thanks: 4
Thanked 5 Times in 5 Posts
|
Re: Tamiya Toyota GT-one 1/24 //full detail//
This indeed is beautiful work!!!!
|
|
|
|
|
|
12-21-2007, 08:25 PM
|
#8 | ||
|
AF Enthusiast

Join Date: Jun 2005
Location: Red Lake, Ontario
Posts: 2,519
Thanks: 3
Thanked 28 Times in 28 Posts

|
Re: Tamiya Toyota GT-one 1/24 //full detail//
Quote:
__________________
  
|
||
|
|
|
|
12-21-2007, 11:36 PM
|
#9 | |
|
AF Enthusiast

Join Date: Feb 2006
Location: Melbourne
Posts: 1,057
Thanks: 5
Thanked 26 Times in 26 Posts
|
Re: Tamiya Toyota GT-one 1/24 //full detail//
Nice work Daniel, look forward to seeing more when you get the body onto the chassis
|
|
|
|
|
|
12-22-2007, 12:09 AM
|
#10 | |
|
AF Enthusiast

Join Date: Mar 2007
Location: Lisle, Illinois
Posts: 809
Thanks: 0
Thanked 2 Times in 2 Posts
|
Re: Tamiya Toyota GT-one 1/24 //full detail//
wow
 love the car, love the work love the car, love the work
__________________
Steve |
|
|
|
|
|
12-22-2007, 03:01 AM
|
#11 | |
|
AF Enthusiast

Join Date: Jun 2005
Location: Céroux-Mousty
Posts: 506
Thanks: 11
Thanked 5 Times in 5 Posts

|
Re: Tamiya Toyota GT-one 1/24 //full detail//
Hello Daniel,
really nice WIP! I like your attention to detail! Keep the pictures coming! Jamme
__________________
WIP: LaFerrari Tamiya 1/24 |
|
|
|
|
|
12-22-2007, 03:13 AM
|
#12 | |
|
Registered User

Join Date: Aug 2003
Location: Tilburg
Posts: 270
Thanks: 8
Thanked 16 Times in 16 Posts
|
Re: Tamiya Toyota GT-one 1/24 //full detail//
Very nice. I build this car with an open door as well, but not to this level. I don't know if you have any reference pictures for this car, but I've got over 100 detailed pictures of it here: http://photos.keepturningleft.com/th...lbum=29&page=7
Tim |
|
|
|
|
|
12-22-2007, 05:44 AM
|
#13 | |
|
AF Enthusiast

Join Date: Feb 2007
Location: San Francisco, California
Posts: 950
Thanks: 1
Thanked 0 Times in 0 Posts
|
Re: Tamiya Toyota GT-one 1/24 //full detail//
Magnificent! Thanks for the brilliant thread.
|
|
|
|
|
|
12-22-2007, 07:27 AM
|
#14 | |
|
AF Regular

Join Date: Oct 2002
Location: Turku (Finland)
Posts: 342
Thanks: 0
Thanked 6 Times in 6 Posts
|
Re: Tamiya Toyota GT-one 1/24 //full detail//
Superb work!
-Mikko |
|
|
|
|
|
12-22-2007, 10:58 AM
|
#15 | |
|
AF Enthusiast

Join Date: Mar 2003
Location: Rostock
Posts: 1,569
Thanks: 0
Thanked 0 Times in 0 Posts
|
Re: Tamiya Toyota GT-one 1/24 //full detail//
Hallo Daniel,
nice to have you here on automotiveforums.com. The German Community seems to get bigger and bigger. I really like your work - excellent CF-ing and great detail on everything. The only thing I dislike is the fabric you used on the seat. It looks odd and out of shape somehow. The rest is just great - very inspiring!
__________________
Recently finished Projects:
Porsche 911 Carrera RS 3.0 Current Projects: Ferrari 250 GTO LM 1962 (chassis #3387)   |
|
|
|
|
|
|
POST REPLY TO THIS THREAD |
 |
|
|

